
TWO-WAY RADIO
GU1 User manual
Please read this manual carefully and keep it in a safe place.
-1
Before operating the radio, please read all safety and operat-
ing instructions. Save all instructions in a safe place for future
reference.
WARNING: Important Safety Instructions
Only accessories included in this package or specified by the
manufacturer should be used with the radio. The 5V USB Type-C
charging input is compatible with most high quality USB Type-C
chargers that fully conform to the USB standards.
Do not use cleaners or solvents to clean the exterior of the radio. Use
only a damp or dry cloth.
Do not attempt to service the radio yourself. Removing the cover will
void the warranty. Changes or modifications not expressly approved
by Gaswei may void the user's authority granted by the FCC to
operate this device and should not be made.
Do not plug the wall adaptor into the power outlet if the outlet is wet.
Do not use any portable radio that has a damaged antenna. lf a
damaged antenna comes into contact with your skin, a minor burn
can result.
1.
2.
3.
4.
5.
Web:www.gaswei.com
Email:[email protected]om
If you have any questions, please feel free to contact us.
The information contained herein is subject to change without notice.
To access the latest version of the User Guide, go to www.gaswei.com.

-2
WARNING: Important Safety Instructions for Battery
Read All Instructions
Do not incinerate the battery even if it is severely damaged or is completely worn
out.
Do not discard battery in a fire. The battery pack can explode in a fire.
Do not replace battery in any area labeled
"Hazardous Atmosphere"
. Any sparks
created in a potentially explosive atmosphere can cause an explosion or fire.
Do not disassemble, crush, puncture, shred, or otherwise attempt to change the
form of your battery.
Do not dry a wet or damp battery with an appliance or heat source, such as a
hair dryer or microwave oven.
A small leakage of liquid from the battery cells may occur under extreme usage
or temperature conditions. This does not indicate a failure. Do not open, deform
or mutilate the battery as there may be corrosive materials which can cause
damage to eyes or skin and may be toxic if swallowed.
However, if the outer seal is broken and this leakage gets on your skin:
a. Wash quickly with soap and water.
b. Neutralize with a mild acid such as lemon juice or vinegar.
c. If battery liquid gets into your eyes, flush them with clean water for a minimum
of 10 minutes and seek immediate medical attention.
Recycle Battery
Local, state or federal laws may prohibit disposal of batteries in ordinary trash.
Consult your local waste authority for information regarding available recycling
and / or disposal options.
This product uses Lithium Polymer Battery.
Do not transport package if damaged, a fire hazard could exist.
-3
Making Life Easier and Safer
Product Service & Support
Staying in touch is convenient and easy when using your radio. Some of
the many uses you will discover include:
Communicating with others while hiking, biking, and
working; keeping track of family and friends at a
crowded public event; checking with travel compan-
ions connecting with neighbors; arranging meeting
spots with others while shopping at the mall, talking
with your colleagues in warehouse or jobsite.
Secure your radio while on the go.
When in use, it can be directly clipped onto your belt,
purse, or backpack.
If you need to install a wrist strap, pass it through the
circular hole at the top of the belt clip and tighten it to
secure it to the clip.
For any questions about operating this new Gaswei branded product,
PLEASE CONTACT US FIRST... do not return this product to the retail store.
The contact information for support will vary depending on the country in
which you purchased and utilize the product.
Customer Service E-mail: [email protected]om
For further information needed on its features,
please visit www.gaswei.com for frequently asked questions and the
electronic manual.
01
02
Belt Clip
Wrist Strap
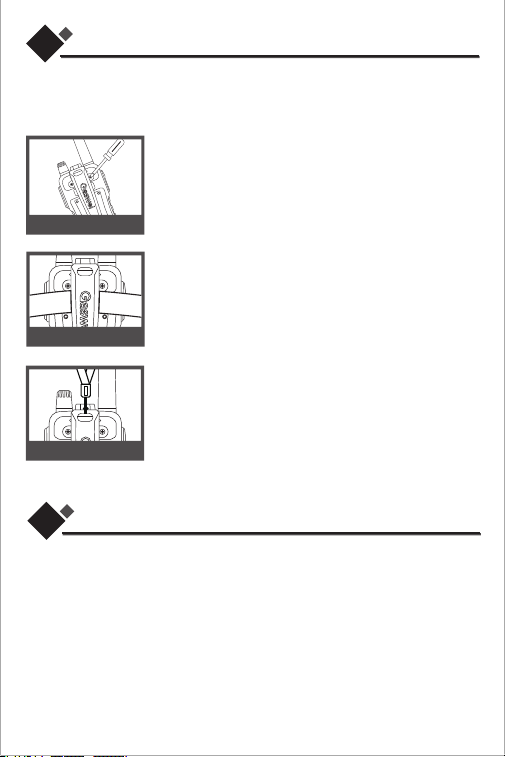
Installing Belt Clip
Installing the Belt Clip.
Place the belt clip in the reserved position on the back of
the radio, and use the screwdriver in the package to
tighten the screws on both sides of the belt clip. The belt
clip is installed.

-4
Operational Cautions
Exposure to high volume sound levels may cause temporary or permanent
damage to your hearing. Although there is no single volume setting that is
appropriate for everyone, you should always use your radio with the volume set at
low level and avoid prolonged exposure to high volume sound levels.
Set the volume control in a low position and use as low a volume as possible.
Avoid turning up the volume to block out noisy surroundings. Whenever
possible, use your radio in a quiet environment with low background noise.
Limit the amount of time you use headsets or earpiece at high volume levels.
When using the radio without a headset or earpiece, do not place the radio's
speaker directly against your ear.
Observe all signs and instructions that require an electrical device or RF radio
product to be switched off in designated areas, such as gas/refueling stations,
hospitals, blasting areas, potentially explosive atmospheres, or aircraft.
If you experience a skin irritation after using this product, discontinue use and
seek medical attention.
If the product or charger: overheats; has a damaged cord or plug; has been
dropped or damaged; has been dropped into water, disconnect any charger
from its power supply, discontinue use of the product.
1.
2.
3.
4.
5.
6.
7.
Electromagnetic Interference
Nearly every electronic device is susceptible to electromagnetic interference (EMI)
if inadequately shielded, designed, or otherwise configured for electromagnetic
compatibility. Turn off your radio in any facility where posted notices instruct you
to do so. These facilities may include hospitals or health care facilities that may be
using equipment that is sensitive to external RF energy.
When instructed to do so, turn off your radios when on board an aircraft. Any use
of a RF device must be in accordance with applicable laws, requlations and
airline crew instructions.
Some radios may interfere with some hearing aids. In the event of such
interference, you may want to consult your hearing aid manufacturer or
physician to discuss alternatives.
If you use any other personal medical device, consult the manufacturer of your
deivce to determine if it is adequately shielded from RF energy. Your doctor or
physician may be able to assist you in obtaining this information.
03
-5
04
Control Buttons
CALL
MEM
MON
MENU
FM
A B
ANNOTATION
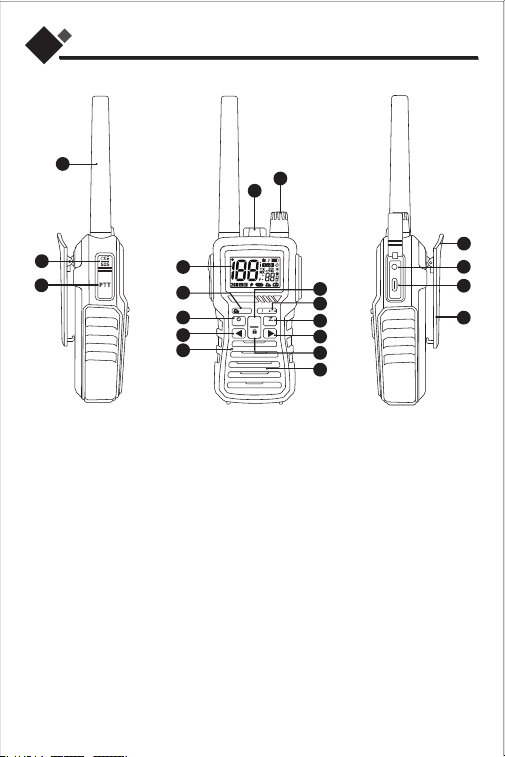
1. Antenna
2. Flashlight / SOS button
3. PTT/OK button (Push-to-Talk)
4. Flashlight
5. Power/Volume Knob Button
6. LCD Display
7. Weather / FM Radio button
8. Timer / CALL button
9. Select- button
10. Microphone
11. Memory button
12. A/B select /Easy Pairing button
13. Scan/Monitor button/Charging
indicator light (red light)
14. Select+ button/Full charge
indicator light (green light)
15. Menu/Lock button
16. Speaker
17. Wristband connection
18. 2.5mm headphone jack
19. Type-C charging port
20. Belt clip
2
3
1
5
4
7
10
8
6
12
11
13
15
16
9
14
19
18
17
20

-6
05
Backlit LCD Display
1. Timer
2. Channel Numbers
3. Dual Watch
4. Main channel transmission
5. Sub-channel transmission
6. Silent Charge Icon
7. VOX Icon
8. Power Saving Icon
9. NOAA Weather Band Icon
10. Privacy Code Channel
11. Radio(FM) Icon
12. Serial Number
13. Keypad Lock
14. DCS/CTCSS icon
15. Whisper Icon
16. Scan Icon
17. High/Medium/Low Power
18. Battery Level Indicator
19. Vibra Icon
20. Easy pairing
21. Transmit/Receive status
Features
IP55 Waterproof and Dustproof
61 Channels + 121 Privacy Codes
(38 CTCSS codes+83 DCS codes)
Dual Watch
A/B transmission channel selection
High, medium and low power selection
Easy pairing (scanning frequency)
11 NOAA weather channels/weather alerts
FM radio
Timer
VOX voice control mode
SOS local alarm/transmission alarm
Key lock
10 call tones
Memory channel storage
Whisper mode
Silent charging (sleep mode)
End reminder tone
Key backlight
Vibration reminder
Scanning channels
Monitoring mode
Power saving mode
Flashlight
2
3
64 5 7
8
9
10
14
15
11
20
21
12
13
1
16
17
18
19
-7
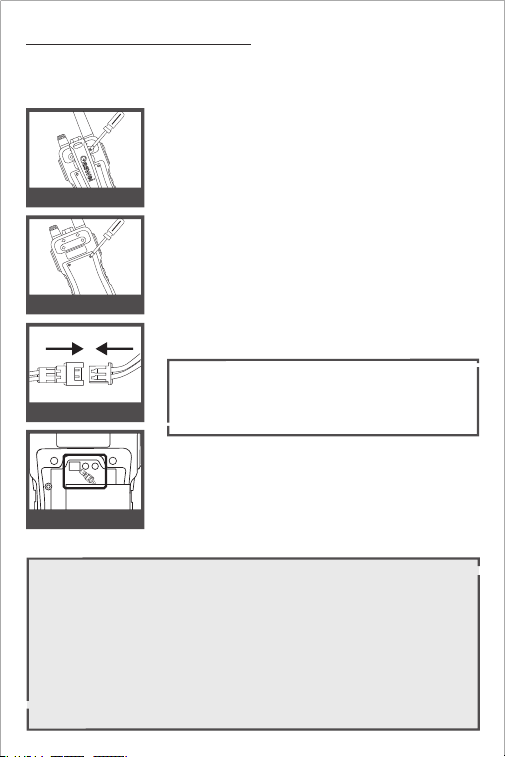
Replace the battery
Unscrew 3 screws at battery door with a proper
screwdriver, then open the battery compartment
cover. Connect the battery connector in proper
polarity.
Unscrew 2 screws at the belt clip with a proper
screwdriver, then remove belt clip .
The battery of this radio is installed at the factory and should not be
removed unless necessary.
If the battery becomes damaged and needs to be
replaced, follow these steps for installation:
Place the battery inside battery compartment and
align the wires as shown.
Ensure the battery connector with cables is tucked
into the hole located at bottom.
Wires are required to be inserted into the battery
compartment completely and carefully. If any object
interferes with the sealing ring, the compartment's
sealing performance will be affected.
Place the battery compartment cover, screw down
the screws mildly.
(Screw nuts may be damaged if overtighten)
Re-attach the belt clip.
1.
2.
3.
4.
5.
1.
2.
3.
4.
Quick Trial
To turn the radio on, turn the knob clockwise. To turn the radio off, turn the
knob counterclockwise.
Select a desired channel(Channel 1 is set as the default channel with no
privacy code, allowing direct communication for trial use.)
Press and hold the PTT button while speaking into the microphone.
When finished talking ,release the PTT button and listen for a response.
Remove Belt Clip
Battery Door Screws
Battery Connector
Wires Alignment
-
+
++
-8
06
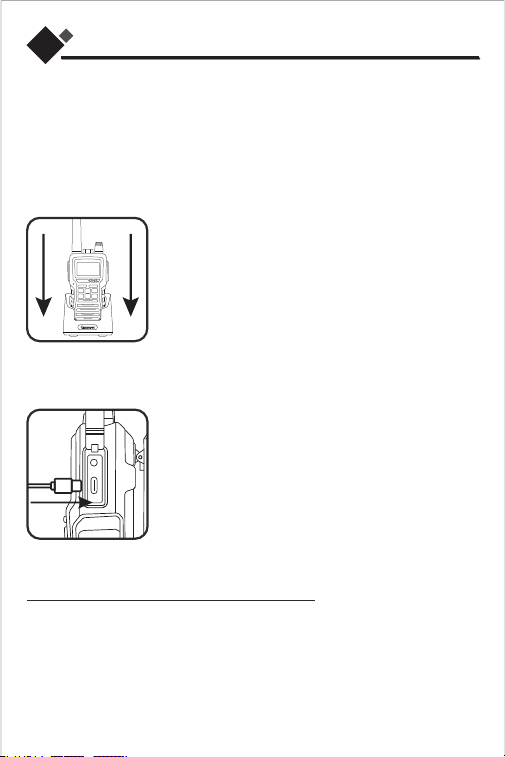
Using Your Radio
For charging radios with the belt clip in desktop charger:
Insert radio(s) into desktop charger as shown.
Insert the
USB Type-C
cable into the jack on back of
the charger.
Plug the cable into USB compatible power port. For
pluggable equipment, the socket-outlet shall be
installed near the equipment and shall be easily
accessible.
1.
2.
3.
The radio is charging and the red light is on. When charging is complete, the green
light is on.
Before using the radio, please ensure that it is fully charged. It is likely that a newly
purchased radio's battery may not be fully charged, with the battery level possibly
being less than 80% or even as low as 20%. To avoid any inconvenience during
your usage, it is recommended to fully charge the battery before using the radio.
This will ensure optimal performance and a better user experience.
Charging the radio with a cable:
To charge a single radio, you can bypass the desktop
charger and plug the Type-C charging cable directly into
the charging jack on the right side of the radio.
The radio will display flashing battery icon while charging.
The radio is equipped with a silent charging function, which disables the reception
of regular two-way calls during charging, but still allows the reception of weather
alerts as well as the reception and transmission of emergency alerts.
Note:
To ensure that your radio is always fully charged and in an alert state, Gaswei
recommend that you connect it to a power source and keep it turned on.
Silent charging
Type-C
-9
This radio is weatherproof to IP55 standards. lt is splash-proof from any direction.
The radio is resistant to water and rain splashes only when the battery cover,
headset accessory port, and USB-C ports are sealed. Open the battery
compartment door or headset port cover only when the radio is dry. Use of a
headset accessory should be in dry environments only. The USB-C adaptor is not
weatherproof.
DO NOT expose to rain or snow.
Charge the radios only in a dry location.
DO NOT charge wet radios.
Therefore:
IP55 Weatherproof
1.
2.
Turning on Your Radio
Turn the knob clockwise to turn the radio on and counterclockwise to turn it off.
When turned on, the radio chimes and briefly displays an
icon of all the functions available on the radio.
The display will show the current channel/code and all
enabled functions.
In any mode, turning the knob clockwise increases the volume, and turning the
knob counterclockwise decreases the volume.
Note: Do not put the radio close to your ears. If the volume is too loud, it may hurt
your ears.
Adjusting the Volume
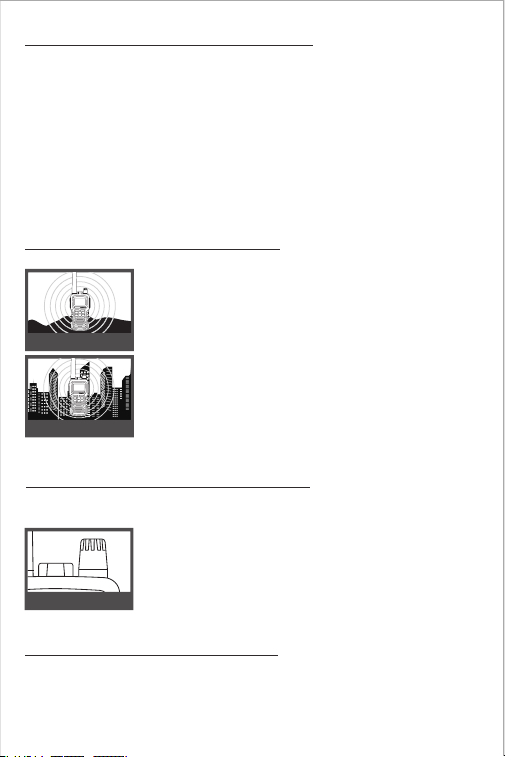
Range
In flat, open areas your radio will work at maximum range.
Buildings and foliage in the path of the signal can reduce the
range of the radio.
Dense foliage and hilly terrain will further reduce the range
of the radio.
Your range will vary depending on terrain and conditions.
Maximum Range
Reduced Range
Knob
1.
2.
3.

-10
Turn on/off the flashlight:
1.
2.
3.
Communicating with Another Person
Press the button briefly on the left side of the radio to turn on the flashlight on
the top of the intercom; press it again to turn on the flashing light alarm, and press
it again to turn off the flashlight.
Press and hold the PTT button.The screen will display the
" "
icon.
Position the microphone about 2 inches (5 cm) from your
mouth, speak in a normal voice.
Release the PTT button when you are finished talking and
listen for a response.
You cannot receive incoming calls while pressing the PTT button.
Listening for a Response
Release the PTT button to receive incoming transmissions. The screen will display
the
" "
icon. Your radio is always in Standby mode while the PTT buttons are
not pressed.
This radio is equipped with default Privacy Code on each channel for
minimizing unwanted signals from others. See page 18 to modify the
channel and privacy code for the radio.
Both radios must be tuned to the same channel and privacy code to
communicate.
2 inches from Mouth
Battery Save Mode
If there are no transmissions within 10 seconds, the radio will automatically switch
to Battery Save Mode.
This will not affect the radio's ability to receive incoming transmissions.
Auto Squelch
Your radio will automatically filter out weak transmissions and unwanted noise
due to terrain, conditions limit.
1.
2.
-11
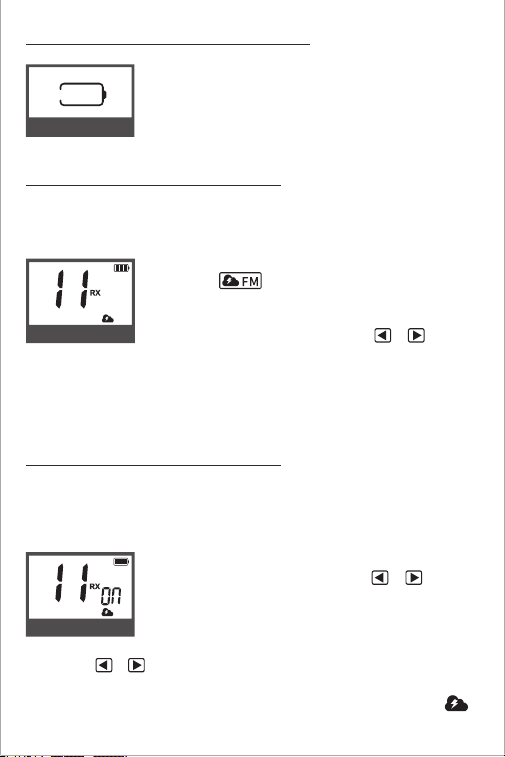
Battery Low
When the battery is low, the battery bar in the battery icon
will be emptied and the radio will beep every minute to
show your battery needs to be recharged.
Battery Low
NOAA Weather Band
NOAA Weather Alerts
Turn weather alerts on or off:
Your radio includes an NOAA weather function, allowing you to listen to 11 chan-
nels of NOAA weather broadcasts from the National Oceanic and Atmospheric
Administration.
Your radio has an NOAA weather alert function, enabling you to automatically
receive weather alerts from designated NOAA stations.
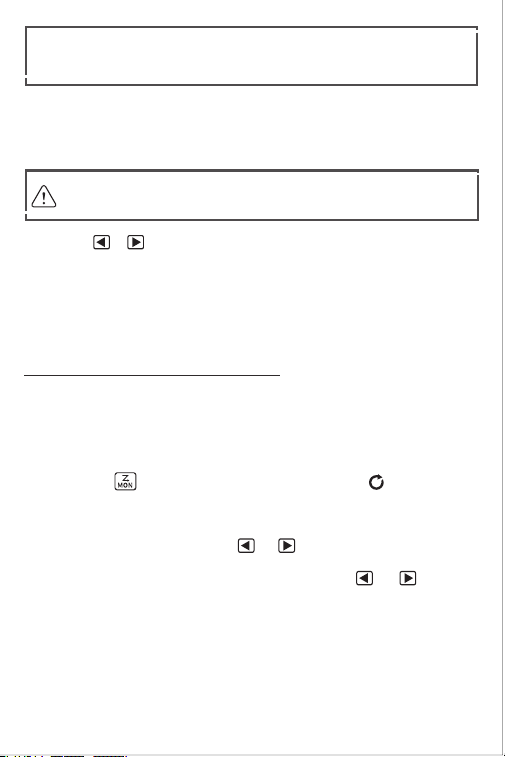
Press the button once to enter weather mode,
where you can listen to the current weather channel.
In weather mode, press the MENU button to make the
weather channel blink. Then press the or button to
select the desired weather channel.
Press the PTT or MON button to confirm and return to weather listening mode,
or press MENU to continue setting weather alarms.
Press the PTT or MON button again to return to standby mode.
In weather mode, press the MENU button to make the
weather channel blink. Then press the / button to
select the weather channel you want alerts from.
Press the MENU button again to make OF or ON blink on
the right side of the weather channel code.
Press the / button to choose to turn weather alerts on or off.
Press the PTT / MON button to confirm and return to weather listening mode.
Press the PTT / MON button again to return to standby mode, and the " "
icon will be displayed. The weather alarm mode has been successfully activated.
To select a weather channel:
1.
2.
3.
4.
1.
2.
3.
4.
5.
NOAA channel 11
Weather Alerts on
-12
NOAA weather stations are designated to cover specific areas, and services may
be limited. Please consult your local meteorological bureau for frequencies and
detailed information, or visit the United States www.weather.gov/nwr to find
suitable transmitters in your area. The use of the NOAA logo does not represent
approval or implied approval by the NOAA National Weather Service.
As with two-way radio reception, weather channel reception depends on your
distance from the transmitter and whether you are indoors or outdoors. Since
weather channel transmissions are uncoded, they may contain static or noise.
1.
2.
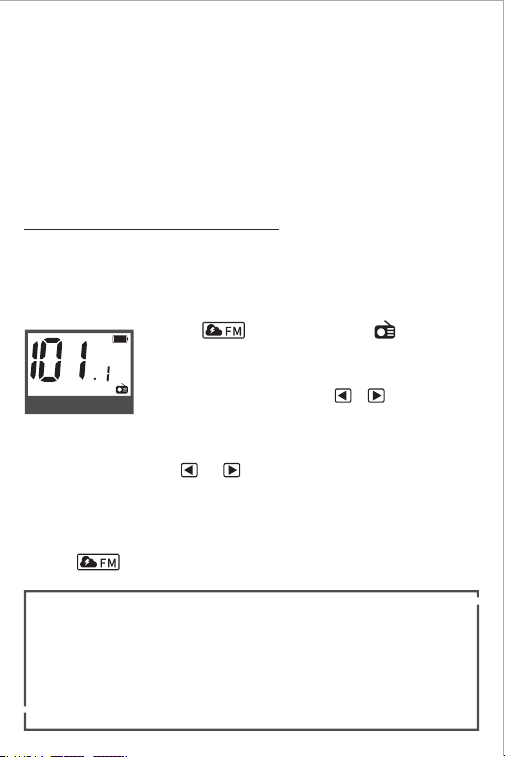
FM Radio
The walkie-talkie features an FM radio function, capable of receiving all stations
within the frequency range of 87.5 MHz to 108.0 MHz.
Press the button twice until the " " icon appears,
entering the FM radio mode.
Entering
the FM radio:
Once in FM radio mode, press the or button to set the
FM radio frequency.
In FM radio mode, hold the or
button for 3 seconds. It will automatically
scan forward or backward for stations with signals, stopping immediately upon
finding one and staying tuned to that station.
Press the button again to turn off the FM radio and return to standby mode.
Radio reception is highly dependent on your surroundings. Moving to an
outdoor highland with no obstacles can provide the best experience.
Intercom signals can be received in FM radio mode. After receiving the
intercom signal, if there is no other operation, it will automatically return to
FM radio mode after 6 seconds.
Weather alerts cannot be received in FM radio mode.
Fine-tuning the station frequency:
Automatic station scanning:
To turn off the FM radio:
1.
2.
3.
FM radio
Note:
-13
1.
2.
3.
4.
5.
A/B transmission channel switching
Easy pairing
1.
2.
3.
4.
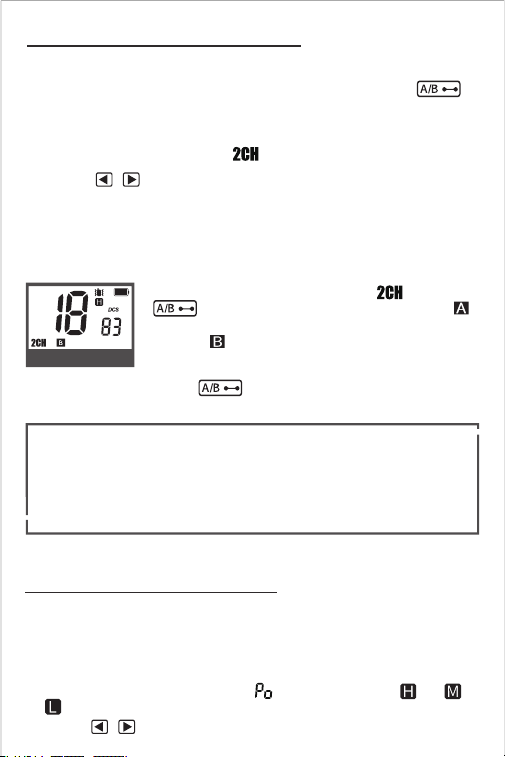
After turning on the
Dual-Watch
mode (2CH), press the to switch the
transmission channel. A in the display represents the main channel and B
reprsents the 2CH sub-channel.
The button switching function is only available in 2CH Dual-Watch mode.
It cannot be used if 2CH Dual-Watch mode is not enabled.
The easy pairing function allows you to quickly copy the channel and privacy code
of other radios and communicate with other radios.
When the G-U1 radio is in standby mode, press and hold
the button for ≥3 seconds. Release the button
after the display shows " " to enter the easy pairing
mode.
At this time, press and hold the PTT button (CALL button) of another radio and
speak to test whether the sound is transmitted to the G-U1 radio.
After the G-U1 radio receives the radio signal, the display shows " " and the
" " receiving icon is displayed, indicating that the pairing is successful.Press
the button to save and return to standby mode.
If the sound is not transmitted from the radio you want to pair, press the or
button to continue pairing.
Short press the button to exit the pairing mode and return to standby
mode.
When performing easy pairing, the radio with the strongest radio signal will
be paired first. To avoid pairing the wrong radio, please operate the two
radios close together.
Each successful pairing will overwrite the radio frequency of the last pairing.
Channel 61 of the intercom is a special channel for easy pairing, and its
frequency will change with each pairing. Even if two G-U1 radios are both set
to channel 61, intercom communication will not be possible.
If the pairing is unsuccessful multiple times, please restart the walkie talkie
and try pairing again.
Pairing
Entering easy pairing:

-14
Entering
the timer:
MEM - 10 memory locations
Storing channel/privacy code combination to memory location:
The radio has 10 memory locations for your most frequently used channel/privacy
code combinations.
These memory locations can be quickly selected and replaced to the current
channel for use.
In standby mode, press and hold MEM for 3 seconds. The
number in the lower right corner of the screen flashes.
Press the or button to select the location you want
to store (0-9).
First, follow the channel/privacy code combination set for
the radio (see page 18).
When leaving the factory, no channel/privacy code combination is stored.
Pressing MEM will not call up any data. Please follow the process below to
store the channel/privacy code combination to the memory location before
using this function.
Call Button
Press and release the button.
The other person will hear a three second call tone. This tone is used only to
establish voice communications.
Press PTT or MON to store the current channel/privacy code combination and
return to standby mode.
During the above operation, press MEM again to cancel the operation and
return to standby mode.
The timer supports 100 minutes of timing.
Timer
Press PTT or MON to exit the timer and return to the standby page.
Press and hold the button for 3 seconds to enter the
timer.
Press the button to start timing.
Press the button to pause timing, and press this
button again to reset the timer.
Timer
Memory Channel 9
1.
2.
3.
3.
4.
1.
2.
4.
-15
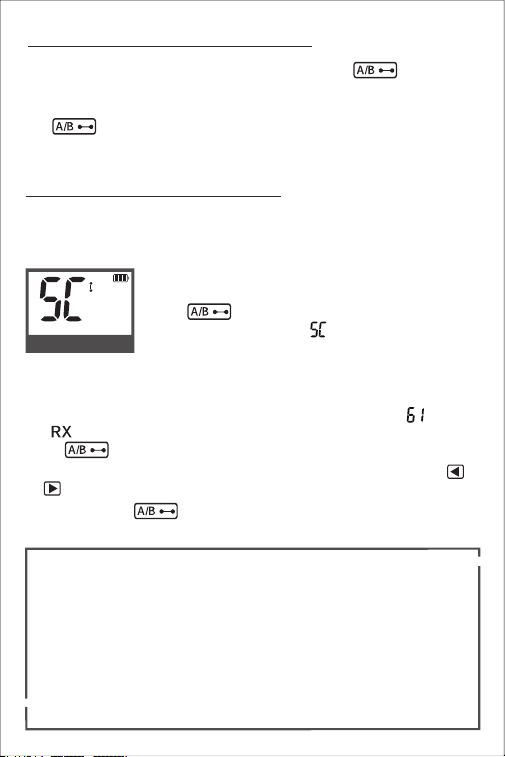
Channel Scan
To start scanning:
While scanning is active, you can perform the following operations:
The radio can automatically scan your channel and privacy code combinations
from 1-61. If the channel scan does not find the radio signal you want to scan, use
the Easy Pairing feature (see page 13).
Tip: When a radio signal is detected during scanning, the radio will stay on the
scanned channel. If the radio signal stops transmitting or no other operations are
performed, the radio will continue scanning after 5 seconds.
1. Change scanning direction: Press or briefly to change the scanning
direction.
2. Resume scanning: After detecting a radio signal, press or briefly to
resume scanning.
3. Cancel scanning: Press the MON button briefly to cancel scanning and return to
standby mode.
4. Save scanned channel: When a radio signal is detected, stop scanning. Press
PTT
on the left side of the radio briefly to save and stay on the scanned channel,
entering standby mode.
Short press the button to start scanning channels. The
" "
icon appears,
and the channels and privacy codes begin to scroll.
Quickly switch the channel/privacy code of the storage location:
If a location has been saved before, its associated channel/privacy code
combination will be shown on the display. Saving it again will overwrite the
previous combination.
Press the MEM button, and the channel/privacy code combination of the
storage location is displayed on the display.
You need to store the channel/code combination to the memory
location before it can be displayed.
Press the or button to select the channel/privacy code combination (0-9)
you need to call.
Press PTT or MON to replace the current channel/privacy code combination
and return to standby mode.
During the above operation, press MEM again to cancel the operation and
return to standby mode.
1.
2.
3.
4.
-16
07
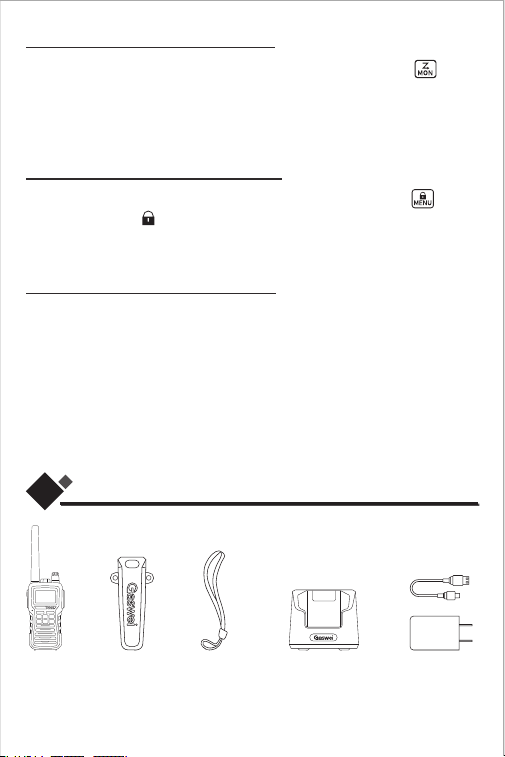
Product Packaging
Note: This is a packaging slip for a pack of two items. The quantity listed in the
product catalog may vary according to different product quantities.
Radio *2
Belt clip *2 Wrist Strap *2 Desktop Charger *2 Charger Case *2
Monitoring mode
When the current channel signal is weak, you can press and hold the button
to enter monitoring mode. Release the button to exit monitoring mode.
With monitoring mode on, you can listen to all conversations on the current
channel, regardless of whether privacy codes are set.
Keyboard lock
To avoid accidental changes to the radio settings, press and hold the button
for 3 seconds. The
" "
icon will appear on the display screen, and only the
PTT
and CALL
will remain active. Repeat the same steps to unlock the keypad.
Factory data reset
If you encounter a program bug or have set parameters that you are not familiar
with, you can perform a restore operation, which will reset all settings to their
factory state.
First, turn off the radio. While it is powered off, hold down the CALL button and
then turn the knob clockwise to power on the radio. The channel will change to
Channel 1, and the privacy code will be set to "off," indicating that the factory reset
has been successfully completed.
-17
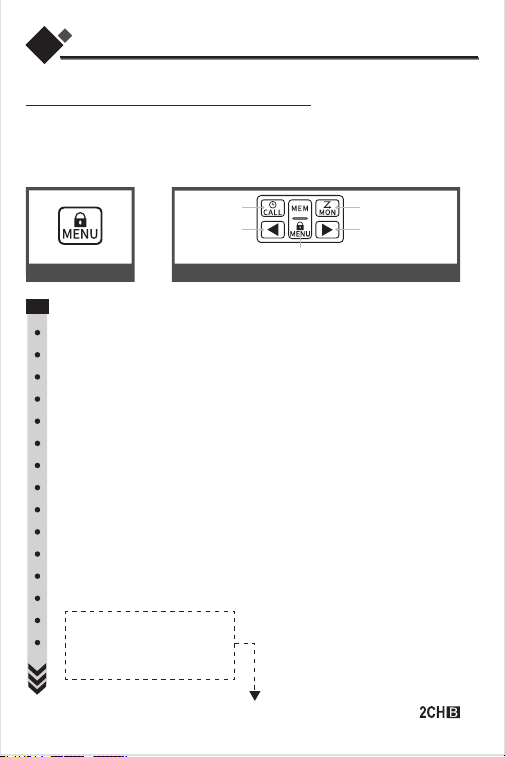
Mode Functions
Scrolling Through the Mode Function
By scrolling through the MENU function, you will be able to select or turn on preferred
features of your radio. When scrolling through the MENU function, your radio features
will be displayed in the same predetermined order:
Channel
CTCSS / DCS Select
Privacy Cades (1-38/1-83)
VOX setting
Power Saving
Call Ringtone selection
Key Tone setting
Roger Beep Confirmation Tone
Screen backlight
SOS Help Options
Whisper
mode
Silent Charge (Sleep pattern)
Vibration Alert
Dual Watch
Channel(B)
CTCSS / DCS Select(B)
Privacy Cades (1-38/1-83)(B)
High/Medium/Low Power
61 channels
off,CTCSS,DCS
121 Privacy Codes
off,01~09L
off, 01~04L
10 call ringtones
on or off
on or off
on or off
on or off
on or off
on or off
on or off
on or off
61 channels
off,CTCSS,DCS
121 Privacy Codes
high,medium,low
Back
OK+Next
ScrollScroll
OK+Standby
When the 2CH Dual-Watch is enabled, the menu for setting the channel and code of will
appear. It will be hidden when Dual-Watch is disabled.
Button function in setting state
08
MENU Button
-18
Tip: If no button is pressed within 10 seconds, it will automatically return to
standby mode.
Channel Selection:
Briefly press and release the MENU button, and the
channel number will blink.
Press the / button to select a channel. (You can hold
down the / button to quickly advance.)
Press PTT or MON to save and return to standby mode. Alternatively, press the
MENU button to continue with other settings.
1.
2.
3.
Select Channel
Selecting a Channel
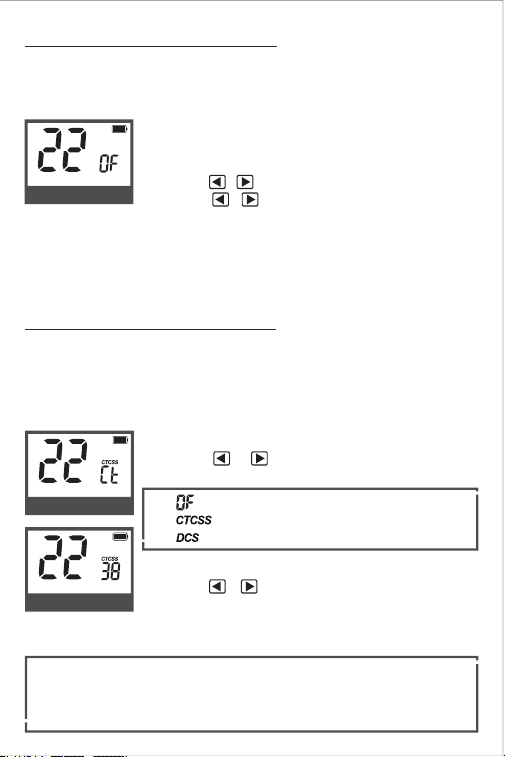
Privacy Codes
The radio has 121 anti-interference privacy codes. They can help reduce interference
from other users. CTCSS codes 1-38 are standard analog codes. DCS codes (1-83) are
digital codes added to better prevent interference.
Setting CTCSS/DCS Privacy Codes:
OF : Off Privacy Code
01 ~ 38 : Standard Analog Code
01 ~ 83 : Digital Code
The radio has 61 channels, of which channels 1-22 are compatible with other
brands of two-way radios. Channels 23-60 are fixed pre-programmed channels.
Channel 61 is a dedicated channel for easy pairing (dynamic frequency)
Press the MENU button until the code area starts flashing.
Press the or button to select the type of code you
want to set.
Continue pressing MENU to set the privacy code number.
Press the or button to select the code number. (Press
and hold these buttons to quickly cycle through the codes)
Press PTT or MON to save the setting and return to standby mode. Or press
MENU to continue with other settings.
The code type must be consistent on the same channel to communicate.
CTCSS code 01 cannot communicate with DCS code 01.
The channel and privacy code type and privacy code number must be
consistent to communicate.
1.
2.
3.
4.
5.
1.
2.
CTCSS/DCS
CTCSS Code
-19
Communicate with other brands of radios:
Power Saving
Power-Saving Settings:
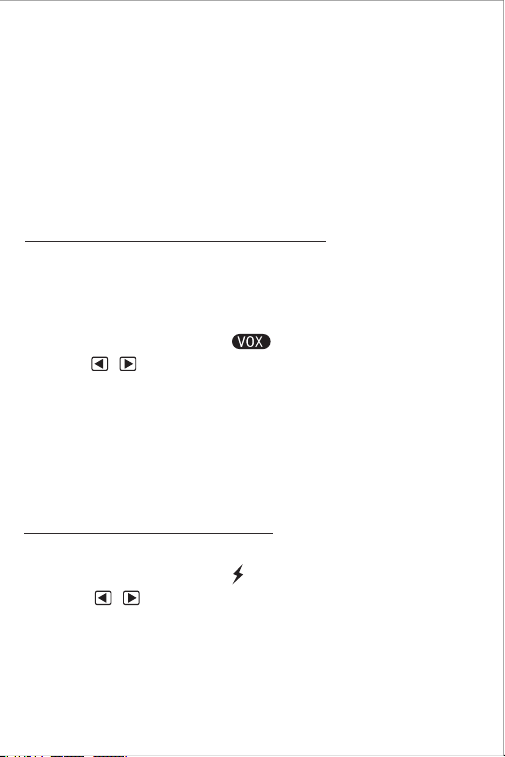
Voice-Activated Transmission (VOX):
Press the MENU button until the " " icon appears.
Press the / button to turn VOX on or off.
Press PTT or MON to save and return to standby mode. Alternatively, press the
MENU button to continue with other settings.
Press the MENU button until the " " icon appears.
Press the / button to select a power-saving level.
Press PTT or MON
to save and return to standby mode. Alternatively, press the
MENU button to continue with other settings.
In VOX mode, your radio can be used “hands-free," automatically transmitting
when you speak. You can set the VOX sensitivity level to fit the volume of your voice
and avoid transmissions triggered by background noise.
It is highly recommended to use the (Easy Pairing on page 13) function to comm-
unicate with other brands of radios, which is simple and fast.
The following is the code correspondence method, which may be slightly
complicated.
Example: Radio A is channel 22, 99 privacy codes
The CTCSS code (1-38) of the G-U1 radio corresponds to the code (1-38) of radio A.
The DCS code (1-61) of the G-U1 radio corresponds to the code (39-99) of radio A.
If the G-U1 radio is DCS code 01, the code of radio A needs to be set to 39.
The calculation method is: DCS code number + 38 = the code of radio A. 1+38=39.
The VOX sensitivity level is displayed as numbers 1-9, where number 9 is the most
sensitive level and number 1 is the least sensitive level.
Voice Activated Transmit (VOX)
OF: Turn off VOX mode.
1-9: Turn on VOX mode and set the VOX sensitivity.
Among them, level 4 is the most energy-efficient, and it is recommended to set the
power-saving level to 3. Please set the power saving level as needed, excessively
high power saving levels may cause some voice loss.
OF: Turn off power-saving mode.
1-4: Turn on power-saving mode and set the power-saving level.
1.
2.
3.
1.
2.
3.
-20
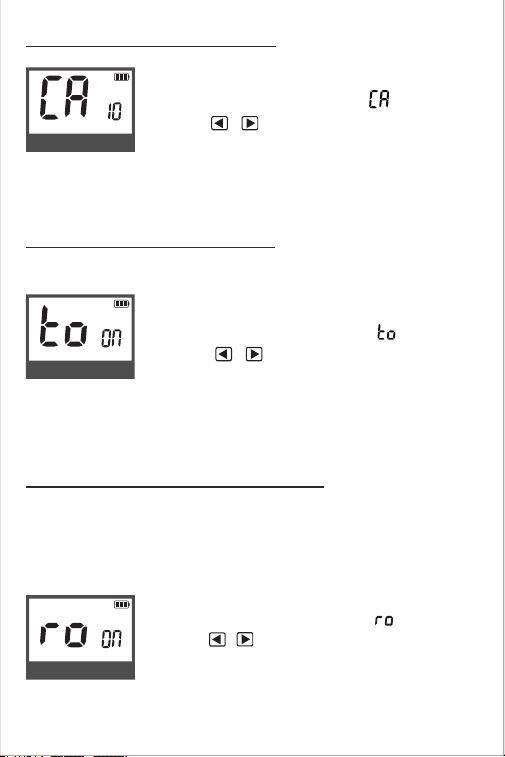
Call Alarm
Call Alarm settings:
Press the MENU button until the letter " " is displayed.
Press the / button to select the call tone. There are
10 call tones to choose from.
Press PTT or MON to save and return to standby mode. Alternatively, press the
MENU button to continue with other settings.
1.
2.
3.
Call Alarm
Key Tone
Roger Beep Confirmation Tone
Key Tone On/Off:
Roger Beep Confirmation Tone:
Press the MENU button until the letter " " is displayed.
Press the / button to select whether to enable or
disable the key tone.
Press the MENU button until the letter " " is displayed.
Press the / button to select ON or OFF for the Roger
Beep confirmation tone.
When the key tone is enabled, a sound will be emitted every time a button is pressed.
When you release the PTT button after speaking, your audience will hear a confir-
mation tone. This will alert them that you have finished speaking and they can
proceed to talk.
1.
2.
1.
2.
Key Tone On
Press PTT or MON to save and return to standby mode. Alternatively, press the
MENU button to continue with other settings.
3.
Press PTT or MON to save and return to standby mode. Alternatively, press the
MENU button to continue with other settings.
3.
Roger Beep On
-21
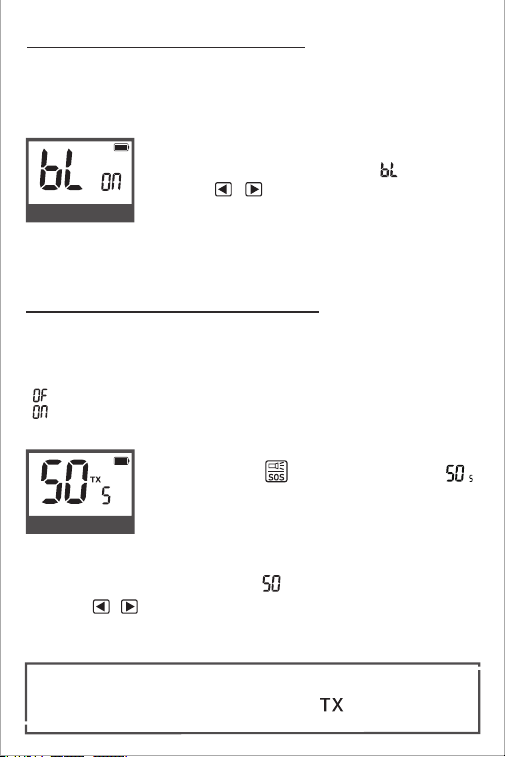
Display backlight and key lighting
Backlight On/Off:
Press the MENU button until the letter " " is displayed.
Press the / button to select whether to enable or
disable the backlight.
When you want to save power or when you don't need the backlight during the day,
you can turn it off. This will maximize battery life. The display backlight and key
lighting of the radio turn on and off at the same time, and you cannot turn one on
and off separately.
1.
2.
Backlight On
Press PTT or MON to save and return to standby mode. Alternatively, press the
MENU button to continue with other settings.
3.
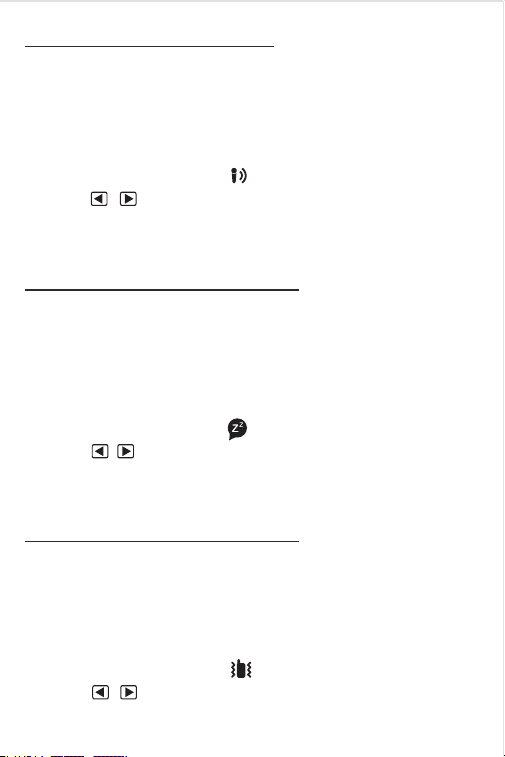
SOS Emergency Alarm
Press the MENU button until the letter " " is displayed.
Press the / button to select Local Alarm or Transmit Alarm.
Press PTT or MON to save and return to standby mode. Alternatively, press the
MENU button to continue with other settings.
Press and hold the button for 3 seconds. The " "
will be displayed, and the alarm sound will be emitted.
Press the side PTT
button to turn off the alarm and return
to standby mode.
When alarm mode is enabled, press PTT button to exit the mode.
When the alarm mode is transmitting alarm, the " " icon in the upper right
corner of the channel continues to display.
Setting Local Alarm/Transmit Alarm:
Alarm On/Off:
The emergency alarm function can be used to signal to your companions that you
need urgent assistance.
The alarm mode includes Local Alarm and Transmit Alarm.
[ ] Local Alarm : only sounds on the device itself.
[ ] Transmit Alarm : sounds on the device and simultaneously sends an alarm
sound to radios on the same channel/privacy code.
1.
2.
3.
1.
2.
1.
2.
Transmit Alarm
-22
Whisper
Setting Whisper Mode:
Press the MENU button until the " " icon appears.
Press the / button to turn on or off .
Press PTT or MON to save and return to standby mode. Alternatively, press the
MENU button to continue with other settings.
This mode allows users to speak in a very low voice while the other party can still
hear a louder and clearer sound. This mode enhances the transmission of sound
through technical means, ensuring clear and reliable communication in noisy
environments. This function is usually enabled when it is inconvenient to speak
loudly.
1.
2.
3.
Silent Charge (Sleep pattern)
Silent Charge
:
Press the MENU button until the " " icon appears.
Press the / button to turn on or off .
Press PTT or MON
to save and return to standby mode. Alternatively, press the
MENU button to continue with other settings.
Setting Vibration Alert:
Press the MENU button until the " " icon appears.
Press the / button to turn on or off .
Press PTT or MON
to save and return to standby mode. Alternatively, press the
MENU button to continue with other settings.
When the silent charge function is enabled, the two-way radio disables the
reception of regular two-way communication while charging, but it can still receive
weather alerts.
This function is generally enabled when you need to rest or sleep and do not want
to be disturbed while the radio is charging.
Vibration Alert
When the vibration function is enabled, the two-way radio vibrates when it
receives a signal or a call while in idle mode.
The radio automatically enters idle mode 6 seconds after the call ends.
Continuous calls within 6 seconds will not trigger repeated vibrations.
1.
2.
3.
1.
2.
3.
-23
Dual Watch
To turn dual table mode on and off :
Transmit Channel Switching (A/B) :
This radio has a Dual-Watch mode that allows the user to scan two channels for
activity. The current transmit channel can be switched by pressing the
button.
Press the MENU button until the " " and " OF "/" ON " icons appear.
Press the / button to select " OF " or " ON ".
Press PTT or MON to save and return to standby mode. Or press the MENU
button to continue setting the channel and privacy code for the second channel
in
Dual-Watch
mode (see Channel and Privacy Code Operation on page 18).
After turning on the
Dual-Watch
mode ( ), press the
button to switch the transmit channel. The " "
in the display represents the main channel transmission
and the " "represents the second channel transmission
in the 2CH
Dual-Watch
mode.
The switching function of the button is only applicable when the
Dual-
Watch
mode is turned on and is not available in the single frequency mode.
1.
2.
3.
Channel B
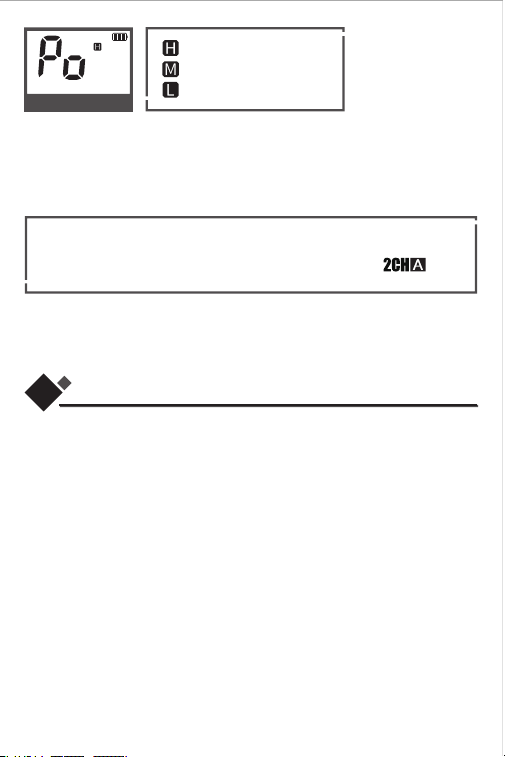
High/Medium/Low Power
The two-way radio has three power level options (Hi/Me/Lo). Higher transmission
power (Hi) provides a longer range but consumes more battery. Set it according to
your actual needs.
Press the MENU button until the letter " " is displayed, and the " " or " "or
" " icon starts flashing.
Press the / button to select the power level .
Transmission Power Level Selection:
1.
2.
After turning off the
Dual-Watch
mode, the setting menu for the second channel
and privacy code of the
Dual-Watch
mode is automatically hidden.
After turning on the
Dual-Watch
mode, the channel and privacy codes of the two
channels are displayed alternately.
In
Dual-Watch
mode, power consumption will increase.
1.
2.
3.
-24
09
Product parameter
You cannot adjust the power settings for FRS channels (8~14)(34-37)(53-56).
According to FCC regulations, they are set to low power.
In
Dual-Watch
mode, power adjustment only takes effect on (main
channel).
NOTE: You cannot adjust the power settings for (8-14)(34-37)(53-56). They are set to
low power due to FCC regulations.
NOTE: After entering the menu settings by pressing MENU, you can press the CALL
button to return to the previous menu settings.
: high power
: medium power
: low power
1.
2.
Model:
Transmit power:
Frequency Range:
Frequency Stability:
Channel Spacing:
Channels:
Privacy Codes:
Wearther Channel:
Call Alarm:
Waterproof rating:
Audio Interface:
Charge Jack:
Operating Voltage:
OperatingTemperature:
Battery Type:
G-U1
H/M/ L
462 - 467 MHz(UHF)
±2.5(ppm)
12.5/25kHz
61
121 (CTCSS: 1-38, DCS: 1-83)
11
10
IP55
2.5mm
Type-C
3.7- 4.2V
-20°C ~ 60°C
1800mAh Lithium Battery
High Power
Press PTT or MON to save and return to standby mode. Alternatively, press the
MENU button to continue with other settings.
3.
-25
10
Ch Freq.
(MHZ)
Freq.
(MHZ)
Freq.
(MHZ)
Freq.
(MHZ)
Ch Ch Ch
1
2
3
4
5
6
7
8
9
10
11
162.550
162.400
162.475
162.425
162.450
162.500
162.525
161.650
161.775
161.750
162.000
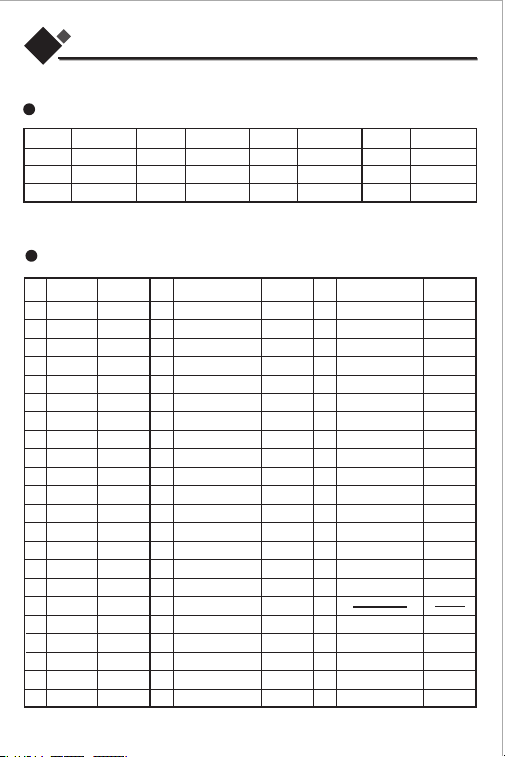
Weather Channels and Frequencies
Freq.Ch Power
1
2
3
4
5
6
7
8
9
10
11
12
13
14
15
16
17
18
19
20
21
22
462.5625
462.5875
462.6125
462.6375
462.6625
462.6875
462.7125
467.5625
467.5875
467.6125
467.6375
467.6625
467.6875
467.7125
462.5500
462.5750
462.6000
462.6250
462.6500
462.6750
462.7000
462.7250
H/M/L
H/M/L
H/M/L
H/M/L
H/M/L
H/M/L
H/M/L
L
L
L
L
L
L
L
H/M/L
H/M/L
H/M/L
H/M/L
H/M/L
H/M/L
H/M/L
H/M/L
Freq./code Freq./codeCh
Power
23
24
25
26
27
28
29
30
31
32
33
34
35
36
37
38
39
40
41
42
43
44
462.5625
462.6125
462.6625
462.7125
462.5500
462.6000
462.6500
462.7000
462.5875
462.6375
462.6875
467.5625
467.6125
467.6625
467.7125
462.5750
462.6250
462.6750
462.7250
462.5625
462.6125
462.6625
250.3
225.7
203.5
179.9
162.2
146.2
131.8
118.8
D023N
D031N
D047N
D065N
D073N
D115N
D131N
D143N
D156N
D172N
D223N
107.2
97.4
88.5
462.7125
462.5500
462.6000
462.6500
462.7000
462.5875
462.6375
462.6875
467.5625
467.6125
467.6625
467.7125
462.5750
462.6250
462.6750
462.7250
79.7
71.9
241.8
218.1
192.8
D025N
D032N
D051N
D071N
D074N
D116N
D132N
D152N
D162N
D174N
D226N
H/M/L
H/M/L
H/M/L
H/M/L
H/M/L
H/M/L
H/M/L
H/M/L
H/M/L
H/M/L
H/M/L
L
L
L
L
H/M/L
H/M/L
H/M/L
H/M/L
H/M/L
H/M/L
H/M/L
Ch Power
45
46
47
48
49
50
51
52
53
54
55
56
57
58
59
60
61
H/M/L
H/M/L
H/M/L
H/M/L
H/M/L
H/M/L
H/M/L
H/M/L
L
L
L
L
H/M/L
H/M/L
H/M/L
H/M/L
Frequency Allocation
Frequency table

-26
Ch
Freq. Ch Freq. Ch Freq. Ch Freq.
01
02
03
04
05
06
07
08
09
10
11
12
13
14
15
16
17
18
19
20
21
D023N
D025N
D026N
D031N
D032N
D043N
D047N
D051N
D054N
D065N
D071N
D072N
D073N
D074N
D114N
D115N
D116N
D125N
D131N
D132N
D134N
D143N
D152N
D155N
D156N
D162N
D165N
D172N
D174N
D205N
D223N
D226N
D243N
D244N
D245N
D251N
D261N
D263N
D265N
D271N
D306N
D311N
D315N
D331N
D343N
D346N
D351N
D364N
D365N
D371N
D411N
D412N
D413N
D423N
D431N
D432N
D445N
D464N
D465N
D466N
D503N
D506N
D516N
D532N
D546N
D565N
D606N
D624N
D627N
D631N
D632N
D654N
D662N
D664N
D703N
D703N
D712N
D723N
D731N
D732N
D734N
D743N
D754N
22
23
24
25
26
27
28
29
30
31
32
33
34
35
36
37
38
39
40
41
42
43
44
45
46
47
48
49
50
51
52
53
54
55
56
57
58
59
60
61
62
63
64
65
66
67
68
69
70
71
72
73
74
75
76
77
78
79
80
81
82
83
DCS
Privacy Code Table
Ch Freq. Ch Freq. Ch Freq. Ch Freq.
01
02
03
04
05
06
07
08
09
10
67.0
71.9
74.4
77.0
79.7
82.5
85.4
88.5
91.5
94.8
97.4
100.0
103.5
107.2
110.9
114.8
118.8
123.0
127.3
131.8
11
12
13
14
15
16
17
18
19
20
21
22
23
24
25
26
27
28
29
30
136.5
141.3
146.2
151.4
156.7
162.2
167.9
173.8
179.9
186.2
31
32
33
34
35
36
37
38
192.8
203.5
210.7
218.1
225.7
233.6
241.8
250.3
CTCSS
Privacy Code Table

-27
11
Normal Position
Hold the transmitter approximately 2 inches from your face and speak in a normal
voice, with the antenna pointed up and away.
General Specifications
IMPORTANT NOTICE
WARNING: Changes or modifications to this unit not expressly approved by the party
responsible for compliance could void the user's authority to operate the equipment.
This device complies with Part 15 of the FCC Rules. Operation is subject to the following
two conditions: 1) This device may not cause harmful interference, and 2) this device
must accept any interference received. Including interference that may cause
undesired operation.
NOTE: This equipment has been tested and found to comply with the limits for a
Class B digital device. Pursuant to Part 15 of the FCC Rules. These limits are
designed to provide reasonable protection against harmful interference in a
residential installation. This equipment generates. uses and can radiate radio
frequency energy and, if not installed and used in accordance with the instructions
may cause harmful interference to radio communications.
However, there is no guarantee that interference will not occur in a particular
installation. If this equipment does cause harmful interference to radio or
television reception. Which can be determined by turning the equipment off and
on. The user is encouraged to try to correct the interference by one or more of the
following measures:
Reorient or relocate the receiving antenna.
Increase the separation between the equipment and receiver.
Connect the equipment into an outlet on a circuit different from that to which the
receiver is connected.
Consult the dealer or an experienced radio/TV technician for help.
Safety Information for Radios
Your wireless handheld portable transceiver contains a low power transmitter.
When the PTT button is pushed, it sends out radio frequency (RF) signals. The
device is authorized to operate at a duty factor not to exceed 50%. In August 1996,
the Federal Communications Commissions (FCC) adopted RF exposure guideli-
nes with safety levels for handheld wireless devices.

-28
FCC Part 15.21 Warning Statement-NOTE:
The Grantee is not responsinle for any changes or modifications not expressly
approved by the party responsinle for compliance. Such modifications could void
the user's authority to operate the equipment.
IC RSS-GEN
This device complies with ISEDC license-exempt RSS standard(s). Operation is
subject to the following two conditions: (1) this device may not cause
interference. and (2) this device must accept any interference, including
interference that may cause undesired operation of the device. Under ISEDC
regulations, this radio transmitter may only operate using an antenna of a type
and maximum (or lesser) gain approved for the transmitter by ISEDC. To reduce
potential radio interference to other users, the antenna type and its gain should
be so chosen that the equivalent isotropically radiated power (e.i.r.p.) is not more
than that necessary for successful communication. The applicant is responsible
for providing proper instructions to the user of the radio device, and any usage
restrictions, including limits of exposure durations. The user manual shall provide
installation and operation instructions, as well as any special usage conditions, to
ensure compliance with SAR and/or RF field strength limits. For instance,
compliance distance shall be clearly stated in the user manual.
IMPORTANT NOTICE, FCC LICENSE REQUIRED FOR GMRS OPERA-
TION (Only Applicable for GMRS Radio Use in the United States)
The G-U1 Series operates on GMRS (General Mobile Radio Service) frequencies
which require an FCC (Federal Communications Commissionlicense. You must
be licensed prior to operating on channels 1 -7,15 -33,38-52 or 57-60 which
comprise the GMRS channels of the GU1 Series. Serious penalties could result
from unlicensed use of GMRS channels, in violation of FCC rules, as stipulated in
the Communications Acts Sections 501 and 502 (amended).
You will be issued a call sign by the FCC which should be used for station
identification when operating the radio on GMRS channels. You should also
cooperate by engaging in permissible transmissions only, avoiding channel
interference with other GRS users, and being prudent with the length of your
transmission time.
Apply for a license at the FCC's website:
http:www.fcc.gov/wireless/universal-license-system
Contact the FCC at 1-888-225-5322 if you have any questions.
-29
Exposure To Radio Frequency Energy
Your Gaswei radio is designed to comply with the following national and intern-
ational standards and guidelines regarding exposure of human beings to radio
frequency electromagnetic energy:
United States Federal Communications Commission, Code of Federal Regula-
tions: 47 CFR part 2 sub-part J
American National Standards Institute (ANSl) / Institute of Electrical & Electro-
nic Engineers (IEEE) C95.1-1992
Institute of Electrical and Electronic Engineers (lEEE) C95. 1-1999 Edition
National Council on Radiation Protection and Measurements (NCRP) of the
United States, Report 86, 1986
International Commission on Non-lonizing Radiation Protection (ICNIRP) 1998.
To control your exposure and ensure compliance with the general populatio or
uncontrolled environment exposure limits, transmit no more than 50% of the
time. The radio generates measurable RF energy exposure only when transmit-
ting.
MODEL G-U1:
This device complies with part 15 of the FCC Rules. Operation is subject
to the following two conditions: 1) This device may not cause harmful
interference, and 2) This device must accept any interference received,
including interference that may cause undesired operation.
FCC Warnings: Replacement or substitution of transistors, regular
diodes or other parts of a unique nature. with parts other than those
recommended by Gaswei may cause a violation of the technical
regulations of part 95 of the FCC rules, or violation of type acceptance
requirements of part 2 of the rules.

-30
12
Common Problems and Solutions
As the battery power decreases, the transmission power will decrease, affect-
ing the communication distance. Please keep the radio fully charged.
There are too many obstacles between the two radios, such as walls/trees/
mountains, etc., which will seriously hinder the transmission of radio signals.
The radio is set to low power, or on a channel that is restricted to low power by
the FCC. Please set the radio to high power (H) or change the channel.
Radio interference will also affect the communication distance.
1. Reasons that affect the communication distance of the radio.
2. If the radio cannot be charged, please try the following methods
to solve it.
3. Two G-U1 radios cannot communicate.
a.
b.
c.
d.
Check whether the power cord of the charging base is connected properly.
Check whether the radio is placed properly.
Check whether there are foreign objects on the charging contact points of the
radio and the contact points of the desktop charger.
Please use the original power cord for charging. Some other brands of Type-C
power cords may not be able to charge.
Use a screwdriver to remove the battery cover and reconnect the battery cable.
a.
b.
c.
d.
e.
Please check whether the channels and privacy codes of the two radios are the
same. Please note that the type of privacy code must also be the same.
Is the volume set too low so that it cannot be heard? Please turn the knob to
increase the volume.
If both G-U1s are on channel 61, channel 61 may not be able to communicate
because it is a covered frequency. Please switch to another channel.
a.
b.
c.
4. How to communicate with two-way radios of other brands.
5. Can I keep charging it on the desktop charger?
Use [Easy Pairing] to communicate. Almost all FRS and GMRS two-way radios
can be paired. (Recommended)
Set the channel and code to the same to communicate. Since the frequency
distribution of each brand may be different, it may only be applicable to some
brands.
Of course, but it is generally not recommended to charge it all the time. Charging
it all the time may reduce the life of the battery. It is recommended to charge it as
you use it, just like charging a mobile phone. Just turn it off when not in use.
a.
b.
Manufactured by:
Xiaowei Communication Technology (Shenzhen) Co., LTD
Address:
Room 1312, Wanjunhui Building, Xixiang Street, Baoan District, Shenzhen,
Guangdong, China
Made In China
Web:www.gaswei.com Email:support@gaswei.com