1
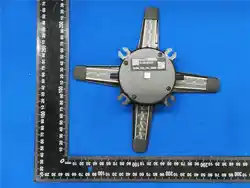
◼ 3D Holographic Fan User Manual (Coeus/C215, Coeus/C38)
Please read this manual carefully before using the device.
➢ Please make sure to secure it in a safe place to prevent it from falling off.
➢ Do not touch the fan blades during rotation.
➢ Do not disassemble the equipment without authorization to avoid causing equipment abnormalities.
➢ Avoid exposure to high temperatures or humid environments, and avoid outdoor use on rainy days.
➢ Pay attention to maintenance and regularly clean the equipment
◼ Parameters and Lists
Model
Coeus/C38
Coeus/C215
\
\
\
Resolution
720*720
404*404
\
\
\
Area(cm)
38*38
21.5*21.5
\
\
\
LED (pieces)
720
404
\
\
\
Storage
4G
4G
\
\
\
Power
12V/36W
12V/36W
\
\
\
Controller
APP、PC、Cloud
Multi-screen
wired
Audio
Music module (Wired) Bluetooth
Temperature
-15℃-50℃
Warranty
one year/>30000 hours
Featured
Features
Wired control
Upgrade
Multi tone
Multi speed
Wired control
Upgrade
Multi tone
Multi speed
Collision
Wired control
Upgrade
Multi tone
Multi speed
Collision
Wired control
Upgrade
Multi tone
Multi speed
Collision
R-time screen
Wired control
Upgrade
Multi tone
Collision
R-time screen
Part Lists
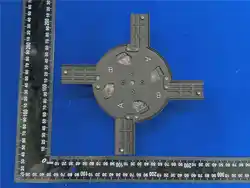
Fan*1,blade *4,Adaptor *1,Remote Controller *1,Wall-mounting Part *1,Setscrew *1,screwdriver
*1, Certification Card *1,User Manual *1, Warranty Card*1(Last page of the User Manual)
2
◼ Installation
1. Tighten the Wall-mounting part onto the back of device with two small screws.
2. Take out the fan body and blades. Put blade A in position A and Screw, Put blade B in position B and Screw.
3. Hang the device to the fixed par. Tighten all screws to complete the installation.
◼ Remote control
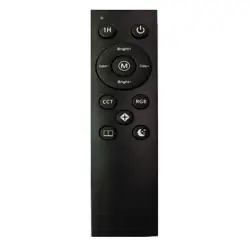
The remote control needs to be paired with the device for the first time.
Press the “MATCH” button on the back of the device, and when the breathing light turns green, press the “Match”
button on the remote control. The breathing light flashes green to complete pairing. (Or connect the mobile app
to the device, go to Settings ->Advanced Options, click "Remote Control Matching", and press the remote control
“match” button when the breathing light is green. The breathing light flashes green to complete pairing.)
Please pull out the PVC insulation sheet before use, in order not to waste the battery, when not in use, please plug
back the PVC insulation sheet. If you need to install or replace the battery, please follow the instructions on the
back of the remote control to remove the battery clip, insert the CR2025 battery and reinsert it.
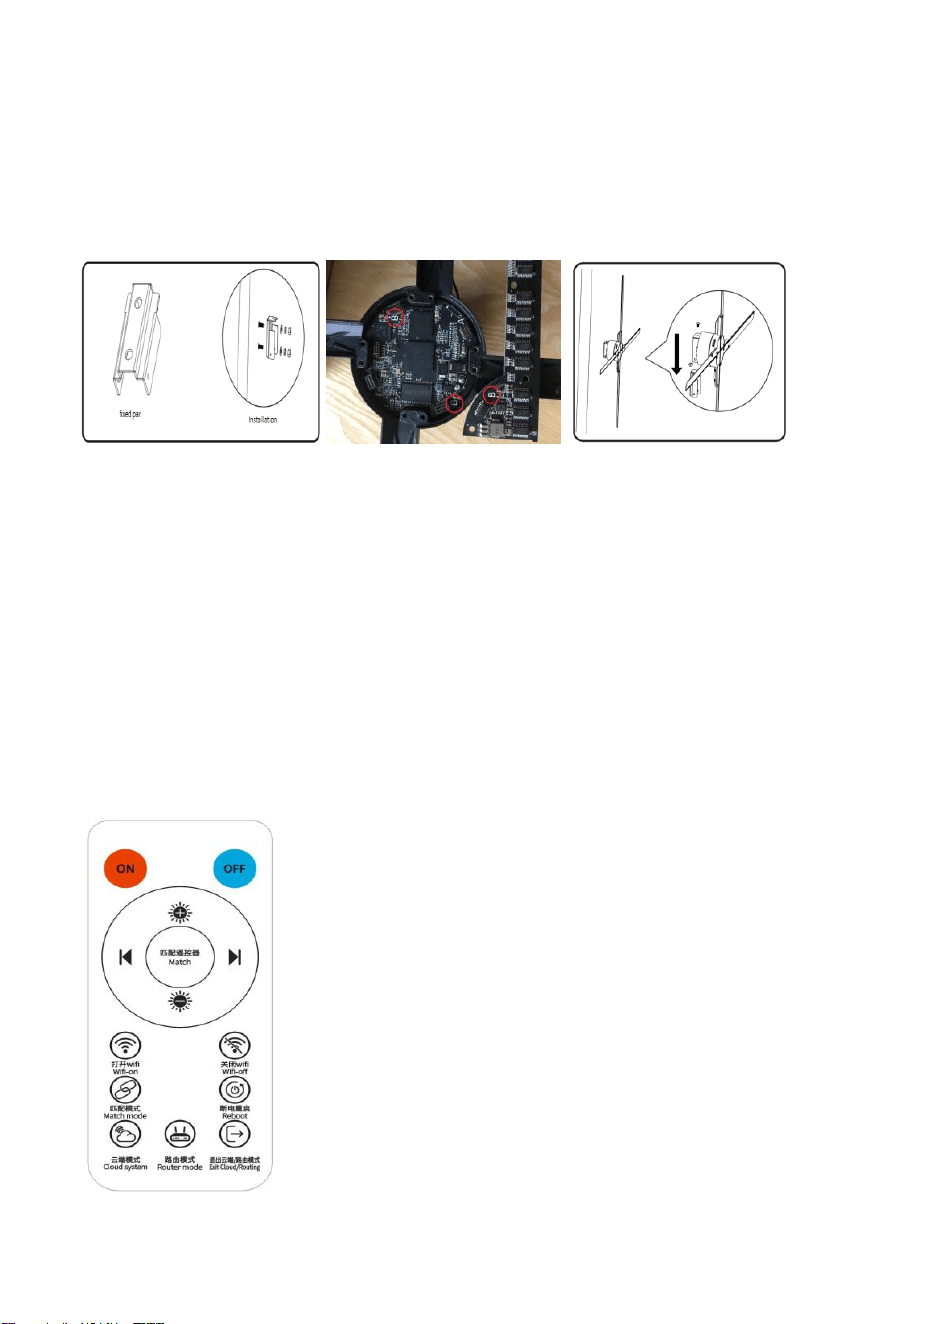
ON: Run the Fan OFF:Stop to run the fan
Match mode:Put the device into remote pairing mode for 10 seconds
Match:Press to match when the Fan is in matching mode
Wifi-on:The hotspot is visible and can be connected when opened
Wifi-off: The hotspot is invisible and cannot be connected when off
Reboot:Restart the device system .
Cloud system:Enter cloud mode.
Route mode:Enter routing mode to upload videos for splicing
Exit Cloud/Routing: Exit cloud and routing mode.
3
◼ Control with mobile
Turn on the wireless function of the phone and connect to the device's WIFI. Open the app, select the standalone,
and the device will automatically connect. (The same device can only have one terminal connected at a time. The
WIFI of the device is like CS_ XXX_ XXXXXX, password CS123456. If the app cannot be connected, check if the app is
the latest version. At the same time, the required permissions need to be enabled such as location and storage.)
◼ Control with computer (Only supports Windows)
Open web page ”http://doc.holocloud.online/“ Download the software and install it. Open the software after
connecting the device WIFI to the computer.
Download URL: http://down.holocloud.online
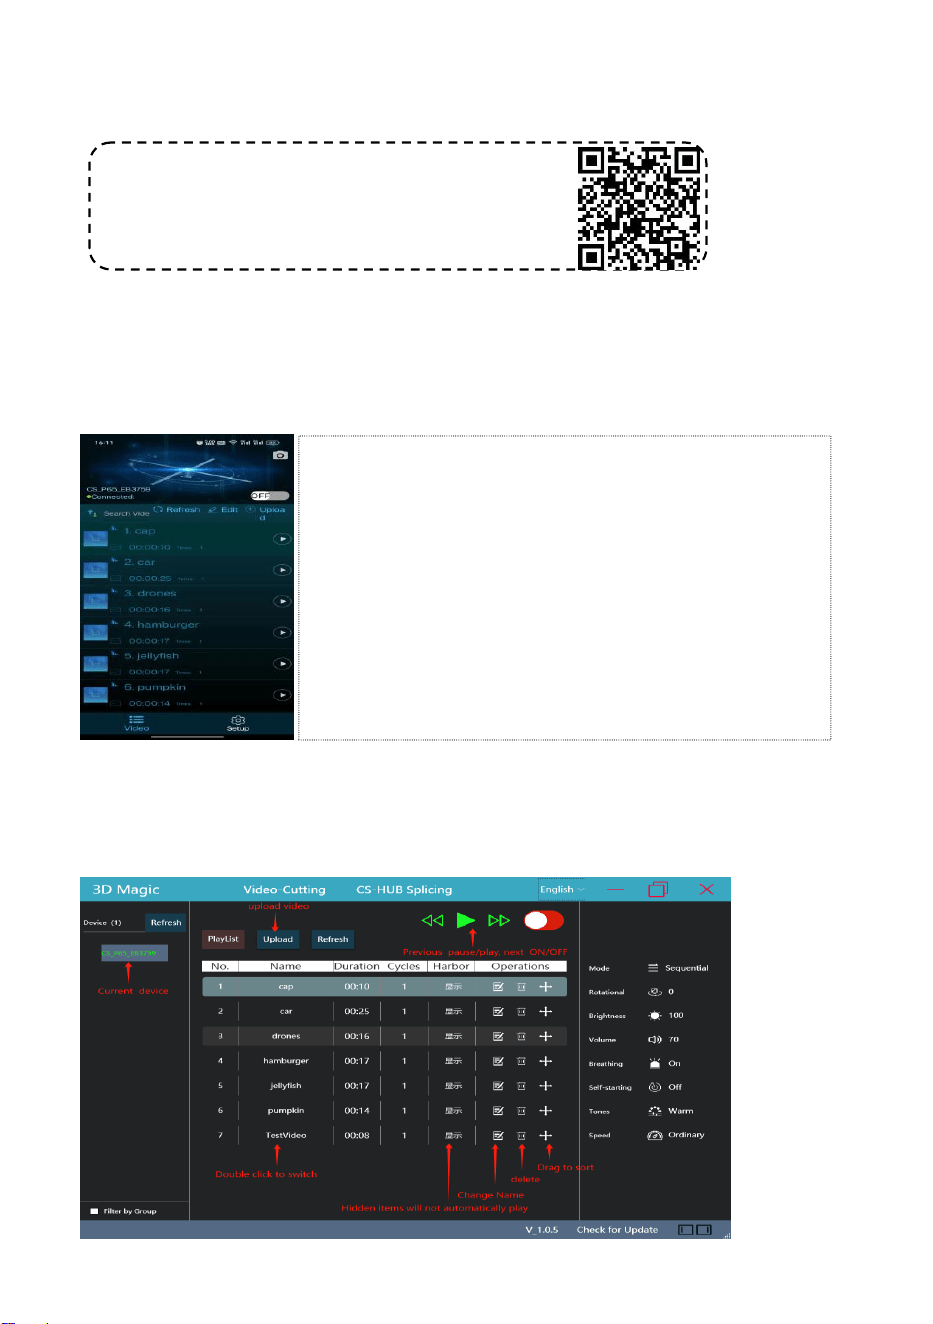
IPhone(App Store) search for :3D Magic
It can be downloaded APP by scanning the QR code
On/Off: Click to switch the device on or off.
Upload: Click to upload images or videos.
Edit: (1) Delete (2) Rename (3) Sort - Hold down a video and drag it to a
new position (4) Hide - Hidden videos will not be played (5) Modify the
times.
Switch: When the device is turned on, click on the video to play it.
Play/Pause: Click on the right of video to switch between play and pause.
Settings: Enter the settings interface.
4
◼ Control with cloud
(1) Before using services, register a cloud account. (address: https://www.holocloud.online/ )
(2) The device needs to be configured through a mobile app to connect to cloud. After connecting the mobile to
the device, go to: Settings ->Remote Control
(3)Logging in cloud and waiting for device online, you can control it and upload videos through the cloud platform.
By any of the following methods, the device can exit cloud mode and its WIFI can be restored to visibility.
A)Press the "Exit Cloud/Routing" button on the remote control. B) Click the “Net” button on the back of the
device. C) Alternatively, you can click "disconnect" on the cloud page.
◼ Audio output
(1) Play sound by connecting to Bluetooth
After connecting the fan, open the APP: “Setup”->“Toggle Bluetooth”. Fan will automatically scan the surrounding
Bluetooth. Select and click" Confirm” to connect. After successful connection, sound can be output through
Bluetooth.
(2) Play the sound through the music module.
A. Connect the computer and module, put music into the removable disk 01 folder directory of the module. The
name of 001_conquest.mp3, indicating that the first video corresponds to the audio 001_conquest
B. Connect music module, Fan and speaker as below, can play sound through music module.
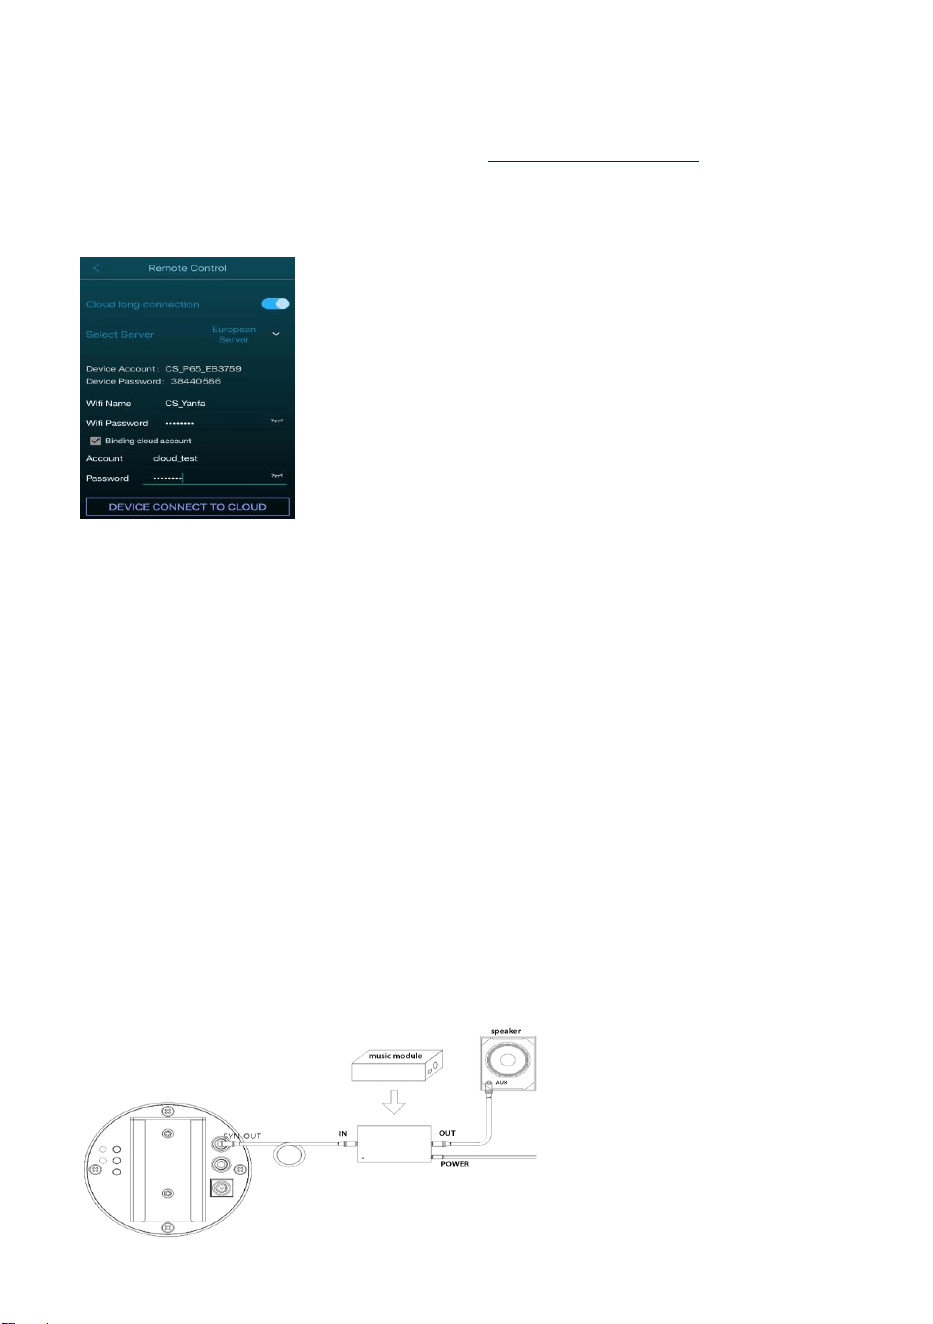
➢ Long Connection: It will not automatically exit cloud mode due to
network unavailability or other reasons
➢ Servers: You can choose between Chinese or European servers
➢ WIFI name: The WIFI name used to connect to the cloud
➢ WIFI password: The password of WIFI used to connect to the cloud
➢ Bind cloud account: The devices will connect to the cloud and
automatically bind to the cloud account
After completing the above information, click "Device Connect to Cloud".
5
◼ Controlled with wired module
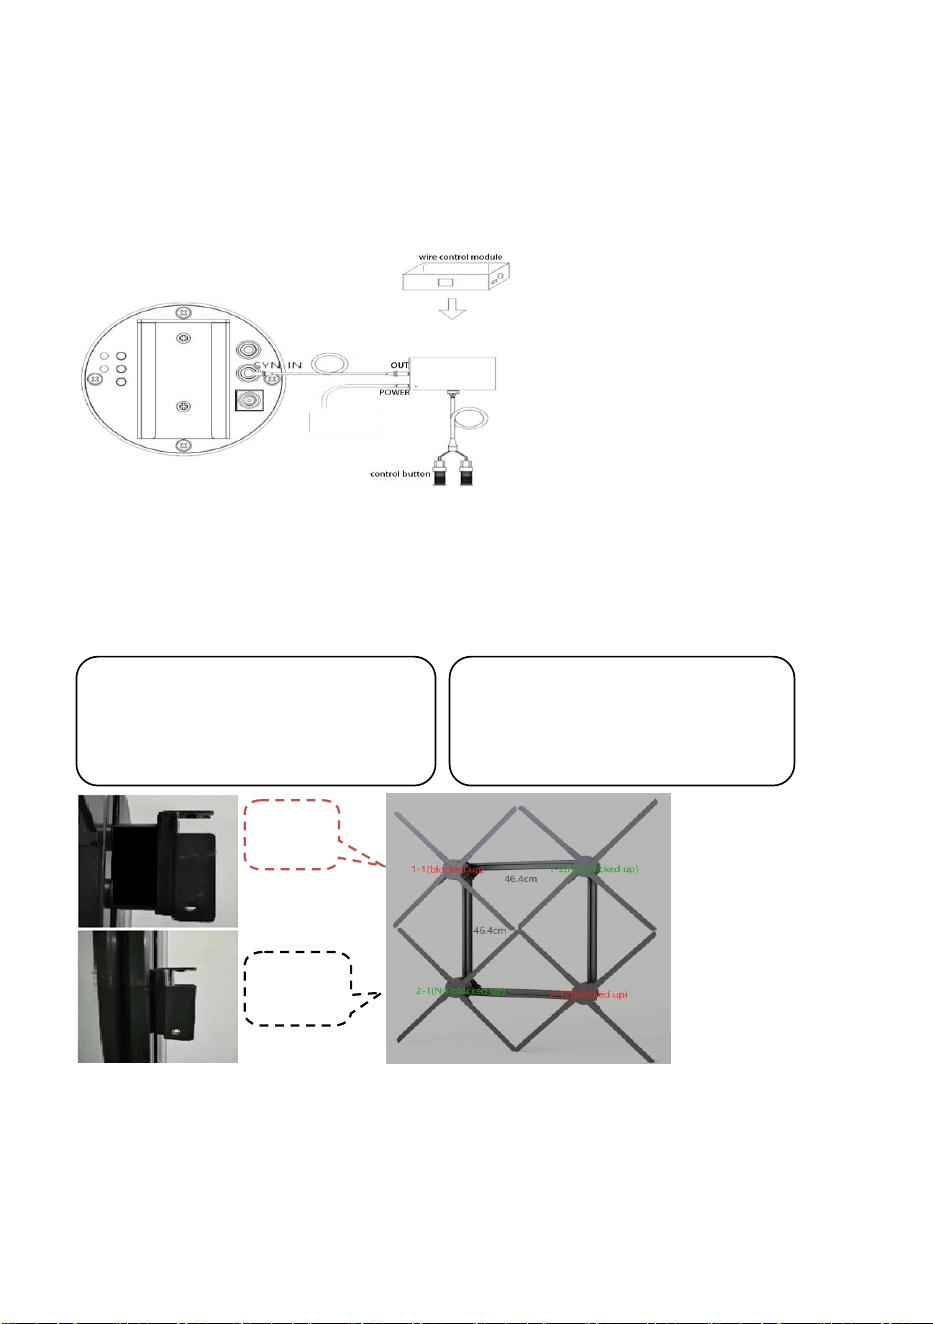
Connect the wired control module and equipment as shown in the figure below (the wire control output is
connected to the SYN-IN of device), the device can be controlled to turn on/off or video switching through the
wire control module. (Specific functions are determined according to the remote control program)
◼ Multi-screen
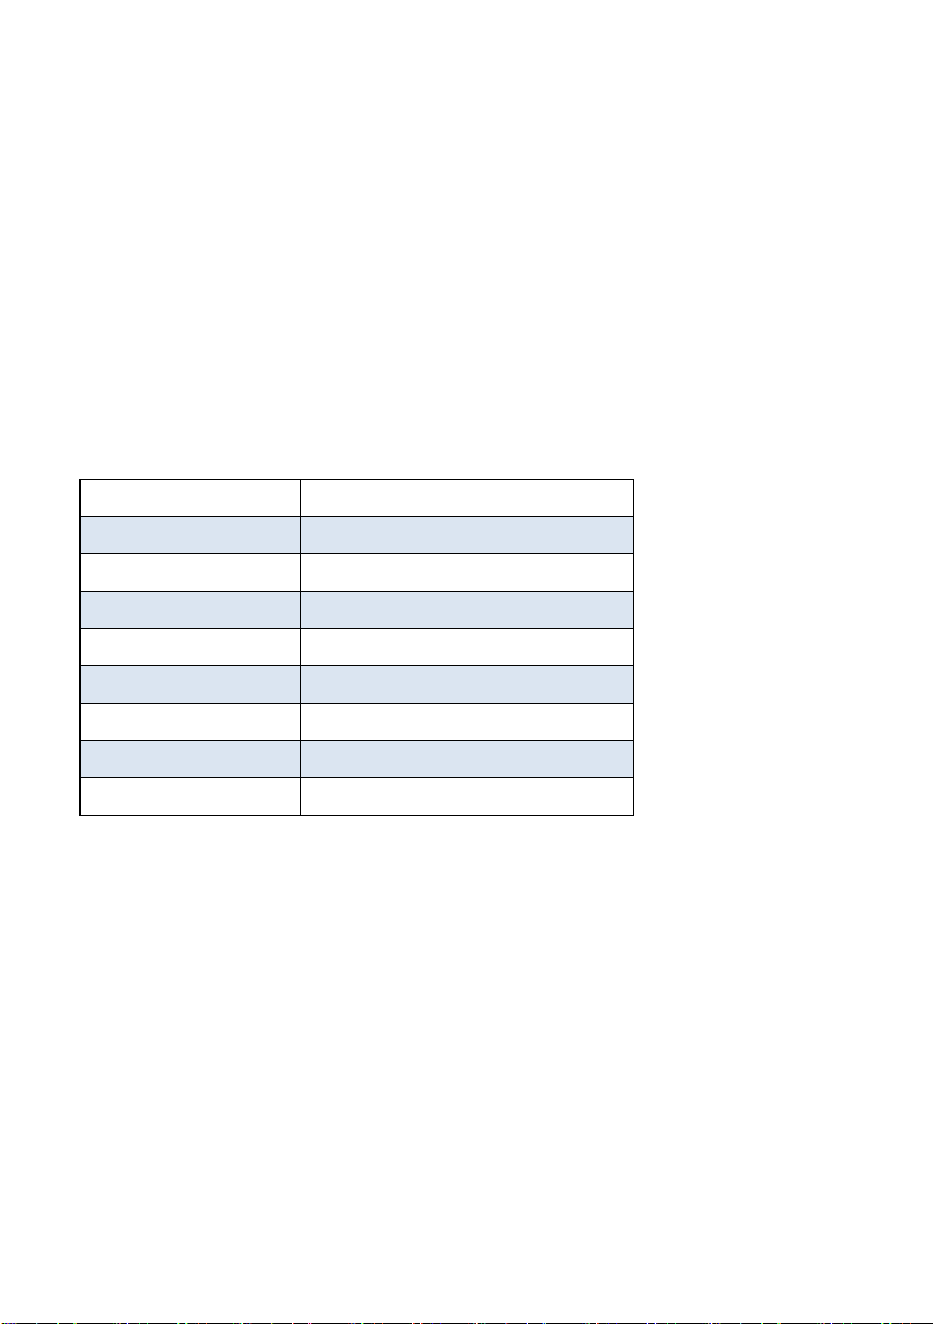
Taking 2X2 (consisting of 4 devices in 2 rows and 2 columns) screen connection as an example. Fix the wall fittings
according to the spacing, and add shims to the first one (1-1) to raise it, without raising it in adjacent positions,
and so on.
(1) The SYN OUT of devices 1-1 is connected to the SYN IN of devices 1-2, the SYN OUT of devices 1-2 is
connected to the SYN IN of devices 2-2, the SYN OUT of devices 2-2 is connected to the SYN IN of devices 2-1, and
finally the SYN OUT of devices 2-1 is connected to the SYN IN of devices 1-1.
(2) Power on all fans, Long press the "MODE" button on the back of the host for 3 seconds, the fan indicator 1
will turn yellow-green, and then double-click the "MATCH" button. If the indicator 1 turns red, the networking
Select an appropriate spacing:
(1)P50S is 35.7cm (2) G65 is 46.4cm
(3)P80/G80 is 55.0cm ④P100 is 71.4cm
Select the appropriate gasket:
(1)G65/P50S is 2cm (2) P80/G80 is 3cm
(3) P100 is 4cm
Raise
d
Lower
6
mode is set successfully; if the indicator 1 turns purple and flashes, means Failed to set the networking mode. At
this time, long press the "MATCH" button to return to the slave mode, check whether all the connections are
correctly connected, and then double-click the "MATCH" networking operation until the indicator light 1 turns red.
◼ Upload videos and control for Multi-screen
Press the remote control “Route mode” or double-click on the host "MODE", and all devices will enter routing
mode. You can control and upload videos after the computer or phone is connected to CS_ Box. When in routing
mode, the device WIFI is not visible. You can press remote control “Exit Cloud/Routing” or double-click "MATCH"
on the back of the host to exit routing mode.(Uploading videos requires physical location of the device. Extensions
Multi-screen requires software splicing and configuration before uploading.)
◼ Indicator status
Device status
Indicator color
Standby
LED1 Red (host); LED1 Yellow-green (slave)
Running
LED1 Blue (host); LED1 Light blue (slave)
Connect to the cloud
LED2 Green
WIFI is off
LED2 Light blue
Matching remote control
LED1 Green flashing (host)
Networking failure
LED1 Purple flashing
Malfunctioning
LED1 White or LED2 green flashing
Restoring factory settings
LED1 All colors are flashing
◼ Troubleshooting
1. After connecting the power, the blade does not light up
Solution: Check the power supply and if the circuit is normal; Is the device's breathing light turned off.
2. Rotating display colored circles
Solution: Check if the installation of the fan blades compact . Stop running and check if the LED is damaged.
3. Unable to start rotation
Solution: Check if the device is powered on or the device is in a slave or emergency stop state.
4. Unable to search for device WIFI
Solution: Routing mode and cloud state WIFI are not visible. If WIFI is turned off, press and hold the remote
control WIFI-on or long press the Net button on the back of the device for 5 seconds to turn on WIFI.
7
◼ Warranty
Within one year from the date of sale, if any malfunction occurs and it is proven to have occurred under normal
use, we will provide repair services. Our company is not responsible for any special, incidental or indirect damages.
Machines that exceed the warranty period are provided with paid repair services. Free maintenance requires
purchase records and warranty cards. Please send it back through a reputable courier company.
Warranty Card
User
User Name
Contact
Purchase date
Mainte
nance
Repair date
Problem
engineer

FCC Warnning:
This equipment has been tested and found to comply with the limits for a Class B digital device,
pursuant to part 15 of the FCC Rules. These limits are designed to provide
reasonable
protection againstharmful interference in a residential installation. This equipment generates,
uses and can radiateradio
frequency
energy
and,
if
not
installed
and
used
in
accordance
with
the
instructions,
maycause
harmful
interference
to
radio
communications.
However,
there
is
no
guarantee
thatinterference
will
not
occur
in
a
particular
installation.
If
this
equipment
does
cause
harmfulinterference to radio or television reception, which can be
determined by turning the equipmentoff
and
on,
the
user
is
encouraged
to
try
to
correct
the
interference
by
one
or
more
of
thefollowing measures:
•
Reorient or relocate the receiving antenna.
•
Increase the separation between the equipment and receiver.
•
Connect the equipment into an outlet on a circuit different from that to which the receiver is
connected.
• Consult the dealer or an experienced radio/TV technician for help.
Caution:
Any
changes
or
modifications
to
this
device
not
explicitly
approved
by
manufacturer
could void your authority to operate this equipment.
This
device
complies
with
part
15
of
the
FCC
Rules.
Operation
is
subject
to
the
following
two
conditions:
(1)This
device
may
not
cause
harmful
interference,
and
(2)
this
device
must
accept
any
interference received, including interference that may cause undesired operation.
This
equipment
complies
with
FCC
radiation
exposure
limits
set
forth
for
an
uncontrolled
environment.
This
equipment
should
be
installed
and
operated
with
minimum
distance
20cm
between the radiator and your body.

ISED Statement
‐
English:
This device contains licence-exempt transmitter(s)/receiver(s) that
comply with Innovation, Science and Economic
Development Canada’s licence-exempt RSS(s).
Operation is subject to the following two conditions:
(1) This device may not cause interference.
(2) This device must accept any interference, including interference that may cause undesired
operation of the device.
‐
French:Cet appareil contient des émetteurs/récepteurs exempts de licence qui sont
conformes aux CNR exempts de licence d’Innovation, Sciences et
Développement économique
Canada. Le fonctionnement est soumis aux deux conditions suivantes :
(1) Cet appareil ne doit pas causer d’interférences.
(2) Cet appareil doit accepter toute interférence, y compris les interférences susceptibles de
provoquer un fonctionnement indésirable de l’appareil.
This
equipment
complies
with
Canada
radiation
exposure
limits
set
forth
for
an
uncontrolled
environment.
This
equipment
should
be
installed
and
operated
with
minimum
distance
20cm
between
the
radiator & your body.
Cet équipement est conforme Canada limites d'exposition aux radiations dans un environnement
non contrôlé.
Cet équipement doit être installé et utilisé avec une distance minimale de 20 cm entre le
radiateur et votre corps.