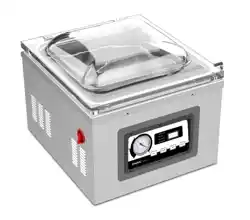
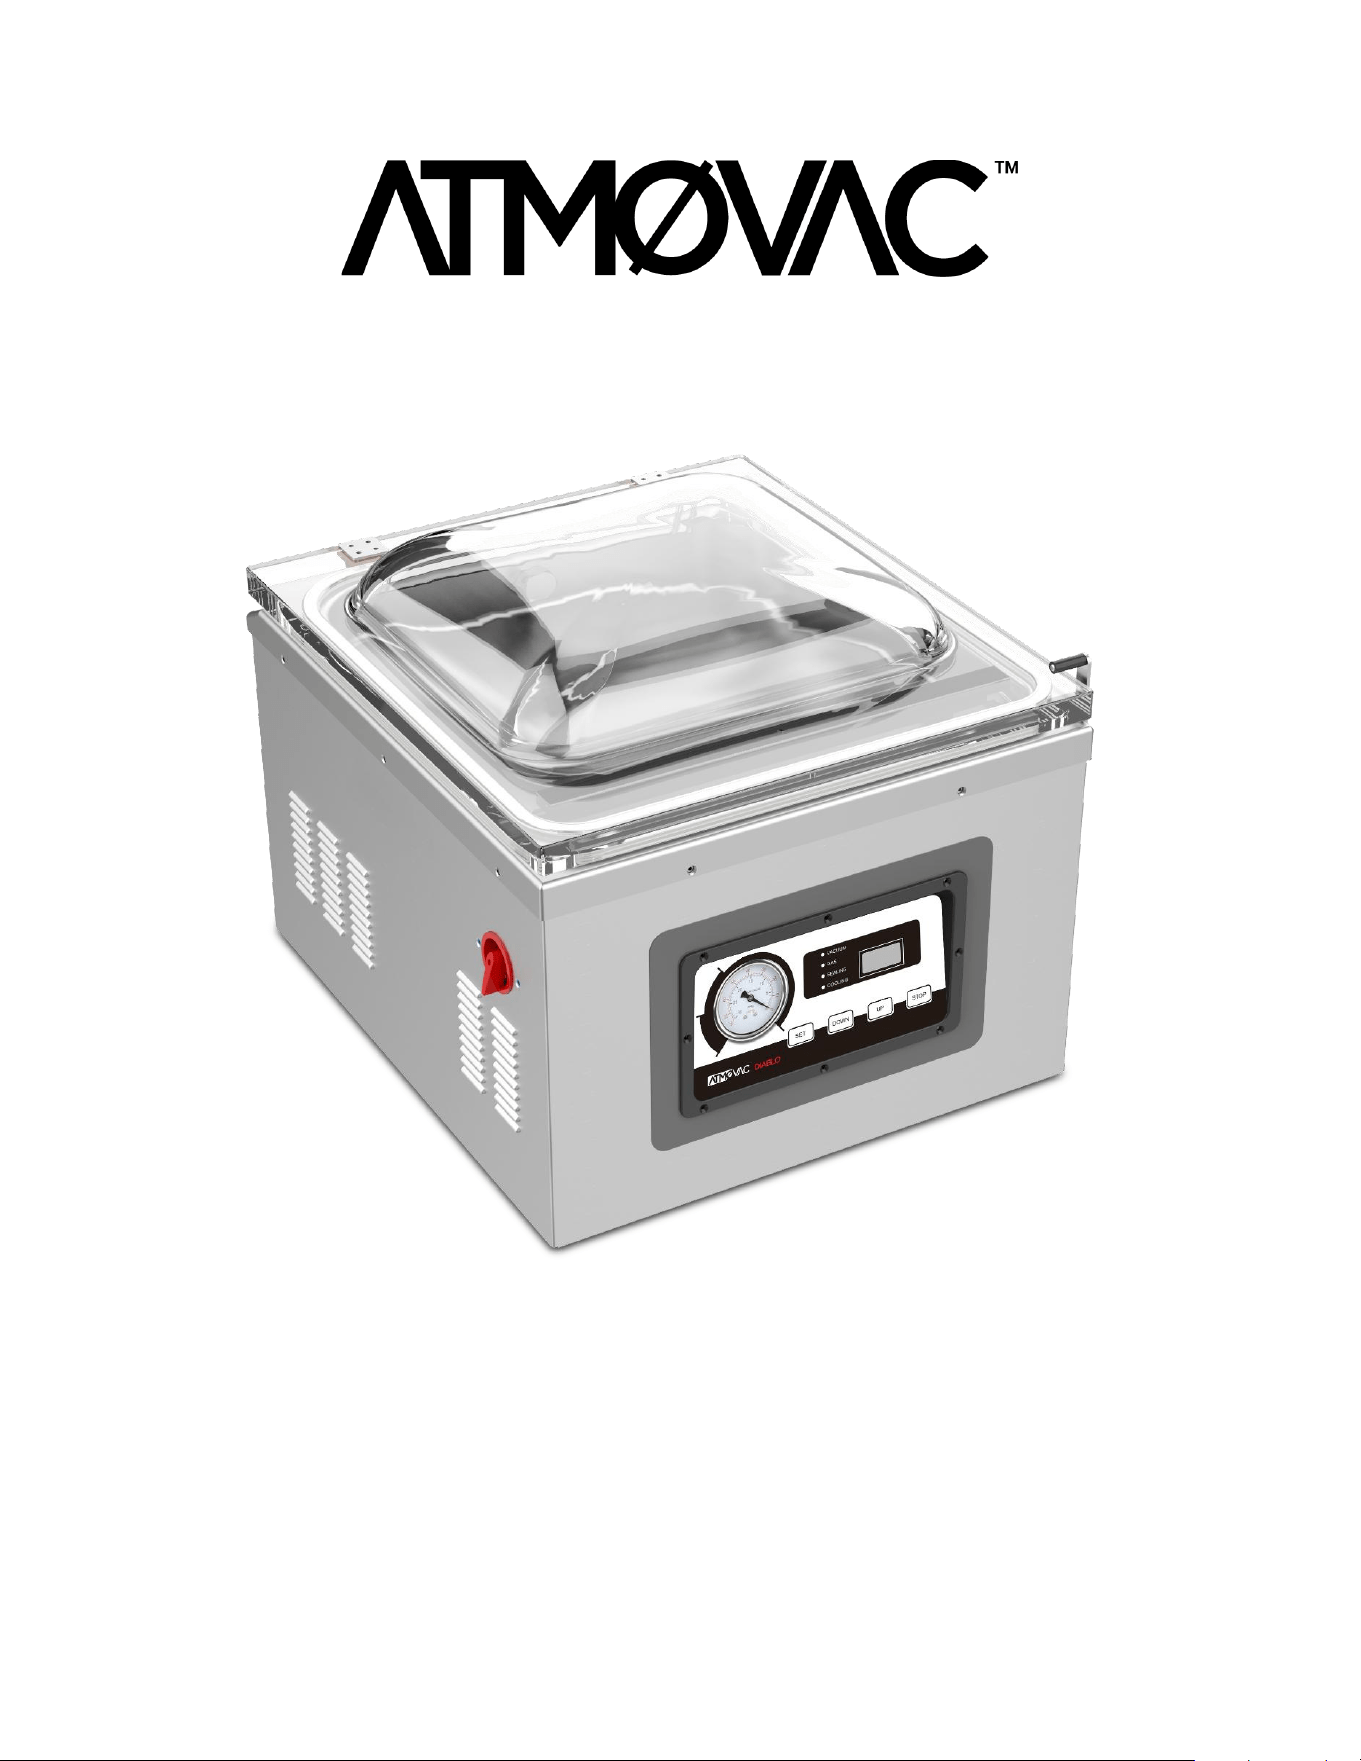
Commercial Vacuum Machine
User manual
Diablo 16
2026

INTRODUCTION
Thank you for purchasing the Atmovac commercial vacuum sealer, model Diablo 16. This unit is
designed for reliable performance and long service life in commercial kitchen environments. To
ensure safe operation and optimal results, read these instructions carefully before operating the
machine and keep them for future reference.
The distributor will not accept liability for product failure if:
• The instructions in this manual are not followed correctly.
• The machine is serviced by unqualied or unauthorized personnel.
• Non-original replacement parts are used.
• The machine is not handled or cleaned correctly.
• Damage results from misuse or improper operation.
SAFETY
This product complies with current technical and safety standards. Carefully review the following
safety instructions to prevent personal injury or property damage.
• This machine is intended for indoor use only
• The recommended ambient operating temperature should be 41-104°F (5-40°C)
• During the operation, the vacuum pump may emit residual oil mist
• The pump exhaust may contain oil mist. Ensure adequate ventilation
• Avoid prolonged inhalation of oil mist
• Use food-grade vacuum pump oil only.
• Tipping the machine while the pump contains oil may cause oil to enter the pump chamber,
resulting in damage
• New machines require oil lling before rst use
• Vacuum sealing slows spoilage but does not prevent it. Always refrigerate or freeze food
according to safe food-handling practices and local health regulations
STORAGE
Short-term storage:
• Turn OFF the machine and unplug it
from the power supply.
• Close and lock the lid.
• Store in a dry, dust-free area.
Long-term storage:
Although internal components are corrosion-
protected, harsh storage conditions (corrosive
air, high or uctuating temperatures) may
require additional protection
• Turn OFF and unplug the machine.
• Close and lock the lid. Cover the
unit to prevent dust accumulation.
• Drain the pump oil before moving or
shipping the machine.
• Store in a dry, dust-free area.
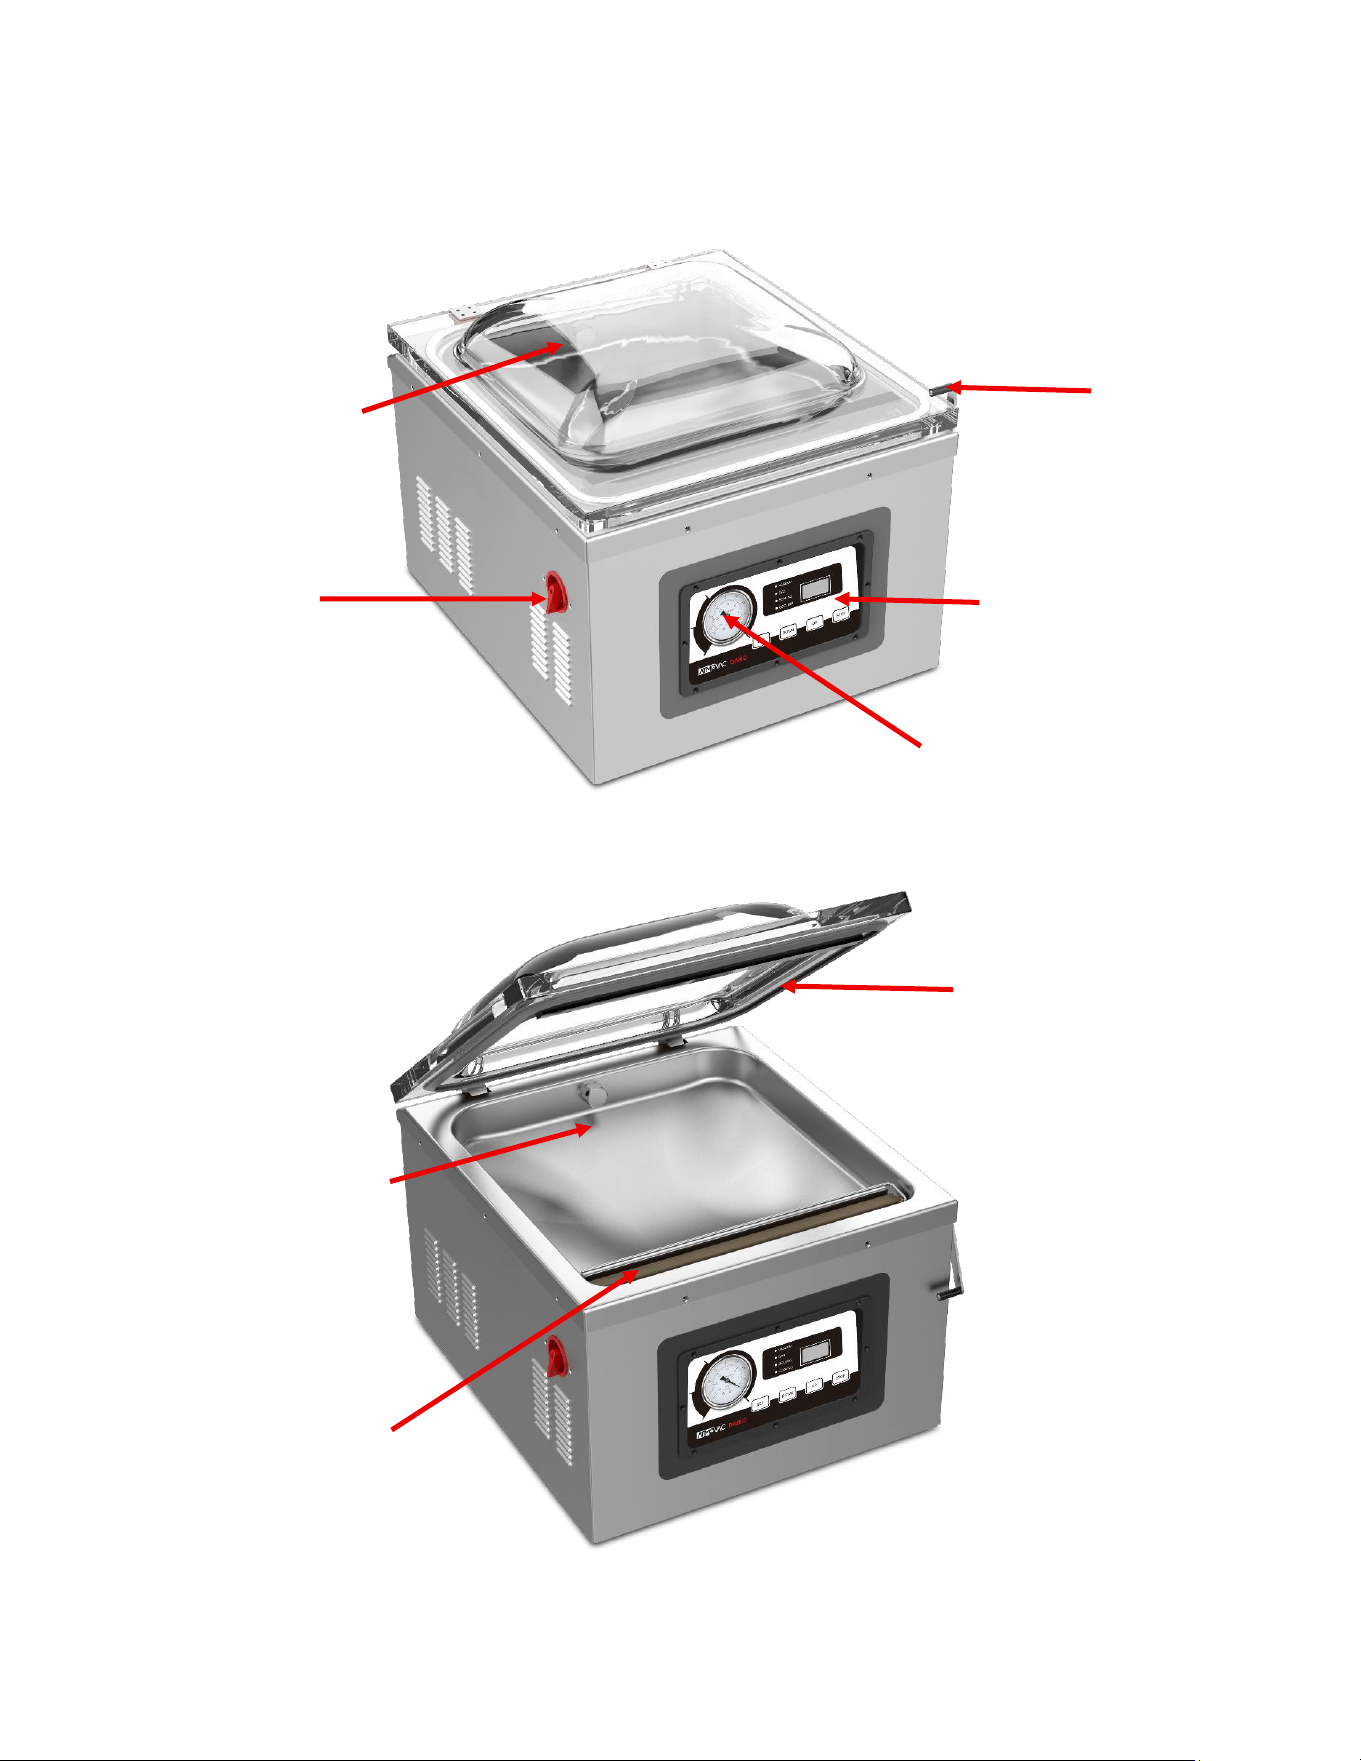
PRODUCT DIAGRAM
Power
switch
Lid
Lid Lock
Control panel
Pressure gauge
Gasket
Chamber
Seal bar
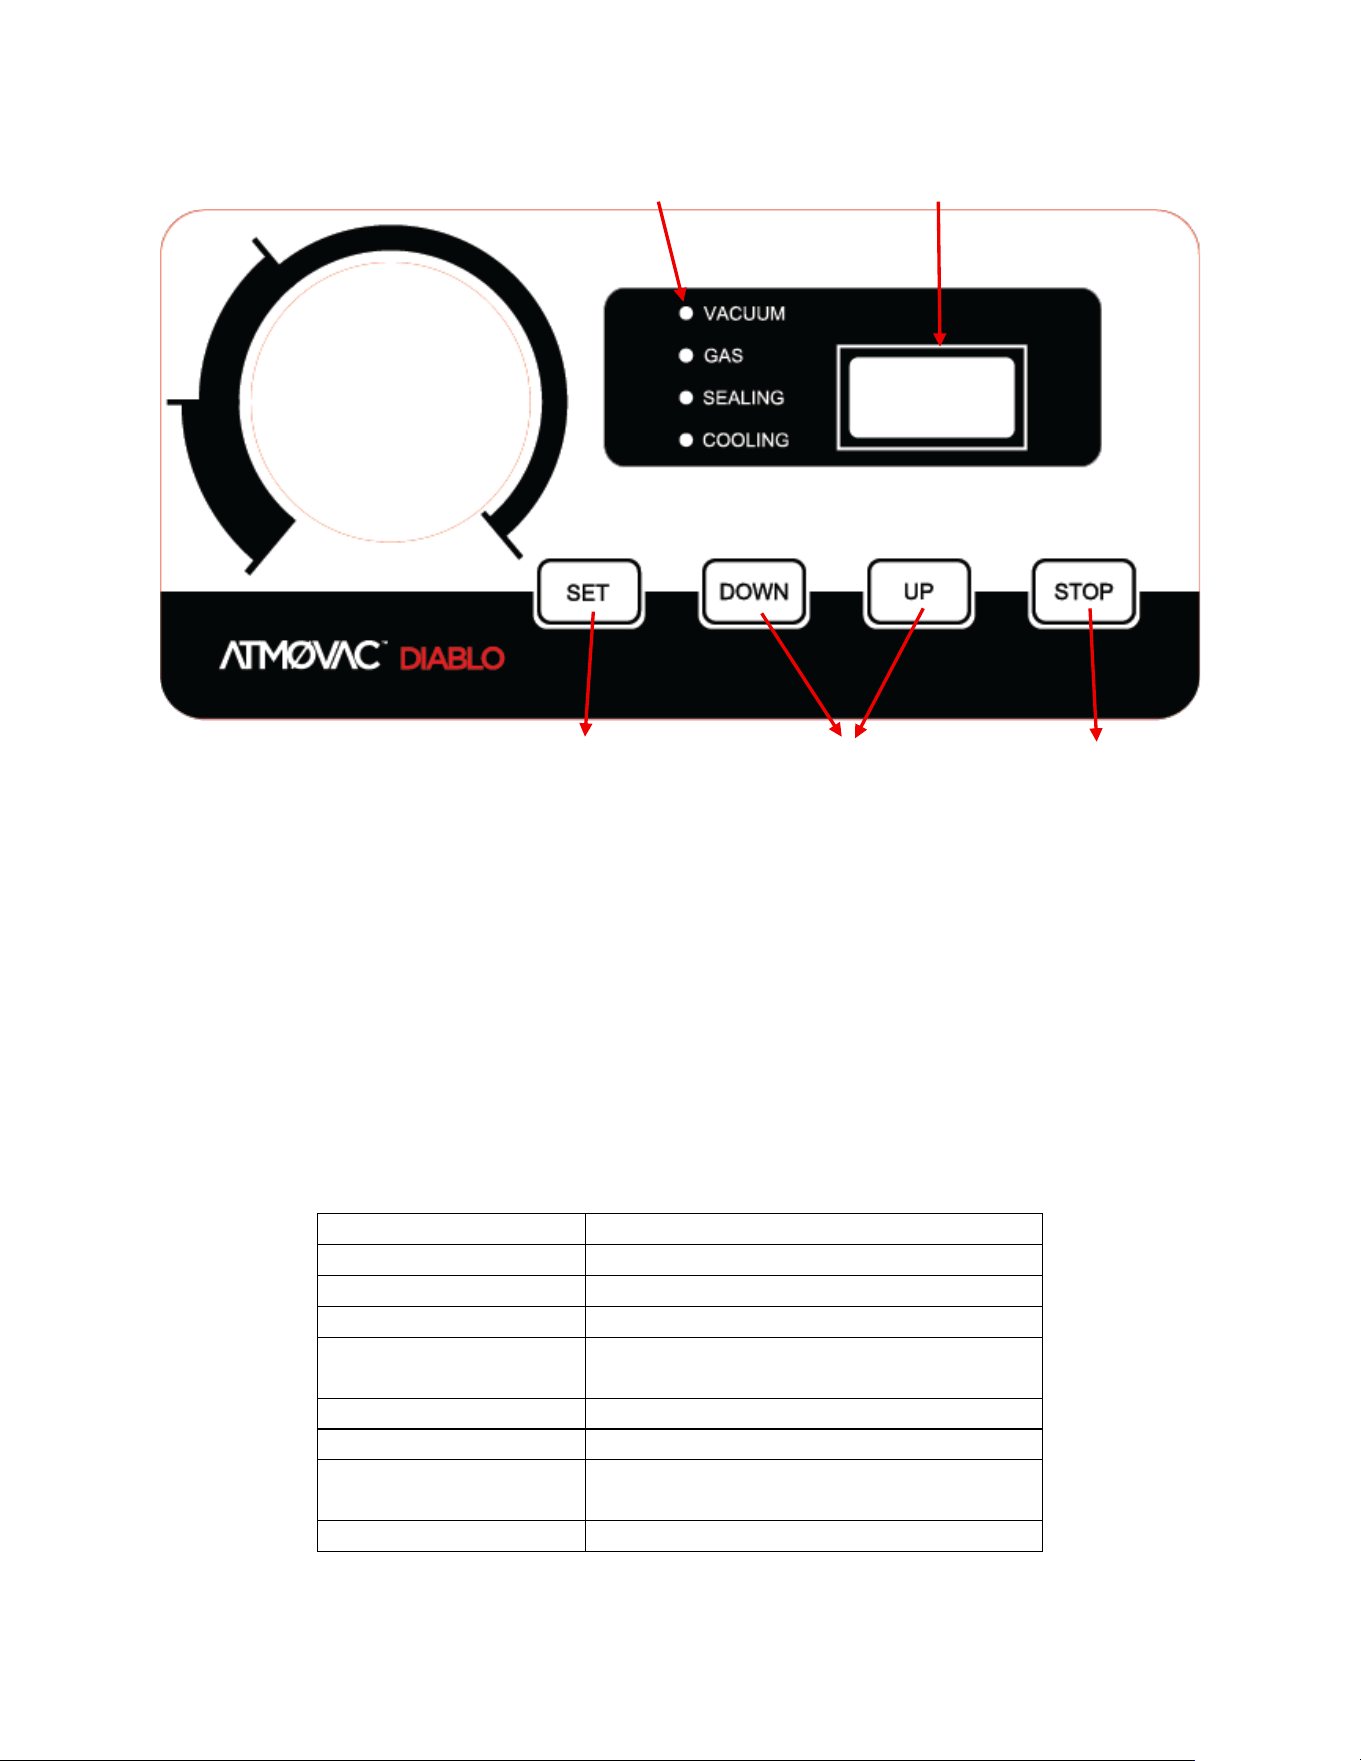
Control panel
A. Pressure gauge: Displays the vacuum level inside the chamber.
B. Indicator lights:
Solid lights: Mode selected and ready to set
Flashing lights: Machine is active during a cycle
C. LED display:
Displays set time during setup and remaining time during operation
OFF: Machine is in standby mode
ON/CLO: Machine is ready for operation
D. SET button: Cycles though vacuum/seal/cool modes
E. ▲ / ▼ buttons: Increase or decrease cycle time
F. STOP button: Interrupts the current cycle immediately
TECHNICAL SPECIFICATIONS
Model
DIABLO16
Voltage
120V~ 60Hz
Power
1150W
Pump
Oil-sealed vacuum pump
Vacuum
Pump: Up to -29.9 inHg (-1012 mbar)
Chamber: -29.8 inHg (-1009 mbar)
Seal wire
Dual 3.5 mm
Max. bag width
16.1 inches (41 cm)
Dimensions
(L x W x H)
21.6 x 19.3 x 17.7 inches
(55 x 49 x 45 cm)
Weight
97 lb (44 kg)
A
B
C
D
E
F
INSTALLATION
WARNING: Failure to install the machine according to these instructions may result in injury or
equipment damage. Please read the instructions before installation.
• Install according to local electrical and safety regulations
• Do no install near ammable or explosive materials
• Recommended ambient temperature for operations is 41-104°F (5-40°C)
• Connect only to a properly grounded electrical supply
• Keep the machine upright during installation and operation
• Place on level, stable surface
• Maintain a minimum of 4 inches (10 cm) on all sides for ventilation
• Keep aways from heat or steam sources (dishwashers, ranges, steamers)
• Ensure adequate service access for oil changes and wear-part replacement
FILING AND DRAINING OIL
WARNING
New machines are shipped without oil. Operating the pump without oil will cause damage.
DANGER
Do not open the oil ll port while the pump is running. Oil mist is hot and pressurized. Only open the
ll cap after the pump has completely stopped.
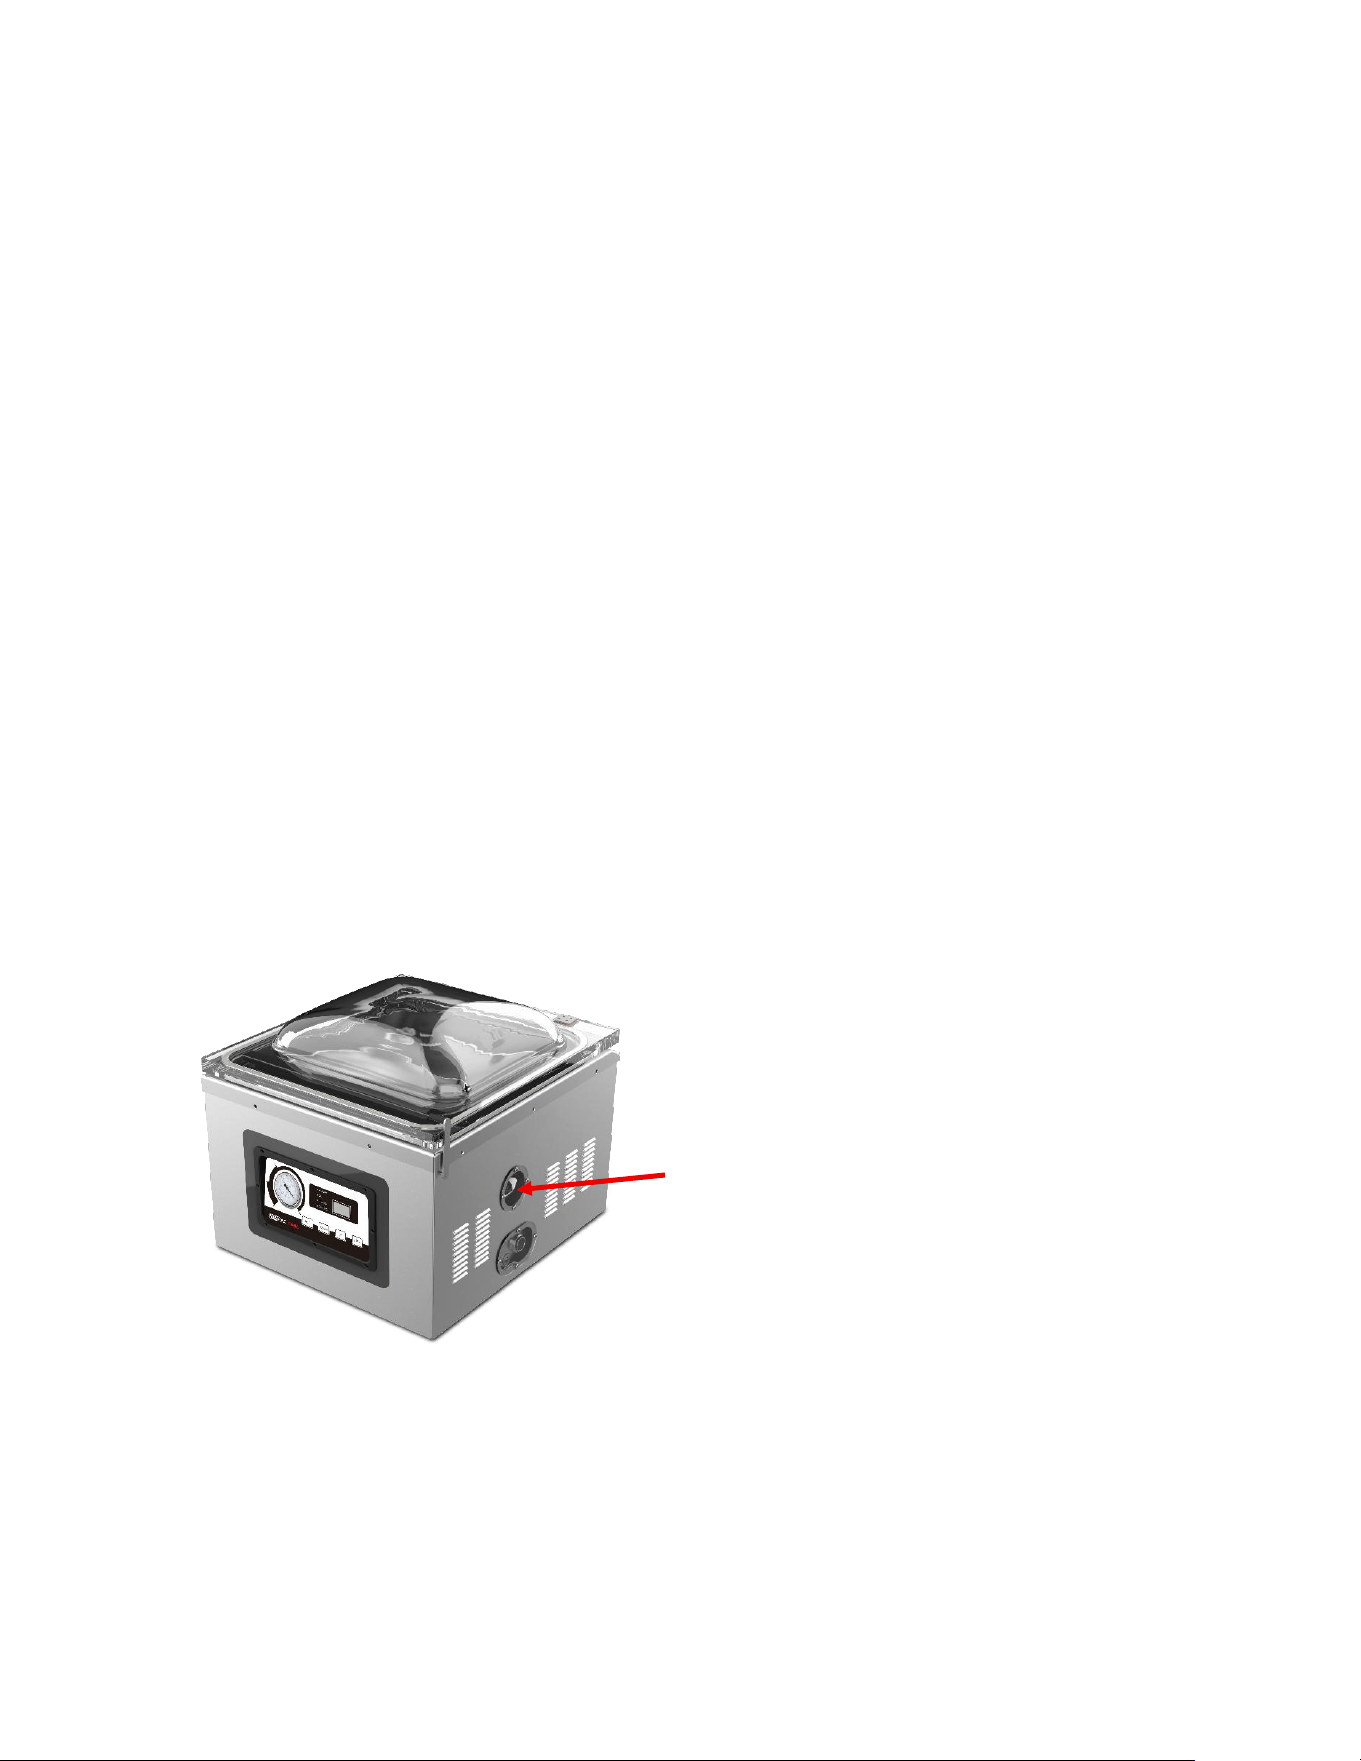
To ll oil:
• Remove the oil window #1
• Unscrew the oil ll cap
• Fill with appropriate oil until ethe indicator reaches ½ to ¾ full.
• Tighten the ll cap
• Reinstall the oil window #1 cover.
Oil window #1
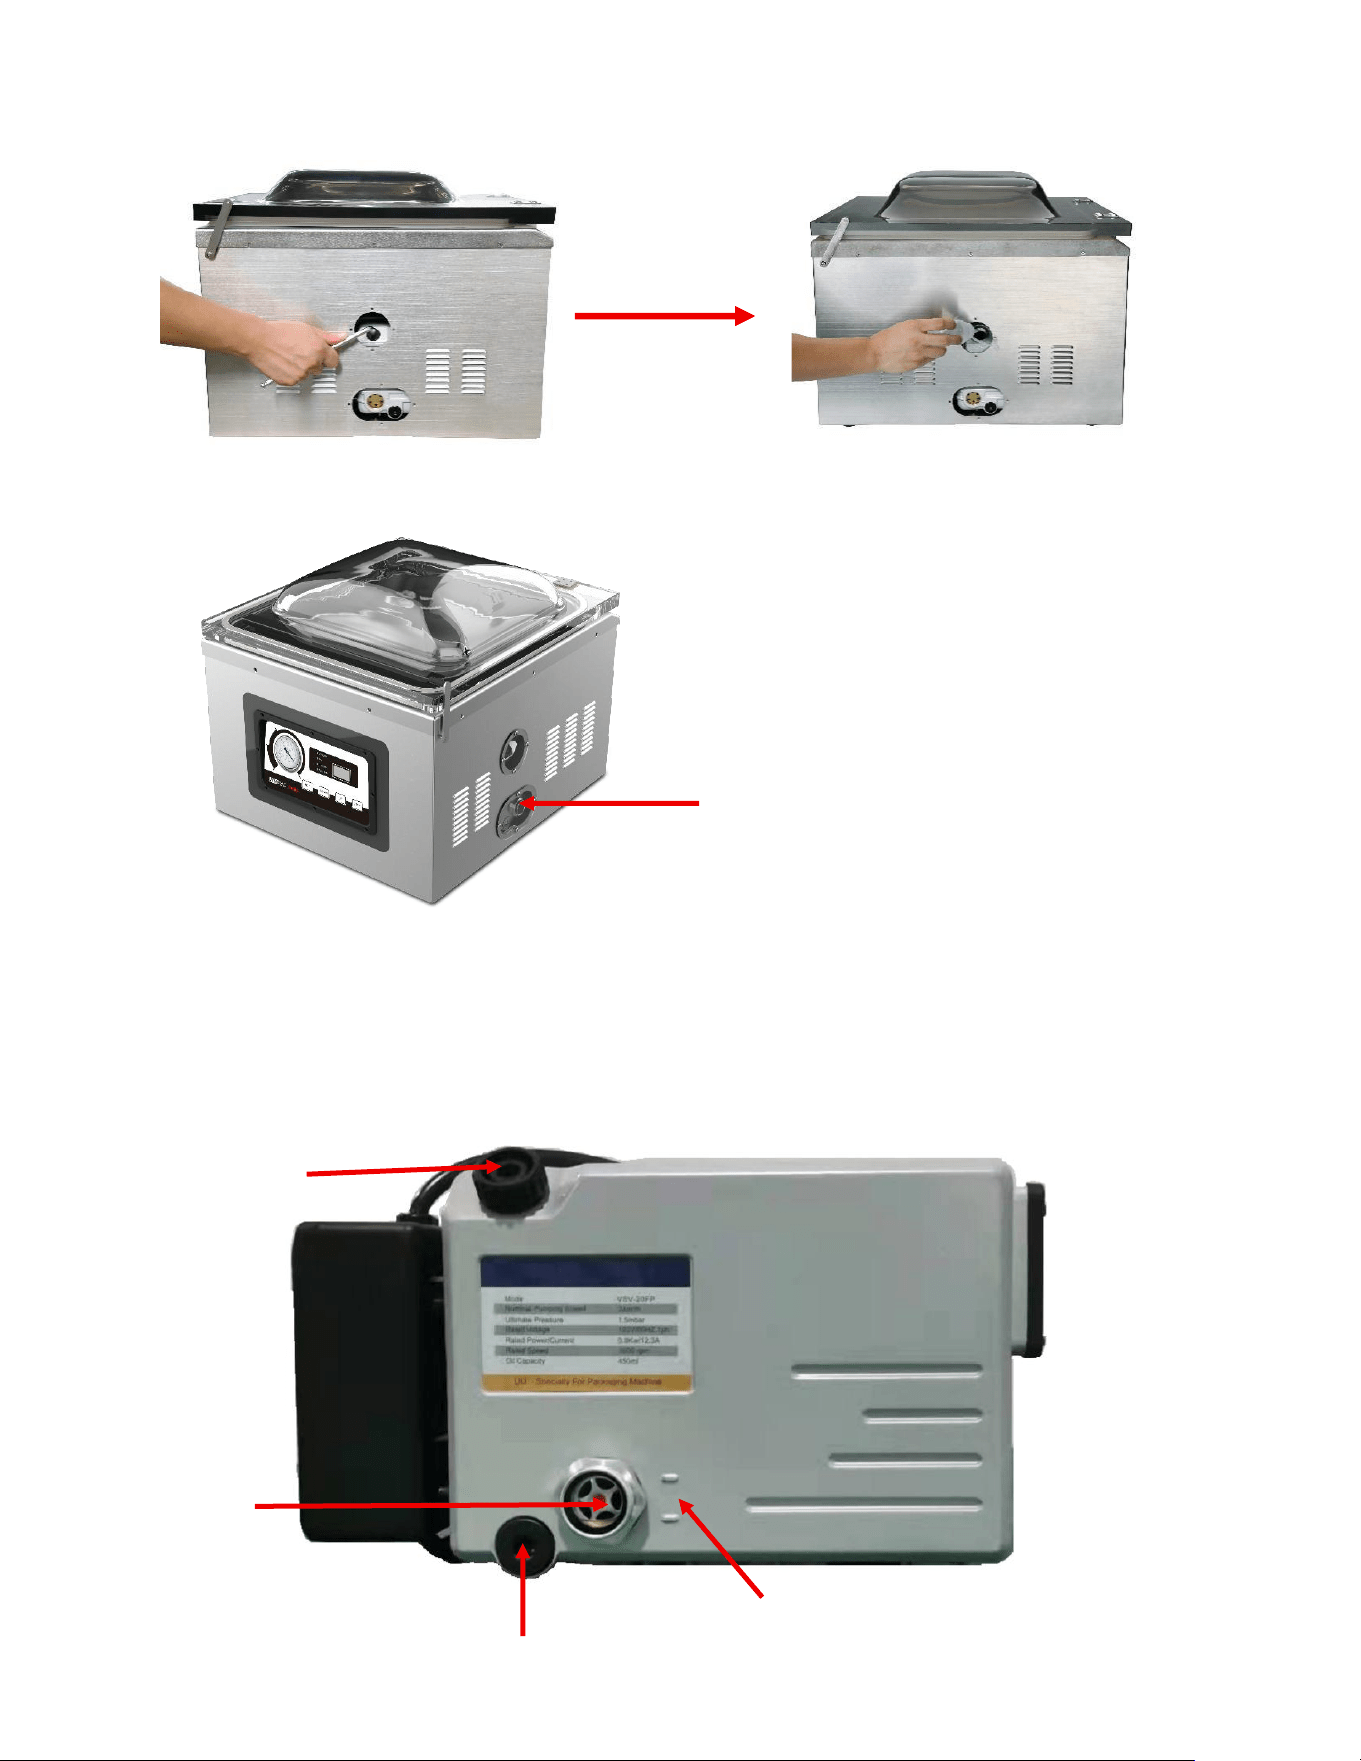
To drain the oil:
• Remove oil window #2
• Place a suitable container under the drain port
• Loosing the drain cap using a wrench and allow oil to drain completely
• Tighten the drain cap
• Reinstall oil window #2
Oil window #2
Oil ll cap
Oil indicator
Minimum and
maximum level
Drain cap

OPERATION
The recommended time for the operation of this machine is 8 hours a day.
1. Plug the machine and turn it ON. The display will show CLO (standby/ready)
2. Unlock the lid and open it.
3. Select a compatible chamber vacuum bag leaving 1-2 inches of headspace
4. Place the edge of the bag at across the seal bar
5. Press SET to select Vacuum / Seal / Cool
6. Adjust times using ▲ / ▼
• Vacuum: 5-90 seconds
• Seal: 0-6 seconds
• Cool: 0-10 seconds.
7. Press SET to conrm
8. Close the lid to start the cycle.
9. The lid opens automatically when the cycle nishes
10. Removed the sealed bag
NOTE: Vacuum sealing slows spoilage but does not stop it. Always refrigerate or freeze food per
food safety guidelines.
Factory reset
• With the power, ON and the display showing OFF, press SET +▲ simultaneously for 3
seconds
• The display will show RS to conrm reset
TROUBLE SHOOTING
ERROR CODE
PROBLEM
SOLUTION
E01
Pressure switch did not close
during vacuum.
1. Ensure the lid is fully
closed and locked
2. Check the gate
control switch
system
LP
Power loss during operation
1. Check the power
supply
2. Inspect the power
cord for damage
The A-weighted sound pressure level is 73.9dB(A). The vibration level is 0.34m/s2
MAINTENANCE
Please follow these maintenance recommendations to ensure a long service life and performance.
General maintenance
• Unplug the unit before maintenance
• Major servicing must be performed by qualied personnel

• If the machine is used for more than 4 hours a day, it is recommended to schedule
professional maintenance once every six months.
• If the machine is used less than 4 hours per day, it is recommended to perform full
professional maintenance once every year.
• If abnormal noise or operation occurs, stop suing the machine and contact your supplier for
service.
• Do not use solvent-based cleaners.
• Do not use a pressure washer to clean the machine or immerse the machine under a direct
stream of water.
• Prevent water from entering the chamber vacuum or the pump as this can irreparably
damage the pump.
• Keep the unit upright when you want to move it or when you are cleaning it.
Lid maintenance
• Keep the lid away from heat.
• Do not place hot, sharp or heavy items on the lid.
• Clean with non-solvent detergents only.
• Inspect the lid weekly and if you see any damage don’t use the machine. Contact your
supplier for service.
• It is recommended to replace the lid every 3 years.
Pump maintenance
• Inspect oil condition regularly-oil should be clear and free of contamination. If oil appears
to be dark or contaminated, drain and replace.
• Change oil every 50 hours or at least every 6 months
• Check oil level weekly; rell if below half
• It is recommended to conduct an annual pump inspection if the machine is frequently
used.
• It is recommended to change the oil every 50 hours of operation or at least once every 6
months.
Seal strip maintenance
• Inspect the seal strip weekly to ensure proper sealing.
• If the strip is damaged, replace the seal strip.
To replace the seal strip:
1. Remove the old strip from the lid
2. Press the new strip into place evenly
3. Ensure the strip is installed at and doesn’t have any bumps
Gasket maintenance

The lid gasket ensures an airtight chamber. It wears with use and should be inspected weekly and
replace if necessary. Make sure the new gasket is the same size as the original to ensure proper lid
closure and prevent vacuum leaks. Install evenly and ensure both ends meet to prevent leaks.
WARRANTY
This machine has a warranty of 1 year for part and labor
If you have any questions or concerns, you can contact our service department to help you resolve
any issues with your machine.
Eurodib Inc.
1-888-956-6866
service@eurodib.com
www.eurodib.com
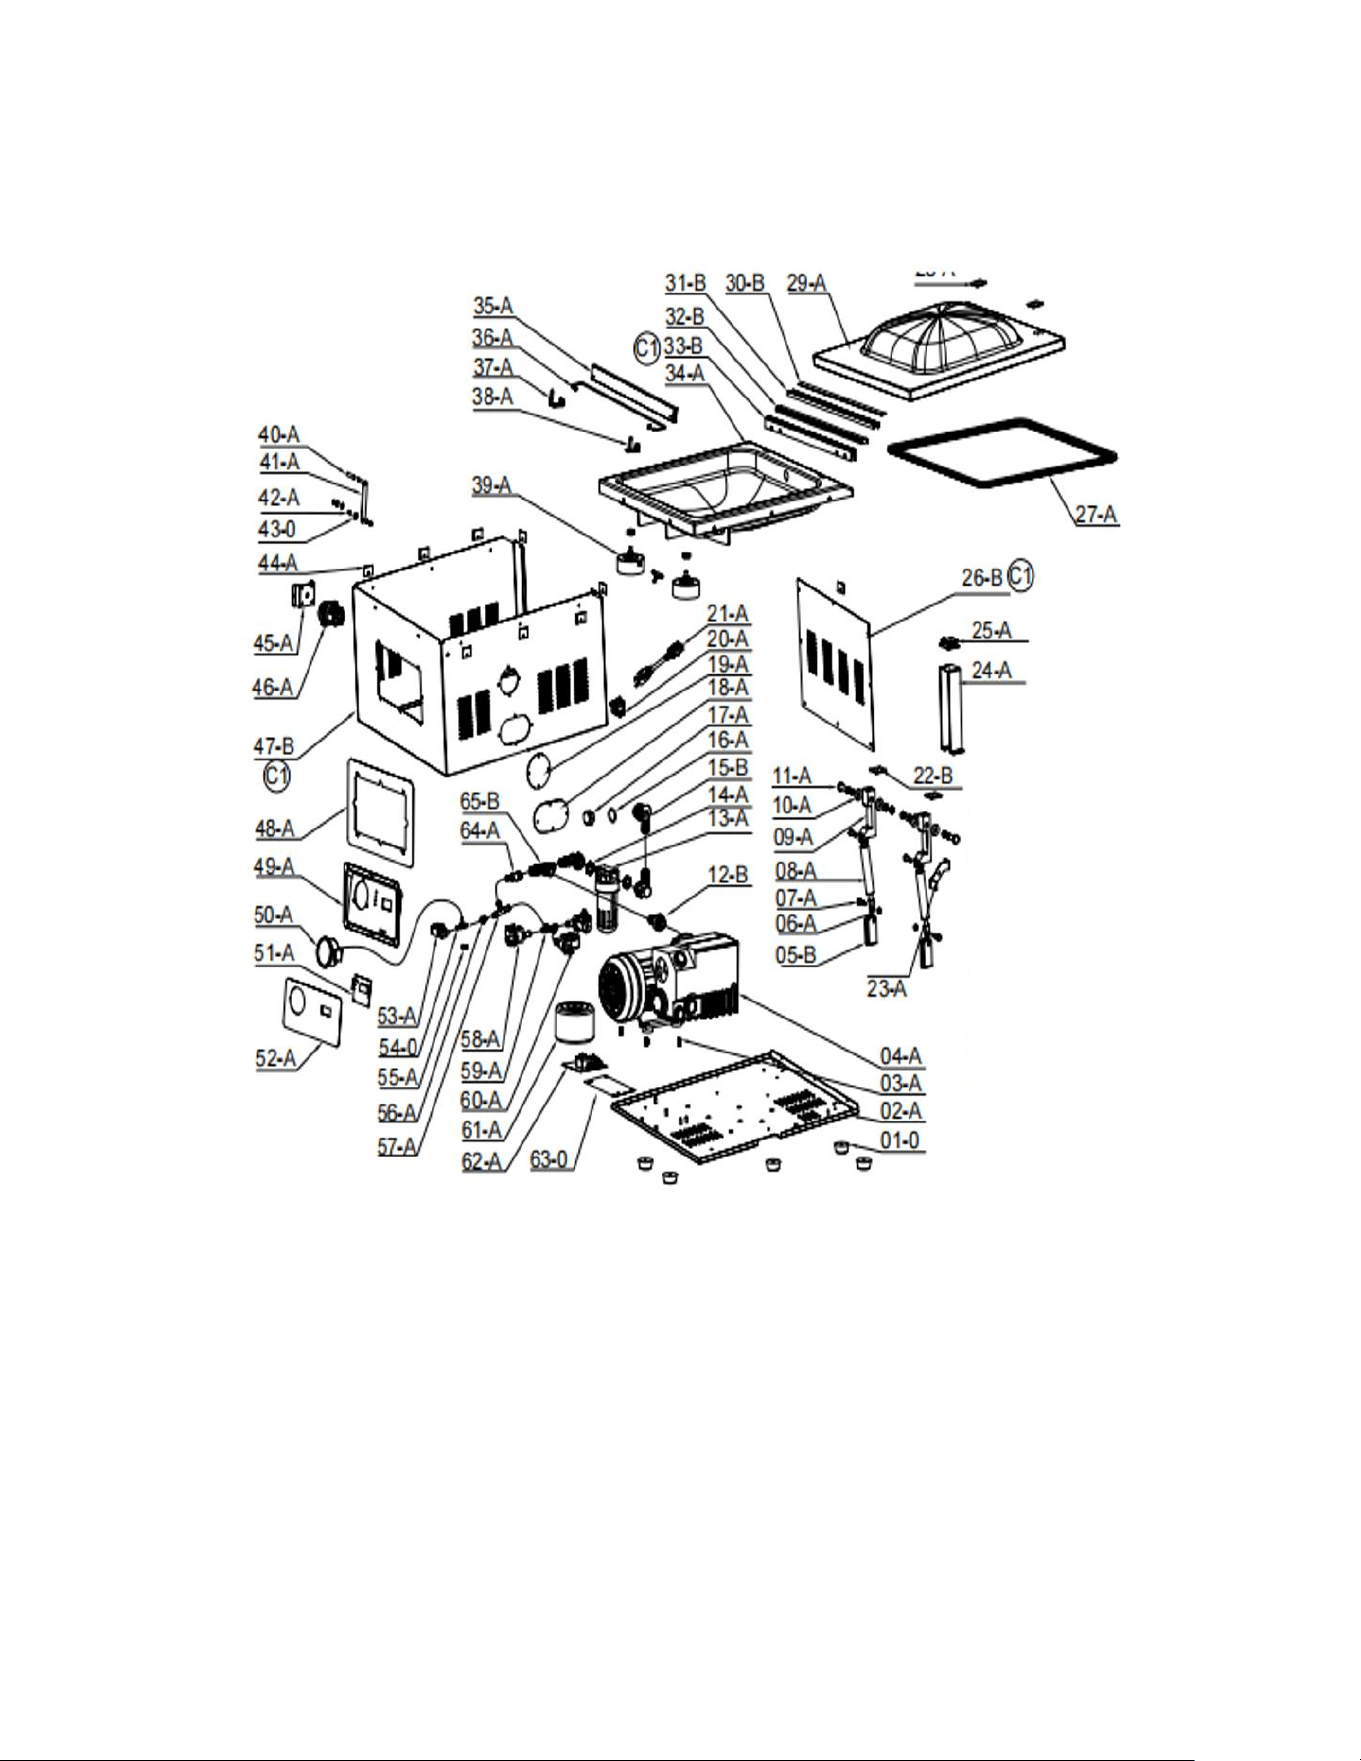
EXPLODED VIEWS
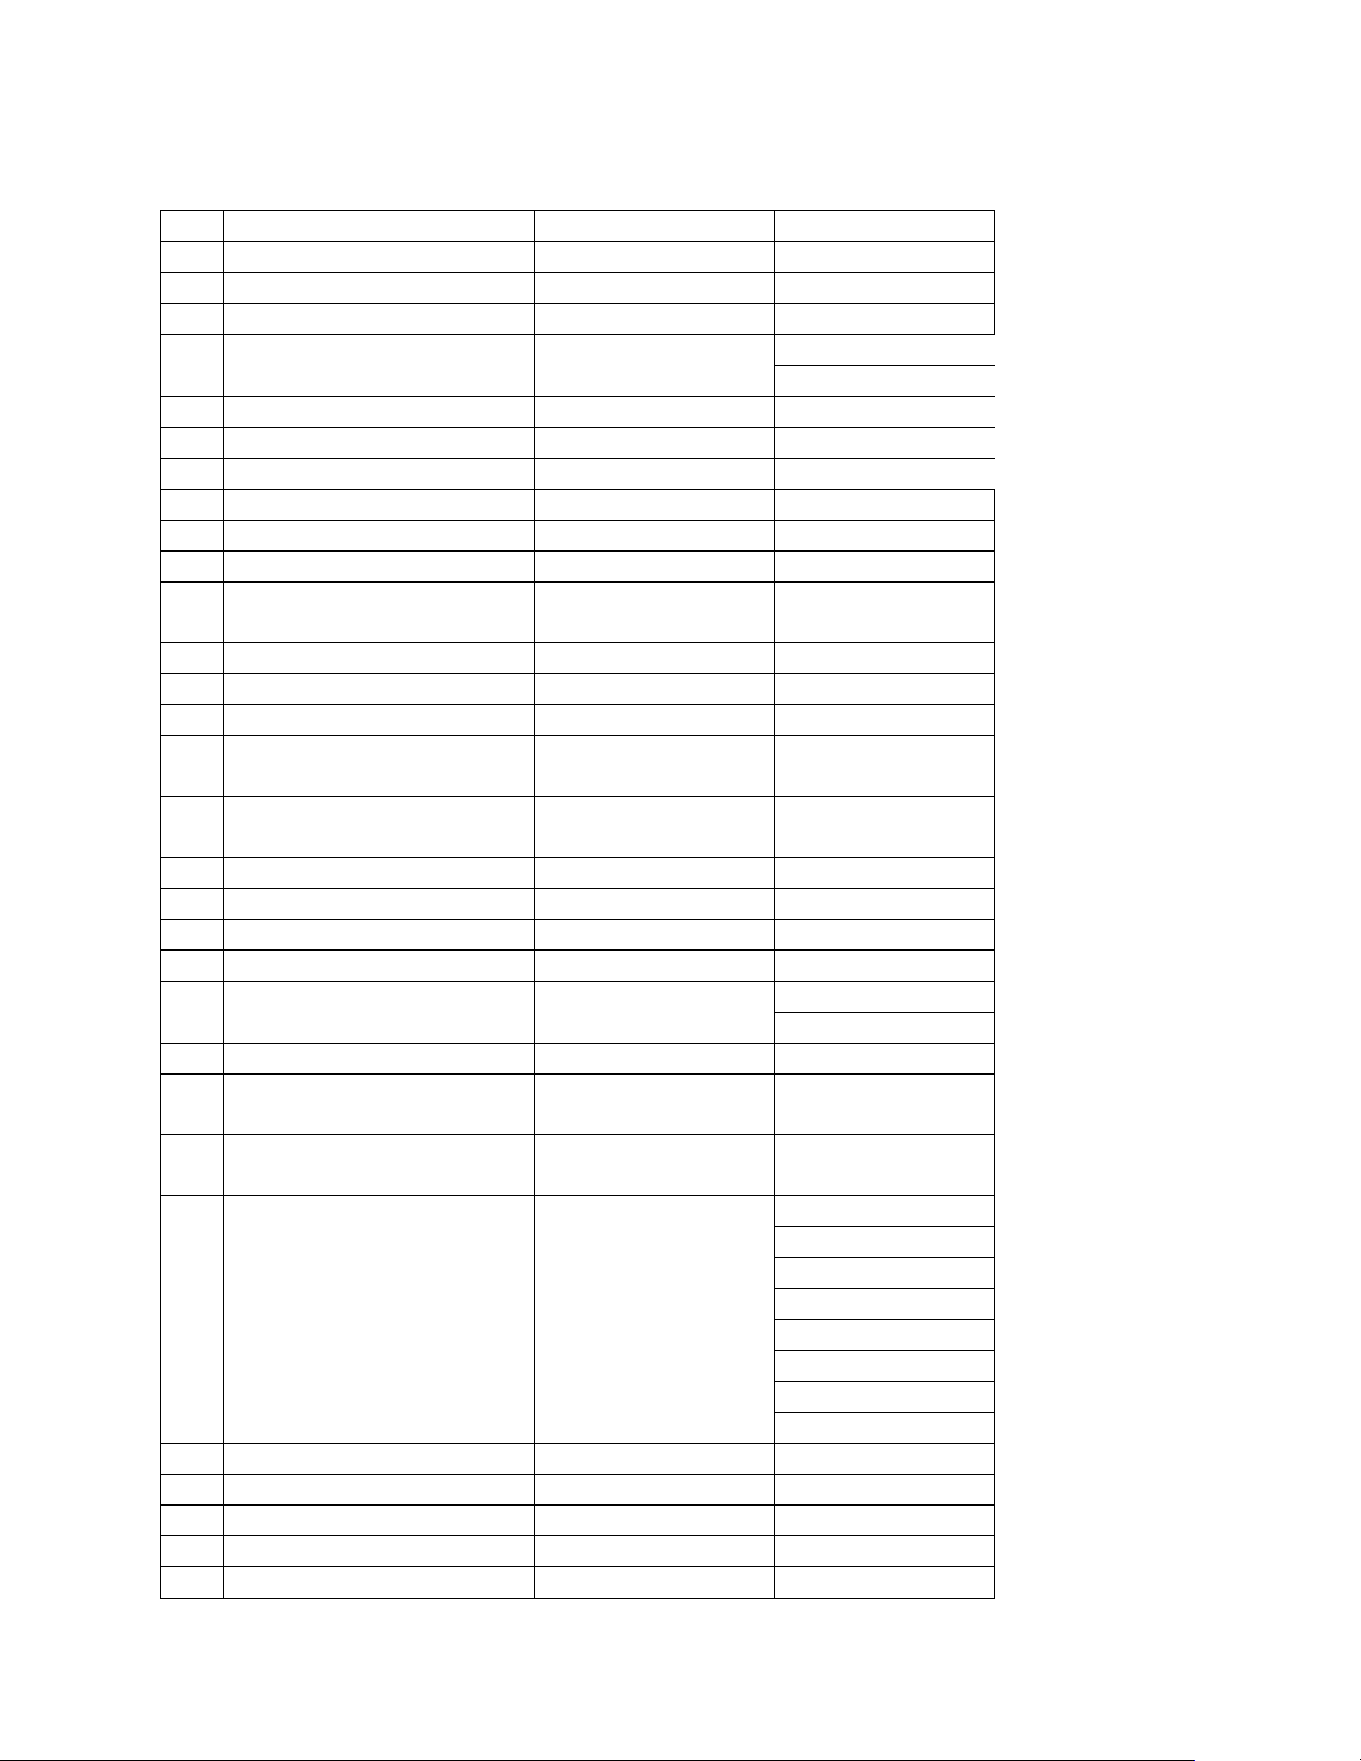
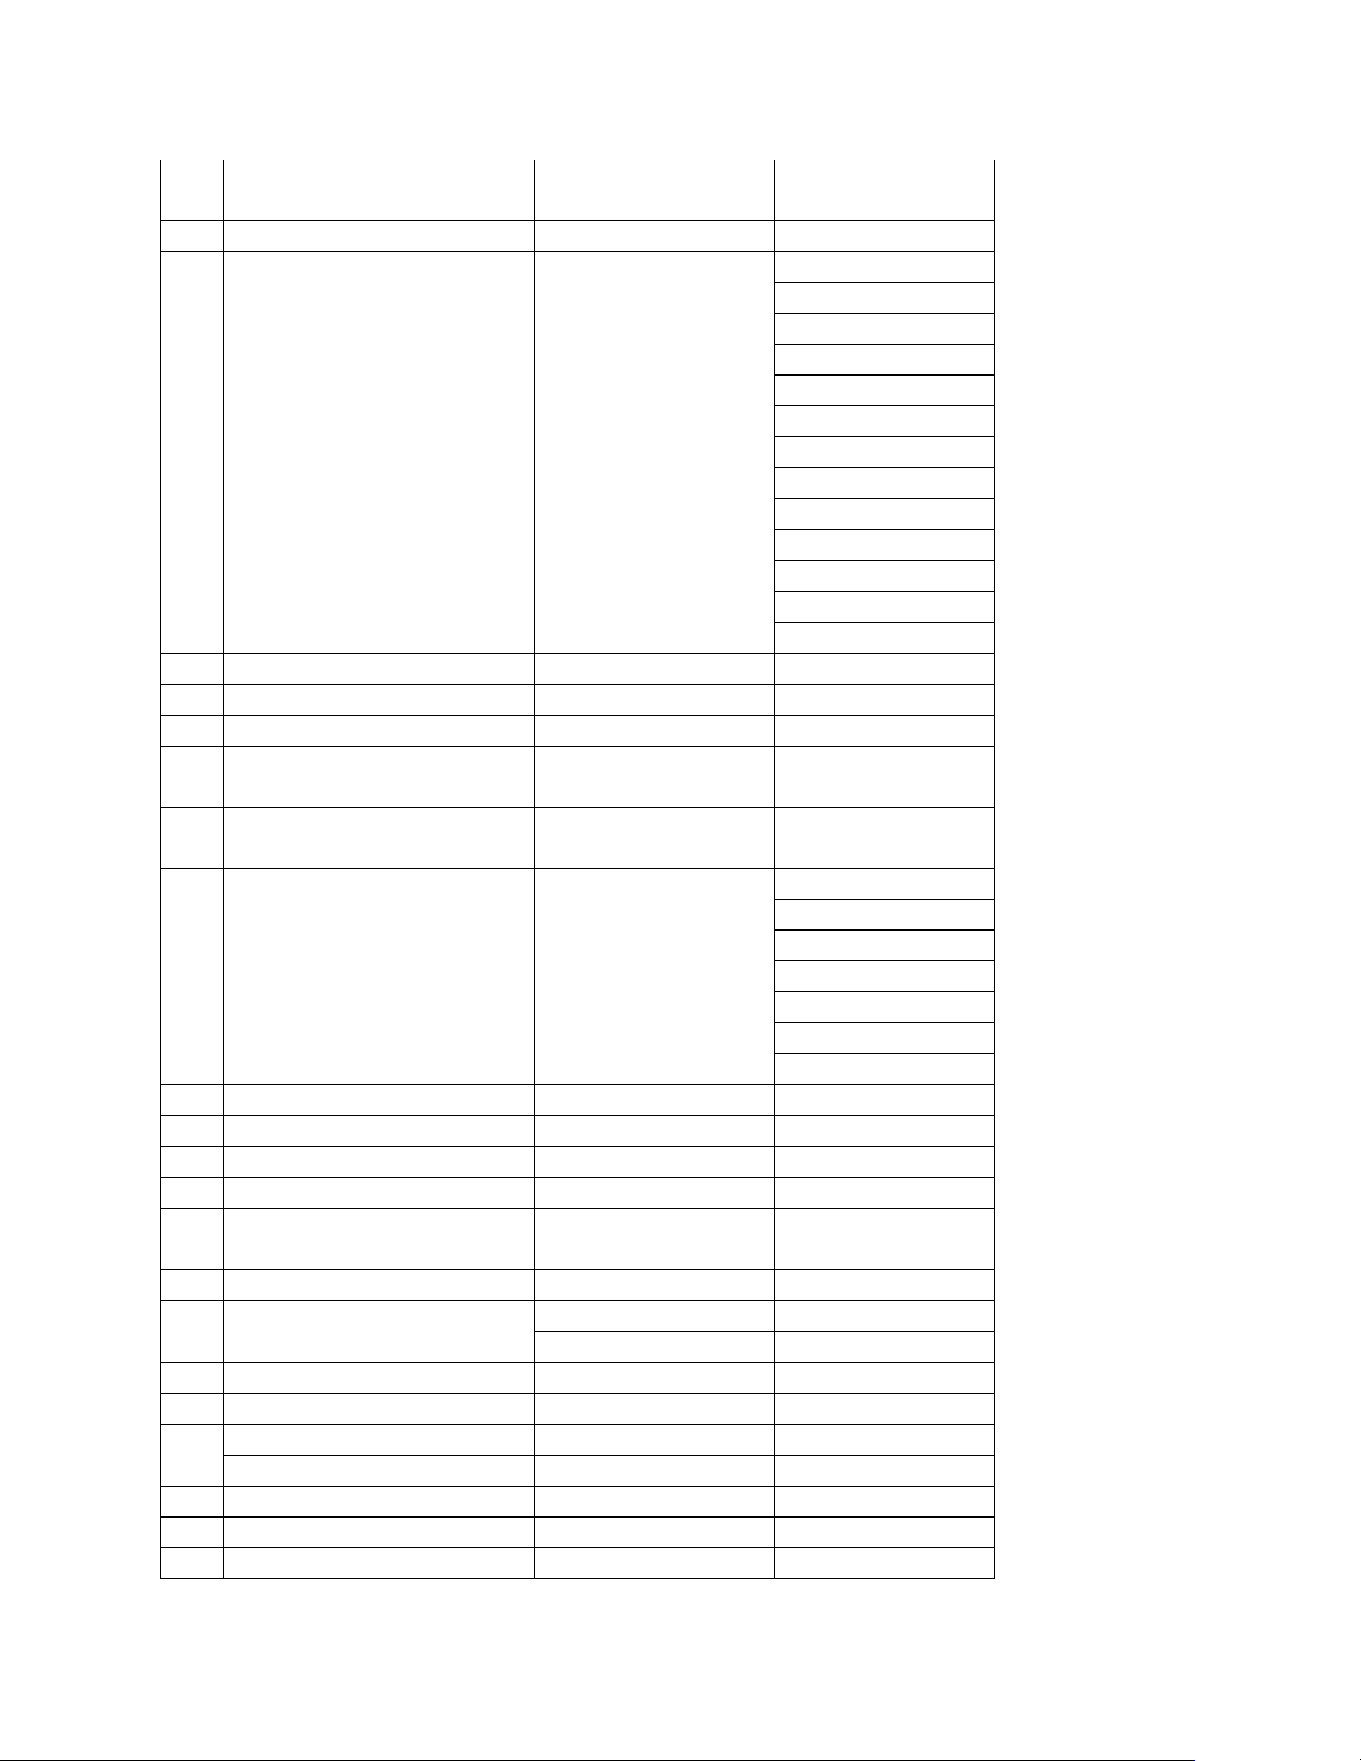
PARTS LIST
No.
Part Name
Exploded view No.
Qty for machine
1
Rubber feet
#1
5
2
Baseplate
#2
1
3
M8 x 20 Set Screw
#3
3
4
Oil pump
#4
1
1
5
Gas Spring Bracket
#5
2
6
M6 Nut
#6
2
7
Gas Spring Mounting Bolt
#7
4
8
Gas Spring
#8
2
9
Swing Arm
#9
2
10
Sliding Washer
#10
4
11
M10 Hex Head Machine
Screw
#11
2
12
Pump suction connection
#12
1
13
Air filter
#13
1
14
Coupling nut
#14
2
15
Vacuum Chamber Exhaust
Connection
#15
3
16
Vacuum connection seal
ring
#16
2
17
Vacuum port nut
#17
1
18
Oil Window Cover B
#18
1
19
Oil Window Cover A
#19
1
20
Three-prong outlet
#20
1
21
Power cord
#21
1
1
22
Swing Arm Insulation Panel
#22
1
23
Door Control Switch
Pressure Plate
#23
1
24
Gate Switch Mounting
Plate
#24
1
25
Gate Control Switch
Assembly
#25
1
1
1
1
3
1
1
1
26
Rear cover plate
#26
1
27
Sealing ring
#27
1
28
Vacuum Lid Press Plate
#28
2
29
Vacuum Lid
#29
1
30
Fixed block spacer
#30
1
31
Heat Sealing Strip
Retaining Block
#31
1
32
Heat Sealing Strip
#32
1
33
Heating Rod Assembly
#33
1
1
1
2
2
2
1
2
4
1
8
4
1
34
Vacuum chamber
#34
1
35
Clamp Support Base
#35
1
36
Clamp
#36
1
37
Left Fixed Plate of the
Rotating Shaft
#37
1
38
Right Fixed Plate of the
Rotating Shaft
#38
1
39
Lifting Piston Assembly
#39
2
2
2
2
4
2
2
40
Silicone tubing
#40
1
41
Vacuum Lid Retaining Clip
#41
1
42
Gas Spring Sleeve A
#42
1
43
Gas Spring Washer
#43
1
44
Main Body Shock Absorber
Spacer
#44
12
45
Switch Mounting Plate
#45
1
46
Power Switch
#46
1
#46
1
47
Main body
#47
1
48
Decorative Panel
#48
1
49
Control Panel
#49
1
Control Panel
#49
1
50
Pressure gauge
#50
1
51
CPU board
#51
1
52
Membrane switch
#52
1
53
Large Solenoid Valve
#53
1
54
Three-way fitting
#54
2
55
φ8.4 wire clip
#55
1
56
Reducing Coupling
#56
1
57
Three-way fitting
#57
1
58
Drain valve
#58
2
59
Four-way connector
#59
1
60
Inlet valve
#60
1
61
Ring-shaped transformer
assembly
#61
1
1
62
Main board
#62
1
63
Motor Board Insulation Pad
#63
1
64
Reducing Coupling
#64
1
65
Three-way fitting
#65
1