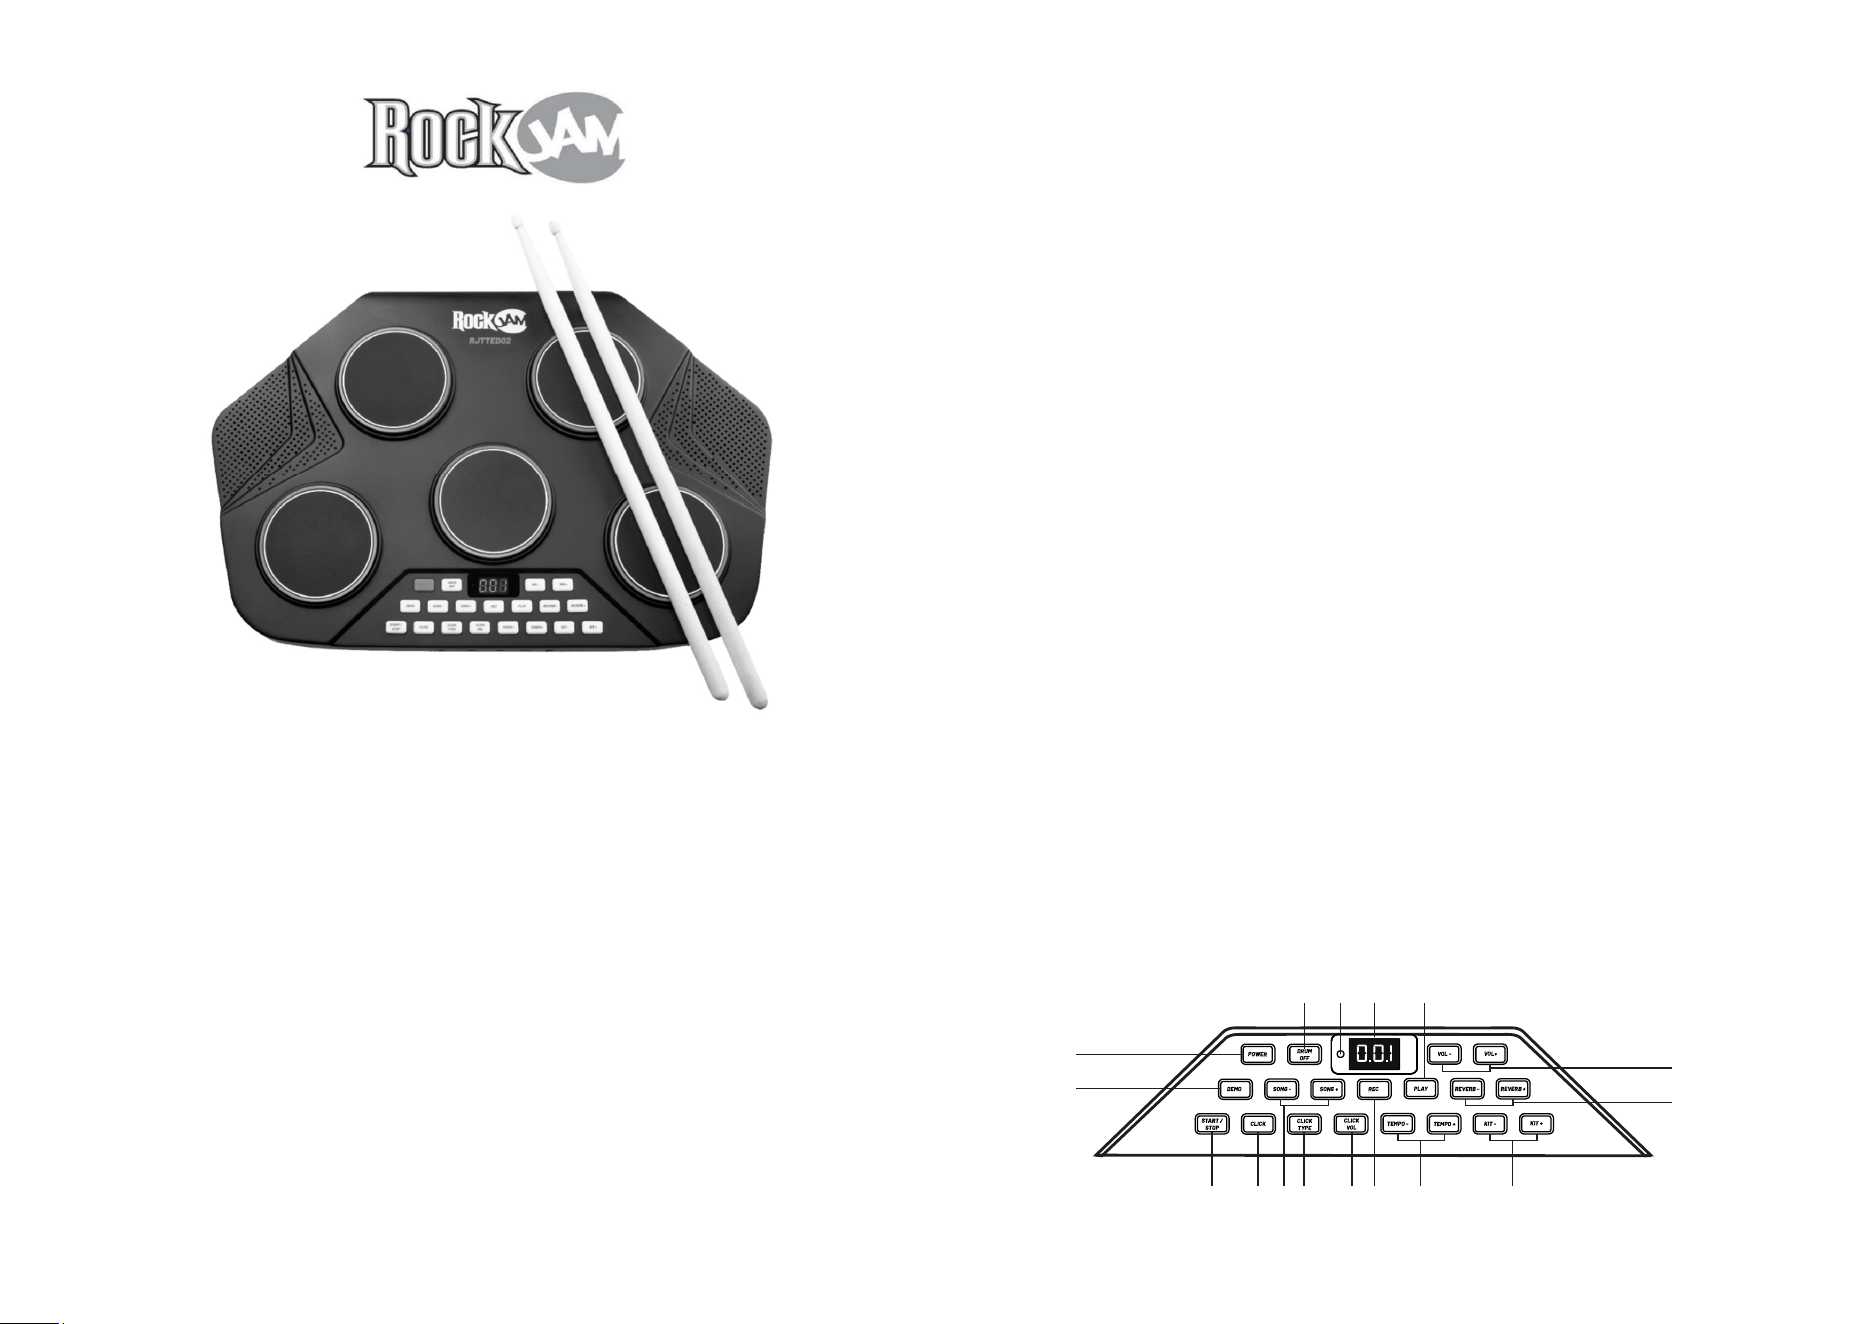
RJTTED02 Tabletop Drum Kit with Bluetooth Audio
+ Wired and Wireless MIDI
User Guide
Please read this user guide first before operating the unit and save it for
future reference.
Congratulations on your purchase of this RockJam Tabletop Drum kit. To get the most from your purchase, please take a few
minutes to read these instructions.
1. Safety instructions
This product should not be exposed to water by dripping or splashing and no objects filled with liquids, such as vases,
should be placed near to the product. Do not place the unit on a wet surface.
Do not expose the product to temperatures above 35C and keep it out of direct sunlight.
This product has no user-serviceable parts. Do not attempt to repair this product yourself. Only qualified service
personnel should perform servicing.
Do not subject the plastic part of the product to harsh impacts. Do not drop the product as this may result in damage.
Disconnect the product from the power source before cleaning. Never handle the Power or USB cable with wet hands
as this could cause electric shock. Unplug the product when it will be unused for long periods of time.
This product is designed for indoor use only.
If the USB cable or power adapter needs to be replaced, ensure that the replacement complies with the manufacturer’s
specifications.
2. Battery Information
Do not dismantle, open or shred secondary cells or batteries.
Do not expose cells or batteries to heat or fire. Avoid storage in direct sunlight.
Keep batteries out of the reach of children.
Battery usage by children should be supervised. Especially keep small batteries out of reach of small children.
Seek medical advice immediately if a cell or a battery has been swallowed.
3. Preparation for use
Unpack the drum kit carefully. We recommend that you save the box and packing materials in case you wish to store the
drum kit. Before setting up the unit, verify that the following accessories are present:
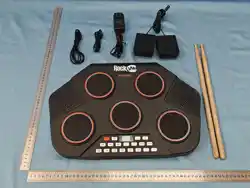
CONTENTS:
1 x RJTTED02 Drum Kit with 5 Pads
2 x Pedals
2 x Drum Sticks
1 x 9V 2A DC Power Adapter
1 x USB C MIDI Data Cable
1 x 3.5mm AUX Input Cable
1 x Printed User Guide
4. Power source
Unwind the DC power adapter cable to its full length; connect the small plug to the DC socket on the front of the drum kit,
plug the DC power adapter into a 110 - 240V power socket and switch on.
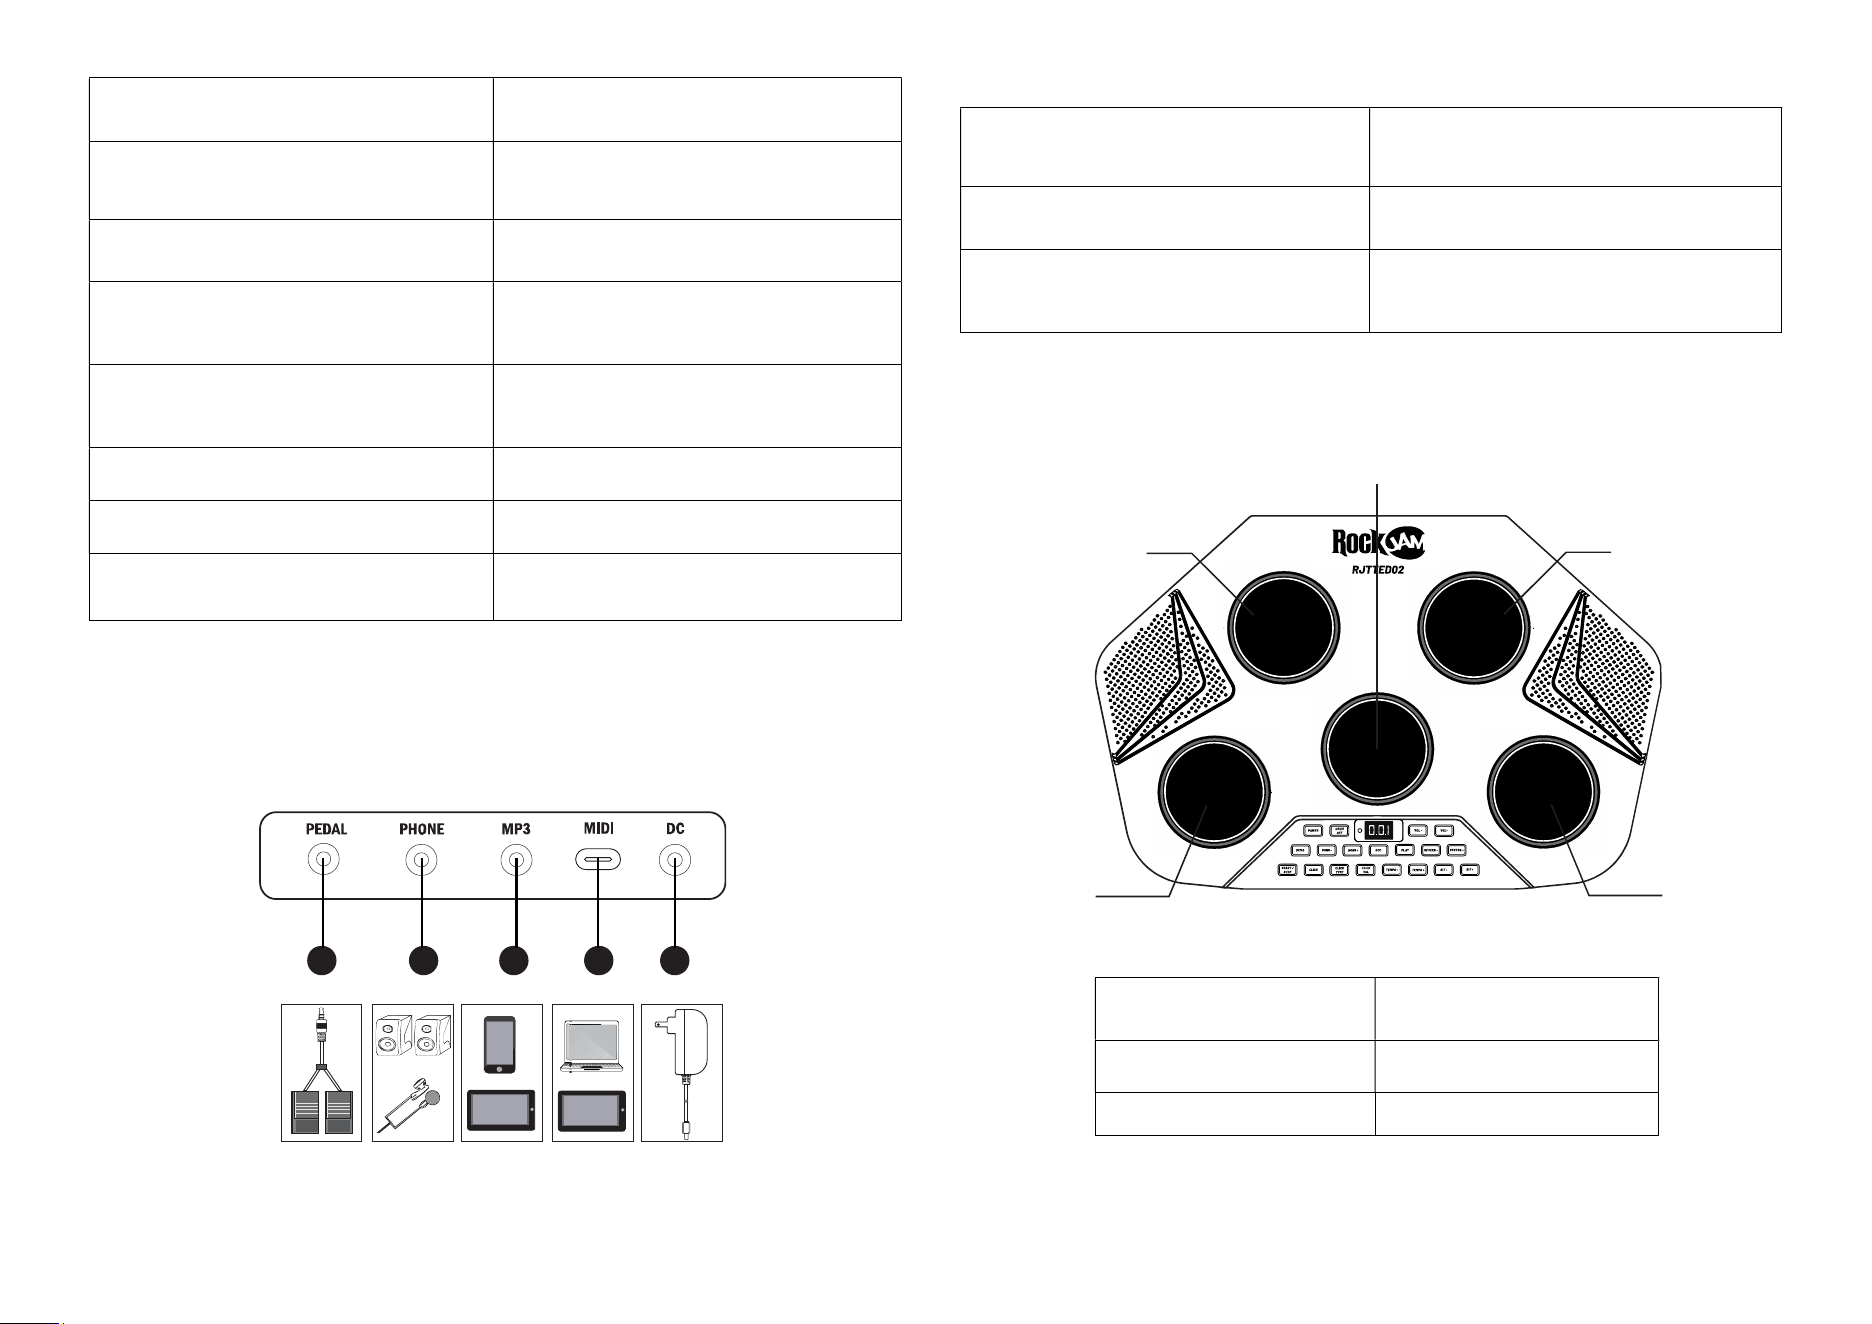
5. Location of controls and indicators
1
2
3 4 5 6 7 8 9
11
12
10
13
14
15
16
6. Front panel connections
Make connections to the front panel of the drum kit as follows before switching on:
7. Drum pad layout
Computer or
T
ablet MIDI
DCAdapter
Mobile or
Tablet Music
Earphones or
Speaker
Pedal
17 18 19 20 21
1
2
3
4
5
1 – POWER: Press to switch the drum kit on or off. 9 – TEMPO - / TEMPO +: Press to adjust the tempo of the
DEMO Song. Tempo can be set between 30 and 250 BPM.
2 – DEMO: Press to start or stop the DEMO track. There
is a different demo track for each of the 12 drum kits
included.
10 – KIT - / KIT +: Press to select the drum kit. There are
12 drum kits to choose from.
3 – START/STOP: Press to start or stop the demo SONG
playback. Then press SONG - or SONG + to choose
different songs.
11- REVERB - / REVERB +: Press to select the reverb
level. There are 4 levels to choose from (r01 to r04).
4 – CLICK: Press to start/stop the metronome sound. 12 –VOLUME - / VOLUME +: Press to adjust the output
volume level. There are 10 volume levels to choose from
(L00 – Off to L09 maximum).
5 – SONG - / SONG +: Press to select the demo SONG
that is played back. There are 10 demo SONGS to choose
from.
13 – PLAY: Press to playback the recorded beats.
6 – CLICK TYPE: Press to adjust the metronome mode. 14 – 3 DIGIT LED:
7 – CLICK VOL: Press to adjust the metronome volume. 15 – CHARGE LED: Lights red during charging and goes
green when fully charged.
8 – REC: Press to start recording up to a maximum of
2,000 beats.
16 – DRUM OFF: Press to turn off the sound of the drums
during DEMO or SONG playback.
1 – Open / Close Hi-Hat
Cymbal
4 – Crash Cymbal
2 – Snare Drum 5 – Mid Tom Drum
3
–
Low Tom Drum
17 – Pedal Input: Connect the combined pedals for Bass
Drum and Hi-Hat.
20 – USB-C MIDI connection: Used for MIDI data
connection to a host computer or tablet.
18 – Phones connection: Connect Headphones,
Earphones or to Amplified speakers.
21 – Power Input: Connect the DC power adapter to power
and recharge the drum kit.
19 – Auxiliary Line input for iPod, iPhone, Smartphone
or MP3 player: Use the 3.5mm cable supplied to connect
the external device.
8. Operation
Charging
Use the included DC power adapter to recharge the drum kit. The charge indicator LED will light up red during charging
and change to green when fully charged. Charge until fully charged before first use.
Switching the unit on
Press the POWER button located at the top left of the control panel to switch on. The unit will enter Bluetooth mode and
connect to the previously connected device if available.
Volume control
Press the VOLUME button to enter volume selection mode. Press the VOL + or VOL – buttons to adjust the volume
between L00 (Off) and L09 (Maximum). The default setting at power up is L07.
Drum kit selection
Press the KIT - and KIT + buttons to cycle through the 12 different drum kits available. Hit the drums to test out the
sounds available until you find the kit that you like. The default setting at power up is kit 001 (POP). The drum kit styles
are listed below in Appendix I.
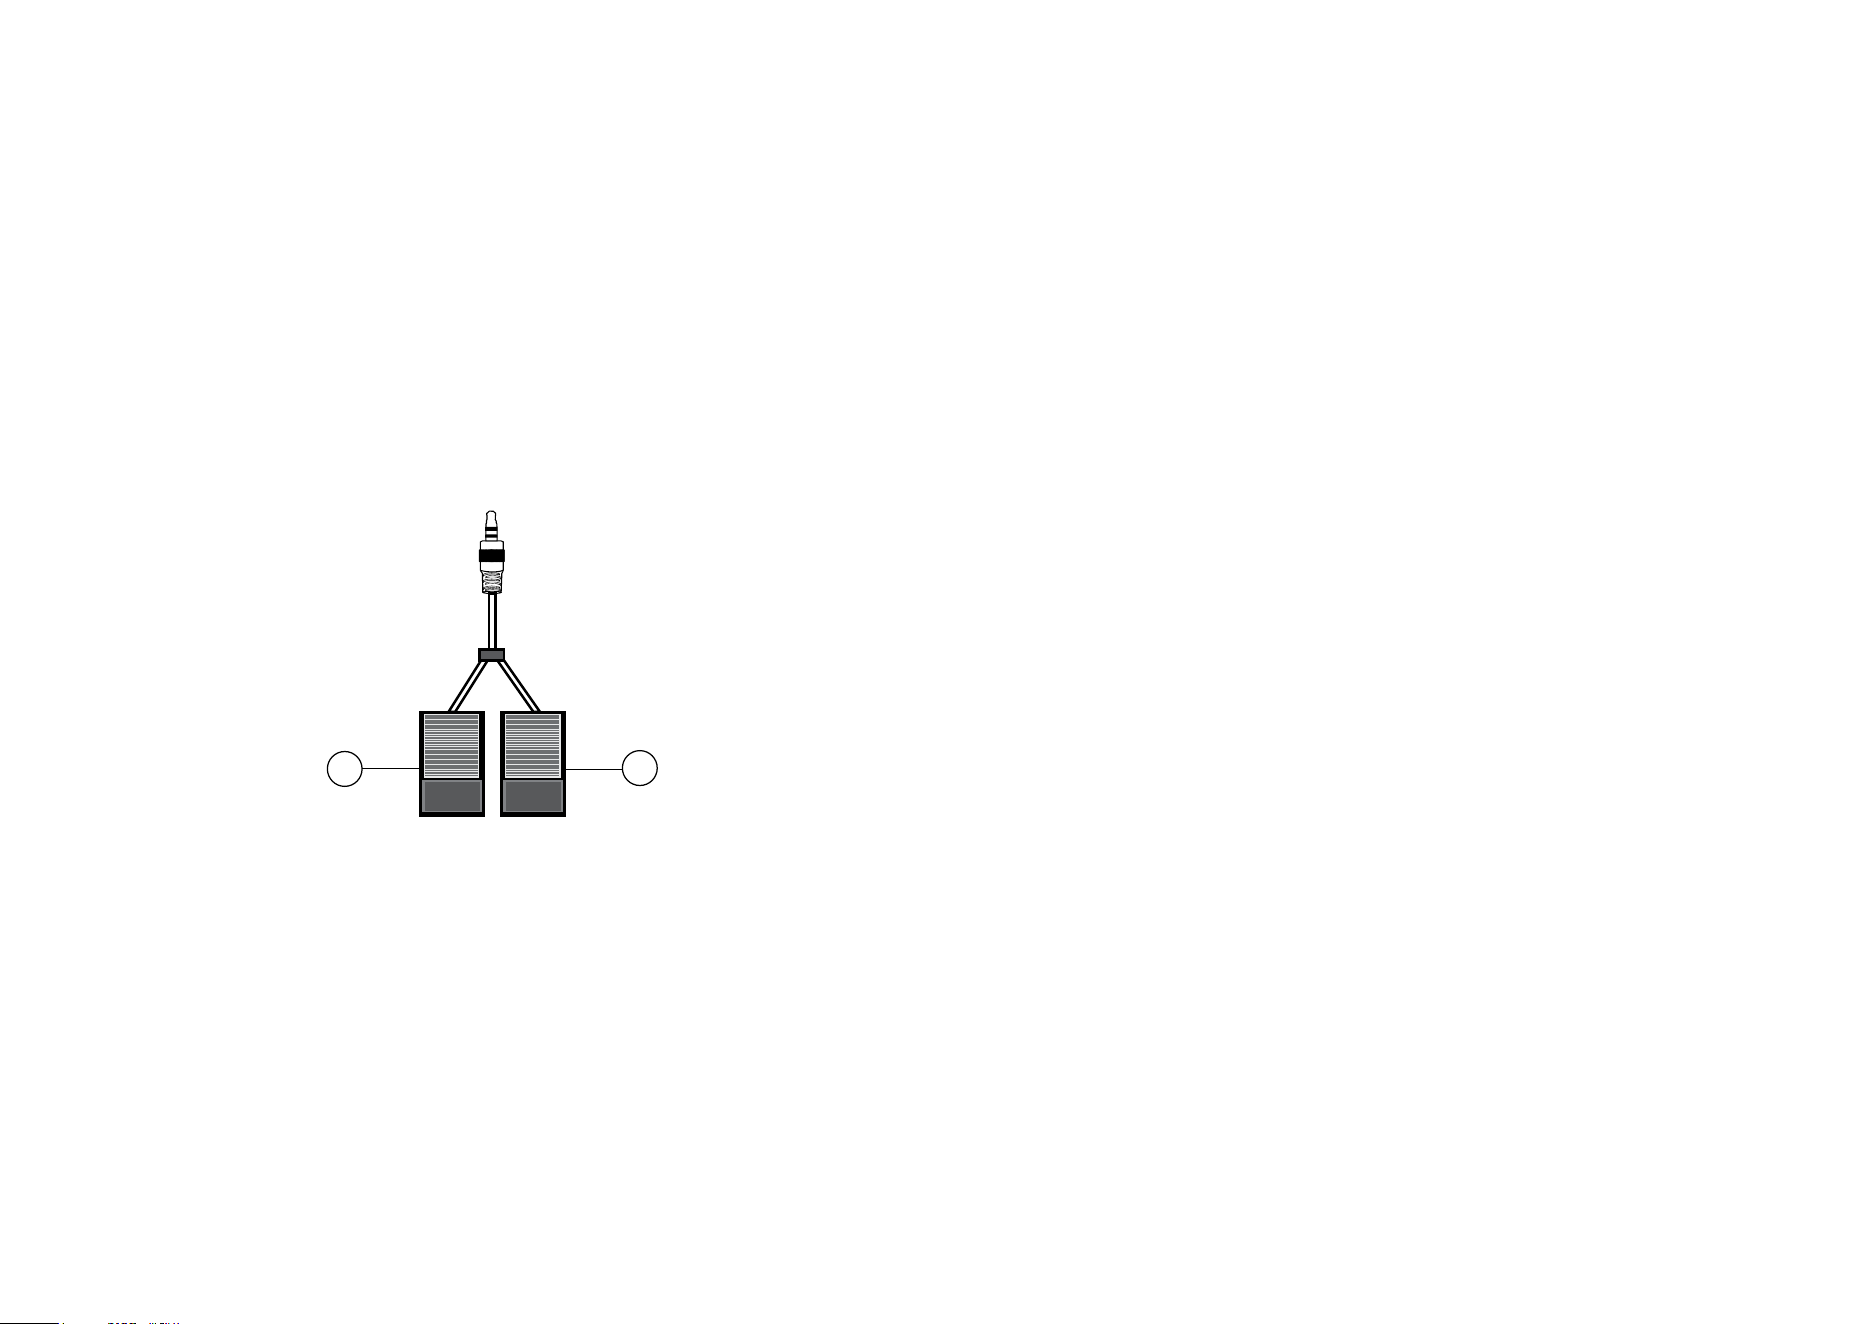
Pedal operation
Press the pedals 1 and 2 for Bass drum and Open / Close Hi-Hat
Hi-Hat function – Without Pedal plugged in – OPEN Hi-Hat
Hi-Hat function – With pedal pressed – CLOSED Hi-Hat
Hi-Hat function – With pedal not pressed – OPEN Hi-Hat
Demo tracks
Press the DEMO button to start and stop the DEMO track. Each of the 12 drum kits has its own DEMO track. Play along
to the DEMO track as desired.
Demo songs
Press the SONG button to start or stop the playback of the demo SONG. There are 10 demo SONGS to choose from
using the SONG - / SONG + buttons. Play along to the demo SONG as desired.
Drum off function
During DEMO track or demo SONG playback, press the DRUM OFF button to mute or unmute the drum sounds. Play
along to the DEMO track or SONG yourself.
Tempo control
Press the TEMPO - / TEMPO + buttons to adjust the tempo between 30 and 250 bpm. Press and hold the TEMPO - /
TEMPO + buttons to cycle through quickly. The default setting at power up is 120 bpm.
Reverb control
Press the REVERB - / REVERB + buttons to adjust the reverb between r01 (OFF) and r04 (Maximum). The default
setting at power up is level r02.
Recording and playback
Press the REC button to enter the recording mode. Play the drums normally and the beats will be recorded. Press the
REC button again to stop recording. Press the PLAY button at any time to play back the recorded beats. The recorded
beats can be overwritten by making a new recording or cleared by powering the unit off then on again. The playback of
the recorded beats is affected by the tempo setting. A maximum of 2,000 beats can be recorded.
Metronome
Press the CLICK button to start the metronome. Press the CLICK TYPE button to adjust the metronome mode. Modes
available 2-4, 3-4, 4-4, 6-8. Press the CLICK VOL button to adjust the metronome volume. There are five volume settings
CL0 (Off) to CL4 (Maximum). The dots on the LED display will also flash to indicate the tempo. Press the CLICK button
to stop the metronome.
Switching the unit off
Press the POWER button located at the top left of the control panel to switch off.
9. Playing along to your iPhone, iPod, MP3 player etc.
Bluetooth
After switching on the drum kit, you can connect your Bluetooth device. From your mobile device search for “RJTTED02”
and connect. Once paired, your device will connect automatically whenever the drum kit is switched on.
Aux Input
You can also listen to the sound of a connected external audio device such as an iPhone, iPod or MP3 player through
your drum kit. Connect one end of the 3.5 mm jack cable supplied to the MP3 socket located on the front panel of the
drum kit, and the other end to your audio equipment (iPhone, iPod, MP3, PC, CD player, etc.). This feature is great for
practice and allows you to play along to a favourite music track.
NOTE: For Bluetooth and Aux Input, use the volume control of the connected device to adjust the playback volume of the
music track. The music volume cannot be adjusted by the VOLUME - / VOLUME + keys of the drum kit.
10. Connecting headphones or external speakers
Headphone, earphones or external amplified speakers can be connected to the PHONES socket on the front of the drum
kit; this is great for private practice.
WARNING! The headphone output can be very loud. When using headphones please lower the
volume to minimum before striking the drum pads and then adjust to a suitable level.
21
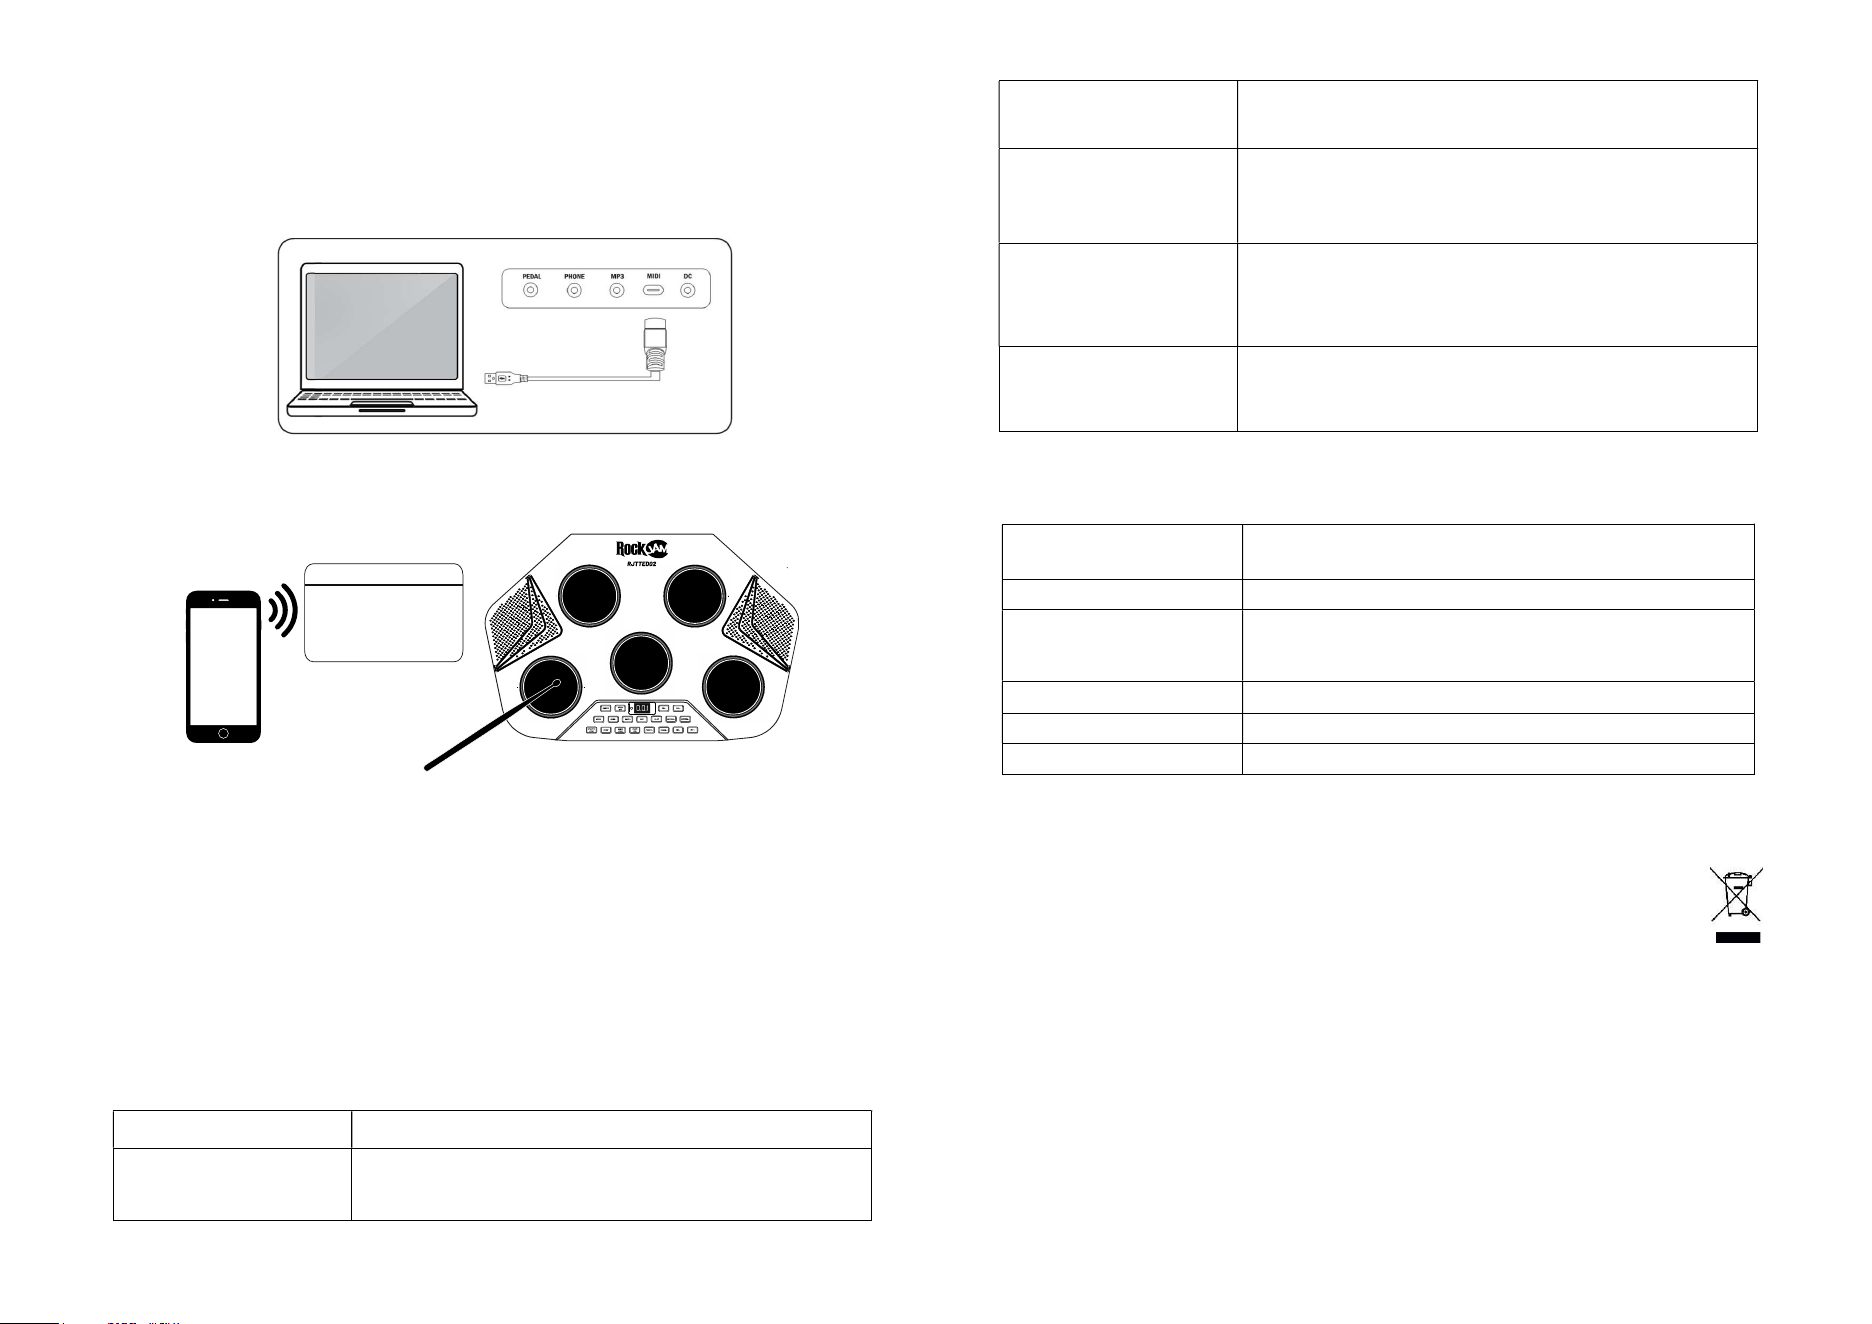
11. Connecting to a computer (MIDI Out)
The drum kit can be connected to a personal computer, either Windows or MAC using the USB-C cable supplied.
The drum kit hardware is compatible with both Windows and MAC and can be used with software such as Sonar,
Cubase, Nuendo and Ezdrummer.
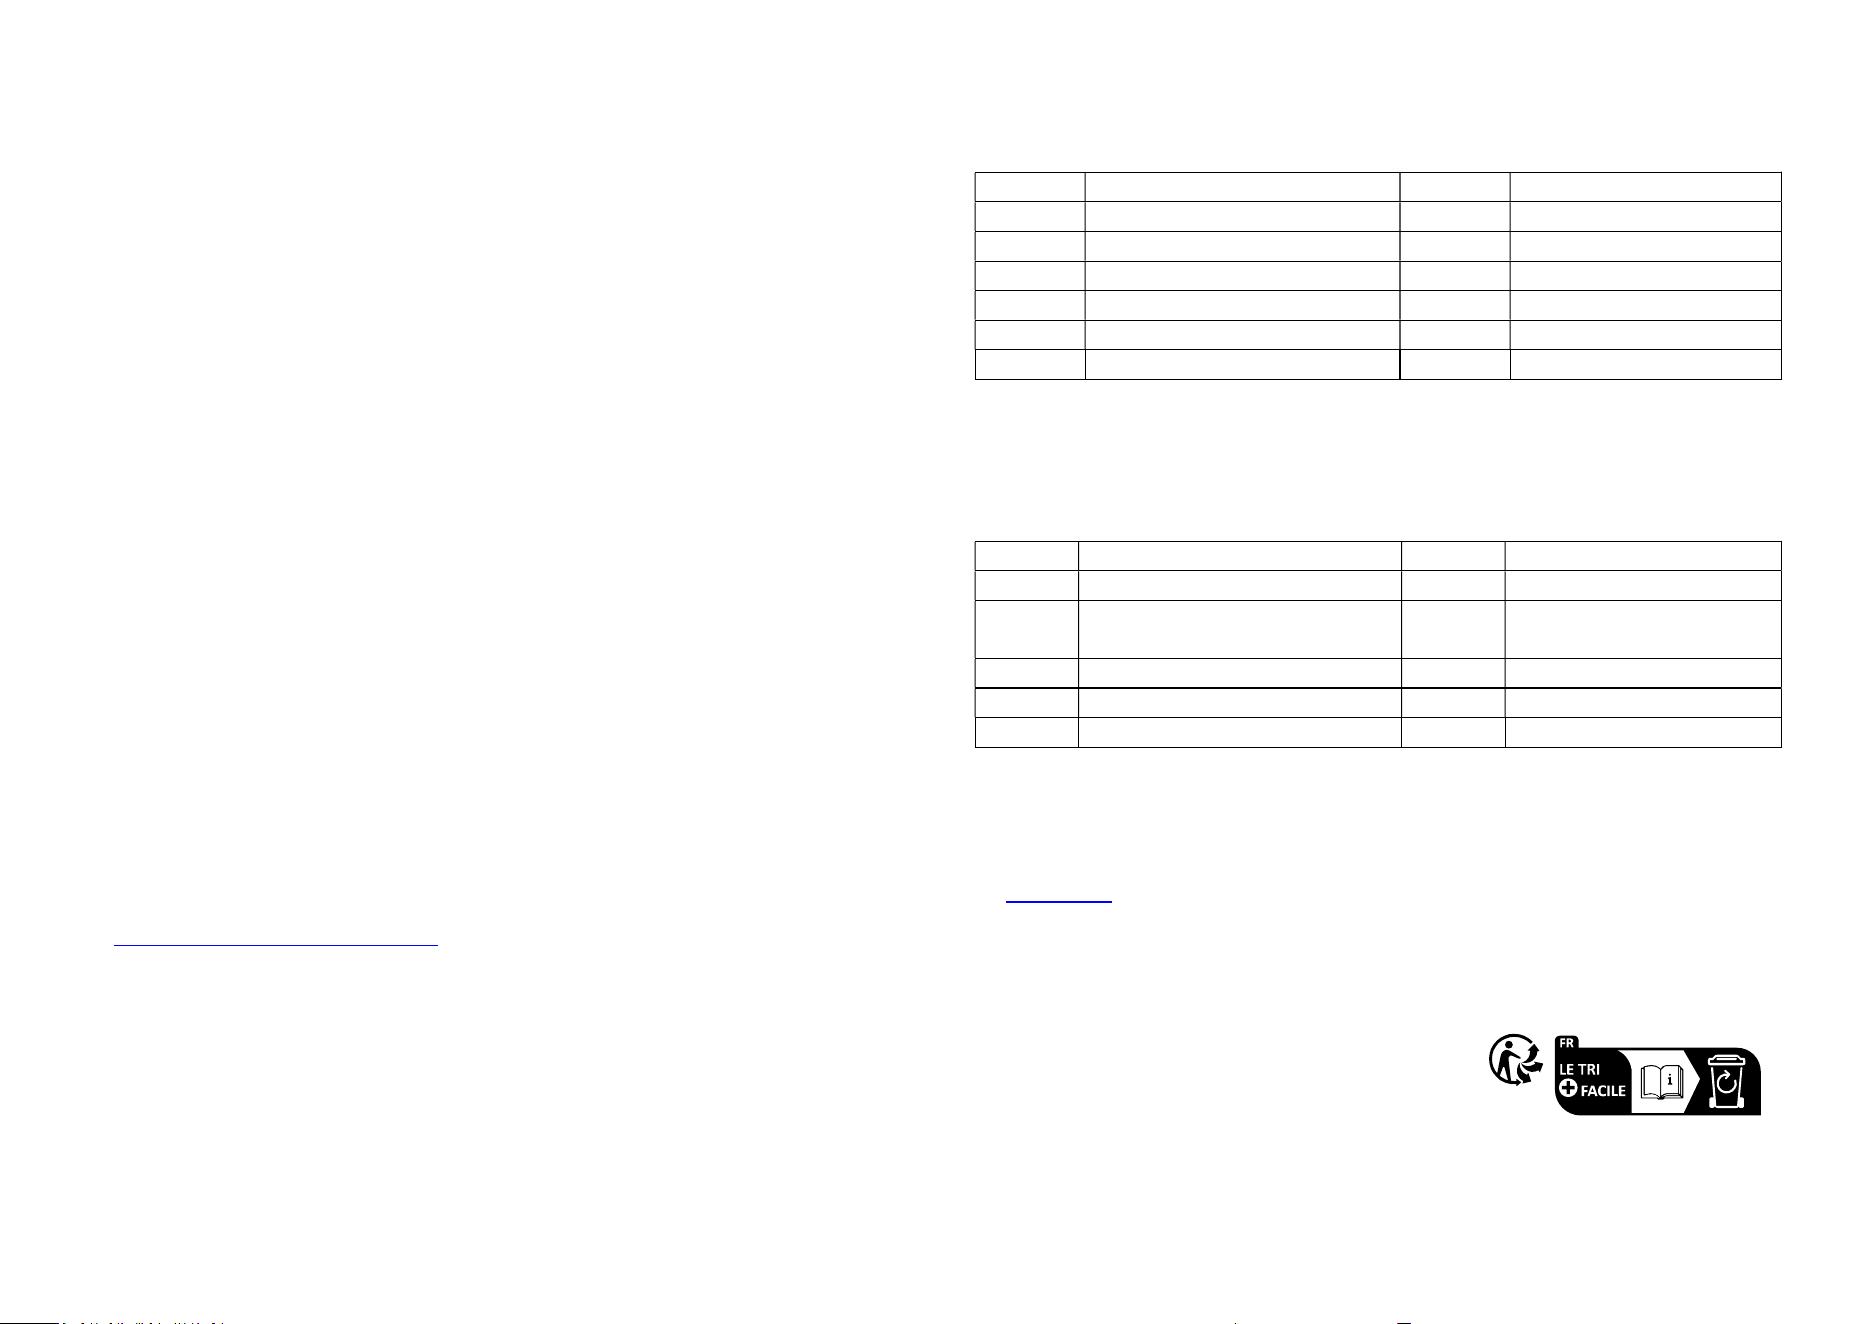
12. Bluetooth MIDI
Switch on the drum kit (the Bluetooth function will switch on automatically) and then open the DAW app that supports
Bluetooth MIDI operation such as ‘Garageband’. Search and connect ‘’RockJam BT MIDI’’ from the APPs settings or
advanced function. Hit any of the drum kit pads and sound should be heard to indicate the device has been connected
successfully.
Note: Do not try and connect via the standard Bluetooth Settings of the Phone or Tablet device as that will not work.
13. Troubleshooting and Support
If a problem occurs please check the following table before returning the unit. If the problem cannot be solved with the
following information then please return the item to the store where it was purchased from.
Problem Remedy
Charging
The red charge light does not turn on.
- Make sure the DC power cable is connected properly.
- Make sure the power switch on the drum kit is set to on.
- Make sure that the power outlet is switched on.
Abnormal sound
Drum sounds are heard when the
pedals are plugged and unplugged
- This is not a fault.
- To avoid the issue please insert the pedals before switching on.
No sound
In normal use
When using headphones
- Make sure the volume has not been set to minimum (Off position).
- Make sure that the headphones are plugged in fully and that the volume is not set to
minimum, L00 (Off position).
iPod/iPhone/Smartphone/MP3
playback
The volume of the music cannot be
adjusted with the VOL- and VOL+
buttons
- This is not a fault.
- Adjust the volume on the audio device.
Unresponsive
The drum kit buttons do not respond
to presses
- This is not a fault.
- The drum kit may be out of charge. Connect the drum kit to a power source. The red
charge light should appear when charging. Charge for a minimum of 3 hours.
14. Product Specifications
DC Power:
Rechargeable Lithium Battery:
9V DC @ 2A
7.4V, 4,000 mAh
Dimensions: 45.0 (L) x 29.0 (W) x 4.2 (H) cm
Functions:
5 Drum pads, Velocity sensitive, 12 Drum kits, 10 Demo songs, Record,
Playback, MIDI out, AUX input, Audio output, Bluetooth Audio, Bluetooth
MIDI
Weight: 1,800 g
Material: ABS + Silicone
Wireless Output Frequency Band : 2402 – 2480 MHz, Power : 3 dBm EIRP
15. Product disposal instructions
The symbol shown here and on the product means that the product is classed as Electrical or Electronic
Equipment and should not be disposed with other household or commercial waste at the end of its working
life.
The Waste Electrical and Electronic Equipment (WEEE) Directive (2012/19/ EU) has been put in place to
encourage the recycling of products using best available recovery and recycling techniques to minimise the impact on the
environment, treat any hazardous substances and avoid the increase of landfill.
When you have no further use for this product, please dispose of it using your local authority’s recycling processes. For
more information, please contact your local authority or the retailer where the product was purchased.
BLUETOOTH MIDI Devices
DEVICES
CONNECTEDRockjam BT MIDI
16. FCC Compliance Statement
Changes or modifications to this unit not expressly approved by the party responsible for compliance
could void the user’s authority to operate this equipment.
NOTE: This equipment has been tested and found to comply with the limits for a Class B digital device,
pursuant to part 15 of the FCC Rules. These limits are designed to provide reasonable protection against
harmful interference in a residential installation. This equipment generates, uses, and can radiate radio
frequency energy and, if not installed and used in accordance with the instructions, may cause harmful
interference to radio communications.
However, there is no guarantee that interference will not occur in a particular installation. If this equipment
does cause harmful interference to radio or television reception, which can be determined by turning the
equipment off and on, the user is encouraged to try to correct the interference by one or more of the
following measures:
Reorient or relocate the receiving antenna.
Increase the separation between the equipment and receiver.
Connect the equipment into an outlet on a circuit different from that to which the receiver is
connected.
Consult the dealer or an experienced radio/TV technician for help.
Portable Device Statements
The device has been evaluated to meet general RF exposure requirement. The device can be used
in portable exposure condition without restriction.
17. EU and UK Regulatory Compliance
PDT Ltd. As manufacturer declares that the radio equipment described within is in compliance with Directive 2014/53/EU
(Radio Equipment) and bears the CE and UKCA marks in accordance with that directive.
The full text of the EU declaration of conformity is available at the following internet address:
https://pdtuk.com/declaration-of-conformity-library/
APPENDIX I
Drum Kits
Number
PRESET DRUM KIT
Number
PRESET DRUM KIT
1
POP
2
ROCK
3
FUNK
4
VINTAGE
5
BRUSH
6
LATIN
7
HIP
-
HOP
8
METAL
9
DANCE
10
ELECTRONIC
11
ORCHESTRO
12
PERCUSSION
APPENDIX II
Demo Songs
Number
Song Name
Number
Song Name
1
MULTI STYLE DEMO
2
MARY
HAD A LITTLE LAMB
3 CLOSE YOUR HANDS OPEN
YOUR HANDS
4 APPLES AND BANANAS
5
JACK AND JILL
6
CAMPTOWN RACE
S
7
SKIP TO MY LOU
8
BILLY BOY
9
OH MY DARLING CLEMENTINE
10
TURKEY IN THE STRAW
RockJam is a registered trademark of:
PDT Ltd., Unit 4B, Greengate Industrial Estate, White Moss View, Middleton, Manchester, M24 1UN, United Kingdom
[email protected] © PDT Ltd. 2025
European Distributor and Authorised Representative:
CMS Distribution SAS, 2-4 Rue Benjamin Franklin, 94370 Sucy-en-Brie, France
iPod and iPhone are trademarks of Apple Inc. registered in the U.S. and other countries. MAC is a registered trademark
of Apple Inc.