User Manual
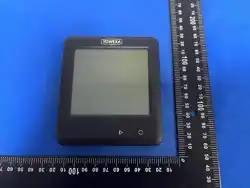
Professional Temperature and Humidity Data Logger
V1.4
3
2
4
1
D EC
B
F
G H
A
Temperature(Digital) Humidity(Digital)
0~100%RH(Non-condesing)
0.1%RH
±3%RH(10~90%RH,25℃)
±4%RH(Others)
Internal: 15 mins, Seperated: 5 mins
-30~65℃ (Without battery)
1.5V AAA (Alkaline battery)
About 1 year (Condiction: when the environment temperature is 25℃, backlight and buzzer are off, and Bluetooth is not connected.)
Micro USB, DC 5V/2A
96*108*20mm
About 120g (Not including battery)
25920 or 500000 groups of readings (Optional from software)
-40~125℃
±0.3℃(-10~65℃)
±0.5℃(Others)
Temperature(Digital) Humidity(Digital)
0~100%RH(Non-condesing)
0.1℃
0.1%RH
P2(Seperated)
-40~125℃
Temperature(Digital)
0.1℃
Temperature(PT1000)
0.1℃
P4(Seperated)
USB2.0, Bluetooth 4.2 (Only for models with Bluetooth)
1. Product Safety Instructions
Before using the instrument, please read the following safety instructions carefully:
(1)The temperature and humidity range of the normal working environment of the instrument is -30~65℃,
0~100%RH (non-condensing). If it is over the limited range while using, the instrument may be damaged.
(2)The safe working temperature range of ordinary AAA alkaline batteries is -15~50℃. If the instrument
needs to be used in an environment beyond this temperature range, it must be used with a suitable battery;
if you have any questions, please contact the after-sales service department.
(3)For precision instruments, please do not disassemble or repair without permission.
(4)Please remove the battery if the instrument will not be used for a long time.
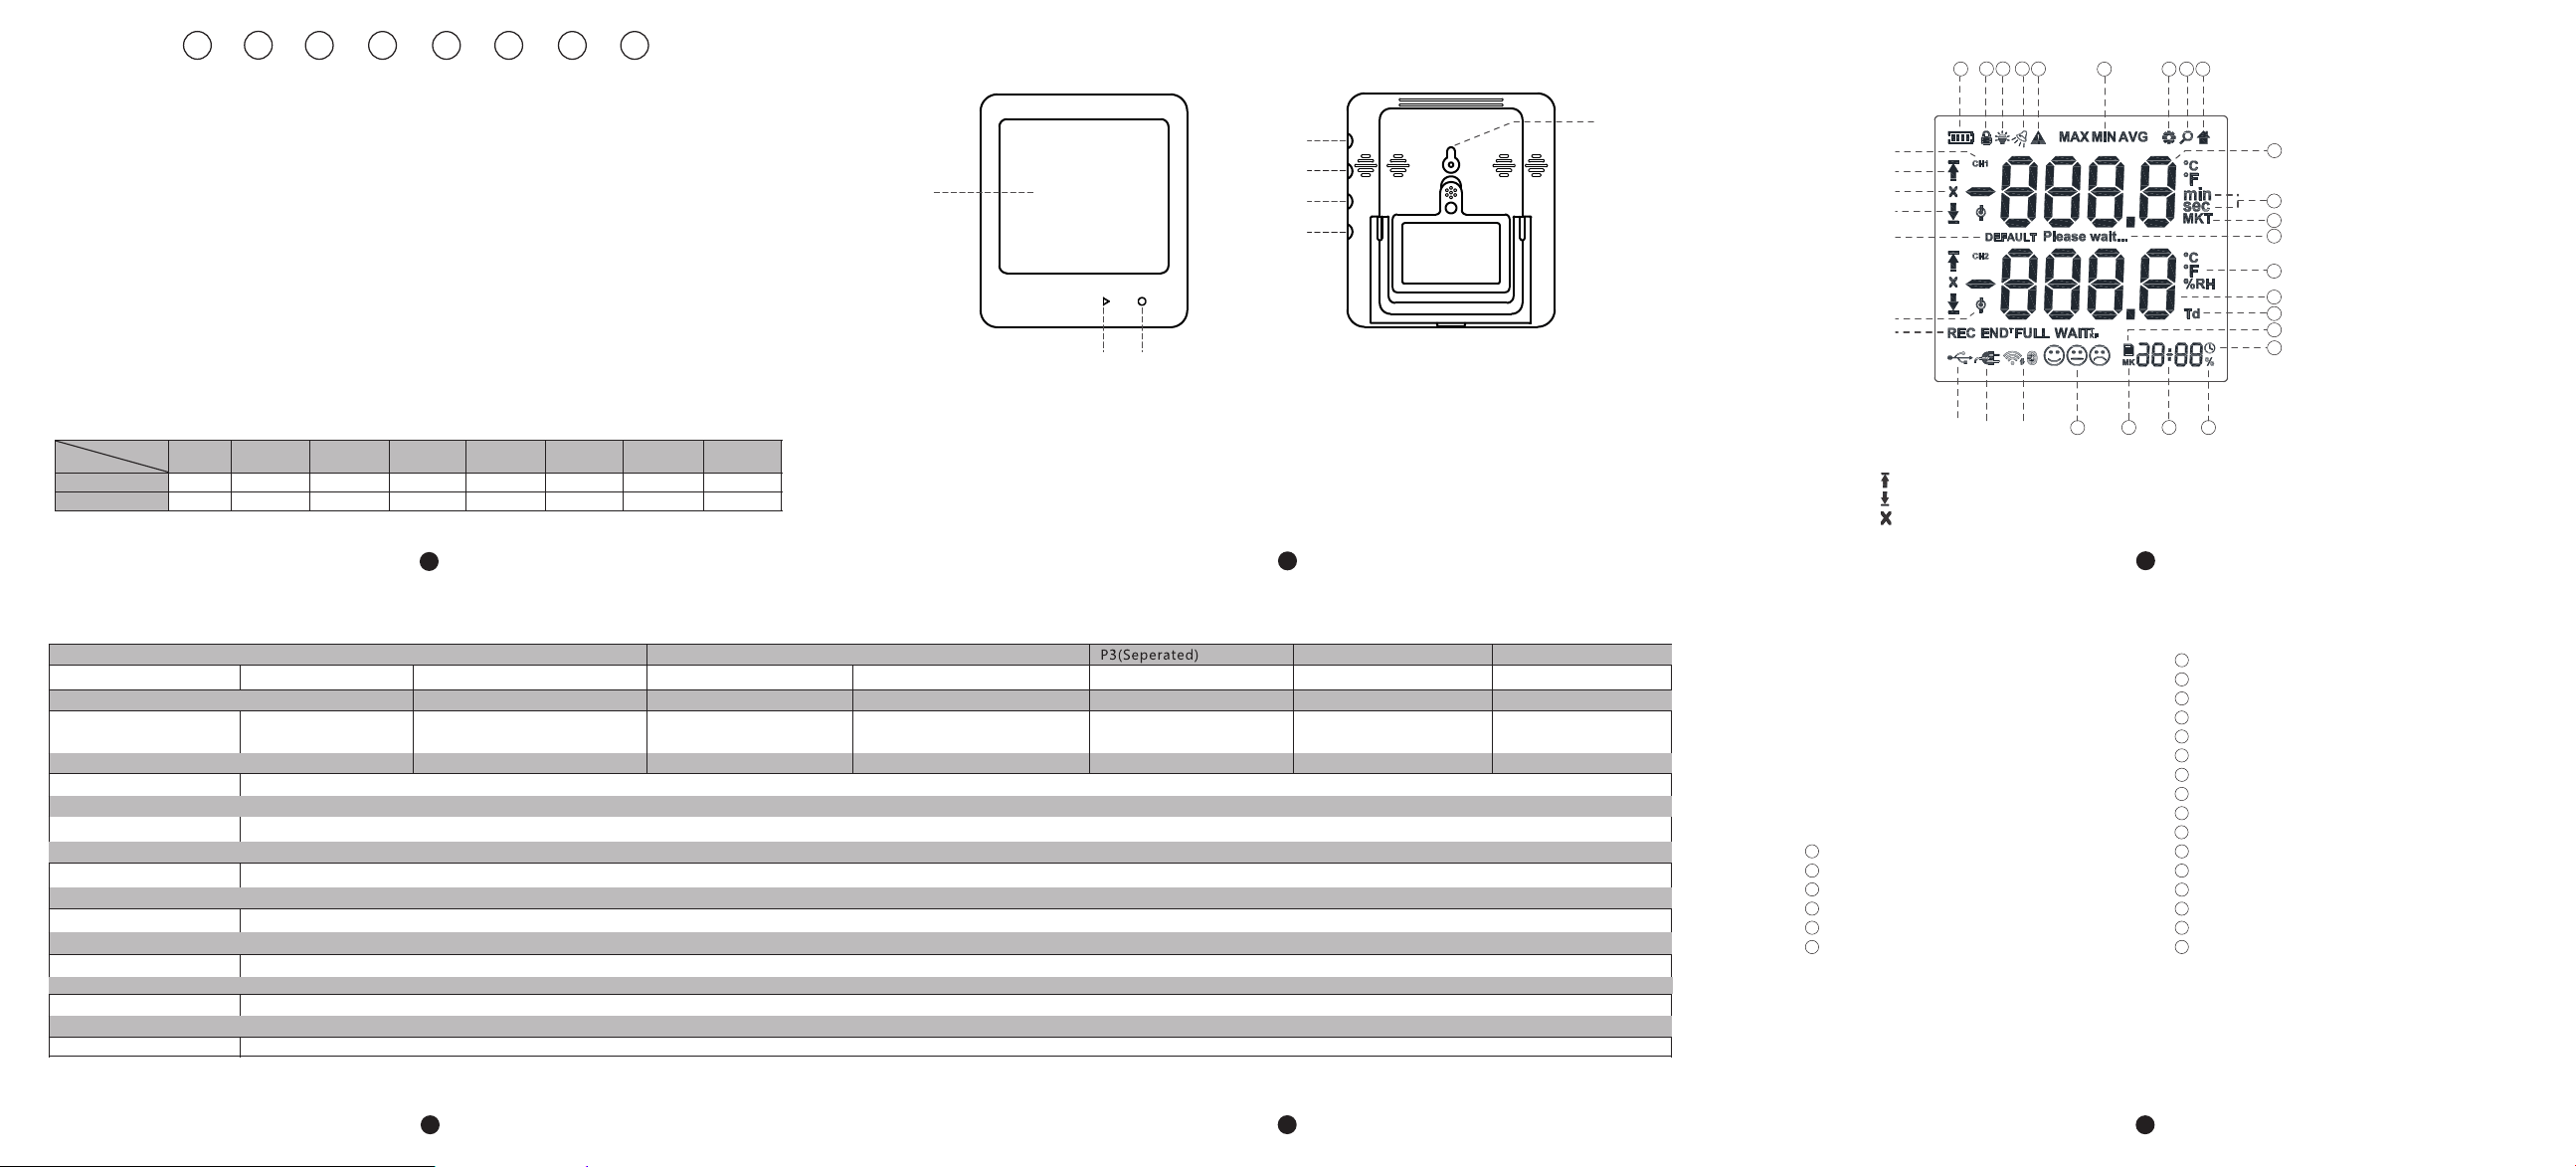
①LCD display
②Turn on/off , Record, Browse time
③Turn the screen on/off , View data , Mark
④External probe port
⑤External probe port
⑥External probe port
⑦External probe port
⑧Reset button
①
②
③
④
⑤
⑥
⑦
⑧
Measurement Parameter
Measuring Range
Resolution
Accuracy
Response Time(t₉₀)
Sample Interval
Operation Temperature
Storage Temperature
Battery Capacity
Battery Life
Power Connector
Size
Case Material
Protection Class
-30~65℃
0.1℃
5 seconds
-30~65℃
ABS
IP20
Memory Capacity
Probe Model
P1(Internal)
-30~65℃
Connection
2. Product Selection Guide
±0.3℃(-10~65℃)
±0.5℃(Others)
0.1℃
P5(Internal)
Temperature(Digital)
Weight
3. View
4. Specification
5
5. LCD
6
: Display when the current record point exceeds the high limit.
: Display when the current record point exceeds the low limit.
: Display when the current or previous record point exceeds limits.
29
17
18
19
20
21
22
23
24
25
26
27
28
32
30
31
Dew point temperature symbol
Measurement data display area 2
Temperature and humidity unit
Waiting reminder symbol
Average kinetic temperature
Time unit
Measurement data display area 1
Main mode indication
Query mode indication
Setting mode indication
Maximum and average symbol
Warning symbols
Buzzer alarm activation indication
Backlight activation indicator
Key lock symbol
Battery level indicator
Emoji
Point mark MK indication
Time display area
Percent sign
Clock
File symbol
11
12
13
14
15
16
①Channel number
②High limit exceeded indication
③Sign for alarm trace
④Low limit exceeded indication
⑤Default sign
⑥External probe
⑦Record status indication
⑧USB communication
⑨USB power supply
⑩Wireless signal indication
● means that the function is supported, ○ means that the function is not supported.
C
D E
P3, P3
P4, P4
F
G
H
P2
P1
P3, P3
P4, P4
●●
○ ○
● ●
B
Model
Optional
A
Probe Type
P2
Bluetooth
P1
○ ○
29
17
18
19
20
21
22
23
24
25
26
27
28
32
30
31
11
12 13
14
15
16
⑩
⑨
⑧
⑦
⑥
⑤
③
②
④
①
See the datasheet for details
See the datasheet for detailsSee the datasheet for details See the datasheet for details See the datasheet for details
8
7
6.7 Stop Recording
(1) Long press the button for 3 seconds to stop recording (function of Stop by Button needs to be set).
In addition, for models with Bluetooth, users can also choose to stop in the mobile APP.
(2) When the number of recording points reaches the maximum limit, the recording will stop automatically.
(3) If the battery is too low, it will automatically stop recording, save data and shut down.
(4) The instrument can be stop recording while connected with PC or other equipment (non-adapter) during
recording (NODATA function has to be turned off).
6.8 Query Max, Min, Average, High and Low Limits
(1) When valid data is recorded (both probes record at least one reading or more), click the button in
turn to query the maximum, minimum, average value and the high, low limit.
(2) When there is no valid data recorded, click the button in turn to query the high and low limits.
(3) After entering the query state, the icon disappears and the icon will be displayed. If there is no
any operation for 10 seconds, or pressing any other buttons, it will return to the main interface. The icon
disappears and the icon will be displayed.
6.9 Turn Off Buzzer Alarm
When the instrument is over-limits, the over-limit indication or of the relevant channel will be displayed.
If the time of the buzzer alarm has been set to a valid value, the buzzer will sound. Click any button to turn
off the alarm bell.
6.10 Point Mark Operation
When the instrument is in the recording state, enter the point marking interface, press and hold the
button for 3 seconds to do point marking once, and it can mark 3 points maximum.
6. Quick Guide
If there is no operation on the touch button for more than 15 seconds, the instrument will automatically lock
and display the icon . If user needs to operate the instrument, must press and hold the button for
3 seconds to unlock it. When the buzzer of the instrument button sounds ”beep...” after the button is
short-pressed or long-pressed by user, which means that the operation is valid.
6.1 Turn On
When the power supply is restarted, the instrument will automatically turn on.
6.2 Turn Off
When the battery power is too low, the instrument will automatically shut down (you must reconnect the
power to turn it on).
6.3 Turn On Display
When the display is off, press button 3 seconds to turn on the display.
6.4 Turn Off Display
When the display is on, press button 3 seconds to turn off the display (the display can not be turned off
when the point mark surface is displayed).
6.5 Switch Display of Time/Point Mark
Click the button in turn to switch the year, month, day, hour, minute, and point mark interface.
6.6 Start Recording
(1) Long press the button for 3 seconds to start recording. In addition, for models with Bluetooth, users
can also choose to start recording in the mobile APP.
(2) When the recording instrument is set to not be recorded repeatedly, the instrument needs to be reset
after each recording, then start perform the operation (1).
Recording Status Indicator Comparison Table
6.11 File Generation
( ) 1 Insert the recorded instrument into a readable U-disk device (PC, etc.) to view the file on the device.
The types of files can be set by the software.
(2) It takes time for files to generating. While waiting for the file conversion process, it will be displayed
” ”.Please wait...
(3) After the file conversion is completed, the icon will be displayed and the character “ ” will be uSb
appeared.
6.12 Bluetooth Wakeup
Short press button to wake up the instrument from Bluetooth sleep state (applicable to models with
Bluetooth).
6.13 Standard Software
The instrument is equipped with a mobile APP (for models with Bluetooth) and professional PC software.
The mobile phone APP software can be downloaded by scanning the QR code in the instruction, and the PC
software can be obtained by consulting our professional staff. After the software is installed, you can
perform parameter setting, data download, data analysis and data exporting operations on the instrument.
If you have any questions, please consult after-sales service department.
7.2 FAQ
(1) The instrument can only be used the external probes provided by our company. If you need to use probes
not provided by our company, please consult the after-sales service department in time.
(2) When sign of the battery power on the LCD is flashing, or “oFF” is displayed and the screen then goes off
immediately after the instrument is turned on, which means that the battery power is too low, please replace
the new battery in time.
(3) When user is marking the recording point, the same recording point can only be marked once. If the same
recording point is marked again, the instrument will sound ”beep——”, which indicates that the operation is
invalid and there is no indication on the LCD.
(4) When the instrument works abnormally, the LCD will display the icon , and user only need to
reconfigure the instrument.
7. Tips and Help
7.1 Tips for General Use
(1) The instrument can be set to use internal or external probes in the PC software. When the instrument is set
to use an external probe, insert the probe into the external probe jack to start measurement.correctly
(2) In the point marking interface, the number of marked points and the maximum number of points that can
be marked are displayed.
(3) Models with Bluetooth communication function do not have NODATA function.
(4) The LCD recording status indication can be compared with the following table (when the instrument is
running normally).
11
9
10
Recording
Waiting to start recording by pressing button
Stop recording, stop when the number of recording points reaches the maximum limit
WAITK
WAIT
REC
END
END
END FULL
Wait for the start delay to end
Record stopped, press button to stop
Recording stopped, stop when the start delay is not over
T
T

FCC Warnning:
This equipment has been tested and found to comply with the limits for a Class B digital device,
pursuant to part 15 of the FCC Rules. These limits are designed to provide
reasonable
protection againstharmful interference in a residential installation. This equipment generates,
uses and can radiateradio
frequency
energy
and,
if
not
installed
and
used
in
accordance
with
the
instructions,
maycause
harmful
interference
to
radio
communications.
However,
there
is
no
guarantee
thatinterference
will
not
occur
in
a
particular
installation.
If
this
equipment
does
cause
harmfulinterference to radio or television reception, which can be
determined by turning the equipmentoff
and
on,
the
user
is
encouraged
to
try
to
correct
the
interference
by
one
or
more
of
thefollowing measures:
•
Reorient or relocate the receiving antenna.
•
Increase the separation between the equipment and receiver.
•
Connect the equipment into an outlet on a circuit different from that to which the receiver is
connected.
• Consult the dealer or an experienced radio/TV technician for help.
Caution:
Any
changes
or
modifications
to
this
device
not
explicitly
approved
by
manufacturer
could void your authority to operate this equipment.
This
device
complies
with
part
15
of
the
FCC
Rules.
Operation
is
subject
to
the
following
two
conditions:
(1)This
device
may
not
cause
harmful
interference,
and
(2)
this
device
must
accept
any
interference received, including interference that may cause undesired operation.
This
equipment
complies
with
FCC
radiation
exposure
limits
set
forth
for
an
uncontrolled
environment.
This
equipment
should
be
installed
and
operated
with
minimum
distance
20cm
between the radiator and your body.