
User Guide

2
Draft for testing - not final
Wireless Dog Fence
Pro
Before we begin
As you set up your new wireless fence, keep in mind:
This product
creates a
wireless pet
area for your
dog to explore
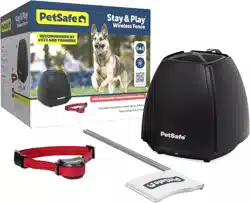
The Wireless Dog Fence Pro has three
main parts: a base unit, a collar and
boundary flags.
The base unit sends out a radio
signal in a 17- to 85-foot radius in
all directions, creating an adjustable
circular boundary zone around the
allowed pet area.
Your dog wears a collar that receives
the signal from the base unit. As your
dog nears the boundary zone, the
collar vibrates and sounds a warning
tone. If your dog continues past the
boundary zone, the collar delivers a
static and vibration correction to get
their attention and prompt them to
return to the pet area.
You’ll place temporary boundary flags
around the pet area to help your dog
learn where the boundary zone is.
After proper training, you will be able
to remove the flags and allow your
dog to roam freely within the pet area.
Important: For important safety and warranty
information, please see the Let us help! guide included
with your product.

3
Draft for testing - not final
Adjust the base
unit location
to fit the
boundary to
your yard
The base unit is the source of the
radio signal and will always be at
the exact center of the pet area. For
optimal performance, it should be
placed off the floor in your home,
away from any large metal objects.
You may need to move the base
unit a few times before you find the
bestspot.
It is important
to keep
your pet
comfortable
andsafe
Important: Avoid leaving the collar
on your dog for more than 12hours
a day. Before beginning, please
read this guide and the Let us help!
guide (provided with the product)
thoroughly for important safety
information about how to fit and use
the collar.
Take care to choose the best
correction level for your dog’s
temperament.
This product limits static correction
duration to 15seconds. To positively
reinforce returning to the pet area, the
collar is programmed with correction-
free re-entry; if your dog leaves the
pet area, they will not receive a static
correction upon their return.
Training time
may vary from
pet to pet
Properly training your pet is essential
to the success of the wireless fence.
Please consult the training guide for
our recommended training method.
4
Draft for testing - not final
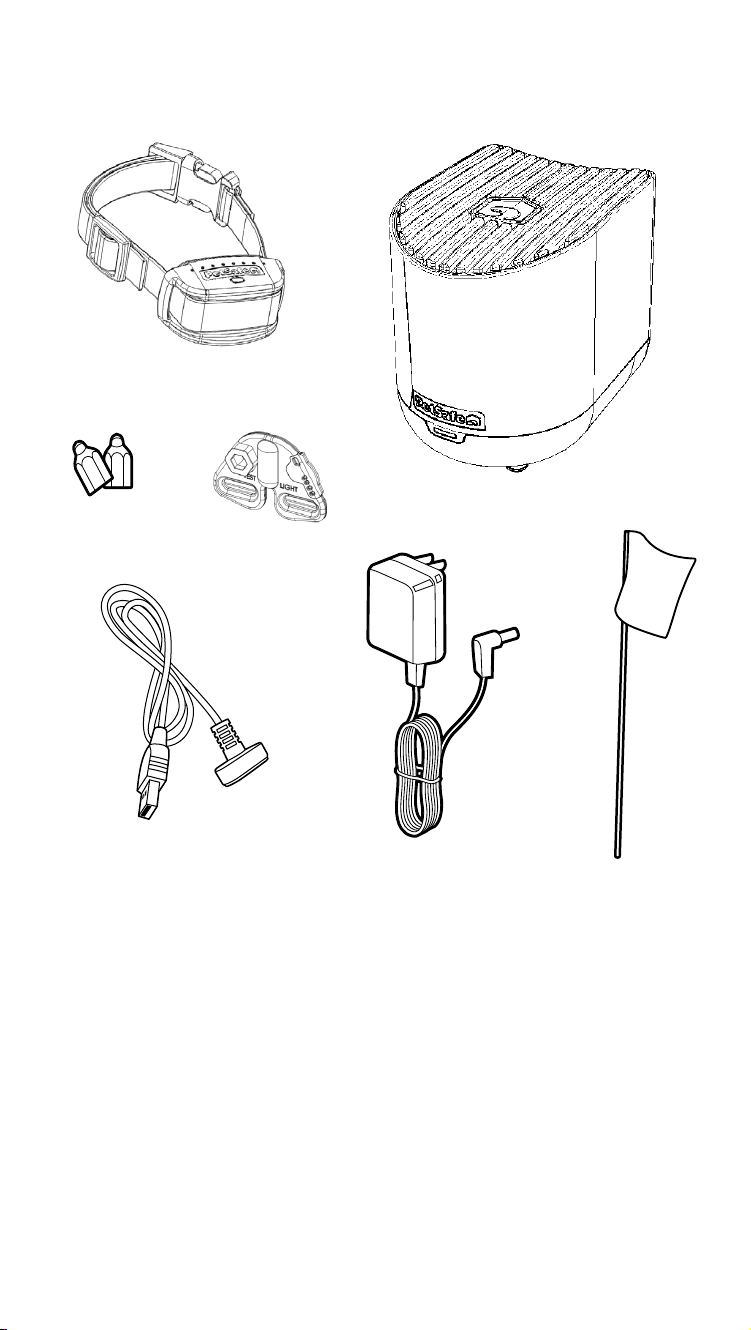
Collar with short
contact points
What you have
What you need
• Scissors
• Lighter
• Non-metallic collar and leash (for training)
Flags
Long contact
points
Collar charging
cable (USB-A)
(USB-A adaptor not included)
Test light tool
Base unit
Base unit
power adaptor
5
Draft for testing - not final
Charge the collar
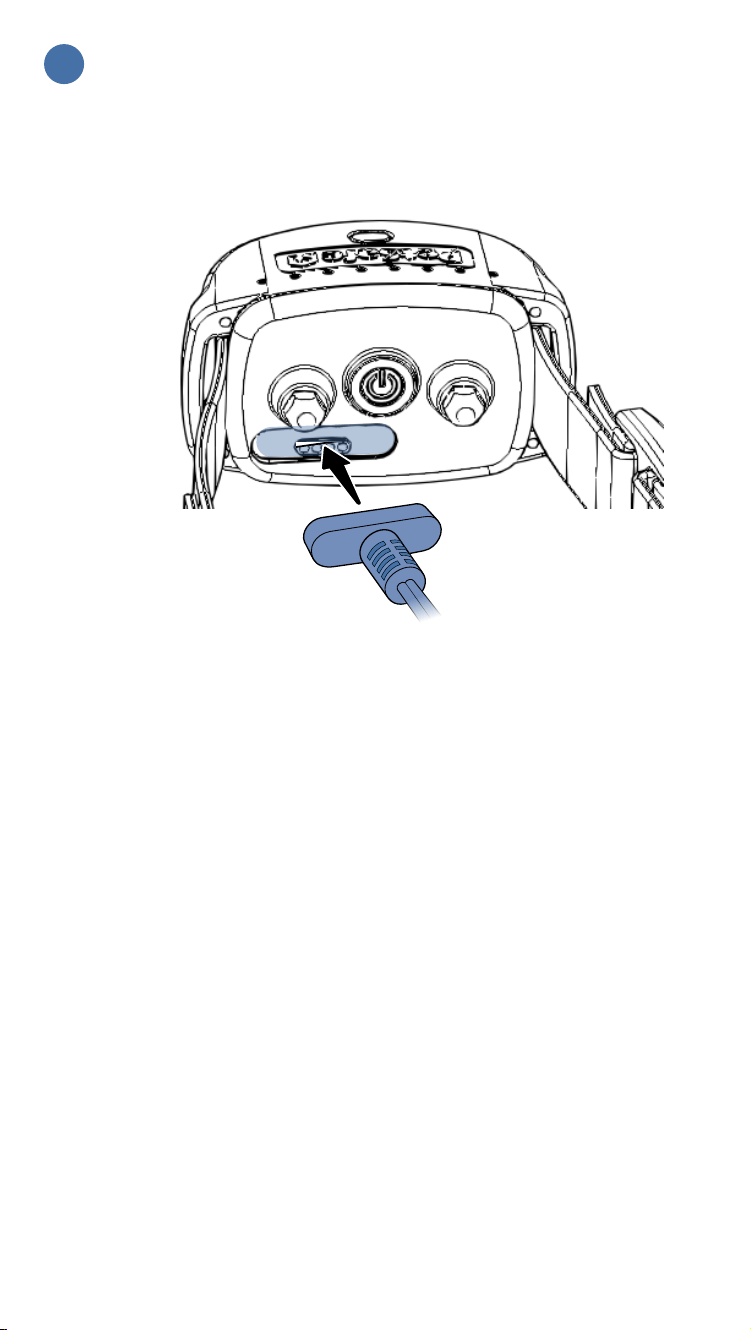
1
Connect the charging cable to the magnetic charging port
on the back of the collar and then plug it into a USB-A
outlet or adaptor (not included). Leave the collar plugged
in until it is fully charged; this will take about 2 hours.
The status light on the top of the collar will glow red
when it is charging and will turn green once charging is
complete.
Each charge can last up to 3 weeks, depending upon
frequency of use.
6
Draft for testing - not final
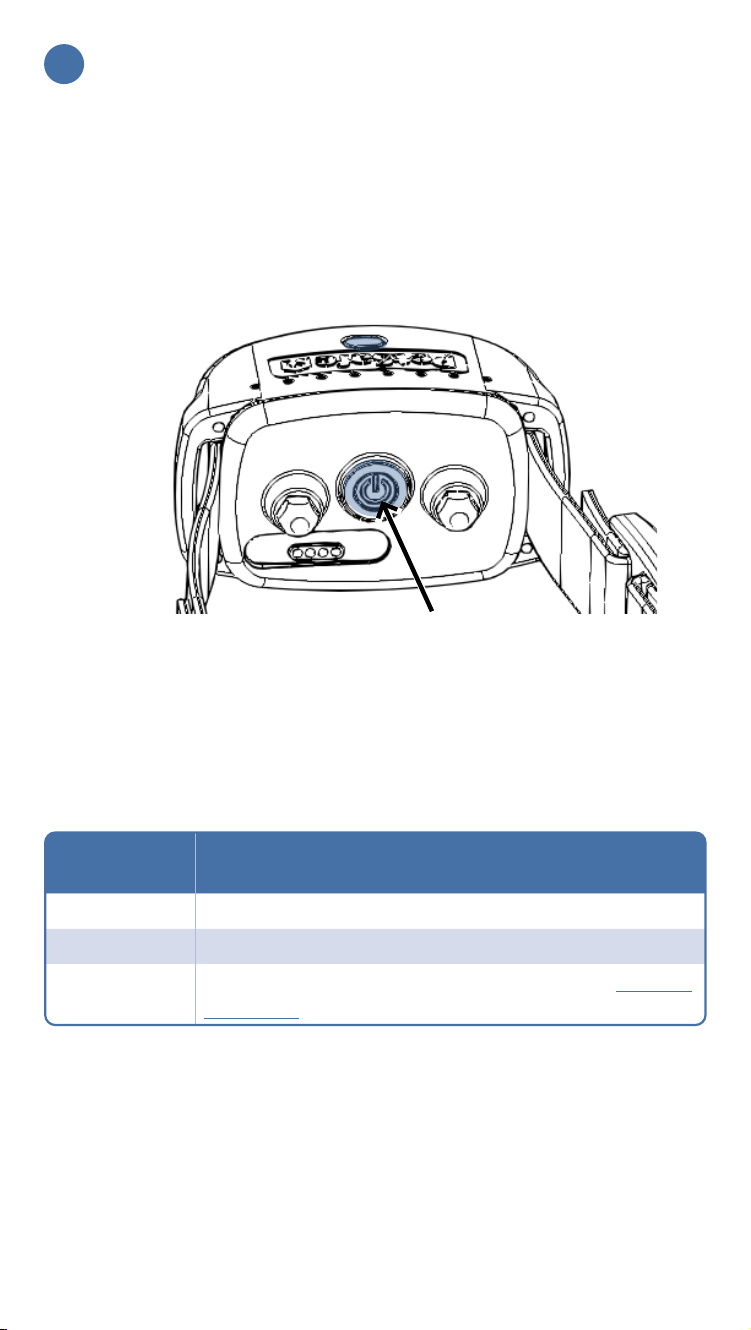
Turn the collar on
2
Turn the collar on by pressing the power button for
1second.
The collar will beep low to high and the status light will
glow for 5 seconds (green, yellow or red) to indicate
battery charge:
Status light
color Meaning
Green The battery level is sufficient (above 40%).
Yellow The battery is low (below40%); replace soon.
Red
The battery is critically low (below20%); charge
the collar.
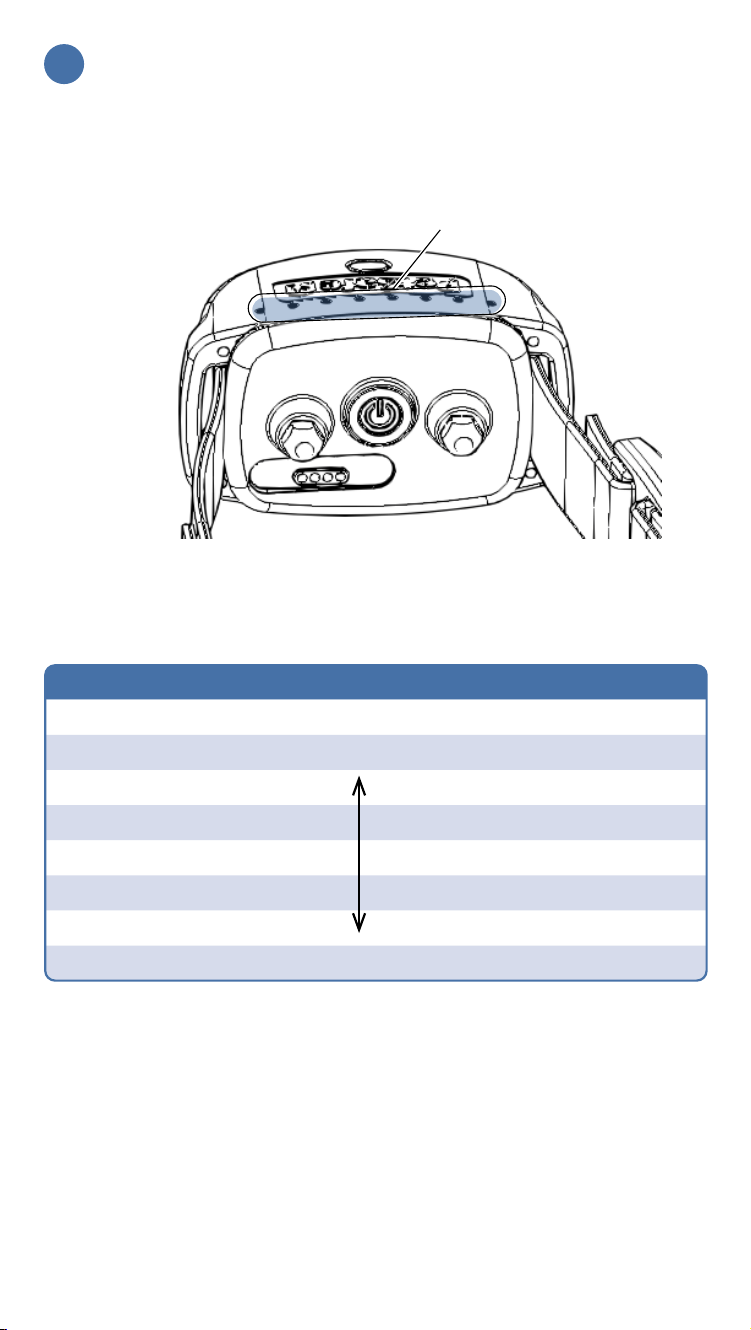
At the same time, the correction level lights across the top
of the collar will illuminate for 5 seconds to indicate the
current correction level.
Power button
7
Draft for testing - not final
Set the correction level
3
The number of correction level lights illuminated indicates
the current correction level:
Number of lights Correction level
1 Level 1: Tone/vibration only
2 Level 2: Low static/vibration correction
3 Level 3
4 Level 4
5 Level 5
6 Level 6
7 Level 7
8 Level 8: High static/vibration correction
To increase the correction level, press the power button
once to view the current correction level, then press it
again within 5 seconds. Each time you press the power
button within 5 seconds of the previous press, the
correction level increases by one. The levels increase up
through level 8 and then start over at level 1.
We recommend setting the correction to level 2 (low
static/vibration) or higher during setup. This will allow you
to use the test light tool when testing your boundary.
Correction level lights
8
Draft for testing - not final
Choose a location for the base unit
4
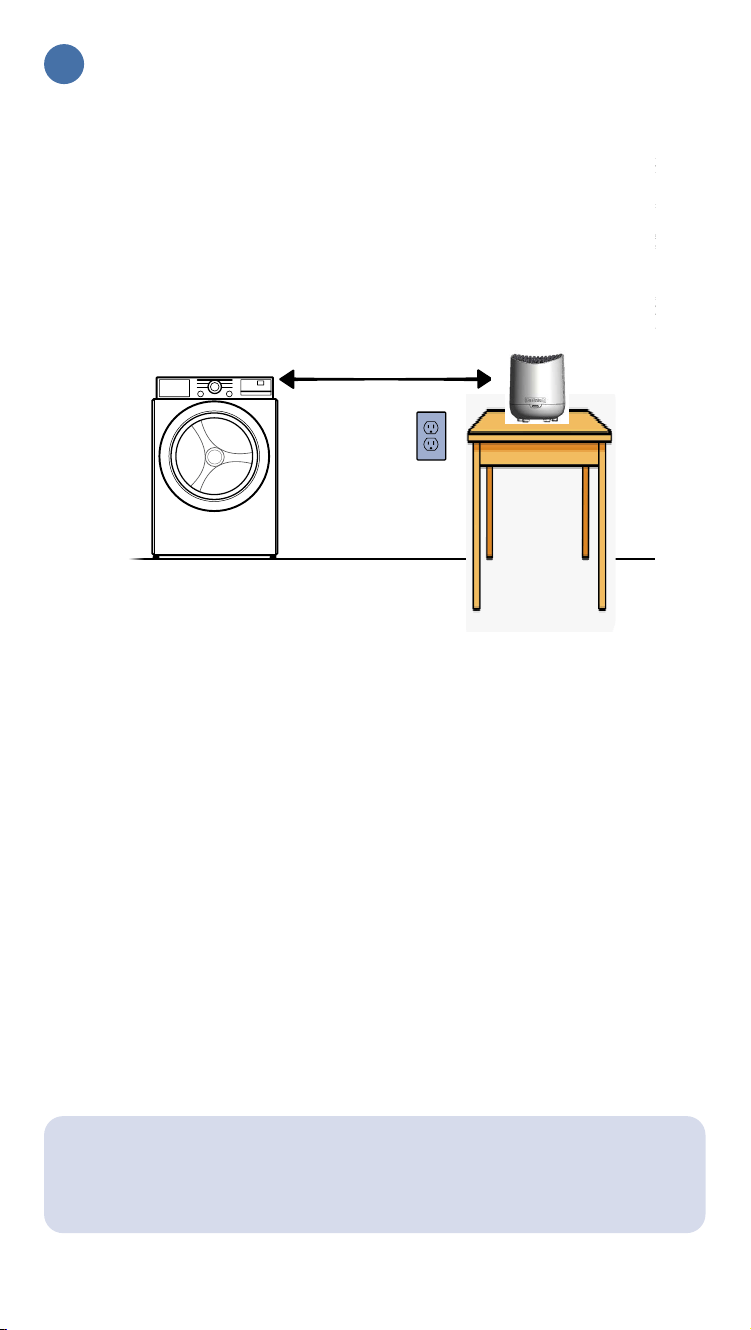
The base unit will be the center of the pet area.
Place the base unit:
• Near a power outlet
• On the ground level of your
home
• In a dry, well-ventilated area
• At least 2 feet above the floor
• On a non-metal table or other
hard surface
• At least 3 feet from any large
metal objects (washing machine,
water heater, etc.)
DO NOT place it:
• On a metal
surface
• In an area where
temperatures go
below 15°F or
above 104°F
Important: Placing the base unit in a metal building,
shed, or home with a metal roof may reduce its
maximum range.
3 feet
9
Draft for testing - not final
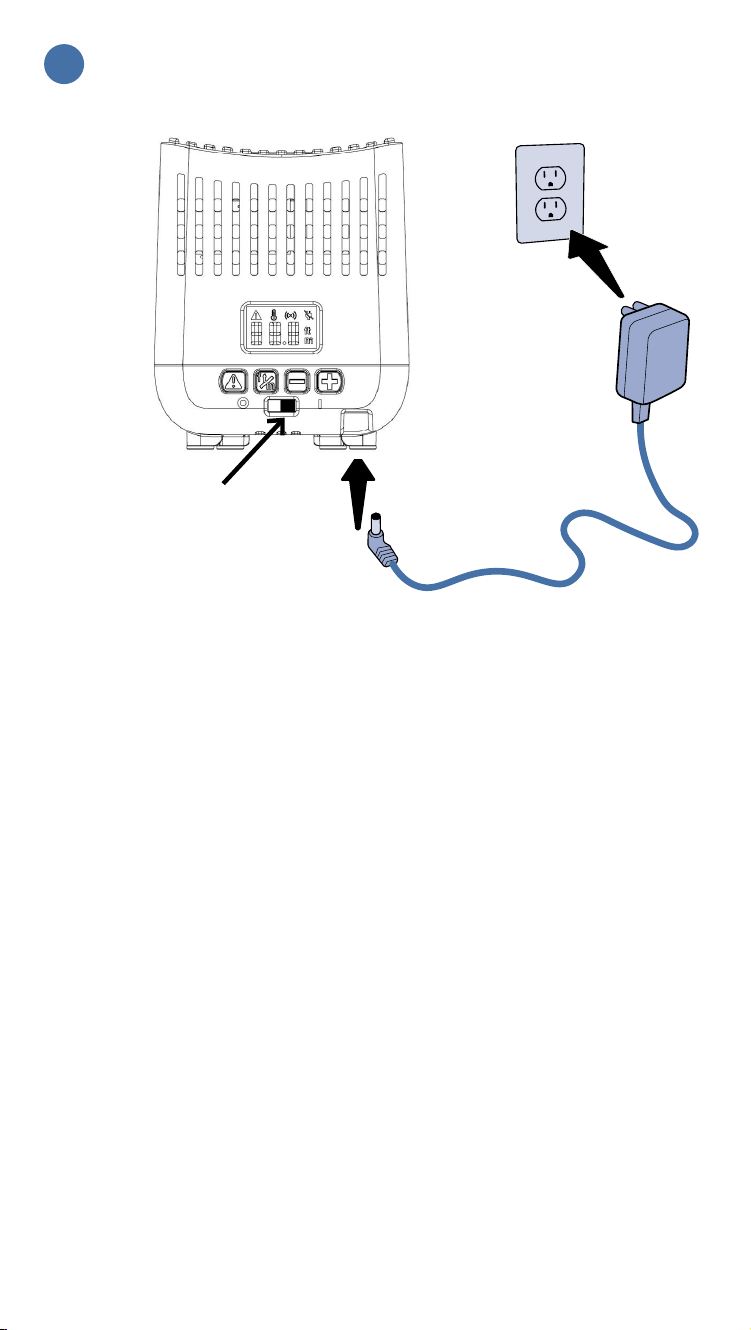
Turn the base unit on
5
Connect the power adaptor to the base unit and then plug
it into a wall outlet.
Slide the power switch to the on position. The light on the
front of the base unit will glow blue when the base unit is
powered on and functioning correctly.
1
2
3
Power switch
ONOFF
10
Draft for testing - not final
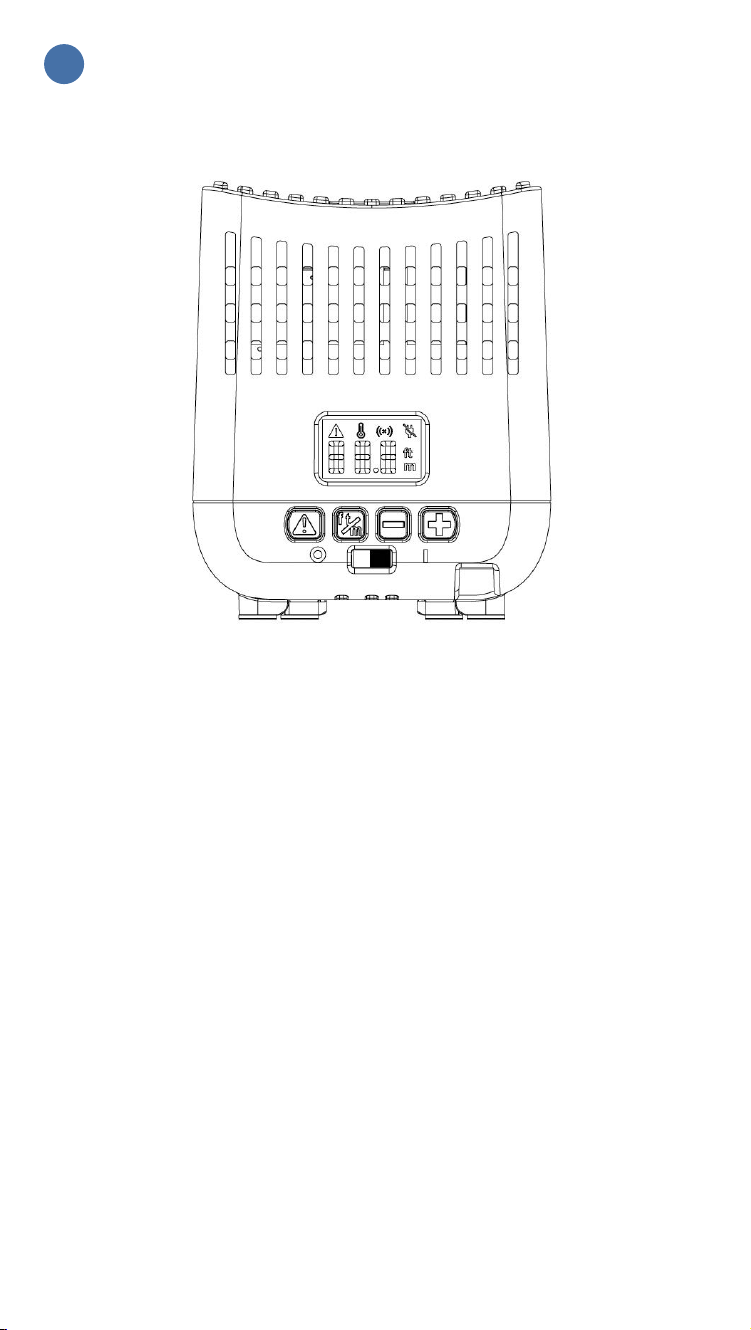
Adjust the pet area radius
6
Next you will adjust the base unit’s range so the pet area
lies within your desired boundaries and only covers areas
that are permitted. The LCD screen on the back of the
base unit displays how far the pet area radius extends in all
directions.
Use the + and - buttons to select the desired pet area
radius:
• The minimum radius is 17 feet.
• The maximum radius is 85 feet (this creates a pet area
of approximately 1/2 an acre, or 40% of an American
football field).
To determine the appropriate radius for your yard, estimate
the distance between the base unit and the nearest edge of
your planned boundary zone.
11
Draft for testing - not final
Test your boundary
7
After setting the radius, it’s important to walk your yard
and make sure the pet area lies within your property and
stops at least 10 feet from any danger zones like roadways.
The easiest way to do this is to use your collar and test
lighttool.
Make sure the base unit and collar are turned on, and that
the collar is set to correction level 2 or above (see Set the
correction level).
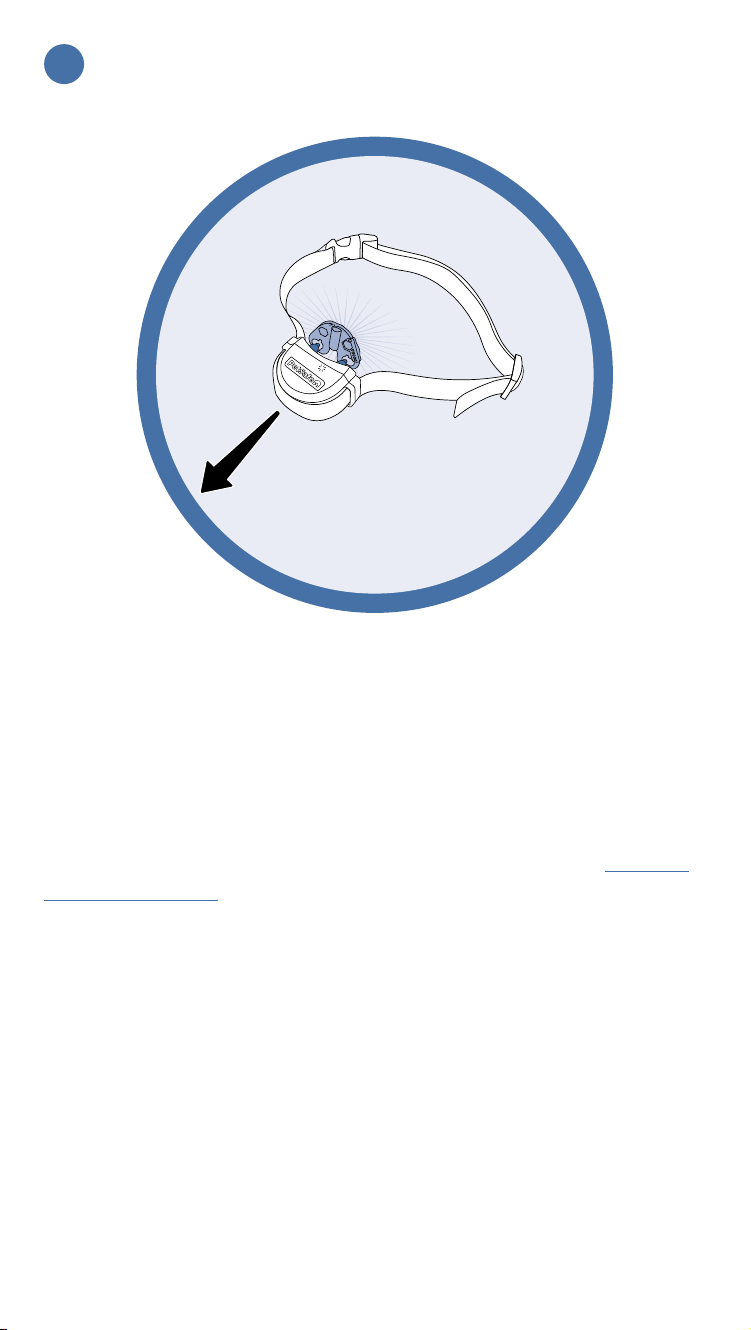
Hold the test light tool contacts to the collar contact
points. Walk toward a critical point in your yard, holding
the collar about waist high, until the collar tones and
vibrates and the test light tool flashes.
Repeat this process at every critical point, adjusting the
radius or moving your base unit as necessary.
B
O
U
N
D
A
R
Y
Pet area
12
Draft for testing - not final
Place boundary flags
8
Now that you’ve made the necessary adjustments to your
pet area, it’s time to place the boundary flags. These flags
will act as a visual aid for your dog during the training
phase.
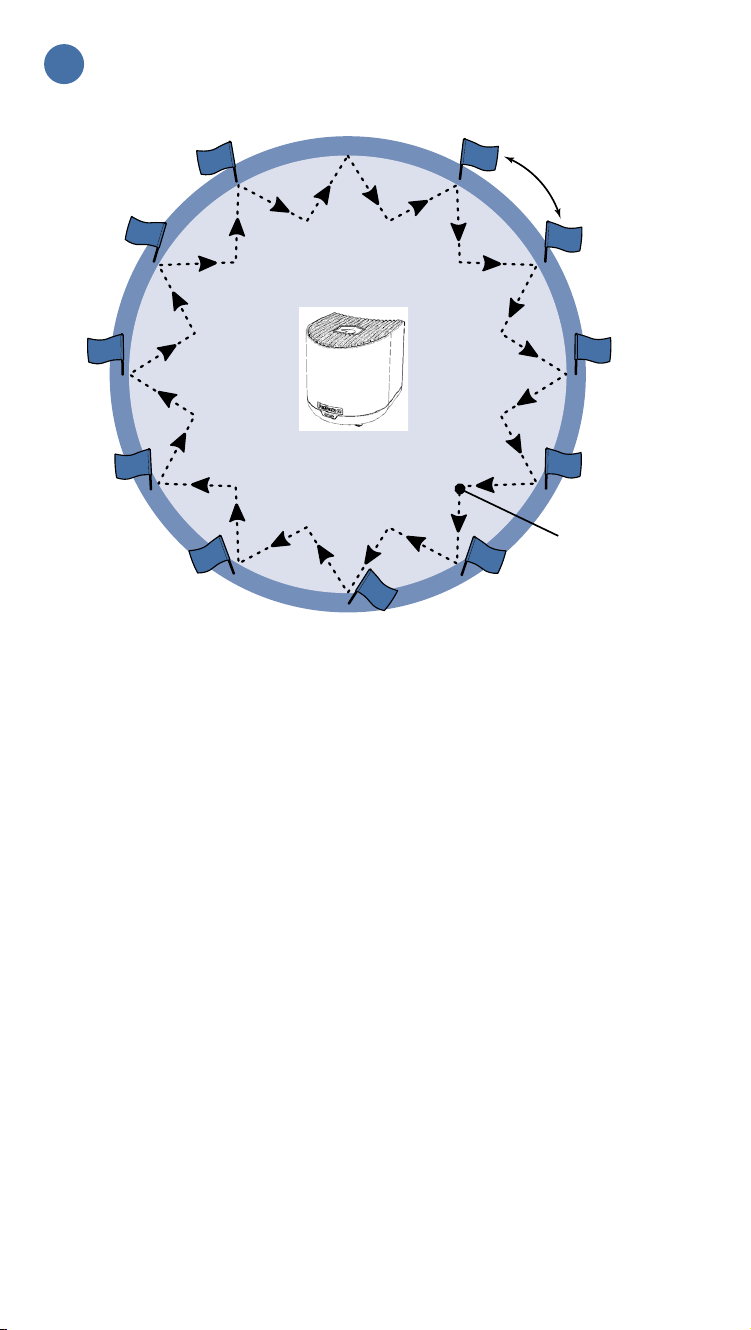
Hold the test light contacts to the collar contact points.
Walk toward the boundary zone while holding the
collar about waist high. As soon as the collar beeps and
vibrates, stop and place a boundary flag in the ground.
Walk back into the pet area until the collar stops beeping
(approximately 5 feet).
Repeat this process around the boundary zone, aiming for
1 flag every 10 feet. The more flags you place, the easier it
will be for your dog to see where the boundary zone is.
B
O
U
N
D
A
R
Y
Transmitter
10 ft
Flag spacing
5 ft
Return distance
Base unit
13
Draft for testing - not final
Fit the collar to your dog
9
Turn the collar off by pressing and holding the power
button for 3 seconds.
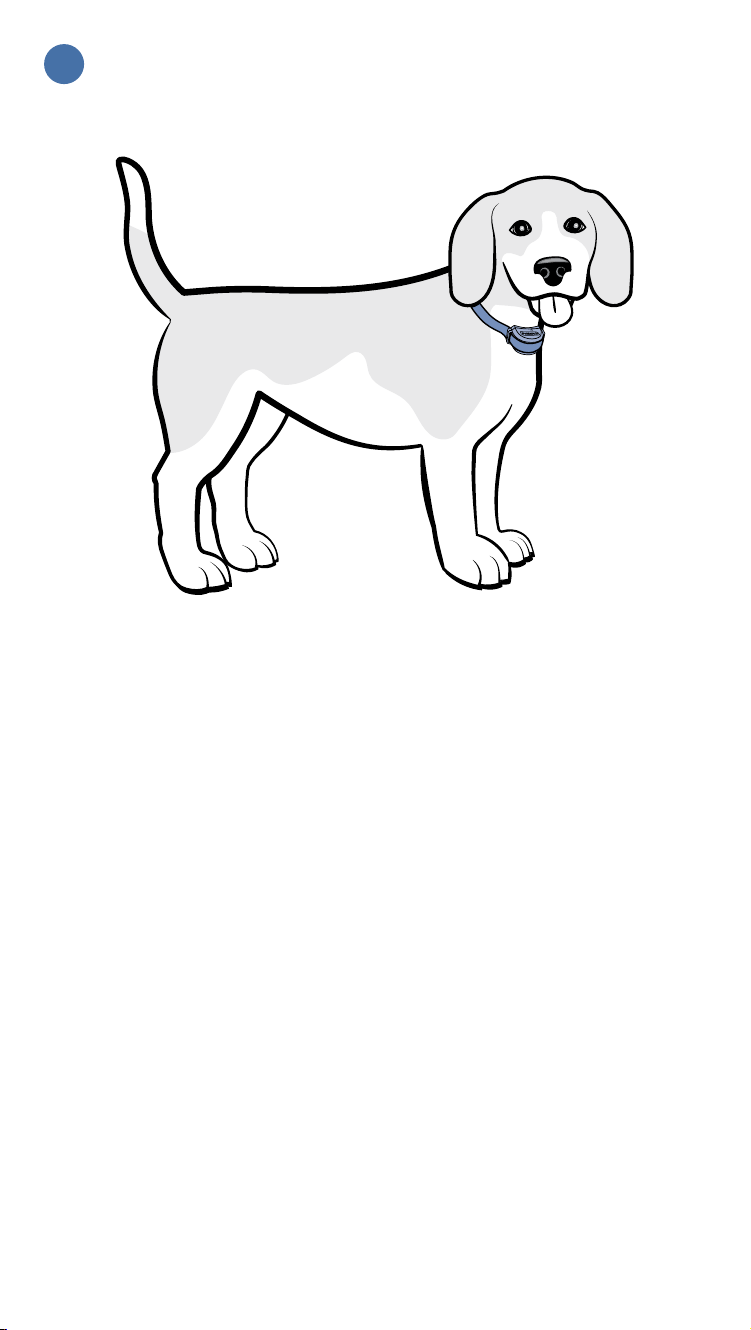
With your dog standing comfortably, place the collar
around their neck. The PetSafe
®
logo should be facing up,
and the contact points should be centered directly under
your dog’s chin, touching the skin. If your dog has long
or thick hair, it may be necessary to switch to the long
contact points provided or trim (not shave) the hair around
the contact points.
Important: Check the tightness of the collar by inserting
one finger between the end of a contact point and your
dog’s neck. The fit should be snug but not constricting.
Once you are satisfied with the fit of the collar, remove it
from your pet and trim it (making sure to allow room for
growth or a thicker winter coat). Seal the edge of the cut
collar by applying a flame along the frayed edge.
Important: Check the collar fit frequently. Take the collar
off when your dog is not using it. Remove the collar from
your dog when indoors to avoid activation of the collar.
14
Draft for testing - not final
Train your dog
10
Now that your wireless fence is up and running, it’s time to
train your dog. The first two weeks of training are the most
important. We have provided a digital training guide to
make the training process quick, easy and fun for you and
your pet. With a little time and a lot of praise, your pet will
learn to roam freely within the pet area (while avoiding the
boundary zone).
Whether your pet loves rolling on their back in the grass
or playing a game of fetch, the PetSafe
®
Wireless Dog
Fence Pro will give them the freedom to enjoy the great
outdoors.
15
Draft for testing - not final
Additional helpful information
Resolving alarms
Important: Before attempting to resolve the alarm, make
sure your pet is secure within your home and is not
wearing the collar.
If your base unit starts sounding an alarm, it means that
your boundary is no longer active, and your pet is no
longer being contained.
There are four reasons why your base unit may sound an
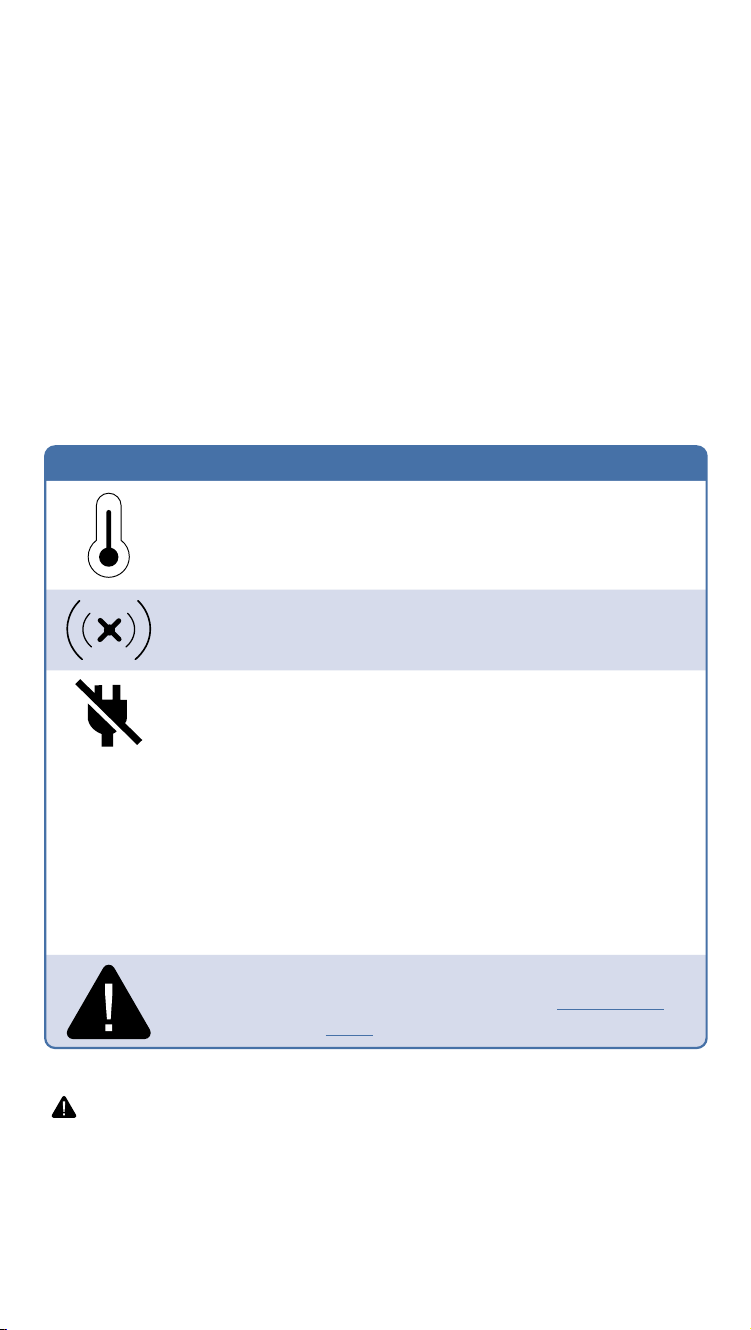
alarm, all of which are indicated by an icon on the base
unit’s LCD screen.
Icon Tone Meaning
Intermittent
triple tone
The base unit is too hot. Move it to
a well-ventilated area and let it cool
down.
Intermittent
double tone
The base unit is too close to a metal
object.
Intermittent
single tone
The base unit has lost power.
Make sure the power adaptor is
connected properly and that it is
plugged into a functioning power
source.
If the alarm is due to an ongoing
power outage, you can stop the
intermittent tone by turning off the
base unit — but remember to turn it
back on once power is restored.
Continuous
tone
The base unit is experiencing a
critical failure; contact Customer
Care.
Once you have resolved any alarms, press the alarm button
( ) on the back of the transmitter for 1 second to reset it.

16
Draft for testing - not final
Turning the collar on
To turn the collar on, press the power button for 1 second.
The collar will beep low to high and the status light will
glow for 5 seconds (green, yellow or red) to indicate
battery charge.
Turning the collar off
To turn the collar off, press the power button for 3
seconds. The collar will beep high to low and the status
light will flash red and then go out.
Understanding collar alerts
If your pet approaches or passes the boundary, the collar
will light and tone as follows:
Status light Audible tone Meaning
Green, fast pulsing
(3 flashes per
second)
Warning tone Your pet is approaching
the boundary zone and
is receiving a warning
tone.
Red, fast pulsing (3
flashes per second)
Tone for the
duration of
static/vibration
correction
Your pet has exited the
pet area and is receiving
a static/vibration
correction (up to
15-second duration).
Green, continuous
(10 seconds)
No tone Safety time-out has
been activated and the
collar is locked for 10
seconds.


NOTE: This equipment has been tested and found to comply with the limits for
a Class B digital device, pursuant to part 15 of the FCC Rules. These limits are
designed to provide reasonable protection against harmful interference in a
residential installation. This equipment generates, uses and can radiate radio
frequency energy and, if not installed and used in accordance with the
instructions, may cause harmful interference to radio communications.
However, there is no guarantee that interference will not occur in a particular
installation. If this equipment does cause harmful interference to radio or
television reception, which can be determined by turning the equipment off and
on, the user is encouraged to try to correct the interference by one or more of
the following measures:
- Reorient or relocate the receiving antenna.
- Increase the separation between the equipment and receiver.
-Connect the equipment into an outlet on a circuit different from that to which
the receiver is connected.
-Consult the dealer or an experienced radio/TV technician for help.
Changes or modifications not expressly approved by the party responsible for
compliance could void the user's authority to operate the equipment.
This device complies with Part 15 of the FCC Rules. Operation is subject to the
following two conditions:
(1) this device may not cause harmful interference, and (2) this device must
accept any interference received, including interference that may cause
undesired operation.
RF Exposure Warning Statements:
This equipment complies with FCC radiation exposure limits set forth for an
uncontrolled environment. This equipment shall be installed and operated with
minimum distance 20cm between the radiator & body.