
Wall Rangehood, Box Chimney
HC60BMB2, HC90BMB2
Built-in Integrated Rangehood
HPH60IMB2, HPH90IMB2
Built-in Integrated
Rangehood and
Wall Rangehood
USER GUIDE NZ AU


3
CONTENTS
Safety and Warnings................................................................................5
First Use .................................................................................................8
Standard Use ..........................................................................................9
WI-FI/APP Connection........................................................................... 12
Hob-to-Hood ....................................................................................... 14
Auto..................................................................................................... 16
Care and Cleaning ................................................................................. 17
Aluminium Filters .................................................................................. 18
Carbon Filters ....................................................................................... 19
Trouble Shooting................................................................................... 20
Parts and Acessories ............................................................................. 22
Manufacturer's Warranty ....................................................................... 23
Customer Service ................................................................................. 25

4

5
SAFETY AND WARNINGS
WARNING!
9 kg
(HC60B)
11 kg
(HC90B)
9 kg
(HPH60I)
12 kg
(HPH90I)
Weight Hazard
The appliance is heavy. Please ensure adequate care
is taken when installing the appliance to prevent
personal injury. Wall rangehoods must be installed
onto a solid wall, stud, beam or truss. Integrated
rangehoods must be installed onto secure cabinetry.
Weight of the products are:
• HC60BMB2 is 9kg
• HC90BMB2 is 11kg
• HPH60IMB2 is 9kg
• HPH90IMB2 is 12kg
WARNING!
Electric Shock Hazard
Always disconnect the appliance from the mains
power supply before carrying out any maintenance
or repairs. Alterations to the domestic wiring system
must be made by a qualified electrician.
Failure to follow this advice may result in electric
shock or death.
IMPORTANT SAFETY INFORMATION
WARNING! When using this appliance always exercise basic safety precautions including the following:
z
Please read the entire set of instructions before installing or using this appliance.
z
Please make this information available to the person installing the appliance - doing so could reduce
your installation costs.
z
Always switch the power off prior to installation, servicing or cleaning of the rangehood.
z
This appliance must be installed and connected to the mains power supply only by a suitably qualified
person according to these installation instructions and in compliance with any applicable local building
and electricity regulations. Failure to install the appliance correctly could invalidate any warranty or
liability claims.
z
To comply with electrical safety regulations, the rangehood must be plugged into a socket near the
appliance. The socket must be accessible, or have an accessible isolating switch, to enable the end
user to isolate the rangehood from the power for the purpose of internal cleaning or maintenance.
z
A power outlet should be within the range that does not affect installation and use of the motor
assembly and can either be on the wall, behind the chimney or in the ceiling.

6
z
If the supply cord of this equipment is damaged, it must only be replaced by the manufacturer, its
service agent or similarly qualified person in order to avoid a hazard.
z
Ducting accessories are not supplied. All ducting must comply with local requirements and
building codes.
z
Attention should be given to ensure that any applicable regulations concerning the discharge of
exhaust air are fulfilled.
z
Before connecting any pipes, consult municipal ordinances to ensure that any applicable regulations
concerning the discharge of exhaust air are adhered to and request permission from the person in
charge of the building.
z
Exhaust air must not be discharged into an existing flue that is used for exhausting fumes from
appliances burning gas or other fuels. Range hoods and other cooking fume extractors may adversely
affect the safe operation of appliances burning gas or other fuels (including those in other rooms)
due to back flow of combustion gases. These gases can potentially result in carbon monoxide
poisoning. After installation of a range hood or other cooking fume extractor, the operation of flued
gas appliances should be tested by a competent person to ensure that back flow of combustion gases
does not occur.
z
The minimum distance between the supporting surface for cooking vessels on thecooktop and the
lowest part of the rangehood shall be 600 mm.
z
Painted surfaces are very easily damaged during installation if abraded or knocked by tools. It
is recommended to protect the top of the rangehood with cardboard or polystyrene during the
installation to minimise the risk of damage occurring.
z
To reduce the risk of damage occurring to the cooktop, it is recommended that the surface of the
cooktop is protected with cardboard or a similar object during installation of the rangehood.
z
This appliance is not intended for use by persons (including children) with reduced physical, sensory
or mental capabilities, or lack of experience and knowledge, unless they have been given supervision
or instruction concerning the use of the appliance by a person responsible for their safety.
z
Children should be supervised to ensure they do not play with the appliance. Cleaning and user
maintenance shall not be made by children without supervision.
z
You must read the details concerning the method and frequency of cleaning.
z
There is a fire risk if cleaning is not carried out in accordance with the instructions.
z
Never leave frying food unattended since grease can overheat and catch fire. The risk of fire is even
greater in the case of used oil.
z
Do not flambe under the rangehood.
z
Never use the rangehood without the filters in place.
z
During an electrostatic discharge (ESD) it is possible that the device will stop working. By switching
the device off and on the device will again work as intended.
z
CAUTION: accessible parts may become hot when used with cooking appliances.
z
Remove all packaging and protective wrappings, including on the grease filters, before use.
IMPORTANT!
SAVE THESE INSTRUCTIONS
The models shown in this user guide may not be available in all markets and are subject to
change at any time.
SAFETY AND WARNINGS

7
Installation with Induction Cooktop
Induction cooktops use energy-efficient technology that only heats the contents of a cooking pot, not the
surrounding air. As a result, there is more likelihood of condensation on rangehood filters, splashbacks and
surrounding cabinetry than when you use traditional electric or gas cooktops.
Other factors that influence condensation are room temperature, humidity, natural ventilation of the room,
size of the cookware and how the induction cooktop is being used. For example, rapid boiling increases
the likelihood of condensation. It is important to understand that neither the rangehood nor the induction
cooktop are faulty.
Installation with Gas Cooktop
Rangehood surfaces may become hot if using a powerful gas cooktop or multiple gas burners operating
at the same time. This effect can be reduced by using the maximum speed setting to enable hot air to be
extracted quickly.
Optimising performance
z
Switch the rangehood on 5 minutes before cooking and let it run for at least 5 minutes after cooking.
This will establish air ow up through the rangehood, removes hot air from your kitchen and keeps the
rangehood surface cool.
z
Reduce fan speed for normal use and increase it for high heat, strong odours or fumes.
z
When boiling, use the rangehood on a lower speed setting and the cooktop on a lower heat setting.
z
In Hob-to-Hood Auto mode the rangehood automatically adjusts fan speed accordingly to cooktop
settings. When the cooktop is powered on the rangehood will automatically turn on without a cooktop
power level selected. The rangehood will turn to Extraction+ for 5mins when the cooktop is turned o.
COOKING CONSIDERATIONS
8
FIRST USE
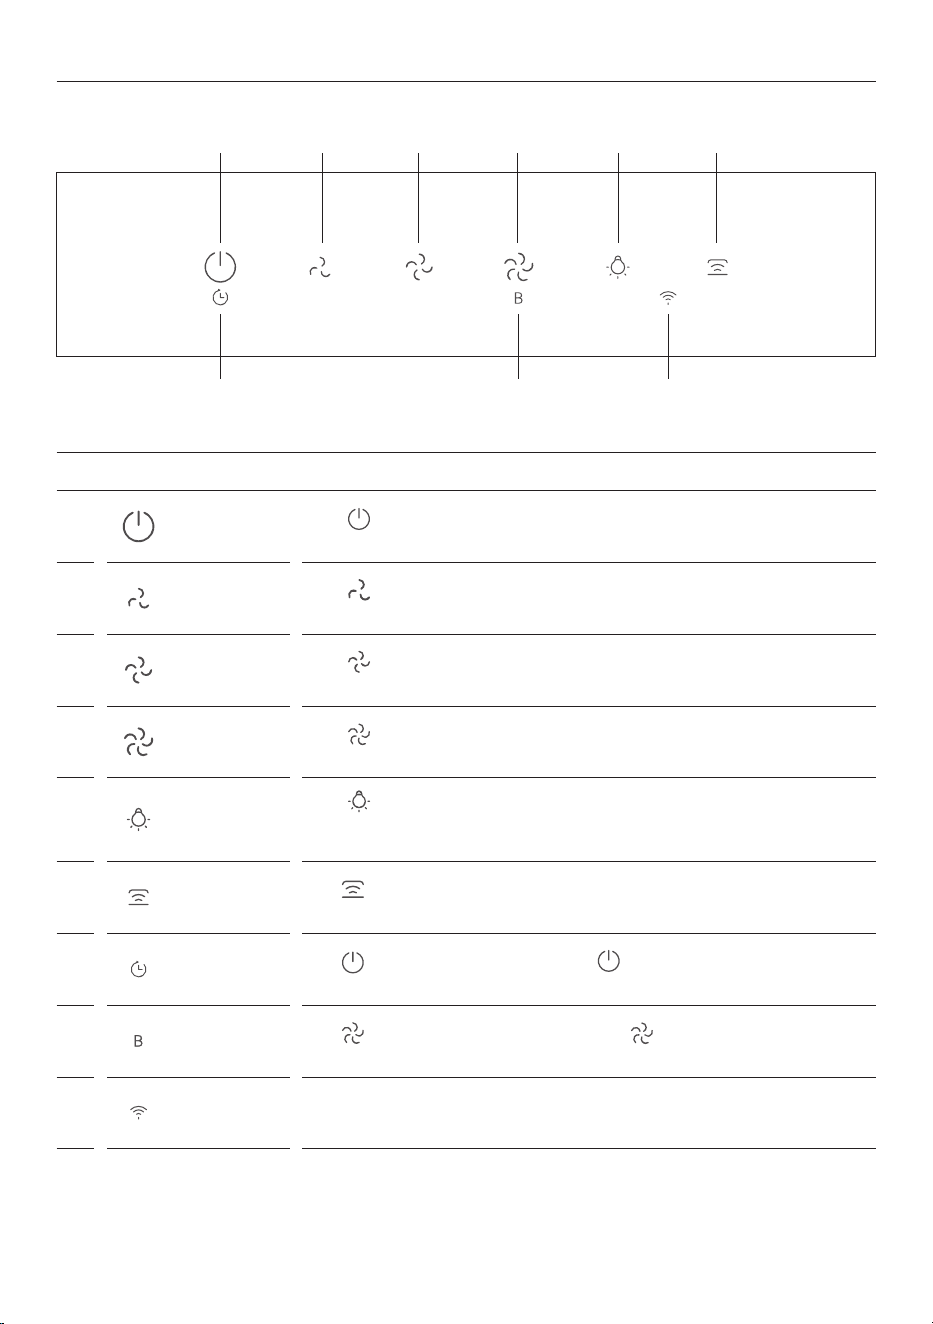
CONTROL PANEL
1
Power
Press
to turn the rangehood on/o. The lights and LOW FAN SPEED turns
on automatically.
2
Low fan speed
Press
to change to LOW FAN SPEED, it illuminates to indicate fan speed has
been selected.
3
Mid fan speed
Press
to change to MID FAN SPEED, it illuminates to indicate fan speed
has been selected.
4
High fan speed
Press
to change to HIGH FAN SPEED, it illuminates to indicate fan speed
has been selected.
5
Light
Press
to turn lights on/o. Lights automatically turn on when the POWER
is pressed or when the cooktop is turned on while connected to Hob-to-
Hood. Lights can be turned on/o independently of rangehood power.
6
Hob-to-Hood
Hold
for 3 seconds until it beeps and ashes. Repeat on the cooktop to
pair products. Refer to section 'HOB-TO-HOOD CONNECTION'.
7
Extraction+
Hold
for 3 seconds until the POWER ashes, ashing indicates the
EXTRACTION+ has started. It will turn o automatically after 5minutes.
8
Boost
Hold
for 2 seconds until HIGH FAN SPEED begins to ash indicating
that boost is ON. Reverts to HIGH FAN SPEED after 5 minutes.
9
Wi-Fi/App
connection
Refer to 'WI-FI/APP CONNECTION' section.
1 2 3 4 5 6
7
9
8
9
Turning on the Rangehood
Press POWER to turn rangehood on.
The lights and LOW FAN SPEED will
turn on automatically.
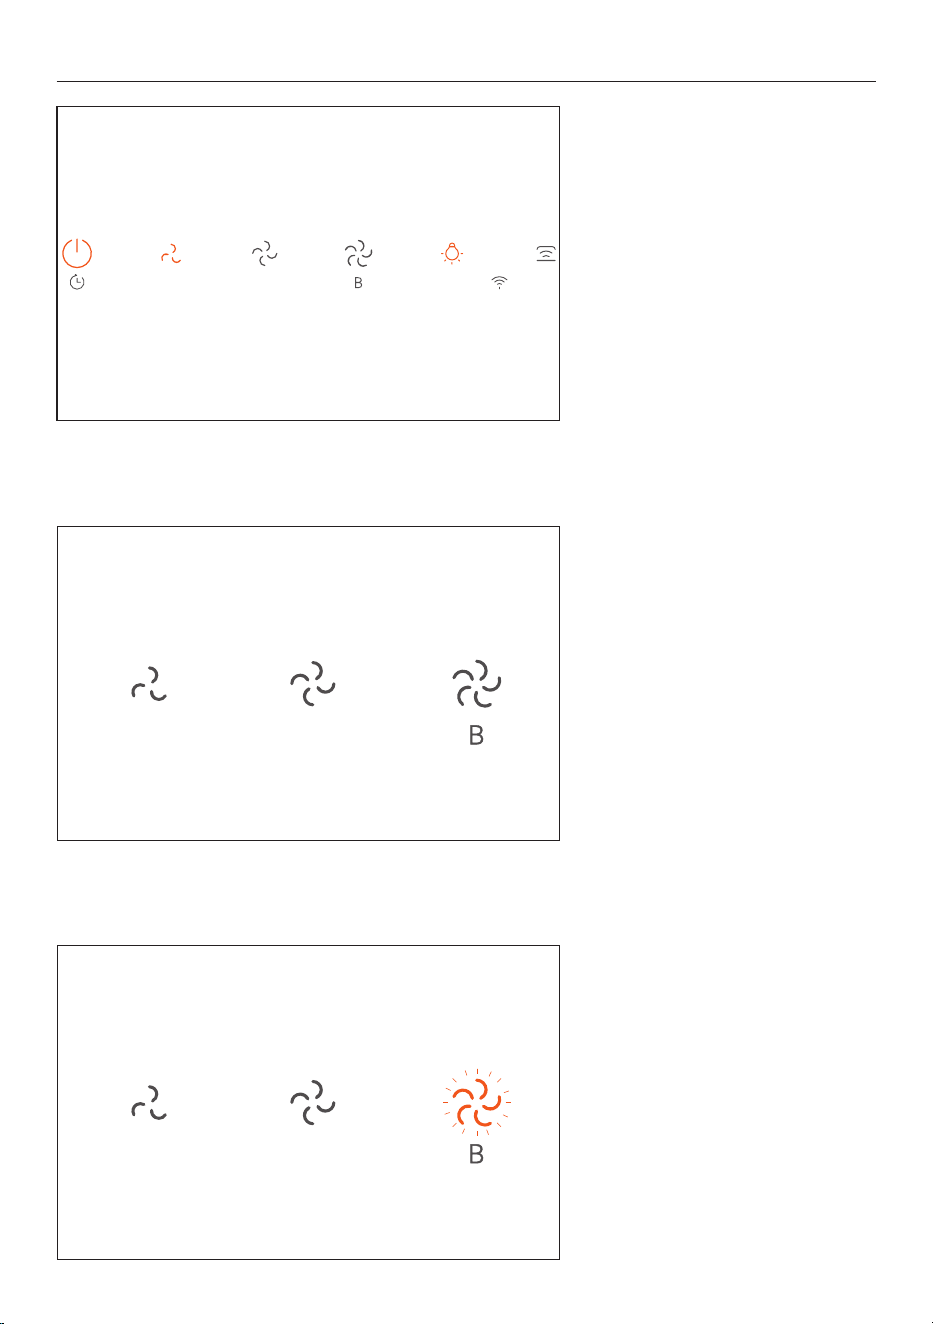
STANDARD USE
Boost
For BOOST, hold down HIGH FAN
SPEED
until the HIGH FAN SPEED
begins to flash indicating that boost
is on.
Reverts to
HIGH FAN SPEED after
5 minutes.
Fan Speed
There are 3 fan speed settings,
LOW FAN SPEED, MID FAN SPEED and
HIGH FAN SPEED
10
Lights
For lights press the LIGHT button
to turn on/off. Lights can be
turned on/off independently of
rangehood power.
Hob-to-Hood
Hob-to-Hood connects the
rangehood to the cooktop. In auto
mode the rangehood fan speed will
adjust & change during a cook, based
on the highest cookzone power level
being used.
Refer to section
'HOOD-TO-HOB
CONNECTION'
for more information.
Hob-to-Hood can be used
without Wi-Fi.
Wi-Fi/App connection
Connect to the WI-FI/APP to be
able to control remotely. Refer
to 'WI-FI/APP CONNECTION' for
more information.
STANDARD USE
11
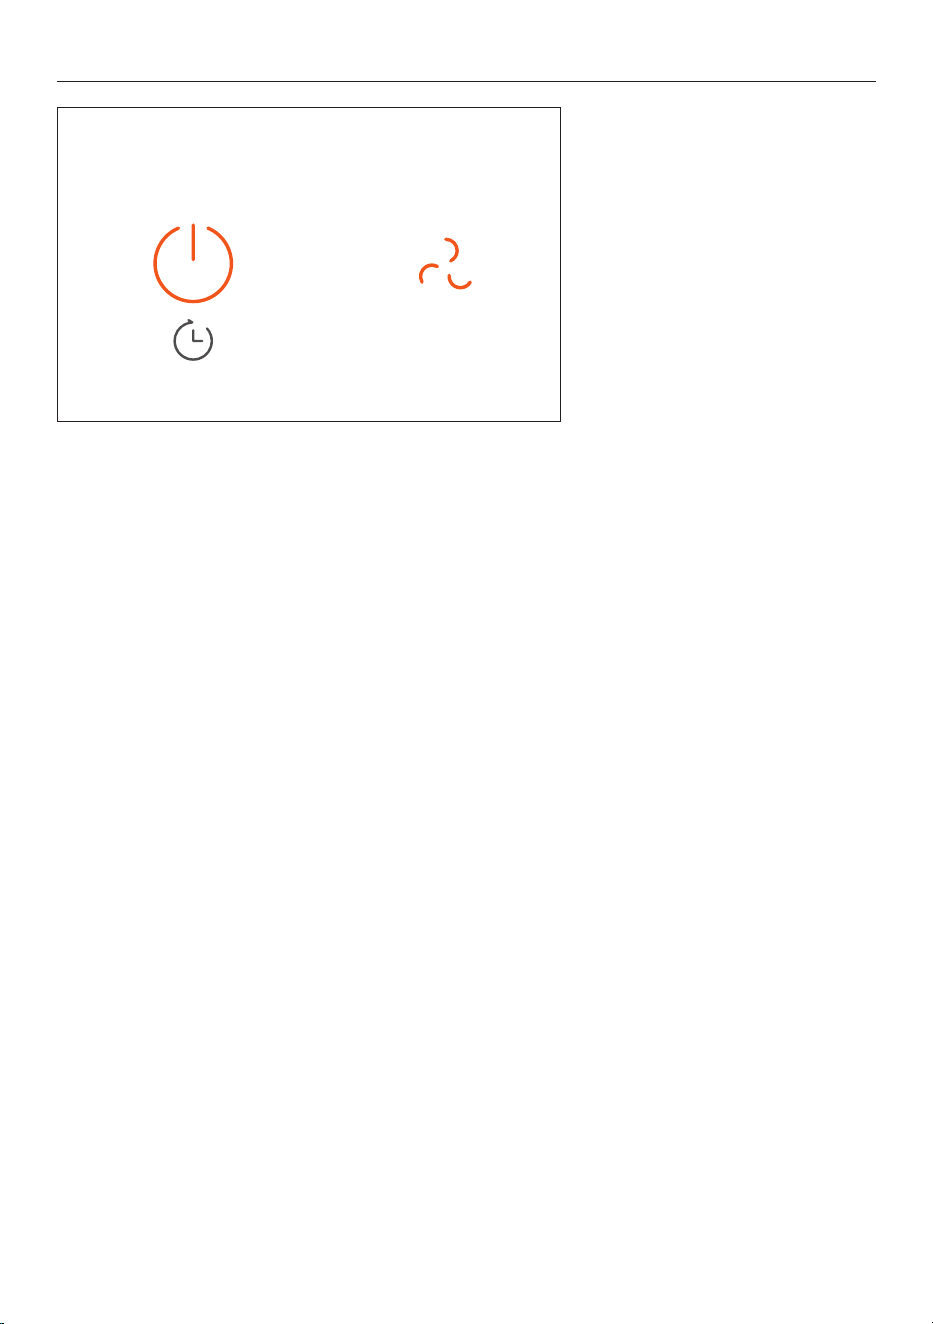
Extraction+
Extraction+ filters the air and helps
remove cooking smells once a cook
is finished. It will continue to extract
on the last fan speed selected and
will automatically turn off after
5 minutes.
Hold
POWER button for 3 seconds
until the Power icon flashes, flashing
indicates the Extraction+ has
started. It will turn off automatically
after after 5 minutes, or you can
press the Power button to turn off
Rangehood and Extraction+.
STANDARD USE
12
WI-FI/APP CONNECTION
Your rangehood can be connected to your home wireless network and operated remotely using the
Smart HQ app. It is important that these steps are done before pairing HOB-TO-HOOD.
Getting started
z
Ensure your home Wi-Fi network is turned on.
z
You will be given step by step guidance on your mobile device.
z
It may take up to 10 minutes to connect your appliance.
z
For further guidance and troubleshooting, please refer to the app.
On your mobile device:
1. Download the SmartHQ app.
2. Register and create an account.
3. Add your appliance and set up the Wi-Fi connection.
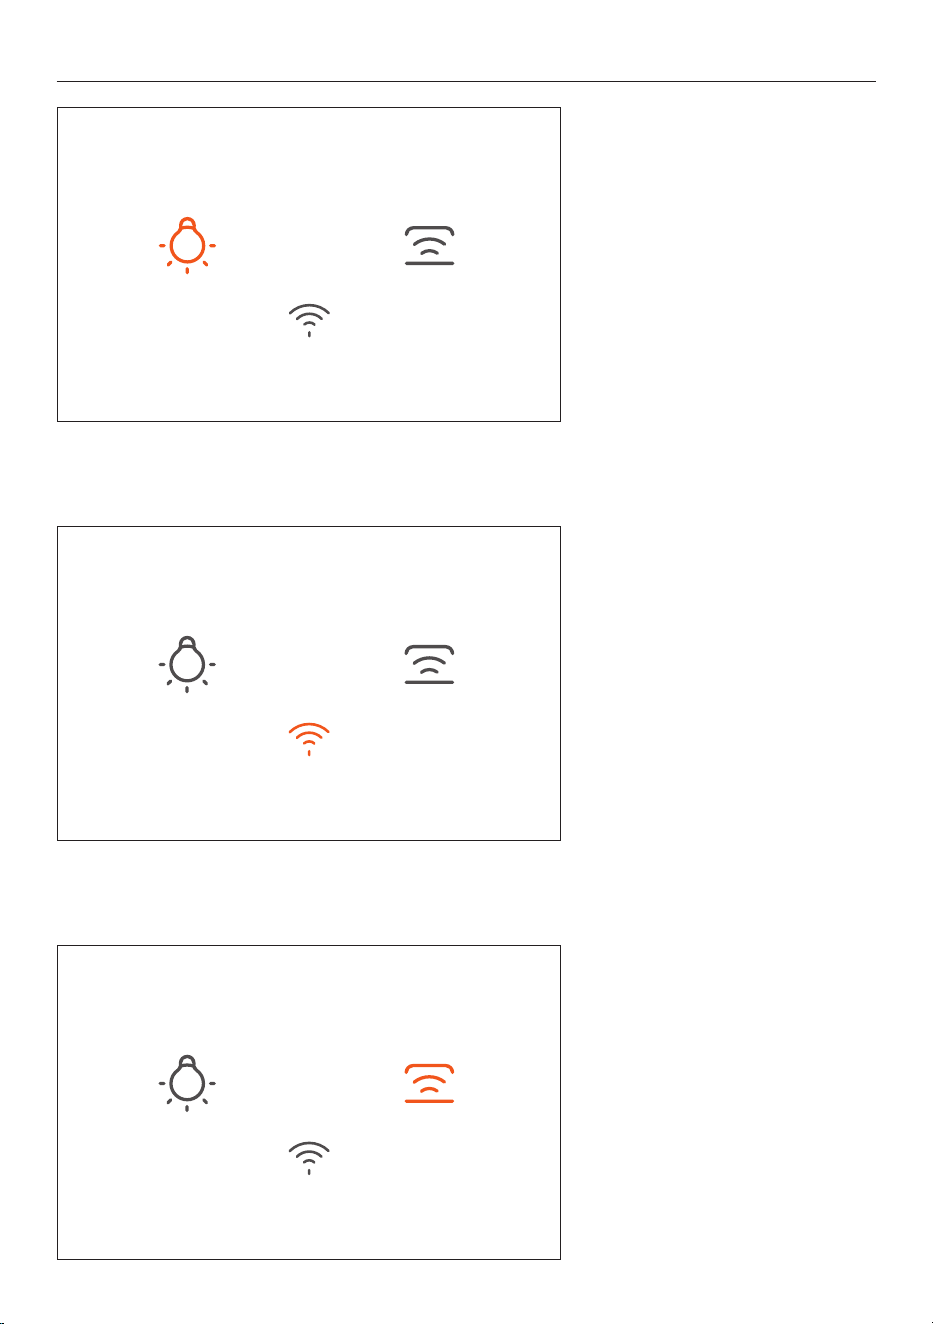
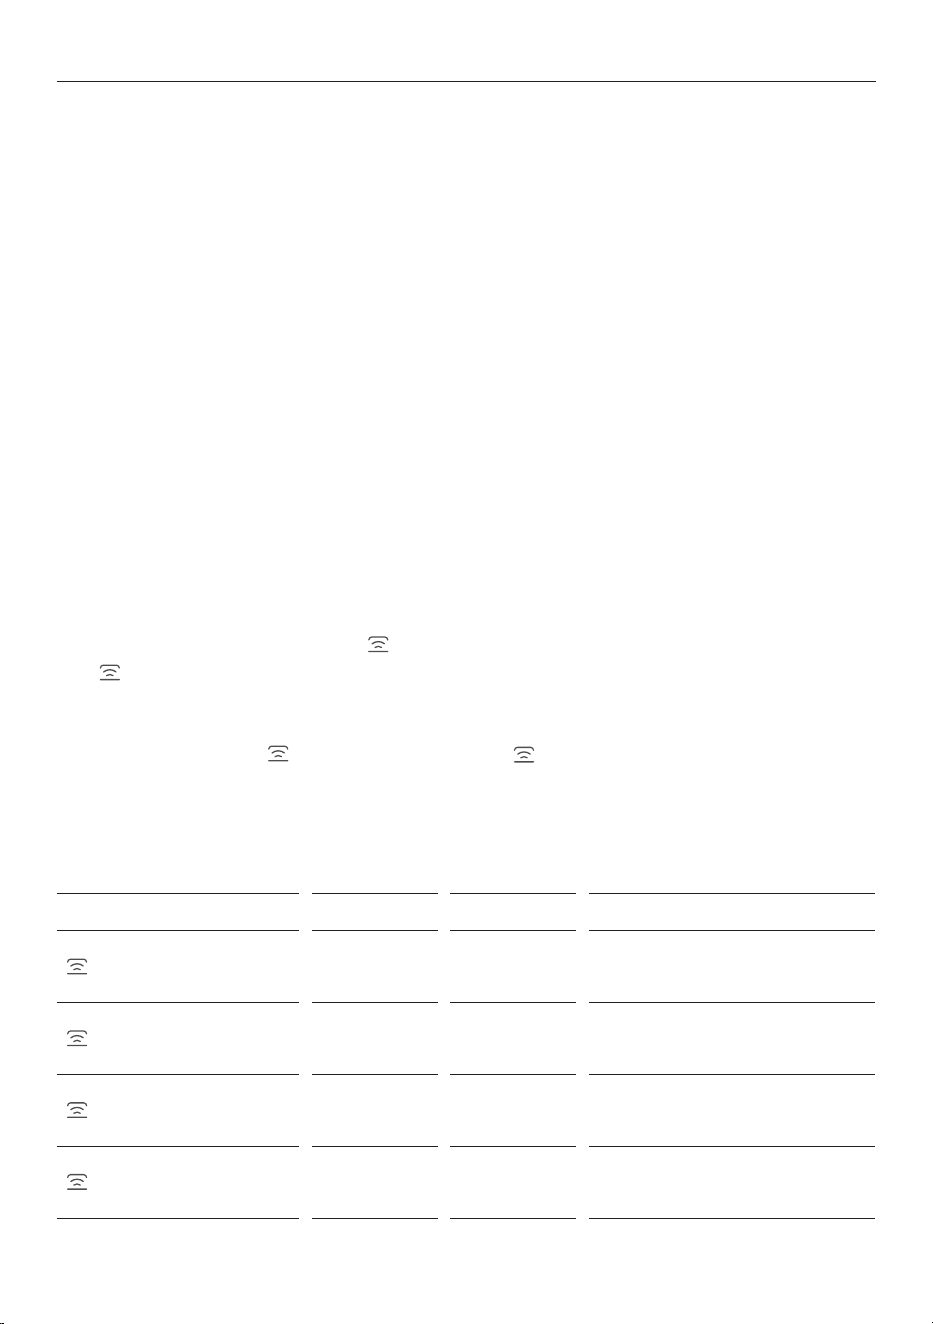
Connecting to your home Wi-Fi
1. Press and hold the LIGHT and HOB-
TO-HOOD
button simultaneously
until the Wi-Fi icon starts to flash.
2. The Wi-Fi icon light flashing
means the device is attempting to
connect to WI-FI/APP. Follow the
instructions in the app to complete
the connection. Once connected the
Wi-Fi icon will stay illuminated.
The
WI-FI/APP icon light will turn off
after 15 minutes if connection is
not completed.
Rangehood - wi- ashing
13
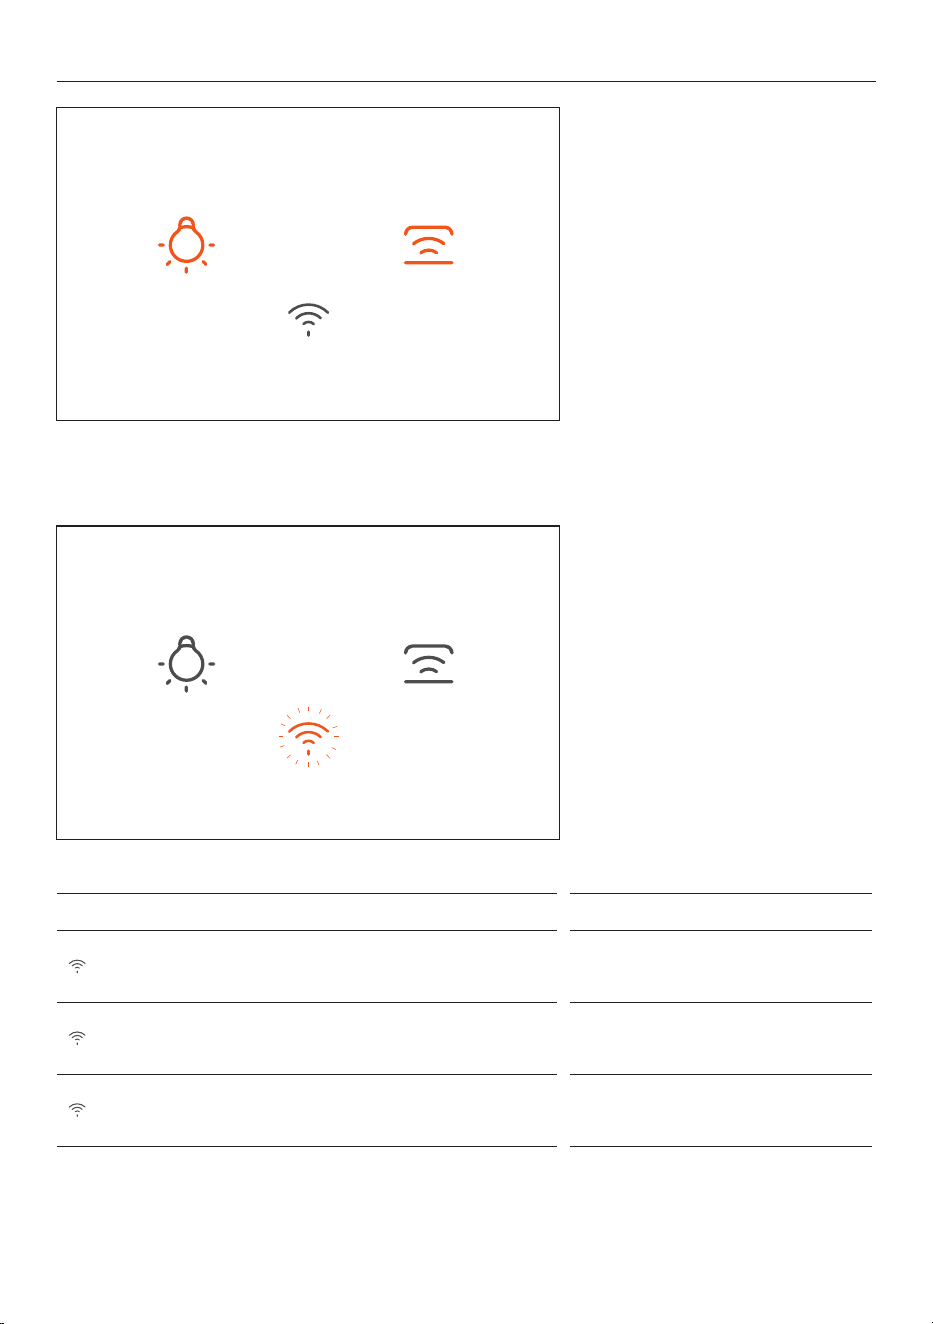
Disconnecting from your
home Wi-Fi
1. Hold for 3 seconds the LIGHT
button and HOB-TO-HOOD button
together. The flashing light indicates
paring mode.
WI-FI/APP CONNECTION
Wi-Fi LED Indicator What is means
Fast ash .25s on/o Ready to connect
Slow ash .5s on/o Appliance is re-connecting
Constant illumination Wi-Fi is connected
2. The Wi-Fi/App icon light will
continue flashing, after 15 minutes
the connection will then disconnect,
and the Wi-Fi/App light will turn off.
Rangehood - wi- ashing
14
HOB-TO-HOOD
This feature enables a compatible Haier rangehood to be paired with your Haier cooktop. Once paired the
extraction speed automatically adjusts based on the cooktop power level.
Ensure you are connected to Hob-to-Hood to use Auto and Manual modes (the product can still be used
without Hob-to-Hood connection, refer to
'STANDARD USE' for more information.
RANGEHOOD/POWER ON:
When the cooktop is powered on, the rangehood will automatically turn on starting at LOW FAN SPEED.
EXTRACTION+
When the cookop is turned off, the rangehood will switch to EXTRACTION+ and will continue operating for 5
minutes on the last used fan speed. EXTRACTION+ can be turned on manually by holding the power button
for 3 secs.
AUTO
While cooking, the rangehood speed will automatically adjust based on cooktop power level.
Pre-extraction and
EXTRACTION+ improve the extraction performance.
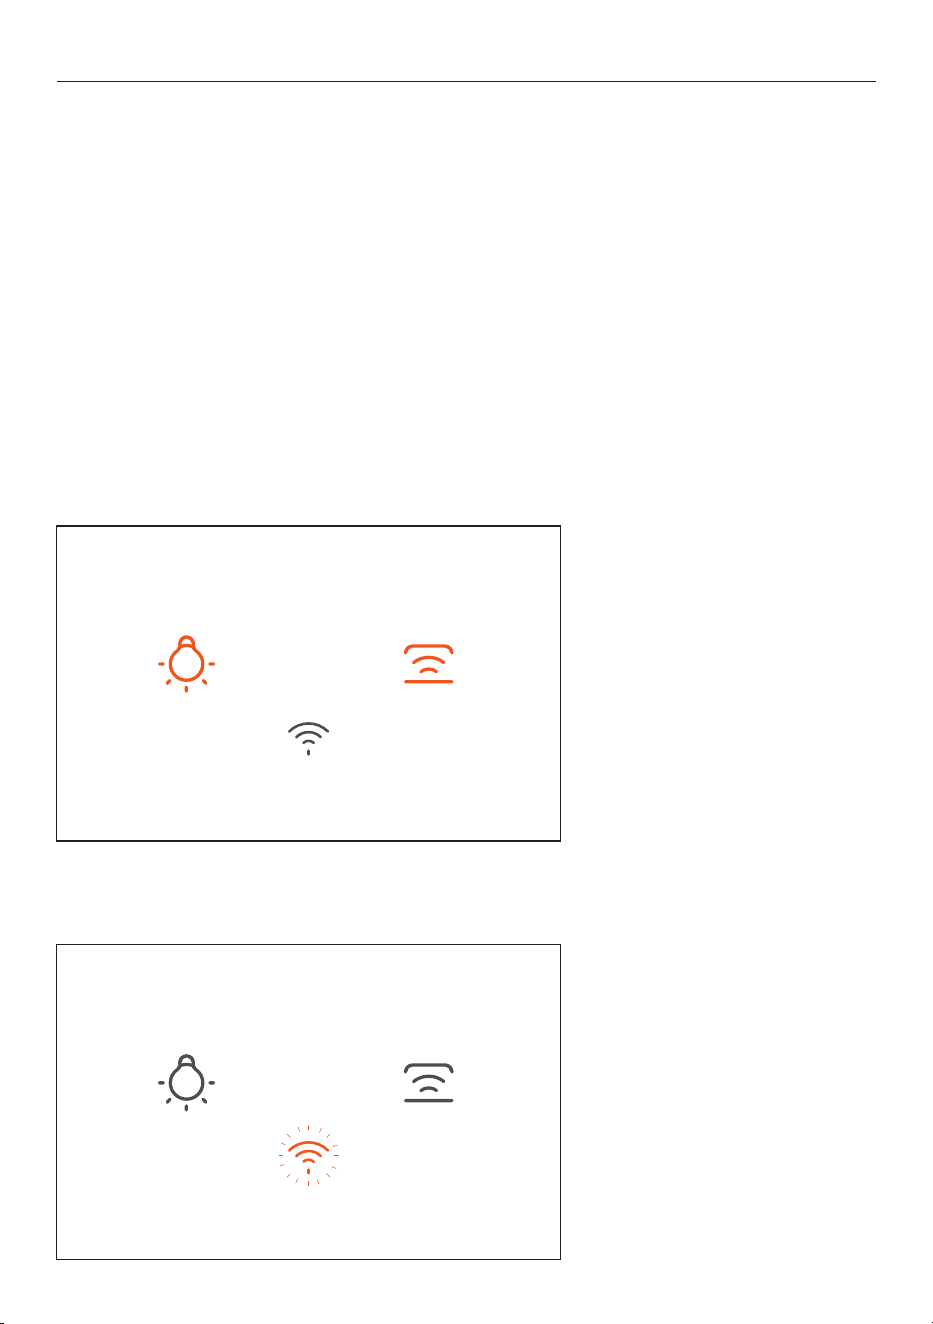
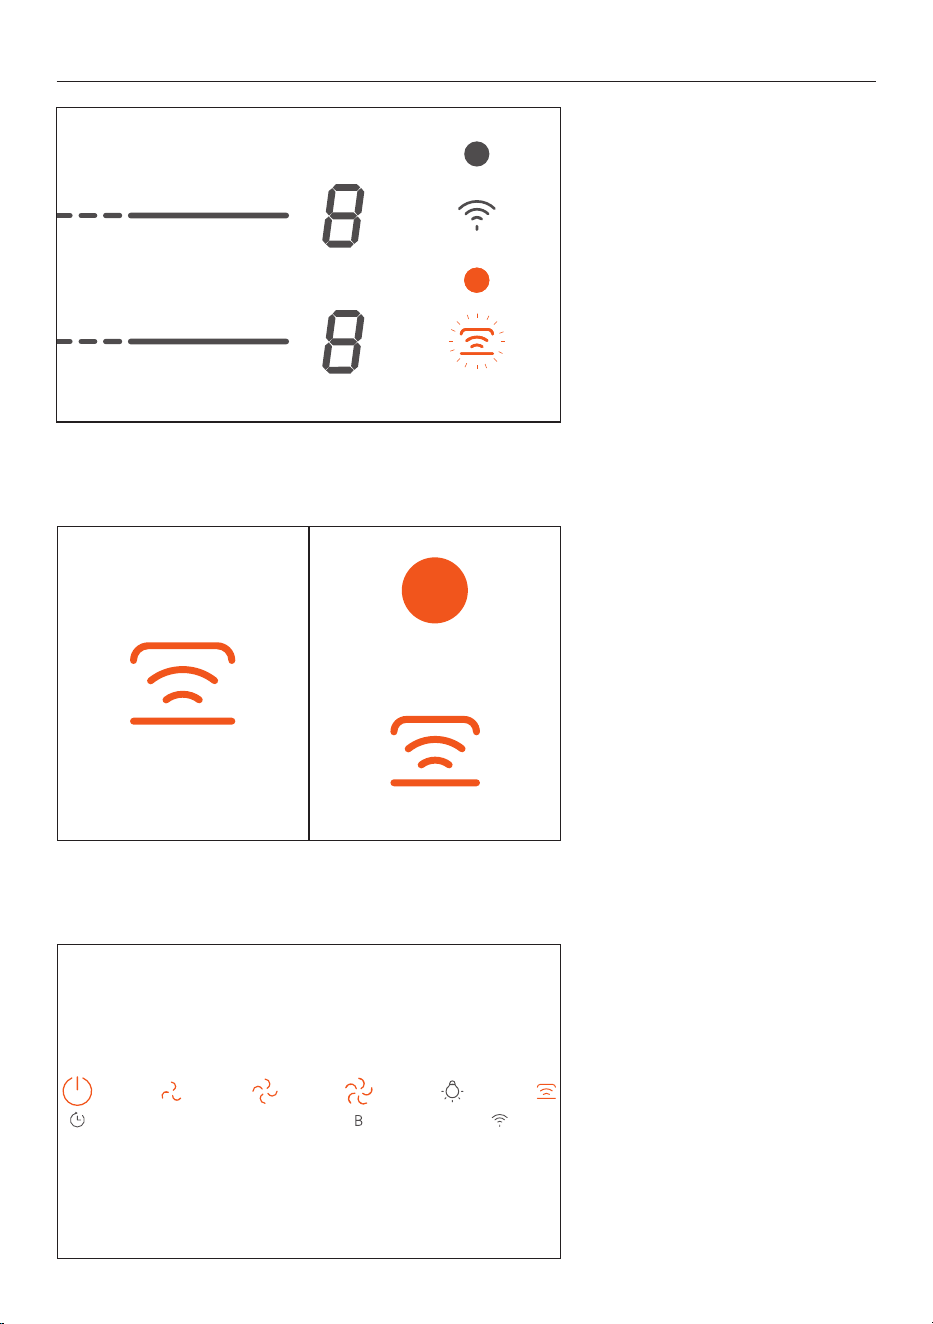
MANUAL
If the rangehood is not connected to the cooktop, it is in MANUAL.
If you prefer to manually adjust the fan speed and enable/disable Extraction+, you can override AUTO by
selecting a different fan speed or press on the cooktop.
The
indicator will illuminate on the rangehood and the cooktop will flash slowly (3s on/0.5s off) to
indicate the two appliances remain paired, but the
rangehood is now operating in
MANUAL.
To re-engage
AUTO, press again on the cooktop. The indicator light will remain on to indicate
the rangehood is now operating in Auto mode.
Refer to section
'MANUAL' for more information.
Hob-to-Hood LED Indicator Cooktop Rangehood What it means
Fast ash .25s on/o Red White Appliance is ready to pair
Slow ash .5s on/o Red White Appliance is reconnecting
Slow ash .3s on .5s o
(Cooktop only)
Red White
Cooktop and rangehood are paired,
rangehood is in Manual mode
Constant illumination Red White
Cooktop and rangehood are paired,
rangehood is in Auto mode

15
HOB-TO-HOOD CONNECTION
1. Press and hold the cooktop
HOB-TO-HOOD button for 3 seconds
until the icon beeps and flashes
0.5s on/off.
2. On the rangehood press and
hold for 3 seconds until the
HOB-TO-HOOD button until the icon
beeps and flashes 0.5s on/off.
Once paired, the rangehood
HOB-
TO-HOOD
icon will have a constant
illumination.
16
Reconnect to Auto
1. From MANUAL mode press the
HOB-TO-HOOD
button on the
cooktop to reconnect AUTO mode.
AUTO
2. Once in AUTO the rangehood and
cooktop HOB-TO-HOOD icon will have
a constant illumination.
Auto to Manual
To disconnect the rangehood from
AUTO mode, press any button except
the LIGHT button. The HOB-TO-HOOD
icon on the rangehood will have
a constant illumination and the
cooktop will have a slow flashing.

17
CARE AND CLEANING
WARNING!
z
Before servicing or cleaning your rangehood, switch the power off at the control panel and disconnect
the power to prevent power from being switched on accidentally.
z
Allow the appliance to cool after the power has been turned off before servicing.
z
There is a risk of fire if cleaning is not carried out in accordance with these instructions.
z
Do not operate the hood without filters in place.
IMPORTANT!
z
Never use abrasive or oil based cleaners.
z
Wear gloves to protect against sharp edges
MAINTENANCE
The rangehood should be cleaned regularly using a mild, liquid detergent and a clean soft cloth to avoid
a build-up of grease occurring. Avoid the use of corrosive chemicals, abrasive cleaning products, hard
brushes and steel wool pads. Grease deposits are corrosive which can cause damage to your rangehoood.
Do NOT use the following to clean your rangehood, they will damage and/or discolour the surfaces:
z
Corrosive chemicals.
z
Abrasive cleaning products.
z
Citrus-based cleaning products.
z
Hard brushes and steel wool.
Note: In areas of high humidity or coastal environments, cleaning should be carried out more frequently.
REPLACING THE LED LIGHT
To replace the LED lights, please contact Customer Care - see Manufacturer's Warranty section.
ALUMINIUM FILTERS
Clean the filters at least once a month. Filters may need to be cleaned more frequently depending on the
cooking methods used and frequency of use.
z
Aluminium lters should be removed and cleaned with hot soapy water or in a dishwasher.
z
If washed in a dishwasher, the lters should be placed in an upright position to prevent food from
falling on them.
z
After cleaning, ensure the lters are completely dry before retting into the rangehood.
18
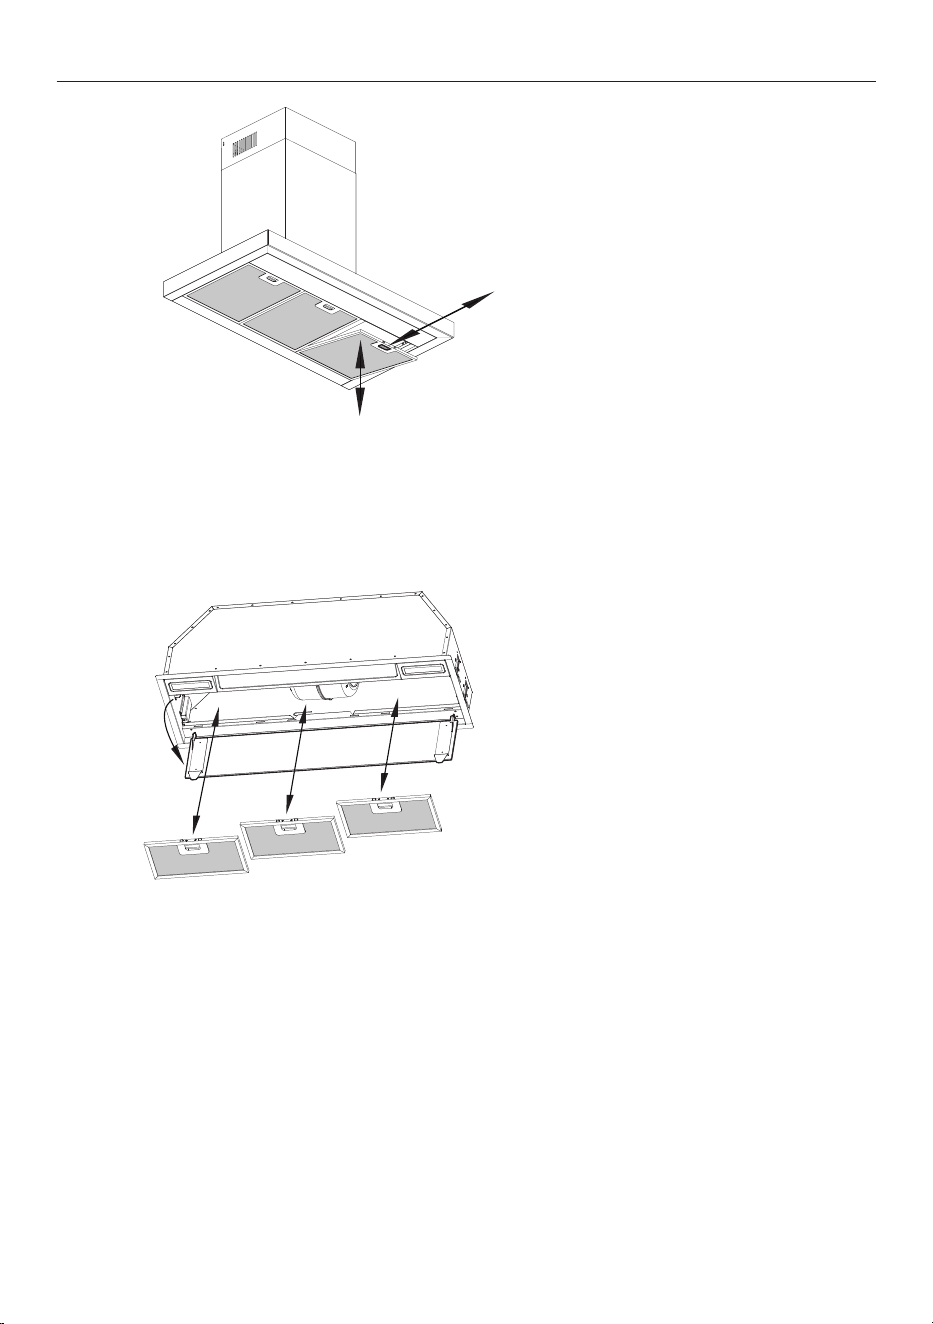
ALUMINIUM FILTERS
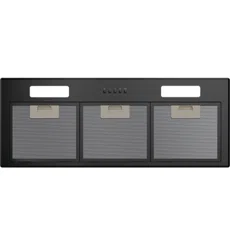
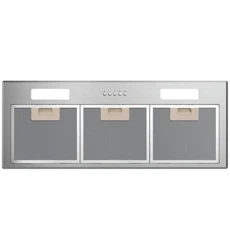
HC60BMB2/HC90BMB2
1. Remove any protective lm
around the perimeter of new grease
lters.
2. Angle the filter into the slots at
the back of the hood.
3. Push the button on the handle of
the filter.
4. Release the handle once the filter
fits into a resting position.
5. Repeat with all filters.
6. To remove, push the button on
the handle to release filters.
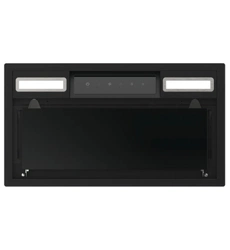
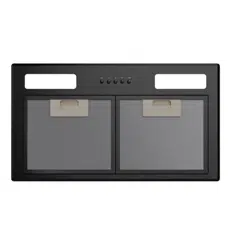
HPH60IMB2/HPH90IMB2
1. Open the perimeter plate.
2. Remove any protective lm
around the perimeter of new grease
lters.
3. Angle the filter into the slots at
the back of the hood.
4. Push the button on the handle of
the filter.
5. Release the handle once the filter
fits into a resting position.
6. Repeat with all filters.
7. Close the perimeter plate.
8. To remove, open the perimeter
plate and push the button on the
handle to release filters.
19
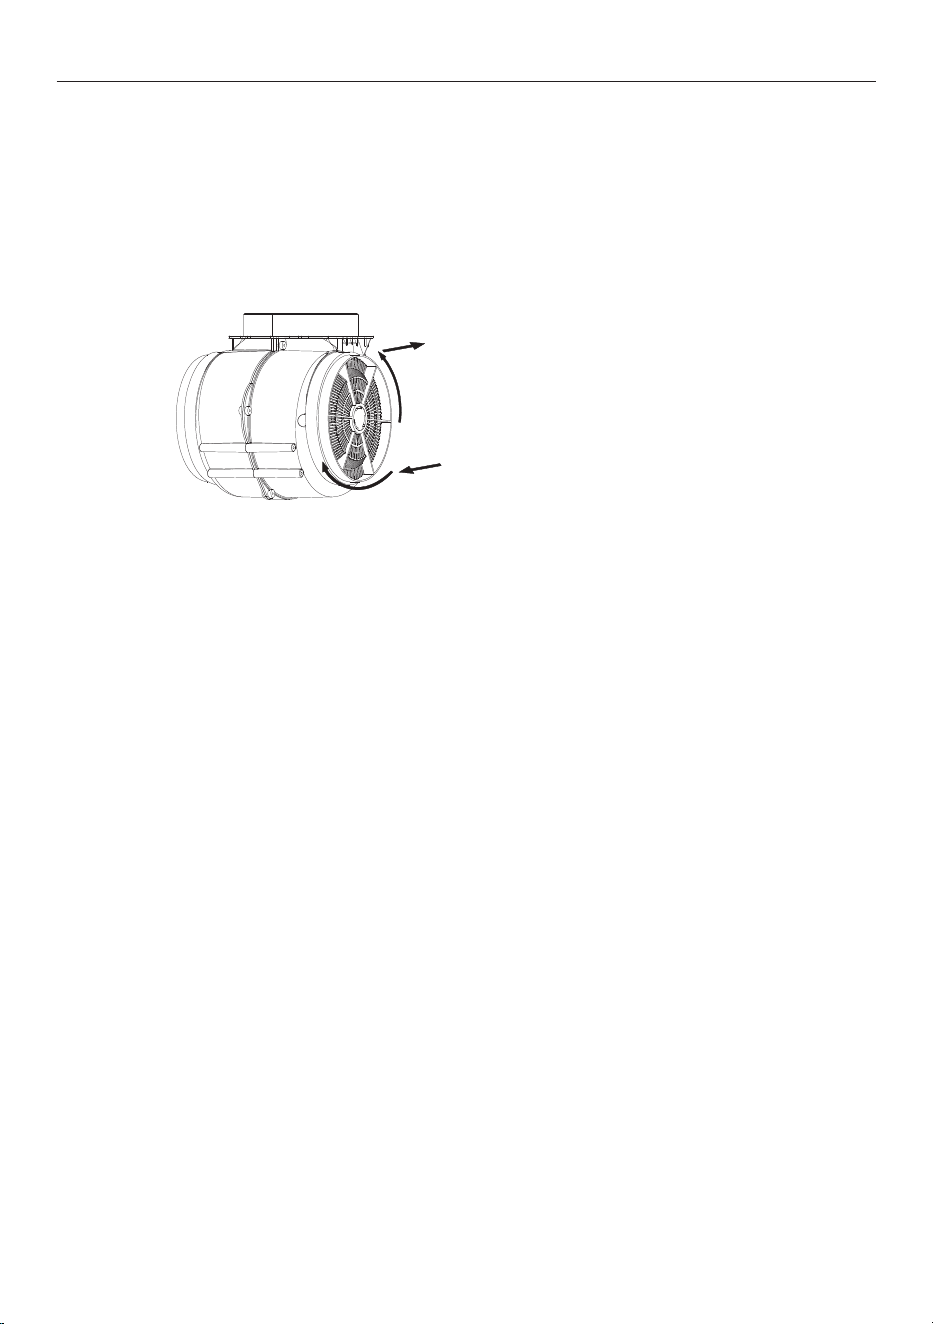
CARBON FILTERS
Carbon filters are optional and for use in recirculation mode only. They are disposable and must be replaced
at least every three months to ensure the performance of the rangehood. In the event of a fire, grease-
laden filters could be flammable.
Before installing or replacing the carbon filters, disconnect the mains power to the unit.
1. Press the filter lock and remove
the mesh filter.
2. Turn the carbon filter on both
sides of the motor anti-clockwise.
Replace the existing carbon filters
with the new carbon filters.
3. Replace the mesh filter.
4. Connect the power supply to the
wall socket.
20
TROUBLE SHOOTING
If there is a problem with your rangehood, please check the following points before contacting your local
Haier trained and supported service technician or the Customer Care Centre.
PROBLEM POSSIBLE CAUSES WHAT TO DO
The external motor
shuts off during use
The thermal protector has
shut o the motor to prevent
overheating.
Turn o the rangehood. Wait approximately 60
minutes, then restart it.
Airflow is lower
than expected
The ducting is blocked. Check the ducting and external vent for kinks or
blockages.
The external motor is blocked Check the external motor is clear of debris.
Incorrect ducting used. Check that the correct ducting has been used as per
the installation guide.
Ducting route is very long. Check the ducting route is as short as possible.
Rangehood is loud External motor is installed in
wrong place.
External motor should be installed as per the
installation guide.
Incorrect ducting used in
installation.
Check ducting is installed as per the installation guide.
Ducting installed incorrectly Check ducting is installed as per installation guide, with
no loose sections, kinks or vibrations.
WI-FI button is
flashing white
Rangehood is trying to
reconnect to the Wi-Fi
network.
Check your Wi-Fi router.
Rangehood is still connected
to old Wi-Fi network.
Open SmartHQ App and follow instructions on screen.
Refer to
'WI-FI/APP CONNECTION' for more information.
App not working to
control rangehood
You are not connected to
the internet.
Check your Wi-Fi router.
HOB-TO-HOOD
button slow flash
.5s on .5s off
Rangehood is trying to
reconnect to the cooktop.
Check your cooktop.
Cooktop flashing
.3s on .5s off
Rangehood is in
MANUAL. To reconnect to AUTO, refer to 'AUTO' section.
Excessive
condensation forms
on the rangehood
Using an induction cooktop. Condensation can be minimised. Refer to
‘Cooking considerations’.
High ambient temperature,
humidity or low natural
ventiliation in the room.
Height of rangehood
installation.
The lights will not
turn on
Replace LED Lights. Please contact Customer Care - see '
MANUFACTURER'S
WARRANTY
' section.
21
PROBLEM POSSIBLE CAUSES WHAT TO DO
CONNECT TO
WIFI/APP
Wi-Fi is not
connecting
Not enough time allowed. The connection process can take up to 10 minutes.
Try to connect again
Internet connection is o or
the network is bad.
Check that your modem is connected and working.
Wi-Fi is not
connecting
HOB-TO-HOOD was
connected before Wi-Fi.
Turn both your rangehood and cooktop o at the power
point. Wait 30 seconds and turn power back on for both
products. Try to connect WIFI/APP again
To many connection
attempts.
HOB TO HOOD
Rangehood does
not stop when the
cooktop is turned off
This is normal The rangehood will continue to run for 5 minutes after
the cooktop has been turned o. This will not happen
in
MANUAL.
Rangehood starts as
soon as cooktop is
turned on.
This is normal The rangehood will turn on as soon as the cooktop
is powered on for maximum eciency. This will not
happen in
MANUAL.
Rangehood is no
longer in
AUTO
The rangehood and cooktop
pairing has disconnected and
is in MANUAL.
Follow the steps to pair the hob and rangehood for
Auto mode to function again.
HOB-TO-HOOD is
not pairing
Wi-Fi trying ot connect at
same time.
Connect WIFI/APP rst and then pair HOB-TO-HOOD.
Too many pairing attempts. Turn both your rangehood and cooktop o at power
point. Wait 30 seconds and turn power back on for both
products. Remove rangehood in app. Try to connect
WIFI/APP again rst and then pair HOB-TO-HOOD.
TROUBLE SHOOTING
22
ITEM REFERENCE NUMBER
HC60BMB2/HC90BMB2
Aluminium filter H0530090426 (HC60BMB2)
H0530090422 (HC90BMB2)
Chimney extension 900mm H0530073719 (HC60BMB2)
H0530073719 (HC90BMB2)
Recirculation carbon filters H0530060509
T-shape recirculation outlet kit H0530062211
HPH60IMB2/HPH90IMB2
Aluminium filter H0530090406 (HPH60IMB2)
H0530090413 (HPH90IMB2)
Recirculation carbon filters H0530060509
PARTS AND ACESSORIES

23
MANUFACTURER'S WARRANTY
Please read this warranty card carefully. Attach your purchase receipt to this warranty card and keep in a
safe place. You must produce both warranty card and proof of purchase in the event of a warranty repair
being required.
When you purchase any new Haier Product you automatically receive a two year Manufacturer's Warranty
covering parts and labour for servicing.
The Manufacturer undertakes to:
Repair or, at its option, replace without cost to the owner either for material or labour any part of the
Product, the serial number of which appears on the Product, which is found to be defective within TWO
YEARS from the date of purchase.
This warranty DOES NOT cover:
A Service calls which are not related to any defect in the Product. The cost of a service call will be charged
if the problem is not found to be a Product related fault. For example:
1 Correct the installation of the product.
2 Provide Instruction on use of the product or change the setup of the product.
3 Replace house fuses or correct house wiring.
4 Correcting faults) caused by the user.
5 Noise or vibration that is considered normal.
6 Water on the floor due to incorrect loading or excessive suds.
7 Blocked pumps, removal of foreign objects/substances from the machine, including the pump and
inlet house filters.
8 Correcting damage caused by pests, eg. rats, cockroaches etc.
9 Correct corrosion or discolouration due to chemical attack.
!0 Power outages or surges.
B Defects caused by factors other than:
1 Normal domestic use or
2 Use in accordance with the Product's User Guide.
C Defects to the Product caused by accident, neglect, misuse or 'Act of God'.
D The cost of repairs carried out by non-authorised repairers or the cost of correcting such
unauthorised repairs.
E Normal recommended maintenance as set out in the Product's User Guide.
F Repairs when the appliance has been dismantled, repaired or serviced by other than an AUTHORISED
CUSTOMER SERVICE CENTRE or the selling dealer.
G Pick up and delivery.
H Transportation or travelling costs involved in the repair when the product is installed outside the
AUTHORISED CUSTOMER SERVICE CENTRE'S normal service area.
This product has been designed for use in a normal domestic environment. It is not intended for
commercial use. Doing so may affect product warranty.
Service under this warranty must be provided by an Authorised Service Repairer (refer to the Customer
Care section for contact details). Such service shall be provided during normal business hours. This
warranty certificate should be shown when making any claim.

24
Note:
This Warranty is an extra benefit and does not affect your legal rights and applies only to product
purchased in New Zealand and Australia. Please keep this Warranty Card in a safe place.
For Australian customers:
Our goods come with guarantees that cannot be excluded under the Australian Consumer Law. You are
entitled to a replacement or refund for a major failure and for compensation for any other reasonably
foreseeable loss or damage. You are also entitled to have the goods repaired or replaced if the goods fail to
be of acceptable quality and the failure does not amount to a major failure.
MANUFACTURER'S WARRANTY

25
CUSTOMER SERVICE
Complete and keep for safe reference:
We recommend our Haier Customer Service and the use of original spare parts.
If you have a problem with your appliance, please first check TROUBLESHOOTING. If you cannot find a
solution there, please contact:
z
Your local dealer
z
The Service & Support area at
www.haier.com.au or
www.haier.co.nz
where you can activate the service claim and also find FAQs.
To contact our Service, ensure that you have the following data available.
The information can be found on the rating plate at the door.
Model
Serial No.
Model
Serial No.
Purchase Date
Purchaser
Dealer
Suburb
To w n
Country