9.800-967.0-D 03/29/22
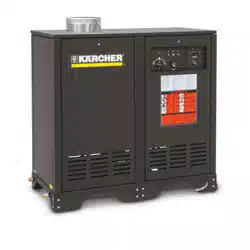
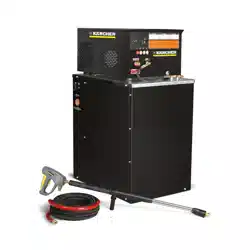
HDS Cabinet Series
Hot Water - Electric Powered - Electric Heated
Operator’s Manual
Pressure Washer
HEATER
ON
TIMER — 7 DAY
CONTROLADOR DE TIEMPO DE SIETE DIEAS
MINUTERIE DE 7 JOURS
POWER
CORRIENTE
COURANT
HEATER
CALENTADOR
CHAUFFE-EAU
PULL OUT PINS TO SET DESIRED “ON” TIMES
EXTRAIGA LAS CLAVIJAS PARA ESTABLECER EL TIEMPO DESEADO.
TIRER LES POINTEURS VERS L’EXTERIEUR POUR E’TABLIR
LES HORAIRES D’OPERATION
10-0726
ON
PRENDER
O
I
OFF
APAGAR
ETTEINT
.
INSTRUCTIONS
40°
40°
25°
INSTRUCTIONS
INSTRUCCIONES
15°
ON
PRENDER
OFF
I
O
EXPOSED PULLEYS AND
BELTS CAN CAUSE INJURY
PRECAUCION/AVERTISSEMENT
WARNING
Operating Instructions (ENG)
MODELS:
HDS 4.0/20 E Ec
1.109-075.0
HDS 4.0/30 E Ec
1.109-076.0
HDS 4.0/20 E Ef
1.109-956.0
HDS 4.0/30 E Ef
1.109-957.0
To locate your local Kärcher Commer-
cial Pressure Washer Dealer
nearest you,
visit www.karchercommercial.com
2 Karcher HDS Series Operator’s Manual 9.800-967.0 - D
Machine Data Label

3
Table of Contents
Machine Data Label . . . . . . . . . . . . . . . . . . . . . . . . . .2
Table of Contents . . . . . . . . . . . . . . . . . . . . . . . . . . .3
How To Use This Manual . . . . . . . . . . . . . . . . . . . . . 4
Safety
Introduction & Safety Information . . . . . . . . . . . . . . .5
Important Safety Instructions . . . . . . . . . . . . . . . . . .5
Operations
Pre-operation Check . . . . . . . . . . . . . . . . . . . . . . . . .7
Component Identification . . . . . . . . . . . . . . . . . . . . .9
Assembly Instructions . . . . . . . . . . . . . . . . . . . . . . .10
Operating Instructions. . . . . . . . . . . . . . . . . . . . . . . 12
Detergents & General Cleaning Techniques . . . . .13
Thermal Pump Protection . . . . . . . . . . . . . . . . . . . .13
Cleaning Tips . . . . . . . . . . . . . . . . . . . . . . . . . . . . . 13
Shutdown Procedures. . . . . . . . . . . . . . . . . . . . . . . 14
Rinsing . . . . . . . . . . . . . . . . . . . . . . . . . . . . . . . . . .14
Maintenance
Pump Storage . . . . . . . . . . . . . . . . . . . . . . . . . . . . . 15
Preventative Maintenance . . . . . . . . . . . . . . . . . . . 16
Oil Change Record . . . . . . . . . . . . . . . . . . . . . . . . . 16
Troubleshooting . . . . . . . . . . . . . . . . . . . . . . . . . . .17
Karcher HDS Series Operator’s Manual 9.800-967.0 - D

4
How To Use This Manual
This manual contains the following sections:
• How to Use This Manual
•Safety
• Operations
• Maintenance
The HOW TO USE THIS MANUAL section will tell you
how to find important information for ordering correct
repair parts.
Parts may be ordered from authorized dealers. When
placing an order for parts, the machine model and
machine serial number are important. Refer to the
MACHINE DATA box which is filled out during the
installation of your machine. The MACHINE DATA box
is located on the inside of the front cover of this manual.
The model and serial number will be found on a decal
attached to the pressure washer.
The SAFETY section contains important information
regarding hazardous or unsafe practices of the
machine. Levels of hazards are identified that could
result in product damage, personal injury, or severe
injury resulting in death.
The OPERATIONS section is to familiarize the operator
with the operation and function of the machine.
The MAINTENANCE section contains preventive main-
tenance to keep the machine and its components in
good working condition. They are listed in this general
order:
• Storage
• Maintenance
• Troubleshooting
NOTE: If a service or option kit is installed on your
machine, be sure to keep the KIT INSTRUCTIONS
which came with the kit. It contains replacement parts
numbers needed for ordering future parts.
NOTE: The manual part number is located on the
lower right corner of the front cover.
Model:
Date of Purchase:
Serial Number:
Dealer:
Address:
Phone Number:
Sales Representative:
Karcher HDS Series Operator’s Manual 9.800-967.0 - D
5
Safety
Introduction & Safety Information
Thank you for purchasing a Kärcher Commercial
Pressure Washer.
This manual covers the operation and maintenance of
the HDS 4.0/20 and HDS 4.0/30 washers. All informa-
tion in this manual is based on the latest product infor-
mation available at the time of printing.
Kärcher Commercial reserves the right to make
changes at any time without incurring any obligation.
Owner/User Responsibility:
The owner and/or user must have an understanding of
the manufacturer’s operating instructions and warnings
before using this Kärcher pressure washer. Warning
information should be emphasized and understood. If
the operator is not fluent in English, the manufacturer’s
instructions and warnings shall be read to and
discussed with the operator in the operator’s native
language by the purchaser/owner, making sure that the
operator comprehends its contents.
Owner and/or user must study and maintain for future
reference the manufacturers’ instructions.
SAVE THESE INSTRUCTIONS
This manual should be considered a permanent
part of the machine and should remain with it if
machine is resold.
When ordering parts, please specify model and
serial number.
Important Safety Instructions
WARNING: When using this
machine basic precautions should
always be followed, including the
following:
AVERTISSEMENT: En utilisant
cette machine, des précautions de
base devraient toujours être
observées, y compris ce qui suit :
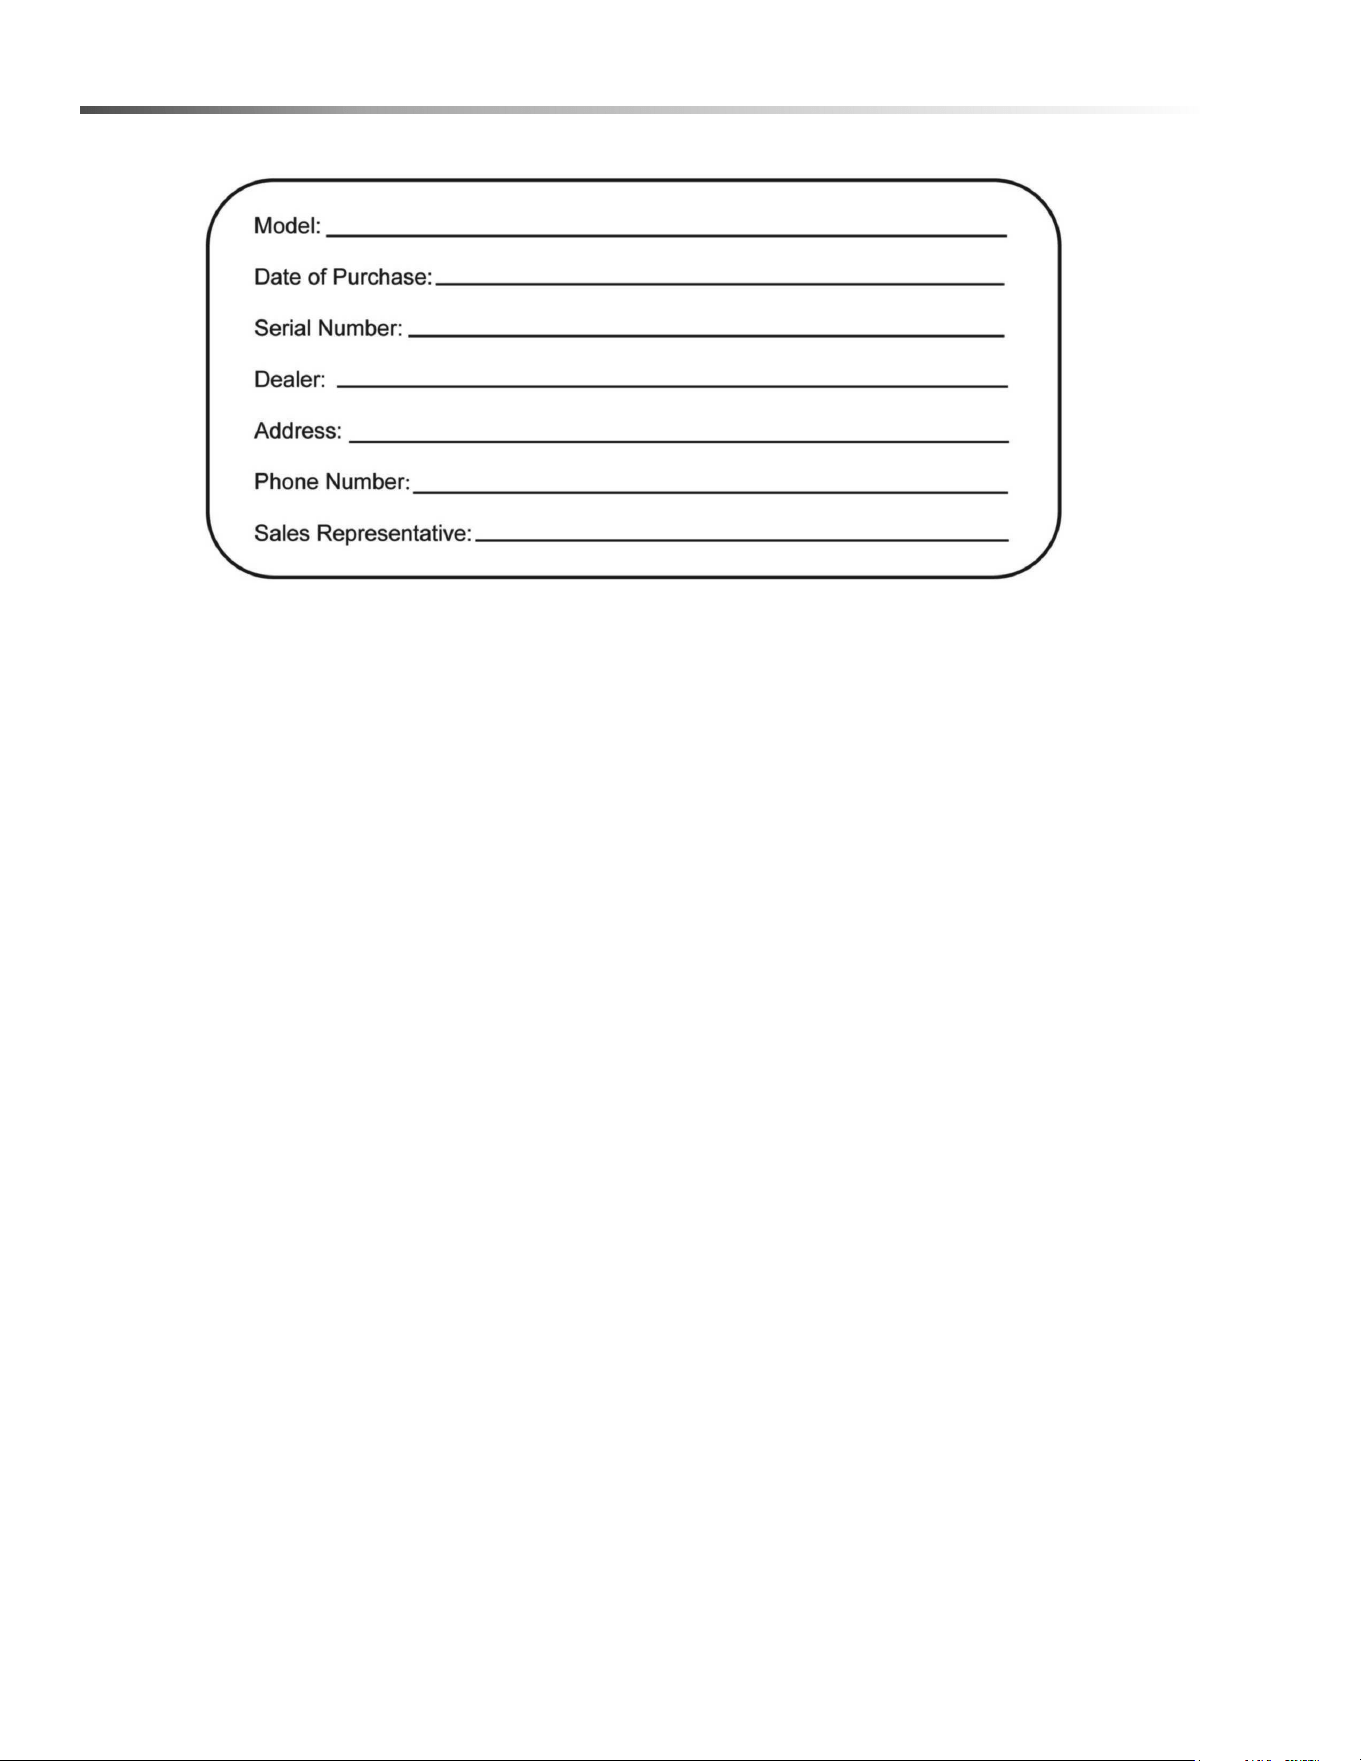
WARNING: To reduce the risk of
injury, read operating instructions carefully before
using.
AVERTISSEMENT: Pour réduire le risque de bless-
ures, lire attentivement les instructions de
fonctionnement avant l'utilisation.
1. Read the owner's manual thoroughly. Failure to
follow instructions could cause malfunction of the
machine and result in death, serious bodily injury
and/or property damage.
2. Know how to stop the machine and bleed
pressures quickly. Be thoroughly familiar with the
controls.
3. Stay alert — watch what you are doing.
4. All installations must comply with local codes.
Contact your electrician, plumber, utility company
or the selling distributor for specific details.
5. This machine requires that it be installed by a
qualified electrician. This product shall only be
connected to a power supply receptacle protected
by a ground fault circuit interrupter.
WARNING: Keep water spray
away from electric wiring or fatal
electric shock may result.
AVERTISSEMENT: Garder le jet
d'eau à l'écart de tout câblage
électrique ou des chocs élec-
triques mortels pourraient
survenir.
6. To protect the operator from
electrical shock, the machine
must be electrically grounded. It
is the responsibility of the owner to connect this
machine to a UL grounded receptacle of proper
voltage and amperage ratings. Do not spray water
near electrical components. Do not touch machine
with wet hands or while standing in water.
WARNING: Always disconnect power before
servicing.
AVERTISSEMENT: Toujours débrancher l'alimenta-
tion avant d'effectuer des opérations d'entretien
su
r la machine.
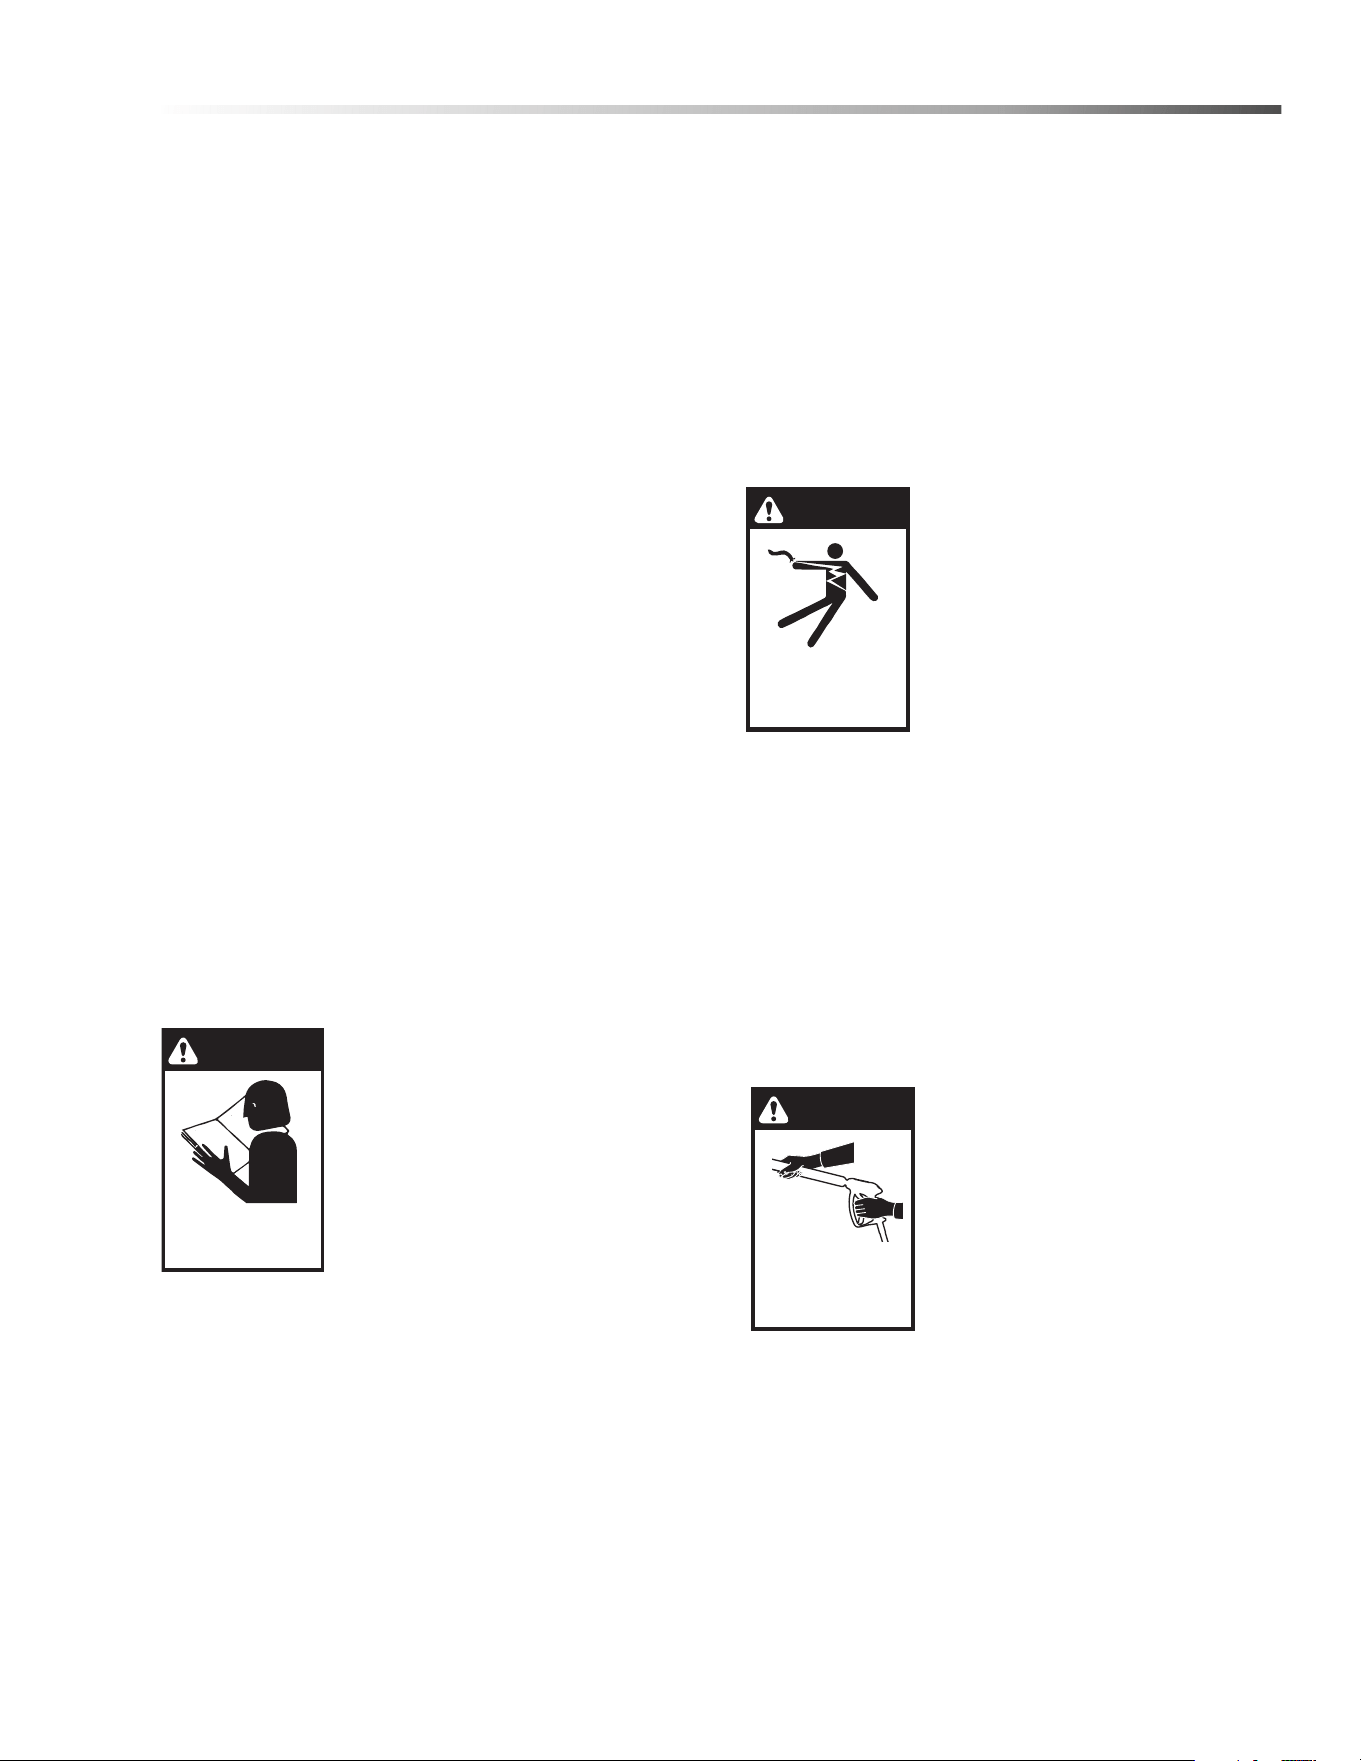
CAUTION: Spray gun kicks back
— hold with both hands.
ATTENTION: Le pistolet pulvéri-
sateur peut présenter un risque
de retour; le tenir avec les deux
mains.
7. Grip spray-gun and wand
securely before starting this
machine. Failure to do this
could result in bodily injury from
a whipping wand.
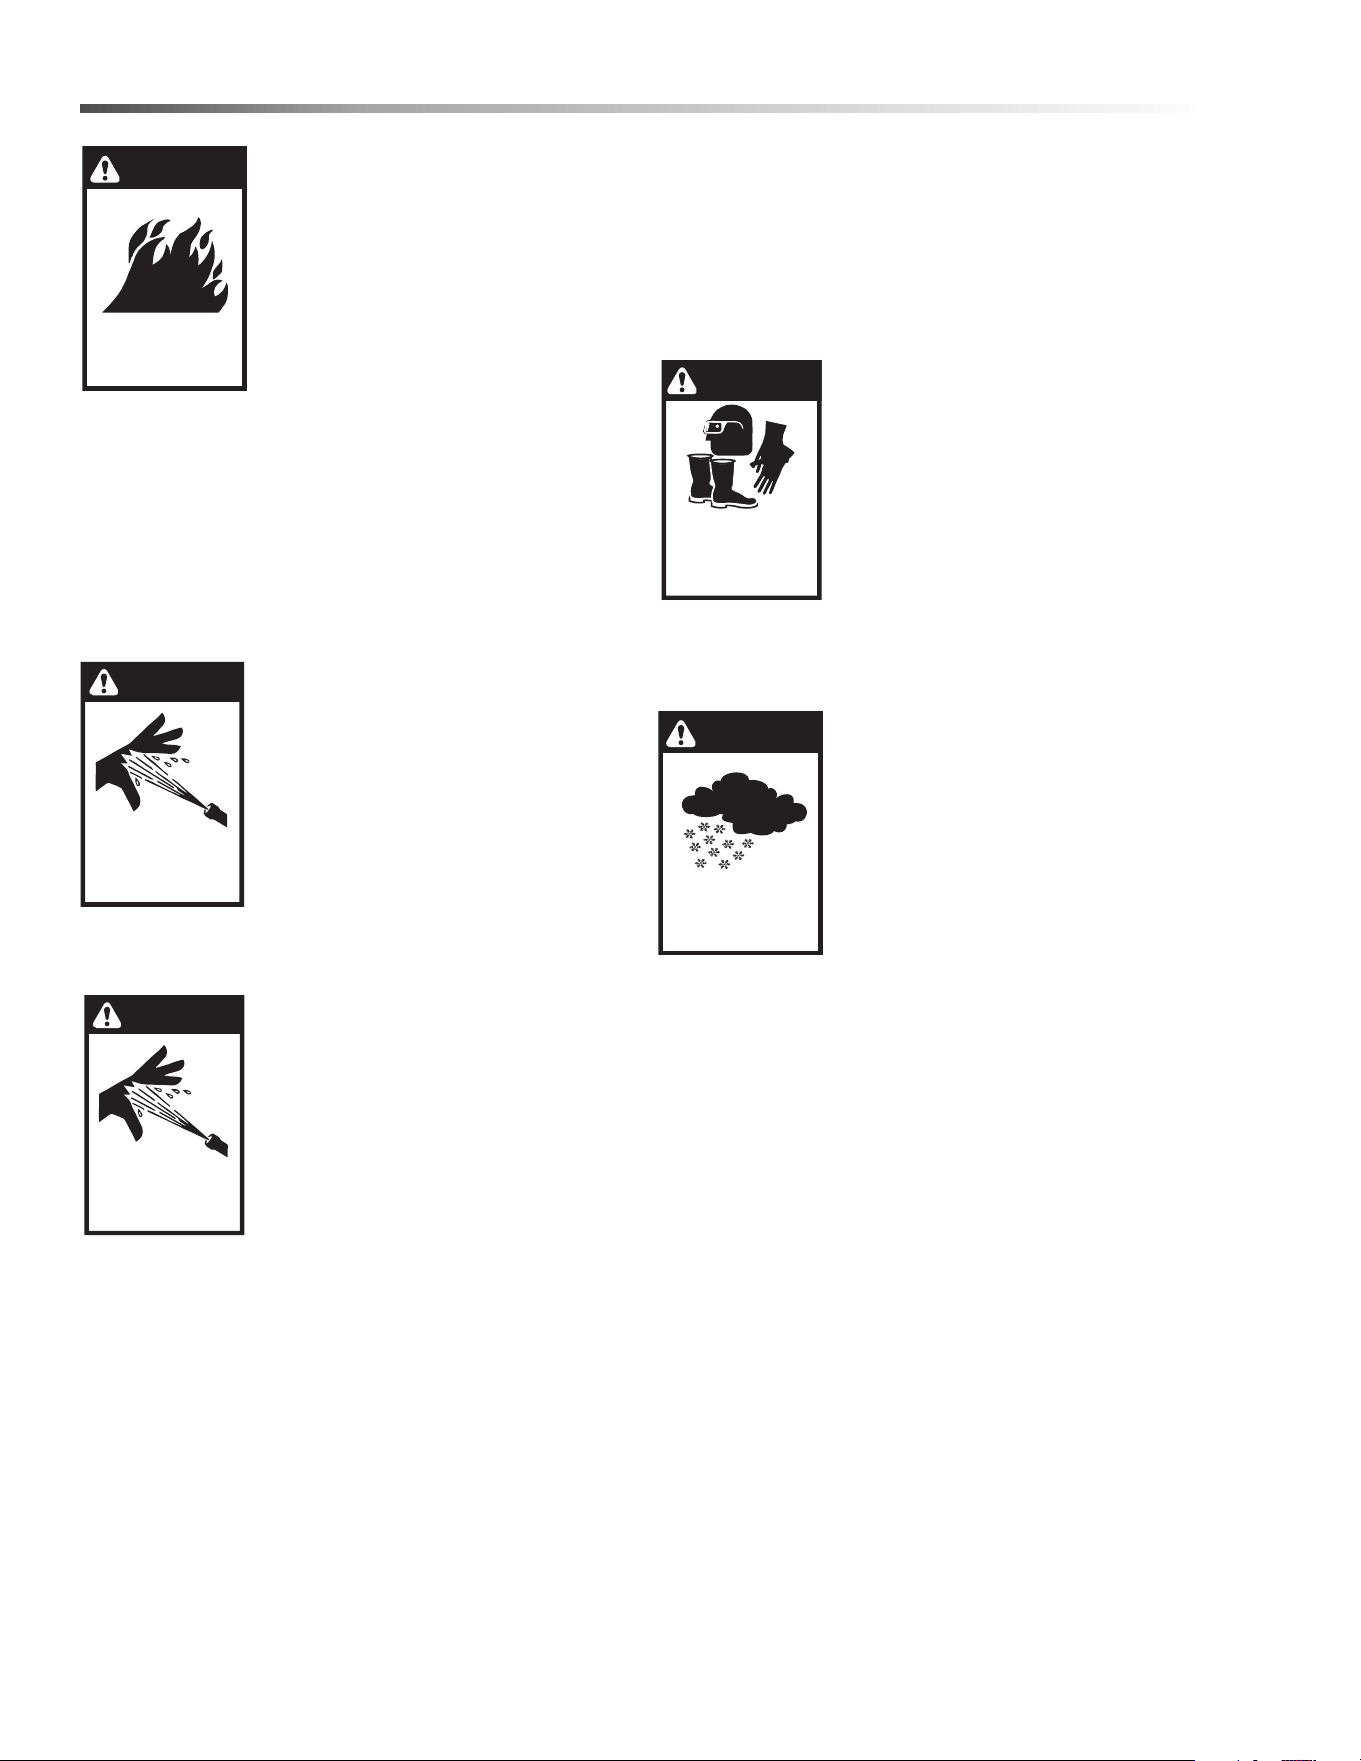
WARNING: Flammable liquids can create fumes
which can ignite causing property damage or
severe injury.
AVERTISSEMENT:Des liquides inflammables
peuvent produire des vapeurs qui peuvent
s'enflammer, causant ainsi des dommages à la
propriété ou des blessures graves.
Karcher HDS Series Operator’s Manual 9.800-967.0 - D
WARNING
READ OPERATOR’S
MANUAL THOROUGHLY
PRIOR TO USE.
OPERATIONS
SAFETY
MAINTENANCE
KEEP WATER
SPRAY AWAY FROM
ELECTRICAL WIRING.
WARNING
WARNING
TRIGGER GUN KICKS
BACK - HOLD WITH
BOTH HANDS
6
Safety
WARNING: Risk of fire. Do not
install or operate near any
flammable liquids.
AVERTISSEMENT: Risque
d'incendie. Ne pas installer ou
utiliser à proximité de liquides
inflammables.
WARNING: Before obtaining
access to electric terminals, all
supply circuits must be disconnected.
AVERTISSEMENT: Avant d'accéder aux bornes
électriques, déconnecter tous les circuits d'alimen-
tation.
8. Electrical appliances shall be installed only in
locations where combustible dusts and flammable
gases or vapors are not present. Do not store or
use gasoline near this machine.
WARNING: High pressure stream
of fluid that this equipment can
produce can pierce skin and its
underlying tissues, leading to
serious injury and possible ampu-
tation.
AVERTISSEMENT: Le jet d'eau
haute pression produit par cet
équipement peut percer la peau et
ses tissus sous-jacents, causant ainsi des
blessures graves et possiblement une amputation.
WARNING: Risk of injection or
severe injury. Keep clear of
nozzle. Do not direct discharge
stream at persons or animals. This
equipment is to be used only by
trained operators.
AVERTISSEMENT: Risque d'injec-
tion ou de blessures graves. Se
tenir à l'écart de la buse. Ne pas
diriger le débit de décharge vers
des personnes ou des animaux. Cet équipement
doit être utilisé uniquement par des opérateurs
formés.
9. Never make adjustments on machine while it is in
operation.
WARNING: High pressure spray can cause paint
chips or other particles to become airborne and fly
at high speeds.
AVERTISSEMENT: Un jet haute pression peut
écailler la peinture ou provoquer l'émission
d'autres particules dans l'air et leur projection à
hautes vitesses.
WARNING: Eye, hand and foot
safety devices must be worn when
using this equipment.
AVERTISSEMENT: Une protection
des yeux, du visage, des mains et
des pieds doit être portée lors de
l'utilisation de cet équipement.
10. Machines with spray guns
should not be operated with the spray gun in the off
position for extended periods of time as this may
cause damage to the pump.
CAUTION: Protect from freezing.
ATTENTION: Protéger la machine
contre le gel.
11. Protect discharge hose from
vehicle traffic and sharp objects.
12. To prevent a serious injury, be
certain quick coupler on
discharge hose has locked
before using pressure washer.
13. Before disconnecting discharge hose from hot
water outlet, disconnect power supply, open spray
gun to relieve back pressure in hose and use
protective gloves.
14. Do not allow acids, caustic or abrasive fluids to
pass through the pump.
15. Inlet water supply must be cold and clean fresh
water and not hotter than 145°.
16. The best insurance against an accident is precau-
tion and knowledge of the machine.
17. Karcher will not be liable for any changes made to
our standard machines, or any components not
purchased from Karcher.
18. To reduce the risk of injury, close supervision is
necessary when a machine is used near children.
Do not allow children to operate the pressure
washer. This machine must be attended during
operation.
Karcher HDS Series Operator’s Manual 9.800-967.0 - D
WARNING
RISK OF INJECTION
OR SEVERE INJURY
TO PERSONS. KEEP
CLEAR OF NOZZLE.
WARNING
USE PROTECTIVE
EYE WEAR
AND CLOTHING
WHEN OPERATING
THIS EQUIPMENT.
WARNING
PROTECT FROM
FREEZING
WARNING
RISK OF FIRE. DO NOT
OPERATE NEAR
FLAMMABLE LIQUIDS
WARNING
HIGH PRESSURE
STREAM CAN PIERCE
SKIN AND TISSUES.
7
Operations
19. Do not overreach or stand on unstable support.
Keep good footing and balance at all times.
20. When making repairs disconnect from electrical
source.
21. Do not operate this product when fatigued or under
the influence of alcohol or drugs. Keep operating
area clear of all persons.
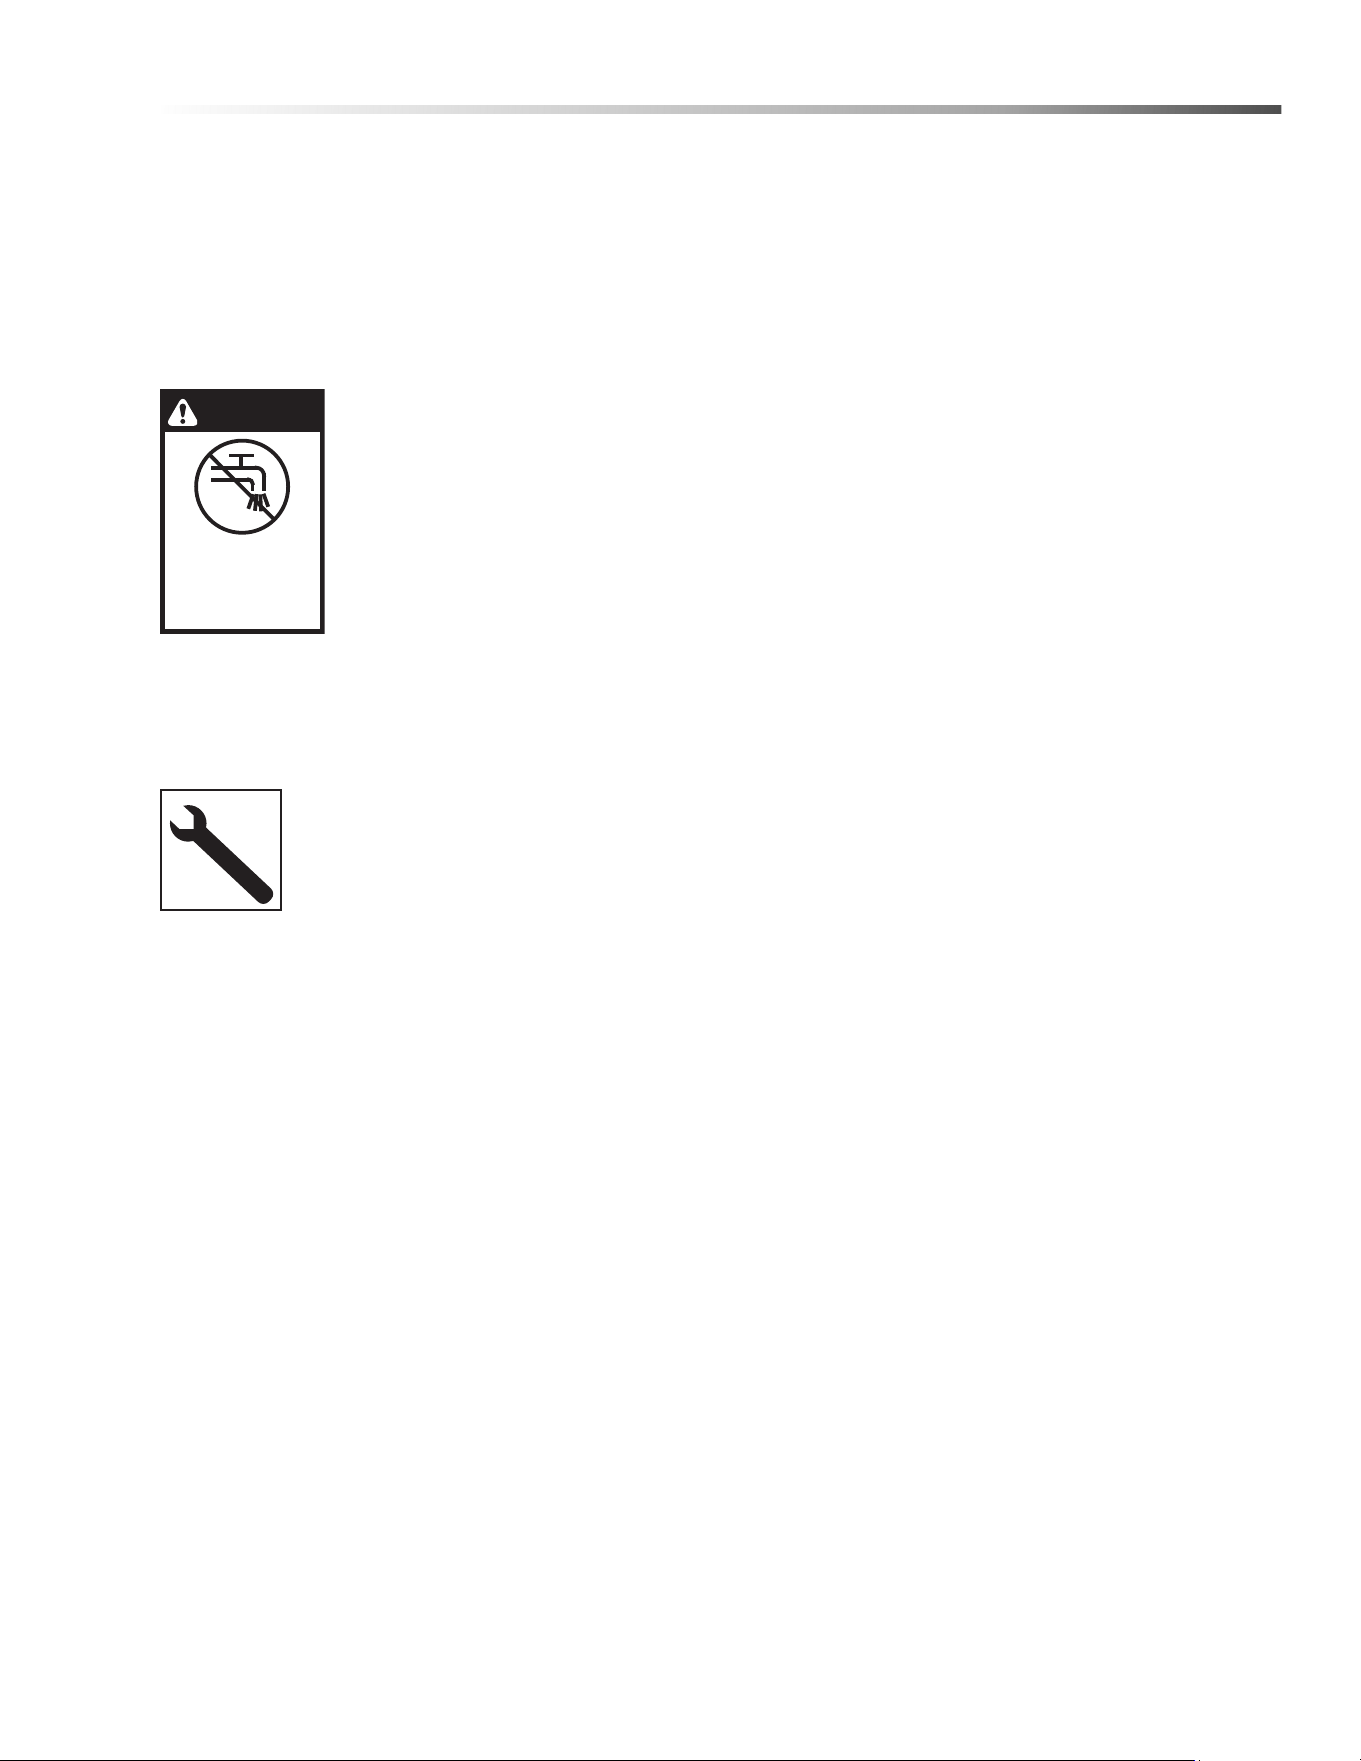
WARNING:
If connection is made
to a potable water system the
system shall be protected against
backflow
AVERTISSEMENT: Si une
connexion est établie avec un
réseau d'eau potable, le réseau
doit être protégé contre le retour
d'eau.
WARNING: Do not use below garage floor or grade
level.
AVERTISSEMENT: Ne pas utiliser sous le plancher
du garage ou au-dessous du niveau du sol.
Follow the maintenance instructions
specified in the manual.
Suivre les instructions d'entretien
spécifiées dans le manuel.
Pre-operation Check
• Heat module water level
• Pump oil (SAE 10W-40 non-foaming oil))
• Cold water supply (6 gpm • 5/8” • 20 psi)
• Proper power supply
• Hose, wand, nozzles (nozzle sizes per serial
plate)
• Water filter (intact, non restrictive)
• Read installation and operation instructions
Karcher HDS Series Operator’s Manual 9.800-967.0 - D
WARNING
IF CONNECTED
TO A POTABLE
WATER SUPPLY,
PROTECT AGAINST
BACKFLOW.
8
Operations
TIME
R
— 7 D
A
Y
C
ON
T
R
OLAD
O
R
D
E
TI
E
M
P
O D
E
S
I
E
TE
D
I
E
A
S
M
I
NU
T
E
R
I
E
D
E
7
J
O
UR
S
PO
W
ER
C
O
RR
IE
N
TE
C
OU
RANT
HE
A
T
ER
C
A
LE
N
T
AD
O
R
CH
A
UFFE
-E
A
U
PU
L
L
OU
T
PI
N
S
T
O
SET DESI
R
ED
“
ON”
TIME
S
E
X
TR
A
IG
A
LAS CL
A
V
I
J
A
S
P
AR
A
E
S
TA
B
LE
CER
E
L
TIEM
PO
D
E
S
E
AD
O
.
TI
R
E
R
LES
P
OI
N
T
E
U
R
S
V
E
R
S
L
’
EX
TE
R
IEUR
P
OU
R
E
’TAB
L
IR
LES
HO
RA
I
R
E
S
D
’OP
ER
AT
IO
N
1
0
-0
7
2
6
ON
PREN
DE
R
O
I
OF
F
AP
A
G
A
R
ET
T
E
IN
T
.
C
O
L
D
W
A
T
E
R
I
NL
E
T
C
O
LD
W
A
TE
R
OUTLE
T
IN
ST
R
U
C
TI
ONS
W
A
RN
I
N
G
PR
E
C
A
U
T
I
ON
A
TTE
N
TI
ON
I
NST
R
U
C
TI
O
N
S
I
N
ST
RU
C
C
I
ON
ES
O
N
P
R
E
N
D
ER
O
F
F
I
O
4
0°
4
0
°
25
°
1
5°
E
XP
OS
E
D
P
U
L
L
E
YS AN
D
BE
L
T
S
C
AN
CA
U
S
E
I
NJUR
Y
P
RE
C
AUCI
O
N
/
A
VER
TI
SSE
M
E
N
T
W
A
R
N
IN
G
Variable
Pressure
Control Wand
Handle
Nozzle Quick
Coupler
Heat Exchanger
Inlet
Connector
Small High Pressure
Hose
Water Fill
Spout
Pressure
Nozzles
Pump Access
Panel
On/Off
Toggle Switch
Detergent
Injector
Discharge
Nipple
Quick Coupler
Collar
Water Supply
Hose
(not included)
Spray
Gun
Trigger
Swivel
Connector
Brass Soap
Nozzle
High Pressure
Hose
Detergent Bucket
(Not included)
Karcher HDS Series Operator’s Manual 9.800-967.0 - D

9
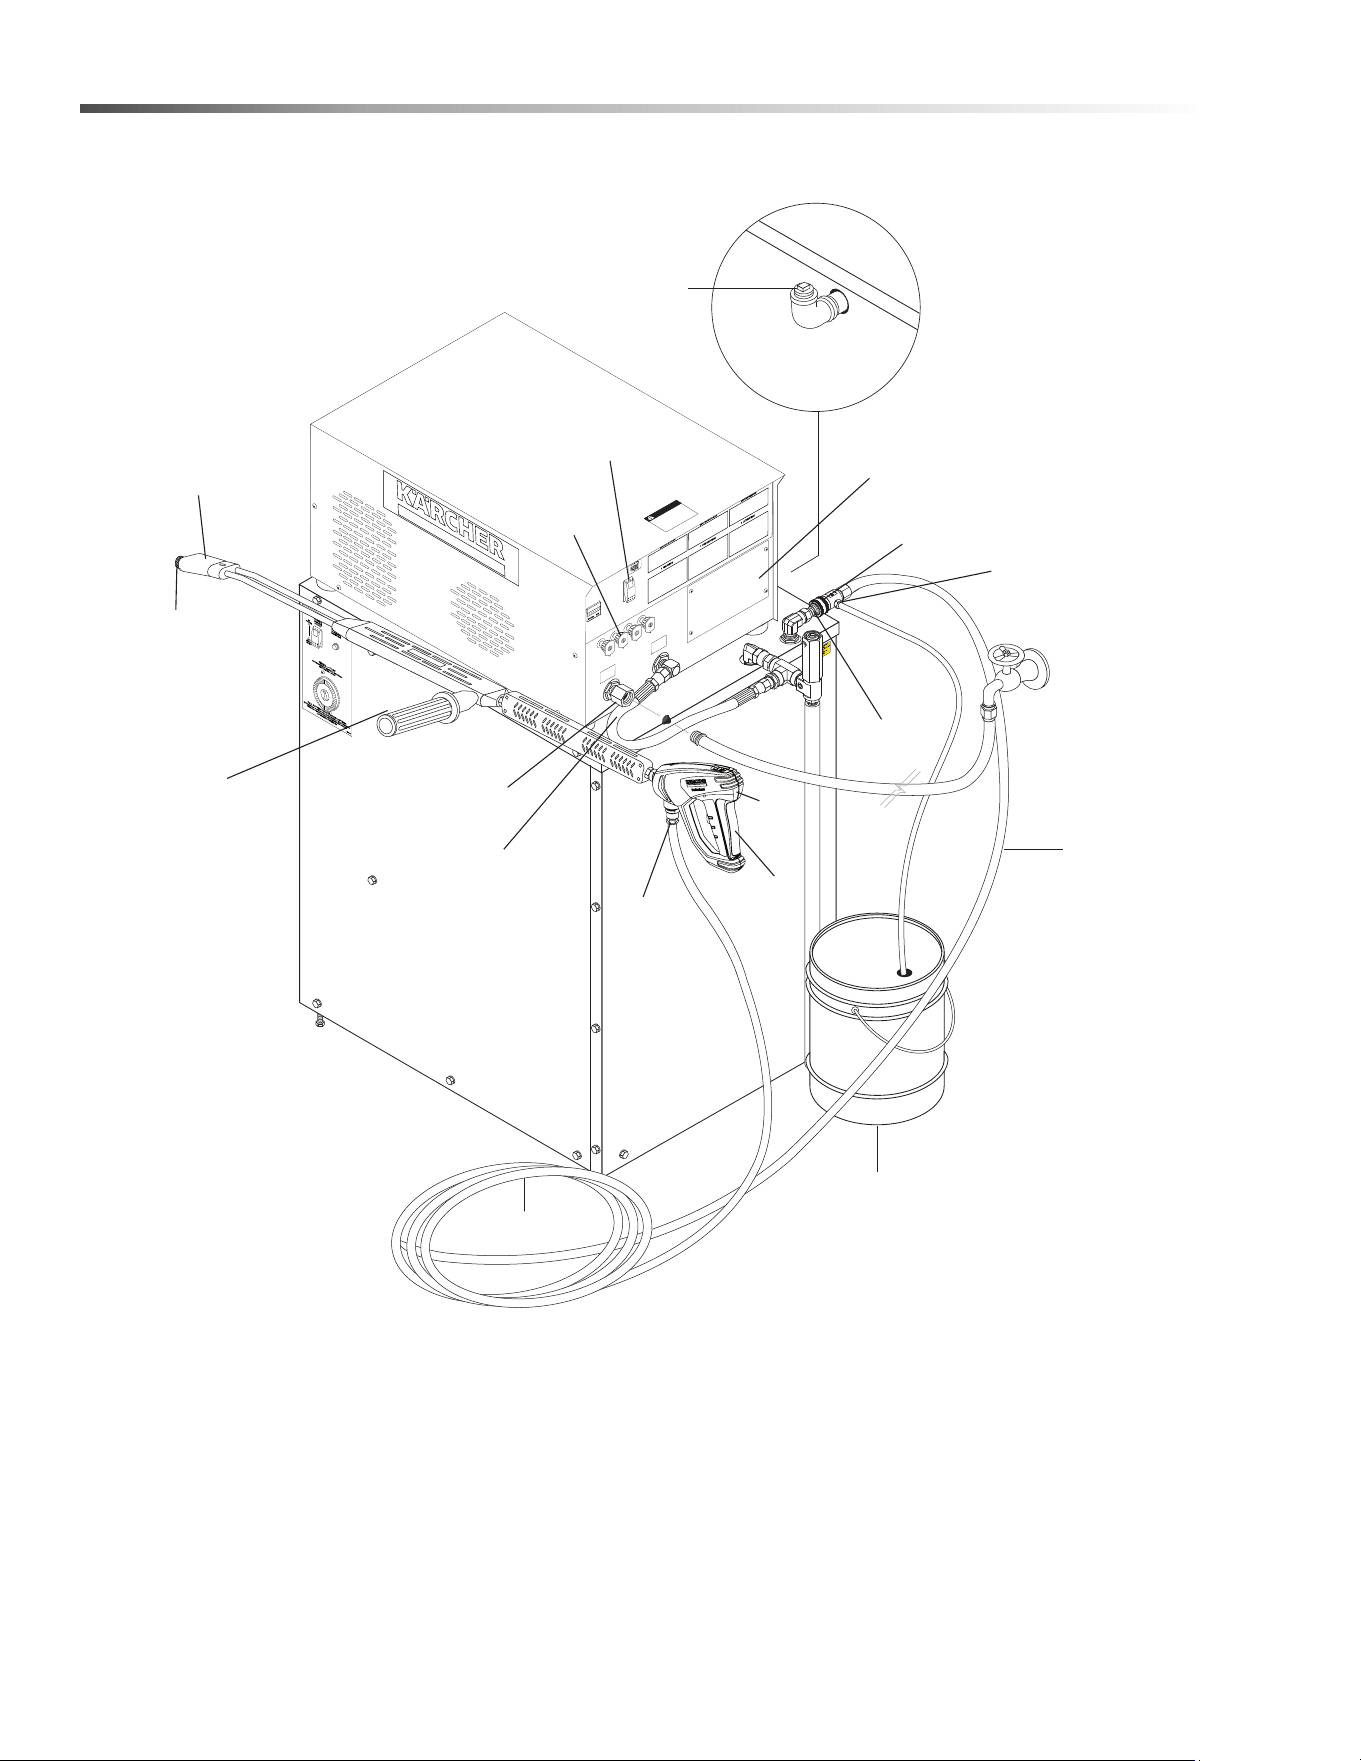
Operations
Component Identification
Pump — Delivers a specific gpm to the high pressure nozzle which develops pressure.
Spray Gun — Controls the application of water and detergent onto cleaning surface with trigger device. Includes
safety latch.
Detergent Injector — Allows you to siphon and mix detergents.
Wand — Must be connected to the spray gun.
Heat Exchanger — Has a stainless steel coil suspended into an 80 gallon water tank that is heated to 200° by
heating elements.
High Pressure Hose — Connect one end to water pump high pressure discharge nipple and the other end to spray
gun.
Unloader Valve — Safety device which, when the spray gun closes, prevents over pressurization (Not Shown.)
NOTE: If trigger on spray gun is released for more than 2 minutes, water will leak from the pump protector. Warm
water will discharge from pump protector onto floor. This system prevents internal pump damage.
Karcher HDS Series Operator’s Manual 9.800-967.0 - D
10
Operations
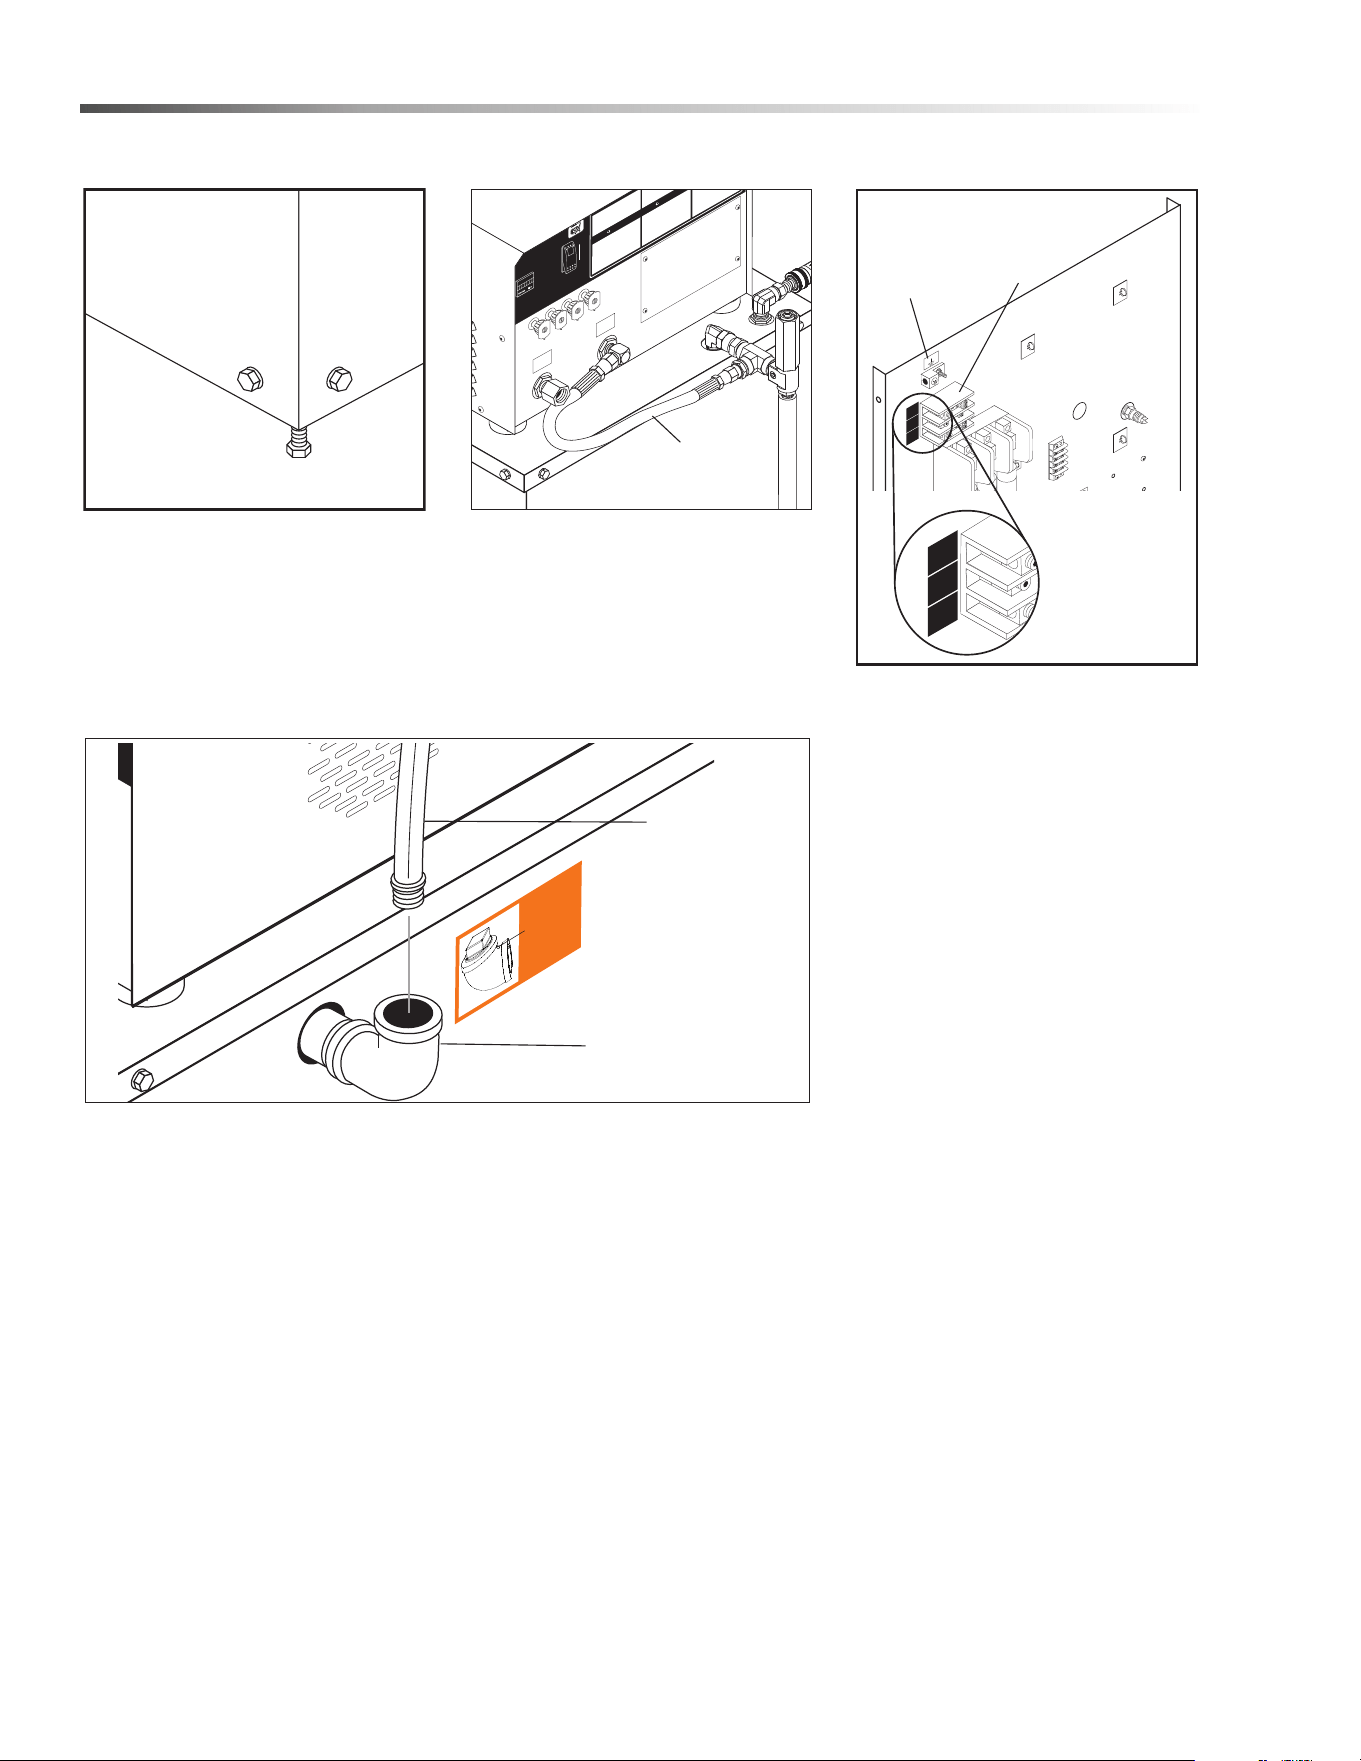
Assembly Instructions
STEP 1: Place machine in a conve-
nient location providing ample
support, drainage and room for
maintenance. Remove pallet bolts
and remove pallet, then re-install
bolts to level machine by adjusting
(machine must be level).
STEP 2: Place the pump package
on top of the heat exchange and
attach the small high pressure hose
to the fittings as shown.
STEP 3: Remove the hex head
screws from electrical access
panel.
NOTE: bottom right screw will
only loosen; access panel is
designed to pivot on this screw.
Once access panel is rotated out
of the way, attach the electrical
harness from the pressure
washer to the heating module as
follows:
a. Feed pressure washer wire
harness through the upper
wire hole located on the
side of the machine
b. On the right side of the
incoming power terminal
block, connect the black
wire to line L1, the red wire
to line L2, and the white
wire to line L3.
c. Attach the green wire to the
ground terminal block.
CAUTION: Have qualified electri-
cian attach the proper supply
cord to the terminal labeled L1,
L2 and L3.
ATTENTION: Demander à un
électricien qualifié de raccorder
le cordon d'alimentation
approprié à la borne étiquetée
L1, L2 et L3.
Karcher HDS Series Operator’s Manual 9.800-967.0 - D
STEP 4: Do not turn power on to equipment until the heating module is
filled with water, as severe damage may occur to heater elements.
Prior to shipping, a rust inhibitor was added to the hot water tank. This will
mix with the added water to prevent rust build-up inside the tank.
Install water fill spout (see Component ID page, shipped loose). Spout
opening should be facing up. Insert water hose and fill. Do not over fill to
allow for thermal expansion. (Maximum is 80 gallons). After heater tank
has been filled to the top, operate for one week and then add one quart of
oil to slow evaporation. Be sure to replace spout plug, hand tight only.
Turn on main power supply to unit. Set 7 day programmable timer to
desired ON/OFF time and switch machine power on, Water will heat up to
operating temperature in 30 to 60 minutes. The heater will turn off automat-
ically when 200°F is reached. Water will come out of heater fill spout due to
heat expansion. However, this will stop after temperature is reached.
Leave main power on to the machine to ensure hot water on pump start up.
WARNING:
TANK
FIL
L
ELB
OW
D
O NOT PLU
G
V
EN
T
HOL
E
Part
N
o
Garden
Hose
Water Fill
Spout
COLD
WATER
INLET
COLD
WATER
OUTLET
INSTRUCTIONS
40°
40°
25°
WARNING
PRECAUTION
15°
ON
PREND
ER
OFF
I
O
Small High
Pressure Hose
GROUND
L2
L3
L1
L2
L3
L1
Incoming
Power
Terminal
Block
Ground
Terminal
Block
11
Operations
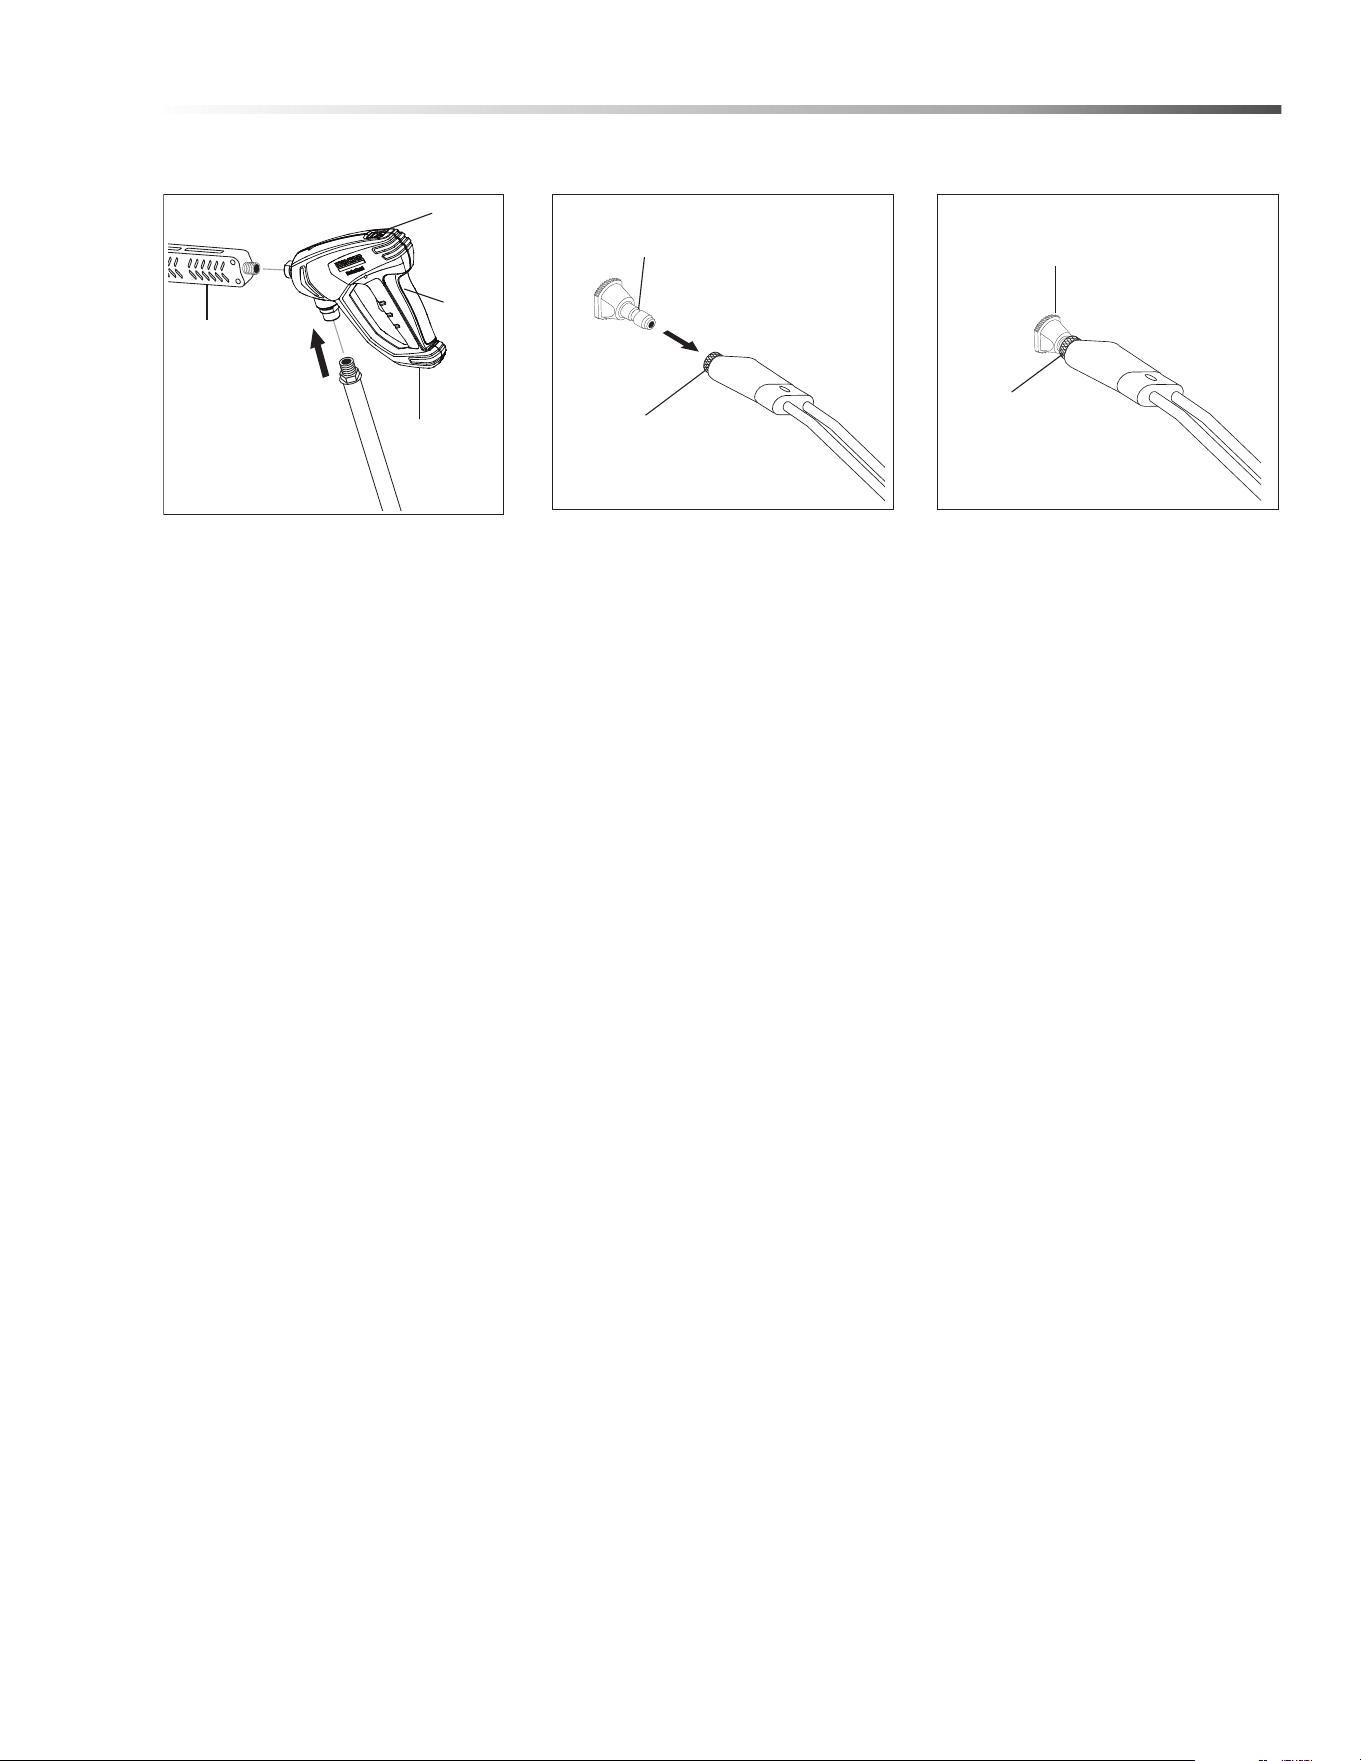
STEP 5: Attach variable pressure
control wand to spray gun using
teflon tape on threads to prevent
leakage. Position safety latch to
prevent trigger from being pulled.
STEP 6: Pull the spring-loaded
collar of the wand coupler collar
back to insert your choice of
pressure nozzle.
CAUTION: Never replace nozzles
without engaging the safety
latch on the spray gun trigger.
ATTENTION: Ne jamais
remplacer les buses sans
d'abord mettre le dispositif de
sécurité sur la détente du
pistolet pulvérisateur.
STEP 7: Release the coupler collar
and push the nozzle until the collar
clicks. Pull the nozzle to make sure
it is seated properly.
WARNING: These machines are
designed for indoor use.
Machine must be stored indoors
when not in use.
AVERTISSEMENT: Ces machines
sont conçues pour une utilisa-
tion à l'intérieur. La machine doit
être entreposée à l'intérieur
lorsqu'elle n'est pas utilisée.
Karcher HDS Series Operator’s Manual 9.800-967.0 - D
Trigger
Gun
Safety
Latch
Trigg
er
Wand
Pressure
Nozzle
Wand
Coupler
Wand
Collar
Pressure
Nozzle
12
Operations
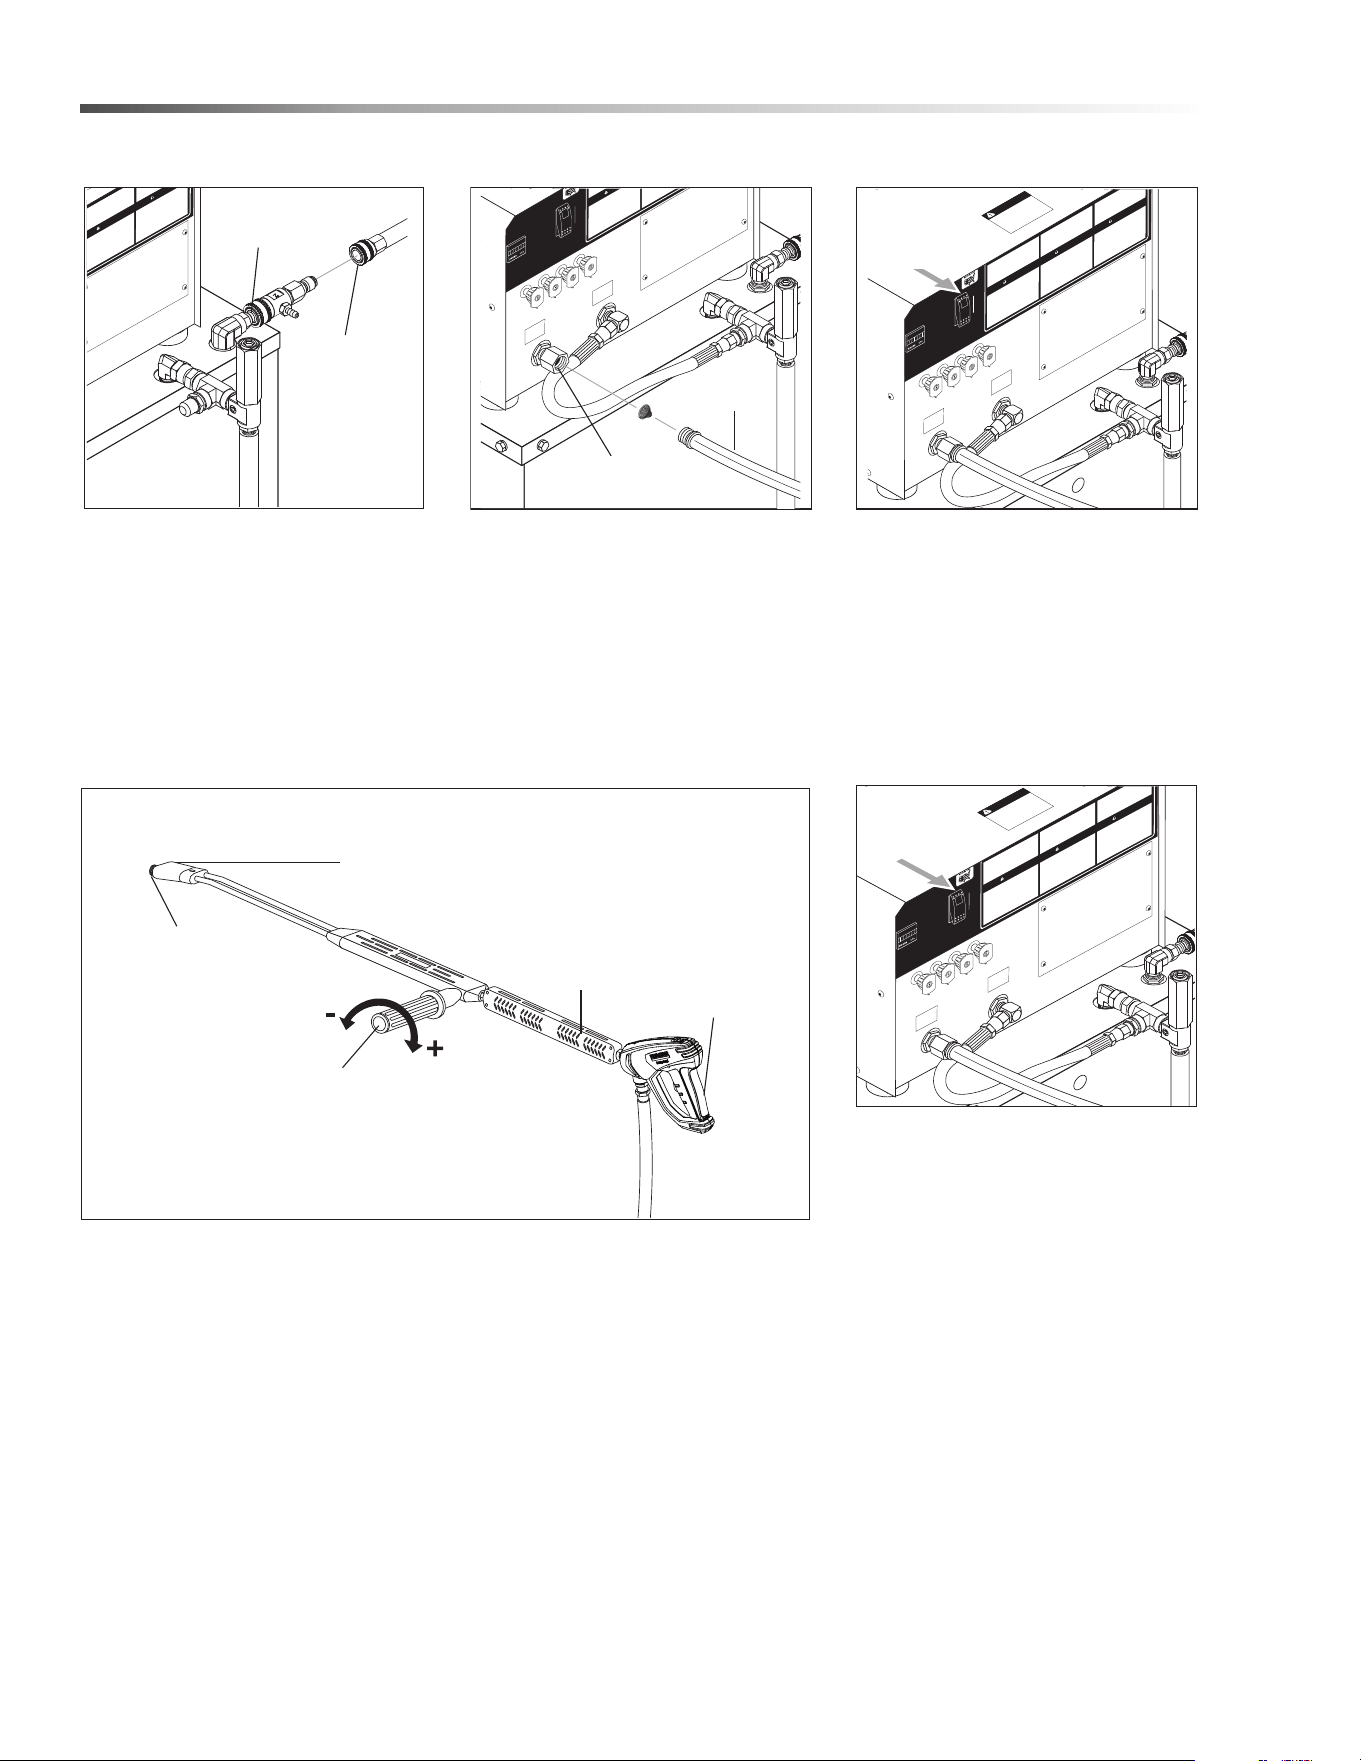
Operating Instructions
STEP 1: Connect the high pressure
hose quick coupler to the discharge
nipple by sliding the quick coupler
collar back and inserting the quick
coupler onto the discharge nipple
and pushing the quick coupler
collar forward to secure it. Secure
desired pressure nozzle into
variable pressure wand coupler.
STEP 2: Connect water supply
hose (garden hose) to inlet
connector. Do not allow acid or
abrasives to be pumped through
system. Turn on water.
STEP 3: Place toggle switch in the
ON position and then pull the
trigger on the spray gun to activate
a pressure switch which will then
start the machine. The ON position
is for auto shut down.
STEP 5: To stop machine, release
the spray gun and machine will
automatically stop in approximately
12 seconds. If machine is going to
be unattended for long periods of
time, turn water supply off and
place switch in OFF position.
NOTE: When removing or
replacing hoses, wand and
nozzles, move switch to OFF
position, open spray gun to
release pressure before removing
discharge hose.
Karcher HDS Series Operator’s Manual 9.800-967.0 - D
STEP 4: Turn the variable pressure control handle clockwise to increase
pressure.
Selection of high or low pressure is accompanied by turning the handle.
NOTE: High pressure nozzle must be inserted at end of wand to obtain
high pressure. To apply soap read Detergents & General Cleaning
Techniques section.
Variable Pressure
Control Handle
Trigger
Variable Pressure
Wand (VP)
High
Pressure
Nozzle
Brass Soap
Nozzle
PRECAUTION
ATTENTI
ON
I
N
S
TR
U
C
C
ION
ES
High Pressure
Hose Coupler
Discharge
Nipple
COLD
WATER
I
N
LE
T
C
OLD
W
A
T
E
R
OUTLET
0°
4
0
°
40
°
25°
W
AR
N
15°
O
N
P
REND
ER
OFF
I
O
Garden
Hose
Inlet
C
O
LD
W
AT
ER
IN
L
E
T
CO
L
D
WATE
R
O
UTL
ET
I
N
S
TR
U
CTIONS
0°
4
0
°
4
0
°
25°
WARN
I
NG
PRECAUTI
ON
A
T
TENTIO
N
I
N
ST
R
IN
ST
R
U
C
C
I
ON
E
S
1
5°
ON
P
R
EN
DE
R
OFF
I
O
EXPOSED
PULLE
YS
AN
D
B
ELTS CAN CAUS
E
I
NJURY
PRE
C
AUC
IO
N/
AVER
T
I
SSE
MENT
WARN
IN
G
Toggle
Switch
C
O
LD
W
AT
E
R
I
N
L
ET
CO
L
D
W
A
TER
OUTLET
INSTRUCTI
O
N
S
0°
40
°
40°
25°
W
ARN
I
N
G
PREC
AUT
I
ON
ATT
E
NTI
ON
I
N
ST
R
IN
ST
R
U
C
CI
O
NES
15°
O
N
PRENDER
O
F
F
I
O
E
XP
OS
E
D
P
UL
L
E
YS
AN
D
B
EL
T
S CAN CAUSE
INJ
UR
Y
PRE
C
AU
CIO
N/
AVER
T
IS
SEM
ENT
WARNING
13
Operations
Detergents & General Cleaning
Techniques
WARNING: Some detergents may
be harmful if inhaled or ingested,
causing severe nausea, fainting or
poisoning. The harmful elements
may cause property damage or
severe injury.
AVERTISSEMENT: Certains
détergents peuvent être dangereux
s'ils sont inhalés ou ingérés,
provoquant de fortes nausées, des
évanouissements et l'empoisonnement. Les
éléments dangereux peuvent causer des dommages
à la propriété ou des blessures graves
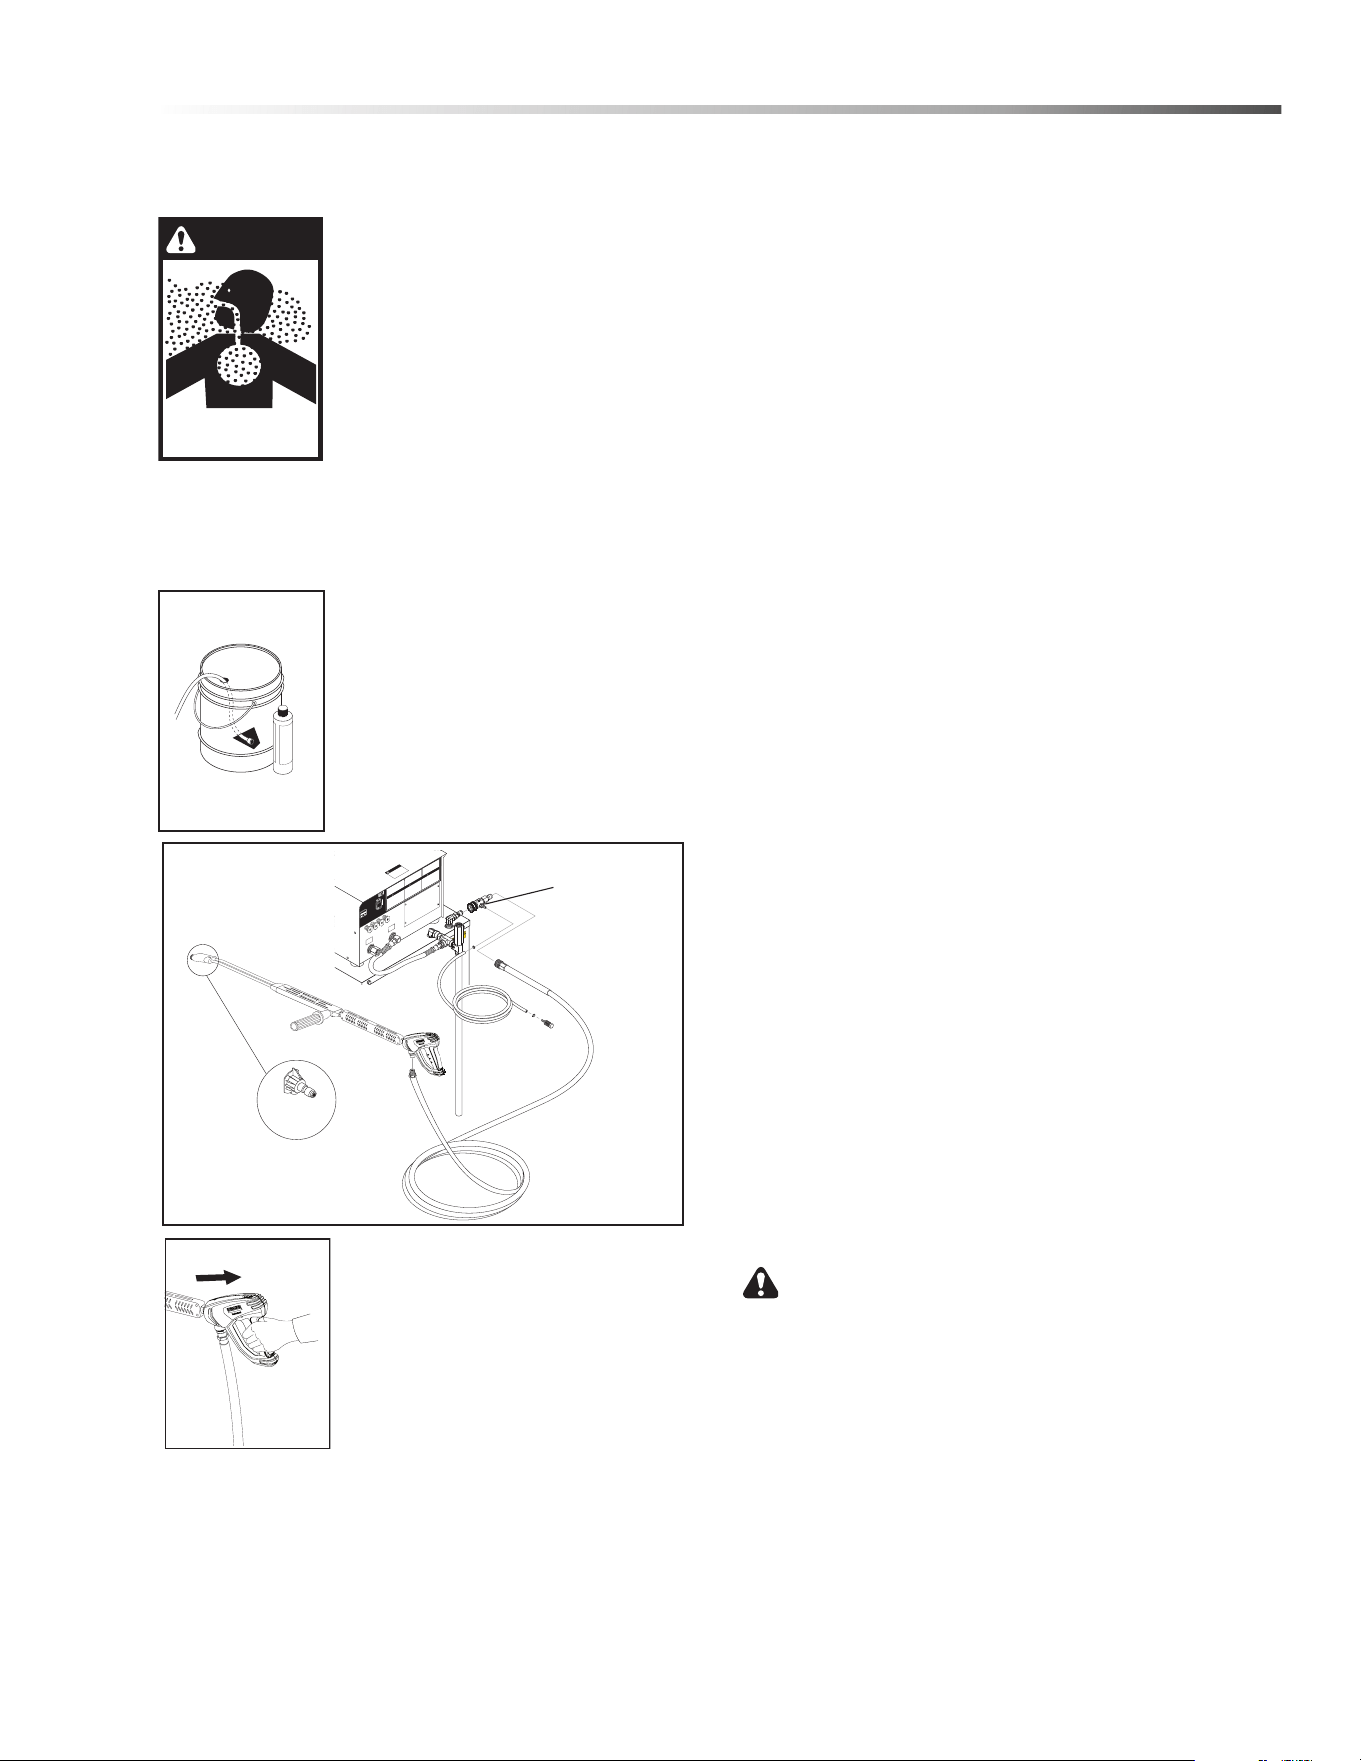
STEP 1: Use detergent designed
specifically for pressure washers.
Household detergents could damage
the pump. Prepare detergent
solution as required by the manufac-
turer. Fill a container with pressure
washer detergent. Place the filter
end of detergent suction tube into the
detergent container.
STEP 2: Apply safety latch to spray
gun trigger. Open variable pressure
wand handle to low pressure which
allows water through black
detergent nozzle.
NOTE: Detergent cannot be applied
during high pressure.
STEP 3: With the motor running, pull
trigger to operate machine. Liquid detergent is drawn
into the machine and mixed with water. Apply detergent
to work area. Do not allow detergent to dry on surface.
IMPORTANT: You must flush the detergent
injection system after each use by placing the
suction tube into a bucket of clean water, then run
the pressure washer in low pressure for 1-2
minutes.
Thermal Pump Protection
If you run your pressure washer for 3-5 minutes without
pressing the trigger on the spray gun, circulating water
in the pump can reach high temperatures. When the
water reaches this temperature, the pump protector
engages and cools the pump by discharging the warm
water onto the ground. This thermal device prevents
internal damage to the pump.
Cleaning Tips
Pre-rinse cleaning surface with fresh water. Place
detergent suction tube directly into cleaning solution
and apply to surface at low pressure (for best results,
limit your work area to sections approximately 6 feet
square and always apply detergent from bottom to top).
Allow detergent to remain on surface 1-3 minutes. Do
not allow detergent to dry on surface. If surface
appears to be drying, simply wet down surface with
fresh water. If needed, use brush to remove stubborn
dirt. Rinse at high pressure from top to bottom in an
even sweeping motion keeping the spray nozzle
approximately 1 foot from cleaning surface. Use over-
lapping strokes as you clean and rinse any surface. For
best surface cleaning action spray at a slight angle.
Recommendations:
• Before cleaning any surface, an inconspicuous
area should be cleaned to test spray pattern
and distance for maximum cleaning results.
• If painted surfaces are peeling or chipping, use
extreme caution as pressure washer may
remove the loose paint from the surface.
• Keep the spray nozzle a safe distance from the
surface you plan to clean. High pressure wash
a small area, then check the surface for
damage. If no damage is found, continue to
pressure washing.
CAUTION - Never use:
• Bleach, chlorine products and other corrosive
chemicals
• Liquids containing solvents (i.e., paint thinner,
gasoline, oils)
• Tri-sodium phosphate products
• Ammonia products
• Acid-based products
These chemicals will harm the machine and will
damage the surface being cleaned.
Karcher HDS Series Operator’s Manual 9.800-967.0 - D
WARNING
COLD
W
A
TE
R
I
NL
E
T
C
O
LD
W
A
TER
O
U
TL
E
T
I
NST
R
UC
T
I
O
NS
0°
40
°
40
°
25
°
W
ARNING
P
RE
CA
UTI
O
N
A
T
T
E
NT
I
O
N
I
N
S
T
R
U
C
T
I
O
NS
I
N
ST
RU
CC
I
ON
E
S
15°
O
N
PRE
ND
E
R
O
F
F
I
O
E
X
P
O
S
E
D
P
UL
L
E
Y
S
AN
D
B
E
L
T
S
C
A
N
C
AUS
E
I
N
J
U
R
Y
P
R
E
C
A
U
C
I
O
N/
A
VE
R
T
IS
S
E
M
E
NT
W
AR
N
I
NG
Detergent
Injector
14
Operations
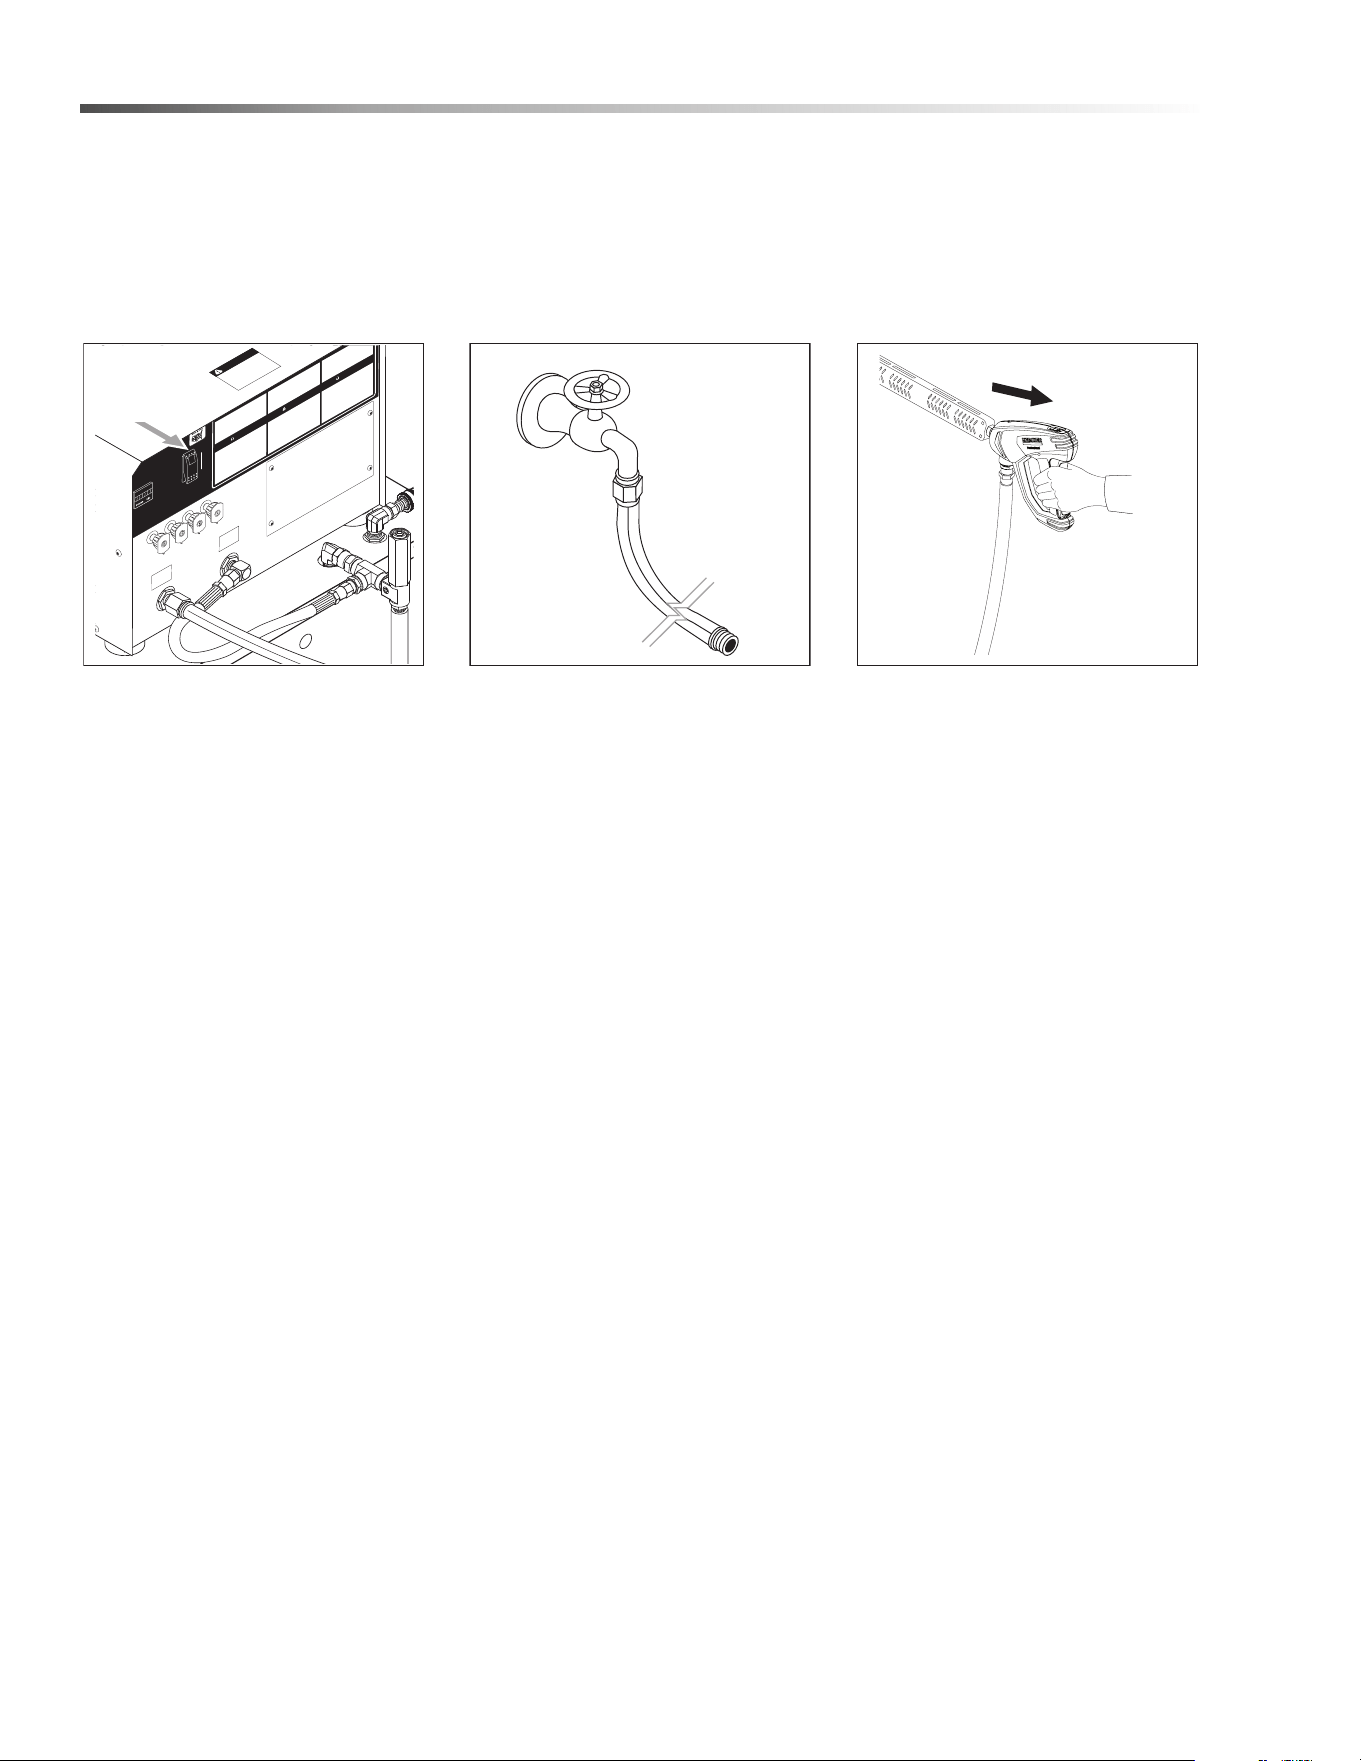
Shutdown Procedures
STEP 1: Rinse all lines (and
injector) with clean water, to
remove any soap residue then turn
toggle switch off.
STEP 2: Turn off water supply. STEP 3: Open spray gun to relieve
remaining pressure and remove
water supply hose.
In freezing conditions, disconnect
water supply and open spray gun to
allow water to drain, then turn off
motor.
CAUTION: Do not allow pump to
run longer than 5 minutes
without water. Disconnect all
hoses to allow water to drain.
ATTENTION: Ne pas laisser la
pompe fonctionner pendant plus
de 5 minutes sans eau.
Débrancher tous les boyaux
pour permettre l'évacuation de
l'eau.
CAUTION: With machine off,
open spray gun to release
pressure before removing
discharge hose.
ATTENTION: Avec la machine
hors tension, ouvrir le pistolet
pulvérisateur pour relâcher la
pression avant de retirer le tuyau
de refoulement
Karcher HDS Series Operator’s Manual 9.800-967.0 - D
Rinsing
It will take a few seconds for the detergent to clear. Apply safety latch to spray gun. Turn variable pressure
control handle to high pressure.
NOTE: You can also stop detergent from flowing by simply removing detergent siphon tube from bottle.
C
O
LD
W
A
TE
R
I
N
L
E
T
COLD
W
A
T
ER
OUTLET
INST
R
U
CTIONS
0°
40°
40°
25°
WARN
I
NG
P
R
ECAU
T
I
ON
A
T
T
E
N
TIO
N
I
N
S
TRU
INSTRUCC
I
ONES
15°
O
N
PR
EN
DE
R
OFF
I
O
EXP
OS
ED PUL
L
EY
S
AN
D
B
EL
T
S CAN CAUSE I
NJ
UR
Y
PRECAUC
IO
N/A
VE
R
TI
SSE
M
ENT
W
ARN
ING
Toggle
Switch

15
Maintenance
Maintenance
Daily:
To ensure a problem free system, simple visual checks
can be performed. Check for leaks in inlet supply,
pumping system, pump to heater hose, heater, spray
gun(s) and high pressure hose. Check for normal
operating functions and pump oil level/condition. Check
nozzle condition. If badly worn or leaking conditions are
found, qualified personnel should repair or replace
components with new original or equivalent manufac-
turers parts.
Check equipment for proper operation. Nozzle spray
should be uniform in flow, angle, and pressure. Clean if
nozzle is plugged and replace if worn. If a heavy
pulsation in the hose or spray is observed, repair of the
pumping system is required.
Weekly:
After the first week of operation, it is recommended 1
quart (1 litre) of motor oil be added to the heat
exchanger tank through the 1-1/4” fill pipe. This oil
creates a vapor barrier and slows evaporation of water
in the tank.
Check heat exchanger water level. The level must be
up to the filler pipe neck. Add water if necessary. If cold
water has been added, heating may cause the
expanding water to escape through the filler plug. This
will stop after operating temperature has been reached.
Monthly:
Check system for operation. Automatic start/stop, hot
high pressure water, and smooth operation should be
noted.
Change oil in pump crankcase. Note the condition of
the oil when drained. If found to be creamy, water seals
in pump may have to be removed and replaced.
Karcher HDS Series Operator’s Manual 9.800-967.0 - D
Pump Storage
CAUTION: Always store your pressure washer in a
location where the temperature will not fall below 32° F
(0° C). The pump in this machine is susceptible to
permanent damage if frozen.
ATTENTION: Toujours entreposer la laveuse à
pression dans un endroit où la température ne sera
pas inférieure à 0 °C (32 °F). La pompe sur cette machine est suscep-
tible de subir des dommages si elle est exposée au gel.
FREEZE DAMAGE IS NOT COVERED BY WARRANTY.
If you must store your pressure washer in a location where the tempera-
ture is below 32° F, you can minimize the chance of damage to your
machine by draining your machine as follows:
1. Stop the pressure washer and detach supply hose and high pressure
hose. Squeeze the trigger of the spray gun to drain all water from the
wand and hose.
2. Restart pressure washer and let it run briefly (about 5 seconds) until
water no longer discharges from the high pressure outlet.
CAUTION

16
Maintenance
Preventative Maintenance
This pressure washer was produced with the best available materials and quality craftsmanship. However, you as
the owner have certain responsibilities for the correct care of the equipment. Attention to regular preventative main-
tenance procedures will assist in preserving the performance of your equipment. Contact your Kärcher dealer for
maintenance. Regular preventative maintenance will add many hours to the life of your pressure washer. Perform
maintenance more often under severe conditions.
Oil Change Record
Pump Oil
SAE10W-40
Non-foaming
Inspect Daily inspect the oil level
Change After first 50 hours, then every 500 hours or
annually
Replace High Pressure Nozzle Every 6 months
Replace Quick Connect Annually
Clean Water Screen/Filter Weekly
Replace HP Hose Annually if there is any sense of wear
Grease Motor Every 10,000 hours
Inspect Heater Module Tank Water Level Weekly
Date Oil Changed
Month/Day/Year
Estimated Operating
Hours Since Last
Oil Change
Karcher HDS Series Operator’s Manual 9.800-967.0 - D

17
Maintenance
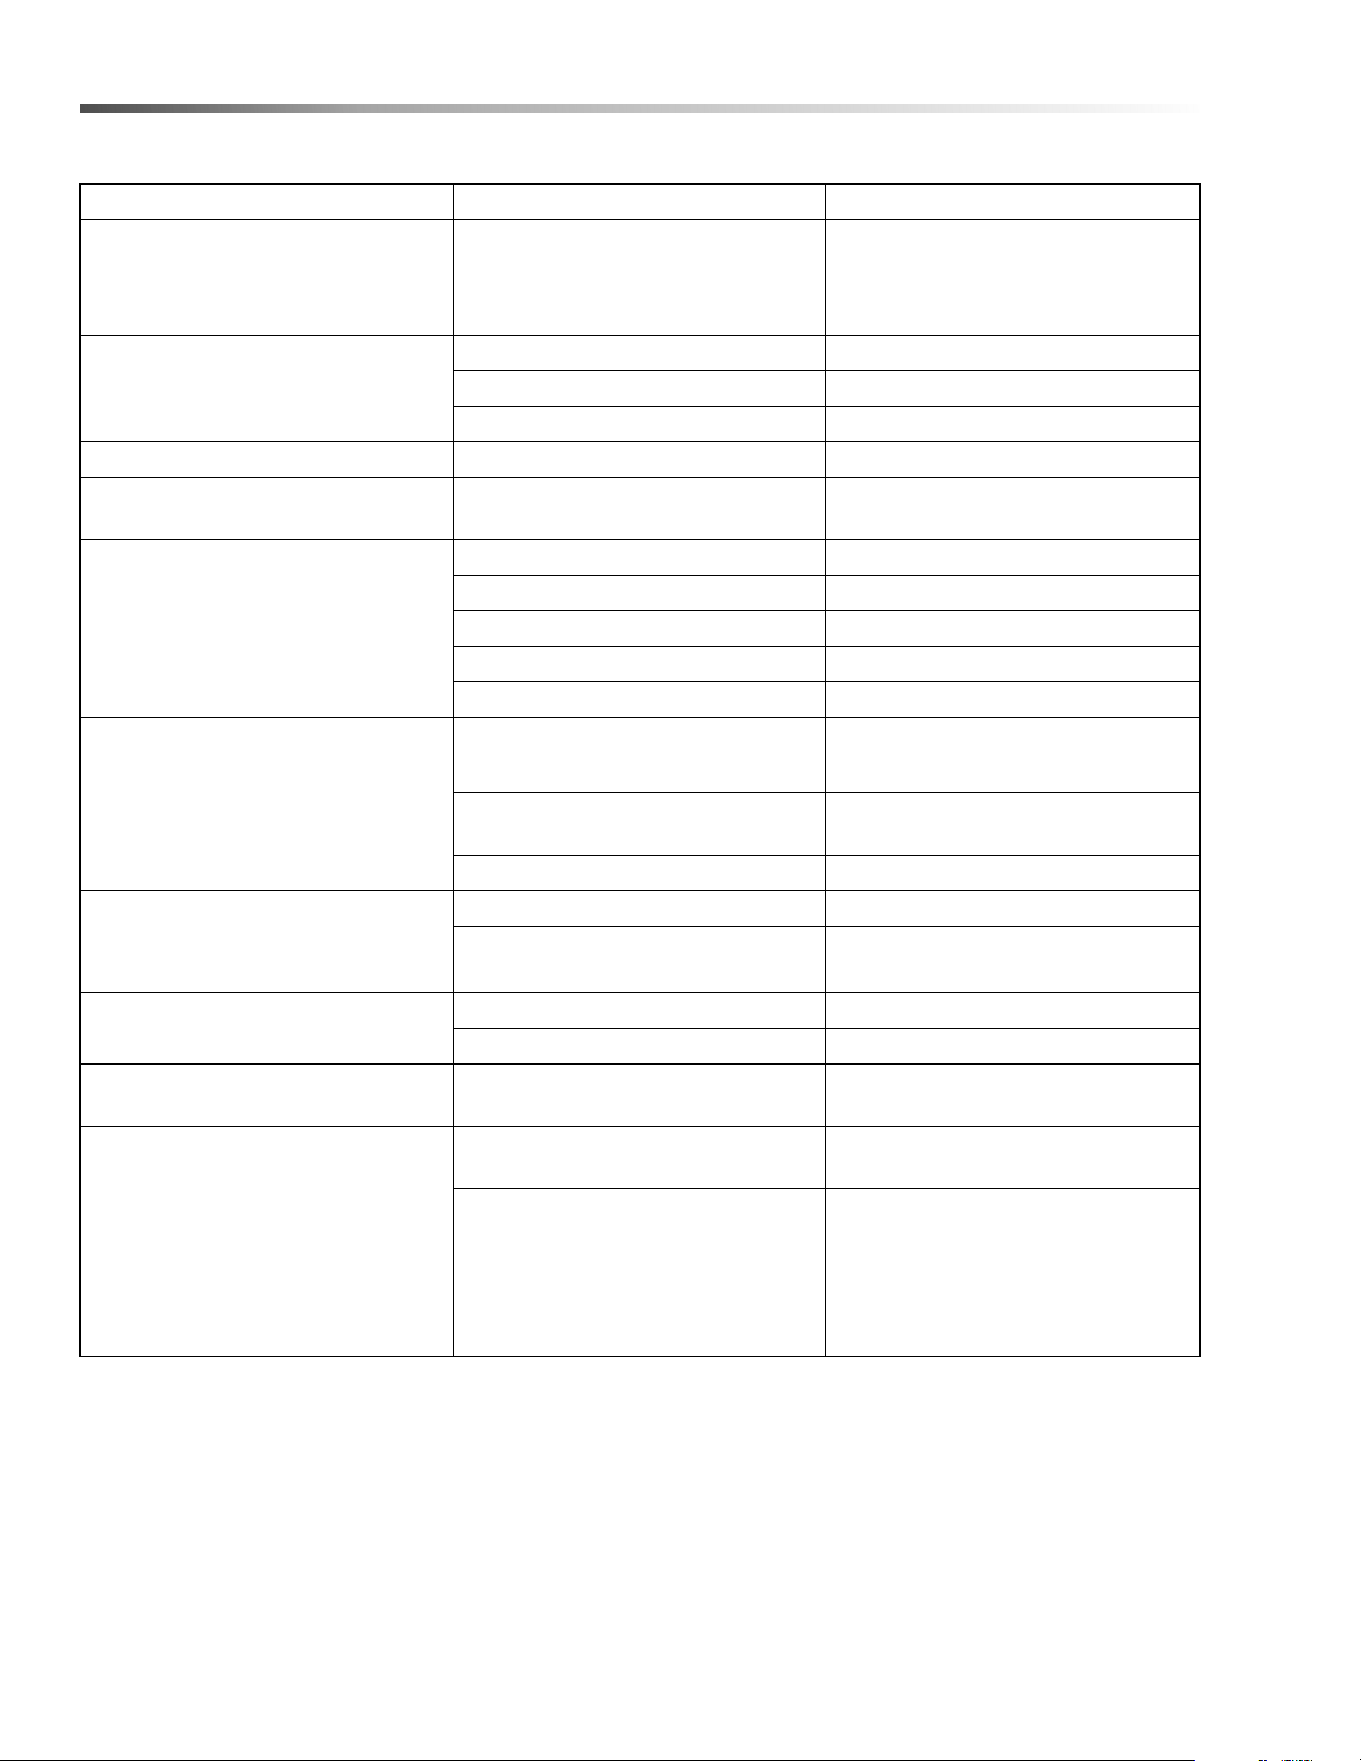
Troubleshooting
PROBLEM POSSIBLE CAUSE SOLUTION
LOW OPERATING
PRESSURE
Faulty pressure gauge Install new gauge.
Insufficient water supply
Use larger garden hose; clean filter washer
at water inlet.
Old, worn or incorrect spray nozzle
Match nozzle number to machine and/or
replace with new nozzle.
Plumbing or hose leak
Check plumbing system for leaks.
Retape leaks with teflon tape.
Faulty or misadjusted unloader valve
(where applicable)
Adjust unloader for proper pressure. Install
repair kit when needed.
Worn packing in pump Install new packing kit.
Fouled or dirty inlet or discharge valves
in pump
Clean inlet and discharge valves.
Worn inlet or discharge valves Replace with valve kit.
Leaking pressure control valve (where
applicable)
Rebuild or replace as needed.
FLUCTUATING
PRESSURE
Valves worn Check and replace if necessary.
Blockage in valve Check and clean out if necessary.
Pump sucking air
Check water supply and suction line for air
seepage at joints.
Worn piston packing Check and replace if necessary.
PRESSURE LOW
AFTER PERIOD OF
NORMAL USE
Nozzle worn Check and replace if necessary.
Inlet or discharge valves blocked or
worn
Check and clean or replace if necessary.
Unloader valve seat worn Check and replace if necessary.
PUMP NOISY
Air in suction line
Check water supply connections on
suction line.
Broken or weak inlet or discharge valve
springs
Check and replace if necessary.
Foreign matter in valves Check and clean if necessary.
Worn bearings Check and replace if necessary.
PRESENCE OF WATER
IN PUMP OIL
Water sprayed at machine
Change oil. Direct spray away from
machine.
High humidity in air Check and change oil twice as often.
Piston packing worn. Oil seal worn Check and replace if necessary.
Karcher HDS Series Operator’s Manual 9.800-967.0 - D
18
Maintenance
PROBLEM POSSIBLE CAUSE SOLUTION
OIL SQUIRTS OUT OF OIL CAP
ON PUMP
Pump overfilled with oil
Maintain oil level at red dot on sight
glass at rear of pump or at top of
notch on dipstick
(where applicable).
WATER DRIPPING FROM
UNDER PUMP
Piston packing worn Check and replace if necessary.
O-Ring plunger retainer worn Check and replace if necessary.
Cracked piston Check and replace if necessary.
OIL DRIPPING Oil seal worn Check and replace if necessary.
EXCESSIVE VIBRATION IN
DELIVERY LINE
Irregular functioning of the valves Check and replace if necessary.
SYSTEM WILL NOT START
Power, water, auto switch not on Check and turn on.
Motor overload tripped Check and reset.
Control fuse blown (2 or 3 amp) Check and replace.
Pressure switch faulty Check, clean or replace.
Timer faulty Check and replace.
SYSTEM WILL NOT STOP
Water leak in discharge line
Repair wate
r leak.
Pressure switch faulty
Disconnect at timer. If unit stops,
replace pressure switch.
Timer resistor faulty Replace timer.
SYSTEM STOPS AFTER
APPROXIMATELY 10 SECONDS
AND THEN RESTARTS
Faulty pressure switch Check and replace.
Leak in system Fix leak.
WATER IS NOT HOT
Tank water low Check for leaks and fill.
Temperature or level controls faulty Check and replace.
MOTOR ”HUMS” BUT DOES NOT
TURN
Electric motor single phasing
Check for blown fuse or loose power
line connections.
PUMP RUNNING NORMALLY BUT
LOW WATER PRESURE
Air leak in inlet
Check water supply and possibility
of air entering water connections.
Faulty pressure unloader
Bypass pressure unloader by wiring
spray gun open. If good PSI, turn
machine off and replace regulator.
DO NOT RELEASE SPRAY GUN
WHILE BYPASSING UNLOADER.
Karcher HDS Series Operator’s Manual 9.800-967.0 - D

19
Maintenance
PROBLEM POSSIBLE CAUSE SOLUTION
WATER ESCAPING FROM
FILL PIPE ON HEAT
EXCHANGER
Cold water added to heat exchanger Will stop once at operating temperature.
Ruptured coil or leaking Check, repair or replace fittings.
UNLOADER DOES NOT GO
INTO BYPASS OR WILL
CYCLE ITSELF
Spray gun or hose is leaking to atmo-
sphere
Check and repair all leaks.
Check plunger either did not move or
did not seal
Remove discharge port. Clean and
inspect the check plunger. Replace the o-
ring if needed.
Actuator o-ring failure
Remove actuator plunger assembly and
inspect o-ring and back-up rings.
Replace if necessary.
SPIKES TOO HIGH
Slow moving actuator; this may be
caused by bad o-rings either on the
plunger or inside the actuator fitting.
Remove the actuator assembly to
inspect the o-ring and back-up rings. The
actuator assembly will have to be disas-
sembled to inspect and/or replace the o-
rings in the actuator fitting.
Spring tension
Adjustment should stop when pressure is
no longer affected by further compres-
sion of the spring.
Hose length
Hose length can affect the amount of
spike pressure. Long lengths of hose
may cause high spike pressures.
SYSTEM WON’T COME UP
TO PRESSURE
Water is leaking between ball and seat
Disassemble inlet fitting and check for
contaminates or worn parts. Clean or
replace as needed.
O-Rings on actuator plunger are bad
Remove actuator assembly and inspect
o-ring and back-up rings. Replace if
necessary.
Locknut may be improperly set
Readjust locknut.
NOTE: The locknut is inside the spring
on models that have the stem exposed
above the spring.
Tip/GPM combination is incorrect
Check actual GPM on unrestricted pump
and size tip accordingly.
Tip worn- the GPM may be greater
than expected with a worn tip
Replace tip.
Bad gauge - the pressure may be
higher than the gauge shows
Replace gauge.
Karcher HDS Series Operator’s Manual 9.800-967.0 - D

9.800-967.0 • Printed in U.S.A.