- 1 -
Item No. 210472
5-IN-1 CORDLESS GROOMING SHAVER
User Guide
Thank you for purchasing the 5-in-1 Cordless Grooming Shaver. Please read this manual
thoroughly before operating this device.
CAUTION
Before using the product, please carefully read and follow these instructions. Keep them for
future reference.
• Only use a 5V 1000mA charger. Do not use a charger with higher power output.
• If the charging USB cable is damaged, discontinue use.
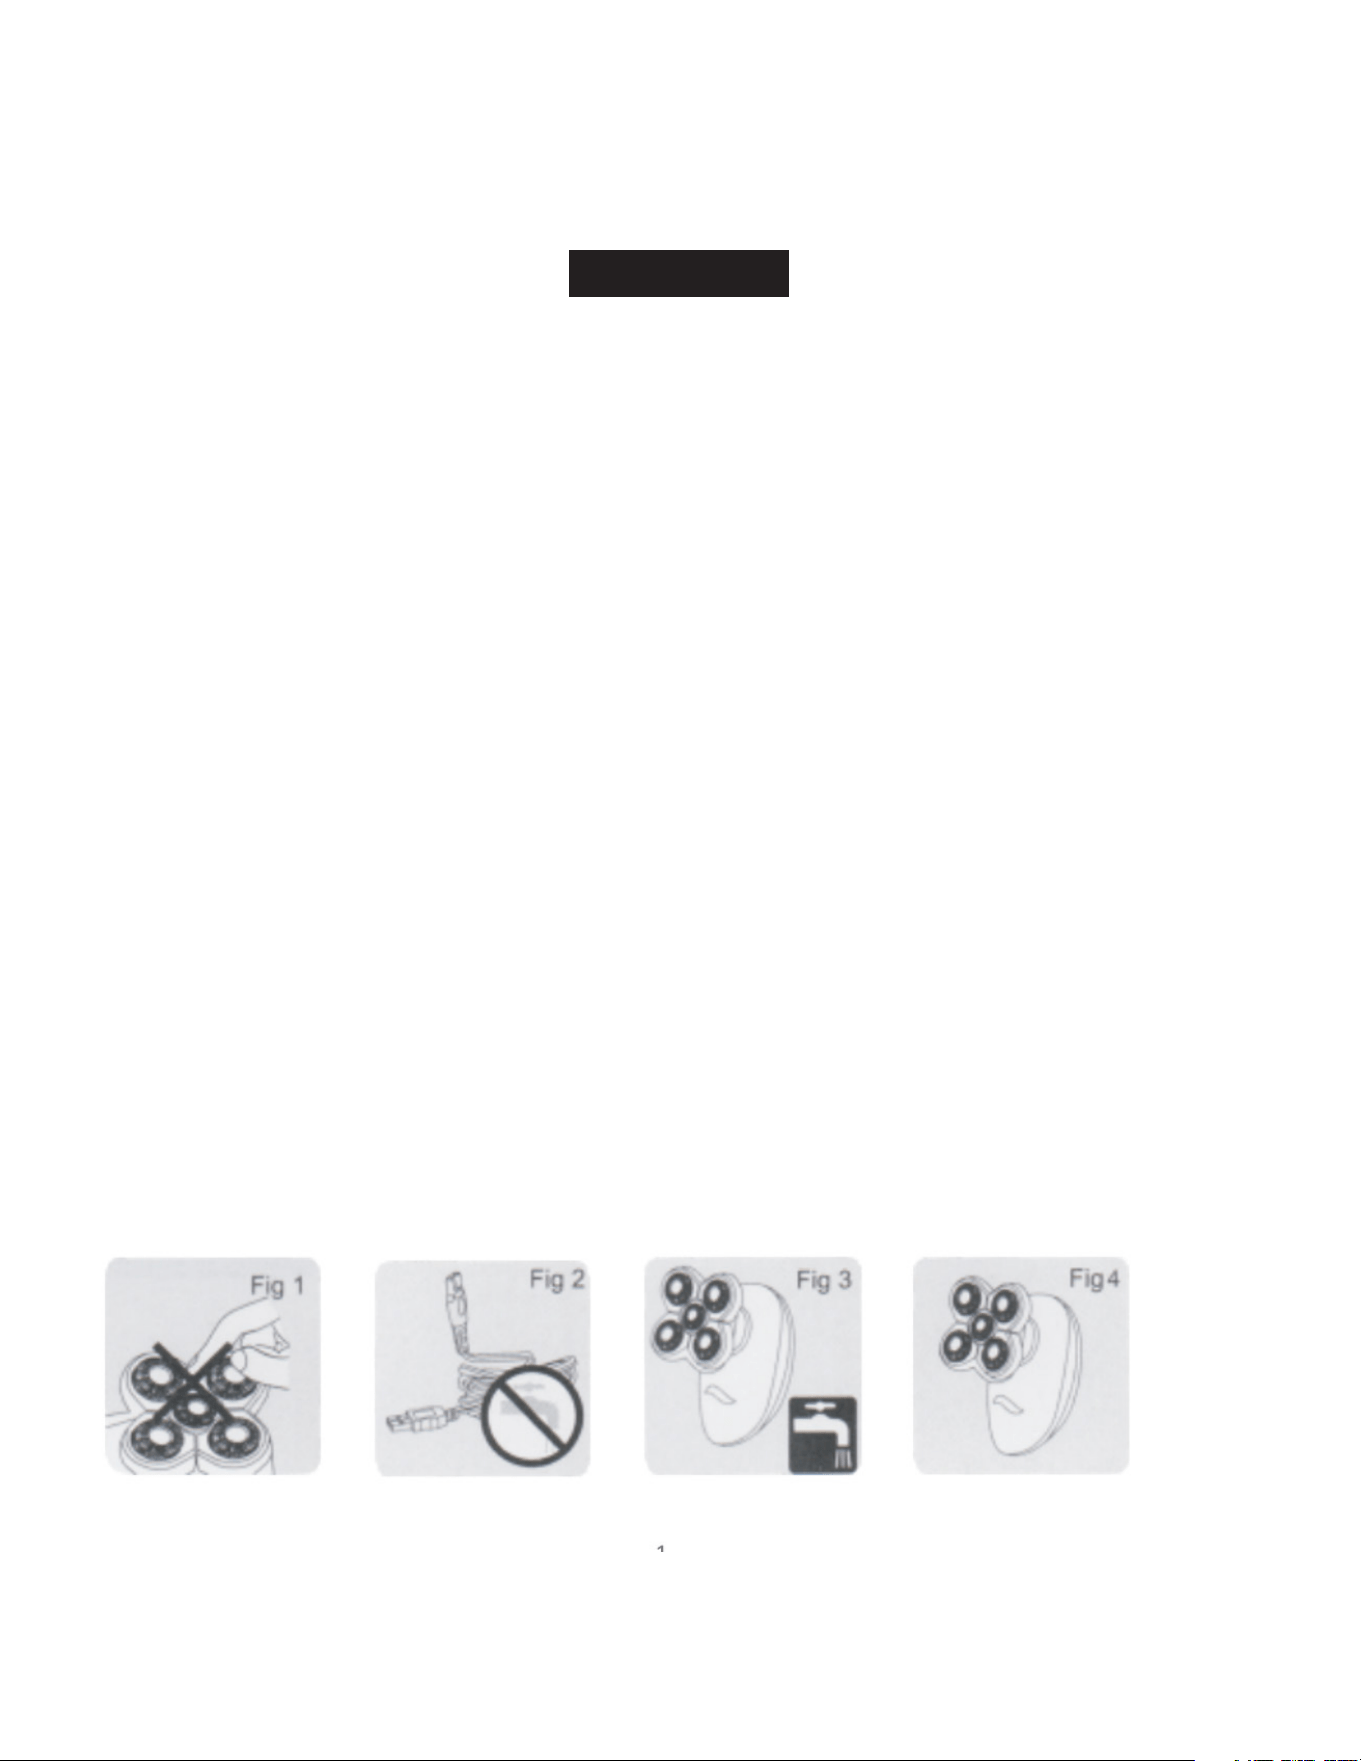
• The blades are made of thin alloy, to avoid damage, do not press them by hand (Fig 1).
• Keep the charger and storage area at a temperature between 5°C and 35°C.
• Do not rinse the charger under water (Fig 2).
• Unplug the charger before cleaning the shaver with running water (Fig 3).
• The product is waterproof with an IPX7 rating.
• This product should not be used by individuals who are physically or mentally impaired, or by
children, unless they are under supervision or have been instructed on its proper use.
• Keep out of reach of children to prevent any accidents.
• Clean inside the beard compartment if the shaver does not work after pressing the switch.
• The indicator light on the shaver will be red while charging. When it turns green, the shaver is
fully charged (Fig 4).
• Always place the protective cover on the shaver head when traveling to protect it.

- 2 -
CHARGING
Instructions
1. Insert the product charger into the shaver (Fig 5).
2. Plug in the charger.
3. The charging indicator light will turn on (Fig 6).
4. Once fully charged, unplug the charger and remove the plug from the shaver.
5. The shaver can also be charged using the charging base.
Notes
• Ensure the shaver is turned off before charging.
• Use fast charging for one hour. For normal charging, keep the device plugged in for about 60
minutes after fully charging.
• Do not keep the product connected to the power supply for more than 24 hours.
INSTRUCTIONS FOR USE
Shaving
1. Press the ON/OFF button to start the shaver.
2. Move the shaver head quickly across your skin in straight lines and circular motions (Fig 7).
Cleaning and Maintenance
For the best shaving results, clean the shaver regularly. The easiest and most hygienic way to clean
the shaver is by washing the shaver head and the whisker compartment with water after each use.
- 3 -
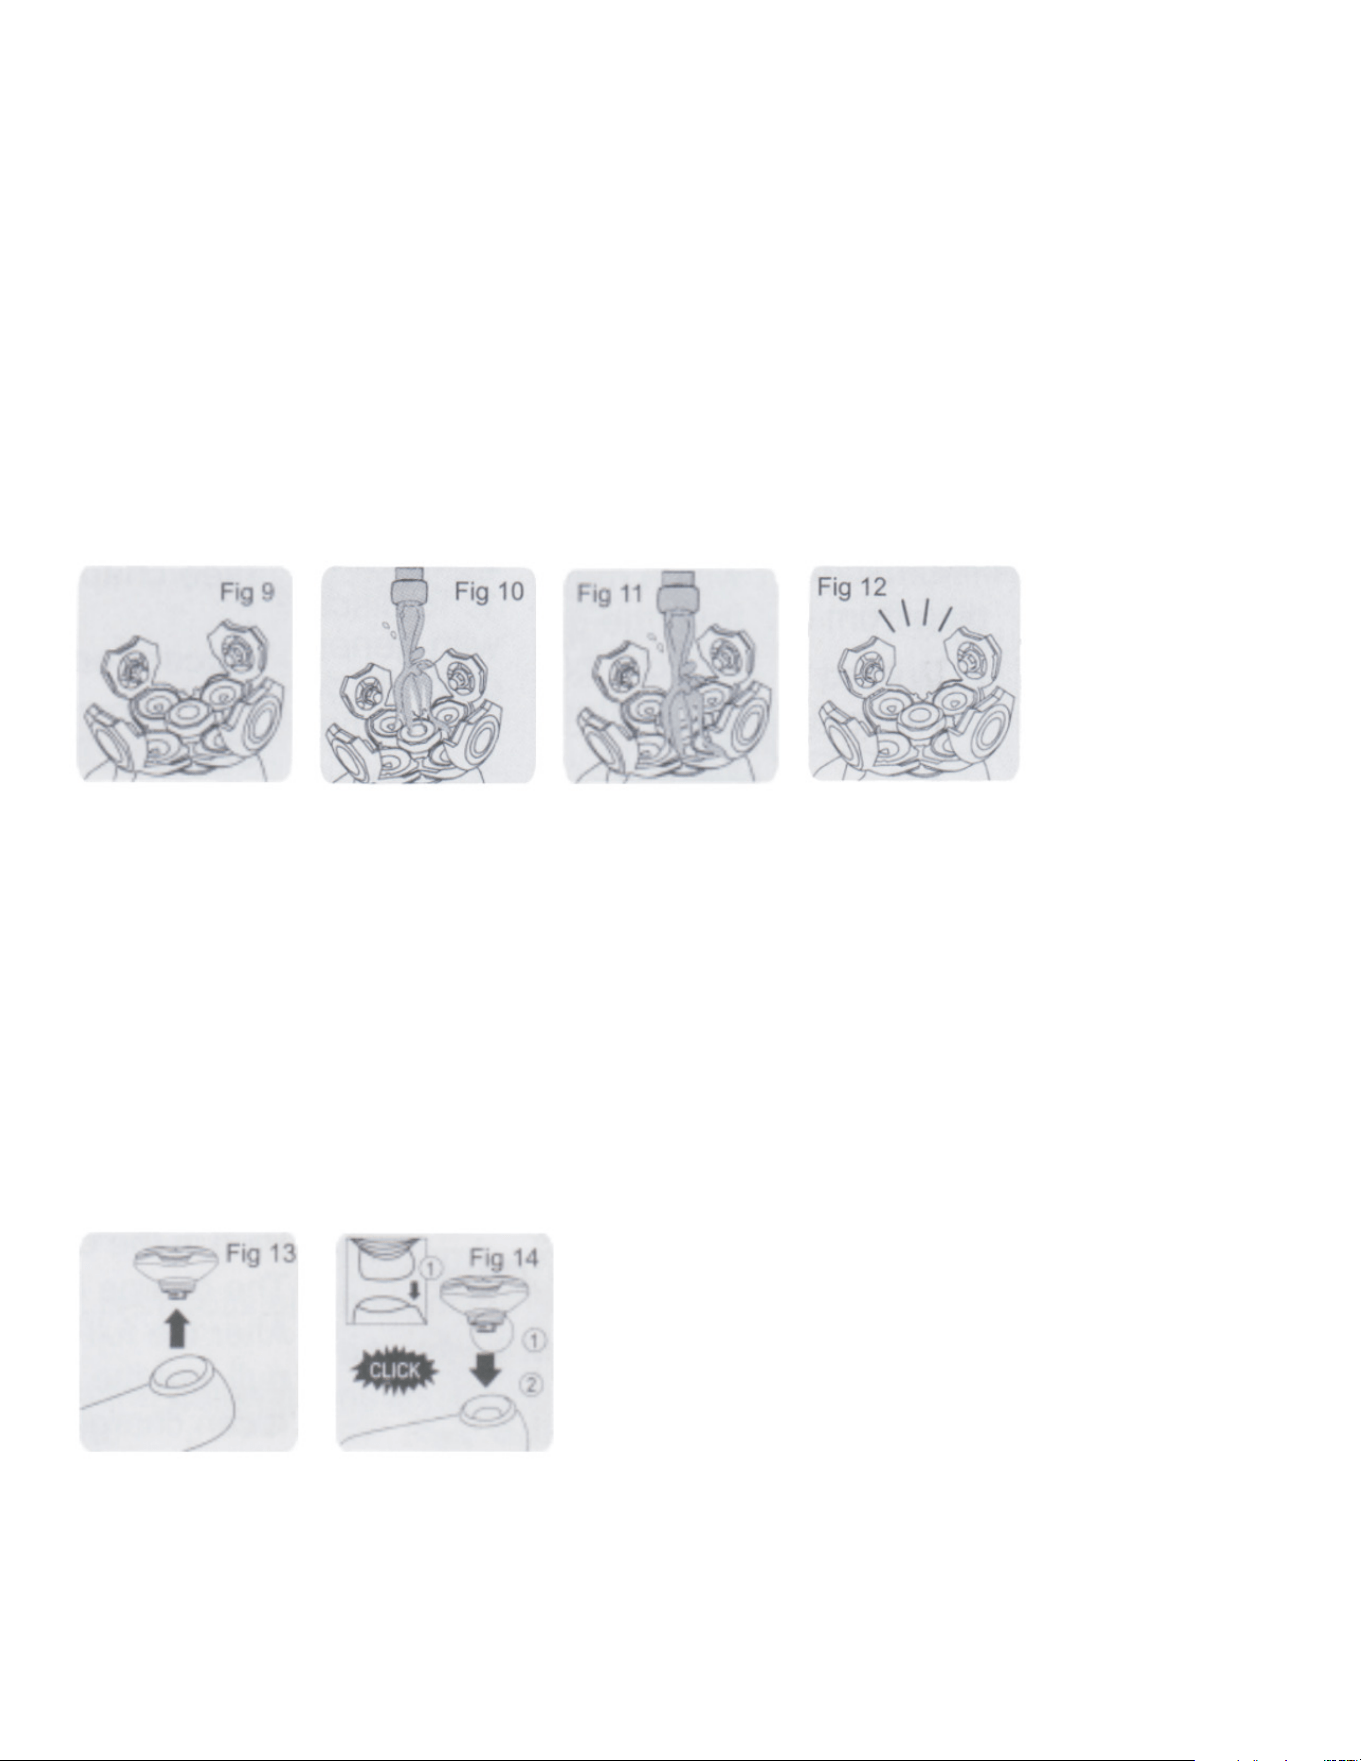
1. Stop the shaver (Fig 9).
2. Remove the shaver heads one by one by rotating and pulling out the middle head in the direction
indicated by the arrow.
3. Clean the shaver head and the whisker compartment thoroughly with running water (Fig 10).
Ensure both the shaver head and whisker compartment are completely clean.
4. Wipe down the surface of the shaver (Fig 11).
5. Reassemble the shaver head and discard any excess water.
Important: Do not wipe the shaver head with a towel or paper tissue, as this may cause damage to
the shaver head.
6. Open the shaver head part again and allow it to dry completely (Fig 12).
7. You can also use the included brush to clean the whisker compartment.
Shaver Head Replacement
• Replace the shaver head once a year for optimal shaving performance. The shaver is designed for
long-term use if not damaged by external factors.
• Only replace the damaged shaver head with the company’s official replacement part.
How to Replace the Shaver Head:
1. Remove the old shaver head assembly from the shaver (see Fig 13).
2. Insert the new shaver head assembly into the groove on the shaver’s top (Fig 14). Press down
until you hear a click, indicating the new head is securely in place.
Treatment Care
1. After shaving, rinse and dry your face. Your face is now ready for your next skincare routine step.
2. Clean the shaver attachment after each use (refer to the “Cleaning and Maintenance” section).

- 4 -
Accessories
The product comes with the following accessories:
• Charger
• Brush
Environmental Protection
1. To dispose of the product, do not place it with general household waste. Instead, take it to the
designated recycling center for proper disposal.
WARRANTY / CUSTOMER SERVICE
This item from SharperImage.com includes a 1-year limited replacement warranty. If you have any
questions not covered in this guide, please call our Customer Service department at 1 (877) 210-
3449. Customer Service agents are available Monday through Friday, 9:00 a.m. to 6:00 p.m. ET.
The SHARPER IMAGE® name and logo are registered trademarks.
©Sharper Image. All Rights Reserved.