User manual for Temperature and Humidity Mobitor NOKLEAD NK5253
Diagram
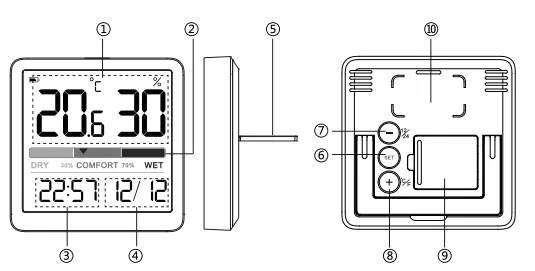
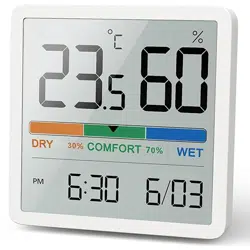
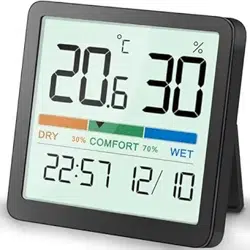
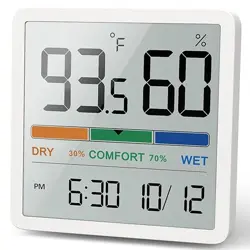
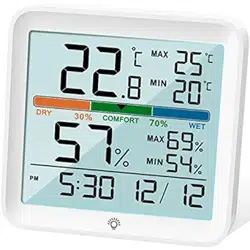
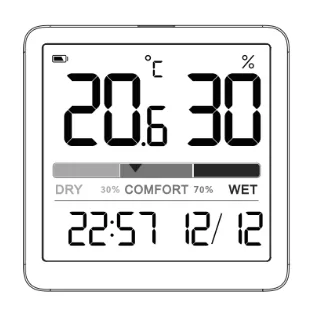
- Humidity and Temperature Display
- Comfort Level: DRY/COMFORT/WET
- Time
- Date
- Stand
- Clock Set
- [-], 12/24H Format
- [+], ℃/℉
- Battery Compartment
- Magnet
Features
1. Display: LCD display, Humidity, Temperature °C/°F, Time, Date
2. Humidity Display Range: 10%~99%
3. Temperature Range: -9.9°C ~ 60.0°C (14.2°F~140°F)
4. Comfort Level: DRY/COMFORT/WET
5. Totally wireless tabletop and magnet mountable design
6. Battery: Holds on a CR2032 button battery to power the unit, and one more comes with
Comfort Level
| Dry |
Humidity is below 29% (10-20%, 21-29%) |
| Comfort |
Humidity is between 30%-69% (30-39%, 40-60%, 61-69%) |
| Wet |
Humidity is above 70% (70-79%, 80-89%, 90-99%) |
Temperature
- Temperature Range: -9.9°C ~ 60°C (14.2°F~140°F)
- Temperature Accuracy: ± 1°C (0~40°C), ± 2°C (40~60°C)
- Refresh Rate: 10 seconds
- Temperature Resolution: 0.1 °F (0.1°C)
Humidity
- Humidity Range: 10% ~ 99%
- Humidity Accuracy: ± 3%-5% RH
- Refresh Rate: 10 seconds
- Humidity resolution: 1%
Operation
Before First Use
Remove the plastic tab from the battery compartment prior to use.
Power On
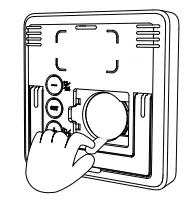
- Open the battery compartment cover.
- Insert or Replace one CR2032 button battery into the battery compartment with correct polarity (+) and (-) as shown.
- Replace the battery cover.
The LCD will display all digits and icons for 2 seconds, followed by the temperature reading.
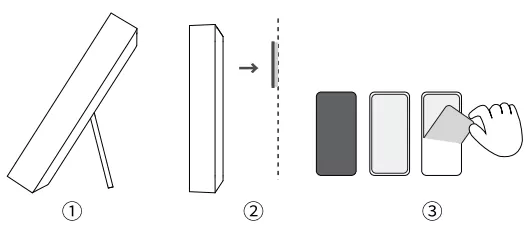
Install
- Lift the stand cover
- Place on Metal Surface: With built-in magnet, you can stick it to any metal surface directly.
- Place on Non-Metallic Surface: Stick the glued side of the adhesive pad to non-metallic surface first, then stick the humidity meter to the iron side of the adhesive pad. (Please keep the surface clean before stick the adhesive pad.)
Date/Time Setting
- Press and hold the "SET" button to enter the date setting. In the time mode, the Year begins to flash, press the "+" or "-" button to adjust the Year. Press and hold the "+" or "-" button for quick adjustment.
- Press the "SET" button again, the Month begins to flash, press the "+" or "-" button to adjust the Month.
- Press the "SET" button again, the Day begins to flash, press the "+" or "-" button to adjust the Day.
- After Date setting, press the "SET" button again and confirm entering the time setting when the hour number in the lower left corner starts to flash.
- Press the "+" or "-" button to adjust the Hour
- Press the "SET" button again, the minute digit starts to flash, press the "+" or "-" button to adjust the minute, long press "+" / "-" to set quickly.
- After setting, press "SET" button to confirm or no operation 15S automatically save and return to time/date display
12/24H Time Setting
Under normal using, Press the "-" button to switch 12/24H time format.
Note: When the 12H time format is selected, the "AM" or "PM" will display on the screen.
°C/°F Setting
Under normal using, Press the "+" button to switch temperature unit to °C/°F.
Specifications
- Power supply: 1 X 3V CR2032 Button Battery
- Product size (weight): 70*70*14mm (65g)
- Battery Life: 8-12 Months
- Install: Magnet/Stick Mount or Stand
Calibration
Actually the factory had calibrated the thermometer when finishing the final testing and inspection. But we still add the calibration funtion to meet the demand of some customers.
- To access calibration mode, press the "+" and "-" buttons and hold together until the temperature number begins to flash, release the both button and just press the "+" or "-" button to adjust the temperature. (Max ±5°C, Max ±9°F)
- Press the "SET" button until the humidity number begins to flash, release the button and press the "+" or "-" button to adjust the humidity. (Max ±10%)
- Press the "SET" button to save your adjustments. Or after 15 seconds of inactivity, the display will save the adjustments and exit calibration mode.
Note: Calibrations will be erased if the batteries are removed.
Default Setting
Default Time: 12:00 (24H Format)
Warnings
- Please operate this product under the operating instructions. Do not expose the unit to extreme temperatures, direct sunlight, dust, humidity and so on.
- Do not disassemble the device privately.
- Please use a CR2032 button battery to supply for this humidity meter, do not mix different type batteries. And please take the battery out when not in use.
- Please prevent the product from falling.
- This product is non-waterproof, please stay away from any liquid.
- When the screen display is unclear, please replace the battery.
- Please keep the screen surface clean.
What You Get
1 * Temperature and Humidity Monitor
2 * CR2032 Button Battery
1 * User Manual
1 * Metal Adhesive Pad
Warranty
60-Day Money-Back for Any Reason
You may return your undamaged product and packaging within 60 days of purchase to receive a full refund for any reason.
18-Month Warranty for Quality-Related Issue
Please kindly contact our customer service if you have quality-related issues, we will take care of quality-related issues with a replacement or full refund.
Customer Service Email: [email protected]