2024/6/17 11:03V01_T81A0_UG_EN_20240528
第1/4⻚https://salesforce-knowledge.s3.us-west-2.amazonaws.com/V01_T81A0_UG_EN_20240528/V01_T81A0_UG_EN_20240528.html
AT A GLANCE
WHAT'S IN THE BOX
CHARGING THE CAMERA
SETTING UP
MOUNTING
Select a Location
Location Height
Mount the Camera
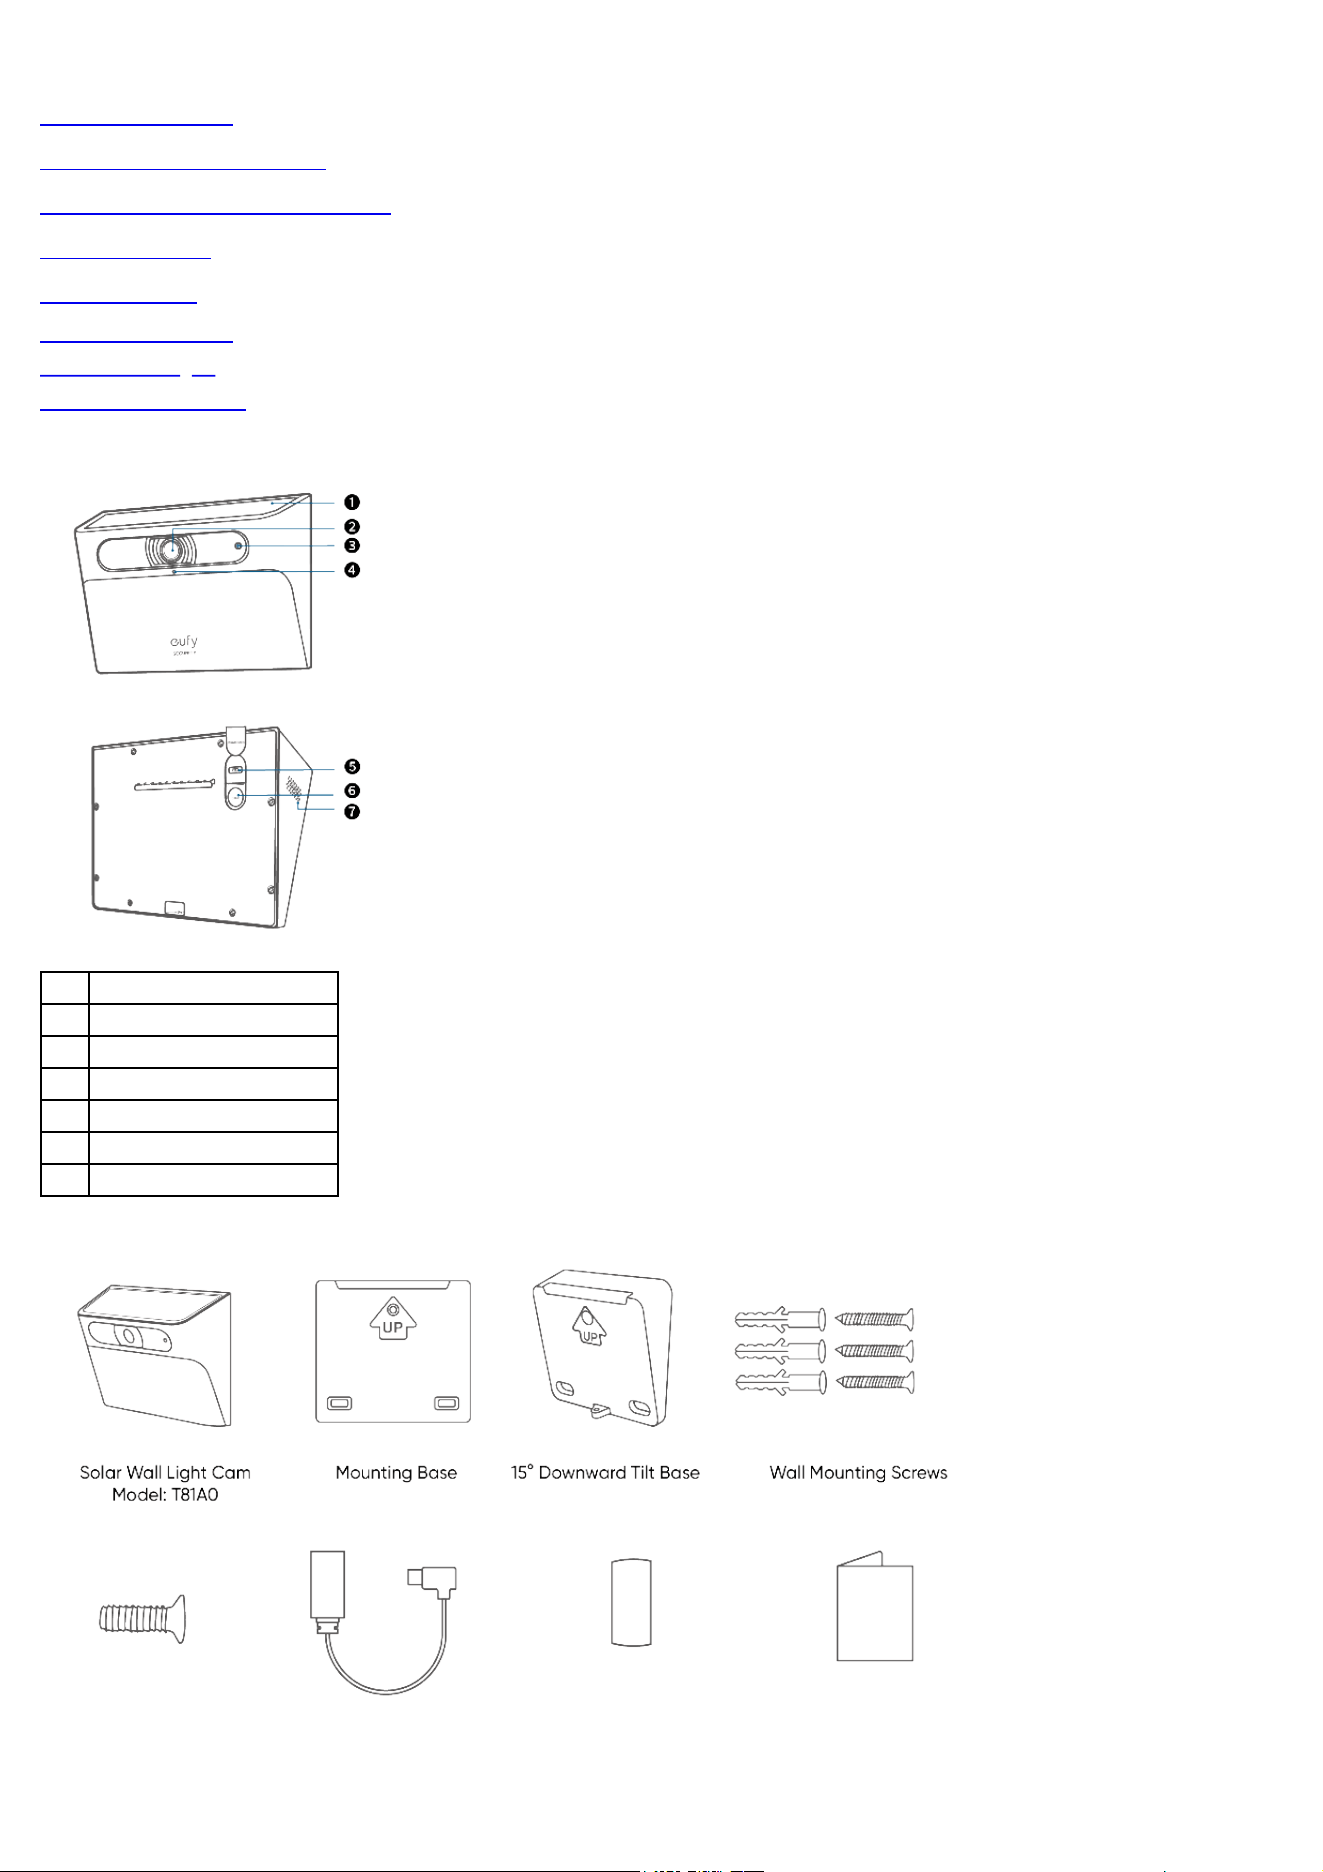
AT A GLANCE
❶Solar Panel
❷Camera
❸LED Indicator
❹Microphone
❺USB-C Charging Port
❻SYNC Button
❼Speaker
WHAT'S IN THE BOX
2024/6/17 11:03V01_T81A0_UG_EN_20240528
第2/4⻚https://salesforce-knowledge.s3.us-west-2.amazonaws.com/V01_T81A0_UG_EN_20240528/V01_T81A0_UG_EN_20240528.html
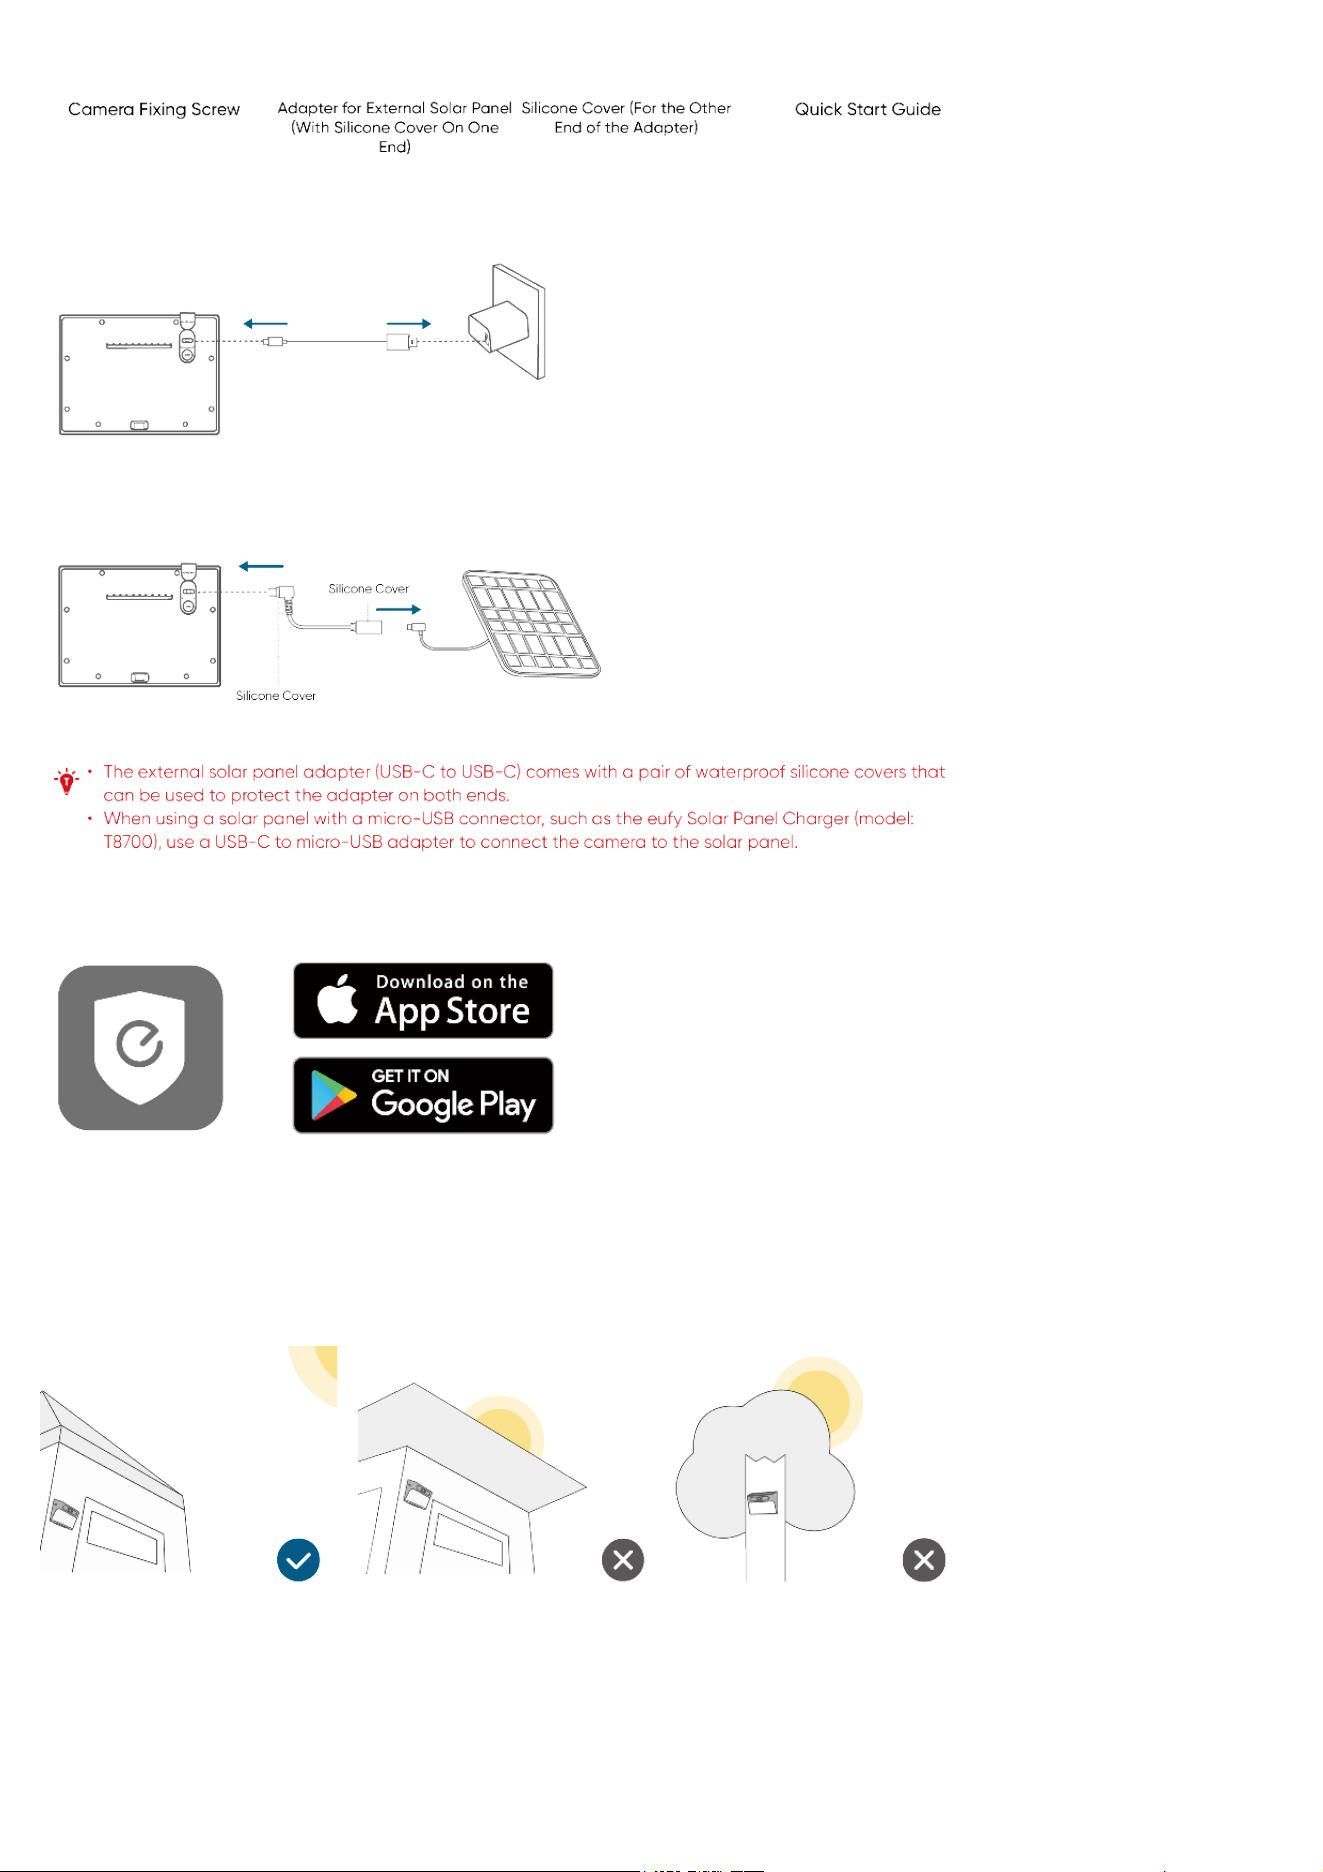
CHARGING THE CAMERA
Option 1:
Note: A standard USB-C charging cable (not included) and AC adapter (not included) are required for charging. Fully charge before first use.
Option 2:
SETTING UP
1. Download and install the eufy Security app, and sign up for an account.
2. Follow the in-app instructions to add your Solar Wall Light Cam.
MOUNTING
Select a Location
The camera can be mounted on a wall or similar surface. Select a location where the solar panel will not be blocked by obstacles such as a roof or
leaves.

2024/6/17 11:03V01_T81A0_UG_EN_20240528
第3/4⻚https://salesforce-knowledge.s3.us-west-2.amazonaws.com/V01_T81A0_UG_EN_20240528/V01_T81A0_UG_EN_20240528.html
Location Height
We recommend mounting 1.8 m - 2.5 m (5.9 ft - 8.2 ft) above ground level.
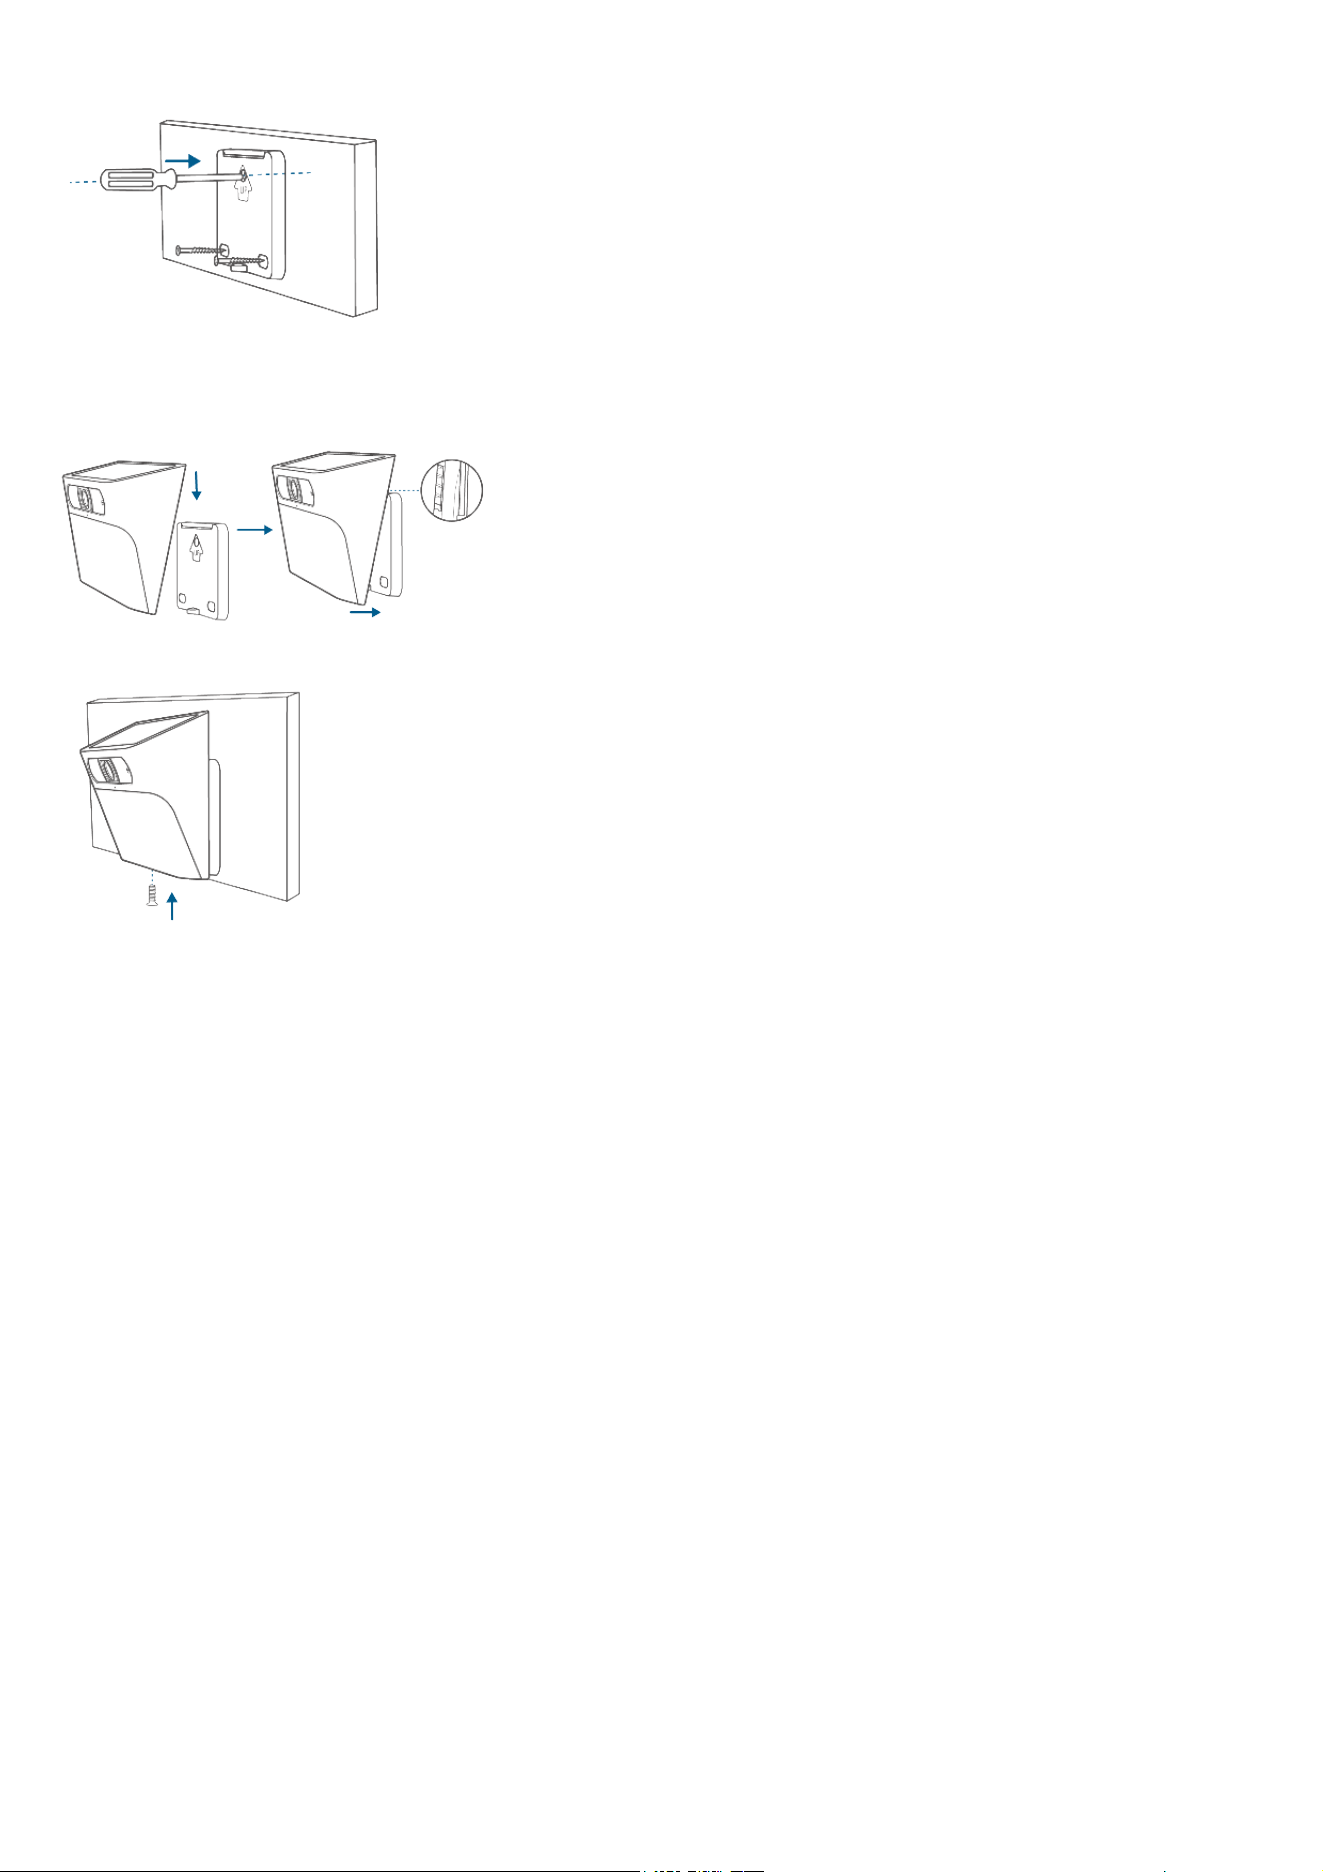
Mount the Camera
1. Mark the mounting points on the wall or surface where drilling will be required, using the mounting base as a template.
2. Drill holes in the wall or surface, then insert the expansion anchors into the holes.
3. Screw the mounting base onto the wall.
2024/6/17 11:03V01_T81A0_UG_EN_20240528
第4/4⻚https://salesforce-knowledge.s3.us-west-2.amazonaws.com/V01_T81A0_UG_EN_20240528/V01_T81A0_UG_EN_20240528.html
4. Slot the camera onto the mounting base and make sure it is attached securely.
5. Insert and tighten the camera fixing screw at the bottom of the camera.