User Manual
Register your product and get support at
www.philips.com/support
NeoPix 230 Smart
Home Projector

Introduction �������������������������������������������������3
Dear customer ...............................................................3
About this user manual ..............................................3
What’s in the box ..........................................................3
Customer service center ............................................3
1 General safety information ��������������� 4
Setting up the product .............................................. 4
Repairs ............................................................................ 4
Power supply .................................................................5
2 Overview ������������������������������������������������5
Rear view .........................................................................5
Front view ....................................................................... 6
Side view ......................................................................... 6
Remote control............................................................. 6
3 Initial setup �������������������������������������������� 7
Install the projector ...................................................... 7
Connect to power supply ......................................... 9
Prepare the remote control ..................................... 9
Power on and set up the projector ......................10
Set up the projector system ....................................11
4 Use Home screen �������������������������������� 12
Navigate Home screen .............................................12
Open and configure apps ....................................... 13
5 Connect to other devices ������������������ 15
Connect to a USB mouse, keyboard or
gamepad .......................................................................15
Connect to a playback device through HDMI™
...........................................................................................15
Connect to a dongle .................................................. 16
Connect to a Bluetooth device ..............................16
Connect to wired speakers or headphones ...... 18
6 Play media from USB storage devices
����������������������������������������������������������������18
Connect a USB storage device ..............................18
Play videos ....................................................................19
Play audios ...................................................................19
View images .................................................................19
7 Wireless projection ���������������������������20
Wireless projection with Android devices/
Windows computers ................................................20
Wireless projection with iOS devices/Mac
computers ....................................................................20
Stream videos/pictures from iOS devices ......... 21
8 Use the LED light ������������������������������� 22
9 Change projector settings ��������������� 22
Change settings using the sidebar ...................... 22
Change more settings .............................................. 23
Change settings using the settings menu ........ 24
10 Maintenance����������������������������������������27
Cleaning ........................................................................ 27
Update software ........................................................ 27
11 Troubleshooting �������������������������������� 28
12 Appendixes �����������������������������������������30
Technical data ............................................................30
CE statement ...............................................................31
FCC statement ............................................................. 31
Canada regulatory compliance ............................. 31
Other notice ................................................................. 32
Table of contents
Introduction 3
Introduction
Dear customer
Thank you for purchasing this projector.
We hope you enjoy this product and the many
functions it offers!
About this user manual
The quick start guide supplied with this product
allows you to start using this product quickly
and easily. Detailed descriptions can be found
in the following sections of this user manual.
Read the entire user manual carefully. Follow
all safety instructions in order to ensure proper
operation of this product (see General safety
information, page 4). The manufacturer
accepts no liability if these instructions are not
followed.
Symbols used
Notice
This symbol indicates tips that will help
you use this product more effectively
and easily.
DANGER!
Danger of personal injury!
This symbol gives warning of danger
of personal injury. Physical injury or
damage can result from improper
handling.
CAUTION!
Damage to the product or loss of data!
This symbol gives warning of damage
to the product and possible loss of
data. Damage can result from improper
handling.
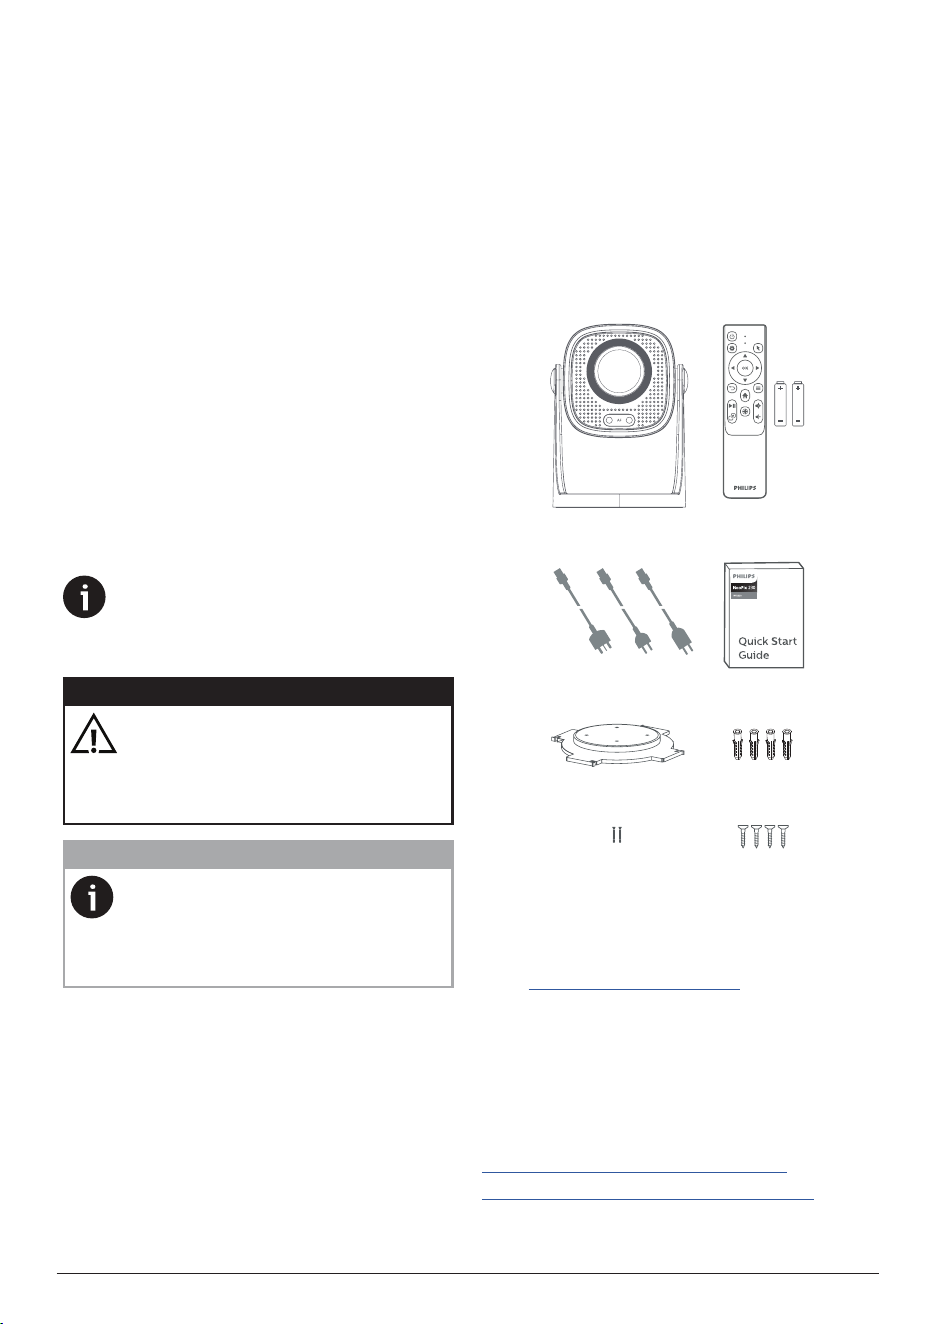
What’s in the box
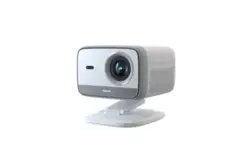
a
NeoPix 230 projector (NPX230/INT)
b
Remote control with 2 AAA batteries
c
Quick Start Guide with Warranty Card
d
Wall anchors x 4
e
Sharp-tipped screws x 4
f
Flat-tipped screws x 2
g
Ceiling hanging metal plate
h
AC power cables with plugs x 3
ab
ch
dg
ef
Customer service center
The Support page, warranty card, and user
manuals can be found here:
Web: www.philips.com/support
Support Contacts:
International Phone: +41 215 391 665
Please ask your provider for international call
costs!
Mail: philips.projector.eu@screeneo.com
Access our FAQ websites:
https://support.philipsprojection.com
https://community.philipsprojection.com
4 Philips · NeoPix 230
1 General safety
information
Take note of all warning and safety notes
indicated. Do not make any changes or settings
that are not described in this user manual.
Incorrect operation, and improper handling can
lead to physical injury, damage to the product
or loss of data.
Setting up the product
This product is for indoor use only. Place the
product securely on a stable, flat surface.
To help avoid possible injuries to persons or
damage to the product itself, position all cables
in such a way that no one will trip over them.
Do not operate the product in damp rooms.
Never touch the mains cable or the mains
connection with wet hands.
Never operate the product immediately after
moving it from a cold location to a hot location.
When the product is exposed to such a change
in temperature, moisture may condense on the
crucial internal parts.
The product must have sufficient ventilation
and must not be covered. Do not put the
product in closed cabinets, boxes, or other
enclosures when in use.
Protect the product from direct sunlight,
heat, intense temperature fluctuations and
moisture. Do not place the product in the
vicinity of heaters or air conditioners. Observe
the information on temperature listed in the
technical data (see Technical data, page 30).
Prolonged operation of the product causes the
surface to become hot. In case of overheating,
the product automatically switches to standby
mode.
Do not allow liquids to leak into the product.
Turn off the product and disconnect it from the
mains supply if liquids or foreign substances
leaked into the product. Have the product
inspected by an authorised service center.
Always handle the product with care. Avoid
touching the lens. Never place heavy or sharp
objects on the product or on the power cable.
If the product gets too hot or emits smoke,
shut it down immediately and unplug the
power cable. Have your product checked by
an authorised service center. Keep the product
away from open flames (e.g. candles).
DANGER!
Risk of explosion with incorrect type
of batteries!
There is a risk of explosion if the wrong
battery type is used.
Do not expose the batteries (battery pack or
embedded batteries) to excessive heat such as
sunshine, or open fire.
Under the following conditions, a layer of
moisture can appear inside the product which
can lead to malfunctions:
• if the product is moved from a cold to a
warm area;
• after a cold room is heated;
• when the product is placed in a damp
room.
Proceed as follows to avoid any moisture
buildup:
1 Seal the product in a plastic bag before
moving it to another room, in order for it to
adapt to room conditions.
2 Wait one to two hours before you take the
product out of the plastic bag.
The product should not be used in a very dusty
environment. Dust particles and other foreign
objects may damage the product.
Do not expose the product to extreme
vibrations. This may damage the internal
components.
Do not allow children to handle the product
without supervision. The packing materials
should be kept out of the hands of children.
For your own safety, do not use the product
during thunderstorms with lightning.
Repairs
Do not repair the product yourself. Improper
maintenance can result in injuries or damage to
the product. The product must be repaired by
an authorised service center.
Please find the details of authorised service
centers on the warranty card supplied with this
product.
Do not remove the type label from this product,
as this will void the warranty.
Overview 5
Power supply
Use only a power adapter which is certified for
this product (see Technical data, page 30).
Check whether the mains voltage of the power
supply matches the mains voltage available at
the setup location. This product complies with
the voltage type specified on the product.
The power outlet shall be installed near the
product and shall be easily accessible.
CAUTION!
Always use the button to turn the
projector off.
Turn off the product and unplug from the
power outlet before cleaning the surface
(see Cleaning, page 27). Use a soft, lint-
free cloth. Never use liquid, gaseous or easily
flammable cleaners (sprays, abrasives, polishes,
alcohol). Do not allow any moisture to reach
the interior of the product.
DANGER!
Risk of eye irritation!
This product is equipped with a high
power LED (Light Emitting Diode),
which emits very bright light. Do not
look directly into the projector lens
during operation. This could cause eye
irritation or damage.
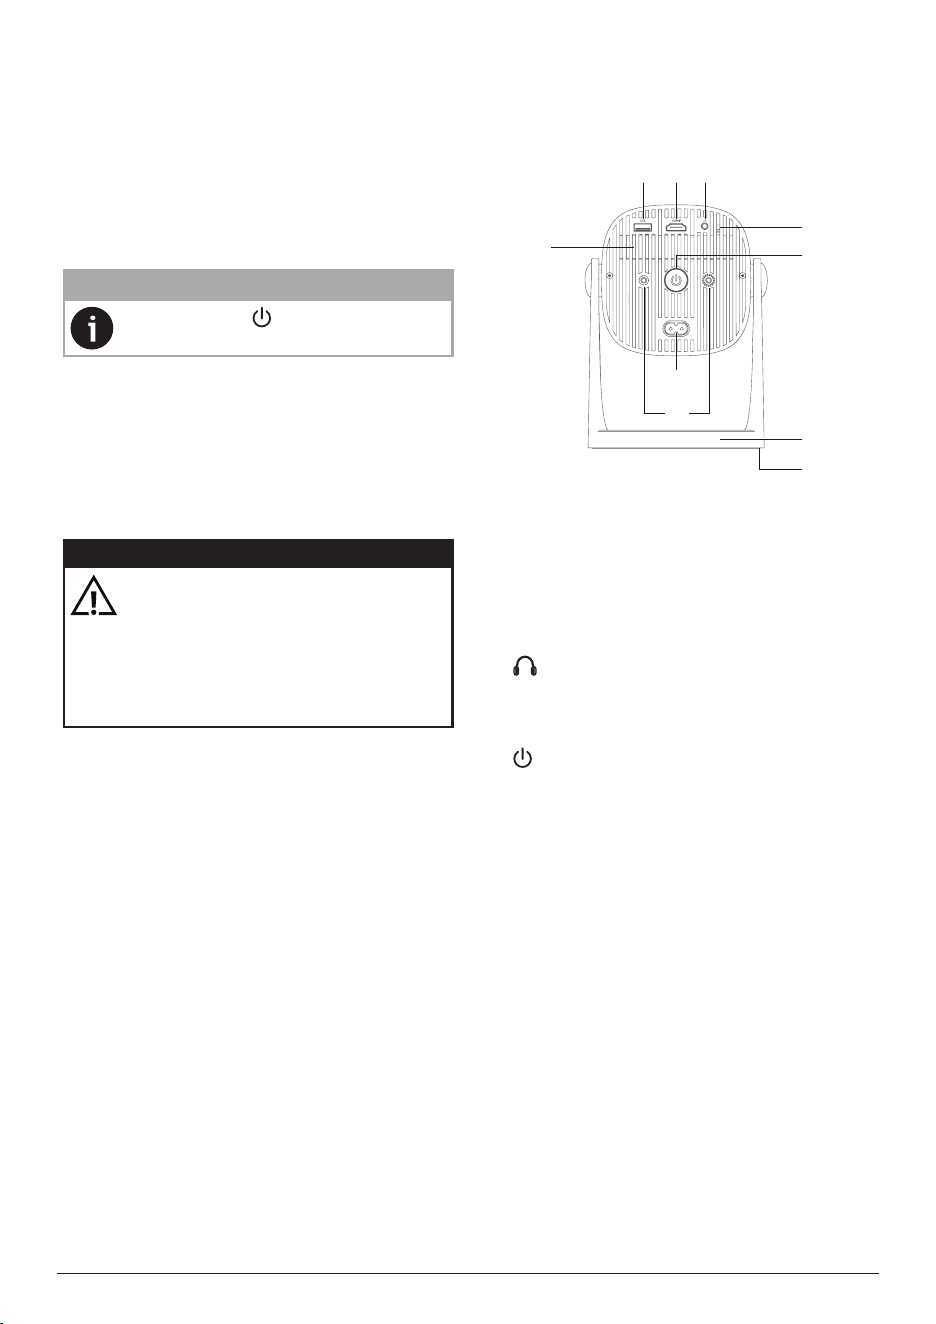
2 Overview
Rear view
abc
h
i
e
d
f
g
j
a
USB
Connect to a USB input device, USB storage
device or dongle.
b
HDMI™
Connect to an HDMI™ output port on a
playback device.
c
3.5 mm audio output; connect to external
speakers or headphones.
d
Rear IR sensor
e
• Switch the projector on or to standby
mode.
• When the projector is on, the LED lights
up in white.
• When the projector is in standby mode,
the LED lights up in red.
f
Ceiling hanging system
g
Foot pad
h
AC power jack
Connect to a supplied power cable.
i
LED light dimmer
• The dimmer is enabled only when the
projector is in standby mode.
• Tap and hold the right button for 2
seconds to turn on the light. Tap this
button to increase the brightness.
• Tap and hold the left button for 2
seconds to turn off the light. Tap this
button to decrease the brightness.
j
Air vent

6 Philips · NeoPix 230
Front view
d
ba c
a
Lens cover
b
Projection lens
c
LED light
You can use this light when the projector is
in standby mode.
d
Auto keystone and autofocus sensor
Side view
a b
c
a
Rotating stand
b
Speaker
c
Screw hole for ceiling hanging
Remote control
b
c
d
e
f
g
a
m
l
k
j
i
h
a
LED indicator
Light up when you press a button on the
remote control.
• Light up in red when the remote control
is not connected to the projector via
Bluetooth.
• Light up in blue when the remote
control is connected to the projector via
Bluetooth.
• Always light up in red when the
projector is off.
b
Enable or disable the on-screen pointer
when the remote control is connected to
the projector via Bluetooth.
c
OK
Confirm a selection or change the value for
the current setting.
d
• Open the options menu when an app is
selected on the Home screen.
• Show or hide the control bar, or open
the more options menu when a video
is playing
.
e
Access the Home screen of the built-in
operating system.
Initial setup 7
f
/
• Increase or decrease the volume.
• Adjust the brightness of the LED light
when the LED light is on.
g
• Adjust the image focus (sharpness)
automatically.
• Turn the LED light on or off when the
projector is in standby mode.
h
View the most recently opened apps and
switch between them.
Press
/
to choose
a recent app and press
the
OK button to
open it.
i
Start, pause or resume media playback
.
j
• Return to the previous screen.
• Open or close the sidebar from the
Home screen.
k
Navigation buttons (Up, Down, Left, Right)
• Navigate items on the screen.
• Press
/ or /
to change the value
for the current setting
.
l
Open or close the projector's settings
menu.
m
Switch the projector on or to standby mode.
3 Initial setup
Notice
Make sure all devices are disconnected
from their power supplies before
establishing or changing any
connections.
Install the projector
You can install the projector in four different
ways. Follow the guidelines below to correctly
install the projector.
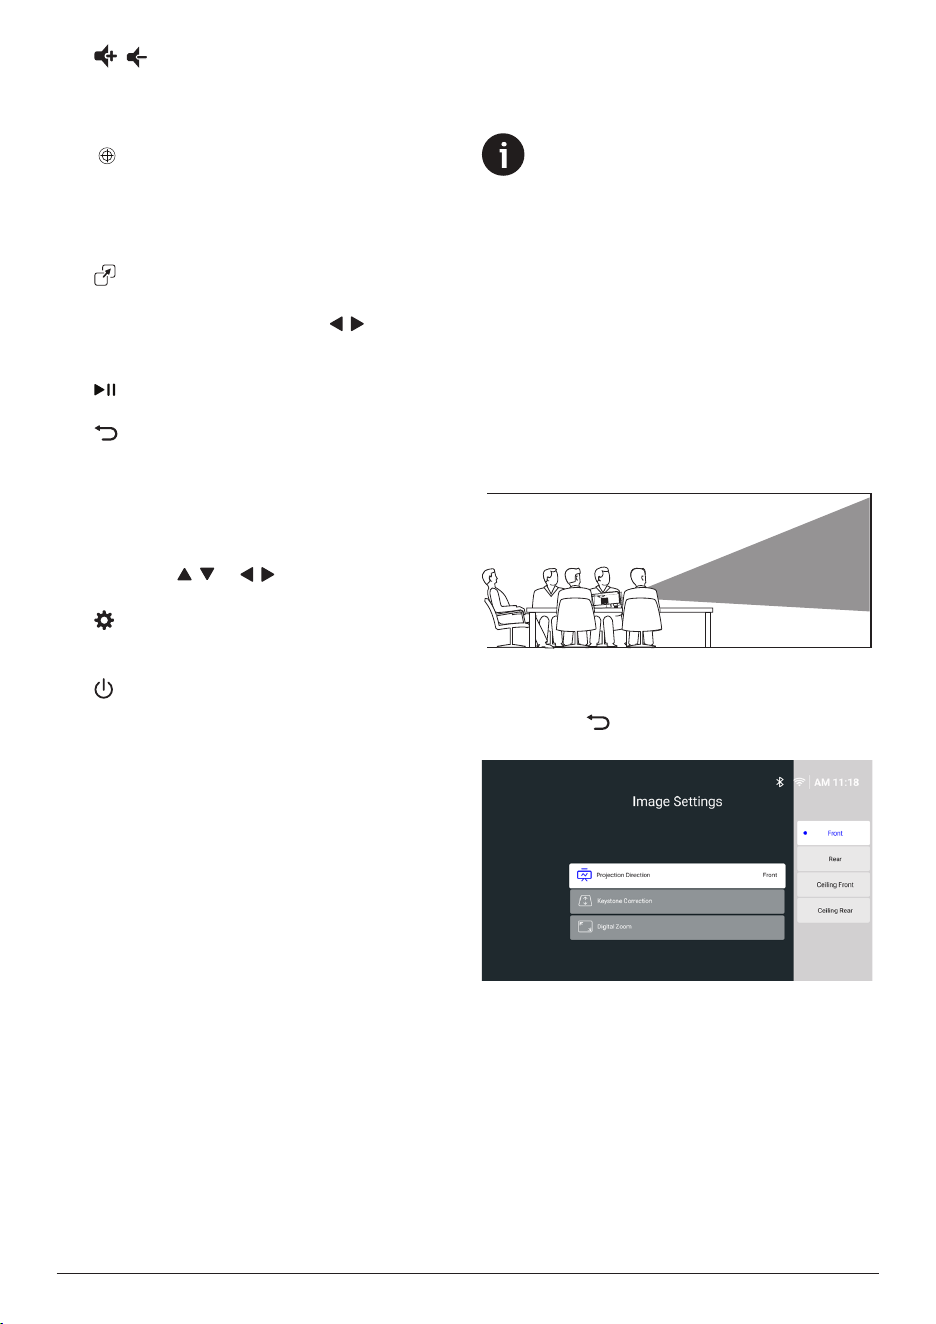
Front
1 Place the projector on a flat surface such
as a table in front of the projection surface.
This is the most common way to position
the projector for quick setup and portability.
2 If the projection direction is incorrect, from
the Home screen, open the sidebar by
pressing on the remote control. Then
select Image > Projection Direction > Front.
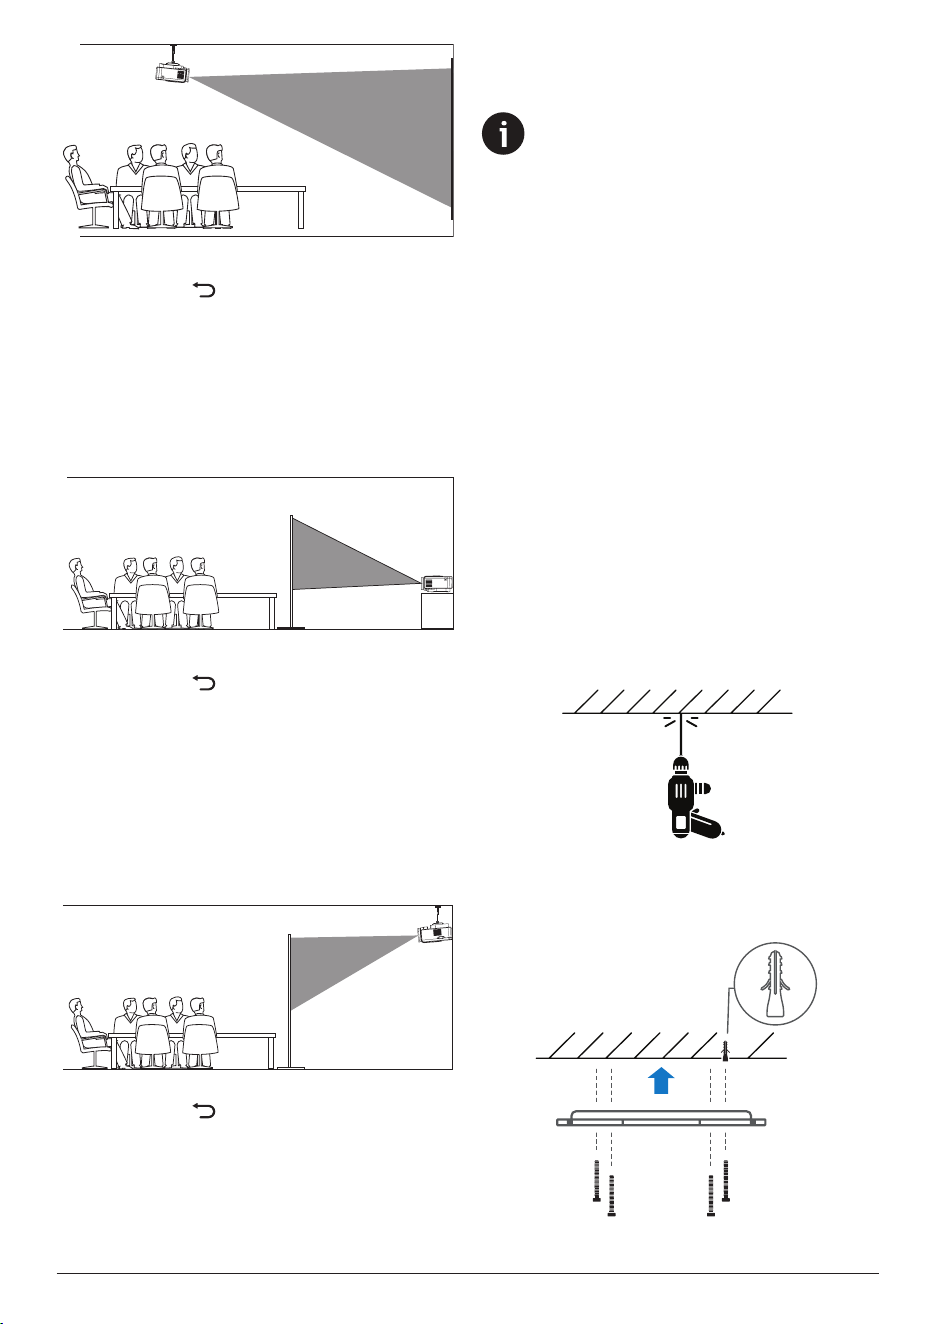
Ceiling Front
1 Mount the projector on the ceiling in front
of the projection screen. To learn how to
mount the projector on a ceiling, see Mount
the projector on a ceiling, page 8.
8 Philips · NeoPix 230
2 From the Home screen, open the sidebar
by pressing on the remote control.
Then select Image > Projection Direction >
Ceiling Front.
Rear
1 Place the projector on a table behind the
projection screen. A special rear projection
screen is required.
2 From the Home screen, open the sidebar
by pressing on the remote control. Then
select Image > Projection Direction > Rear.
Ceiling Rear
1 Mount the projector on the ceiling behind
the projection screen. A special rear
projection screen is required. To learn how
to mount the projector on a ceiling, see
Mount the projector on a ceiling, page
8.
2 From the Home screen, open the sidebar
by pressing on the remote control.
Then select Image > Projection Direction >
Ceiling Rear.
Mount the projector on a ceiling
Notice
Before mounting on the ceiling, make
sure the ceiling can support the weight
of the projector and mounting kit.
For ceiling installation, this product
must be securely attached to the ceiling
in accordance with the installation
instructions. An improper ceiling
installation may result in accident, injury
or damage.
We recommend that you hire an
installation professional to complete the
mounting for you.
This projector is packed with a ceiling hanging
metal plate, 4 wall anchors, 4 sharp-tipped
screws, and 2 flat-tipped screws in the box.
To mount the projector on a ceiling, follow the
following steps:
1 Choose a ceiling and a location on the
ceiling for mounting the projector.
2 Use the holes in the ceiling hanging metal
plate as a template to mark 4 hole locations
for attaching the metal plate to the ceiling.
3 Use a suitable drill bit to drill the 4 holes in
the ceiling. The depth of each hole should
be approximately 3 cm.
4 Insert the wall anchors into the holes. You
may have to use a hammer to gently tap
the anchors fully into the ceiling.

Initial setup 9
5 Align the metal plate holes with the holes
in the ceiling. Secure the metal plate to the
ceiling by inserting and tightening the 4
sharp-tipped screws.
6 Align the 4 slots of the ceiling hanging
system of the projector with the protruding
tabs of the metal plate. Slowly push the
hanging system towards the metal plate
until it comes to a stop. Then turn the
hanging system clockwise by about 20° to
attach it to the metal plate.
7 To secure the projector, insert the 2 flat-
tipped screws into the screw holes on the
sides of the hanging system and tighten
both screws.
Connect to power supply
CAUTION!
Always use the button to turn the
projector on and off.
1 Select a supplied power cable with the
correct plug (EU/UK/US).
2 Connect the power cable to the power jack
on the back of the projector.
3 Connect the power cable to an electrical
socket.
• The power LED on the projector lights
up in red.
b
c
Prepare the remote control
CAUTION!
The improper use of batteries can
lead to overheating, explosion, risk of
fire and injury. Leaking batteries can
possibly damage the remote control.
Never expose the remote control to
direct sunlight.
Avoid deforming, dismantling or
charging the batteries.
Avoid exposure to open fire and water.
Replace empty batteries immediately.
Remove the batteries from the remote
control if not in use for long periods of
time.
1 Open the battery compartment.
2 Insert the supplied batteries (type AAA)
with correct polarity (+/-) indicated.
3 Close the battery compartment.
• When using a remote control with infrared
signals, point the remote control at the IR
sensor on the projector, and make sure
there is no obstacle between the remote
control and the IR sensor.
10 Philips · NeoPix 230
Power on and set up the
projector
Power on/off the projector
• Before turning on the projector, make sure
you have removed the lens cover.
• To turn on the projector, press on the
projector/remote control. The power LED
on the projector turns from red to white.
• To turn off the projector, press and hold
on the projector/remote control for 2
seconds or press this button twice. The
projector enters standby mode and its
power LED turns from white to red.
• To fully shut down the projector, disconnect
the power cable from the electrical socket.
Image focus adjustment
The projector automatically adjusts the image
focus (sharpness) every time it turns on or
detects a change in its position or angle. You
can also force the projector to automatically
adjust the focus by pressing on the remote
control.
Screen size adjustment
The projection screen size (or size of images) is
determined by the distance between the lens
of the projector and the projection surface.
This projector has a recommended projection
distance of 216 cm (85"), and thus creates a
screen size of 80" (203 cm). The minimum
distance from the projection surface is 70 cm
(27.6").
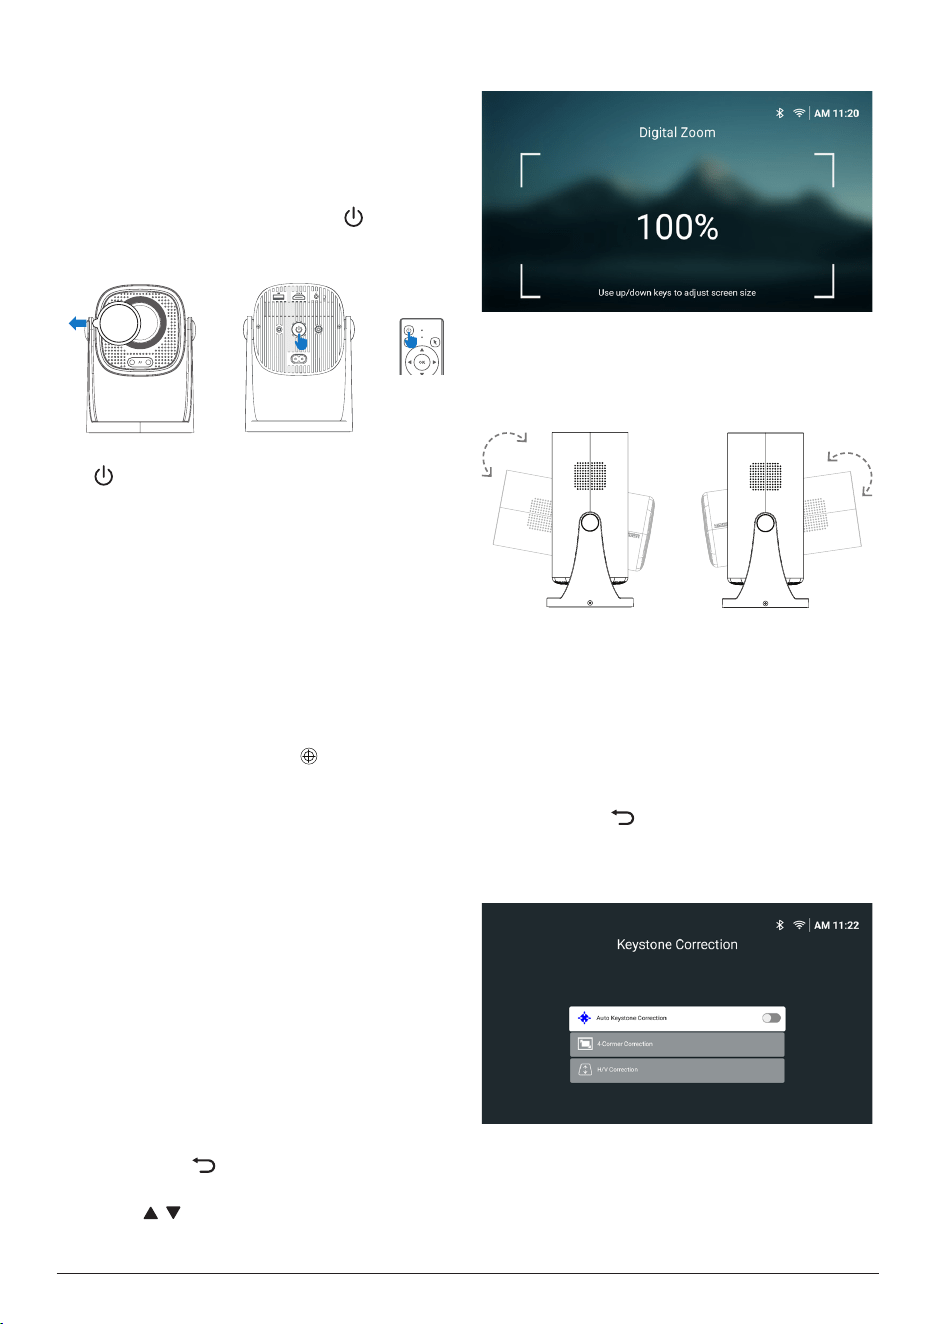
Digital zooming
You can use the digital zooming function to
reduce the screen size.
1 From the Home screen, open the sidebar
by pressing on the remote control. Then
select Digital Zoom.
2 Press / to adjust the screen size. You
can scale down the screen to up to 60% of
its full size.
Projection direction adjustment
You can adjust the projection direction by
rotating the main body around the pivot of the
stand. The main body can rotate by up to 180°.
Image shape adjustment
Auto keystone correction
You can turn on auto keystone correction to
let the projector automatically make the image
rectangular.
1 From the Home screen, open the sidebar
by pressing on the remote control. Then
select Keystone > Auto Keystone Correction.
2 Press the OK button to turn auto keystone
correction on or off.
H/V Correction (manual)
When auto keystone correction is off, you
can manually make the image rectangular by
adjusting the horizontal and vertical keystone
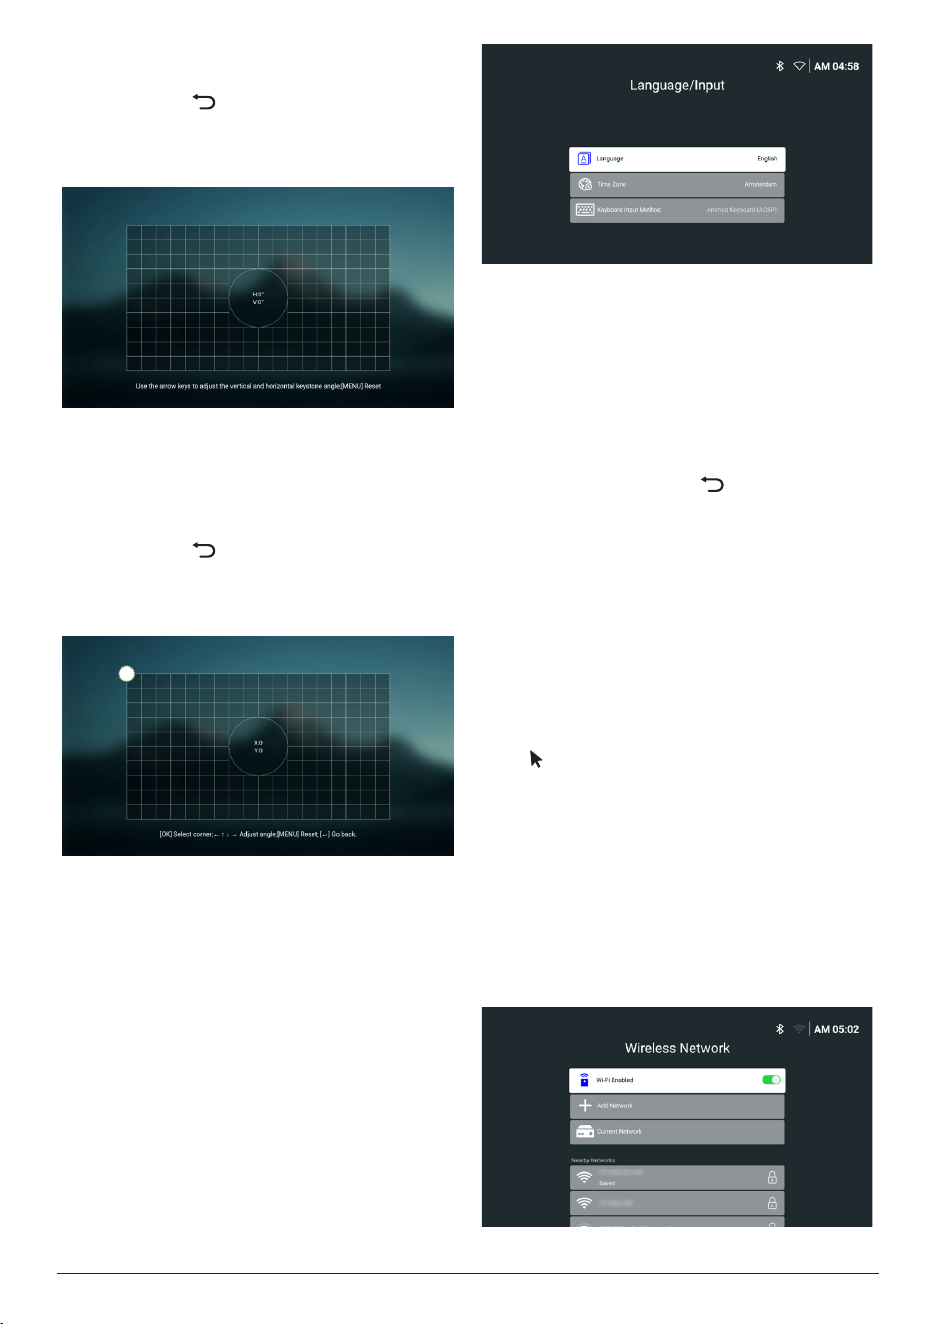
Initial setup 11
angles.
1 From the Home screen, open the sidebar
by pressing on the remote control. Then
select Keystone > H/V Correction.
2 Follow the on-screen instructions to adjust
the image shape.
4-Corner Correction (manual)
When auto keystone correction is off, you
can manually make the image rectangular by
moving four corners of the image.
1 From the Home screen, open the sidebar
by pressing on the remote control. Then
select Keystone > 4-Corner Correction.
2 Follow the on-screen instructions to adjust
the image shape.
Set up the projector system
When you turn on the projector for the first
time or after it was reset to its factory default
settings, the projector system will start and
prompt you to set it up by making some basic
settings.
After the setup, you can start using the projector
or continue to make other adjustments.
Step 1: Select the language and
time zone
On the Welcome screen, press the OK button
on the remote control. Then use the navigation
buttons and OK button to make changes.
• Language: Select your preferred display
language.
• Time Zone: Set the time zone used by the
projector by selecting a city.
• Keyboard Input Method: Select your
preferred on-screen keyboard or input
method.
Note: The default display language is English
and not all languages are available.
When you are done, press to return to the
Welcome screen and press the OK button to go
to the next step.
Step 2: Connect the remote
control via Bluetooth
Follow the on-screen instructions to connect
the remote control to the projector via
Bluetooth. After making the connection, you
can use the on-screen pointer to navigate the
on-screen user interface of the projector.
Tip: To enable or disable the on-screen pointer,
press on the remote control.
When you are done, press the OK button to go
to the next step.
Step 3: Connect to a Wi-Fi
network
1 Press the OK button on the remote control
to open the Wireless Network screen. Tip:
Step 3 is optional. You may skip to Step
4 by selecting Next and pressing the OK
button.
12 Philips · NeoPix 230
2 Select a network from the list under Nearby
Networks and press the OK button. You
are prompted to enter the password for
connecting to the network using the on-
screen keyboard.
3 Enter the password by pressing the
navigation buttons and OK buttons. Tips:
Press and hold a navigation button to move
to the key you want more quickly. You can
also enter the password using the on-
screen pointer and OK button.
4 Select the green check mark on the
keyboard and press the OK button.
5 Wait a few seconds for the connection to
be established. After the connection is
established, the connected Wi-Fi network's
name appears after Current Network and
the Wi-Fi icon in the upper-right corner of
the screen turns bright white.
Notes:
• If you connect to an open (unsecured) Wi-
Fi network, you won't be prompted to enter
the password and the connection will be
automatically established.
• The next time you turn on the projector, it
will automatically try to reconnect to the
last connected Wi-Fi network, unless you
manually disconnect/forget the network or
factory reset the projector.
When you are done, press to return to the
previous screen and press the OK button to go
to the next step.
Step 4: Agree to the software
end user license agreement
1 View the software end user license
agreement. Press / on the remote
control to scroll up or down.
2 When you are done, press the OK button to
agree to the agreement.
You will see the Home screen after completing
the setup.
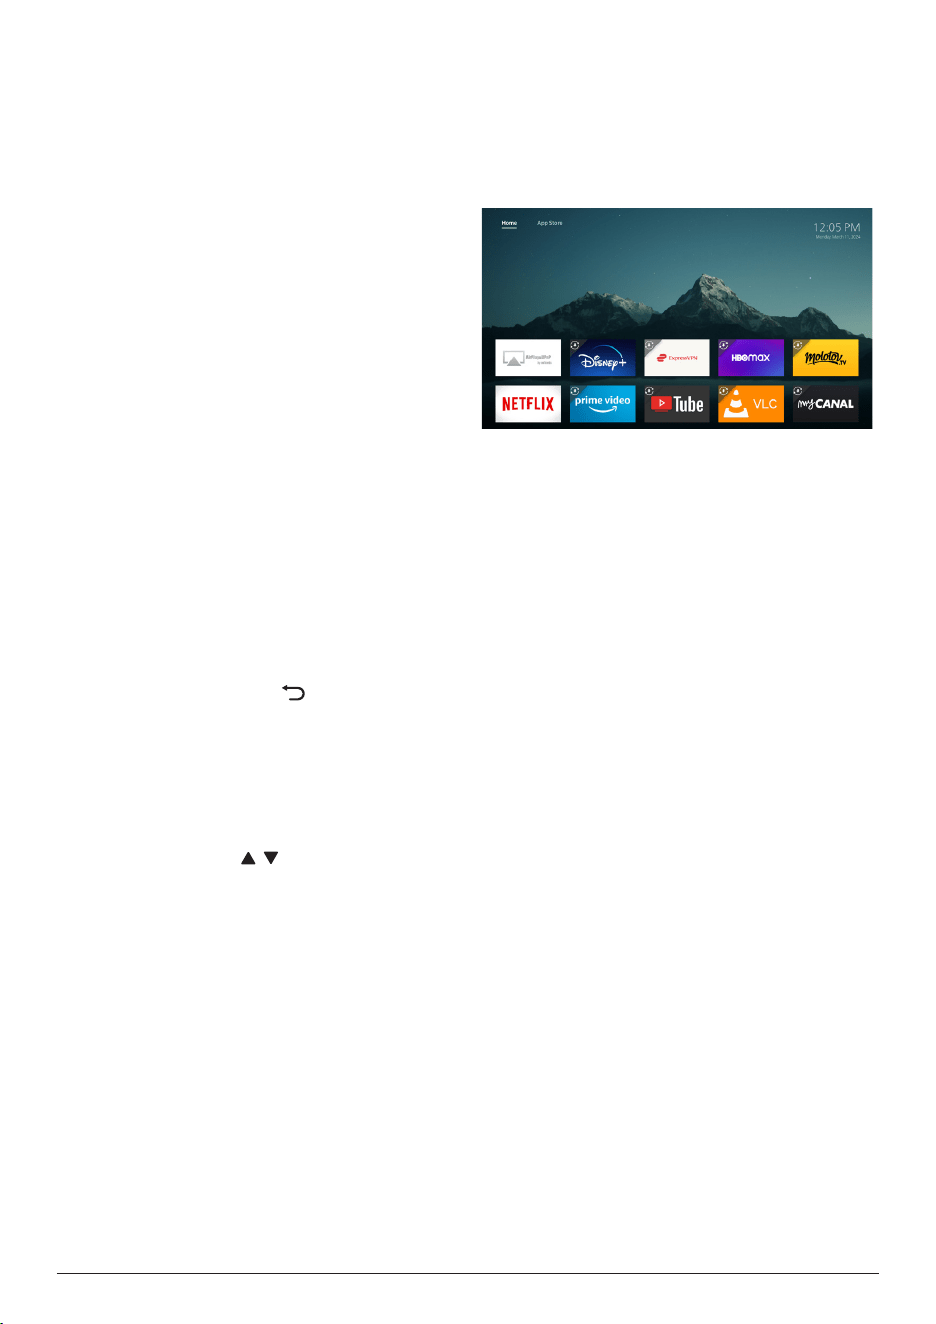
4 Use Home screen
You will see the Home screen of the built-in
operating system after setting up or turning on
the projector. The Home screen is the jumping-
off point for starting all activities on the
projector.
From the Home screen, you can:
• Open and configure the pre-installed apps.
For more details, see Open and configure
apps, page 13.
• Change the projector settings. For more
details, see Change projector settings,
page 22.
• View the date and time in upper-right
corner. You can toggle between the 12-hour
and 24-hour time formats by selecting the
time and pressing the OK button.
Navigate Home screen
You can navigate the Home screen using one of
the following:
• The remote control. For more details, see
Navigate Home screen with the remote
control, page 12.
• A USB input device such as a USB mouse or
keyboard. To learn how to connect and use
a USB input device, see Connect to a USB
mouse, keyboard or gamepad, page 15.
• A Bluetooth input device such as a
Bluetooth mouse or keyboard. To learn how
to connect a Bluetooth mouse or keyboard,
see Connect to a Bluetooth device, page
16�
Navigate Home screen with the
remote control
The remote control gives you immediate and
easy access to everything on the Home screen.
• Press the navigation button to select an
item (e.g. an app, a setting or a button) on
the screen.
Use Home screen 13
• Press the OK button to confirm a selection
or change the value for the current setting.
• From the Home screen, press to open or
close the sidebar.
• Press to return to the previous screen.
• Press to view more options when an app
is selected.
• Press to view the most recently opened
apps and switch between them.
Press
/
to choose a recent app and press
the
OK
button to open it.
• Press to return to the Home screen. Tip:
If the current input source is HDMI, pressing
this button will also switch the input source
back to LuminOS.
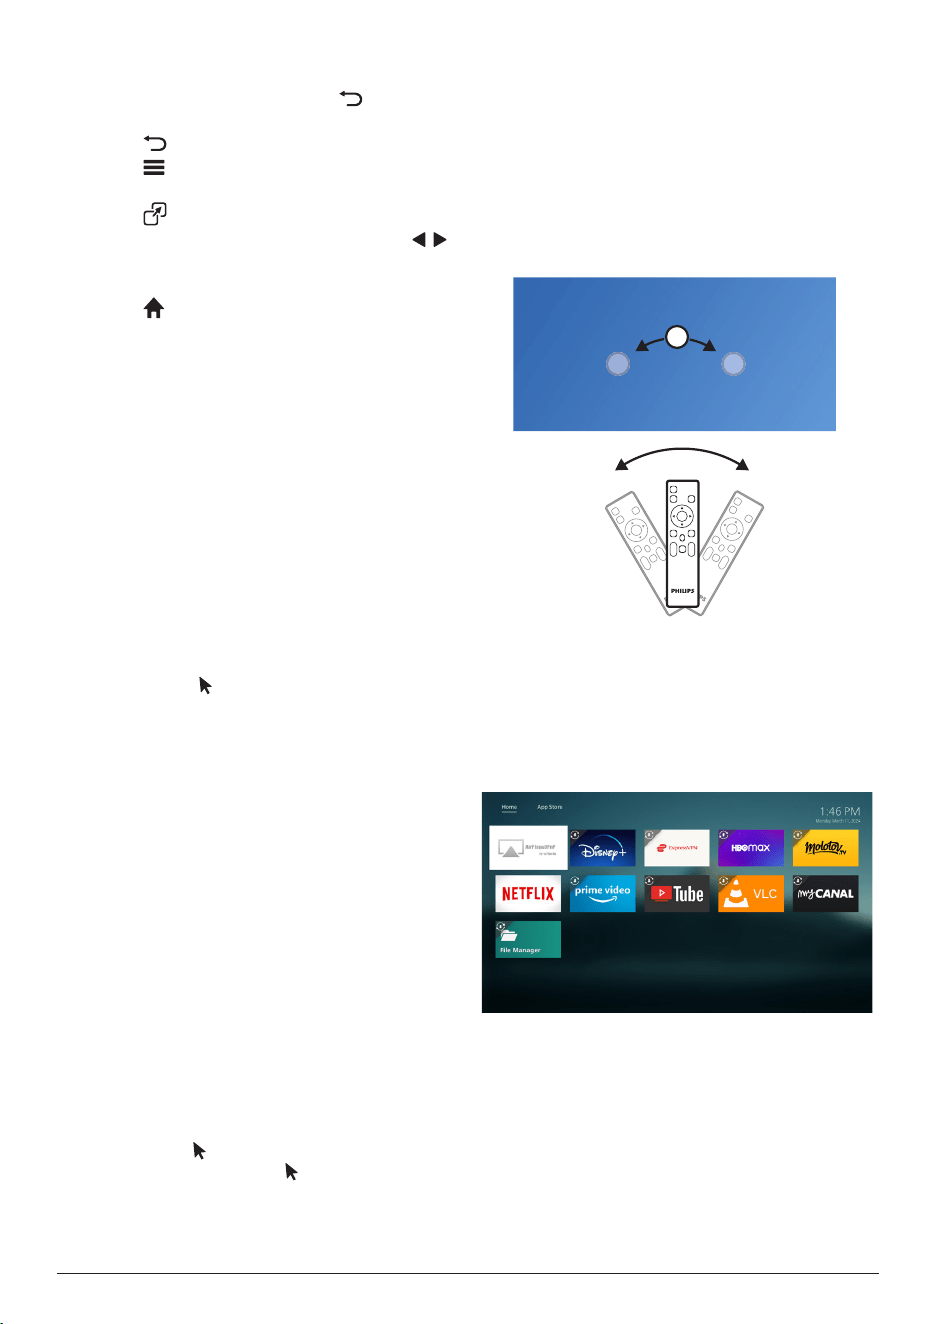
Use the on-screen pointer
The on-screen pointer gives you an alternative
way to select an item (e.g. an app, a setting or a
button) on the screen. It takes the place of the
navigation buttons on the remote control.
Connect the remote control via Bluetooth
If you did not connect the remote control to the
projector via Bluetooth during the setup (see
Set up the projector system, page 11) or
the remote control became disconnected, you
must make the connection before using the on-
screen pointer.
When you press on the remote control,
the projector will prompt you to connect the
remote control if it is disconnected. When this
happens, follow the on-screen instructions to
connect the remote control to the projector.
Notes:
• You can make the connection only when
Bluetooth is enabled on the projector.
Bluetooth is enabled by default. If it is
disabled, follow the instructions in Connect
to a Bluetooth device, page 16 to
enable it.
• On the Bluetooth setting screen, the remote
control appears as Philips AirMote.
• The LED indicator near the top of the
remote control lights up when you press a
button. It lights up in red when the remote
control is disconnected and blue when the
remote control is connected.
Enable/disable the on-screen pointer
When the remote control is connected to the
projector, press to enable the on-screen
pointer. To disable it, press again or any of
the navigation buttons.
Use the on-screen pointer
• After you enable the on-screen pointer, a
circular pointer will appear on the screen.
• Point the remote control at the screen and
move or swivel it. The pointer will then
move on the screen.
• The faster you move or swivel the remote
control, the faster the pointer moves.
• Press the OK button to confirm a selection
or change the value for the current setting.
Open and configure apps
The projector has a number of frequently used
apps pre-installed for your convenience. You
can access these apps from the app list on the
Home screen.
The apps on the Home screen mainly fall into
the following categories:
• Video streaming apps: Netflix, Prime Video,
SmartTube, etc.
• File management and playback apps: File
Manager, VLC, etc.
• Setting apps: Airplay&UPnP, etc.
An app on the Home screen can be in one of
following statuses:
14 Philips · NeoPix 230
• Installed: This app has no extra symbol
in upper-left corner of its icon. This app is
already installed and ready to be used.
• Installed and can be updated: This app has
a download symbol in upper-left corner of
its icon. This app is already installed and
must be updated before you can open it.
You will be prompted to update this app
when you try opening it.
Notes:
• For Netflix, use the on-screen pointer to
navigate more easily.
• Before installing/updating an app or using
a video streaming app to watch videos,
make sure the projector can access the
internet via a Wi-Fi network. To learn how
to connect the projector to a Wi-Fi network,
see Step 3: Connect to a Wi-Fi network,
page 11.
Open an app
To open an app, select it on the Home screen
and then press the OK button on the remote
control.
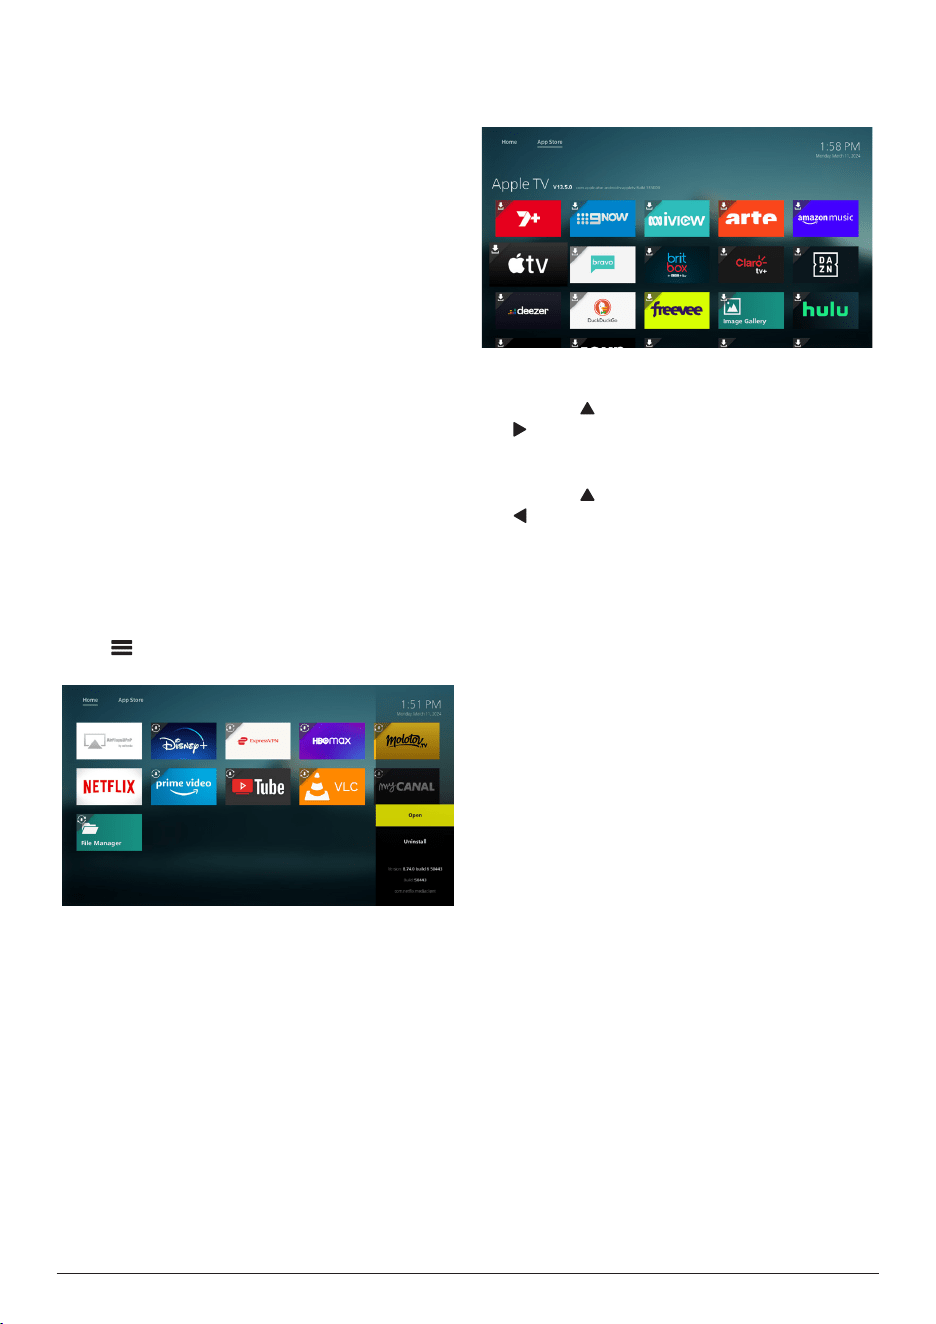
Configure an app
If you select an app on the Home screen and
press on the remote control, an options
menu will appear on the right of the screen.
Using the options menu, you can:
• Open the app by selecting Open.
• Uninstall the app by selecting Uninstall and
following the on-screen instructions.
• View the version and build numbers of the
app at the bottom of the menu.
Install more apps
You can browse and install more apps on the
App Store screen.
• To open the App Store screen, go to the
top of the Home screen by pressing and
holding on the remote control, then press
.
• To return to the Home screen, go to the top
of the App Store screen by pressing and
holding on the remote control, then press
.
To install an app, follow these steps:
1 Select an app on the App Store screen.
2 Press the OK button and wait for the
projector to complete downloading the
installation file.
3 When you are prompted whether to install
the app, select INSTALL and press the OK
button.
4 When the installation is complete, select
Done to return to the App Store screen or
Open to open the app.
Notes:
• After installing an app, you can see and
open it on the Home screen.
• You may get new or updated apps by
updating the projector's software. To learn
how to update the projector's software, see
Update software, page 27.
Connect to other devices 15
5 Connect to other
devices
Connect to a USB mouse,
keyboard or gamepad
You can connect a USB mouse, keyboard or
gamepad to the projector to quickly and easily
navigate menus, enter your passwords, search
for movies and shows, play games, and so on.
Note: Not all games and apps are compatible
with a mouse and keyboard.
Connect a USB mouse, keyboard
or gamepad
To connect a USB mouse, keyboard, or
gamepad, plug it into the USB port on the
projector.
Tip: You can connect more than one device to a
USB port using a USB hub. Connect the devices
to the USB ports on the hub, then connect the
hub to the projector.
Note: When using a wireless USB mouse or
keyboard, the connection can be lost or slow,
depending on the distance between the two
devices and the signal status.
Use a USB mouse, keyboard or
gamepad
Once connected, your USB mouse, keyboard
or gamepad will start to work without any
additional configuration.
Mouse
• Move your mouse and a circular pointer will
appear on the screen.
• Move your mouse and left-click to
navigation the projector's user interface
like you do on a computer. The left button
works like OK on the remote control.
• Right-click to return to the previous screen.
The right button works like on the
remote control.
• Rotate the wheel to scroll up or down.
Keyboard
• Your keyboard is best for entering text in
text fields, allowing you to type much faster
and see more of the screen by removing
the need for the on-screen keyboard. Tip:
You may need to press Esc to hide the on-
screen keyboard.
• Use the arrow keys and Enter to navigation
the projector's user interface. They work
like the navigation buttons and OK on the
remote control respectively.
• Press Tab or Shift+Tab to move to next or
previous item. Press the menu key to access
more options when an app is selected or a
video is playing.
• Press Windows+Backspace to return to the
previous screen. Press Home or Alt+Esc to
return to the Home screen.
• Many keyboard shortcuts work like they
do on a computer, including Alt+Tab for
switching between recent apps and Ctrl+X/
C/V for Cut/Copy/Paste.
Gamepad
• You can use your gamepad with games that
support controllers.
• Your gamepad can also be used to navigate
the projector's user interface and open
apps.
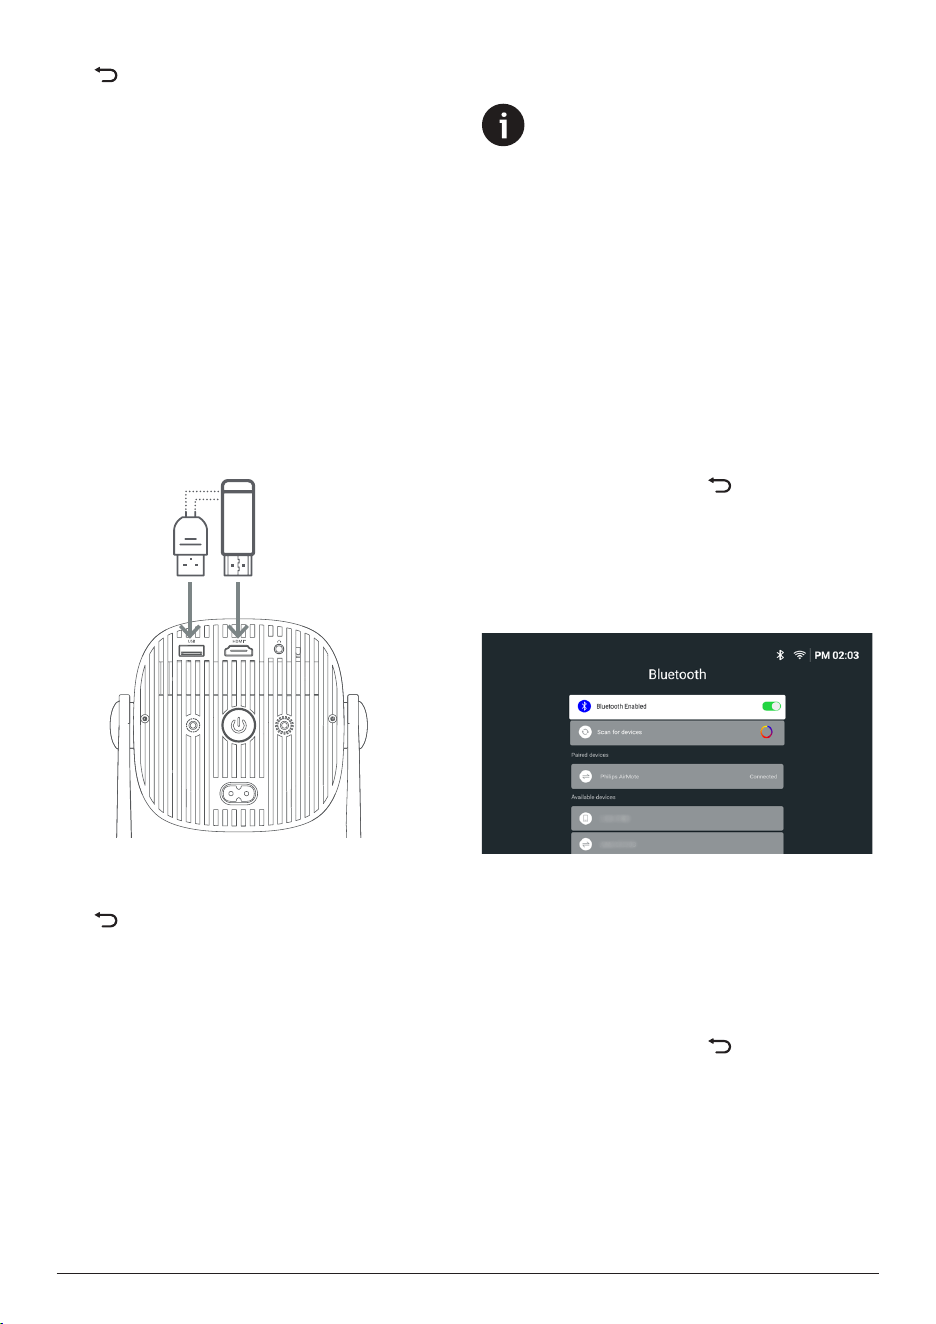
Connect to a playback
device through HDMI™
You can connect a playback device (e.g. a Blu-
ray player, gaming console, camcorder, digital
camera or PC) to the projector through HDMI™
connection. With this connection, images are
shown on the projection screen, and audio is
played on the projector.
1 Using an HDMI™ cable, connect the HDMI™
port on the projector to an HDMI™ output
port on a playback device.
Computers
Phones
Tablets
DVD/VCR
Smart Sticks
Game consoles
2 The projector should automatically switch
to the correct input source. If not, from the
16 Philips · NeoPix 230
Home screen, open the sidebar by pressing
on the remote control. Then select Input
Source > HDMI.
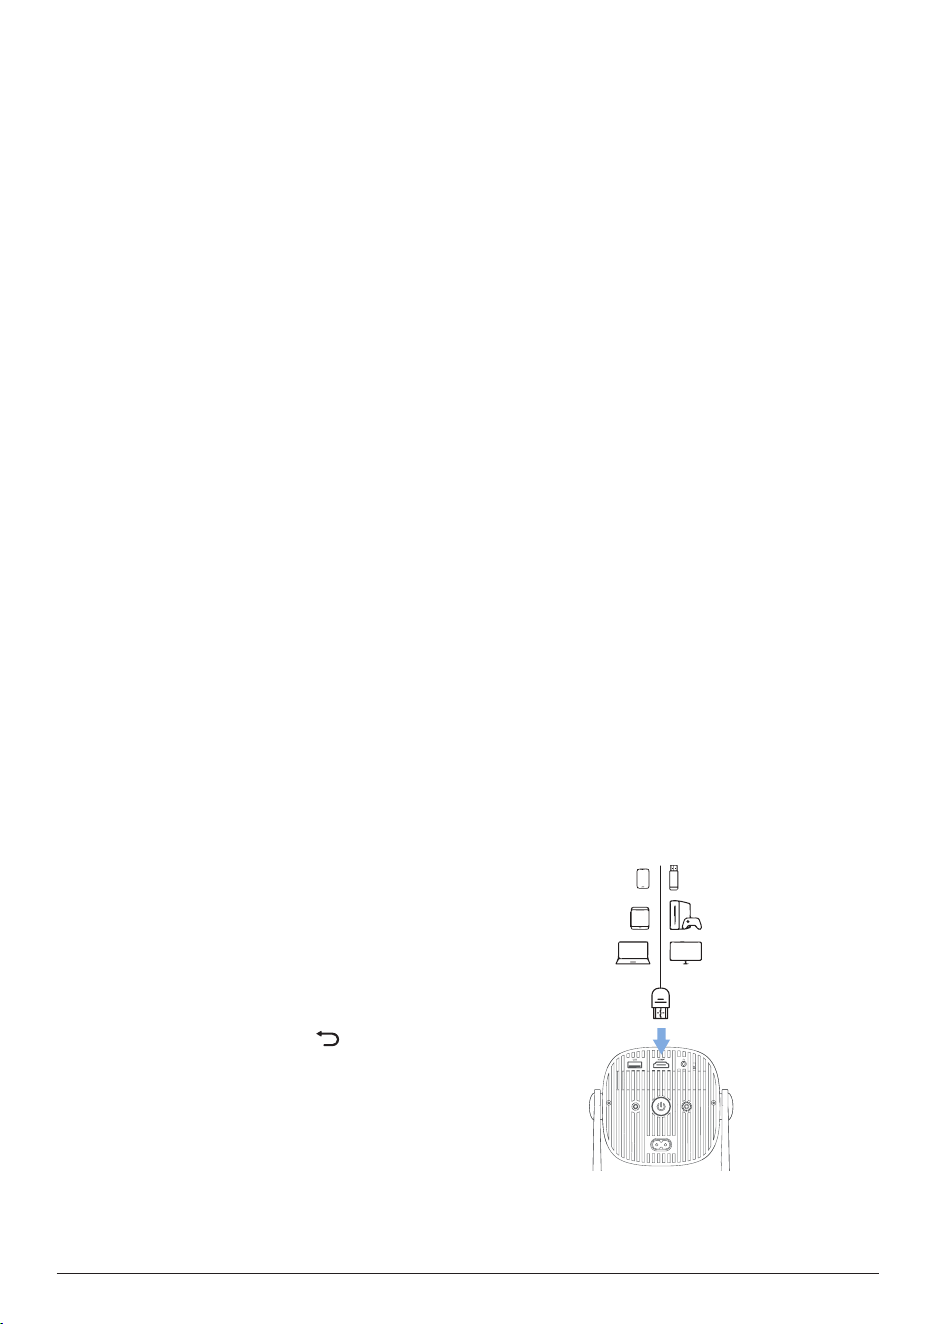
Connect to a dongle
You can connect a dongle (e.g. Amazon Fire
Stick, Roku Stick and Chromecast) to the
projector to easily watch videos over the
internet. With this connection, images are
shown on the projection screen, and audio is
played on the projector.
1 Connect the dongle to the projector's
HDMI™ port directly or using an HDMI™
cable.
2 Connect the dongle to the projector's
USB port using a USB cable
. Note: The
maximum current supplied by this port is
5V2A.
External Dongle
(not included)
3 The projector should automatically switch
to the correct input source. If not, from the
Home screen, open the sidebar by pressing
on the remote control. Then select Input
Source > HDMI.
Connect to a Bluetooth
device
The projector is equipped with Bluetooth
5.0 technology, allowing you to connect
it to Bluetooth devices such as Bluetooth
gamepads, speakers, mice and keyboards.
Before you can use the projector with a
Bluetooth device for the first time, you must
pair the projector with it. The projector will
automatically connect to a device as soon as
they are paired.
Notice
Be sure that the Bluetooth device is
no farther than 10 m (33 ft) from the
projector when connecting the two.
Even when connecting within the
specified communication distance,
connections can be lost due to the signal
status.
You can pair the projector with multiple
Bluetooth devices, but can only connect
the projector to one of them at a time.
Enable/Disable Bluetooth on the
projector
Bluetooth is enabled on the projector by
default. You can manually enable or disable it.
1 From the projector's Home screen, open
the sidebar by pressing on the remote
control. Then select Bluetooth.
2 Press the OK button to enable or disable
Bluetooth on the projector. When Bluetooth
is enabled, a white Bluetooth icon
appears near the upper-right corner of the
Bluetooth setting screen.
Pair a Bluetooth device
1 Turn on your Bluetooth device and make
sure it is in pairing mode. Press the pairing
button on the device, if needed. See the
documentation supplied with the device for
more information.
2 From the projector's Home screen, open
the sidebar by pressing on the remote
control. Then select Bluetooth.
3 If Bluetooth is disabled on the projector,
press the OK button to enable it. The
projector will automatically scan for
available devices and display them under
Available devices.
Tip: To manually rescan for available

Connect to other devices 17
devices, select Scan for devices and press
the OK button.
4 Select your Bluetooth device from the list of
available devices and press the OK button
to start the pairing.
When the pairing is complete, your
Bluetooth device moves to the list under
Paired devices and its status becomes
Connected.
Disconnect a Bluetooth device
Use one of the following methods to disconnect
a Bluetooth device from the projector but leave
it paired.
• Terminate the Bluetooth connection
from the Bluetooth device, or turn off the
Bluetooth device. The Bluetooth device's
status will become Paired.
• Disable Bluetooth on the projector.
• Turn off the projector.
Reconnect a Bluetooth device
Once you pair and connect a Bluetooth device
to the projector using the steps above, the
projector will automatically try to reconnect
unless the Bluetooth device gets unpaired or its
Bluetooth is off.
You can manually reconnect a paired Bluetooth
device on the Bluetooth setting screen.
1 Select the Bluetooth device from the list
of paired devices and then press the OK
button.
2 Select Connect and then press the OK
button.
Unpair a Bluetooth device
You can unpair a Bluetooth device on the
Bluetooth setting screen. This will remove the
Bluetooth device from the projector's memory.
You'll need to pair and connect this device to
use it again.
• To unpair a Bluetooth device connected to
the projector, select it from the list of paired
devices and then press the OK button.
• To unpair a Bluetooth device not connected
to the projector, select it from the list of
paired devices and then press the OK
button twice.
Tips for connecting audio output
devices
The following are the tips for connecting
Bluetooth audio output devices such as
Bluetooth speakers and headphones.
• After connecting a Bluetooth audio output
device, the projector will automatically
switch its audio output type to Bluetooth.
• After disconnecting a Bluetooth
audio output device, the projector will
automatically switch its audio output type
back to Internal Speaker.
• If you switch the projector's audio output
type to Internal Speaker while a Bluetooth
audio output device is connected, the
projector automatically disconnects that
device.
• If you switch the projector's audio
output type to Bluetooth, the projector
automatically tries to reconnect to the last
connected Bluetooth audio output device.
• If you switch the projector's audio output
type to Bluetooth, the Bluetooth setting
screen automatically opens if Bluetooth is
disabled, or Bluetooth is enabled but the
projector cannot reconnect to a Bluetooth
audio output device.
• You can pair the projector with multiple
audio output devices, but can only connect
the projector to one of them at a time.
18 Philips · NeoPix 230
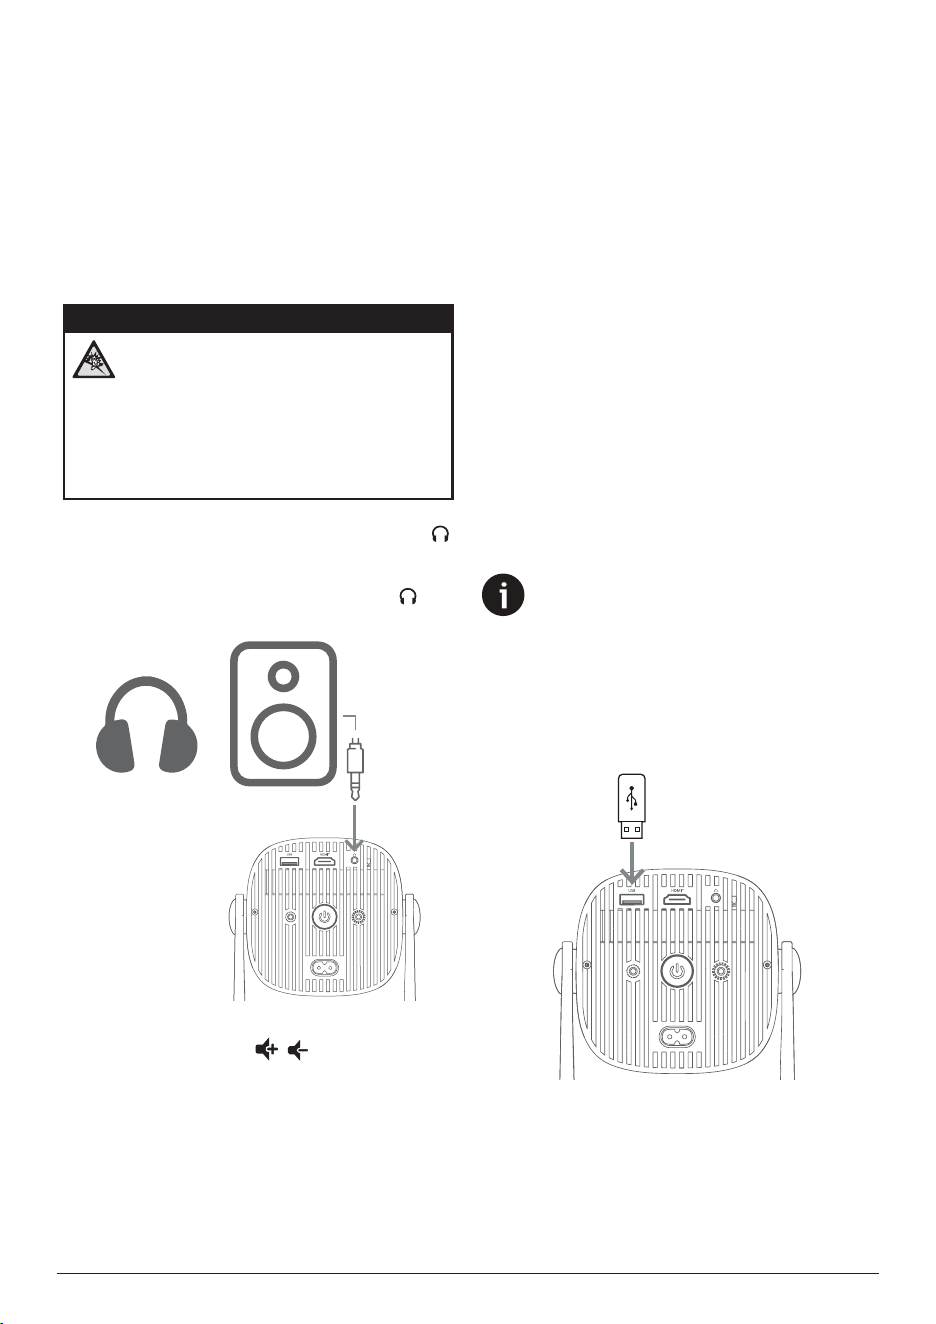
Connect to wired speakers
or headphones
You can connect wired speakers or headphones
to the projector. With this connection, audio
from the projector is played through the
external speakers or headphones.
• The internal speakers of the projector
are deactivated automatically when
external speakers or headphones are
connected to the projector.
DANGER!
Danger of hearing damage!
Before connecting the headphones,
turn down the volume on the projector.
Do not use the projector over a longer
time at high volume – especially when
using headphones. This could lead to
hearing damage.
1 Using a 3.5 mm audio cable, connect the
jack on the projector to the analogue audio
input (3.5 mm jack, or red and white jacks)
on external speakers. Or connect the jack
on the projector to headphones.
2 After connecting the speakers or
headphones, press / on the remote
control to adjust the volume to the desired
level.
6 Play media from
USB storage
devices
Using the pre-installed VLC app, you can play/
view videos, audios or images stored on a USB
storage device.
Supported file formats
The VLC app supports the following file
formats.
• Video formats: MP4, RMVB, AVI, RM, MKV
• Audio formats: MP3, WMA, OGG, AAC,
FLAC, APE, WAV
• Image formats: BMP, PNG, JPEG
Connect a USB storage
device
Notice
The projector supports a USB storage
device that is formatted for FAT16 or
FAT32 file system.
1 Make sure your USB storage device
contains media files supported by the VLC
app.
2 Connect your USB storage device to the
USB port on the projector.
Play media from USB storage devices 19
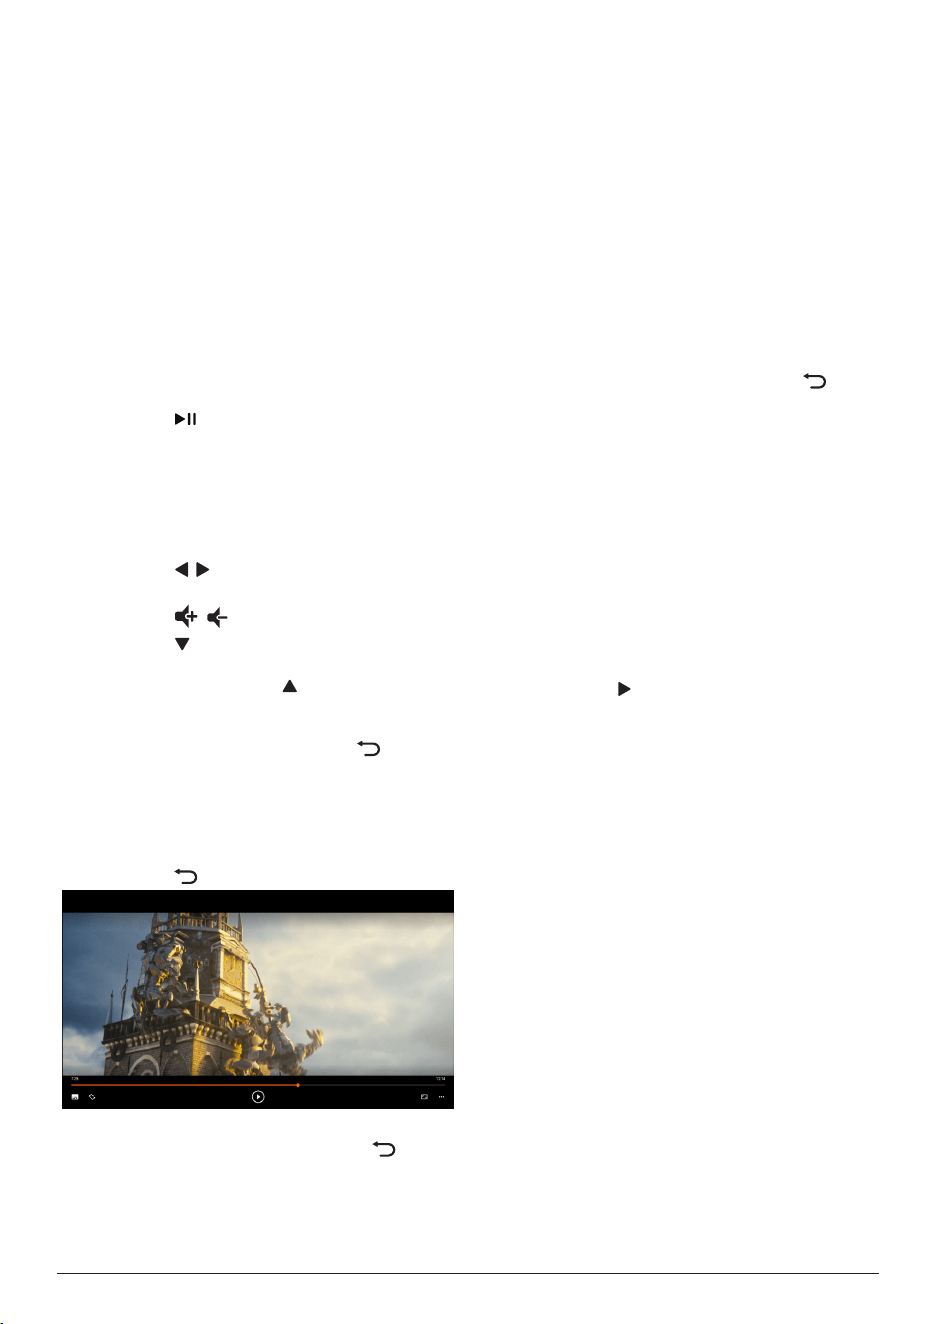
Play videos
1 From the projector's Home screen, open
the VLC app.
2 Select Browsing from the left navigation
pane, and then select and open the folder
for the USB storage device, which is to the
right of the Internal memory folder.
3 Select a media file. Note: Only supported
media files are displayed on the screen. All
folders and files are ordered alphabetically
by name.
4 Press the OK button to start playing the
selected media file.
5 During the playback, you can perform the
following actions using the remote control:
• Press to pause or resume the
playback.
• Press the OK button to pause the
playback and bring up the control bar at
the bottom of the screen. Press the OK
button again to resume the playback
and hide the control bar.
• Press / to go 10 seconds backward
or forward.
• Press / to adjust the volume.
• Press to temporarily bring up the
control bar at the bottom of the screen.
You can also press to bring up the
more options menu on the right of the
screen. To instantly hide the control bar
or more option menu, press .
• While the control bar is visible, press
the navigation buttons to select an
option and then press the OK button to
confirm the option or change the value.
To close the dialog box of an option,
press .
6 To stop the playback and return to the list
of files in the current folder, press .
Play audios
You can play audios in a similar way as you play
videos. The major differences are:
• When an audio is playing, its filename and
the control bar are always visible on the
screen.
• When an audio is playing, the list of media
files in the current folder is always visible on
the right of the screen. There is a changing
sound wave icon next to the audio file
being played.
• To quickly start playing another media file,
press the navigation keys to highlight it on
the list and then press the OK button.
• When an audio is playing, pressing
will not stop the playback. The audio will
continue to play even if you return to the
Home screen. To return to the previous
playback screen, reopen the VLC app and
press the OK button twice.
View images
You can view images in a similar way as you
play videos. The major differences are:
• The app displays each image in the current
folder for 10 seconds.
• To skip to the next image in the current
folder, press �
20 Philips · NeoPix 230
7 Wireless
projection
This projector can wirelessly mirror the screens
of the following devices to the projection
screen.
• Android devices
• Windows computers
• iOS devices (iPhone, iPad and iPod touch)
• Mac computers
Notice
For better streaming performance, use a
5 GHz Wi-Fi network.
Copyright-protected content from
Netflix, Amazon Prime Video, Hulu, etc.
cannot be streamed.
The steps below might vary slightly
depending on the version of your
operating system and your device.
Wireless projection with
Android devices/Windows
computers
What you need
• An Android device or Windows computer
that supports Miracast. Note: This feature
is also called Screen Cast, Screen Sharing,
Wireless Display, Wireless projection, etc.
Not all devices have this feature. Refer to
your device user manual for details.
1 Make sure you have turned on Wi-Fi on
the projector and your Android device or
Windows computer. Tip: You do not need to
connect these devices to Wi-Fi networks to
use screen mirroring.
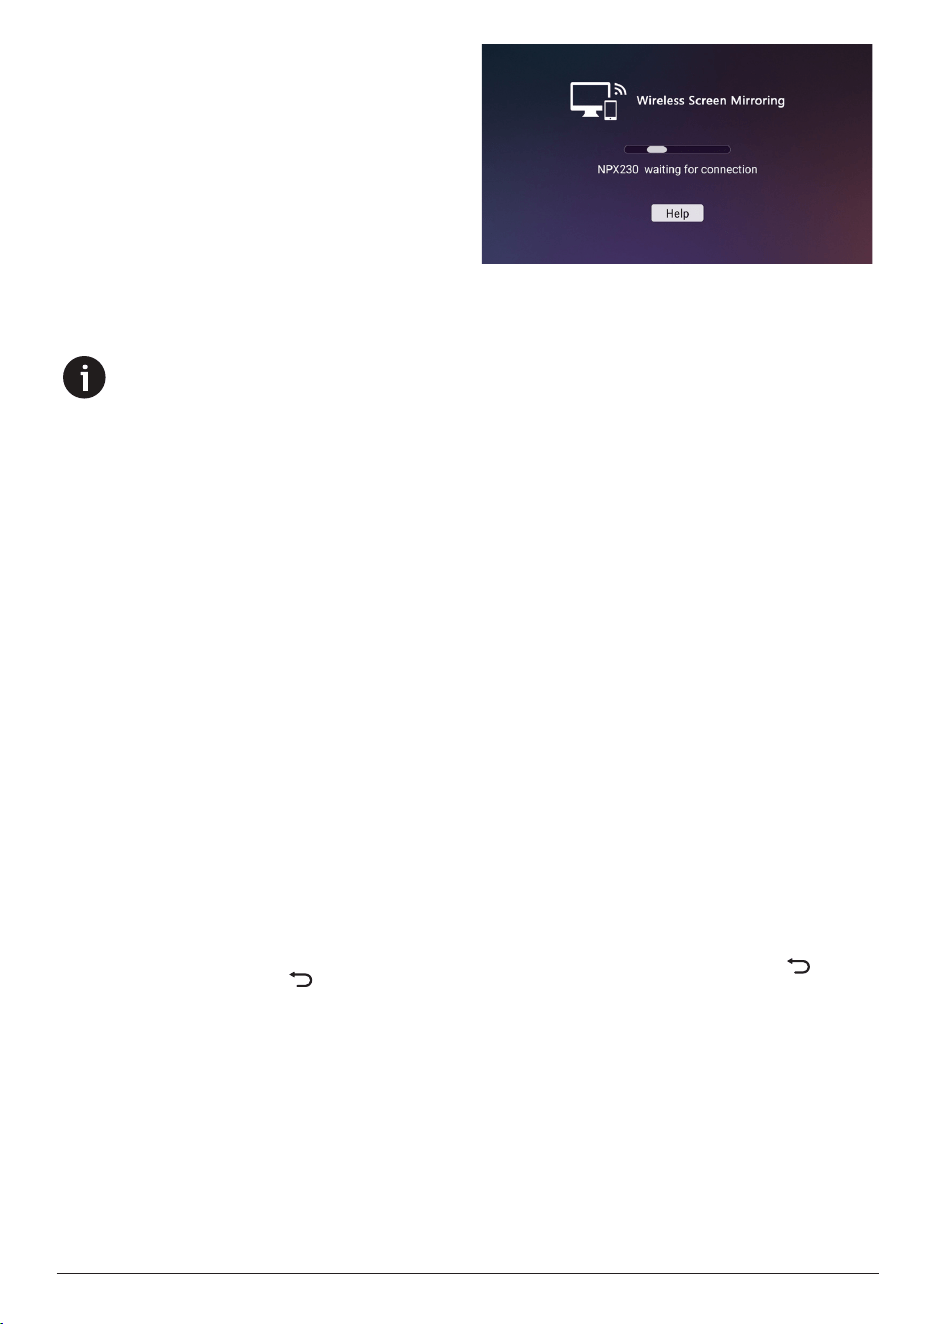
2 From the projector's Home screen, open
the sidebar by pressing on the remote
control. Then select Screencast.
• The projector displays its device name
and the status of the Screencast
connection on the screen.
3 On your Android device, access the
“Settings” menu and then select the setting
for wireless display or projection.
Or on your Windows 10 computer, select the
action center icon in the lower-right corner
of the screen and then select Connect.
Your device will automatically scan for and
display the available display devices.
4 On your Android device or Windows
computer, select the projector to make a
connection and start mirroring your device’s
screen. If the projector prompts you decline
or accept the connection invitation, select
ACCEPT and press the OK button. Note:
You may need to wait a few seconds for the
screen mirroring to start.
Wireless projection with
iOS devices/Mac computers
What you need
• An iOS device such as an iPhone or a Mac
computer.
1 Make sure you have connected the
projector and your iOS device or Mac
computer to the same Wi-Fi network.
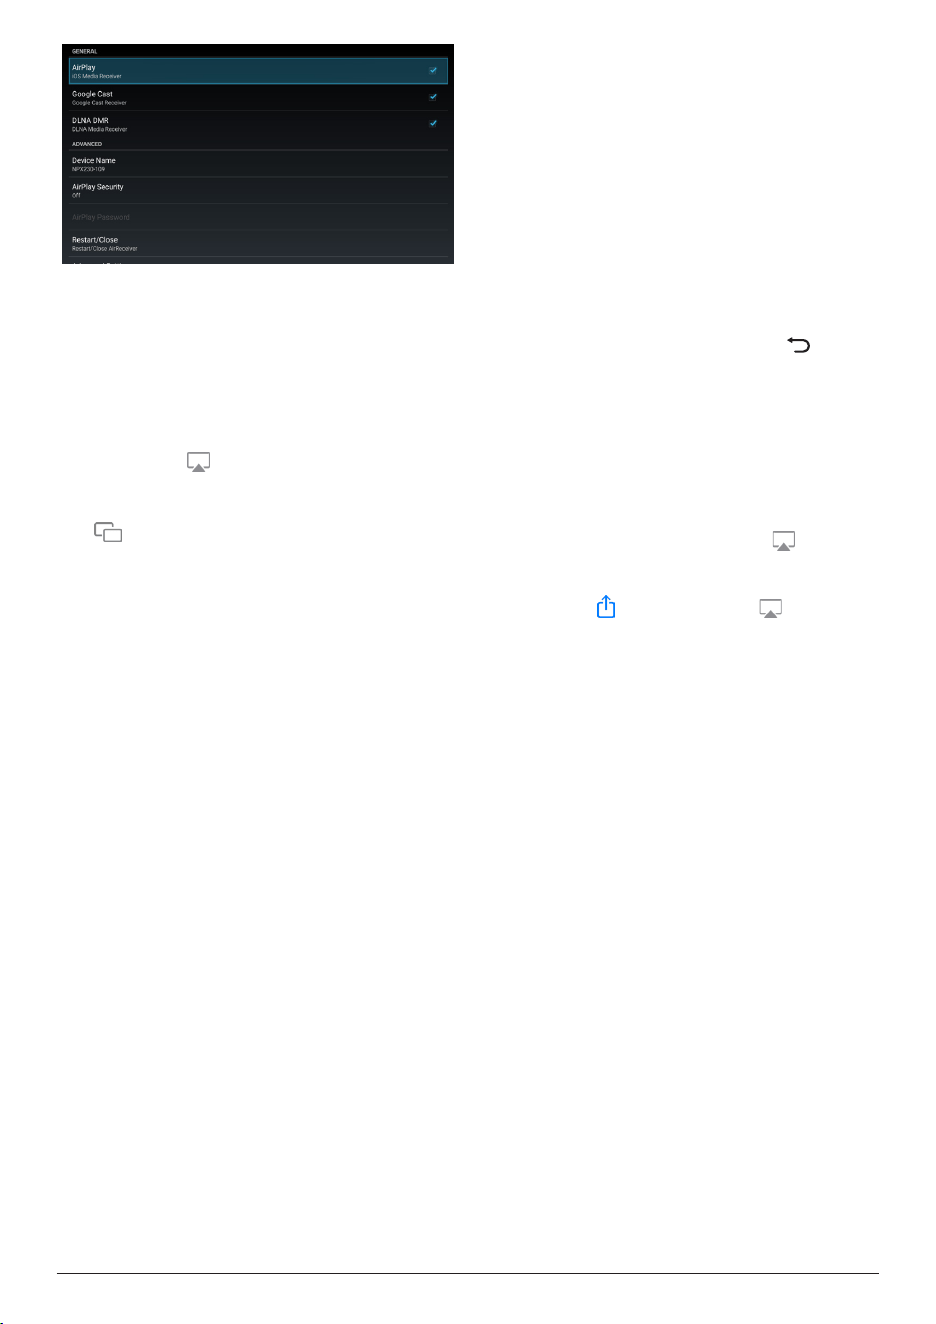
2 Make sure you have enabled AirPlay on the
projector. Tip: AirPlay is enabled by default.
You can use the method below to enable it.
• From the projector's Home screen,
open the sidebar by pressing on the
remote control. Then select AirPlay
TM
to
open the settings screen. If the box next
to AirPlay is not checked, press the OK
button to check it.
Wireless projection 21
3 On your iOS device, open Control Center.
• On iPhone X or later or iPad with
iPadOS 13 or later: Swipe down from
the upper-right corner of the screen.
• On iPhone 8 or earlier or iOS 11 or
earlier: Swipe up from the bottom edge
of the screen.
Or on your Mac computer, select the AirPlay
status icon in the menu bar, which is
near the upper-right corner of the screen.
4 On your iOS device, tap Screen Mirroring
in Control Center and select the
projector to start mirroring your iOS device’s
screen.
Or on your Mac computer, select the
projector to start mirroring your Mac
computer’s screen.
Note: You may need to wait a few seconds
for the screen mirroring to start.
Stream videos/pictures
from iOS devices
What you need
• An iOS device such as an iPhone or an iPad.
1 Make sure you have connected the
projector and your iOS device to the same
Wi-Fi network.
2 Make sure you have enabled AirPlay on the
projector. Tip: AirPlay is enabled by default.
You can use the method below to enable it.
• From the projector's Home screen,
open the sidebar by pressing on the
remote control. Then select AirPlay
TM
to
open the settings screen. If the box next
to AirPlay is not checked, press the OK
button to check it.
3 On your iOS device, while playing a video or
viewing a picture in a supported app such
Safari or Photos, tap the screen to show the
controls if they are invisible.
4 On your iOS device, tap AirPlay . In some
apps, you might need to tap a different
button first. For example, in the Photos app,
tap Share , then tap AirPlay .
5 On your iOS device, select the projector to
start streaming the video or picture. Note:
You may need to wait a few seconds for the
streaming to start.
22 Philips · NeoPix 230
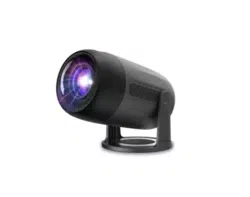
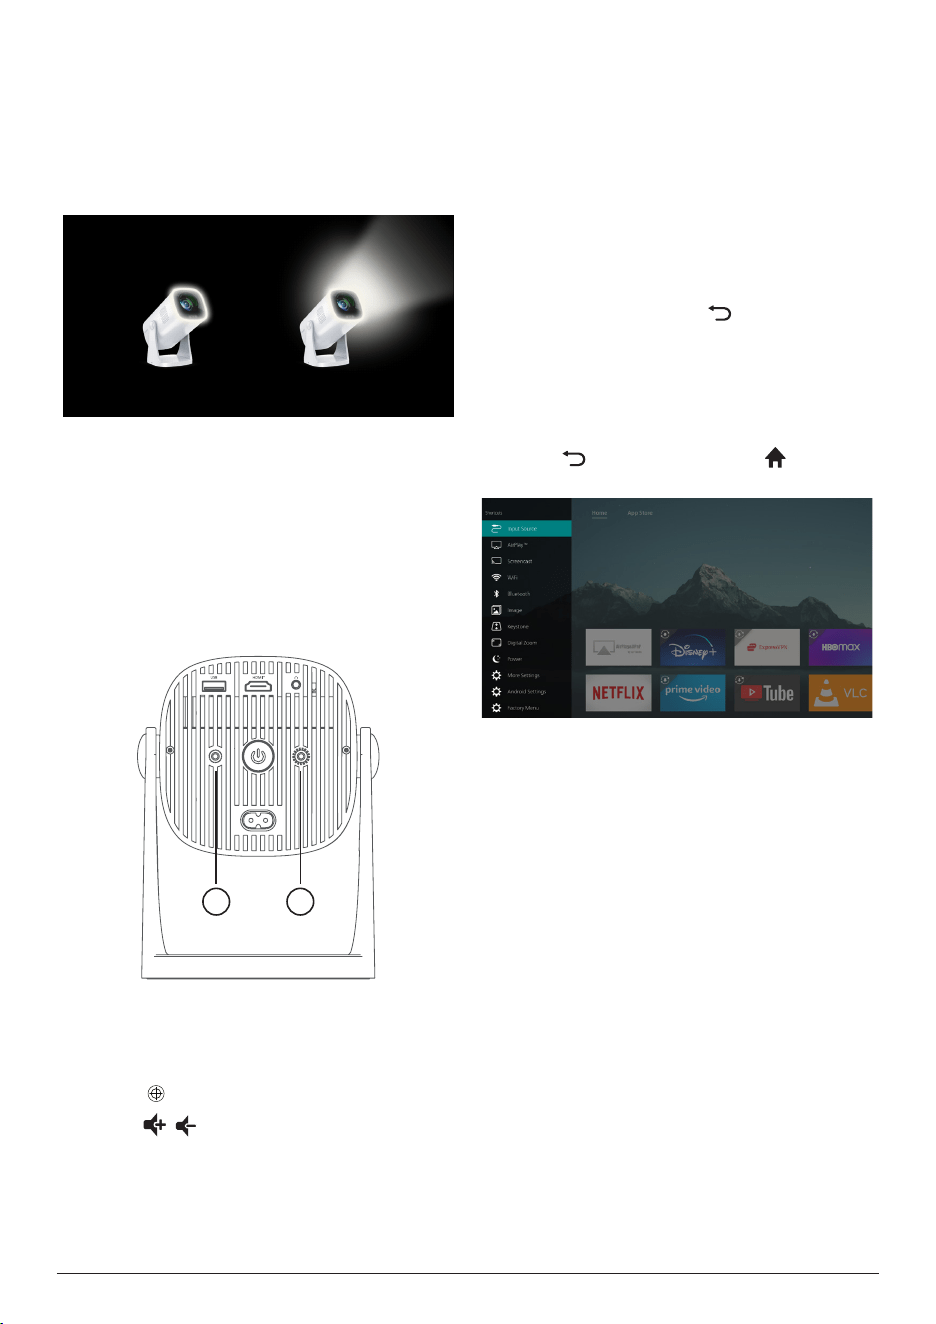
8 Use the LED light
The projector is equipped with an LED light for
indoor lighting. You can use the light when the
projector is in standby mode. To control the
light, use the LED light dimmer on the back the
projector or the remote control.
Control the light using the LED
light dimmer
• Tap and hold the right button for 2 seconds
to turn on the light. Tap this button to
increase the brightness.
• Tap and hold the left button for 2 seconds
to turn off the light. Tap this button to
decrease the brightness.
+-
Control the light using the
remote control
• Press to turn the light on or off.
• Press / to adjust the brightness of the
light when the light is on.
9 Change projector
settings
This section helps you change the projector
settings using the sidebar and settings menu.
Change settings using the
sidebar
1 From the projector's Home screen, open
the sidebar by pressing on the remote
control.
2 Select a setting on the sidebar using the
navigation buttons and the OK button.
3 Make changes using the navigation buttons
and the OK button.
4 Press one or more times or to return
to the Home screen.
The following settings are available on the
sidebar:
• Input Source: Toggle the input source
between LuminOS and HDMI.
• AirPlay™: View and change the settings for
AirPlay. To learn how to wirelessly mirror the
screen of an iOS device or Mac computer
using AirPlay, see Wireless projection with
iOS devices/Mac computers, page 20.
• Screencast: Wirelessly mirror the screen of
an Android device or Windows computer.
For more details, see Wireless projection
with Android devices/Windows computers,
page 20.
• WiFi: Access the Wireless Network screen.
To learn how to connect the projector to
a Wi-Fi network, see Step 3: Connect to a
Wi-Fi network, page 11.
• Bluetooth: Access the Bluetooth screen. To
learn how to connect a Bluetooth device,
see Connect to a Bluetooth device, page
16.
Change projector settings 23
• Image: Access the Image Settings screen.
The following settings are available:
• Projection Direction: Adjust the
projection to the correct direction based
on how the projector is installed.
• Keystone Correction: See Keystone
below for details.
• Digital Zoom: See Digital Zoom below
for details.
• Keystone: Access the Keystone Correction
screen. The following settings are available:
• Auto Keystone Correction: Turn auto
keystone correction on or off by
pressing the OK button.
• 4-Corner Correction: Select this to
manually make the image rectangular
by moving four corners of the image.
This setting is visible only when auto
keystone correction is off.
• H/V Correction: Select this to manually
make the image rectangular by
adjusting the horizontal and vertical
keystone angles. This setting is visible
only when auto keystone correction is
off.
• Digital Zoom: Scale down the screen to up
to 60% of its full size. The default value is
100% (no scale-down).
• Power: Access the Power screen. The
following settings are available:
• Shutdown: Select this to turn off the
projector immediately.
• Timed Shutdown: Select this to turn off
the projector after a specific period of
time.
• More Settings: See the subsection below
for details.
• Android Settings: View and change the
settings for Android, on which LuminOS is
based.
• Help: View the website addresses, QR
code and email address for getting help
information on the projector.
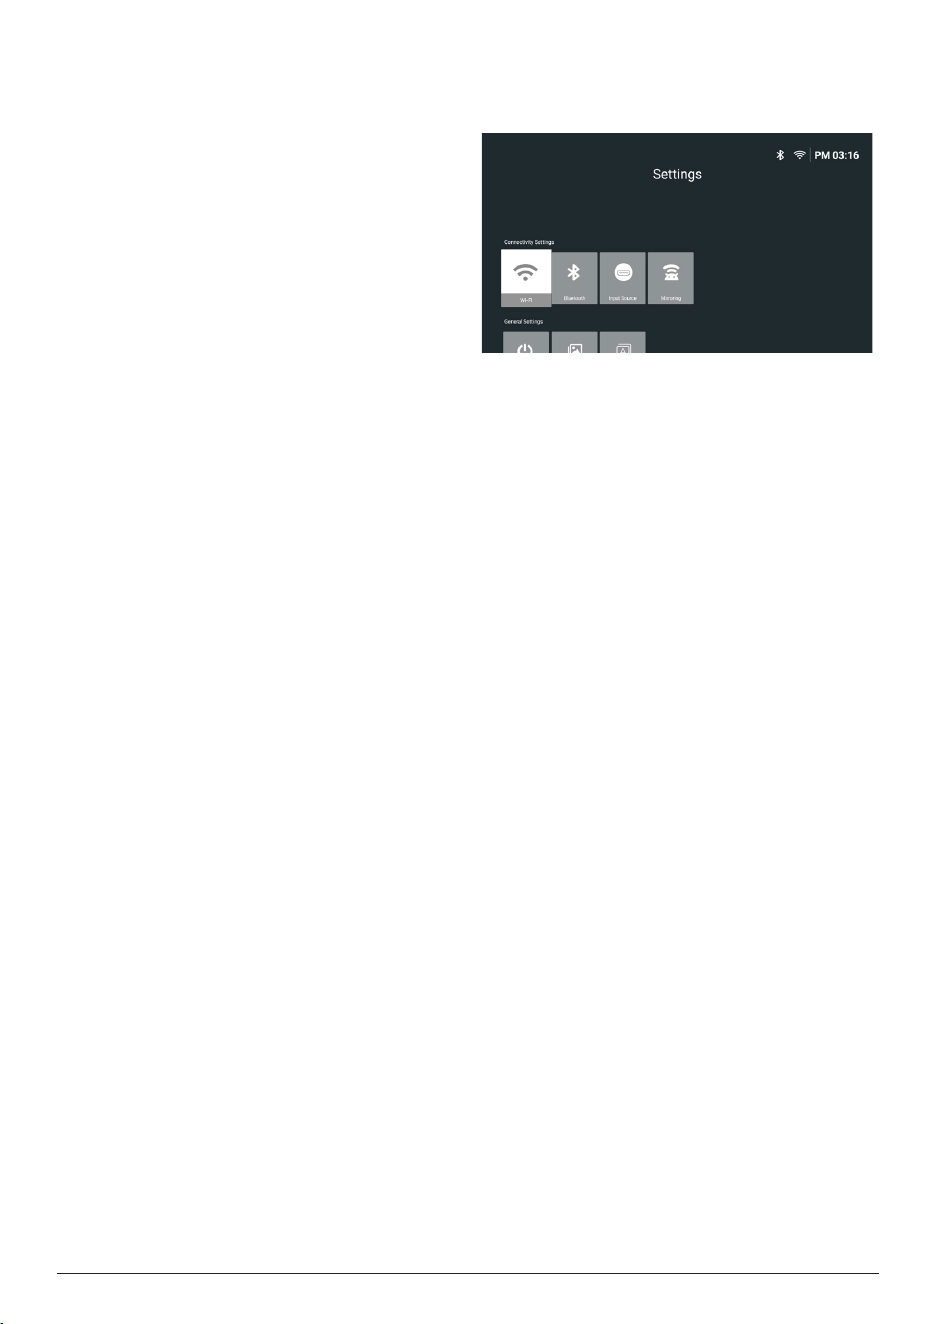
Change more settings
If you open More Settings from the sidebar, you
will see the following screen.
The following settings are available on this
screen:
Connectivity Settings
• WI-FI: Access the Wireless Network screen.
To learn how to connect the projector to
a Wi-Fi network, see Step 3: Connect to a
Wi-Fi network, page 11.
• Bluetooth: Access the Bluetooth screen. To
learn how to connect a Bluetooth device,
see Connect to a Bluetooth device, page
16.
• Input Source: Toggle the input source
between LuminOS and HDMI.
• Mirroring: Access the Screen Mirroring
screen. The following settings are available:
• Android: Wirelessly mirror the screen
of an Android device or Windows
computer. For more details, see
Wireless projection with Android
devices/Windows computers, page
20.
• IOS: View and change the settings
for AirPlay. To learn how to wirelessly
mirror the screen of an iOS device
or Mac computer using AirPlay, see
Wireless projection with iOS devices/
Mac computers, page 20.
General Settings
• Power: Access the Power screen. The
following settings are available:
• Shutdown: Select this to turn off the
projector immediately.
• Timed Shutdown: Select this to turn off
the projector after a specific period of
time.
• Image Settings: Access the Image Settings
screen. The following settings are available:
24 Philips · NeoPix 230
• Projection Direction: Adjust the
projection to the correct direction based
on how the projector is installed.
• Auto Keystone Correction: Turn auto
keystone correction on or off by
pressing the OK button.
• 4-Corner Correction: Select this to
manually make the image rectangular
by moving four corners of the image.
This setting is visible only when auto
keystone correction is off.
• H/V Correction: Select this to manually
make the image rectangular by
adjusting the horizontal and vertical
keystone angles. This setting is visible
only when auto keystone correction is
off.
• Digital Zoom: Scale down the screen
to up to 60% of its full size. The default
value is 100% (no scale-down).
• Language/Input: Access the Language/
Input screen. The following settings are
available:
• Language: Select your preferred display
language.
• Time Zone: Set the time zone used by
the projector by selecting a city.
• Keyboard Input Method: Select your
preferred on-screen keyboard or input
method.
System Settings
• System Clean: Optimize the operating
system by automatically clearing junk files
and the system cache.
• Software Update: Update the projector's
software or factory reset the projector.
• Online Upgrade: For more details, see
Update software online, page 27.
• Offline Upgrade: For more details, see
Update software offline, page 27.
• Factory Reset: Restore the product to
its factory default settings. After the
factory reset, the projector will restart
and allow you to set it up as new.
• About: View the model, software version,
MAC address, serial number, launcher
version and built-in storage of this product.
Change settings using the
settings menu
1 Press on the remote control to access
the projector's settings menu.
2 Use the navigation buttons and the OK
button to select a menu item.
3 Press / or / to select a value for the
menu item.
4 Press the OK button to make the change.
Note: For some menu items such as Digital
Zoom, the change takes effect once you
select a different value.
5 Press one or more times to exit the
projector's settings menu.
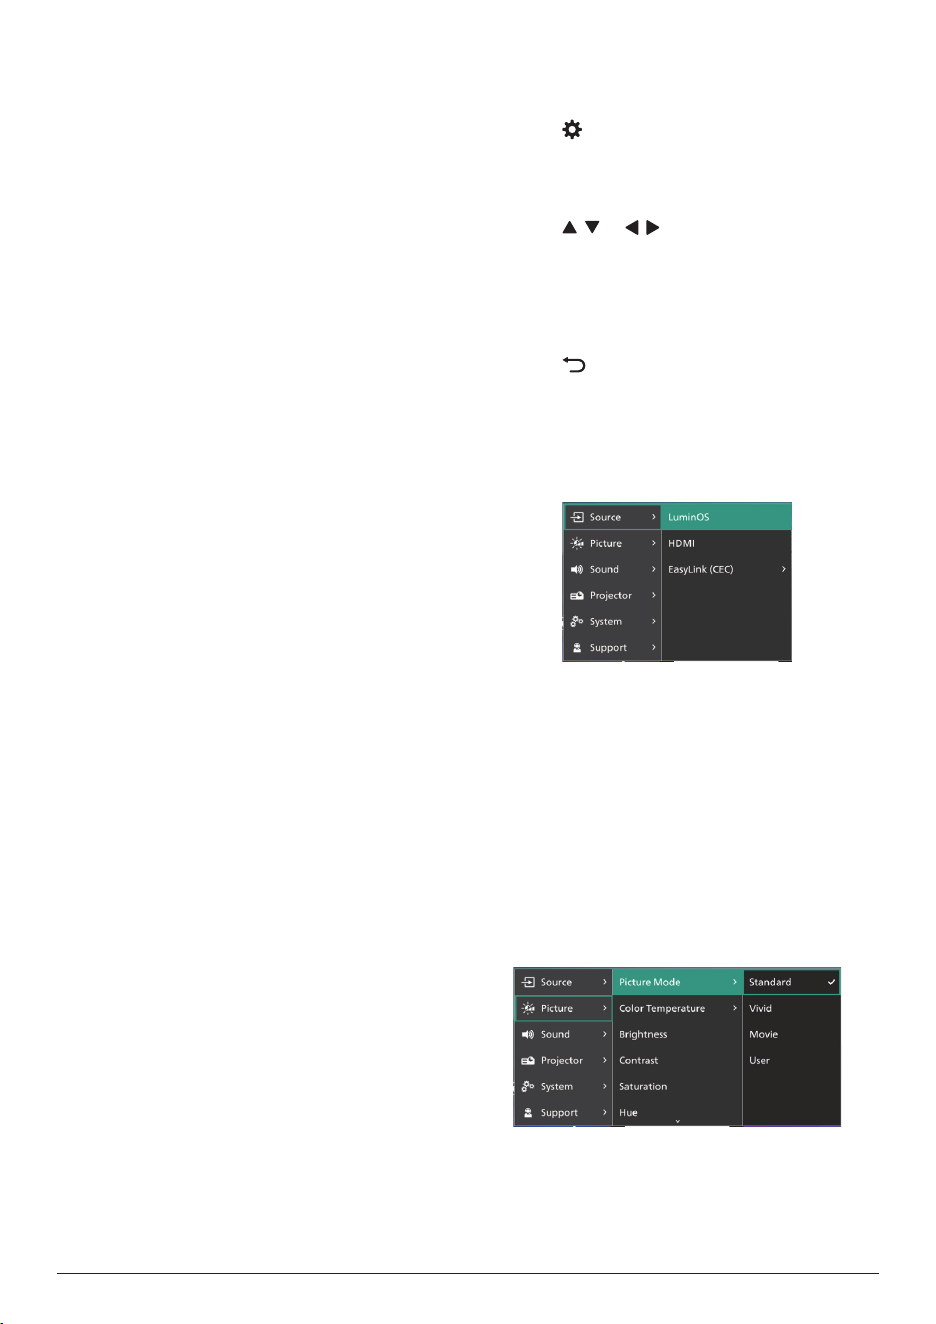
Input source settings
You can view and change the following input
source settings.
• LuminOS: Select this to use the internal
LuminOS as the input source. This is the
default input source.
• HDMI: Select this to use the device
connected to the projector's HDMI™ port
as the input source.
• EasyLink (CEC): Choose to enable or
disable HDMI™ CEC (Consumer Electronics
Control). The default value is Enabled.
Picture settings
You can view and change the following picture
settings.
• Picture Mode: You can set the projector
to use the following picture modes,
depending on your viewing environment or
preferences. After selecting a picture mode,
Change projector settings 25
you can modify its settings.
• Standard: Display the picture with
normal brightness, contrast, saturation,
hue and sharpness levels.
• Vivid: Sharpen the image by increasing
the contrast, saturation and sharpness.
• Movie: Optimize the settings for movies.
• User: Define your own settings.
• Color Temperature: You can set the
projector to use the following color
temperature types. After selecting a color
temperature type, you can modify its
settings.
• User: Define your own settings.
• Cool: Make the picture more bluish.
• Standard: Use a moderate color
temperature.
• Warm: Make the picture more reddish.
• Brightness: Adjust the screen's overall
brightness.
• Contrast: Adjust the contrast of the bright
and dark areas of the image.
• Saturation: Adjust the intensity of the
colors.
• Hue: Adjust the hue of the colors.
• Sharpness: Adjust the sharpness of the
image.
• Red Gain: Adjust the gain for red.
• Green Gain: Adjust the gain for green.
• Blue Gain: Adjust the gain for blue.
• Reset to Default: Select Yes to reset all the
picture settings above.
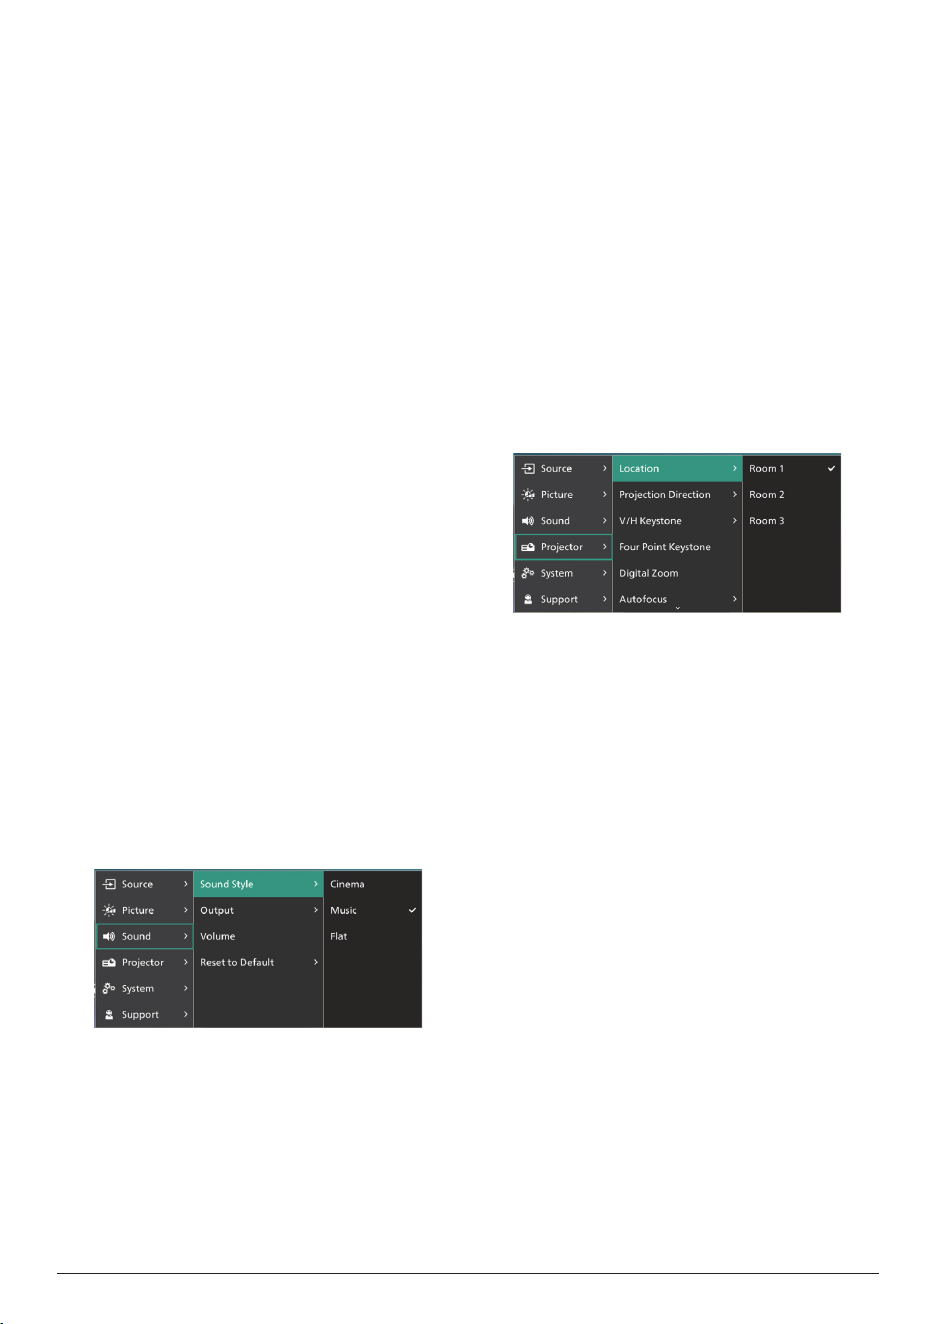
Sound settings
You can view and change the following sound
settings.
• Sound Style: You can set the projector to
use the following sound styles, depending
on your environment, audio type or
preferences.
• Cinema: Optimize the settings for
movies.
• Music: Optimize the settings for music.
• Flat: Set both the bass and treble levels
to medium levels.
• Output: Select the projector's audio output
type.
• Internal Speaker: Use the projector's
internal speaker to output audio.
• Bluetooth: Use a Bluetooth device
paired with the projector to output
audio. To learn how to connect a
Bluetooth device, see Connect to a
Bluetooth device, page 16.
• Volume: Adjust the volume of the internal
speaker or connected Bluetooth speaker.
• Reset to Default: Select Yes to reset all the
sound settings above.
Image settings
You can view and change the following image
settings.
• Location: You can select a location and then
modify the image settings. All the modified
image settings will be associated with the
selected (current) location. You can create
up to 3 different sets of image settings
this way and quickly switch between them
by selecting a location. Tip: The projector
always selects the last used location after
being restarted.
• Room 1: Select this to use or modify the
image settings for Room 1.
• Room 2: Select this to use or modify the
image settings for Room 2.
• Room 3: Select this to use or modify the
image settings for Room 3.
• Projection Direction: Adjust the projection
to the correct direction based on how the
projector is installed.
• V/H Keystone: Select Automatic to turn on
auto keystone correction. Select Manual
to manually make the image rectangular
by adjusting the horizontal and vertical
keystone angles.
• Four Point Keystone: Select this to manually
make the image rectangular by moving four
corners of the image.
• Digital Zoom: Scale down the screen to up
to 60% of its full size. The default value is
26 Philips · NeoPix 230
100% (no scale-down).
• Autofocus: Select Yes to enable autofocus
or No to disable it. The default value is Yes.
• Reset to Default: Select Yes to reset all the
image settings above except Projection
Direction for the current location (Room
1/2/3). The other two locations will not be
affected.
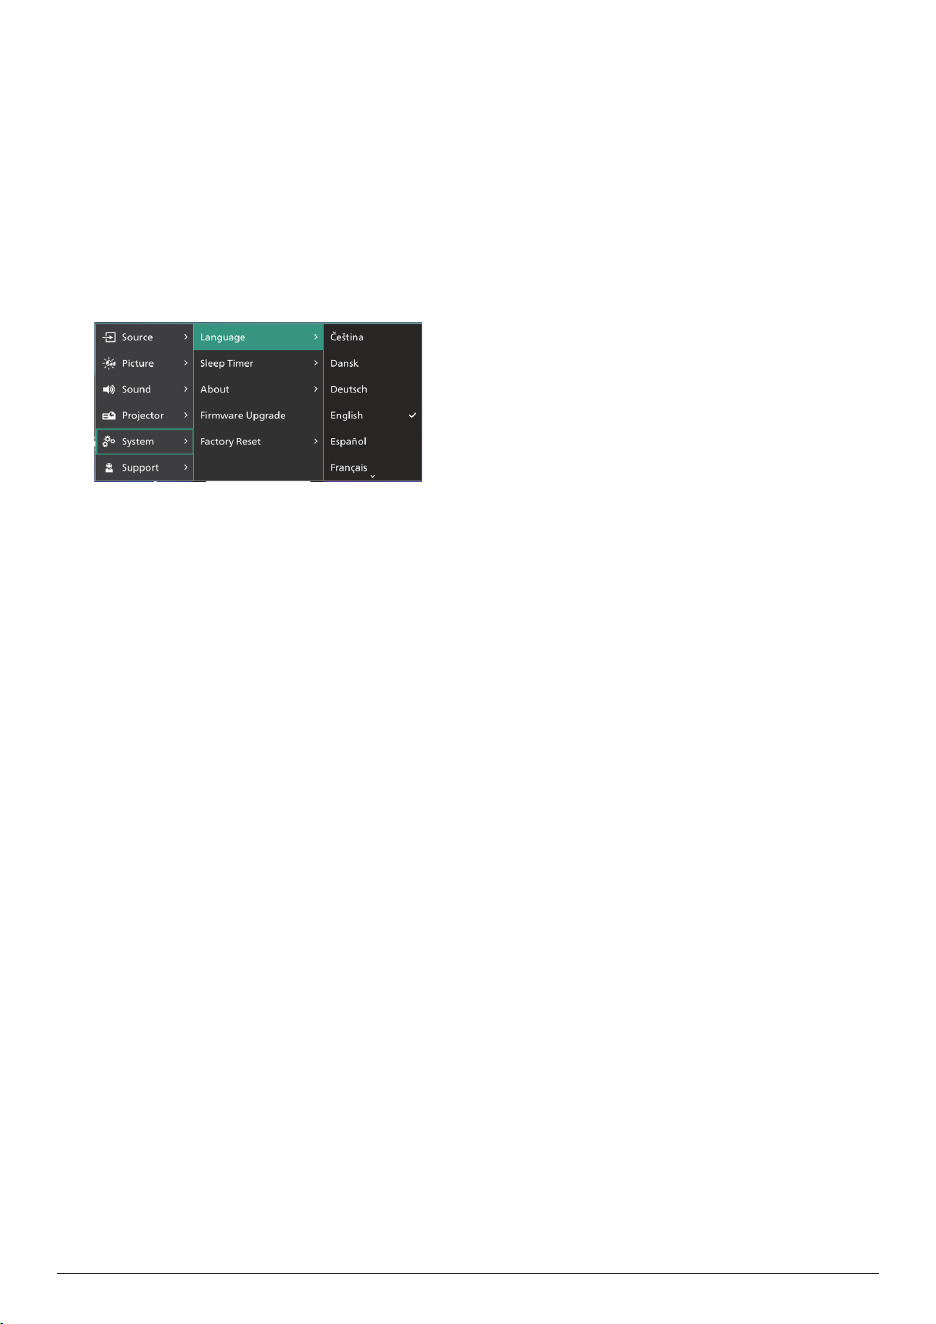
Other settings
You can view and change the following
additional settings.
• Language: Select your preferred display
language.
• Sleep Timer: Select a period of time after
which the projector turns off automatically.
The default value is Disabled.
• About: View the hardware version, firmware
version, serial number and MAC address of
this product.
• Firmware Upgrade: Update the projector's
software or factory reset the projector.
• Online Upgrade: For more details, see
Update software online, page 27.
• Offline Upgrade: For more details, see
Update software offline, page 27.
• Factory Reset: Restore the product to
its factory default settings. After the
factory reset, the projector will restart
and allow you to set it up as new.
• Factory Reset: Select Yes to restore the
product to its factory default settings. After
the factory reset, the projector will restart
and allow you to set it up as new.
• Support: View the website addresses, QR
code and email address for getting help
information on the projector.
Maintenance 27
10 Maintenance
Cleaning
DANGER!
Follow the following instructions when
cleaning the projector:
Use a soft, lint-free cloth. Never use
liquid or easily flammable cleansers
(sprays, abrasives, polishes, alcohol,
etc.). Do not allow any moisture to
reach the interior of the projector.
Do not spray the projector with any
cleaning fluids.
Wipe over the surfaces gently. Be
careful that you do not scratch the
surfaces.
Cleaning the lens
Use a soft brush or lens cleaning paper for
cleaning the lens of the projector.
DANGER!
Do not use any liquid cleaning agents!
Do not use any liquid cleaning
agents for cleaning the lens, to avoid
damaging the coating film on the lens.
Update software
You can update the projector software online
or offline to get the best features and support
from the projector.
CAUTION!
Do not turn off the projector or remove
the USB flash drive during a software
update.
Update software online
Updating the projector software online is quick
and easy.
1 Make sure the projector can access the
internet via a Wi-Fi network. To learn how
to connect the projector to a Wi-Fi network,
see Step 3: Connect to a Wi-Fi network,
page 11.
2 Press on the remote control and then
select System > Firmware Upgrade > Online
Upgrade. The projector will automatically
check for a new version of projector
software. If a new version is found, the
projector will prompt you to start the
update.
3 If a new version is found, follow the on-
screen instructions to complete the update.
Tip: When the projector is connected to the
internet, it will check for a new version of
projector software every time you turn it on. If a
new version is found, the projector will prompt
you to start the update. If this happens, you can
choose to start or cancel the update.
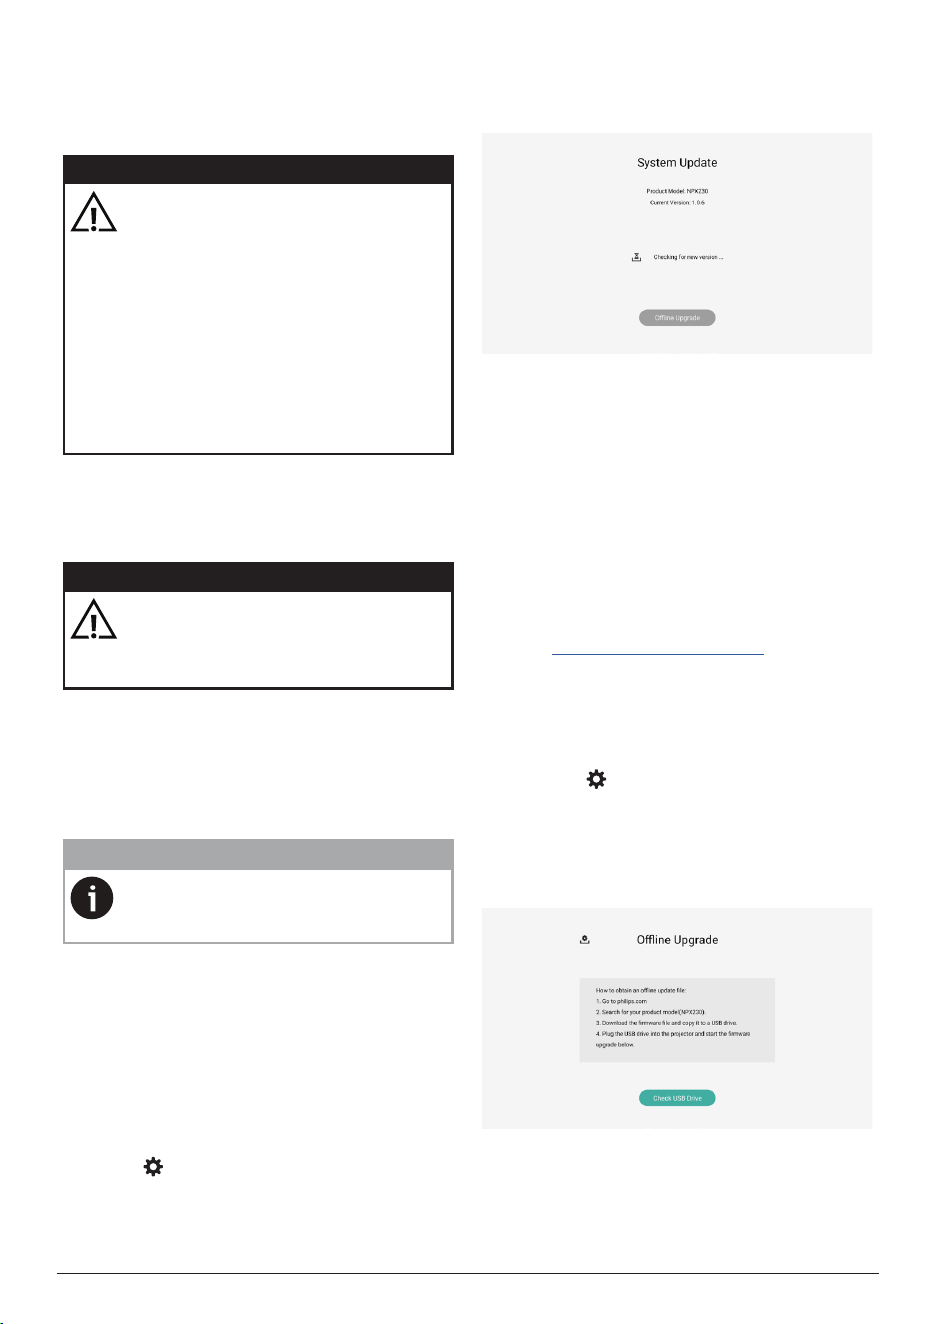
Update software offline
If your projector has no access to the internet,
you can manually update its software offline.
1 Visit www.philips.com/support, find your
product (model number: NPX230/INT),
open its support page and locate "Software
& drivers". Then check the latest software
version there.
2 Check the current software version by
pressing on the remote control and
selecting System > About. Proceed to the
next step if the latest software version is
greater than the current software version.
3 Select System > Firmware Upgrade >
Offline Upgrade from the settings menu.
4 Follow the on-screen instructions to
complete the update.
28 Philips · NeoPix 230
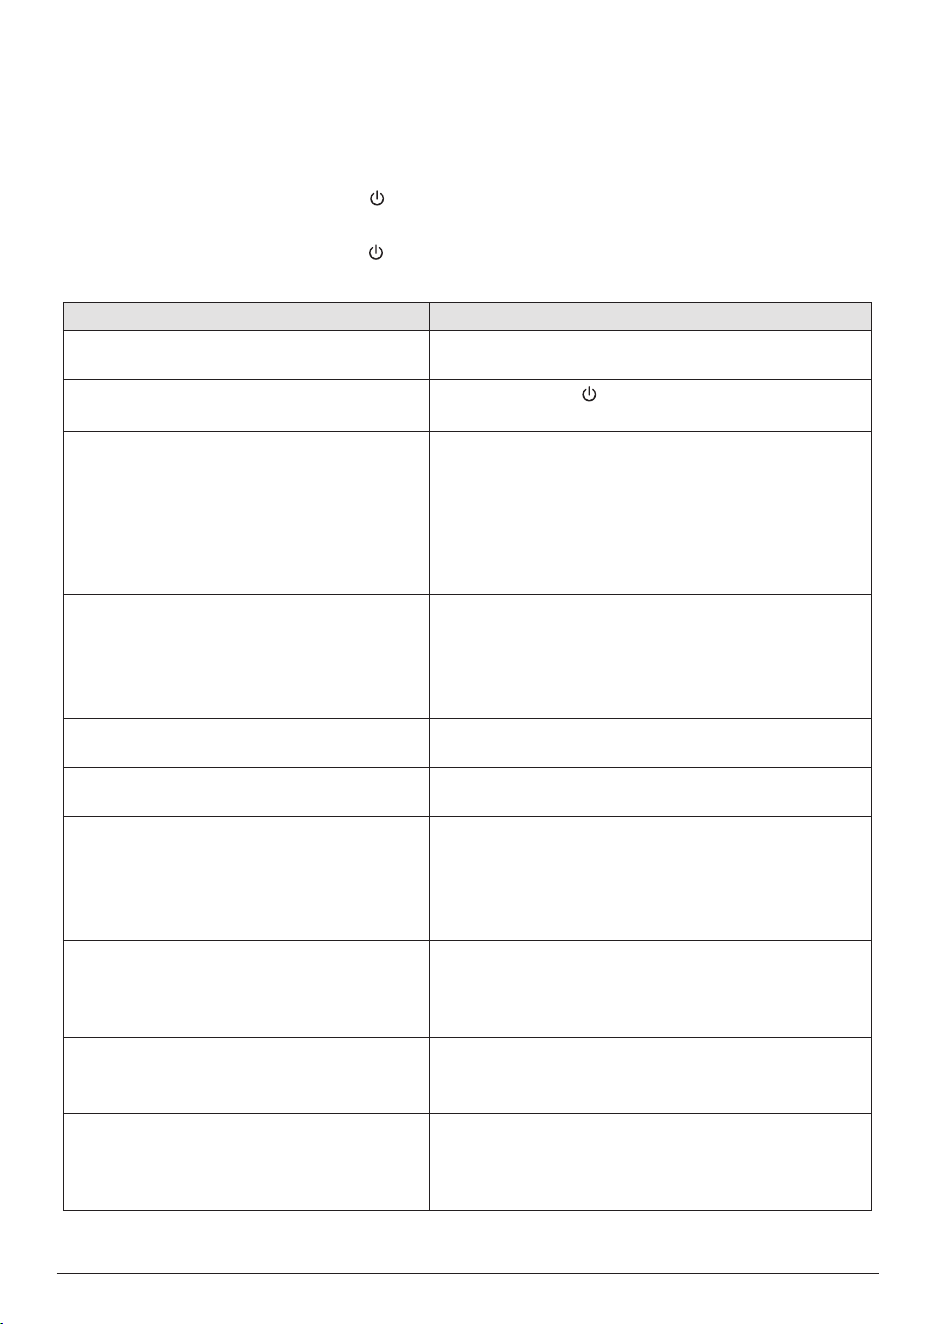
11 Troubleshooting
Power cycling
If a problem occurs and you cannot resolve it using the instructions in this user manual, try the
following steps to resolve the problem.
1 Turn the projector off by pressing twice.
2 Wait at least 10 seconds.
3 Turn the projector on by pressing .
4 If the problem persists, contact one of our customer service centers or your dealer.
Problem Solution
The projector cannot be turned on. • Disconnect and reconnect the power cable, and
try to turn the projector on again.
The projector cannot be turned off.
• Press and hold longer than ten seconds. If this
does not work, disconnect the power cable.
No image from the external HDMI™ device. 1. Check if you have switched the input source to
HDMI.
2. Disconnect the HDMI™ cable or switch off the
HDMI™ device.
3. Wait three seconds.
4. Reconnect the HDMI™ cable or switch on the
HDMI™ device again.
No sound from the external connected
device.
• Check the cables to the external device.
• Check that the sound is activated on the external
device.
• Only the original cables from the device
manufacturer may function.
No sound from external HDMI™ output
device.
• On the HDMI™ output device, set the audio
setting to Multichannel (Raw data) & Stereo (PCM).
No sound when you connect your
computer using an HDMI™ cable.
• Check that the sound is activated on the
computer.
Only the home menu appears and not the
image from the external device.
• Check if the cables are connected to the correct
sockets.
• Check that the external device is turned on.
• Check if the video output of the external device is
turned on.
Only the home menu appears and not the
image from the connected computer.
• Check that the HDMI™ output of the computer is
turned on.
• Check if the resolution of the computer is set to
1920*1080.
The projector turns itself off. • When the projector is running for a long period of
time, the surface becomes hot.
• Check that the power cable is connected correctly.
The projector cannot read the USB storage
device.
• The projector does not support the exFAT file
system.
• Format the USB storage device in FAT32 or NTFS
format, then use it.

Troubleshooting 29
Problem Solution
The projector does not react to remote
control commands.
• Check the batteries of the remote control.
The temperature of the projector’s surface
is warm.
• For this projector it is normal to generate
moderate heat during operation.
The projector does not work after I connect
it to a laptop.
• Check that the HDMI™ cable is plugged in
correctly.
• Make sure that the laptop has been switched to
projector display.
I cannot pair the projector with a Bluetooth
device.
• Turn on the Bluetooth device and make sure it is
in pairing mode.
• Position the Bluetooth device so that it is less
than 10 m (33 ft) from the projector.
• To connect a Bluetooth device to the projector,
follow the instructions in Connect to a Bluetooth
device, page 16.
• If another Bluetooth device is already connected
to the projector, disconnect it.
• Move the projector farther away from other
devices (microwave oven, wireless router, etc.)
that are emitting radio frequency signals.
After a Bluetooth device is connected,
there is no sound from the projector or the
Bluetooth device.
• Check if the Bluetooth device’s volume is at the
minimum.
• Check if projector's volume is at the minimum.
• Check if the playback has started.
• Try playing another video/audio file.
• Try reconnecting the two devices.
Black / White Pixels An LCD display may contain a small number of
pixels that do not function normally (also known
as “dead pixels” or “black pixels”). Your display
has been inspected and is in compliance with the
manufacturer's specifications, meaning that any
pixel defects do not affect the operation or use of
your display. Without prejudice to generality of the
foregoing, dead pixels or black pixels not exceeding
5 dots meet the factory specifications and are not
considered a defect under this warranty.
Concerning dust:
Dust may appear during the use of a projector.
Without prejudice to generality of the foregoing,
dust spots not exceeding 3 dots meet the factory
specifications and are not considered a defect
under this warranty. Please clean the lens with a
gentle specific glass tissue. You can also push dry air
into the product by the side holes in order to clean
the optical engine inside.

30 Philips · NeoPix 230
12 Appendixes
Technical data
Technology/optical
Display technology ...............................................LCD
Light source ...........................................single LED W
Lumens ...................................................................... 250
Resolution ................................... 1920 x 1080 pixels
LED lifetime ................................over 30,000 hours
Contrast ratio .................................................... 3000:1
Aspect ratio ...................................................16:9 / 4:3
Throw ratio .............................................................. 1.21:1
Screen size (diagonal)............................... up to 80"
Screen distance ..............70-400 cm (27.6-157.5")
Projection modes ........................................................4
Focus adjustment .................................................auto
Keystone correction .........................................digital
4 corner correction ................................................. yes
Digital zoom .......................................yes (60-100%)
Sleep timer ................................................................ yes
Operating system
LuminOS with pre-loaded apps:
Netflix, MyCanal, Disney+, VLC, SmartTube, etc.
(Apps may vary depending on availability)
Sound
Built-in speakers ..............................................2 x 3 W
Speaker type .......................................................stereo
Connection
HDMI™ in ....................................................................... x1
USB-A (5 V/2 A out + external drive) .................. x1
3.5 mm audio out .......................................................x1
Wi-Fi.........................802.11a/b/g/n/ac, 2.4 + 5 GHz
Wi-Fi screen mirroring ........................................... yes
Bluetooth .............To connect gamepad, speaker,
mouse, keyboard, etc.
Power source
Power consumption ...................... operating: 52 W
....................................................... standby: 0.25 W
Input: AC 100-240 V, 50/60 Hz, 1.3 A (Max)
Multimedia player
Supported video formats: MP4, RMVB, AVI, RM,
MKV
Supported audio formats: MP3, WMA, OGG,
AAC, FLAC, APE, WAV
Supported photos formats: BMP, PNG, JPEG
Dimensions and weight
Unpacked (W x D x H) ..... 239 x 140.7 x 187.9 mm
Packed (W x D x H) ..................414 x 172 x 150 mm
Net weight ......................................... 1.38 kg / 3.04 lb
Gross weight ....................................... 2.54 kg / 5.6 lb
Temperature requirements
Operating temperature.......................... 5 °C - 35 °C
Storage temperature ...................................... < 60 °C
Package contents
1. NeoPix 230 projector
2. Remote control
3. Power cables (EU, UK, US)
4. AAA batteries for remote control
5. Quick Start Guide with Warranty Card
6. Ceiling hanging metal plate
7. Wall anchors and screws
Model
NPX230/INT
EAN: 7640186960373
UPC: 667619992906
Appendixes 31
CE statement
• The product shall only be connected to a
USB interface of version USB 2.0 or higher.
• Adapter shall be installed near the
equipment and shall be easily accessible.
• The operating temperature of the EUT can’t
exceed 35°C and shouldn’t be lower than
5°C.
• The plug is considered as disconnect device
of adapter.
• The UNII Band 5150-5250 MHz is for indoor
use only.
• The device complies with RF specifications
when the device is used at 20 cm from your
body.
Hereby, Screeneo Innovation SA declares that
this product is in compliance with essential
requirements and other relevant provisions of
Directive 2014/53/EU.
The Declaration of Compliance can be
consulted on the site www.philips.com.
Frequency bands Maximum output
power
BT EDR (EIRP) 9.09 dBm
BT BLE (EIRP) 4.85 dBm
Wi-Fi 2.4GHz (EIRP) 17.88 dBm
Wi-Fi 5GHZ (EIRP) 17.89 dBm
FCC statement
15�19 Labeling requirements�
This device complies with part 15 of the FCC
Rules. Operation is subject to the following
two conditions: (1) This device may not cause
harmful interference, and (2) this device must
accept any interference received, including
interference that may cause undesired
operation.
15�21 Information to the user�
Any changes or modifications not expressly
approved by the party responsible for
compliance could void the user’s authority to
operate the equipment.
15�105 Information to user�
This equipment has been tested and found
to comply with the limits for a Class B digital
device, pursuant to Part 15 of the FCC Rules.
These limits are designed to provide reasonable
protection against harmful interference in
a residential installation. This equipment
generates, uses and can radiate radio
frequency energy and, if not installed and used
in accordance with the instructions, may cause
harmful interference to radio communications.
However, there is no guarantee that interference
will not occur in a particular installation. If this
equipment does cause harmful interference
to radio or television reception, which can be
determined by turning the equipment off and
on, the user is encouraged to try to correct the
interference by one or more of the following
measures:
• Reorient or relocate the receiving antenna.
• Increase the separation between the
equipment and receiver.
• Connect the equipment into an outlet on
a circuit different from that to which the
receiver is connected.
• Consult the dealer or an experienced radio/
TV technician for help.
During operation, the separation distance
between the user and the antenna shall be
at least 20 cm. This separation distance will
ensure that there is sufficient distance from a
properly installed externally-mounted antenna
to satisfy the RF exposure requirements.
FCC ID: 2ASRT-NPX230
Canada regulatory
compliance
This device complies with Industry Canada CAN
ICES-3 (B)/NMB-3(B)
RSS-Gen & RSS-247 statement: This device
complies with Industry Canada RSS standard(s).
Operation is subject to the following two
conditions:
1 This device may not cause interference, and
2 This device must accept any interference,
including interference that may cause
undesired operation of the device.

32 Philips · NeoPix 230
RF Radiation Exposure statement: The
device meets the exemption from the routine
evaluation limits in section 2.5 of RSS102 and
users can obtain Canadian information on RF
exposure and compliance.
This device should be installed and operated
with a minimum distance of 7.8 inches
(20 centimetres) between the device and your
body.
Other notice
Preservation of the environment as part
of a sustainable development plan is an
essential concern of Screeneo Innovation SA.
The desire of Screeneo Innovation SA is to
operate systems respecting the environment
and consequently it has decided to integrate
environmental performances in the life cycle
of these products, from manufacturing to
commissioning use and elimination.
Batteries: If your product contains batteries,
they must be disposed of at an appropriate
collection point.
Product: The crossed-out waste bin symbol on
the product means that the product belongs
to the family of electrical and electronic
equipment. In this respect, the European
regulations ask you to dispose of it selectively:
• At sales points in the event of the
purchase of similar equipment.
• At the collection points made available
to you locally (drop-off center, selective
collection, etc.).
In this way you can participate in the reuse
and upgrading of Electrical and Electronic
Equipment Waste, which can have an effect on
the environment and human health.
The paper and cardboard packaging used can
be disposed of as recyclable paper. Have the
plastic wrapping recycled or dispose of it in
the non-recyclable waste, depending on the
requirements in your country.
Trademarks: The mentioned references in
this manual are trademarks of the respective
companies. The lack of the trademarks ®
and ™ does not justify the assumption that
these dedicated terminologies are free
trademarks. Other product names used herein
are for identification purposes only and may
be trademarks of their respective owners.
Screeneo Innovation SA disclaims any and all
rights in those marks.
Neither Screeneo Innovation SA nor its affiliates
shall be liable to the purchaser of this product
or third parties for damages, losses, costs, or
expenses incurred by the purchaser or third
parties as a result of accident, misuse, or abuse
of this product or unauthorised modifications,
repairs, or alterations to this product, or failure
to strictly comply with Screeneo Innovation SA
operating and maintenance instructions.
Screeneo Innovation SA shall not be liable for
any damages or problems arising from the use
of any options or any consumable materials
other than those designated as original
Screeneo Innovation SA/PHILIPS products or
Screeneo Innovation SA/PHILIPS approved
products.
Screeneo Innovation SA shall not be held liable
for any damage resulting from electromagnetic
interference that occurs from the use of any
interface cables other than those designated as
Screeneo Innovation SA/PHILIPS products.
All rights reserved. No part of this publication
may be reproduced, stored in a retrieval
system or transmitted in any form or by any
means, electronic, mechanical, photocopying,
recording, or otherwise, without the prior
written permission of Screeneo Innovation SA.
The information contained herein is designed
only for use with this product. Screeneo
Innovation SA is not responsible for any use of
this information as applied to other devices.
This user manual is a document that does not
represent a contract.
Errors, printing errors and changes are reserved.
The terms HDMI, HDMI High-Definition
Multimedia Interface, HDMI Trade Dress and
the HDMI Logos are trademarks or registered
trademarks of HDMI Licensing Administrator,
Inc.

Screeneo Innovation SA
Route de Lully 5c - 1131 Tolochenaz - Switzerland
Philips and the Philips Shield Emblem are registered trademarks of Koninklijke Philips N.V. and are
used under license. Screeneo Innovation SA is the warrantor in relation to the product with which
this booklet was packaged.
2024 © Screeneo Innovation SA. All rights reserved.
NeoPix 230
EN