User Manual
HVD132
Non-Contact High AC Voltage Detector

Index
1. Introduction......................................................
2. Safety precaution.............................................
3. Applications......................................................
4. Features & specications.................................
5. Instrument layout..............................................
6. Operation.........................................................
7. Maintenance....................................................
Page
1
1-2
2
3
4
5-8
9

-1-
1. Introduction
NOTE
This detector has been designed and tested
according to CE Safety Requirements for Electronic
Measuring Apparatus. Follow all warnings to ensure
safe operation.
WARNING
READ "SAFETY PRECAUTION" (NEXT PAGE)
BEFORE USING THE HIGH VOLTAGE DETECTOR.
2. Safety precaution
Electricity can cause severe injuries with high
voltages. Therefore it is very important to read the
following info before using the Non-contact High
Voltage Detector.
This must only be used and operated by a
competent trained person and in strict accordance
with the instructions. We will not accept liability for
any damage or injury caused by misuse or non
compliance with instructions and safety procedures.
Examine the Non-contact High Voltage Detector to
make sure it is clean and dry. If it is not, wipe with a
clean, dry, lint-free cloth.
The high voltage detector test should always be used
as an indication only.
Read all safety information carefully before attempting
to operate or service the High Voltage Detector.

-2-
Use the High Voltage Detector only as specied in
this manual. Otherwise, the protection provided by
the High Voltage Detector may be impaired.
Please keep in your mind to wear high insulated
gloves when you test high voltages between
600V~1.5kV.
Please keep in your mind to wear high insulated
gloves and to use the HVD132 when you test high
voltages between 1.5kV~132kV.
3. Applications
● Non-contact detection of live voltages
● Find faults in cables
● Check and detect live high voltage cables
● Trace live wires
● Check high frequency radiation
● Check grounding equipment
● Detect residual or induced voltages

-3-
4. Features & specications
● Power ON/OFF function
● Circuit Test function
● Press the Test button to make sure the whole circuit
is working well before testing actual high voltage
circuits.
● 2 ranges for selection (2 function buttons)
Low : 50V~1.5kV
Press the LOW button, HVD132 is ready for low
voltage detection.
HIGH : 1.5kV~132kV
Press the HIGH button, HVD132 is ready for high
voltage detection.
● Power consumption
OFF : Less than 5μA
Low voltage detection mode : Less than 40mA
High voltage detection mode : Less than 40mA
● Duty cycle : Continuous
● Response Time : Instantaneous
● Operating temperature : 0~40°C
● Power source :
Alkaline battery 9V x 1
● Dimensions : 318(L) x 75(W) x 71(D) mm
● Weight : Approx. 227g (Battery included)
● Accessories
Instruction manual
Carry case
Battery
-4-
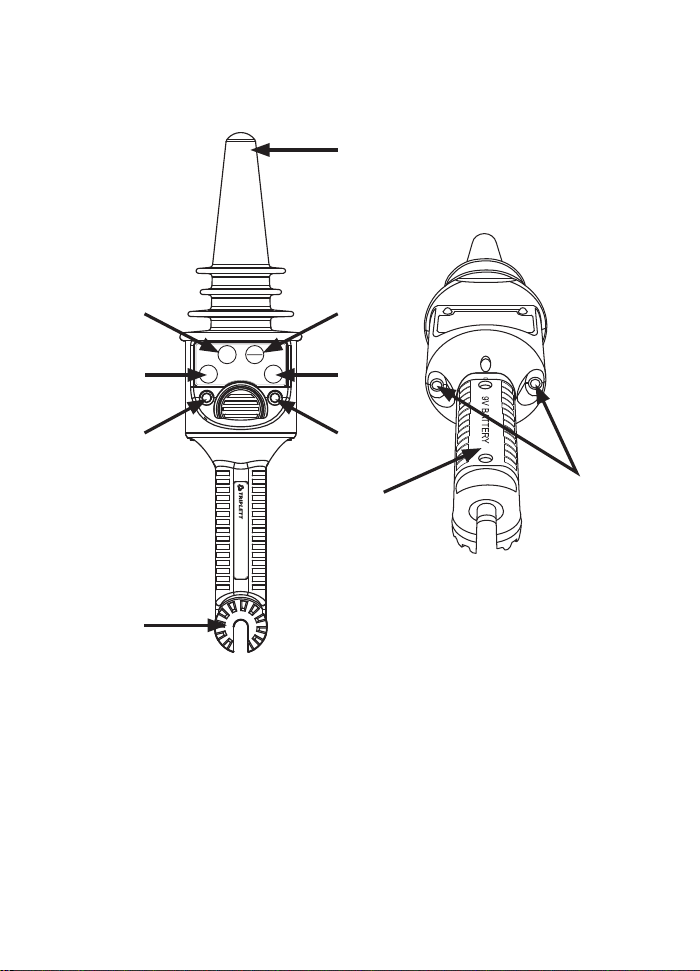
5. Instrument layout
(1) Voltage sensor (7) HIGH range LED
(2) TEST button (8) The connection point of
Hot Stick
(3) ON/OFF button
(4) LOW range button (9) Battery cover
(5) HIGH range button (10) Red LEDs for detection
(6) LOW range LED
(1)
(5)
(3)
(7)
(2)
(6)
(4)
(8)
(9)
(10)
LOW
TEST
HIGH
ON
OFF
HVD132
Non-contact H.V. Detector

-5-
6. Operation
●
ON/OFF button
When POWERED ON, the 2 red LEDs will Flash
and the buzzer will generate a sound intermittently.
The red LED of the HIGH range will be turned on.
The original mode is the HIGH range.
●
TEST button
Press the TEST button to do the self-test rst, this
is to make sure the circuits inside the HVD132
is ok. When you press the TEST button, the 2
red LEDs will glow and the buzzer will generate
a sound continuously. The red LED of the HIGH
range will be still on (the original mode). If the 2
red LEDs do not glow and the continuous sound
doesn't be generated, please replace with a new
battery.
●
LOW range button (Low voltage detection)
Press the ON/OFF button to turn on the high
voltage detector.
Press the LOW range button, the 2 red LEDs
will ash and the buzzer will generate a sound
intermittently. The red LED of the LOW range will
be turned on.
The LOW range for low voltage detection :
50V~1.5kV. Place the probe sensing tip of the
high voltage detector near a low voltage line
(50V~1.5kV), but not touching the line.
The red LEDs will ash very fast and the frequency
of the sound will be at the same rate if a voltage is
present.
-6-
When the probe sensing tip makes contact or is
very close to the voltage line, the red LEDs will
glow and the sound will last continuously.
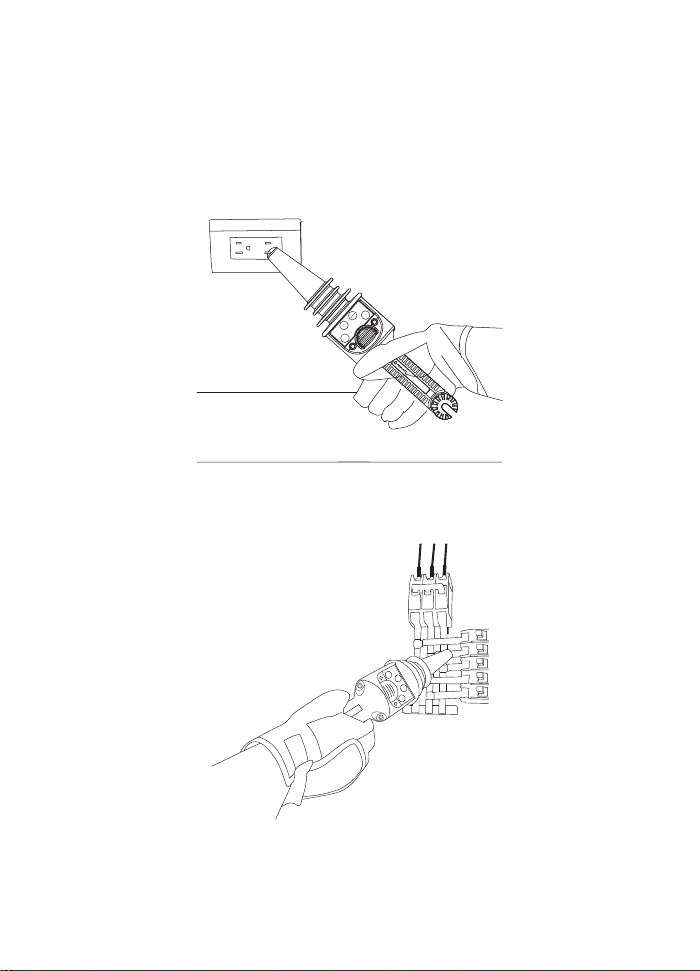
Voltage detection for a wall outlet
For nding a breaker
LOW
TEST
HIGH
ON
OFF
HVD132
Non-contact H.V. Detector
-7-
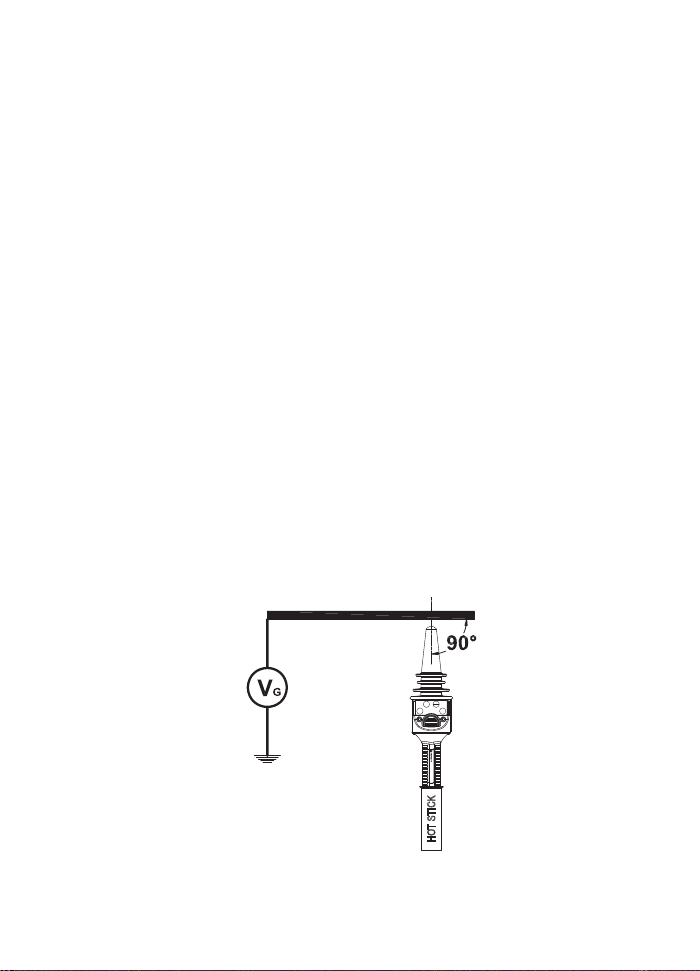
●
HIGH range (High voltage detection)
Press the ON/OFF button to turn on the high
voltage detector.
The 2 red LEDs will ash and the buzzer will
generate a sound intermittently. The red LED of the
HIGH range will be turned on.
The original mode is the HIGH range for high
voltage detection: 1.5kV~132kV.
Place the probe sensing tip of the high voltage
detector near a high voltage source (1.5kV~132kV),
but not touching the high voltage source.
The red LEDs will ash very fast and the frequency
of the sound will be at the same rate if a high
voltage is present.
When the probe sensing tip is getting closer to the
High voltage source, the red LEDs will glow and the
sound will last continuously.
The ideal detection angle
LOW
TEST
HIGH
ON
OFF
HVD132
Non-contact H.V. Detector
HOT STICK
-8-
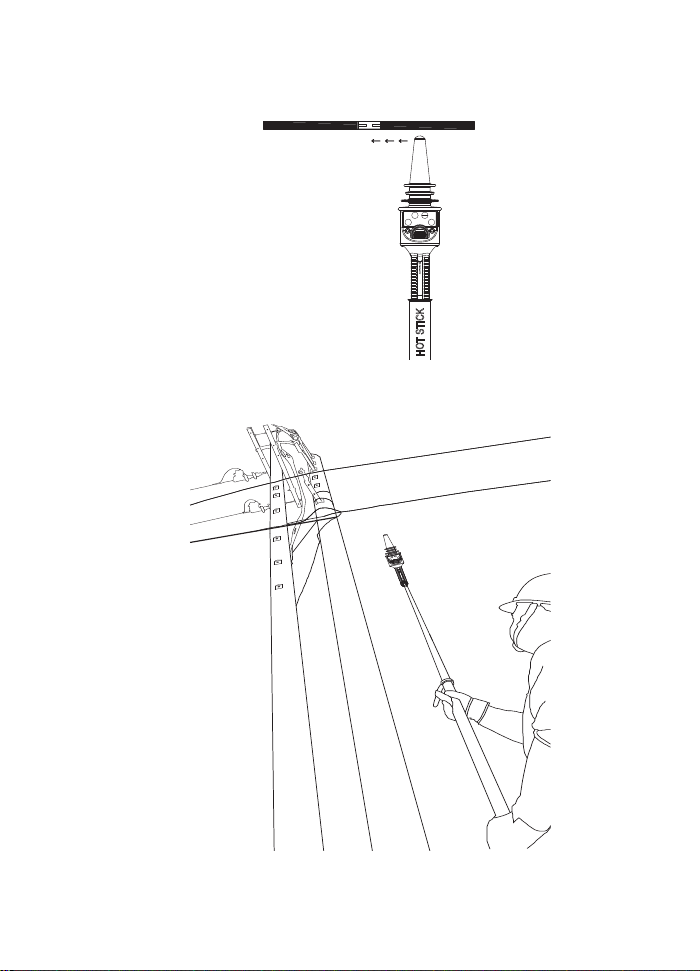
For nding a break of cable
Voltage detection for a line
LOW
TEST
HIGH
ON
OFF
HVD132
Non-contact H.V. Detector
HOT STICK
LOW
TEST
HIGH
ON
OFF
HVD132
Non-contact H.V. Detector
-9-
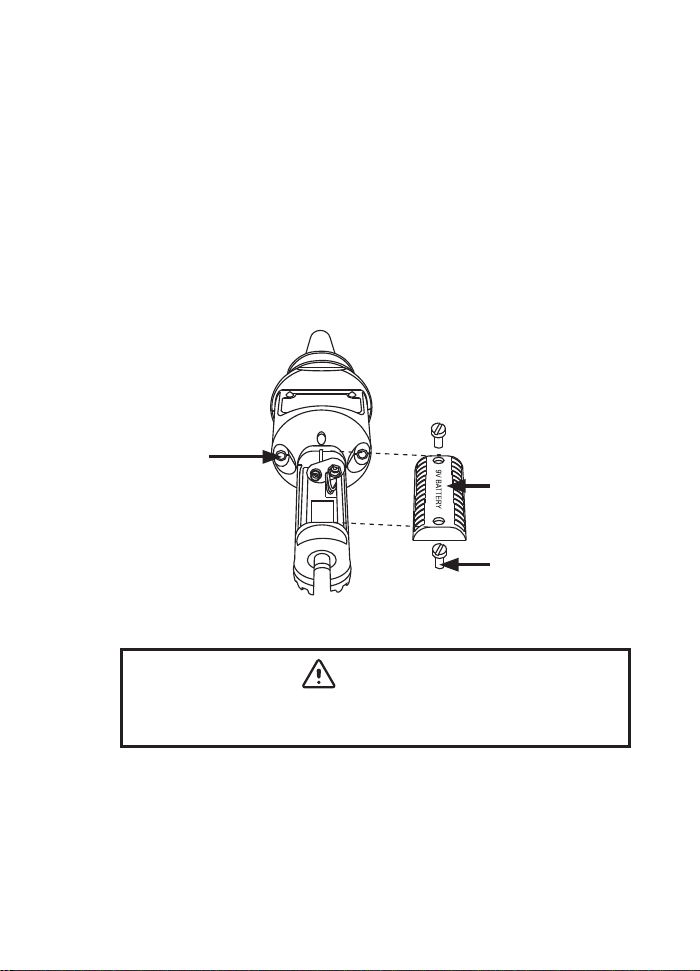
7. Maintenance
●
Battery replacement
(1) Unscrew the battery cover on the rear with a
screwdriver, then slide the battery cover o the
tester.
(2) Take out the battery.
(3) Replace with a new battery (9V).
(4) Reinstall the battery cover and fasten the cover
screws.
●
Cleaning and storage
WARNING
To avoid electrical shock or damage to the
detector, do not get water inside the case.
(1) Periodically wipe the case with a damp cloth and
detergent; do not use abrasives or solvents.
(2) If the detector is not used for periods of longer
than 60 days, remove the battery and store
them separately.
Battery
connector
Battery cover
Screw
-10-