

Technical Support and E-Warranty Certificate www.vevor.com/support
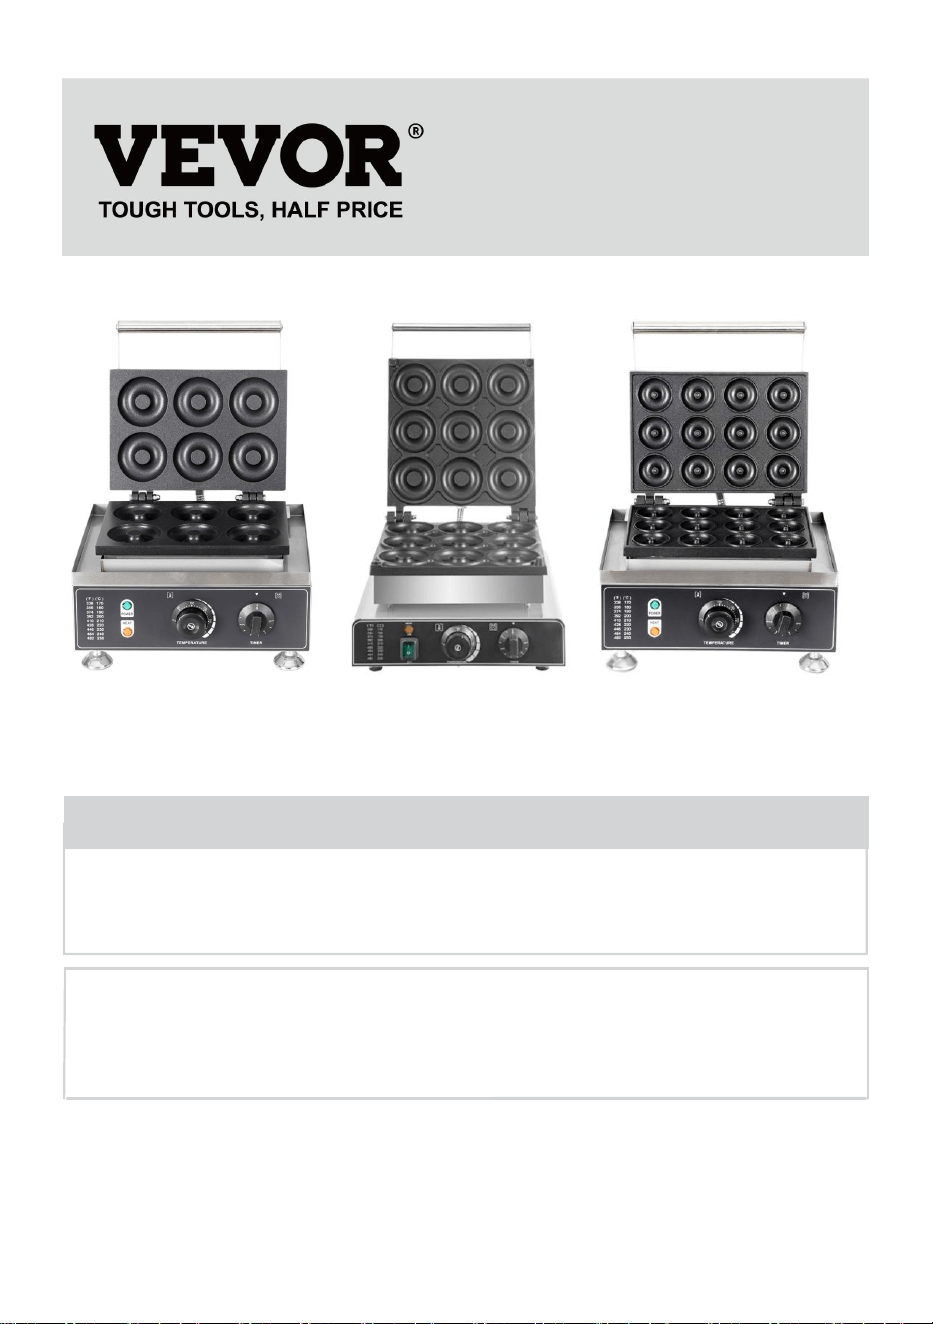
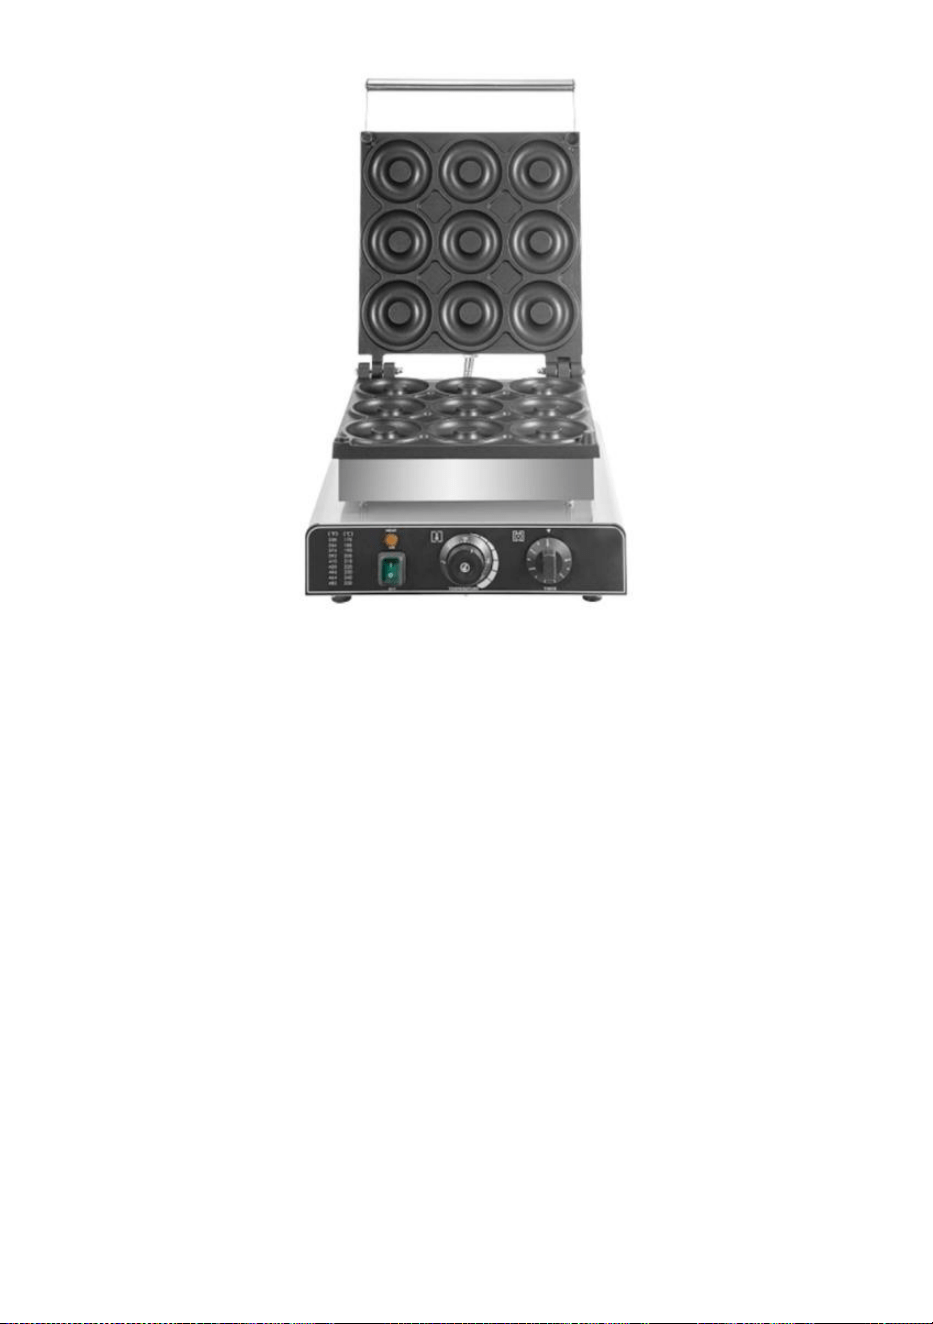
COMMERCIAL DONUT MACHINE
MODEL: HT-6A / HT-9A / HT-12A
We continue to be committed to provide you tools with competitive price.
"Save Half", "Half Price" or any other similar expressions used by us only represents an
estimate of savings you might benefit from buying certain tools with us compared to the major
top brands and does not necessarily mean to cover all categories of tools offered by us. You
are kindly reminded to verify carefully when you are placing an order with us if you are
actually saving half in comparison with the top major brands.

- 1 -
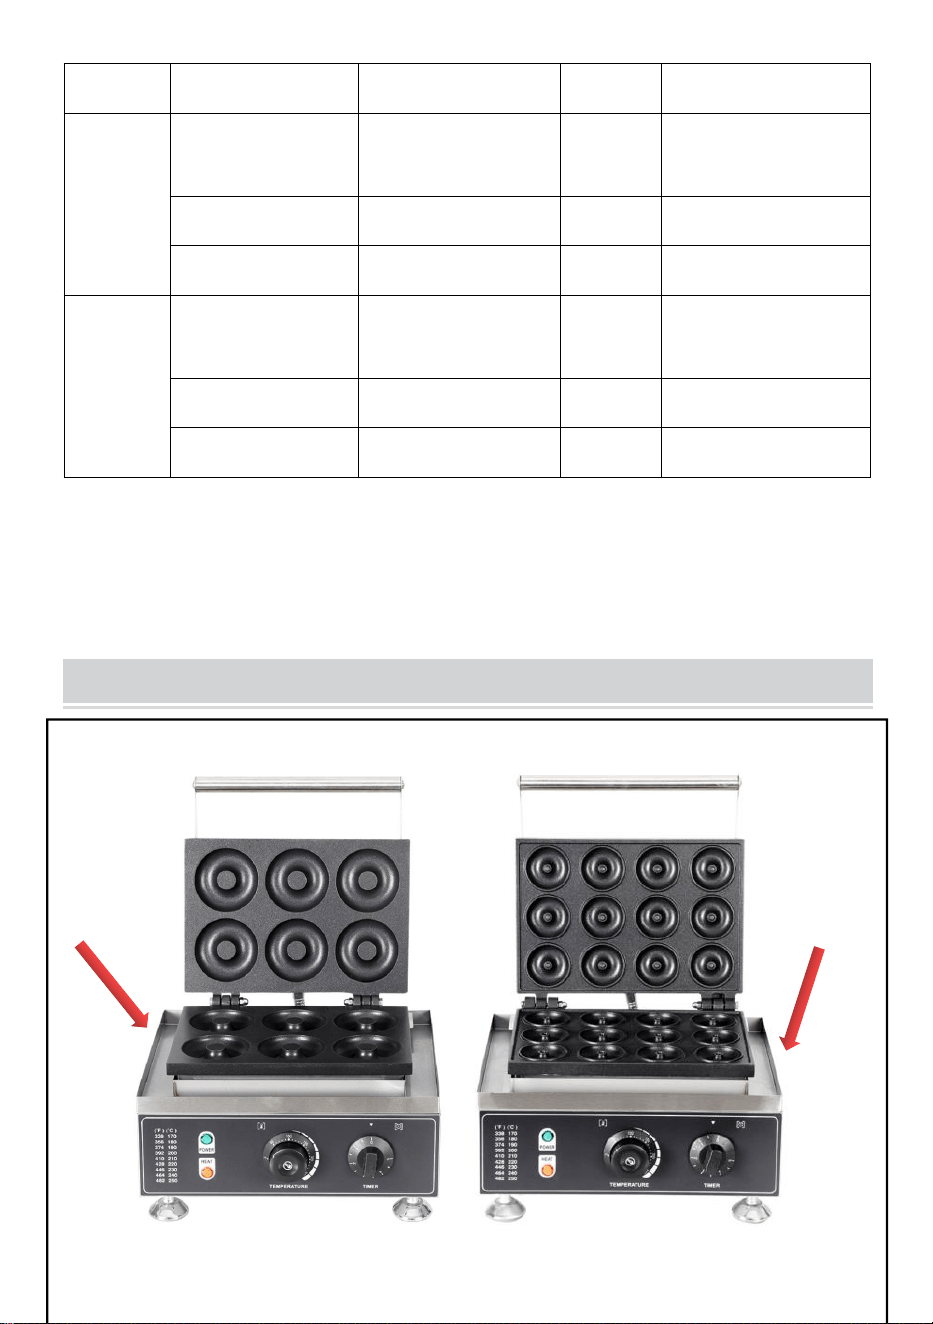
MODEL: HT-6A MODEL: HT-9A MODEL: HT-12A
Have product questions? Need technical support? Please feel free to contact
us: Technical Support and E-Warranty Certificate
www.vevor.com/support
NEED HELP? CONTACT US!
This is the original instruction, please read all manual instructions carefully before
operating. VEVOR reserves a clear interpretation of our user manual. The appearance of
the product shall be subject to the product you received. Please forgive us that we won't
inform you again if there are any technology or software updates on our product.
COMMERCIAL DONUT
MACHINE
- 2 -
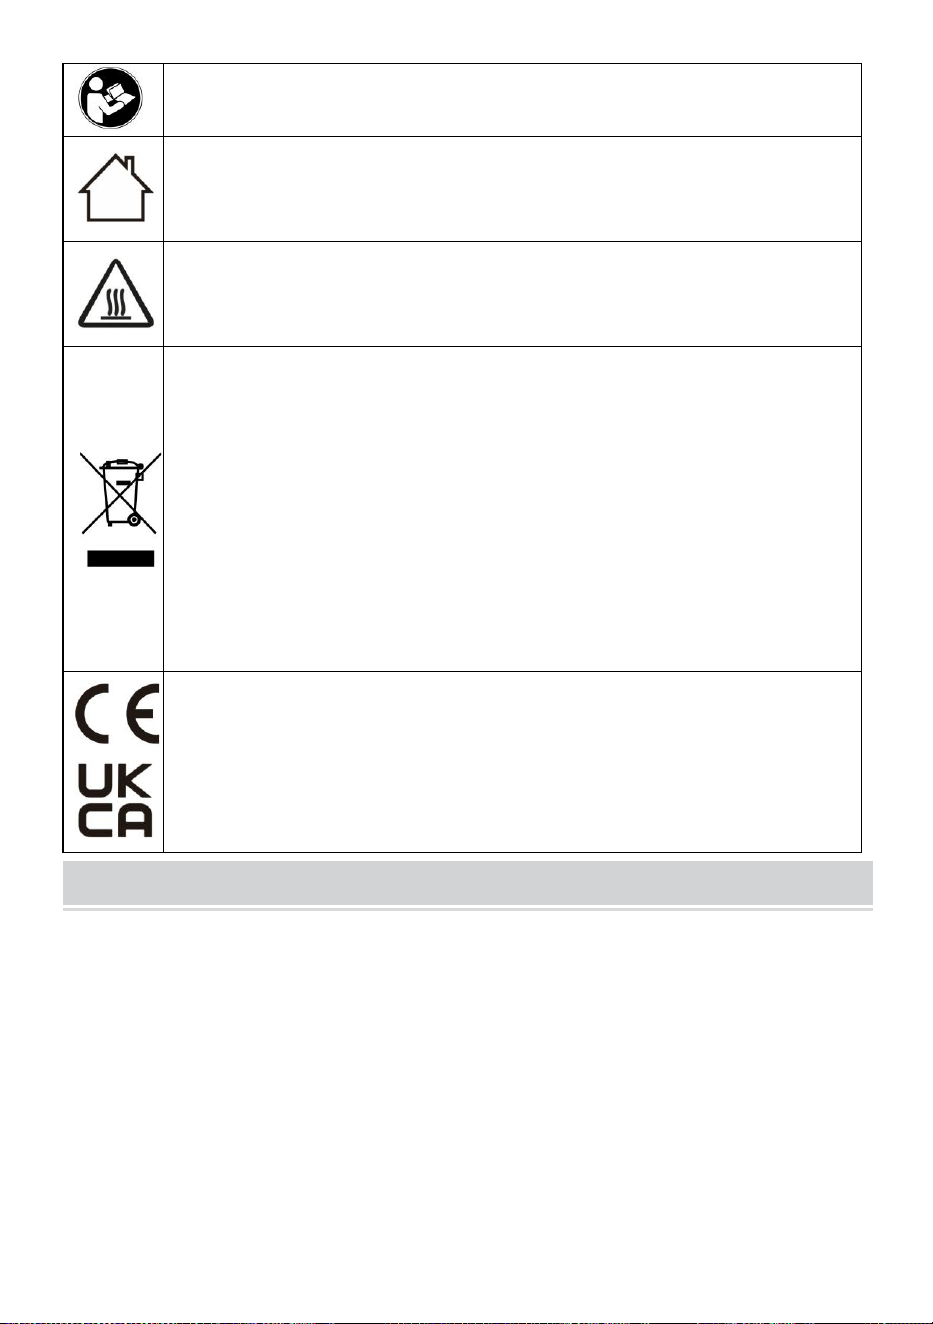
Warning-To reduce the risk of injury, user must read instructions
manual carefully.
Indoor use only.
Pay attention to high temperatures to prevent burns.
CORRECT DISPOSAL
This product is subject to the provision of European Directive
2012/19/EC. The symbol showing a wheelie bin crossed through
indicates that the product requires separate refuse collection in the
European Union. This applies to the product and all accessories
marked with this symbol. Products marked as such may not be
discarded with normal domestic waste, but must be taken to a
collection point for recycling electrical and electronic devices
Compliance is a EC & UK security certification.
SAFETY WARNINGS AND PRECAUTIONS
Thank you for using this product. In order to make sure that you can operate the
machine correctly, read this instruction carefully before operation and keep it
properly for future reference. Please read the precautions and safety rules on this
page to ensure your safe use. This manual will outline safety warnings and
precautions, operating, maintenance and cleaning. The warnings and instructions
reviewed in this manual cannot cover all possible conditions and situations that
may occur. Caution and common sense are not built into this product, since we
believe that the uses will comply with these codes. Before starting a training
program or engaging in strenuous endurance activity on the device, please consult
a doctor.

- 3 -
Please read ALL the instructions before using your machine.
1. Make sure the voltage in your outlet is the same as the voltage indicated on the
appliance's rating label.
2. Do not let children and minors and pet get close to or touch the machine.
3. Do not touch the hot surface directly with your hands. Always use the handle or
knob for operation.
4. To prevent electrical shock, do not immerse the cord or plug into water or other
liquids.
5. Do not immerse the appliance in water or any other liquid.
6. Unplug the machine from the outlet when not in use and before cleaning. Cool
the appliance before installing or removing parts and before cleaning.
7. Cool down the HOT parts before operation and cleaning.
8. Do not operate the device with damaged cord or plug, malfunction or with any
mechanical damage. Send it to your nearest authorized service centre for
examination and repair (ONLY technicians should open up the unit).
9. Using any accessories or attachments that are not provided or recommended
by the manufacturer may cause injury.
10. If the machine is not to be used for a long period of time, unplug it, clean and
cover it and store it in a dry and safe place.
11. Do not leave the power cord hanging over the edge of table or counter or let it
come into contact with any hot surfaces.
12. Do not place the unit on or near hot air, electric burners or heaters. 13. Always
switch off the power to the socket before plugging in or unplugging. Hold the plug
instead of pulling on the cord.
13. Do not apply this unit to any other purposes than the indicated usage. 15.Do
not use it outdoors or for commercial purposes.
14. KEEP IT OUT OF CHILDREN'S REACH. Never leave it unattended while in
use.
15. DO NOT CLEAN IT WITH ANY ABRASIVE MATERIAL.
16. Always check that this machine is plugged into a grounded outlet with the
appropriate electrical supply. Ensure that the wall outlet being used is properly
grounded. If not, you must install a grounded outlet. Have the work performed only
by a certified electrician who is properly qualified to meet local safety and electrical
codes.
17. Ensure that the power outlet, plug and cord being used are in good working
condition. Damaged components should be repaired by a certified electrician who
is qualified to meet local safety and electrical codes. Even if your power cord is
functioning properly, keep it away from water and avoid letting it run over carpets
or heating devices.
18. Avoid using it in the presence of flammable liquids, gases, dust or other
explosive situations.
19. Do not move the machine before cooling and during heating
20. Do not operate the machine in an appliance garage or under a wall cabinet.
Always unplug the unit from the electrical outlet when storing in an appliance
garage. Otherwise, it would cause a risk of fire, especially if the machine touches
the garage wall or the door touches it as it closes.
- 4 -
21. Type Y attachment: If the supply cord is damaged, it must be replaced by the
manufacturer, its service agent or similarly qualified persons in order to avoid a
hazard.
22. Children shall not play with the appliance. Cleaning and user maintenance
shall not be made by children without supervision.
23. Inspect before every use.
24. DO NOT CLEAN IT WITH ANY ABRASIVE MATERIAL.
25. Never leave it unattended while in use. Never leave the child unattended.
26. Pet urine and feces can damage the product, please keep away.
WARNING: This appliance is not intended for use by young or infirm
persons unless supervised by a responsible person to ensure that they can
use the appliance safely. Young children should be supervised to ensure
that they do not play with the product. Pets should stay away from the
product.
PRODUCT PARAMETERS
MODEL
Region
Voltage
Power
Plug Type
HT-6A
North America
AC120V 60Hz
1550W
American PLUG
Europe
AC220-240V 50Hz
1550W
European PLUG
Australia
AC220-240V 50Hz
1550W
Australia PLUG
HT-9A
North America
AC120V 60Hz
2000W
American PLUG
Europe
AC220-240V 50Hz
2000W
European PLUG
Australia
AC220-240V 50Hz
2000W
Australia PLUG
HT-12A
North America
AC120V 60Hz
1550W
American PLUG
Europe
AC220-240V 50Hz
1550W
European PLUG
Australia
AC220-240V 50Hz
1550W
Australia PLUG
Attention:
1. Please use an appropriate external power supply according to the product
voltage.
2. Do not exceed the maximum load specified in the product manual.
- 5 -
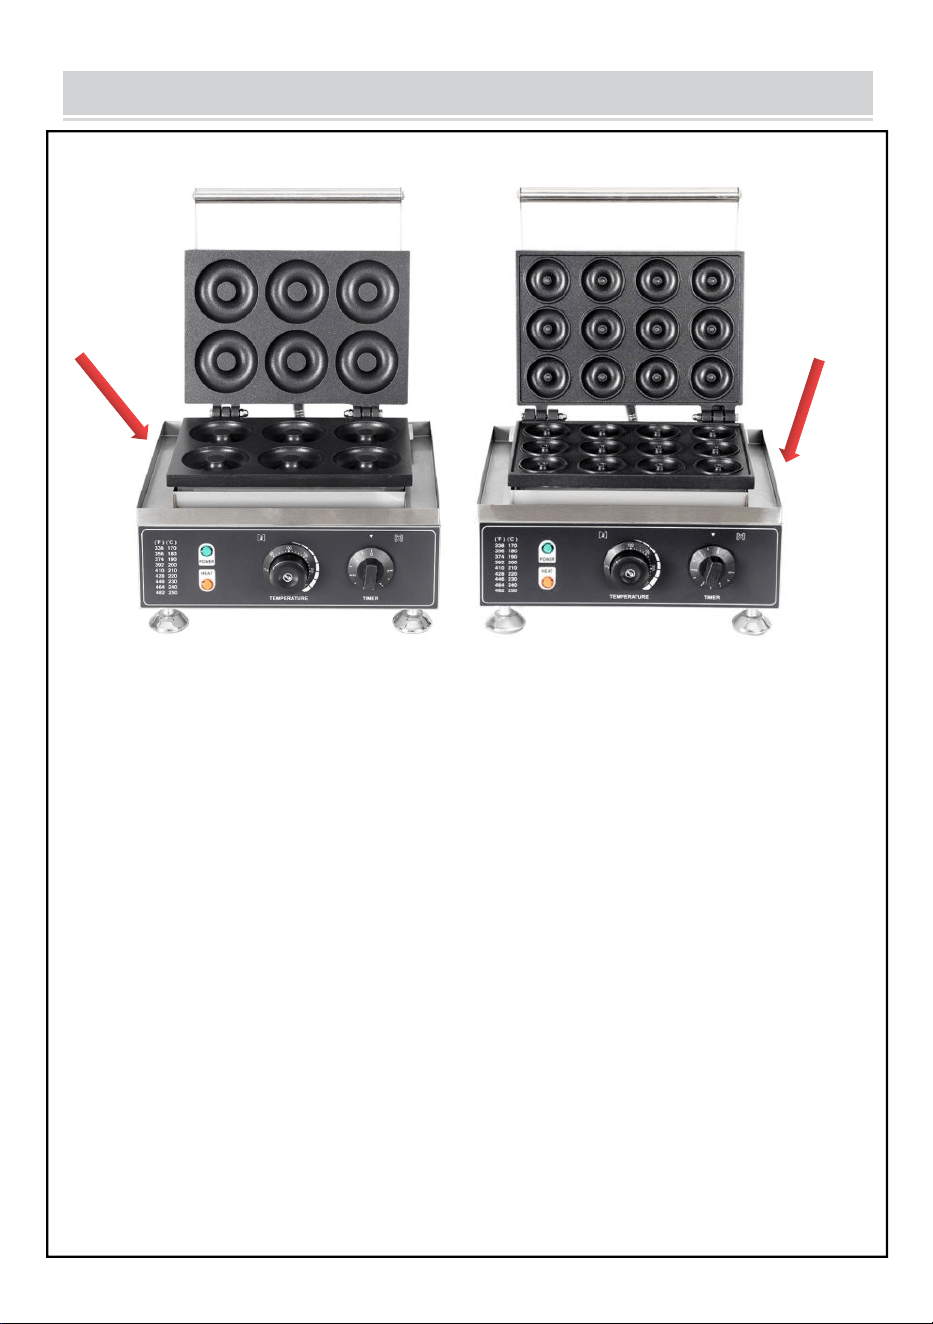
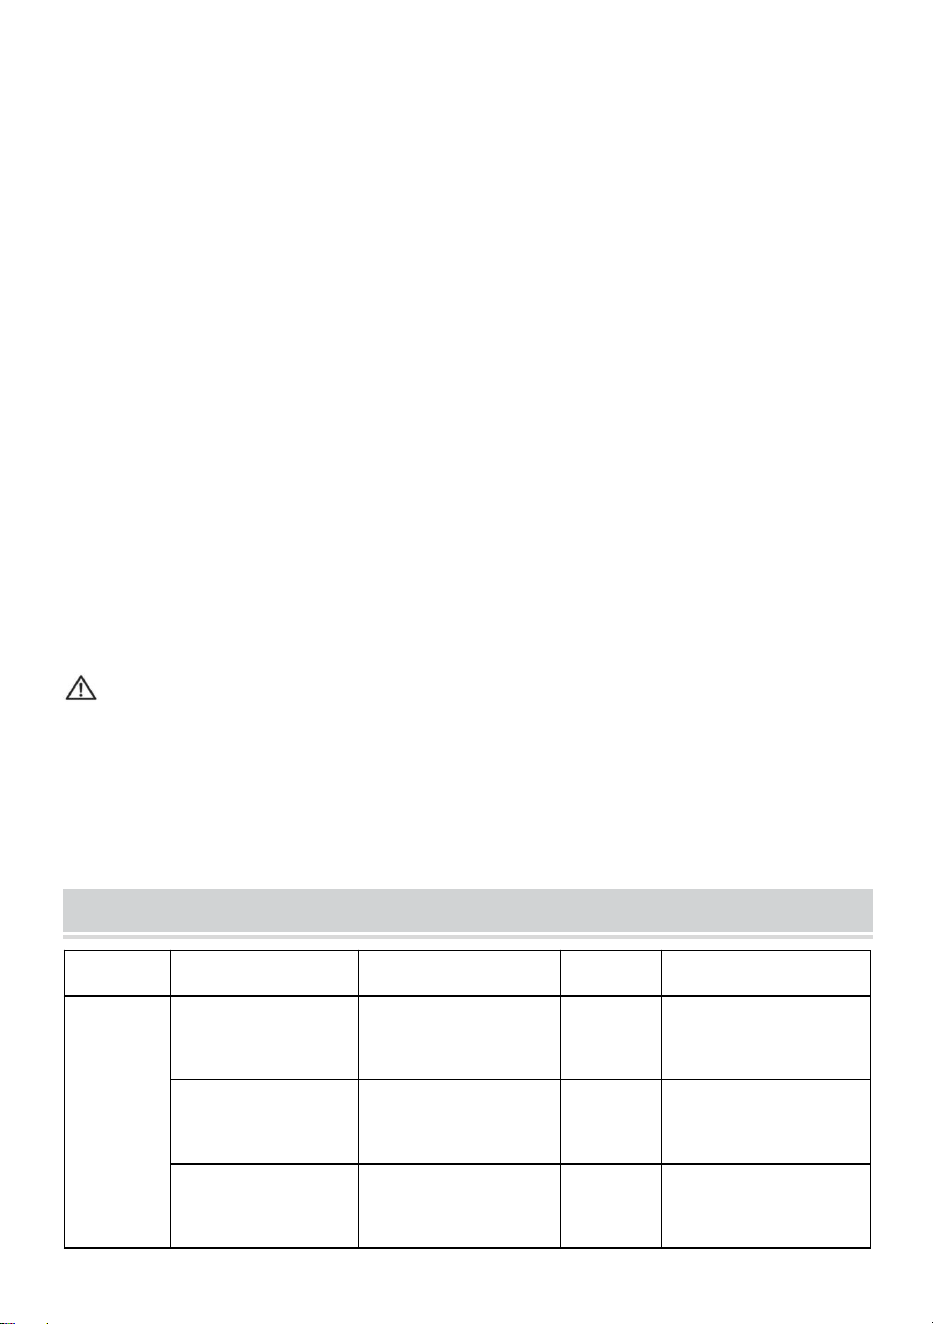
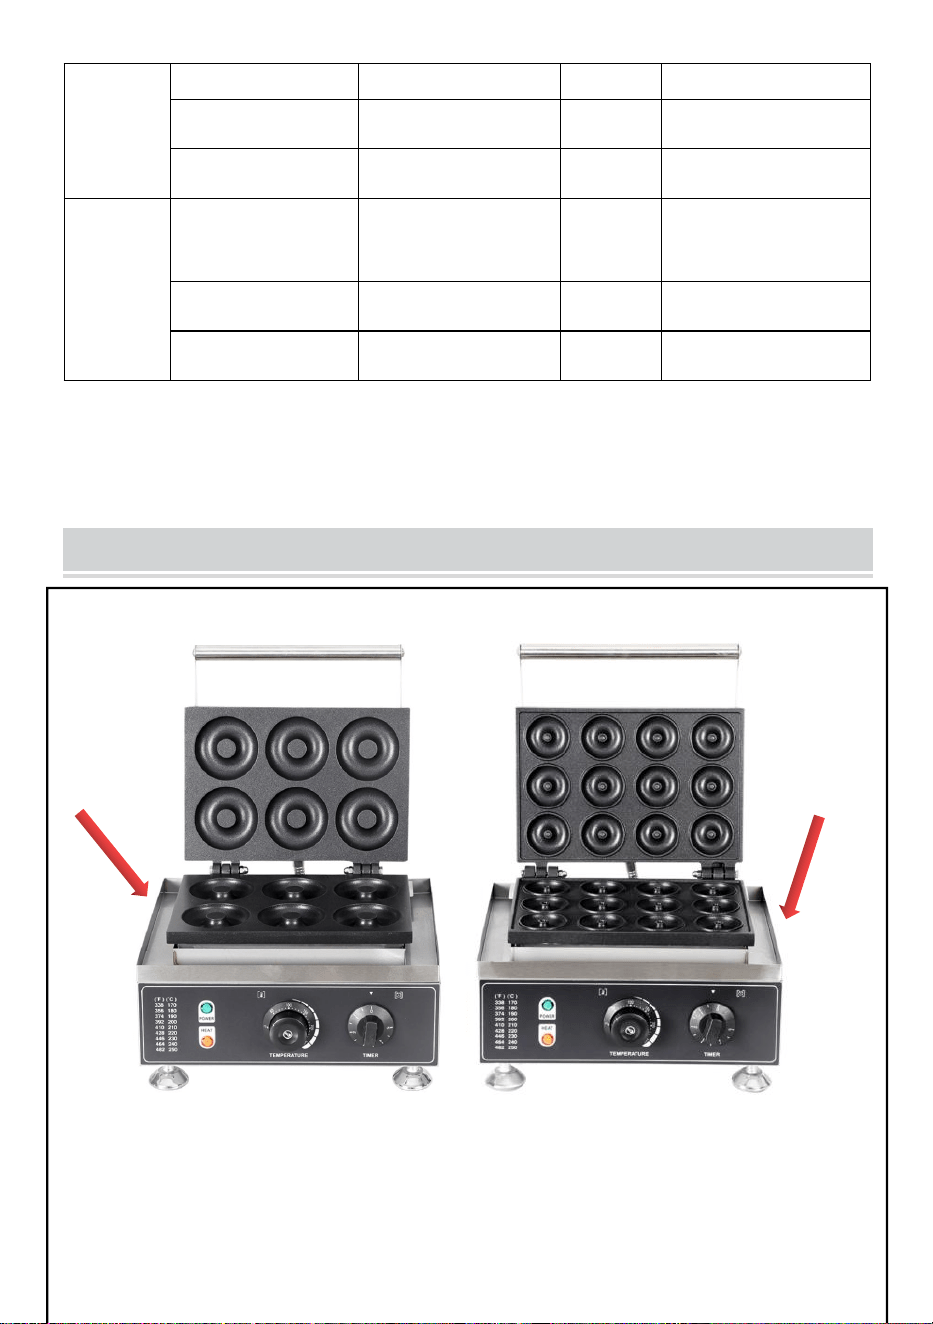
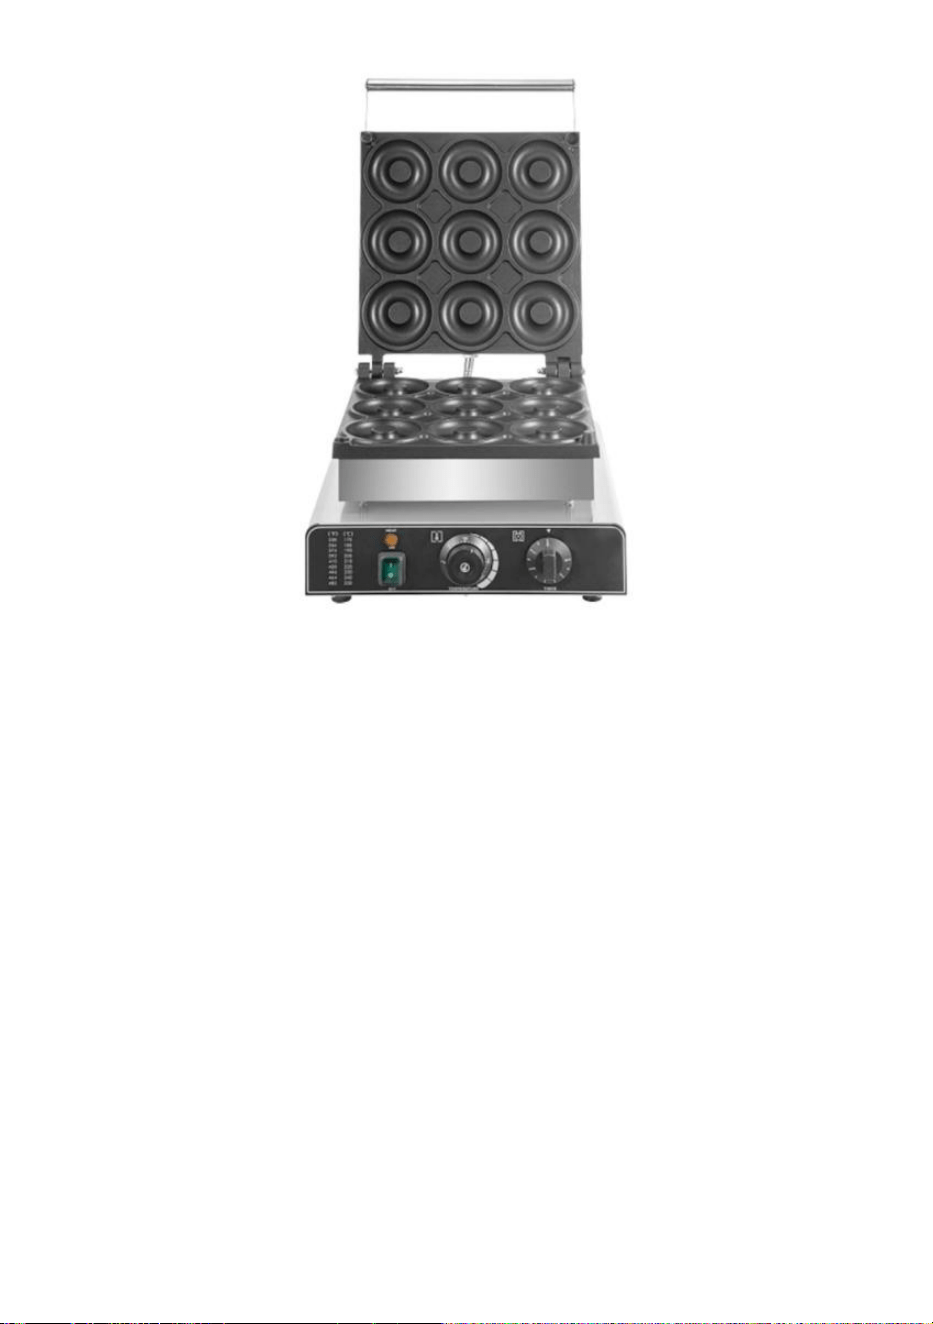
PRODUCT COMPONENTS
Warning: Please ensure that the slag collecting tray is installed correctly
before use.
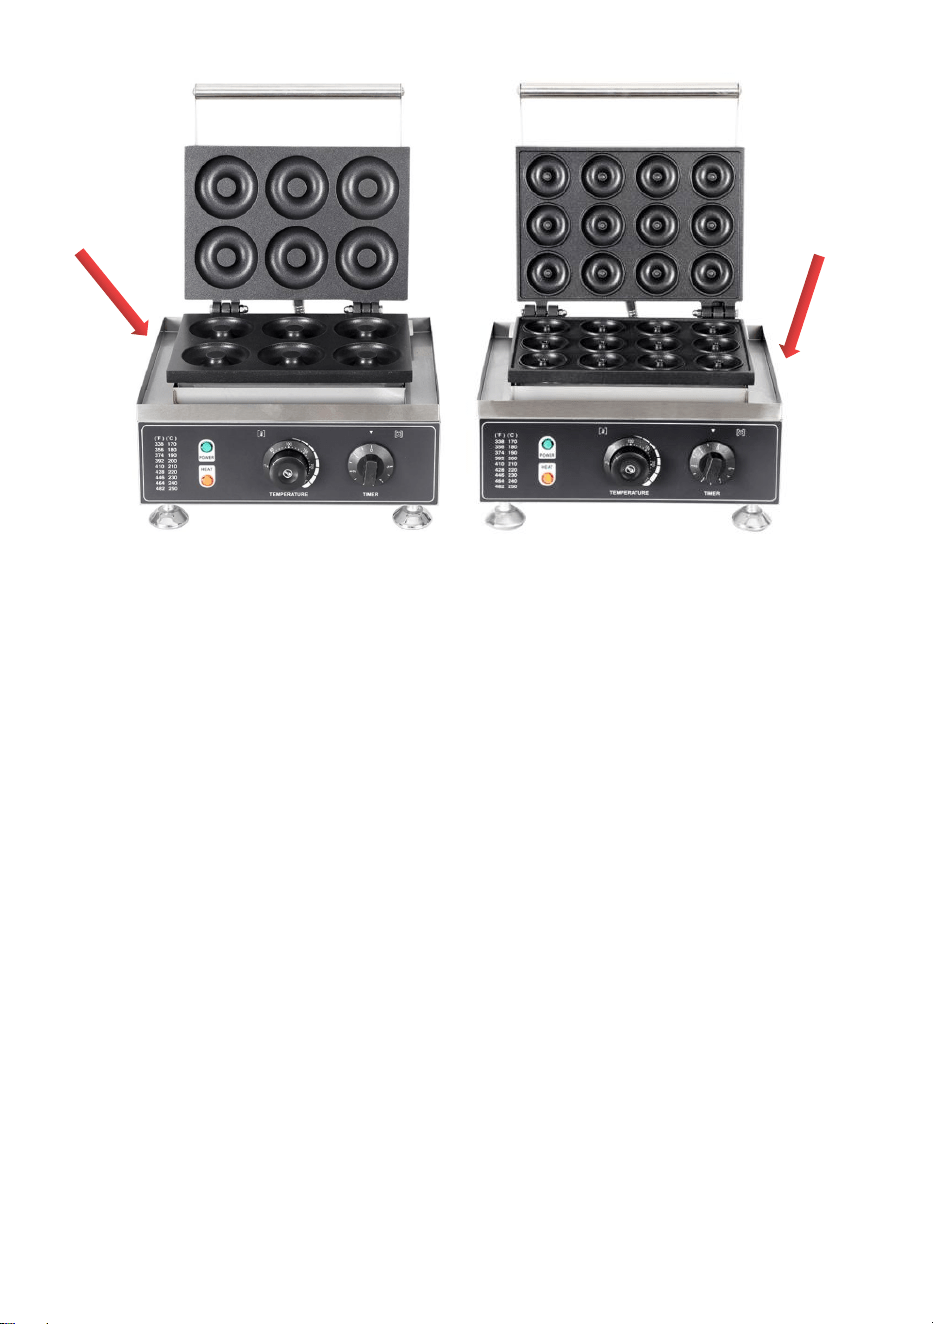
Green light: Power Indicator
● When the product is powered on, the green light turns on.
Note: HT-6A and HT-12A do not have a power switch. The products are powered
on directly after plugging them into the socket.
Orange light: Heating indicator light
● When the product does not reach the set temperature, the product continues to
heat and lights up in orange.
●When the product reaches the set temperature, the product stops heating and
the orange color goes out.
Temperature knob: Set the desired temperature
Time knob: Set reference time
Note: The time knob is for reference only, and the product will not power off
when the set time is reached.
Slag
collecting
tray
Slag
collecting
tray
MODEL: HT-6A
MODEL: HT-12A

- 6 -
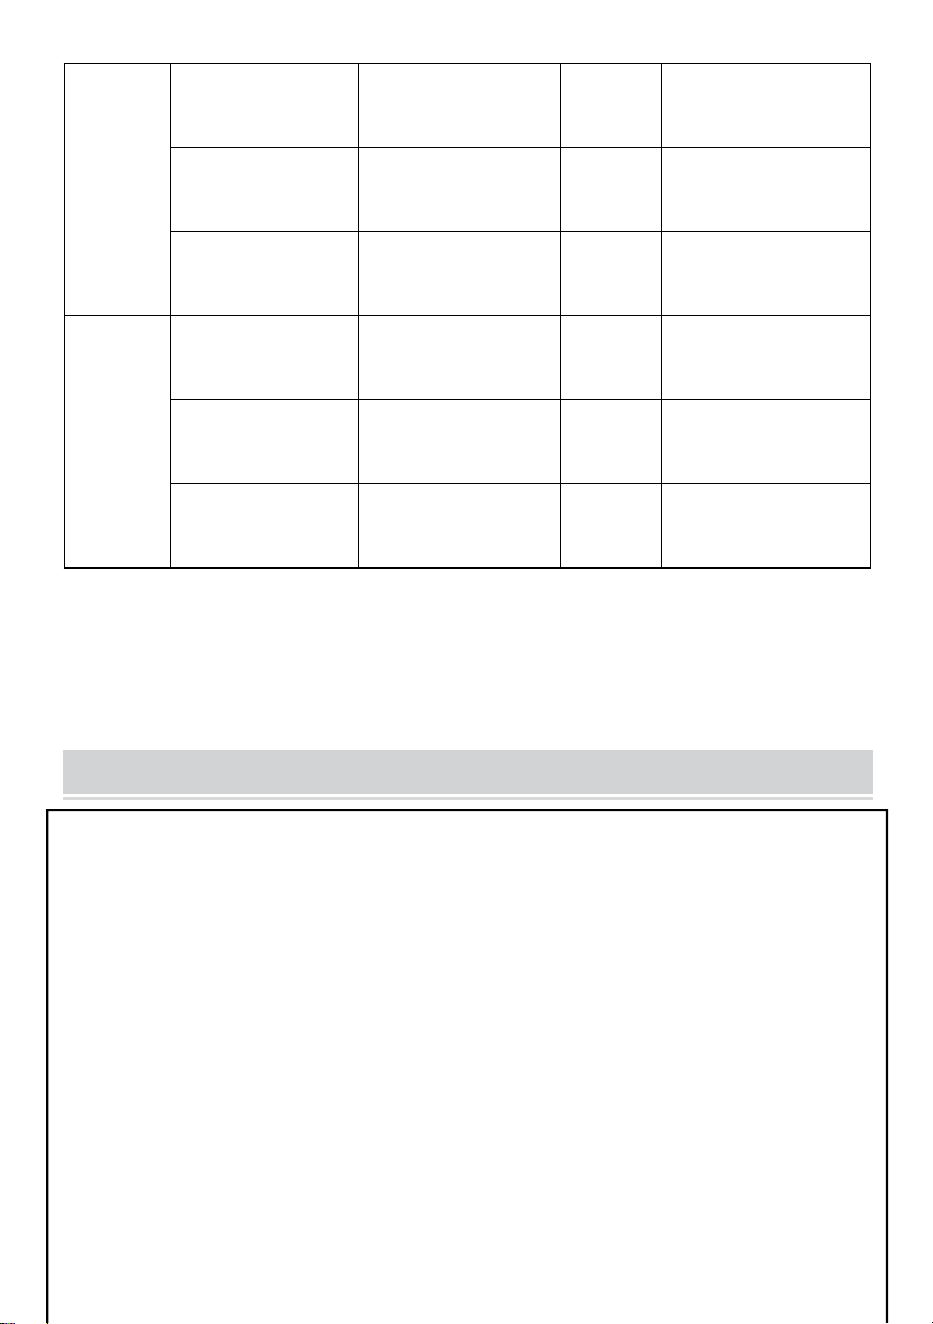
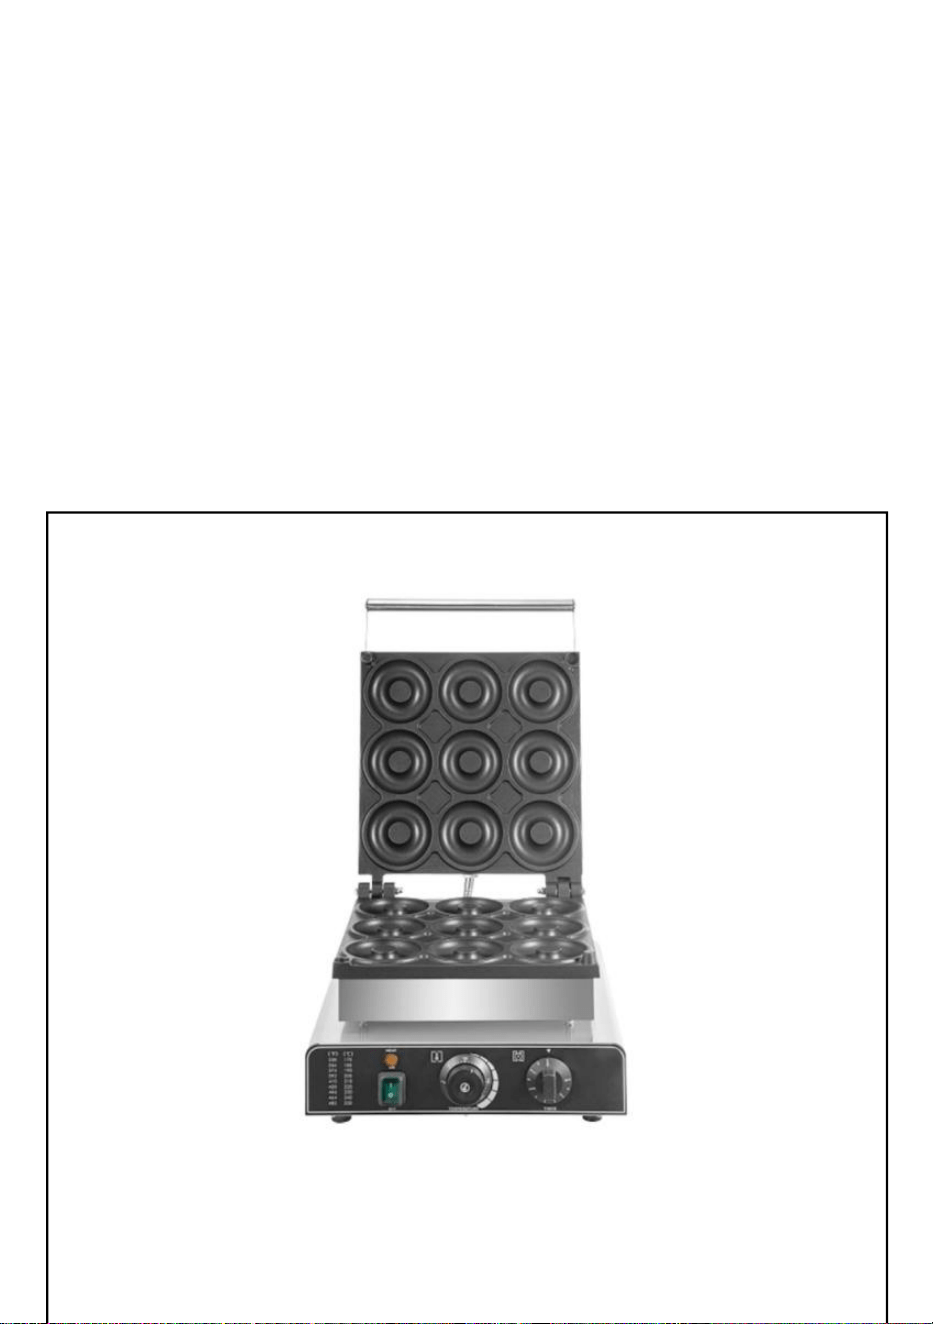
Green button: Power switch
● After plugging in the socket, you need to press the button to turn on the power.
Orange light: Heating indicator light
● When the product does not reach the set temperature, the product continues to
heat and lights up in orange.
● When the product reaches the set temperature, the product stops heating and
the orange color goes out.
Temperature knob: Set the desired temperature
Time knob: Set reference time
Note: The time knob is for reference only, and the product will not power off
when the set time is reached.
MODEL: HT-9A

- 7 -
OPERATING INSTRUCTIONS
Before using the appliance for the first time:
● Peel off promotional and packaging materials, and check that the cooking plates
are clean and dust-free. If necessary, wipe them over with a damp cloth. Spread
over with an absorbent kitchen towel and wipe off any excess oil.
Note: When your appliance is heated for the first time, it may emit slight
smoke or odor, which is normal for many heating appliances, and will not
affect the safety of your appliance.
Warning: Please ensure that the slag collecting tray is installed correctly
before use.
1. Place the machine on a clean, dry, level surface near a plug base outlet.
2. Adjust the temperature knob to the lowest temperature position, check again
whether the product and power cord are intact, and connect the plug to the socket.
3. Adjust the temperature knob to the required temperature, the orange light will
turn on and the machine will start heating.
4. When the machine temperature reaches the set temperature, the orange light
goes out. You can start making donuts.
5. Open the upper template of the product and use a brush to apply cooking oil to
the upper and lower templates of the product.
6. Pour the prepared batter into the lower mold of the product.
TIPS: It is recommended that the batter does not exceed the surface of the
product mold to avoid overflowing.
7. Cover the upper template of the product and adjust the time knob to the set
time.
8. After hearing a "ding", open the upper template and use tongs to remove the
donuts.
Note: The time knob is for reference only, and the product will not power off
when the set time is reached.
9. After finished, for safety, please turn the temperature knob counterclockwise to
the limit position and cut off the power.
Note: It works in this way repeatedly in order to make sure temperature is certain
in a range. During the operation of the machine, the orange light will cycle on and
off.

- 8 -
CLEANING AND MAINTENANCE
1. After use, turn the temperature knob to the lowest temperature, unplug, and wait
for the product to cool down.
2. Use a soft brush to clean the residue and oil on the mold surface.
3. For the exterior, wipe with a soft, dry cloth. dry cloth. Never use an abrasive
cleanser or harsh pad.
4. Please clean regularly to avoid dirt.
Note: Do not use hard and sharp objects to clean the mold to avoid
damaging the non-stick coating.
Notes: Before using it again, reassemble according to the instructions.
Warning: Do not use liquid to rinse the product directly to avoid water
damage to internal components.
Warning: Pay attention to the mold drop grip when cleaning.
STORAGE
1. Always unplug the machine before storage.
2. Always ensure the machine is cleaned, cooled, and dried before the string.
3. Before storage, place pearl cotton or oil-absorbing paper between the upper
and lower molds to protect the non-stick coating.

- 9 -
RECIPE
Ingredients:
4 eggs 2 cups sugar 1 teaspoon vanilla extract
1 teaspoon salt 1⁄4 teaspoon nutmeg, grated 1teaspoon white vinegar
1 1⁄2 cups buttermilk 1⁄2 cup heavy cream 5 1⁄2 cups all-purpose flour
2 teaspoons baking soda 1 teaspoon baking powder
Step:
1. Cream eggs and sugar until well blended.
2. Add vanilla and vinegar and mix well.
3. Combine flour, baking soda, baking powder, salt and nutmeg.
4. Combine buttermilk and heavy cream.
5. Add dry ingredients and buttermilk mixture alternately to sugar mixture.
6. Put into a donut maker.
7. Drop into 375ºF ( 190°C).
8. Fry until brown on one side, flip and fry until the other side is browned.
9. Remove to paper towels.
TIPS
1. Use a brush to apply cooking oil on the surface of the mold before pouring the
batter into the machine mold.
2. It is recommended that the batter does not exceed the surface of the product
mold to avoid overflowing.
3. It is recommended to use donut pre-mixed flour.
4. It is recommended to use a flour mixer when mixing.
Warning: Pay attention to the mold drop grip when cooking.

- 10 -
Manufacturer: Shanghaimuxinmuyeyouxiangongsi
Address: Baoshanqu Shuangchenglu 803long 11hao 1602A-1609shi
Shanghai
Imported to AUS: SIHAO PTY LTD. 1 ROKEVA STREETEASTWOOD
NSW 2122 Australia
Imported to USA: Sanven Technology Ltd. Suite 250, 9166 Anaheim
Place, Rancho Cucamonga, CA 91730
REPUK
Pooledas Group Ltd
Unit 5 Albert Edward House, The
Pavilions Preston, United Kingdom
REPEC
SHUNSHUN GmbH
Römeräcker 9 Z2021,76351
Linkenheim-Hochstetten, Germany


Techniczny Certyfikat wsparcia i e-gwarancji www.vevor.com/support
KOMERCYJNA MASZYNA DO PĄCZKÓW
MODEL: HT-6A / HT-9A / HT-12A
We continue to be committed to provide you tools with competitive price.
"Save Half", "Half Price" or any other similar expressions used by us only represents an
estimate of savings you might benefit from buying certain tools with us compared to the major
top brands and does not necessarily mean to cover all categories of tools offered by us. You
are kindly reminded to verify carefully when you are placing an order with us if you are
actually saving half in comparison with the top major brands.

- 1 -
MODEL: HT-6A MODEL: HT-9A MODEL: HT-12A
Have product questions? Need technical support? Please feel free to contact
us: Technical Support and E-Warranty Certificate
www.vevor.com/support
NEED HELP? CONTACT US!
This is the original instruction, please read all manual instructions carefully before
operating. VEVOR reserves a clear interpretation of our user manual. The appearance of
the product shall be subject to the product you received. Please forgive us that we won't
inform you again if there are any technology or software updates on our product.
COMMERCIAL DONUT
MACHINE
- 2 -
Ostrzeżenie — aby zmniejszyć ryzyko obrażeń, użytkownik musi
uważnie przeczytać instrukcję obsługi.
Do użytku wewnątrz.
Uważaj na wysokie temperatury, aby zapobiec poparzeniom.
PRAWIDŁOWA UTYLIZACJA
Ten produkt podlega przepisom Dyrektywy Europejskiej 2012/19/EC.
Symbol przekreślonego kosza na śmieci oznacza, że produkt
wymaga selektywnej zbiórki śmieci na terenie Unii Europejskiej.
Dotyczy to produktu i wszystkich akcesoriów oznaczonych tym
symbolem. Produktów oznaczonych jako takie nie można wyrzucać
razem ze zwykłymi odpadami domowymi, lecz należy je oddać do
punktu zbiórki w celu recyklingu urządzeń elektrycznych i
elektronicznych
Zgodność to certyfikat bezpieczeństwa WE i Wielkiej Brytanii.
SAFETY WARNINGS AND PRECAUTIONS
Dziękujemy za korzystanie z tego produktu . Aby mieć pewność, że będziesz mógł
prawidłowo obsługiwać maszynę, przeczytaj uważnie niniejszą instrukcję przed
rozpoczęciem użytkowania i zachowaj ją odpowiednio do wykorzystania w
przyszłości . Aby zapewnić bezpieczne użytkowanie, prosimy o zapoznanie się ze
środkami ostrożności i zasadami bezpieczeństwa zamieszczonymi na tej stronie.
Niniejsza instrukcja zawiera ostrzeżenia i środki ostrożności dotyczące
bezpieczeństwa, obsługi, konserwacji i czyszczenia . Ostrzeżenia i instrukcje
omówione w tej instrukcji nie obejmują wszystkich możliwych warunków i sytuacji,

- 3 -
które mogą wystąpić . Ostrożność i zdrowy rozsądek nie są podstawą tego
produktu, ponieważ wierzymy, że jego zastosowanie będzie zgodne z tymi
kodami . Przed rozpoczęciem programu treningowego lub podjęciem wytężonej
aktywności wytrzymałościowej na urządzeniu należy skonsultować się z lekarzem.
Przed użyciem urządzenia przeczytaj WSZYSTKIE instrukcje .
1. Upewnij się, że napięcie w gniazdku jest takie samo, jak napięcie wskazane na
tabliczce znamionowej urządzenia.
2. Nie pozwalaj dzieciom, osobom niepełnoletnim ani zwierzętom zbliżać się ani
dotykać maszyny.
3. Nie dotykaj bezpośrednio rękami gorącej powierzchni. Do obsługi zawsze
używaj uchwytu lub pokrętła.
4. Aby zapobiec porażeniu prądem, nie zanurzaj przewodu ani wtyczki w wodzie
lub innych płynach.
5. Nie zanurzać urządzenia w wodzie lub innym płynie.
6. Odłącz urządzenie od gniazdka, gdy nie jest używane i przed czyszczeniem.
Schłodzić urządzenie przed montażem lub demontażem części oraz przed
czyszczeniem.
7. Ochłodzić GORĄCE części przed rozpoczęciem pracy i czyszczeniem .
8. Nie używaj urządzenia z uszkodzonym przewodem lub wtyczką, wadliwym
działaniem lub jakimkolwiek uszkodzeniem mechanicznym. Wyślij go do
najbliższego autoryzowanego centrum serwisowego w celu sprawdzenia i
naprawy (urządzenie powinni otwierać WYŁĄCZNIE technicy).
9. Korzystanie z akcesoriów lub przystawek, które nie są dostarczone lub
zalecane przez producenta, może spowodować obrażenia.
10. Jeżeli maszyna nie będzie używana przez dłuższy czas, należy ją odłączyć od
prądu, wyczyścić, przykryć i przechowywać w suchym i bezpiecznym miejscu.
11. Nie zostawiaj przewodu zasilającego wiszącego nad krawędzią stołu lub blatu
ani nie dopuszczaj do jego kontaktu z gorącymi powierzchniami.
12. Nie umieszczaj urządzenia na lub w pobliżu gorącego powietrza, palników
elektrycznych lub grzejników. 13. Zawsze wyłączaj zasilanie z gniazdka przed
podłączeniem lub odłączenie. Przytrzymaj wtyczkę, zamiast ciągnąć za przewód.
1 3 . Nie używaj tego urządzenia do celów innych niż wskazane. 15. Nie używaj go
na zewnątrz ani do celów komercyjnych.
1 4 . TRZYMAJ GO W miejscu niedostępnym dla dzieci. Nigdy nie pozostawiaj
go bez nadzoru podczas użytkowania.
1 5 . NIE CZYŚCIĆ GO ŻADNYMI MATERIAŁAMI ŚCIERNYMI.
1 6 . Zawsze sprawdzaj, czy urządzenie jest podłączone do uziemionego gniazdka
elektrycznego o odpowiednim napięciu. Upewnij się, że używane gniazdko
ścienne jest prawidłowo uziemione. Jeżeli nie, należy zainstalować uziemione
gniazdko. Mieć prace wykonywane wyłącznie przez certyfikowanego elektryka,
posiadającego odpowiednie kwalifikacje, aby spełniać lokalne przepisy
bezpieczeństwa i przepisy elektryczne.
17 . Upewnij się, że gniazdko elektryczne, wtyczka i używany przewód są sprawne
warunki pracy. Uszkodzone komponenty powinny być naprawiane przez
certyfikowanego elektryka posiadającego kwalifikacje spełniające lokalne przepisy
- 4 -
bezpieczeństwa i elektryczne. Nawet jeśli przewód zasilający działa prawidłowo,
należy trzymać go z dala od wody i unikaj spływania po dywanach lub
urządzeniach grzewczych.
18 . Unikaj używania go w obecności łatwopalnych cieczy, gazów, pyłów lub w
innych sytuacjach wybuchowych.
19 . Nie przesuwaj urządzenia przed schłodzeniem i podczas nagrzewania
2 0 . Nie używaj maszyny w garażu ze sprzętem ani pod ścianą gabinet. Zawsze
odłączaj urządzenie od gniazdka elektrycznego podczas przechowywania w
garażu. W przeciwnym razie może to spowodować ryzyko pożaru, zwłaszcza jeśli
maszyna dotknie ściany garażu lub brama dotknie jej podczas zamykania.
2 1 . Mocowanie typu Y: Jeśli przewód zasilający jest uszkodzony, musi go
wymienić producent, jego agent serwisowy lub podobnie wykwalifikowana osoba
w aby uniknąć zagrożenia.
2 2 . Dzieciom nie wolno bawić się urządzeniem. Czyszczenie i konserwacja nie
mogą być wykonywane przez dzieci bez nadzoru.
23 . Sprawdź przed każdym użyciem.
24 . NIE CZYŚCIĆ GO ŻADNYMI MATERIAŁAMI ŚCIERNYMI .
25 . Nigdy nie pozostawiaj go bez nadzoru podczas użytkowania . Nigdy nie
zostawiaj dziecka bez opieki.
26. Mocz i odchody zwierząt domowych mogą uszkodzić produkt. Trzymaj je z
daleka .
OSTRZEŻENIE: To urządzenie nie jest przeznaczone do użytku przez
osoby młode lub niedołężne, chyba że będzie nadzorowane przez osobę
odpowiedzialną, która zapewni im bezpieczne korzystanie z urządzenia. Małe
dzieci należy nadzorować, aby mieć pewność, że nie bawią się produktem .
Zwierzęta powinny trzymać się z daleka od produktu.
PRODUCT PARAMETERS
MODEL
Region
Napięcie
Moc
Typ wtyczki
HT-6A
Ameryka
północna
AC120V 60Hz
1550
W
Amerykanin
WTYCZKA
Europa
AC 220-240V 50
Hz
1550
W
Europejczyk
WTYCZKA
Australia
AC 220-240V 50
Hz
1550
W
Australia
WTYCZKA
- 5 -
HT-9A
Ameryka
północna
AC120V 60Hz
2000
W
Amerykanin
WTYCZKA
Europa
AC 220-240V 50
Hz
2000
W
Europejczyk
WTYCZKA
Australia
AC 220-240V 50
Hz
2000
W
Australia
WTYCZKA
HT- 12 A
Ameryka
północna
AC120V 60Hz
1550
W
Amerykanin
WTYCZKA
Europa
AC 220-240V 50
Hz
1550
W
Europejczyk
WTYCZKA
Australia
AC 220-240V 50
Hz
1550
W
Australia
WTYCZKA
Uwaga :
1. Użyj odpowiedniego zewnętrznego źródła zasilania w zależności od
napięcia produktu .
2. Nie przekraczaj maksymalnego obciążenia określonego w instrukcji
produktu.
PRODUCT COMPONENTS
MODEL: HT-6A
MODEL: HT-12A
- 6 -
Ostrzeżenie: Przed użyciem należy upewnić się, że taca zbierająca żużel jest
prawidłowo zainstalowana.
Zielone światło : Wskaźnik zasilania
● Gdy produkt jest włączony, zapala się zielona lampka.
Uwaga: HT-6A i HT-12A nie posiadają wyłącznika zasilania. Produkty włączają się
bezpośrednio po podłączeniu ich do gniazdka.
Pomarańczowe światło: Kontrolka ogrzewania
● Jeśli produkt nie osiągnie ustawionej temperatury, będzie się nadal nagrzewał i
zapali się na pomarańczowo.
● Gdy produkt osiągnie ustawioną temperaturę, przestaje się nagrzewać i pomara
ńczowy kolor gaśnie.
Pokrętło temperatury: Ustaw żądaną temperaturę
Pokrętło czasu: Ustaw czas odniesienia
Uwaga: Pokrętło czasu służy wyłącznie do celów informacyjnych i produkt
nie wyłączy się po osiągnięciu ustawionego czasu.
Slag
collecting
tray
Slag
collecting
tray
- 7 -
Zielony przycisk: wyłącznik zasilania
● Po podłączeniu do gniazdka należy nacisnąć przycisk, aby włączyć zasilanie .
Pomarańczowe światło: Kontrolka ogrzewania
● Jeśli produkt nie osiągnie ustawionej temperatury, będzie się nadal nagrzewał i
zapali się na pomarańczowo.
● Gdy produkt osiągnie ustawioną temperaturę, przestaje się nagrzewać i pomara
ńczowy kolor gaśnie.
Pokrętło temperatury: Ustaw żądaną temperaturę
Pokrętło czasu: Ustaw czas odniesienia
Uwaga: Pokrętło czasu służy wyłącznie do celów informacyjnych i produkt
MODEL: HT-9A

- 8 -
nie wyłączy się po osiągnięciu ustawionego czasu.
OPERATING INSTRUCTIONS
Przed pierwszym użyciem urządzenia:
● Odklej materiały promocyjne i opakowania oraz sprawdź, czy płyty grzewcze są
czyste i wolne od kurzu. W razie potrzeby przetrzyj je wilgotną szmatką. Rozłóż na
chłonnym ręczniku kuchennym i zetrzyj nadmiar oleju.
Notatka: Kiedy urządzenie jest podgrzewane po raz pierwszy, może
wydzielać się lekki dym lub zapach, co jest zjawiskiem normalnym w
przypadku wielu urządzeń grzewczych i nie ma wpływu na bezpieczeństwo
urządzenia.
Ostrzeżenie: Przed użyciem należy upewnić się, że taca zbierająca żużel jest
prawidłowo zainstalowana.
1. Umieść maszynę na czystej, suchej i poziomej powierzchni w pobliżu gniazdka
elektrycznego.
2. Ustaw pokrętło temperatury na najniższą temperaturę, sprawdź ponownie, czy
produkt i przewód zasilający są nienaruszone, a następnie podłącz wtyczkę do
gniazdka.
3. Ustawić pokrętło temperatury na żądaną temperaturę, zaświeci się pomarań
czowa lampka i urządzenie zacznie się nagrzewać.
4. Gdy temperatura urządzenia osiągnie ustawioną temperaturę, pomarań czowe
światło zgaśnie. Możesz zacząć robić pączki.
5. Otwórz górny szablon produktu i za pomocą pędzla nałóż olej spożywczy na
górny i dolny szablon produktu.
6. Przygotowane ciasto wlać do dolnej formy produktu.
WSKAZÓWKI: Zaleca się, aby ciasto nie wystawało poza powierzchnię formy
produktu, aby uniknąć jego przelania.
7. Przykryj górny szablon produktu i ustaw pokrętło czasu na ustawiony czas.
8. Po usłyszeniu „ding” otwórz górny szablon i za pomocą szczypiec wyjmij

- 9 -
pączki.
Uwaga: Pokrętło czasu służy wyłącznie do celów informacyjnych i produkt
nie wyłączy się po osiągnięciu ustawionego czasu.
9 . Po zakończeniu, dla bezpieczeństwa, przekręć pokrętło temperatury w
kierunku przeciwnym do ruchu wskazówek zegara do pozycji granicznej i odłącz
zasilanie.
Uwaga: Działa to w ten sposób wielokrotnie, aby mieć pewność, że temperatura
jest pewna w określonym zakresie. Podczas pracy maszyny pomarańczowe
światło będzie się włączać i wyłączać.
CLEANING AND MAINTENANCE
1. Po użyciu ustaw pokrętło temperatury na najniższą temperaturę, odłącz
wtyczkę z gniazdka i poczekaj, aż produkt ostygnie.
2. Za pomocą miękkiej szczoteczki usuń pozostałości i olej z powierzchni formy.
3 . Zewnętrzną część należy wycierać miękką, suchą szmatką. Suche ubranie.
Nigdy nie używaj ściernych środków czyszczących ani szorstkich podkładek.
4. Regularnie czyść, aby uniknąć zabrudzeń.
Uwaga: Do czyszczenia formy nie używaj twardych i ostrych przedmiotów,
aby uniknąć uszkodzenia powłoki nieprzywierającej.
Uwagi: Przed ponownym użyciem zmontuj ponownie zgodnie z instrukcją .
Ostrzeżenie: Nie używaj płynu do bezpośredniego płukania produktu, aby
uniknąć uszkodzenia elementów wewnętrznych przez wodę.
Ostrzeżenie: Podczas czyszczenia należy zwrócić uwagę na uchwyt
opadający formy .
STORAGE
1. Zawsze odłączaj maszynę od prądu przed przechowywaniem.
2. Zawsze upewnij się, że maszyna jest wyczyszczona, schłodzona i wysuszona
przed naciągnięciem sznurka.
3. Przed przechowywaniem umieść bawełnę perłową lub papier pochłaniający

- 10 -
tłuszcz pomiędzy górną i dolną formą, aby zabezpieczyć powłokę
nieprzywierającą.
RECIPE
Składniki :
4 jajka 2 szklanki cukru 1 łyżeczka ekstraktu z
wanilii
1 łyżeczka soli 1/4 łyżeczka gałki muszkatołowej, startej 1 łyżeczka
białego octu
1 1⁄2 szklanki maślanki 1⁄2 szklanka gęstej śmietanki 5 1⁄2 szklanki
uniwersalnej mąki
2 łyżeczki sody oczyszczonej 1 łyżeczka proszku do pieczenia
Krok :
1. Jajka utrzeć z cukrem na gładką masę.
2. Dodaj wanilię i ocet i dobrze wymieszaj.
3. Połącz mąkę, sodę oczyszczoną, proszek do pieczenia, sól i gałkę
muszkatołową.
4. Połącz maślankę i gęstą śmietanę.
5. Do masy cukrowej dodawaj na zmianę suche składniki i mieszankę maślanki.
6. Włóż do maszynki do pączków.
7. Włóż do 190°C.

- 11 -
8. Smażyć do zarumienienia z jednej strony, przewrócić i smażyć, aż druga strona
się zarumieni.
9. Wyjmij na ręczniki papierowe.
TIPS
1. Przed wlaniem ciasta do formy maszynowej nałóż pędzelkiem olej spożywczy
na powierzchnię formy.
2. Zaleca się, aby ciasto nie wystawało poza powierzchnię formy produktu, aby
uniknąć jego przelania.
3. Zaleca się użycie mąki pączkowej wstępnie przemieszanej.
4. Podczas mieszania zaleca się użycie miksera do mąki.
Ostrzeżenie: Podczas gotowania należy zwrócić uwagę na uchwyt
opadający pleśni .
Producent: Shanghaimuxinmuyeyouxiangongsi
Adres: Baoshanqu Shuangchenglu 803long 11hao 1602A-1609shi
Szanghaj
Import do AUS: SIHAO PTY LTD. 1 ROKEVA STREETEASTWOOD NSW
2122 Australia
Import do USA: Sanven Technology Ltd. Suite 250, 9166 Anaheim Place,
Rancho Cucamonga, CA 91730

- 12 -
REP
UK
Pooledas Group Ltd
Unit 5 Albert Edward House, The
Pavilions Preston, United Kingdom
REP
EC
SHUNSHUN GmbH
Römeräcker 9 Z2021,76351
Linkenheim-Hochstetten, Germany


Technique Assistance et certificat de garantie électronique
www.vevor.com/support
MACHINE À BEIGNETS COMMERCIALE
MODÈLE : HT-6A/HT-9A/HT-12A.
We continue to be committed to provide you tools with competitive price.
"Save Half", "Half Price" or any other similar expressions used by us only represents an
estimate of savings you might benefit from buying certain tools with us compared to the major
top brands and does not necessarily mean to cover all categories of tools offered by us. You
are kindly reminded to verify carefully when you are placing an order with us if you are
actually saving half in comparison with the top major brands.

- 1 -
MODÈLE : HT-6A MODÈLE : HT-9A MODÈLE : HT-12A
Have product questions? Need technical support? Please feel free to contact
us: Technical Support and E-Warranty Certificate
www.vevor.com/support
NEED HELP? CONTACT US!
This is the original instruction, please read all manual instructions carefully before
operating. VEVOR reserves a clear interpretation of our user manual. The appearance of
the product shall be subject to the product you received. Please forgive us that we won't
inform you again if there are any technology or software updates on our product.
COMMERCIAL DONUT
MACHINE

- 2 -
Avertissement : Pour réduire le risque de blessure, l'utilisateur doit
lire attentivement le manuel d'instructions.
Utilisation en intérieur uniquement.
Faites attention aux températures élevées pour éviter les brûlures.
ÉLIMINATION CORRECTE
Ce produit est soumis aux dispositions de la directive européenne
2012/19/CE. Le symbole représentant une poubelle barrée indique
que le produit nécessite une collecte sélective des déchets dans
l'Union européenne. Ceci s'applique au produit et à tous les
accessoires marqués de ce symbole. Les produits marqués comme
tels ne peuvent pas être jetés avec les ordures ménagères normales,
mais doivent être déposés dans un point de collecte pour le
recyclage des appareils électriques et électroniques.
La conformité est une certification de sécurité CE et
Royaume-Uni.
SAFETY WARNINGS AND PRECAUTIONS
Merci d'avoir utilisé ce produit . Afin de vous assurer que vous pouvez utiliser la
machine correctement, lisez attentivement ces instructions avant de l'utiliser et
conservez-les correctement pour référence future . Veuillez lire les précautions et
les règles de sécurité sur cette page pour garantir votre utilisation en toute sécurité.
Ce manuel décrit les avertissements et les précautions de sécurité, le
fonctionnement, l'entretien et le nettoyage . Les avertissements et instructions
examinés dans ce manuel ne peuvent pas couvrir toutes les conditions et
situations possibles qui peuvent survenir . La prudence et le bon sens ne sont pas
intégrés à ce produit, car nous pensons que les utilisations seront conformes à ces

- 3 -
codes . Avant de commencer un programme d'entraînement ou de vous lancer
dans une activité d'endurance intense avec l'appareil, veuillez consulter un
médecin.
Veuillez lire TOUTES les instructions avant d'utiliser votre machine .
1. Assurez-vous que la tension de votre prise est la même que la tension indiquée
sur l'étiquette signalétique de l'appareil.
2. Ne laissez pas les enfants, les mineurs et les animaux domestiques s'approcher
ou toucher la machine.
3. Ne touchez pas la surface chaude directement avec vos mains. Utilisez toujours
la poignée ou le bouton pour le fonctionnement.
4. Pour éviter les chocs électriques, ne plongez pas le cordon ou la fiche dans
l'eau ou d'autres liquides.
5. Ne plongez pas l’appareil dans l’eau ou tout autre liquide.
6. Débranchez la machine de la prise lorsqu'elle n'est pas utilisée et avant de la
nettoyer. Refroidissez l'appareil avant d'installer ou de retirer des pièces et avant
de le nettoyer.
7. Refroidissez les pièces CHAUDES avant l'utilisation et le nettoyage .
8. N'utilisez pas l'appareil avec un cordon ou une fiche endommagée, un
dysfonctionnement ou un dommage mécanique. Envoyez-le à votre centre de
service agréé le plus proche pour examen et réparation (SEULS les techniciens
doivent ouvrir l'appareil).
9. L'utilisation d'accessoires ou d'accessoires non fournis ou recommandés par le
fabricant peut provoquer des blessures.
dix. Si la machine ne doit pas être utilisée pendant une longue période,
débranchez-la, nettoyez-la, couvrez-la et rangez-la dans un endroit sec et sûr.
11. Ne laissez pas le cordon d'alimentation pendre au-dessus du bord d'une table
ou d'un comptoir et ne le laissez pas entrer en contact avec des surfaces chaudes.
12. Ne placez pas l'appareil sur ou à proximité de brûleurs à air chaud, électriques
ou de radiateurs. 13. Coupez toujours l'alimentation de la prise avant de brancher
ou débranchement. Tenez la fiche au lieu de tirer sur le cordon.
1 3 . N'utilisez pas cet appareil à d'autres fins que l'utilisation indiquée. 15.Ne
l'utilisez pas à l'extérieur ou à des fins commerciales.
1 4 . GARDEZ-LE HORS DE LA PORTÉE DES ENFANTS. Ne le laissez jamais
sans surveillance pendant son utilisation.
1 5 . NE LE NETTOYEZ PAS AVEC UN MATÉRIAU ABRASIF.
1 6 . Vérifiez toujours que cette machine est branchée sur une prise mise à la terre
avec l'alimentation électrique appropriée. Assurez-vous que la prise murale
utilisée est correctement mise à la terre. Sinon, vous devez installer une prise
mise à la terre. Avoir la travail effectué uniquement par un électricien certifié et
dûment qualifié pour respecter les codes locaux de sécurité et d'électricité.
17 . Assurez-vous que la prise de courant, la fiche et le cordon utilisés sont en bon
état. condition de travail. Les composants endommagés doivent être réparés par
un électricien certifié et qualifié pour respecter les codes locaux de sécurité et
d'électricité. Même si votre cordon d'alimentation fonctionne correctement,
gardez-le à l'écart de l'eau et évitez de le laisser couler sur des tapis ou des
- 4 -
appareils de chauffage.
18 . Évitez de l'utiliser en présence de liquides, de gaz, de poussières ou d'autres
situations explosives inflammables.
19 . Ne déplacez pas la machine avant le refroidissement et pendant le chauffage
2 0 . N'utilisez pas la machine dans un garage électroménager ou sous un mur
armoire. Débranchez toujours l'appareil de la prise électrique lorsque vous le
rangez dans un garage pour appareils électroménagers. Dans le cas contraire,
cela entraînerait un risque d'incendie, notamment si la machine touche le mur du
garage ou si la porte le touche en se fermant.
2 1 . Fixation de type Y : Si le cordon d'alimentation est endommagé, il doit être
remplacé par le fabricant, son agent de service ou des personnes de qualification
similaire en afin d'éviter un danger.
2 2 . Les enfants ne doivent pas jouer avec l'appareil. Le nettoyage et l'entretien
par l'utilisateur ne doivent pas être effectués par des enfants sans surveillance.
23 . Inspectez avant chaque utilisation.
24 . NE LE NETTOYEZ PAS AVEC UN MATÉRIAU ABRASIF .
25 . Ne le laissez jamais sans surveillance pendant son utilisation . Ne laissez
jamais l'enfant sans surveillance.
26. L'urine et les excréments d'animaux peuvent endommager le produit, veuillez
le tenir à l'écart .
AVERTISSEMENT: Cet appareil n'est pas destiné à être utilisé par des
personnes jeunes ou infirmes, à moins d'être supervisées par une personne
responsable pour garantir qu'elles peuvent utiliser l'appareil en toute
sécurité. Les jeunes enfants doivent être surveillés pour s'assurer qu'ils ne
jouent pas avec le produit . Les animaux domestiques doivent rester à l'écart
du produit.
PRODUCT PARAMETERS
MODÈL
E
Région
Tension
Pouvoi
r
Type de
connecteur
HT-6A
Amérique du
Nord
CA120V 6 0Hz
1550W
Américain
PRISE
L'Europe
AC220-240V 50Hz
1550W
européen PRISE
Australie
AC220-240V 50Hz
1550W
Australie PRISE
HT-9A
Amérique du
CA120V 6 0Hz
2000W
Américain
- 5 -
Nord
PRISE
L'Europe
AC220-240V 50Hz
2000W
européen PRISE
Australie
AC220-240V 50Hz
2000W
Australie PRISE
HT- 12 A
Amérique du
Nord
CA120V 6 0Hz
1550W
Américain
PRISE
L'Europe
AC220-240V 50Hz
1550W
européen PRISE
Australie
AC220-240V 50Hz
1550W
Australie PRISE
Attention :
1. Veuillez utiliser une alimentation externe appropriée en fonction de la
tension du produit .
2. Ne dépassez pas la charge maximale spécifiée dans le manuel du produit.
PRODUCT COMPONENTS
Avertissement : Veuillez vous assurer que le bac de collecte des scories est
correctement installé avant utilisation.
Lumière verte : indicateur d'alimentation
● Lorsque le produit est sous tension, le voyant vert s'allume.
Slag
collecting
tray
Slag
collecting
tray
MODEL: HT-6A
MODEL: HT-12A
- 6 -
Remarque : les HT-6A et HT-12A n'ont pas d'interrupteur d'alimentation. Les
produits sont mis sous tension directement après avoir été branchés sur la prise.
Voyant orange : voyant de chauffage
● Lorsque le produit n'atteint pas la température réglée, le produit continue de
chauffer et s'allume en orange.
● Lorsque le produit atteint la température réglée, le produit arrête de chauffer et la
couleur orange s'éteint.
Bouton de température : réglez la température souhaitée
Bouton de temps : régler le temps de référence
Remarque : le bouton de temps est uniquement à titre de référence et le
produit ne s'éteindra pas lorsque l'heure réglée est atteinte.
Bouton vert : interrupteur d'alimentation
● Après avoir branché la prise, vous devez appuyer sur le bouton pour allumer
l'appareil .
MODEL: HT-9A

- 7 -
Voyant orange : voyant de chauffage
● Lorsque le produit n'atteint pas la température réglée, le produit continue de
chauffer et s'allume en orange.
● Lorsque le produit atteint la température réglée, le produit arrête de chauffer et la
couleur orange s'éteint.
Bouton de température : réglez la température souhaitée
Bouton de temps : régler le temps de référence
Remarque : le bouton de temps est uniquement à titre de référence et le
produit ne s'éteindra pas lorsque l'heure réglée est atteinte.
OPERATING INSTRUCTIONS
Avant d'utiliser l'appareil pour la première fois :
● Décollez les supports promotionnels et d'emballage et vérifiez que les plaques
de cuisson sont propres et sans poussière. Si nécessaire, essuyez-les avec un
chiffon humide. Étalez-la avec un torchon absorbant et essuyez tout excès d’huile.
Note: Lorsque votre appareil est chauffé pour la première fois, il peut
émettre une légère fumée ou odeur, ce qui est normal pour de nombreux
appareils de chauffage, et n'affectera pas la sécurité de votre appareil.
Avertissement : Veuillez vous assurer que le bac de collecte des scories est
correctement installé avant utilisation.
1. Placez la machine sur une surface propre, sèche et plane à proximité d'une
prise de courant.
2. Réglez le bouton de température sur la position de température la plus basse,
vérifiez à nouveau si le produit et le cordon d'alimentation sont intacts et
connectez la fiche à la prise.
3. Réglez le bouton de température sur la température requise, le voyant orange
s'allumera et la machine commencera à chauffer.
4. Lorsque la température de la machine atteint la température réglée, le voyant
orange s'éteint. Vous pouvez commencer à faire des beignets.

- 8 -
5. Ouvrez le gabarit supérieur du produit et utilisez un pinceau pour appliquer de
l'huile de cuisson sur les gabarits supérieur et inférieur du produit.
6. Versez la pâte préparée dans le moule inférieur du produit.
CONSEILS : Il est recommandé que la pâte ne dépasse pas la surface du moule
du produit pour éviter tout débordement.
7. Couvrez le modèle supérieur du produit et réglez le bouton de temps sur l'heure
réglée.
8. Après avoir entendu un « ding », ouvrez le gabarit supérieur et utilisez des
pinces pour retirer les beignets.
Remarque : le bouton de temps est uniquement à titre de référence et le
produit ne s'éteindra pas lorsque l'heure réglée est atteinte.
9 . Une fois terminé, pour des raisons de sécurité, veuillez tourner le bouton de
température dans le sens inverse des aiguilles d'une montre jusqu'à la position
limite et couper l'alimentation.
Remarque : Cela fonctionne de cette manière à plusieurs reprises afin de
garantir que la température est certaine dans une plage. Pendant le
fonctionnement de la machine, le voyant orange s'allume et s'éteint.
CLEANING AND MAINTENANCE
1. Après utilisation, tournez le bouton de température sur la température la plus
basse, débranchez et attendez que le produit refroidisse.
2. Utilisez une brosse douce pour nettoyer les résidus et l'huile sur la surface du
moule.
3 . Pour l'extérieur, essuyez avec un chiffon doux et sec. linge sec. N'utilisez
jamais de nettoyant abrasif ou de tampon agressif.
4. Veuillez nettoyer régulièrement pour éviter la saleté.
Remarque : n'utilisez pas d'objets durs et pointus pour nettoyer le moule
afin d'éviter d'endommager le revêtement antiadhésif.
Remarques : Avant de l' utiliser à nouveau, remontez-le conformément aux
instructions .
Avertissement : N'utilisez pas de liquide pour rincer le produit directement
afin d'éviter d'endommager les composants internes par l'eau.
Attention : faites attention à la poignée de chute du moule lors du
nettoyage .

- 9 -
STORAGE
1. Débranchez toujours la machine avant de la ranger.
2. Assurez-vous toujours que la machine est nettoyée, refroidie et séchée avant la
ficelle.
3. Avant le stockage, placez du coton perlé ou du papier absorbant l'huile entre les
moules supérieur et inférieur pour protéger le revêtement antiadhésif.
RECIPE
Ingrédients :
4 œufs 2 Tasse de sucre 1 cuillère à café
d'extrait de vanille
1 cuillère à café de sel 1⁄4 à café de muscade, râpée 1 cuillère à café de
vinaigre blanc
1 1⁄2 tasses de babeurre 1⁄2 tasse de crème épaisse 5 1⁄2 tasses de
farine ordinaire
2 cuillères à café de bicarbonate de soude 1 cuillère à café de levure chimique
Étape :
1. Battre les œufs et le sucre jusqu'à ce que le tout soit bien mélangé.
2. Ajoutez la vanille et le vinaigre et mélangez bien.
3. Mélanger la farine, le bicarbonate de soude, la levure chimique, le sel et la

- 10 -
muscade.
4. Mélangez le babeurre et la crème épaisse.
5. Ajouter alternativement les ingrédients secs et le mélange de babeurre au
mélange de sucre.
6. Mettez dans une machine à beignets.
7. Baisser à 375 °F (190 °C).
8. Faites frire jusqu'à ce qu'ils soient dorés d'un côté, retournez et faites frire
jusqu'à ce que l'autre côté soit doré.
9. Retirer sur du papier absorbant.
TIPS
1. Utilisez un pinceau pour appliquer de l'huile de cuisson sur la surface du moule
avant de verser la pâte dans le moule de la machine.
2. Il est recommandé que la pâte ne dépasse pas la surface du moule du produit
pour éviter tout débordement.
3. Il est recommandé d’utiliser de la farine pré-mélangée pour beignets.
4. Il est recommandé d'utiliser un mélangeur à farine lors du mélange.
Attention : faites attention à la poignée de chute du moule lors de la
cuisson .
Fabricant : Shanghaimuxinmuyeyouxiangongsi
Adresse : Baoshanqu Shuangchenglu 803long 11hao 1602A-1609shi
Shanghai
Importé en Australie : SIHAO PTY LTD. 1 ROKEVA STREETASTWOOD
NSW 2122 Australie

- 11 -
Importé aux États-Unis : Sanven Technology Ltd. Suite 250, 9166
Anaheim Place, Rancho Cucamonga, CA 91730
REP
UK
Pooledas Group Ltd
Unit 5 Albert Edward House, The
Pavilions Preston, United Kingdom
REP
EC
SHUNSHUN GmbH
Römeräcker 9 Z2021,76351
Linkenheim-Hochstetten, Germany


Technisch Ondersteuning en e-garantiecertificaat www.vevor.com/support
COMMERCIËLE DONUTMACHINE
MODEL: HT-6A / HT-9A / HT-12A
We continue to be committed to provide you tools with competitive price.
"Save Half", "Half Price" or any other similar expressions used by us only represents an
estimate of savings you might benefit from buying certain tools with us compared to the major
top brands and does not necessarily mean to cover all categories of tools offered by us. You
are kindly reminded to verify carefully when you are placing an order with us if you are
actually saving half in comparison with the top major brands.
- 1 -
MODEL: HT-6A MODEL: HT-9A MODEL: HT-12A
Have product questions? Need technical support? Please feel free to contact
us: Technical Support and E-Warranty Certificate
www.vevor.com/support
NEED HELP? CONTACT US!
This is the original instruction, please read all manual instructions carefully before
operating. VEVOR reserves a clear interpretation of our user manual. The appearance of
the product shall be subject to the product you received. Please forgive us that we won't
inform you again if there are any technology or software updates on our product.
COMMERCIAL DONUT
MACHINE

- 2 -
Waarschuwing-Om het risico op letsel te verminderen, moet de
gebruiker de handleiding zorgvuldig lezen.
Alleen binnenshuis te gebruiken.
Let op hoge temperaturen om brandwonden te voorkomen.
CORRECTE VERWIJDERING
Dit product valt onder de bepalingen van de Europese richtlijn
2012/19/EG. Het symbool met een doorgestreepte afvalcontainer
geeft aan dat het product in de Europese Unie een aparte
afvalinzameling vereist. Dit geldt voor het product en alle
accessoires die met dit symbool zijn gemarkeerd. Producten die als
zodanig gemarkeerd zijn, mogen niet met het normale huisvuil
worden weggegooid, maar moeten naar een inzamelpunt voor
recycling van elektrische en elektronische apparaten worden
gebracht
Compliance is een EG- en VK-veiligheidscertificering.
SAFETY WARNINGS AND PRECAUTIONS
Bedankt voor het gebruik van dit product . Om er zeker van te zijn dat u de
machine correct kunt bedienen, dient u deze instructie zorgvuldig door te lezen
voordat u de machine gebruikt en deze goed te bewaren voor toekomstig gebruik .
Lees de voorzorgsmaatregelen en veiligheidsregels op deze pagina om een veilig
gebruik te garanderen. Deze handleiding beschrijft veiligheidswaarschuwingen en
voorzorgsmaatregelen, bediening, onderhoud en reiniging . De waarschuwingen
en instructies die in deze handleiding worden besproken, kunnen niet alle
mogelijke omstandigheden en situaties dekken die zich kunnen voordoen .

- 3 -
Voorzichtigheid en gezond verstand zijn niet ingebouwd in dit product, omdat wij
van mening zijn dat het gebruik aan deze codes zal voldoen . Voordat u met een
trainingsprogramma begint of zware duuractiviteiten op het apparaat uitvoert, dient
u een arts te raadplegen.
Lees ALLE instructies voordat u uw machine gebruikt .
1. Zorg ervoor dat de spanning in uw stopcontact hetzelfde is als de spanning
aangegeven op het typeplaatje van het apparaat.
2. Zorg ervoor dat kinderen, minderjarigen en huisdieren niet in de buurt van de
machine komen of deze aanraken.
3. Raak het hete oppervlak niet rechtstreeks met uw handen aan. Gebruik altijd de
hendel of knop voor bediening.
4. Om elektrische schokken te voorkomen, mag u het snoer niet onderdompelen
en niet in water of andere vloeistoffen steken.
5. Dompel het apparaat niet onder in water of een andere vloeistof.
6. Haal de stekker van de machine uit het stopcontact wanneer deze niet in
gebruik is en voordat u deze schoonmaakt. Laat het apparaat afkoelen voordat u
onderdelen installeert of verwijdert en voordat u het schoonmaakt.
7. Laat de HETE onderdelen afkoelen voordat u ze in gebruik neemt en reinigt .
8. Gebruik het apparaat niet als het snoer of de stekker beschadigd is, als het niet
goed werkt of als er mechanische schade is. Stuur het naar het dichtstbijzijnde
erkende servicecentrum voor onderzoek en reparatie (ALLEEN technici mogen
het apparaat openen).
9. Het gebruik van accessoires of hulpstukken die niet door de fabrikant zijn
geleverd of aanbevolen, kan letsel veroorzaken.
10. Als de machine langere tijd niet wordt gebruikt, haal dan de stekker uit het
stopcontact, maak hem schoon, dek hem af en bewaar hem op een droge en
veilige plaats.
11. Laat het netsnoer niet over de rand van een tafel of aanrecht hangen en laat
het niet in contact komen met hete oppervlakken.
12. Plaats het apparaat niet op of in de buurt van hete lucht, elektrische branders
of verwarmingstoestellen. 13. Schakel altijd de stroom naar het stopcontact uit
voordat u de stekker in het stopcontact steekt loskoppelen. Houd de stekker vast
in plaats van aan het snoer te trekken.
1 3 . Gebruik dit apparaat niet voor andere doeleinden dan het aangegeven
gebruik. 15.Gebruik het niet buitenshuis of voor commerciële doeleinden.
1 4 . HOUD HET BUITEN HET BEREIK VAN KINDEREN. Laat het nooit
onbeheerd achter terwijl het in gebruik is.
1 5 . REINIG HET NIET MET SCHUREND MATERIAAL.
1 6 . Controleer altijd of deze machine is aangesloten op een geaard stopcontact
met de juiste elektrische voeding. Zorg ervoor dat het gebruikte stopcontact goed
geaard is. Als dit niet het geval is, moet u een geaard stopcontact installeren. Heb
de werkzaamheden mogen alleen worden uitgevoerd door een gecertificeerde
elektricien die voldoende gekwalificeerd is om te voldoen aan de plaatselijke
veiligheids- en elektriciteitsvoorschriften.
17 . Zorg ervoor dat het stopcontact, de stekker en het snoer dat u gebruikt in

- 4 -
goede staat zijn werk omstandigheden. Beschadigde onderdelen moeten worden
gerepareerd door een gecertificeerde elektricien die gekwalificeerd is om te
voldoen aan de plaatselijke veiligheids- en elektriciteitsvoorschriften. Zelfs Als uw
netsnoer goed functioneert, houd het dan uit de buurt van water en laat het
apparaat niet over tapijten of verwarmingstoestellen lopen.
18 . Vermijd gebruik in de aanwezigheid van ontvlambare vloeistoffen, gassen,
stof of andere explosieve situaties.
19 . Verplaats de machine niet vóór het afkoelen en tijdens het verwarmen
2 0 . Gebruik de machine niet in een garage voor apparaten of onder een muur
kastje. Haal altijd de stekker van het apparaat uit het stopcontact als u het in een
garage voor apparaten opbergt. Anders bestaat er brandgevaar, vooral als de
machine de garagemuur raakt of als de deur deze raakt terwijl deze sluit.
2 1 . Type Y-bevestiging: Als het netsnoer beschadigd is, moet het worden
vervangen door de fabrikant, zijn serviceagent of vergelijkbaar gekwalificeerde
personen in om een gevaar te vermijden.
2 2 . Kinderen mogen niet met het apparaat spelen. Reiniging en
gebruikersonderhoud mogen niet door kinderen zonder toezicht worden
uitgevoerd.
23 . Inspecteer vóór elk gebruik.
24 . REINIG HET NIET MET SCHUREND MATERIAAL .
25 . Laat het nooit onbeheerd achter terwijl het in gebruik is . Laat het kind nooit
zonder toezicht achter.
26. Urine en uitwerpselen van huisdieren kunnen het product beschadigen, houd
het uit de buurt .
WAARSCHUWING: Dit apparaat is niet bedoeld voor gebruik door jonge
of zwakke personen, tenzij onder toezicht van een persoon die
verantwoordelijk is om ervoor te zorgen dat zij het apparaat veilig kunnen
gebruiken. Op jonge kinderen moet toezicht worden gehouden om ervoor te
zorgen dat ze niet met het product spelen . Huisdieren moeten uit de buurt
van het product blijven.
PRODUCT PARAMETERS
MODEL
Regio
Spanning
Stroo
m
Stekkertype
HT-6A
Noord Amerika
Wisselstroom120V
6 0 Hz
1550W
Een mericaan
PLUG
Europa
AC220-240V 50Hz
1550W
Europees PLUG
- 5 -
Australië
AC220-240V 50Hz
1550W
Australië PLUG
HT-9A
Noord Amerika
Wisselstroom120V
6 0 Hz
2000W
Een mericaan
PLUG
Europa
AC220-240V 50Hz
2000W
Europees PLUG
Australië
AC220-240V 50Hz
2000W
Australië PLUG
HT- 12 A
Noord Amerika
Wisselstroom120V
6 0 Hz
1550W
Een mericaan
PLUG
Europa
AC220-240V 50Hz
1550W
Europees PLUG
Australië
AC220-240V 50Hz
1550W
Australië PLUG
Aandacht :
1. Gebruik een geschikte externe voeding, afhankelijk van de
productspanning .
2. Overschrijd de maximale belasting die is gespecificeerd in de
producthandleiding niet.
PRODUCT COMPONENTS
Slag
collecting
tray
Slag
collecting
tray
MODEL: HT-6A
MODEL: HT-12A

- 6 -
Waarschuwing: Zorg ervoor dat de slakopvangbak vóór gebruik correct is
geïnstalleerd.
Groen licht : Stroomindicator
● Wanneer het product wordt ingeschakeld, gaat het groene lampje branden.
Opmerking: HT-6A en HT-12A hebben geen aan/uit-schakelaar. De producten
worden direct ingeschakeld nadat u ze in het stopcontact steekt.
Oranje lampje: indicatielampje verwarming
● Wanneer het product de ingestelde temperatuur niet bereikt, blijft het product
opwarmen en licht het oranje op.
● Wanneer het product de ingestelde temperatuur bereikt, stopt het product met
verwarmen en gaat de oranje kleur uit.
Temperatuurknop: Stel de gewenste temperatuur in
Tijdknop: referentietijd instellen
Opmerking: de tijdknop dient alleen ter referentie en het product wordt
niet uitgeschakeld wanneer de ingestelde tijd is bereikt.
MODEL: HT-9A
- 7 -
Groene knop: aan/uit-schakelaar
● Nadat u de stekker in het stopcontact heeft gestoken, drukt u op de knop om de
stroom in te schakelen .
Oranje lampje: indicatielampje verwarming
● Wanneer het product de ingestelde temperatuur niet bereikt, blijft het product
opwarmen en licht het oranje op.
● Wanneer het product de ingestelde temperatuur bereikt, stopt het product met
verwarmen en gaat de oranje kleur uit.
Temperatuurknop: Stel de gewenste temperatuur in
Tijdknop: referentietijd instellen
Opmerking: de tijdknop dient alleen ter referentie en het product wordt
niet uitgeschakeld wanneer de ingestelde tijd is bereikt.

- 8 -
OPERATING INSTRUCTIONS
Voordat u het apparaat voor de eerste keer gebruikt:
● Verwijder promotie- en verpakkingsmateriaal en controleer of de kookplaten
schoon en stofvrij zijn. Veeg ze indien nodig af met een vochtige doek. Verspreid
met een absorberende keukendoek en veeg overtollige olie weg.
Opmerking: Wanneer uw apparaat voor de eerste keer wordt verwarmd, kan
er een lichte rook of geur vrijkomen, wat normaal is voor veel
verwarmingsapparaten, en dit heeft geen invloed op de veiligheid van uw
apparaat.
Waarschuwing: Zorg ervoor dat de slakopvangbak vóór gebruik correct is
geïnstalleerd.
1. Plaats de machine op een schoon, droog en horizontaal oppervlak in de buurt
van een stopcontact.
2. Zet de temperatuurknop op de laagste temperatuurstand, controleer opnieuw of
het product en het netsnoer intact zijn en steek de stekker in het stopcontact.
3. Stel de temperatuurknop in op de gewenste temperatuur. Het oranje lampje
gaat branden en de machine begint te verwarmen.
4. Wanneer de machinetemperatuur de ingestelde temperatuur bereikt, gaat het
oranje lampje uit. Je kunt beginnen met het maken van donuts.
5. Open de bovenste sjabloon van het product en gebruik een borstel om bakolie
op de bovenste en onderste sjabloon van het product aan te brengen.
6. Giet het voorbereide beslag in de onderste vorm van het product.
TIPS: Het wordt aanbevolen dat het beslag het oppervlak van de productvorm niet
overschrijdt om overlopen te voorkomen.
7. Bedek de bovenste sjabloon van het product en stel de tijdknop in op de
ingestelde tijd.
8. Nadat je een "ding" hebt gehoord, open je de bovenste sjabloon en gebruik je
een tang om de donuts te verwijderen.
Opmerking: de tijdknop dient alleen ter referentie en het product wordt
niet uitgeschakeld wanneer de ingestelde tijd is bereikt.
9 . Als u klaar bent, draait u voor de veiligheid de temperatuurknop tegen de klok in
naar de eindpositie en schakelt u de stroom uit.
Opmerking: Het werkt herhaaldelijk op deze manier om ervoor te zorgen dat de

- 9 -
temperatuur binnen een bepaald bereik zeker is. Tijdens de werking van de
machine gaat het oranje lampje aan en uit.
CLEANING AND MAINTENANCE
1. Draai na gebruik de temperatuurknop op de laagste temperatuur, haal de
stekker uit het stopcontact en wacht tot het product is afgekoeld.
2. Gebruik een zachte borstel om het residu en de olie op het maloppervlak te
reinigen.
3 . Veeg de buitenkant af met een zachte, droge doek. droge doek. Gebruik nooit
een schurend reinigingsmiddel of een schuursponsje.
4. Maak regelmatig schoon om vuil te voorkomen.
Let op: Gebruik geen harde en scherpe voorwerpen om de vorm schoon te
maken om beschadiging van de antiaanbaklaag te voorkomen.
Opmerkingen: Monteer het apparaat opnieuw volgens de instructies voordat
u het opnieuw gebruikt .
Waarschuwing: Gebruik geen vloeistof om het product rechtstreeks af te
spoelen om waterschade aan interne componenten te voorkomen.
Waarschuwing: Let bij het schoonmaken op de vormdruppelgreep .
STORAGE
1. Haal altijd de stekker uit het stopcontact voordat u de machine opbergt.
2. Zorg er altijd voor dat de machine vóór het spannen wordt gereinigd, gekoeld en
gedroogd.
3. Plaats vóór het opbergen parelkatoen of olie-absorberend papier tussen de
bovenste en onderste vorm om de antiaanbaklaag te beschermen.

- 10 -
RECIPE
Ingrediënten :
4 eieren 2 kopjes suiker 1 theelepel vanille
extract
1 theelepel zout ¼ theelepel nootmuskaat, geraspt 1 theelepel witte
azijn
1 ½ kopjes karnemelk ½ kopje zware room 5 ½ kopjes bloem voor
alle doeleinden
2 theelepels zuiveringszout 1 theelepel bakpoeder
Stap :
1. Klop de eieren en de suiker tot ze goed gemengd zijn.
2. Voeg vanille en azijn toe en meng goed.
3. Combineer bloem, zuiveringszout, bakpoeder, zout en nootmuskaat.
4. Combineer karnemelk en slagroom.
5. Voeg afwisselend de droge ingrediënten en het karnemelkmengsel toe aan het
suikermengsel.
6. Doe het in een donutmaker.
7. Laat het in een temperatuur van 375º C (190°C) vallen.
8. Bak tot de ene kant bruin is, draai om en bak tot de andere kant bruin is.
9. Verwijder het op papieren handdoeken.
TIPS
1. Gebruik een borstel om bakolie op het oppervlak van de vorm aan te brengen
voordat u het beslag in de machinevorm giet.
2. Het wordt aanbevolen dat het beslag het oppervlak van de productvorm niet
overschrijdt om overlopen te voorkomen.
3. Het wordt aanbevolen om voorgemengd donutmeel te gebruiken.

- 11 -
4. Het wordt aanbevolen om tijdens het mixen een bloemmixer te gebruiken.
Waarschuwing: Let tijdens het koken op de vormdruppelgreep .
Fabrikant: Shanghaimuxinmuyeyouxiangongsi
Adres: Baoshanqu Shuangchenglu 803long 11hao 1602A-1609shi
Shanghai
Geïmporteerd naar AUS: SIHAO PTY LTD. 1 ROKEVA
STREETEASTWOOD NSW 2122 Australië
Geïmporteerd naar de VS: Sanven Technology Ltd. Suite 250, 9166
Anaheim Place, Rancho Cucamonga, CA 91730
REP
UK
Pooledas Group Ltd
Unit 5 Albert Edward House, The
Pavilions Preston, United Kingdom
REP
EC
SHUNSHUN GmbH
Römeräcker 9 Z2021,76351
Linkenheim-Hochstetten, Germany


Técnico Soporte y certificado de garantía electrónica www.vevor.com/support
MÁQUINA COMERCIAL DE DONAS
MODELO: HT-6A / HT-9A / HT-12A
We continue to be committed to provide you tools with competitive price.
"Save Half", "Half Price" or any other similar expressions used by us only represents an
estimate of savings you might benefit from buying certain tools with us compared to the major
top brands and does not necessarily mean to cover all categories of tools offered by us. You
are kindly reminded to verify carefully when you are placing an order with us if you are
actually saving half in comparison with the top major brands.

- 1 -
MODELO: HT-6A MODELO: HT-9A MODELO: HT-12A
Have product questions? Need technical support? Please feel free to contact
us: Technical Support and E-Warranty Certificate
www.vevor.com/support
NEED HELP? CONTACT US!
This is the original instruction, please read all manual instructions carefully before
operating. VEVOR reserves a clear interpretation of our user manual. The appearance of
the product shall be subject to the product you received. Please forgive us that we won't
inform you again if there are any technology or software updates on our product.
COMMERCIAL DONUT
MACHINE
- 2 -
Advertencia: para reducir el riesgo de lesiones, el usuario debe leer
atentamente el manual de instrucciones.
Solamente para uso en interiores.
Preste atención a las altas temperaturas para evitar quemaduras.
ELIMINACIÓN CORRECTA
Este producto está sujeto a las disposiciones de la Directiva Europea
2012/19/CE. El símbolo que muestra un contenedor con ruedas
tachado indica que el producto requiere recogida selectiva de basura
en la Unión Europea. Esto se aplica al producto y a todos los
accesorios marcados con este símbolo. Los productos marcados
como tales no podrán desecharse con la basura doméstica normal,
sino que deberán llevarse a un punto de recogida para el reciclaje de
aparatos eléctricos y electrónicos.
El cumplimiento es una certificación de seguridad de la CE y
el Reino Unido.
SAFETY WARNINGS AND PRECAUTIONS
Gracias por usar este producto . Para asegurarse de que puede operar la
máquina correctamente, lea atentamente estas instrucciones antes de utilizarla y
consérvelas adecuadamente para consultarlas en el futuro . Lea las precauciones
y reglas de seguridad en esta página para garantizar su uso seguro. Este manual
describirá las advertencias y precauciones de seguridad, operación,
mantenimiento y limpieza . Las advertencias e instrucciones revisadas en este
manual no pueden cubrir todas las condiciones y situaciones posibles que puedan
ocurrir . Este producto no incluye precaución ni sentido común, ya que creemos
que los usos cumplirán con estos códigos . Antes de iniciar un programa de

- 3 -
entrenamiento o realizar una actividad de resistencia extenuante en el dispositivo,
consulte a un médico.
Lea TODAS las instrucciones antes de utilizar su máquina .
1. Asegúrese de que el voltaje en su toma de corriente sea el mismo que el voltaje
indicado en la etiqueta de clasificación del aparato.
2. No permita que los niños, menores y mascotas se acerquen o toquen la
máquina.
3. No toque la superficie caliente directamente con las manos. Utilice siempre la
manija o perilla para operar.
4. Para evitar descargas eléctricas, no sumerja el cable ni el enchufe en agua u
otros líquidos.
5. No sumerja el aparato en agua ni en ningún otro líquido.
6. Desenchufe la máquina del tomacorriente cuando no esté en uso y antes de
limpiarla. Enfríe el aparato antes de instalar o quitar piezas y antes de limpiarlo.
7. Enfríe las piezas CALIENTES antes de operarlas y limpiarlas .
8. No opere el dispositivo con un cable o enchufe dañado, mal funcionamiento o
con cualquier daño mecánico. Envíelo a su centro de servicio autorizado más
cercano para su examen y reparación (SÓLO los técnicos deben abrir la unidad).
9. El uso de accesorios o accesorios que no sean proporcionados o
recomendados por el fabricante puede causar lesiones.
10. Si la máquina no va a utilizarse durante un largo período de tiempo,
desenchúfela, límpiela, cúbrala y guárdela en un lugar seco y seguro.
11. No deje el cable de alimentación colgando sobre el borde de la mesa o
mostrador ni permita que entre en contacto con superficies calientes.
12. No coloque la unidad sobre o cerca de aire caliente, quemadores eléctricos o
calentadores. 13. Apague siempre la alimentación del tomacorriente antes de
enchufarlo o desenchufar. Sostenga el enchufe en lugar de tirar del cable.
1 3 . No utilice esta unidad para ningún otro propósito que no sea el uso indicado.
15. No lo utilice al aire libre ni con fines comerciales.
1 4 . MANTÉNGALO FUERA DEL ALCANCE DE LOS NIÑOS. Nunca lo dejes
desatendido mientras esté en uso.
15 . NO LIMPIARLO CON NINGÚN MATERIAL ABRASIVO.
dieciséis . Siempre verifique que esta máquina esté enchufada a un
tomacorriente con conexión a tierra con el suministro eléctrico adecuado.
Asegúrese de que el tomacorriente de pared que se utiliza esté correctamente
conectado a tierra. De lo contrario, deberá instalar un tomacorriente con conexión
a tierra. Tener el trabajo realizado únicamente por un electricista certificado que
esté debidamente calificado para cumplir con los códigos eléctricos y de
seguridad locales.
17 . Asegúrese de que el tomacorriente, el enchufe y el cable utilizados estén en
buenas condiciones. condiciones de trabajo. Los componentes dañados deben
ser reparados por un electricista certificado que esté calificado para cumplir con
los códigos eléctricos y de seguridad locales. Incluso Si su cable de alimentación
funciona correctamente, manténgalo alejado del agua y Evite dejarlo pasar sobre
alfombras o aparatos de calefacción.

- 4 -
18 . Evite usarlo en presencia de líquidos inflamables, gases, polvo u otras
situaciones explosivas.
19 . No mueva la máquina antes de enfriar y durante el calentamiento.
2 0 . No opere la máquina en un garaje de electrodomésticos o debajo de una
pared. gabinete. Desenchufe siempre la unidad del tomacorriente cuando la
guarde en un garaje para electrodomésticos. De lo contrario, se produciría riesgo
de incendio, especialmente si la máquina toca la pared del garaje o la puerta al
cerrar.
2 1 . Accesorio tipo Y: Si el cable de alimentación está dañado, debe ser
reemplazado por el fabricante, su agente de servicio o personas igualmente
calificadas en fin de evitar un peligro.
2 2 . Los niños no deben jugar con el aparato. La limpieza y el mantenimiento del
usuario no deben ser realizados por niños sin supervisión.
23 . Inspeccione antes de cada uso.
24 . NO LIMPIARLO CON NINGÚN MATERIAL ABRASIVO .
25 . Nunca lo deje desatendido mientras esté en uso . Nunca deje al niño
desatendido.
26. La orina y las heces de las mascotas pueden dañar el producto; manténgalo
alejado .
ADVERTENCIA: Este aparato no está diseñado para que lo utilicen
personas jóvenes o enfermas a menos que esté supervisado por una
persona responsable para garantizar que puedan utilizar el aparato de forma
segura. Se debe supervisar a los niños pequeños para asegurarse de que no
jueguen con el producto . Las mascotas deben mantenerse alejadas del
producto.
PRODUCT PARAMETERS
MODEL
O
Región
Voltaje
Fuerza
Tipo de enchufe
HT-6A
América del
norte
CA120V 6 0Hz
1550W
Americano
ENCHUFAR
Europa
CA220-240 V 50
Hz.
1550W
europeo
ENCHUFAR
Australia
CA220-240 V 50
Hz.
1550W
Australia
ENCHUFAR
- 5 -
HT-9A
América del
norte
CA120V 6 0Hz
2000W
Americano
ENCHUFAR
Europa
CA220-240 V 50
Hz.
2000W
europeo
ENCHUFAR
Australia
CA220-240 V 50
Hz.
2000W
Australia
ENCHUFAR
HT- 12 A
América del
norte
CA120V 6 0Hz
1550W
Americano
ENCHUFAR
Europa
CA220-240 V 50
Hz.
1550W
europeo
ENCHUFAR
Australia
CA220-240 V 50
Hz.
1550W
Australia
ENCHUFAR
Atención :
1. Utilice una fuente de alimentación externa adecuada según el voltaje del
producto .
2. No exceda la carga máxima especificada en el manual del producto.
PRODUCT COMPONENTS
MODEL: HT-6A
MODEL: HT-12A

- 6 -
Advertencia: asegúrese de que la bandeja recolectora de escoria esté
instalada correctamente antes de su uso.
Luz verde : Indicador de encendido
● Cuando el producto está encendido, se enciende la luz verde.
Nota: HT-6A y HT-12A no tienen interruptor de encendido. Los productos se
encienden directamente después de enchufarlos a la toma de corriente.
Luz naranja: Luz indicadora de calefacción
● Cuando el producto no alcanza la temperatura establecida, el producto continúa
calentándose y se ilumina en color naranja.
● Cuando el producto alcanza la temperatura establecida, deja de calentarse y el
color naranja se apaga.
Perilla de temperatura: establece la temperatura deseada
Perilla de tiempo: establece el tiempo de referencia
Nota: La perilla de tiempo es solo como referencia y el producto no se
apagará cuando se alcance el tiempo establecido.
Slag
collecting
tray
Slag
collecting
tray
MODEL: HT-9A
- 7 -
Botón verde: interruptor de encendido
● Después de enchufar el enchufe, debe presionar el botón para encender la
alimentación .
Luz naranja: Luz indicadora de calefacción
● Cuando el producto no alcanza la temperatura establecida, el producto continúa
calentándose y se ilumina en color naranja.
● Cuando el producto alcanza la temperatura establecida, el producto deja de
calentarse y el color naranja se apaga.
Perilla de temperatura: establece la temperatura deseada
Perilla de tiempo: establece el tiempo de referencia
Nota: La perilla de tiempo es solo como referencia y el producto no se
apagará cuando se alcance el tiempo establecido.

- 8 -
OPERATING INSTRUCTIONS
Antes de utilizar el aparato por primera vez:
● Retire los materiales promocionales y de embalaje y compruebe que las placas
de cocción estén limpias y sin polvo. Si es necesario, límpielos con un paño
húmedo. Extender con un paño de cocina absorbente y limpiar el exceso de
aceite.
Nota: Cuando su aparato se calienta por primera vez, puede emitir un ligero
humo u olor, lo cual es normal en muchos aparatos de calefacción y no
afectará la seguridad de su aparato.
Advertencia: asegúrese de que la bandeja recolectora de escoria esté
instalada correctamente antes de su uso.
1. Coloque la máquina sobre una superficie limpia, seca y nivelada cerca de un
tomacorriente con base de enchufe.
2. Ajuste la perilla de temperatura a la posición de temperatura más baja, verifique
nuevamente si el producto y el cable de alimentación están intactos y conecte el
enchufe al tomacorriente.
3. Ajuste la perilla de temperatura a la temperatura requerida, la luz naranja se
encenderá y la máquina comenzará a calentar.
4. Cuando la temperatura de la máquina alcanza la temperatura establecida, la luz
naranja se apaga. Puedes empezar a hacer donas.
5. Abra la plantilla superior del producto y use un cepillo para aplicar aceite de
cocina a las plantillas superior e inferior del producto.
6. Vierta la masa preparada en el molde inferior del producto.
TIPS: Se recomienda que la masa no sobrepase la superficie del molde del
producto para evitar que se desborde.
7. Cubra la plantilla superior del producto y ajuste la perilla del tiempo al tiempo
establecido.
8. Después de escuchar un "ding", abra la plantilla superior y use unas pinzas
para quitar las donas.
Nota: La perilla de tiempo es solo como referencia y el producto no se
apagará cuando se alcance el tiempo establecido.
9 . Después de terminar, por seguridad, gire la perilla de temperatura en sentido
antihorario hasta la posición límite y corte la energía.

- 9 -
Nota: Funciona de esta manera repetidamente para garantizar que la
temperatura esté determinada dentro de un rango. Durante el funcionamiento de
la máquina, la luz naranja se encenderá y apagará.
CLEANING AND MAINTENANCE
1. Después del uso, gire la perilla de temperatura a la temperatura más baja,
desenchufe y espere a que el producto se enfríe.
2. Utilice un cepillo suave para limpiar los residuos y el aceite de la superficie del
molde.
3 . Para el exterior, limpie con un paño suave y seco. paño seco. Nunca utilice un
limpiador abrasivo o una almohadilla áspera.
4. Limpie regularmente para evitar la suciedad.
Nota: No utilice objetos duros y afilados para limpiar el molde para evitar
dañar el revestimiento antiadherente.
Notas: Antes de volver a usarlo , vuelva a ensamblarlo según las
instrucciones .
Advertencia: No utilice líquido para enjuagar el producto directamente para
evitar daños por agua a los componentes internos.
Advertencia: preste atención al agarre del molde al limpiar .
STORAGE
1. Desenchufe siempre la máquina antes de guardarla.
2. Asegúrese siempre de que la máquina esté limpia, enfriada y seca antes de
colocar el hilo.
3. Antes de guardarlo, coloque algodón perlado o papel absorbente de aceite
entre los moldes superior e inferior para proteger el revestimiento antiadherente.

- 10 -
RECIPE
Ingredientes :
4 huevos 2 tazas de azúcar 1 cucharadita de
extracto de vainilla
1 cucharadita de sal 1⁄4 cucharadita de nuez moscada rallada 1
cucharadita de vinagre blanco
1 1⁄2 tazas de suero de leche 1⁄2 taza de crema espesa 5 1⁄2 tazas de
harina para todo uso
2 cucharaditas de bicarbonato de sodio 1 cucharadita de polvo para hornear
Paso :
1. Batir los huevos y el azúcar hasta que estén bien mezclados.
2. Agrega la vainilla y el vinagre y mezcla bien.
3. Combine la harina, el bicarbonato de sodio, el polvo para hornear, la sal y la
nuez moscada.
4. Combine el suero de leche y la crema espesa.
5. Agregue los ingredientes secos y la mezcla de suero de leche alternativamente
a la mezcla de azúcar.
6. Poner en una máquina para hacer donas.
7. Bajar a 375ºF (190°C).
8. Freír hasta que se dore por un lado, voltear y freír hasta que se dore el otro
lado.
9. Retirar a toallas de papel.
TIPS
1. Utilice una brocha para aplicar aceite de cocina en la superficie del molde antes
de verter la masa en el molde de la máquina.

- 11 -
2. Se recomienda que la masa no sobrepase la superficie del molde del producto
para evitar que se desborde.
3. Se recomienda utilizar harina premezclada para donuts.
4. Se recomienda utilizar una batidora de harina al mezclar.
Advertencia: preste atención al agarre del molde cuando cocine .
Fabricante: Shanghaimuxinmuyeyouxiangongsi
Dirección: Baoshanqu Shuangchenglu 803long 11hao 1602A-1609shi
Shanghai
Importado a AUS: SIHAO PTY LTD. 1 ROKEVA STREETASTWOOD
NSW 2122 Australia
Importado a EE. UU.: Sanven Technology Ltd. Suite 250, 9166 Anaheim
Place, Rancho Cucamonga, CA 91730
REP
UK
Pooledas Group Ltd
Unit 5 Albert Edward House, The
Pavilions Preston, United Kingdom
REP
EC
SHUNSHUN GmbH
Römeräcker 9 Z2021,76351
Linkenheim-Hochstetten, Germany


Tecnico Supporto e certificato di garanzia elettronica www.vevor.com/support
MACCHINA PER CIAMBELLE
COMMERCIALE
MODELLO: HT-6A / HT-9A / HT-12A
We continue to be committed to provide you tools with competitive price.
"Save Half", "Half Price" or any other similar expressions used by us only represents an
estimate of savings you might benefit from buying certain tools with us compared to the major
top brands and does not necessarily mean to cover all categories of tools offered by us. You
are kindly reminded to verify carefully when you are placing an order with us if you are
actually saving half in comparison with the top major brands.

- 1 -
MODELLO: HT-6A MODELLO: HT-9A MODELLO: HT-12A
Have product questions? Need technical support? Please feel free to contact
us: Technical Support and E-Warranty Certificate
www.vevor.com/support
NEED HELP? CONTACT US!
This is the original instruction, please read all manual instructions carefully before
operating. VEVOR reserves a clear interpretation of our user manual. The appearance of
the product shall be subject to the product you received. Please forgive us that we won't
inform you again if there are any technology or software updates on our product.
COMMERCIAL DONUT
MACHINE

- 2 -
Avvertenza: per ridurre il rischio di lesioni, l'utente deve leggere
attentamente il manuale di istruzioni.
Solo per uso interno.
Fare attenzione alle alte temperature per evitare ustioni.
CORRETTO SMALTIMENTO
Questo prodotto è soggetto alle disposizioni della Direttiva Europea
2012/19/CE. Il simbolo del bidone della spazzatura barrato indica
che nell'Unione Europea il prodotto richiede la raccolta differenziata
dei rifiuti. Ciò vale per il prodotto e tutti gli accessori contrassegnati
da questo simbolo. I prodotti contrassegnati come tali non possono
essere smaltiti con i normali rifiuti domestici, ma devono essere
portati in un punto di raccolta per il riciclaggio di dispositivi elettrici ed
elettronici
La conformità è una certificazione di sicurezza CE e Regno
Unito.
SAFETY WARNINGS AND PRECAUTIONS
Grazie per aver utilizzato questo prodotto . Per essere sicuri di poter utilizzare
correttamente la macchina, leggere attentamente queste istruzioni prima dell'uso
e conservarle adeguatamente per riferimento futuro . Si prega di leggere le
precauzioni e le regole di sicurezza in questa pagina per garantire un utilizzo
sicuro. Questo manuale descrive le avvertenze e le precauzioni di sicurezza, il
funzionamento, la manutenzione e la pulizia . Le avvertenze e le istruzioni
contenute nel presente manuale non possono coprire tutte le possibili condizioni e
situazioni che potrebbero verificarsi . La cautela e il buon senso non sono
incorporati in questo prodotto, poiché riteniamo che gli usi saranno conformi a

- 3 -
questi codici . Prima di iniziare un programma di allenamento o intraprendere
un'attività di resistenza faticosa sul dispositivo, consultare un medico.
Si prega di leggere TUTTE le istruzioni prima di utilizzare la macchina .
1. Assicuratevi che il voltaggio della presa corrisponda a quello indicato sulla
targhetta identificativa dell'apparecchio.
2. Non lasciare che bambini, minorenni e animali domestici si avvicinino o tocchino
la macchina.
3. Non toccare la superficie calda direttamente con le mani. Utilizzare sempre la
maniglia o la manopola per il funzionamento.
4. Per evitare scosse elettriche, non immergere il cavo o la spina in acqua o altri
liquidi.
5. Non immergere l'apparecchio in acqua o in qualsiasi altro liquido.
6. Scollegare la macchina dalla presa quando non viene utilizzata e prima di pulirla.
Raffreddare l'apparecchio prima di installare o rimuovere parti e prima di pulirlo.
7. Raffreddare le parti CALDE prima del funzionamento e della pulizia .
8. Non utilizzare il dispositivo con cavo o spina danneggiati, malfunzionamenti o
con qualsiasi danno meccanico. Inviarlo al centro di assistenza autorizzato più
vicino per l'esame e la riparazione (SOLO i tecnici dovrebbero aprire l'unità).
9. L'utilizzo di accessori o accessori non forniti o consigliati dal produttore può
causare lesioni.
10. Se si prevede di non utilizzare la macchina per un lungo periodo, scollegarla,
pulirla, coprirla e conservarla in un luogo asciutto e sicuro.
11. Non lasciare il cavo di alimentazione sospeso oltre il bordo del tavolo o del
bancone e non lasciarlo entrare in contatto con superfici calde.
12. Non posizionare l'unità sopra o vicino ad aria calda, fornelli elettrici o stufe. 13.
Spegnere sempre la presa prima di collegare o staccando la spina. Tenere la
spina invece di tirare il cavo.
1 3 . Non utilizzare questa unità per scopi diversi dall'uso indicato. 15.Non
utilizzarlo all'aperto o per scopi commerciali.
1 4 . TENERE FUORI DALLA PORTATA DEI BAMBINI. Non lasciarlo mai
incustodito durante l'uso.
1 5 . NON PULIRLO CON NESSUN MATERIALE ABRASICO.
1 6 . Controllare sempre che questa macchina sia collegata a una presa con
messa a terra con l'alimentazione elettrica appropriata. Assicurarsi che la presa a
muro utilizzata sia adeguatamente collegata a terra. In caso contrario, è
necessario installare una presa con messa a terra. Avere il lavoro eseguito solo da
un elettricista certificato adeguatamente qualificato per soddisfare le norme
elettriche e di sicurezza locali.
17 . Assicurarsi che la presa di corrente, la spina e il cavo utilizzati siano in buone
condizioni condizioni di lavoro. I componenti danneggiati devono essere riparati da
un elettricista certificato e qualificato per soddisfare le normative elettriche e di
sicurezza locali. Anche se il cavo di alimentazione funziona correttamente, tenerlo
lontano dall'acqua e evitare di farlo scorrere su tappeti o apparecchi riscaldanti.
18 . Evitare di utilizzarlo in presenza di liquidi infiammabili, gas, polvere o altre
situazioni esplosive.
- 4 -
19 . Non spostare la macchina prima del raffreddamento e durante il
riscaldamento
2 0 . Non utilizzare la macchina in un garage per elettrodomestici o sotto un muro
mobiletto. Scollegare sempre l'unità dalla presa elettrica quando si ripone in un
garage per elettrodomestici. In caso contrario, potrebbe verificarsi un rischio di
incendio, soprattutto se la macchina tocca la parete del garage o la porta la tocca
mentre si chiude.
2 1 . Attacco di tipo Y: se il cavo di alimentazione è danneggiato, deve essere
sostituito dal produttore, dal suo agente di assistenza o da personale similmente
qualificato in per evitare un pericolo.
2 2 . I bambini non devono giocare con l'apparecchio. La pulizia e la manutenzione
da parte dell'utente non devono essere effettuate da bambini senza supervisione.
23 . Ispezionare prima di ogni utilizzo.
24 . NON PULIRLO CON NESSUN MATERIALE ABRASICO .
25 . Non lasciarlo mai incustodito durante l'uso . Non lasciare mai il bambino
incustodito.
26. L'urina e le feci degli animali domestici possono danneggiare il prodotto, tenerli
lontani .
AVVERTIMENTO: Questo apparecchio non è destinato all'uso da parte di
persone giovani o inferme a meno che non siano supervisionate da una
persona responsabile per garantire che possano utilizzare l'apparecchio in
sicurezza. I bambini piccoli devono essere sorvegliati per assicurarsi che
non giochino con il prodotto . Gli animali domestici devono stare lontani dal
prodotto.
PRODUCT PARAMETERS
MODEL
LO
Regione
Voltaggio
Energi
a
Tipo di spina
HT-6A
Nord America
CA120 V 6 0 Hz
1550
W
Un americano
TAPPO
Europa
CA220-240 V 50
Hz
1550
W
europeo TAPPO
Australia
CA220-240 V 50
Hz
1550
W
AustraliaTAPPO
- 5 -
HT-9A
Nord America
CA120 V 6 0 Hz
2000W
Un americano
TAPPO
Europa
CA220-240 V 50
Hz
2000W
europeo TAPPO
Australia
CA220-240 V 50
Hz
2000
W
AustraliaTAPPO
HT- 12 A
Nord America
CA120 V 6 0 Hz
1550
W
Un americano
TAPPO
Europa
CA220-240 V 50
Hz
1550W
europeo TAPPO
Australia
CA220-240 V 50
Hz
1550
W
AustraliaTAPPO
Attenzione :
1. Utilizzare un alimentatore esterno appropriato in base alla tensione del
prodotto .
2. Non superare il carico massimo specificato nel manuale del prodotto.
PRODUCT COMPONENTS
MODEL: HT-6A
MODEL: HT-12A
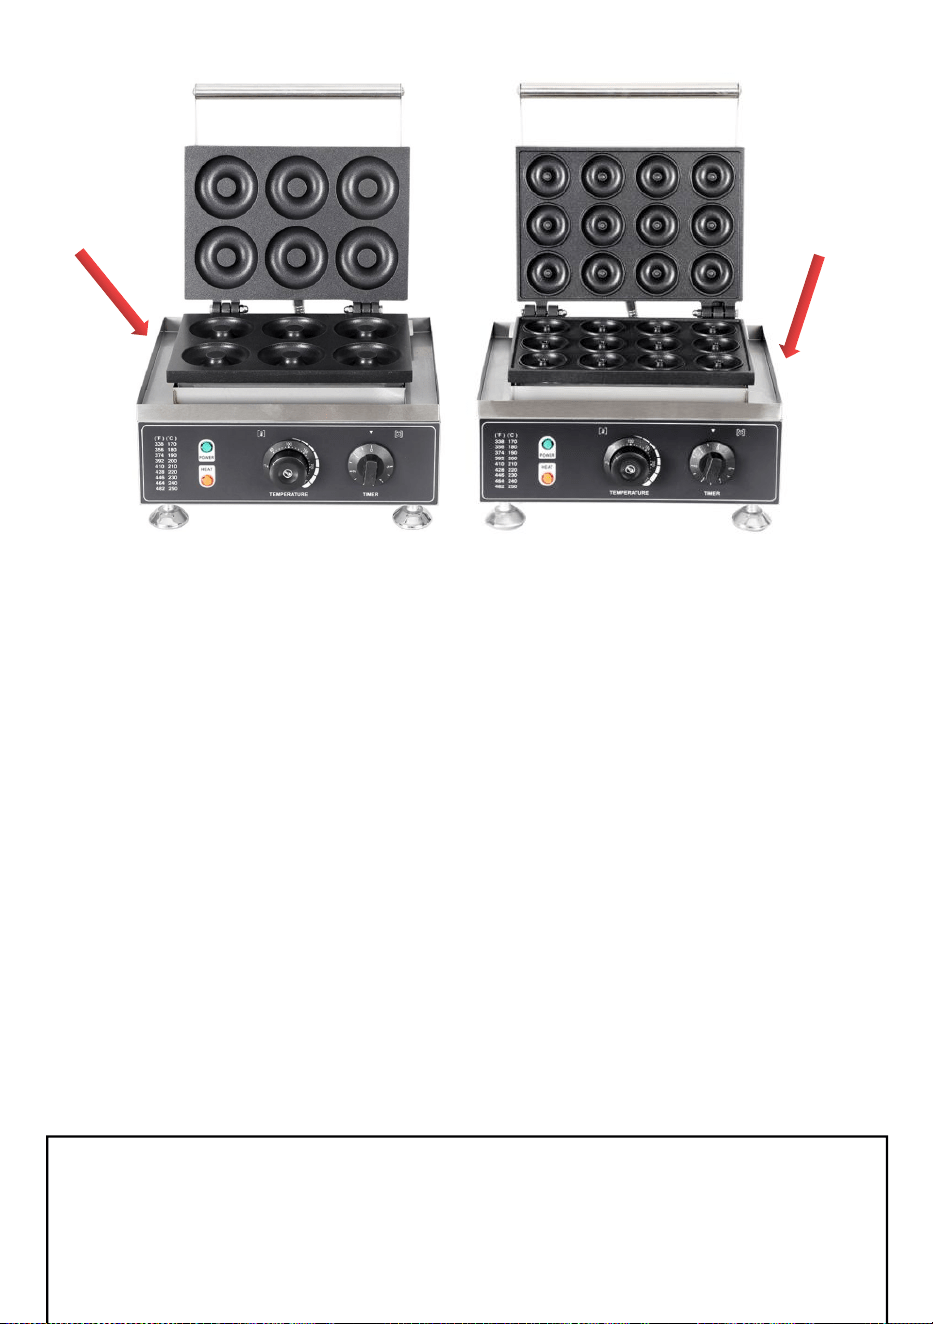
- 6 -
Avvertenza: assicurarsi che il vassoio di raccolta delle scorie sia installato
correttamente prima dell'uso.
Luce verde : indicatore di alimentazione
● Quando il prodotto è acceso, la luce verde si accende.
Nota: HT-6A e HT-12A non dispongono di un interruttore di alimentazione. I
prodotti vengono accesi direttamente dopo averli collegati alla presa.
Luce arancione: spia di riscaldamento
● Quando il prodotto non raggiunge la temperatura impostata, il prodotto continua
a riscaldarsi e si illumina in arancione.
● Quando il prodotto raggiunge la temperatura impostata, smette di riscaldarsi e il
colore arancione si spegne.
Manopola della temperatura: imposta la temperatura desiderata
Manopola del tempo: imposta l'ora di riferimento
Nota: la manopola dell'ora è solo di riferimento e il prodotto non si
spegnerà quando viene raggiunta l'ora impostata.
Slag
collecting
tray
Slag
collecting
tray
MODEL: HT-9A

- 7 -
Pulsante verde: interruttore di alimentazione
● Dopo aver collegato la presa, è necessario premere il pulsante per accendere
l'alimentazione .
Luce arancione: spia di riscaldamento
● Quando il prodotto non raggiunge la temperatura impostata, il prodotto continua
a riscaldarsi e si illumina in arancione.
● Quando il prodotto raggiunge la temperatura impostata, il prodotto smette di
riscaldarsi e il colore arancione si spegne.
Manopola della temperatura: imposta la temperatura desiderata
Manopola del tempo: imposta l'ora di riferimento
Nota: la manopola dell'ora è solo di riferimento e il prodotto non si
spegnerà quando viene raggiunta l'ora impostata.

- 8 -
OPERATING INSTRUCTIONS
Prima di utilizzare l'apparecchio per la prima volta:
● Rimuovere i materiali promozionali e di imballaggio e verificare che le piastre di
cottura siano pulite e prive di polvere. Se necessario, pulirli con un panno umido.
Stendetela con un canovaccio da cucina assorbente e asciugate l'eventuale olio in
eccesso.
Nota: Quando l'apparecchio viene riscaldato per la prima volta, potrebbe
emettere un leggero fumo o odore, che è normale per molti apparecchi di
riscaldamento e non influirà sulla sicurezza dell'apparecchio.
Avvertenza: assicurarsi che il vassoio di raccolta delle scorie sia installato
correttamente prima dell'uso.
1. Posizionare la macchina su una superficie pulita, asciutta e piana vicino a una
presa con base.
2. Regolare la manopola della temperatura sulla posizione della temperatura più
bassa, controllare nuovamente che il prodotto e il cavo di alimentazione siano
intatti e collegare la spina alla presa.
3. Regolare la manopola della temperatura sulla temperatura richiesta, la luce
arancione si accenderà e la macchina inizierà a riscaldarsi.
4. Quando la temperatura della macchina raggiunge la temperatura impostata, la
luce arancione si spegne. Puoi iniziare a fare le ciambelle.
5. Aprire la sagoma superiore del prodotto e utilizzare un pennello per applicare
l'olio da cucina sulle sagome superiore e inferiore del prodotto.
6. Versare la pastella preparata nello stampo inferiore del prodotto.
CONSIGLI: Si consiglia di non superare la superficie dello stampo del prodotto per
evitare che la pastella trabocchi.
7. Coprire la sagoma superiore del prodotto e regolare la manopola del tempo
sull'ora impostata.
8. Dopo aver sentito un "ding", aprire la sagoma superiore e utilizzare le pinze per
rimuovere le ciambelle.
Nota: la manopola dell'ora è solo di riferimento e il prodotto non si
spegnerà quando viene raggiunta l'ora impostata.
9 . Al termine, per sicurezza, ruotare la manopola della temperatura in senso
antiorario fino alla posizione limite e interrompere l'alimentazione.

- 9 -
Nota: funziona ripetutamente in questo modo per garantire che la temperatura
rientri in un determinato intervallo. Durante il funzionamento della macchina, la
luce arancione si accenderà e spegnerà ciclicamente.
CLEANING AND MAINTENANCE
1. Dopo l'uso, ruotare la manopola della temperatura sulla temperatura più bassa,
scollegare e attendere che il prodotto si raffreddi.
2. Utilizzare una spazzola morbida per pulire i residui e l'olio sulla superficie dello
stampo.
3 . Per l'esterno, pulire con un panno morbido e asciutto. panno asciutto. Non
utilizzare mai un detergente abrasivo o una spugnetta dura.
4. Si prega di pulire regolarmente per evitare lo sporco.
Nota: non utilizzare oggetti duri e affilati per pulire lo stampo per evitare di
danneggiare il rivestimento antiaderente.
Note: Prima di utilizzarlo nuovamente , rimontarlo secondo le istruzioni .
Avvertenza: non utilizzare liquidi per sciacquare direttamente il prodotto per
evitare danni causati dall'acqua ai componenti interni.
Avvertenza: prestare attenzione alla presa dello stampo durante la
pulizia .
STORAGE
1. Scollegare sempre la macchina prima di riporla.
2. Assicurarsi sempre che la macchina sia pulita, raffreddata e asciugata prima
della corda.
3. Prima di riporlo, posizionare cotone perlato o carta assorbente tra gli stampi
superiore e inferiore per proteggere il rivestimento antiaderente.

- 10 -
RECIPE
Ingredienti :
4 uova 2 tazze di zucchero 1 cucchiaino di
estratto di vaniglia
1 cucchiaino di sale 1/4 cucchiaino di noce moscata, grattugiata 1
cucchiaino di aceto bianco
1 1/2 tazze di latticello 1/2 tazza di panna pesante 5 1/2 tazze di farina
per tutti gli usi
2 cucchiaini di bicarbonato di sodio 1 cucchiaino di lievito in polvere
Fare un passo :
1. Sbattere le uova e lo zucchero finché non saranno ben amalgamati.
2. Aggiungi la vaniglia e l'aceto e mescola bene.
3. Unisci farina, bicarbonato di sodio, lievito, sale e noce moscata.
4. Unisci il latticello e la panna.
5. Aggiungi alternativamente gli ingredienti secchi e la miscela di latticello alla
miscela di zucchero.
6. Metti in una macchina per ciambelle.
7. Scendi a 375ºF (190°C).
8. Friggere fino a doratura su un lato, girare e friggere fino a doratura sull'altro lato.
9. Rimuovere su carta assorbente.
TIPS
1. Utilizzare un pennello per applicare l'olio da cucina sulla superficie dello stampo
prima di versare la pastella nello stampo della macchina.
2. Si raccomanda che la pastella non superi la superficie dello stampo del prodotto
per evitare traboccamenti.

- 11 -
3. Si consiglia di utilizzare farina premiscelata per ciambelle.
4. Si consiglia di utilizzare un mixer per farina durante la miscelazione.
Avvertenza: prestare attenzione alla presa dello stampo durante la
cottura .
Produttore: Shanghaimuxinmuyeyouxiangongsi
Indirizzo: Baoshanqu Shuangchenglu 803long 11hao 1602A-1609shi
Shanghai
Importato in AUS: SIHAO PTY LTD. 1 ROKEVA STREETEASTWOOD
NSW 2122 Australia
Importato negli Stati Uniti: Sanven Technology Ltd. Suite 250, 9166
Anaheim Place, Rancho Cucamonga, CA 91730
REP
UK
Pooledas Group Ltd
Unit 5 Albert Edward House, The
Pavilions Preston, United Kingdom
REP
EC
SHUNSHUN GmbH
Römeräcker 9 Z2021,76351
Linkenheim-Hochstetten, Germany


Technisch Support- und E-Garantie-Zertifikat www.vevor.com/support
KOMMERZIELLE DONUT-MASCHINE
MODELL: HT-6A / HT-9A / HT-12A
We continue to be committed to provide you tools with competitive price.
"Save Half", "Half Price" or any other similar expressions used by us only represents an
estimate of savings you might benefit from buying certain tools with us compared to the major
top brands and does not necessarily mean to cover all categories of tools offered by us. You
are kindly reminded to verify carefully when you are placing an order with us if you are
actually saving half in comparison with the top major brands.

- 1 -
MODELL: HT-6A MODELL: HT-9A MODELL: HT-12A
Have product questions? Need technical support? Please feel free to contact
us: Technical Support and E-Warranty Certificate
www.vevor.com/support
NEED HELP? CONTACT US!
This is the original instruction, please read all manual instructions carefully before
operating. VEVOR reserves a clear interpretation of our user manual. The appearance of
the product shall be subject to the product you received. Please forgive us that we won't
inform you again if there are any technology or software updates on our product.
COMMERCIAL DONUT
MACHINE
- 2 -
Warnung: Um das Verletzungsrisiko zu verringern, muss der
Benutzer die Bedienungsanleitung sorgfältig lesen.
Nur Innen benutzen.
Achten Sie auf hohe Temperaturen, um Verbrennungen zu
vermeiden.
RICHTIGE ENTSORGUNG
Dieses Produkt unterliegt den Bestimmungen der europäischen
Richtlinie 2012/19/EG. Das Symbol einer durchgestrichenen
Mülltonne weist darauf hin, dass das Produkt in der Europäischen
Union einer getrennten Müllsammlung bedarf. Dies gilt für das
Produkt und alle Zubehörteile, die mit diesem Symbol
gekennzeichnet sind. Als solche gekennzeichnete Produkte dürfen
nicht über den normalen Hausmüll entsorgt werden, sondern
müssen an einer Sammelstelle für das Recycling von Elektro- und
Elektronikgeräten abgegeben werden
Compliance ist eine EG- und UK-Sicherheitszertifizierung.
SAFETY WARNINGS AND PRECAUTIONS
Vielen Dank, dass Sie dieses Produkt verwenden . Um sicherzustellen, dass Sie
die Maschine ordnungsgemäß bedienen können, lesen Sie diese Anleitung vor
der Inbetriebnahme sorgfältig durch und bewahren Sie sie zum späteren
Nachschlagen sorgfältig auf . Bitte lesen Sie die Vorsichtsmaßnahmen und
Sicherheitsregeln auf dieser Seite, um eine sichere Verwendung zu gewährleisten.
In diesem Handbuch werden Sicherheitswarnungen und Vorsichtsmaßnahmen
sowie Bedienung, Wartung und Reinigung beschrieben . Die in diesem Handbuch
aufgeführten Warnungen und Anweisungen können nicht alle möglichen

- 3 -
Bedingungen und Situationen abdecken, die auftreten können . Vorsicht und
gesunder Menschenverstand sind in diesem Produkt nicht eingebaut, da wir
davon ausgehen, dass die Verwendung diesen Codes entspricht . Bevor Sie ein
Trainingsprogramm beginnen oder eine anstrengende Ausdaueraktivität auf dem
Gerät ausüben, konsultieren Sie bitte einen Arzt.
Bitte lesen Sie ALLE Anweisungen, bevor Sie Ihr Gerät verwenden .
1. Stellen Sie sicher, dass die Spannung in Ihrer Steckdose mit der auf dem
Typenschild des Geräts angegebenen Spannung übereinstimmt.
2. Lassen Sie Kinder, Minderjährige und Haustiere nicht in die Nähe der Maschine
kommen oder diese berühren.
3. Berühren Sie die heiße Oberfläche nicht direkt mit Ihren Händen. Benutzen Sie
zur Bedienung immer den Griff oder Knopf.
4. Um einen Stromschlag zu vermeiden, tauchen Sie das Kabel oder den Stecker
nicht in Wasser oder andere Flüssigkeiten.
5. Tauchen Sie das Gerät nicht in Wasser oder andere Flüssigkeiten.
6. Trennen Sie das Gerät von der Steckdose, wenn es nicht verwendet wird und
bevor Sie es reinigen. Kühlen Sie das Gerät ab, bevor Sie Teile einbauen oder
entfernen und bevor Sie es reinigen.
7. Kühlen Sie die HEISSEN Teile vor dem Betrieb und der Reinigung ab .
8. Betreiben Sie das Gerät nicht, wenn das Kabel oder der Stecker beschädigt ist,
eine Fehlfunktion vorliegt oder mechanische Schäden vorliegen. Senden Sie es
zur Überprüfung und Reparatur an das nächstgelegene autorisierte Servicecenter
(das Gerät darf NUR von Technikern geöffnet werden).
9. Die Verwendung von Zubehör oder Anbaugeräten, die nicht vom Hersteller
bereitgestellt oder empfohlen werden, kann zu Verletzungen führen.
10. Wenn Sie die Maschine längere Zeit nicht benutzen, ziehen Sie den
Netzstecker, reinigen Sie sie, decken Sie sie ab und lagern Sie sie an einem
trockenen und sicheren Ort.
11. Lassen Sie das Netzkabel nicht über der Tisch- oder Thekenkante hängen und
lassen Sie es nicht mit heißen Oberflächen in Berührung kommen.
12. Stellen Sie das Gerät nicht auf oder in die Nähe von Heißluft-, Elektrobrennern
oder Heizgeräten. 13. Schalten Sie immer die Stromversorgung zur Steckdose
aus, bevor Sie das Gerät anschließen oder anschließen ausstecken. Halten Sie
den Stecker fest, anstatt am Kabel zu ziehen.
1 3 . Benutzen Sie dieses Gerät nicht für andere Zwecke als den angegebenen. 15.
Benutzen Sie es nicht im Freien oder für gewerbliche Zwecke.
1 4 . Bewahren Sie es außerhalb der Reichweite von Kindern auf. Lassen Sie
es während des Gebrauchs niemals unbeaufsichtigt.
15 . REINIGEN SIE ES NICHT MIT SCHEUERMITTELN.
1 6 . Überprüfen Sie immer, ob diese Maschine an eine geerdete Steckdose mit
geeigneter Stromversorgung angeschlossen ist. Stellen Sie sicher, dass die
verwendete Steckdose ordnungsgemäß geerdet ist. Wenn nicht, müssen Sie eine
geerdete Steckdose installieren. Habe den Arbeiten dürfen nur von einem
zertifizierten Elektriker durchgeführt werden, der entsprechend qualifiziert ist, um

- 4 -
die örtlichen Sicherheits- und Elektrovorschriften einzuhalten.
17 . Stellen Sie sicher, dass die verwendete Steckdose, der Stecker und das Kabel
in gutem Zustand sind Arbeitsbedingung. Beschädigte Komponenten sollten von
einem zertifizierten Elektriker repariert werden, der für die Einhaltung der örtlichen
Sicherheits- und Elektrovorschriften qualifiziert ist. Sogar Wenn Ihr Netzkabel
ordnungsgemäß funktioniert, halten Sie es von Wasser fern Lassen Sie es nicht
über Teppiche oder Heizgeräte laufen.
18 . Vermeiden Sie die Verwendung in der Nähe von brennbaren Flüssigkeiten,
Gasen, Staub oder anderen explosiven Situationen.
19 . Bewegen Sie die Maschine nicht vor dem Abkühlen und während des
Erhitzens
2 0 . Betreiben Sie die Maschine nicht in einer Gerätegarage oder unter einer
Wand Kabinett. Trennen Sie das Gerät immer vom Stromnetz, wenn Sie es in
einer Gerätegarage lagern. Andernfalls besteht Brandgefahr, insbesondere wenn
die Maschine die Garagenwand berührt oder das Tor diese beim Schließen
berührt.
2 1 . Befestigung vom Typ Y: Wenn das Netzkabel beschädigt ist, muss es vom
Hersteller, seinem Kundendienst oder einer ähnlich qualifizierten Person in ersetzt
werden um eine Gefahr zu vermeiden.
2 2 . Kinder dürfen nicht mit dem Gerät spielen. Reinigung und Benutzerwartung
dürfen nicht von Kindern ohne Aufsicht durchgeführt werden.
23 . Vor jedem Gebrauch prüfen.
24 . REINIGEN SIE ES NICHT MIT SCHEUERMITTELN .
25 . Lassen Sie es während des Gebrauchs niemals unbeaufsichtigt . Lassen Sie
das Kind niemals unbeaufsichtigt.
26. Urin und Kot von Haustieren können das Produkt beschädigen, bitte
fernhalten .
WARNUNG: Dieses Gerät ist nicht für die Verwendung durch junge oder
gebrechliche Personen bestimmt, es sei denn, sie werden von einer
verantwortlichen Person beaufsichtigt, um sicherzustellen, dass sie das
Gerät sicher verwenden können. Kleine Kinder sollten beaufsichtigt werden,
um sicherzustellen, dass sie nicht mit dem Produkt spielen . Haustiere
sollten vom Produkt ferngehalten werden.
PRODUCT PARAMETERS
MODEL
L
Region
Stromspannung
Leistu
ng
Steckertyp
HT-6A
Nordamerika
Wechselstrom120
1550W
EinAmerikaner

- 5 -
V6 0 Hz
STECKER
Europa
AC220-240V 50Hz
1550W
Europäisch
STECKER
Australien
AC220-240V 50Hz
1550W
Australien
STECKER
HT-9A
Nordamerika
Wechselstrom120
V6 0 Hz
2000W
EinAmerikaner
STECKER
Europa
AC220-240V 50Hz
2000W
Europäisch
STECKER
Australien
AC220-240V 50Hz
2000W
Australien
STECKER
HT- 12 A
Nordamerika
Wechselstrom120
V6 0 Hz
1550W
EinAmerikaner
STECKER
Europa
AC220-240V 50Hz
1550W
Europäisch
STECKER
Australien
AC220-240V 50Hz
1550W
Australien
STECKER
Aufmerksamkeit :
1. Bitte verwenden Sie ein geeignetes externes Netzteil entsprechend der
Produktspannung .
2. Überschreiten Sie nicht die im Produkthandbuch angegebene maximale
Belastung.
PRODUCT COMPONENTS
MODEL: HT-6A
MODEL: HT-12A

- 6 -
Warnung: Bitte stellen Sie vor der Verwendung sicher, dass die
Schlacke-Auffangwanne korrekt installiert ist.
Grünes Licht : Betriebsanzeige
● Wenn das Produkt eingeschaltet ist, leuchtet das grüne Licht.
Hinweis: HT-6A und HT-12A verfügen über keinen Netzschalter. Die Produkte
werden direkt nach dem Einstecken in die Steckdose eingeschaltet.
Orangefarbenes Licht: Heizkontrollleuchte
● Wenn das Produkt die eingestellte Temperatur nicht erreicht, heizt das Produkt
weiter und leuchtet orange.
● Wenn das Produkt die eingestellte Temperatur erreicht, hört das Produkt auf zu
heizen und die orange Farbe erlischt.
Temperaturknopf: Stellen Sie die gewünschte Temperatur ein
Zeitknopf: Referenzzeit einstellen
Hinweis: Der Zeitknopf dient nur als Referenz und das Produkt schaltet
sich nicht aus, wenn die eingestellte Zeit erreicht ist.
Slag
collecting
tray
Slag
collecting
tray
MODEL: HT-9A

- 7 -
Grüne Taste: Netzschalter
● Nachdem Sie die Steckdose angeschlossen haben, müssen Sie die Taste
drücken, um den Strom einzuschalten .
Orangefarbenes Licht: Heizkontrollleuchte
● Wenn das Produkt die eingestellte Temperatur nicht erreicht, heizt das Produkt
weiter und leuchtet orange.
● Wenn das Produkt die eingestellte Temperatur erreicht, hört das Produkt auf zu
heizen und die orange Farbe erlischt.
Temperaturknopf: Stellen Sie die gewünschte Temperatur ein
Zeitknopf: Referenzzeit einstellen
Hinweis: Der Zeitknopf dient nur als Referenz und das Produkt schaltet
sich nicht aus, wenn die eingestellte Zeit erreicht ist.

- 8 -
OPERATING INSTRUCTIONS
Vor dem ersten Gebrauch des Geräts:
● Ziehen Sie Werbe- und Verpackungsmaterialien ab und prüfen Sie, ob die
Kochplatten sauber und staubfrei sind. Wischen Sie sie bei Bedarf mit einem
feuchten Tuch ab. Mit einem saugfähigen Küchentuch verteilen und
überschüssiges Öl abwischen.
Notiz: Wenn Ihr Gerät zum ersten Mal erhitzt wird, kann es zu einer leichten
Rauch- oder Geruchsentwicklung kommen, was bei vielen Heizgeräten
normal ist und keinen Einfluss auf die Sicherheit Ihres Geräts hat.
Warnung: Bitte stellen Sie vor der Verwendung sicher, dass die
Schlacke-Auffangwanne korrekt installiert ist.
1. Stellen Sie die Maschine auf eine saubere, trockene und ebene Fläche in der
Nähe einer Steckdose.
2. Stellen Sie den Temperaturknopf auf die niedrigste Temperaturposition,
überprüfen Sie erneut, ob das Produkt und das Netzkabel intakt sind, und
schließen Sie den Stecker an die Steckdose an.
3. Stellen Sie den Temperaturknopf auf die gewünschte Temperatur ein. Das
orangefarbene Licht leuchtet auf und die Maschine beginnt zu heizen.
4. Wenn die Maschinentemperatur die eingestellte Temperatur erreicht, erlischt
das orangefarbene Licht. Sie können mit der Herstellung von Donuts beginnen.
5. Öffnen Sie die obere Schablone des Produkts und tragen Sie mit einem Pinsel
Speiseöl auf die obere und untere Schablone des Produkts auf.
6. Gießen Sie den vorbereiteten Teig in die untere Form des Produkts.
TIPPS: Es wird empfohlen, dass der Teig nicht über die Oberfläche der
Produktform hinausragt, um ein Überlaufen zu vermeiden.
7. Decken Sie die obere Schablone des Produkts ab und stellen Sie den Zeitknopf
auf die eingestellte Zeit ein.
8. Nachdem Sie ein „Klingeln“ gehört haben, öffnen Sie die obere Schablone und
entfernen Sie die Donuts mit einer Zange.
Hinweis: Der Zeitknopf dient nur als Referenz und das Produkt schaltet
sich nicht aus, wenn die eingestellte Zeit erreicht ist.
9 . Wenn Sie fertig sind, drehen Sie aus Sicherheitsgründen bitte den

- 9 -
Temperaturknopf gegen den Uhrzeigersinn bis zur Endposition und unterbrechen
Sie die Stromversorgung.
Hinweis: Auf diese Weise wird wiederholt vorgegangen, um sicherzustellen,
dass die Temperatur innerhalb eines bestimmten Bereichs liegt. Während des
Betriebs der Maschine geht das orangefarbene Licht abwechselnd an und aus.
CLEANING AND MAINTENANCE
1. Drehen Sie nach dem Gebrauch den Temperaturknopf auf die niedrigste
Temperatur, ziehen Sie den Netzstecker und warten Sie, bis das Produkt
abgekühlt ist.
2. Reinigen Sie die Formoberfläche mit einer weichen Bürste von Rückständen
und Öl.
3 . Wischen Sie die Außenseite mit einem weichen, trockenen Tuch ab. trockene
Kleidung. Verwenden Sie niemals Scheuermittel oder scharfe Schwämme.
4. Bitte regelmäßig reinigen, um Schmutz zu vermeiden.
Hinweis: Verwenden Sie zum Reinigen der Form keine harten und scharfen
Gegenstände, um eine Beschädigung der Antihaftbeschichtung zu
vermeiden.
Hinweise: Bevor Sie es wieder verwenden, bauen Sie es gemäß den
Anweisungen wieder zusammen .
Warnung: Spülen Sie das Produkt nicht direkt mit Flüssigkeit ab, um
Wasserschäden an den internen Komponenten zu vermeiden.
Warnung: Achten Sie beim Reinigen auf den Fallgriff der Form .
STORAGE
1. Trennen Sie die Maschine immer vom Netz, bevor Sie sie lagern.
2. Stellen Sie immer sicher, dass die Maschine vor dem Bespannen gereinigt,
gekühlt und getrocknet wird.
3. Legen Sie vor der Lagerung Perlbaumwolle oder ölabsorbierendes Papier
zwischen die Ober- und Unterform, um die Antihaftbeschichtung zu schützen.

- 10 -
RECIPE
Zutaten :
4 Eier 2 Tassen Zucker 1 Teelöffel Vanilleextrakt
1 ein Teelöffel salz 1⁄4 Teelöffel Muskatnuss, gerieben 1 Teelöffel weißer
Essig
1 1⁄2 Tassen Buttermilch 1⁄2 Tasse Sahne 5 1⁄2 Tassen Allzweckmehl
2 Teelöffel Backpulver 1 Teelöffel Backpulver
Schritt :
1. Eier und Zucker schaumig rühren, bis alles gut vermischt ist.
2. Vanille und Essig hinzufügen und gut vermischen.
3. Mehl, Natron, Backpulver, Salz und Muskat vermischen.
4. Buttermilch und Sahne verrühren.
5. Trockene Zutaten und Buttermilchmischung abwechselnd zur Zuckermischung
geben.
6. In einen Donut-Maker geben.
7. Auf 190 °C (375 °F) absenken.
8. Auf einer Seite braun braten, umdrehen und braten, bis die andere Seite braun
ist.
9. Auf Papiertücher legen.
TIPS
1. Tragen Sie mit einem Pinsel Speiseöl auf die Oberfläche der Form auf, bevor

- 11 -
Sie den Teig in die Maschinenform gießen.
2. Es wird empfohlen, dass der Teig nicht über die Oberfläche der Produktform
hinausragt, um ein Überlaufen zu vermeiden.
3. Es wird empfohlen, vorgemischtes Donutmehl zu verwenden.
4. Es wird empfohlen, beim Mischen einen Mehlmixer zu verwenden.
Achtung: Achten Sie beim Kochen auf den Fallgriff der Form .
Hersteller: Shanghaimuxinmuyeyouxiangongsi
Adresse: Baoshanqu Shuangchenglu 803long 11hao 1602A-1609shi
Shanghai
Importiert nach AUS: SIHAO PTY LTD. 1 ROKEVA STREETEASTWOOD
NSW 2122 Australien
In die USA importiert: Sanven Technology Ltd. Suite 250, 9166 Anaheim
Place, Rancho Cucamonga, CA 91730
REP
UK
Pooledas Group Ltd
Unit 5 Albert Edward House, The
Pavilions Preston, United Kingdom
REP
EC
SHUNSHUN GmbH
Römeräcker 9 Z2021,76351
Linkenheim-Hochstetten, Germany