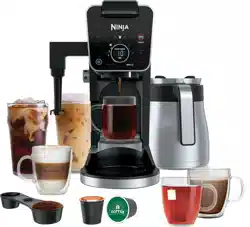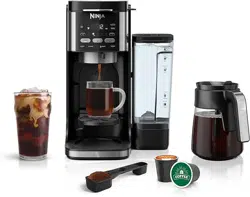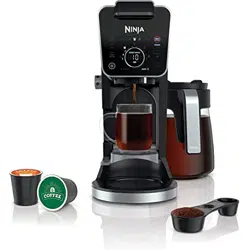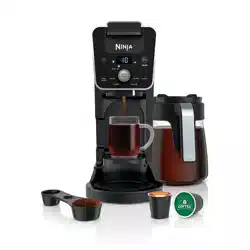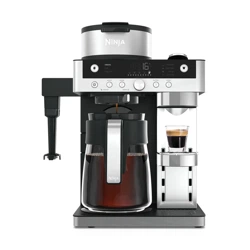
CFN800 Series | Owner’s Guide
General Precautions
• To eliminate a choking hazard for young children, discard all packaging materials immediately upon unpacking.
• This appliance can be used by children aged 8 upwards and by persons with reduced physical, sensory or mental capabilities or who lack
of experience and knowledge if they are supervised or have been given instructions concerning use of the appliance in a safe way and
understand the hazards involved. Children must not play with the appliance. Cleaning and user maintenance must not be carried out by
children unless they are older than 8 and supervised. Keep the appliance and its cord out of the reach of children under 8 years of age.
• Keep the machine and its cord out of reach of children. DO NOT allow the machine to be played with or be used by children. Close
supervision is necessary when used near children.
• To protect against fire, electric shock, and injury to persons, DO NOT immerse cord, plugs, or body of machine in water or other liquid.
• NEVER carry the machine by the power cord or pull it to disconnect from electrical socket; instead grasp the plug and pull to disconnect.
• DO NOT operate any machine with a damaged cord or plug, or after the machine malfunctions or has been dropped or damaged in any
manner. Contact SharkNinja Operating LLC for service.
• For household and countertop use only. DO NOT let the power cord hang over the edge or touch hot surfaces such as a stove.
• NEVER use an electrical socket below a counter.
• To avoid risk of fire, electrical shock, or damage to the machine, DO NOT use machine in machine garage or under a wall cabinet.
• Unplug from outlet when the machine is not in use and before cleaning.
• NEVER leave machine unattended while in use.
• Machine is not intended to be operated by means of an external timer or separate remote-control system.
• DO NOT place on top of any other machine.
• The machine shall not be placed in a cabinet when in use.
• DO NOT use any accessory not recommended by the manufacturer, as this may result in injury or damage to the machine.
• Avoid spillage on the connector.
IMPORTANT SAFETY INSTRUCTIONS
PLEASE READ CAREFULLY BEFORE USE • FOR HOUSEHOLD USE ONLY
WARNING
To reduce the risk of injury, fire, electrical shock or property damage, basic safety precautions must always be followed,
including the following numbered warnings and subsequent instructions. Do not use machine for other than intended use.
Read all instructions before using your Ninja® Prestige DualBrew System.
Indicates the presence of a hazard that can cause personal injury, death or substantial property damage if the warning
included with this symbol is ignored.
Avoid contact with hot surface. Always use hand protection to avoid burns.
For indoor and household use only.
READ AND SAVE THESE INSTRUCTIONS

2 3ninjakitchen.co.uk
General Precautions
1 To eliminate a choking hazard for young
children, discard all packaging materials
immediately upon unpacking.
2 This appliance can be used by persons
with reduced physical, sensory or mental
capabilities or lack of experience and
knowledge if they have been given
supervision or instruction concerning use of
the appliance in a safe way and understand
the hazards involved.
3 To reduce the risk of electric shock,
this appliance has a polarized plug
(one blade is wider than the other).
As a safety feature, this plug will fit into a
polarized outlet only one way. If the plug
does not fit fully into the outlet, reverse the
plug. If it still does not fit, contact a qualified
electrician. DO NOT force into outlet or try
to modify to fit.
4 Keep the appliance and its cord out of reach
of children. DO NOT allow the appliance
to play or be used by children. Close
supervision is necessary when used near
children.
5 To protect against fire, electric shock, and
injury to persons, DO NOT immerse cord,
plugs, or body of machine in water or other
liquid.
6 NEVER carry the appliance by the power
cord or pull it to disconnect from electrical
socket; instead grasp the plug and pull to
disconnect.
7 DO NOT operate any appliance with
a damaged cord or plug, or after the
appliance malfunctions, or has been
dropped or damaged in any manner.
Contact SharkNinja Operating LLC for
service.
8 For household and countertop use only.
DO NOT let the power cord hang over
the edge or touch hot surfaces such as
the stove.
9 NEVER use socket below counter.
10 To avoid risk of fire, electrical shock, or
damage to the brewer, DO NOT use brewer
in an appliance garage or under a wall
cabinet.
11 Unplug from outlet when either the
appliance or display clock is not in use,
and before cleaning.
12 Turn o and allow to cool before putting on
or taking o parts, and before cleaning the
appliance.
13 WARNING: Do not use the appliance if the
surface is cracked.
Operating Notice
1 Power the machine o and unplug from the
wall socket.
2 The use of an accessory not
recommended by the manufacturer may
create an overflow condition and scalding
hazard, or result in fire, electric shock,
or personal injury.
3 ALWAYS use appliance on a clean, dry, level
surface.
4 DO NOT place on or near a hot gas or
electric burner or in a heated oven.
5 DO NOT use this appliance for anything
other than its intended use.
6 DO NOT use outdoors.
7 DO NOT touch hot surfaces. Use handles or
knobs.
8 To avoid contact with steam and hot
surfaces, DO NOT reach across top of
brewer to froth.
9 ALWAYS place a vessel, carafe or cup
beneath the brew basket to receive the
brewed coee.
10 DO NOT open brew chambers during brew
cycle and cleaning cycle.
Scalding may occur.
11 DO NOT remove the vessel, carafe or cup
while the appliance is running without the
Drip Stop in the closed position. Return the
vessel, carafe or cup quickly and open the
Drip Stop to continue the brew.
12 DO NOT fill water reservoir with anything
other than water, as other liquids may
damage your brewer.
13 DO NOT overfill the water reservoir.
Fill water only to the Full line.
14 Keep lid on water reservoir when brewing.
15 DO NOT run the appliance without water.
16 DO NOT brew ground coee without a
#4 paper cone filter or a permanent filter
installed in the brew basket.
17 Exceeding maximum Coee
Measurement Chart capacity may cause
overflow. DO NOT use fine or espresso
ground coee.
18 DO NOT put fingers under coee outlet,
risk of scalding. DO NOT put fingers into
capsule compartment or the capsule shaft.
Danger of injury.
19 Only use capsules/pods intended for this
appliance. If the capsule/pod does not fit,
do not force it into the appliance.
20 Be careful to avoid being scalded by
spraying water or steam or due to improper
use of the appliance.
21 The surface of the heating element remains
hot after use and the outside of the
appliance may retain the heat for several
minutes depending on use.
Carafe
1 The carafe is designed for use with this
appliance only. DO NOT place carafe on
or near a hot gas or electrical burner, or in a
heated oven.
2 DO NOT use a cracked or scratched carafe
or a carafe that has a loose or weakened
handle.
3 DO NOT place carafe in microwave.
4 DO NOT drink directly from the carafe.
Liquid from the carafe may be very hot.
5 DO NOT use the carafe to store food when
not in use.
6 Ensure the carafe is completely empty
before starting a cleaning or brewing cycle.
Starting a cycle with water, coee, or tea in
the carafe will cause an overflow.
7 DO NOT clean carafe with abrasive cleaners,
steel wool pads, or other abrasive materials.
8 DO NOT set a hot carafe on a wet or cold
surface.
9 DO NOT expose carafe to extreme
temperature changes.
Care & Maintenance
1 Turn o the appliance and allow the
appliance to cool before removing any parts
and before cleaning.
2 To prevent microbial growth in the machine,
follow all cleaning instructions in the
Cleaning & Maintenance section of this
Owner’s Guide.
3 Clean the system on a weekly basis.
4 If the product is not operating properly, visit
ninjakitchen.co.uk or contact SharkNinja
Operating LLC for examination, repair, or
adjustment.
5 Cleaning and user maintenance shall not be
made by children.
Cord Statement
1 A short power-supply cord is provided to
reduce the risks resulting from becoming
entangled in or tripping over a longer cord.
2 DO NOT use extension cords with this
product.
ninjakitchen.co.uk
IMPORTANT SAFETY INSTRUCTIONS
PLEASE READ CAREFULLY BEFORE USE • FOR HOUSEHOLD USE ONLY
IMPORTANT SAFETY INSTRUCTIONS
PLEASE READ CAREFULLY BEFORE USE • FOR HOUSEHOLD USE ONLY
WARNING
To reduce the risk of injury, fire, electrical shock or property damage, basic safety precautions must always be followed,
including the following numbered warnings and subsequent instructions. Do not use machine for other than intended use.
This machine is intended exclusively for making coee, as described in this manual.
READ AND SAVE THESE INSTRUCTIONS
READ AND SAVE THESE INSTRUCTIONS
L
mL
5ninjakitchen.co.uk4
PARTS
ninjakitchen.co.uk
USING THE CONTROL PANEL
1 Power Button
2 Filter Coee Button
3 Intelligent Clean Cycle Indicator
4 Capsule Button
5 Drip Stop Indicator
6 Keep Warm Indicator
7 Keep Warm Button
8 Delay Brew Button
9 Dial/Start Brew Button
10 Programmable Digital Clock
and Drink Size Display
11 Hour/Minute Button
12 Intelligent Clean Cycle Button
1 2 43
9
5
8
76
NOTE: Functions vary by model.
10 11 12
A Single-Serve Cup Platform
B Frother Whisk
C Brewer (Power cord not shown)
D Flip Top Lid
E Brew Basket
F Removable Water Reservoir Lid
G 1.8 L Removable Water Reservoir
H Lever
I Control Panel
J Drip Stop
K Capsule Bin
L Intelligent
Warming Plate
M Cup Tray Base
N Permanent Filter*
O #4 Paper Cone Filter*
P Ninja Smart Scoop
Q Adjustable Cup Tray
R Brew-Through Lid
S Ninja® Glass Carafe
T Capsule Clean
Cycle Platform
*not available on all models
D
F
H
I
E
B
P
N
A
G
R
S
C
L
J
M
Q
K
T
0
6
PREPARING FOR USE
7ninjakitchen.co.uk
ninjakitchen.co.uk
NOTE: If you unplug the brewer or in the
event of a power loss, you will need to reset
the clock the next time the brewer is
plugged in.
NOTE: This calibration is permanently saved
and will not be lost if power is lost or brew
is unplugged. Brewer can be recalibrated at
any time if the altitude where it is being used
changes.
NOTE: At any time, you can set the clock by
pressing the HR/MIN button and following
steps 2-3.
SETTING THE CLOCK
1 When the brewer is plugged in, the clock
display and HR/MIN will begin to flash.
2 Use the Dial to select the correct hour.
Then, press the HR/MIN button to toggle to
minutes.
3 Use the dial again to select the correct
minute, and press the HR/MIN button to set
the clock at the displayed time.
HIGH-ALTITUDE CALIBRATION BREW
Required for users in high-altitude areas. Not
running the high-altitude calibration brew in
a high-altitude area will result in excessive
steaming during brewing.
Because water boils at a lower temperature
at higher altitudes, running a calibration cycle
before your first brew allows the brewer to
detect the boiling point of water at your
location. Running a calibration cycle will help
deliver a consistent brew each time.
1 Fill the water reservoir up to, but not
exceeding, the Full line.
2 Insert the brew basket and close the flip-
top lid, then place an empty carafe on the
base.
3 Power on the unit and press the Filter Coee
Button. Ensure the Drip Stop is set to the
open position. Next, press and hold both
Filter Coee Button and HR/MIN until you
hear a confirmation sound.
4 A calibration cycle will begin, and the
display will count down until the altitude
calibration is complete. When complete,
the brewer will beep and display “End” on
the dial. Discard the water in the carafe.
BEFORE THE FIRST BREW
NOTE: We recommend using cool or room
temperature water in the reservoir. DO NOT fill
with hot or boiling water.
1 Clean all accessories before your first brew.
2 Plug the brewer in and turn it on by pressing the power button.
3 Lift the water reservoir o of its base. Remove the reservoir lid. Add water up to, but not exceeding,
the Full line. Return the water reservoir to the brewer. DO NOT fill the water reservoir with anything
other than water, as other liquids may damage your brewer.
PRIMING THE FILTER COFFEE SIDE
1 Ensure the brew basket is fully installed in
the unit and close the flip-top lid. Do not
add coee.
2 Center the carafe with the brew-through lid
installed below the Filter Coee brew outlet.
Press the Filter Coee Button
to select
Classic and turn the dial to select the Full
Carafe size.
3 To start, press START BREW. When the
cycle is complete, discard the water and rinse
the carafe. You are now ready to brew
filter coee.
PRIMING THE CAPSULE SIDE
1 Ensure the lever is closed. Do not insert
a capsule.
2 Center a vessel under the capsule brew outlet.
Press the Capsule Button
to select Lungo.
3 To start, press START BREW. When the cycle
is complete, discard the water and rinse the
vessel. Repeat this process 3 times. You are
now ready to brew capsules.
PRIMING THE MACHINE
DO NOT PROCEED UNTIL COMPLETING THESE STEPS.
BREWING CAPSULES
1 Fill reservoir to at
least the Cup line.
2 Lift lever completely
and insert capsule.
Close the lever.
3 Place the vessel
centered on the cup
tray below the spout.
9ninjakitchen.co.uk8
ninjakitchen.co.uk
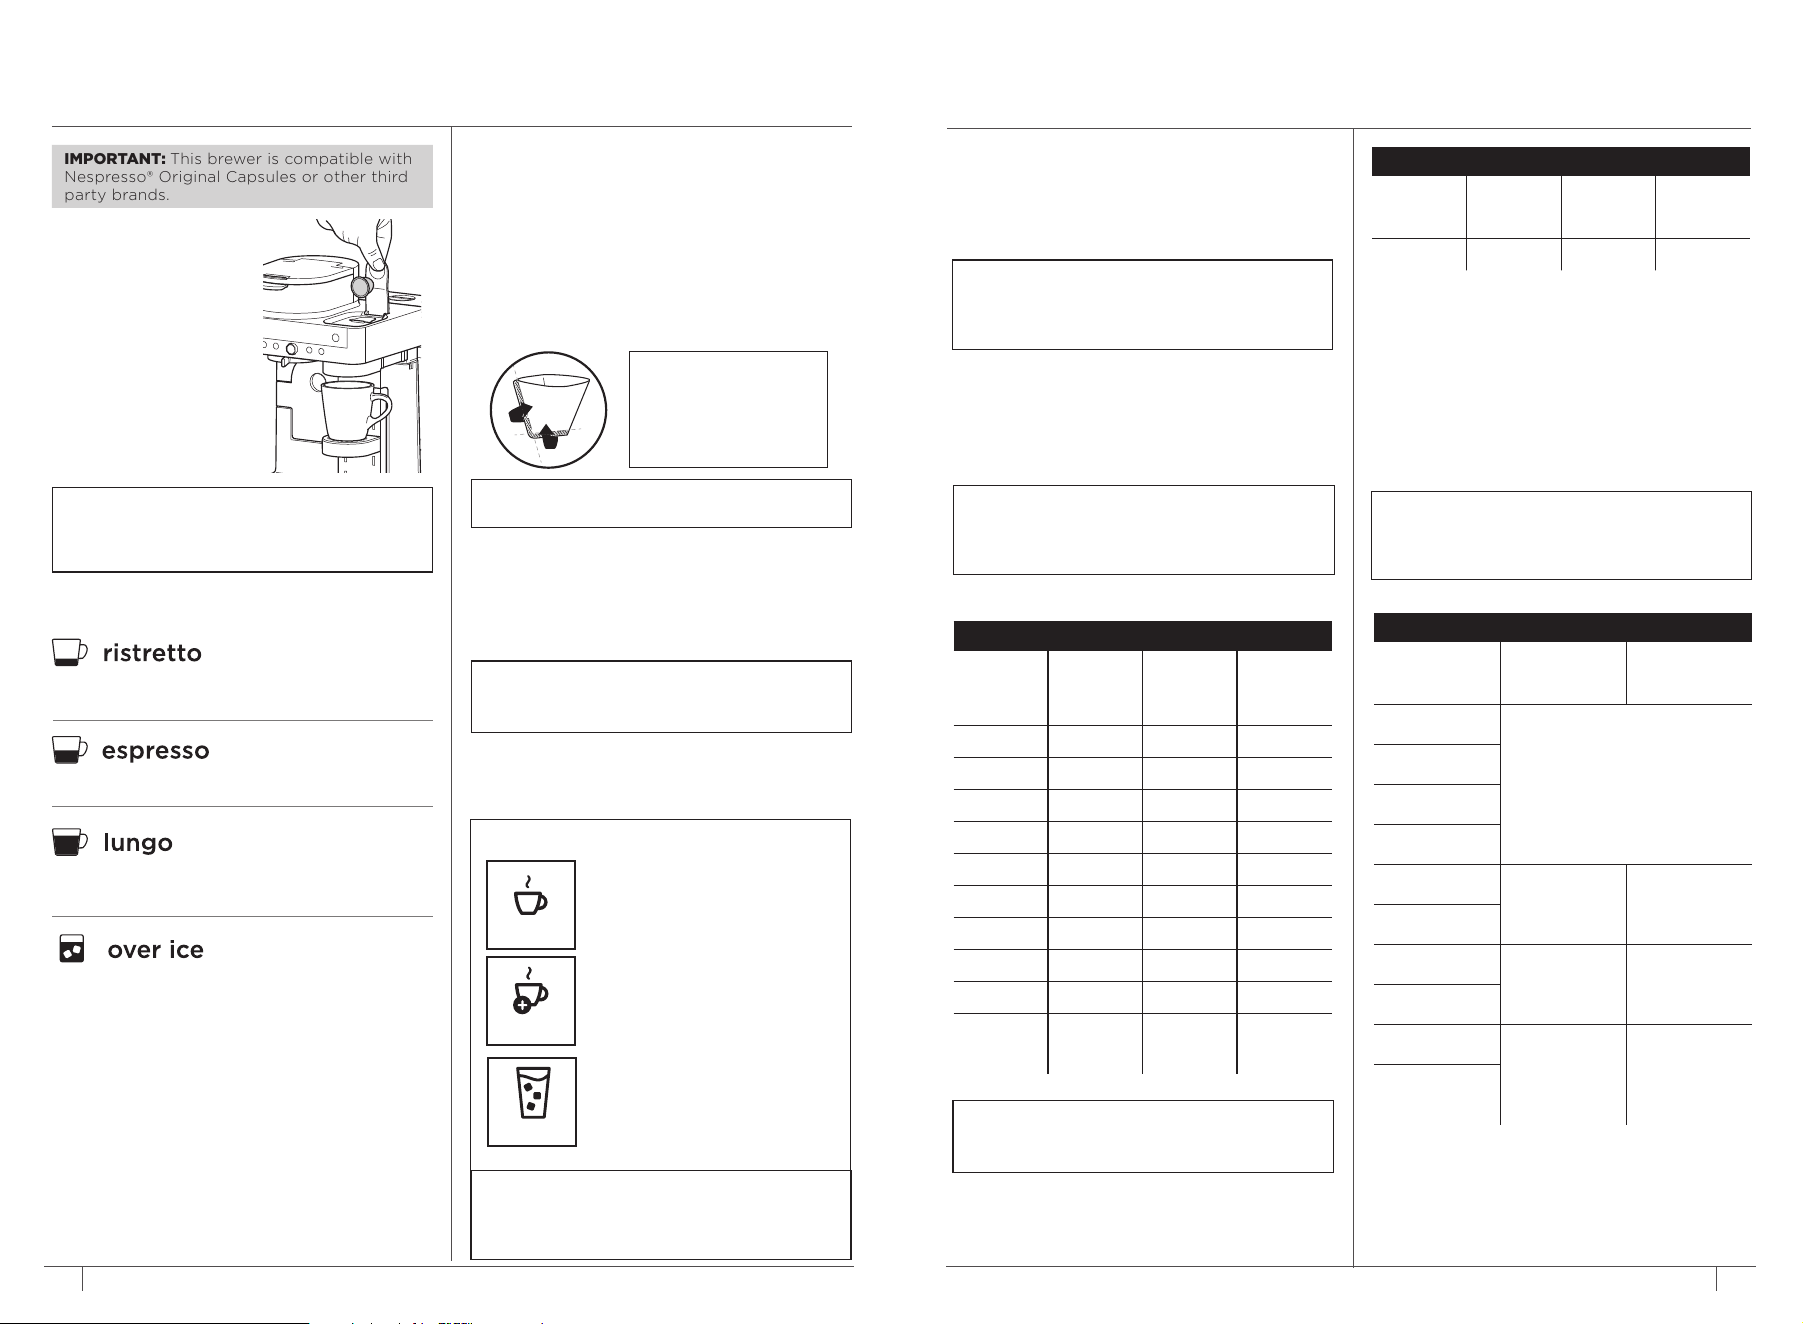
4 Press the Capsule Button and select either
Ristretto, Espresso, Lungo, or Over Ice Brew.
NOTE: Set the Adjustable Cup Tray height and
set the vessel in the center of it to help prevent
splashing. The cup tray may be removed for
brewing into taller and wider vessels.
BREWING FILTER COFFEE
1 To prepare for brewing, open the flip-top
lid and ensure the brew basket is installed.
2 Place a #4 paper cone filter or permanent
filter (included filter varies by model) in the
brew basket. Use only a paper filter OR the
permanent filter--not both.
BREW STYLES
CLASSIC
RICH
Smooth, well-balanced flavour.
Richer than classic, with more
intense flavour that stands up to
milk, cream, or flavouring.
NOTE: Rich Brew will use slightly less water
and yield slightly less brewed coee than
Classic Brew. See Approximate Brew Volume
chart for additional information.
Specially designed to brew
hot over ice for freshly brewed
iced coee that is not watered
down. Always fill your vessel to
the top with ice cubes before
brewing Over Ice.
OVER ICE
5 To start, press START BREW. The brewer
will beep to signal the brew has started.
The clock display may show “pre”
indicating the brewer is preheating and
will automatically start brewing once up
to temperature. The progress bar will
illuminate to indicate the status of the
brew. When finished, the brewer will beep
again, and End will appear on the display.
6 To cancel the brew at any time, press the
START BREW again or press the Power Button.
USING THE NINJA® PRESTIGE
DUALBREW SYSTEM
Smaller, more concentrated serving with a sweeter,
richer flavour.
Concentrated, flavourful serving of coee.
A larger, less concentrated serving with a sharper
flavour.
Specially designed to brew straight over ice and
stand up to milk-based beverages.
40 ml
110 ml
30 ml
25 ml
Always fill your vessel to the top with ice
cubes before brewing Over Ice.
IMPORTANT: This brewer is compatible with
Nespresso® Original Capsules or other third
party brands.
NOTE: Use fewer scoops of decaeinated
coee to prevent overflow. Use a medium-
sized grind if grinding whole beans. Grinding
beans too finely may cause the brew basket
to overflow.
APPROXIMATE BREW VOLUMES
MEASURING YOUR COFFEE GROUNDS
For best results, use the measurements on the
Ninja Smart Scoop™ or in the chart to determine
how much ground coee to use for each brew
size. Always use level scoops when measuring
ground coee. The amount of ground coee
for each size will remain the same for any brew
type you select. For example, if you select Cup
and Classic, you will use the same amount of
coee grounds as if you were to select Cup and
Over Ice.
COFFEE MEASUREMENT CHART
Serving Size
Ninja Smart
Scoop
Tablespoons
XS Cup
2–3
small scoops
2–3
tablespoons
Sm Cup
Cup
XL Cup
Travel
3–5
small scoops
3–5
tablespoons
XL Travel
1
/4 Carafe
3–5
big scoops
6–10
tablespoons
1
/2 Carafe
3
/4 Carafe
4–7
big scoops
8–14
tablespoonsFull
Carafe
CAPSULES
Ristretto Espresso Lungo Over Ice
25 mL 40 mL 110 mL 30 mL
FILTER COFFEE
Size Classic Rich
Over Ice
(filled
with ice)
XS Cup 190 ml 175 ml 190 ml
Sm Cup 235 ml 205 ml 235 ml
Cup 295 ml 235 ml 295 ml
XL Cup 355 ml 295 ml 355 ml
Travel 455 ml 355 ml 455 ml
XL Travel 560 ml 475 ml 560 ml
1
/4 Carafe 830 ml 770 ml 830 ml
1
/2 Carafe 1.1 L 1 L 1.1L
3
/4 Carafe 1.4 L 1.2 L 1.4 L
Full
Carafe
1.6 L 1.4 L 1.6 L
NOTE: There may be some water left in the
reservoir after your brew. This is normal to
keep the brewer from running out of water.
3 Use the Ninja Smart Scoop and follow the
measurements on the scoop or on the Coee
Measurement Chart on page 9 to fill the filter.
Close the flip-top lid.
4 Place the empty vessel under the brew
basket.
NOTE: If making a single cup, lower the
Single-Serve Cup Platform and set your vessel
in the center of it to help prevent splashing.
5 Press the Filter Coee Button and select
either Classic, Rich, or Over Ice Brew. Turn the
dial to select the desired brew size.
NOTE:
To purchase a permanent filter, visit
ninjakitchen.co.uk
NOTE: Fold the paper
filter along the seams,
open the top fully, and
firmly press it into the
brew basket, making
sure it is fully seated.
BREW VOLUMES AND MEASUREMENTS
Each size and brew style produces a dierent
amount of coee to optimize strength and flavour.
NOTE: The coee grounds will absorb some
of the water that is brewed; this will cause
slight variability in brew volumes than what
is stated below.
6 To start, press START BREW. The brewer
will beep to signal the brew has started. The
progress bar around the dial will illuminate to
indicate the status of the brew. When finished,
the brewer will beep again, and End will
appear on the display.
7 To cancel the brew at any time, press
START BREW again or press the Power Button.
NOTE: The brew cycle will begin, then pause
for a short period before resuming. This
process is used to evenly saturate the coee
grounds. This applies to all brew styles.
10 11ninjakitchen.co.uk
ninjakitchen.co.uk
IMPORTANT: The light on the base
of the brewer will illuminate only when
the warming plate is hot and will remain
illuminated until the plate has cooled down.
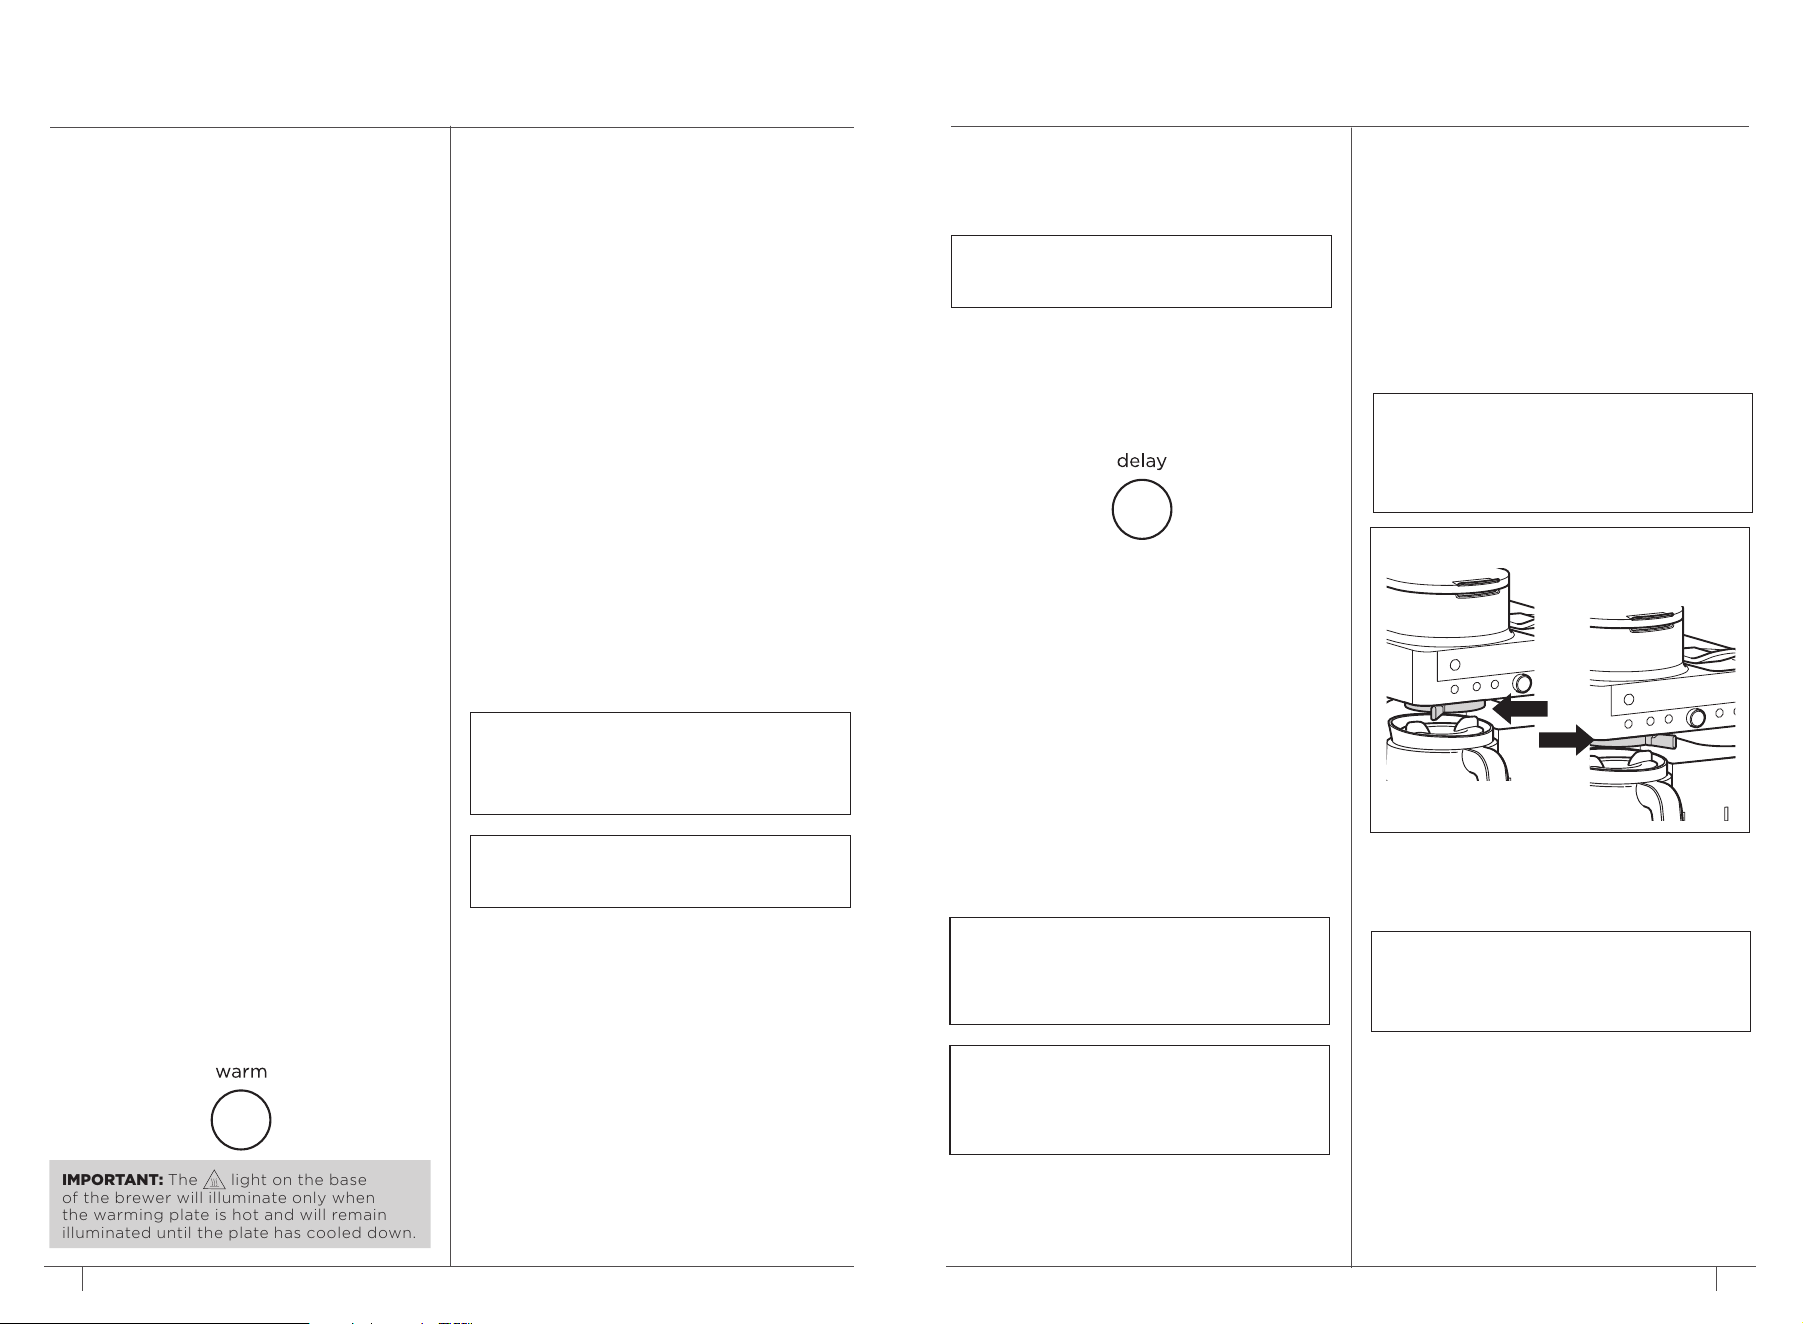
TIME & TEMPERATURE ADJUSTMENT
You can adjust how long the Intelligent Warming
Plate remains on (up to 40 minutes ) and/or set
the temperature to Low, Medium, or High.
By default, the Intelligent Warming Plate is set to
remain on for 4 0 minutes and is set to medium.
To change the time/temperature settings of the
warming plate, follow these instructions:
1 Press and hold WARM until the clock begins to
flash the current warming time.
2 Turn the dial to increase the time in 5-minute
increments up to 40 minutes or decrease the
time to 0 hours. Press WARM or START BREW
to set the new time.
3. Next, the clock will display the current
warming plate temperature. To keep the
same temperature, press WARM or START
BREW. To change the temperature, turn the
dial and press WARM or START BREW for
the temperature to lock in. The unit will beep
signifying that the time and temperature has
been set.
INTELLIGENT WARMING PLATE
The Intelligent Warming Plate will automatically
turn on during Classic or Rich brews when any
carafe size is selected. The Intelligent Warming
Plate is set to a specific temperature setpoint to
avoid burning the coee over time. To turn the
warming plate on at any time, press the Filter
Coe Button to select either Classic or Rich, turn
the dial to one of the carafe sizes, and press the
WARM button.
CUSTOMIZE YOUR BREW:
PICKING THE RIGHT BEANS
Light Roast: High acidity, floral, and delicate.
Dark Roast: Low acidity, sweet, and nutty with
notes of chocolate.
ADJUSTING STRENGTH
Too Watery/Weak: If classic was selected, try
the rich setting. If that is still too weak, add one
more scoop. Adding a scoop with make your drink
stronger, but will have a slightly lower volume.
Too Strong: If rich was selected, try classic. If that is
still too strong, try using one less scoop. Removing
a scoop will make your drink weaker, but will have a
slightly higher volume.
For best results, do not go more than 2 scoops
above or below the recommended amount.
ADJUSTING BREW TEMPERATURE:
CHOOSING THE RIGHT CUP
Ensure the cup you are using is appropriate for the
size of your drink. For a hotter drink, use a cup that
is a similar size to your drink. The thickness of the
material your cup is made of will also aect the
temperature of your drink. For a hotter drink, use a
cup made of thinner material.
PREHEATING BEFORE YOU BREW
Running hot water through a filter coee or
capsules brew will help preheat the machine.
Be sure to run a hot water brew with whatever
function you would like to use.
To further increase the temperature of your drink,
brew the hot water into the cup you would like to
brew your drink in. The temperature of your cup will
impact the temperature of your drink. Discard the
water, then dry the cup. Then, proceed to brewing.
NOTE: If you set the warming time to
0 hours, Keep Warm will not automatically
activate during or after a carafe brew cycle,
but you can still turn it on manually by
pressing the WARM button.
NOTE: The time adjustment setting will be
saved and will not reset when the brewer is
unplugged or loses power.
NOTE: The brewer must remain on for
the Delay Brew function to work.
DO NOT power o or unplug after setting
Delay Brew. If the brewer is turned o or
unplugged, delay brew will need to be reset.
NOTE: When delay brew is set, a filter coee
brew cannot be run until the delay brew has
finished or has been canceled. A capsule
brew may be run at any time up until
5 minutes before the preset brew time.
NOTE: The clock will remain on even if the
brewer is turned o. Ensure the brewer is
powered on to set Delay Brew.
SETTING THE DELAY BREW
(Grounds Mode Only)
1 Plug the brewer in and turn it on by pressing
the Power button.
2 After filling the water reservoir and adding
ground coee to the filter, place the
appropriate-size vessel under the brew basket.
3 Press the Filter Coee Button to enter grounds
mode. Press DELAY. The clock will begin to
flash “12:00” or the previous time set.
4 While the clock is flashing, turn the dial to
adjust the hour. Press START BREW to lock
in the hour. Now, turn the dial to adjust the
minute. Press START BREW to lock in your
time.
5 Next, turn the dial to select the size that you
would like to brew.
6 Press the Grounds button to choose your brew
style.
7 Once the time, brew size, and brew style have
been set, press the dial to activate. When
activated, the brewer will beep and DELAY and
your selected options will remain illuminated.
To view your set delay brew time, press and
hold the DELAY button. To cancel, press the
DELAY button or power o the unit.
USING THE NINJA® PRESTIGE
DUALBREW SYSTEM – CONT.
USING THE DRIP STOP
The drip stop is used to close o the brew basket
to prevent any coee from dispensing. You will
need to manually open and close the drip stop
by moving the lever to your desired position. It
can be closed and reopened at any point before,
during, or after a brew.
If the Drip Stop is closed mid-brew the brewer
will pause the brew, and after 30 seconds it will
give you a friendly audible reminder to reopen
the Drip Stop. After 5 minutes, the brew will be
canceled.
NOTE: If the Drip Stop is closed before you
begin a brew, the brewer will notify you with
3 beeps and the Drip Stop indicator will
illuminate. Move the Drip Stop to the open
position and press START BREW to begin
your brew.
NOTE: Remember to open the Drip Stop
when you are ready to brew again. If you
forget, your brewer will give you a friendly
audible reminder.
CLOSING THE DRIP STOP AFTER A BREW
When the brew cycle is complete, set the Drip
Stop to the closed position to stop dripping from
the brew basket.
OPEN
CLOSED
12
ninjakitchen.co.uk
13ninjakitchen.co.uk
CLEANING & MAINTENANCE
CLEANING AFTER A BREW
Dishwasher Safe Parts:
Brew basket, glass carafe and brew-through lid,
water reservoir and lid, frother whisk, Ninja smart
scoop, capsule bin, adjustable cup tray, cup tray
base, and permanent filter are dishwasher safe.
CLEANING THE FROTHER
Clean the frother whisk after each use. Hand-
wash thoroughly or place on top rack of
dishwasher.
CLEANING THE WATER RESERVOIR
NOTE: For best results, we recommend rinsing
the reservoir after brewing and refilling with
fresh water prior to the next brew.
Empty the reservoir and hand-wash or place in
dishwasher. For a better clean, we recommend
placing it in the bottom rack of the dishwasher
standing upright with the opening facing
downward. We recommend doing this weekly.
CLEANING THE CARAFE
We recommend cleaning your carafe after each use
with warm, soapy water.
To clean the carafe more thoroughly, we
recommend using a soft foam brush.
DO NOT use a wire brush.
CLEANING THE CAPSULE BIN
Remove the cup tray, cup tray base, and capsule
bin from under the capsule outlet. Discard the
used capsules from the capsule bin. Hand-wash
the cup tray, cup tray base, and capsule bin or
place on top rack of dishwasher.
CLEANING THE BREW BASKET
If brewing grounds, allow the brewer to cool,
then remove the brew basket by pinching the
handle and lifting straight up. If using a paper
filter, discard the filter by dumping the brew
basket upside down into a waste-bin.
CLEANING & DESCALING YOUR BREWING
SYSTEM
Your Ninja Espresso & Coee Barista System
oers two sides to choose from: Filter Coee and
Capsules. Either side that you use will eventually
need to be cleaned with a clean cycle. The clean
cycle is used for descaling the brewer when
calcium scale buildup is aecting the performance
of the brewer and/or the flavour of your coee.
When cleaning is needed in Filter Coee
mode, the Intelligent Clean Cycle Indicator will
automatically illuminate orange under the Filter
Coee Button. If the indicator is ignored, your
brewer may stop mid-brew and display “CLn,”
indicating it needs immediate cleaning.
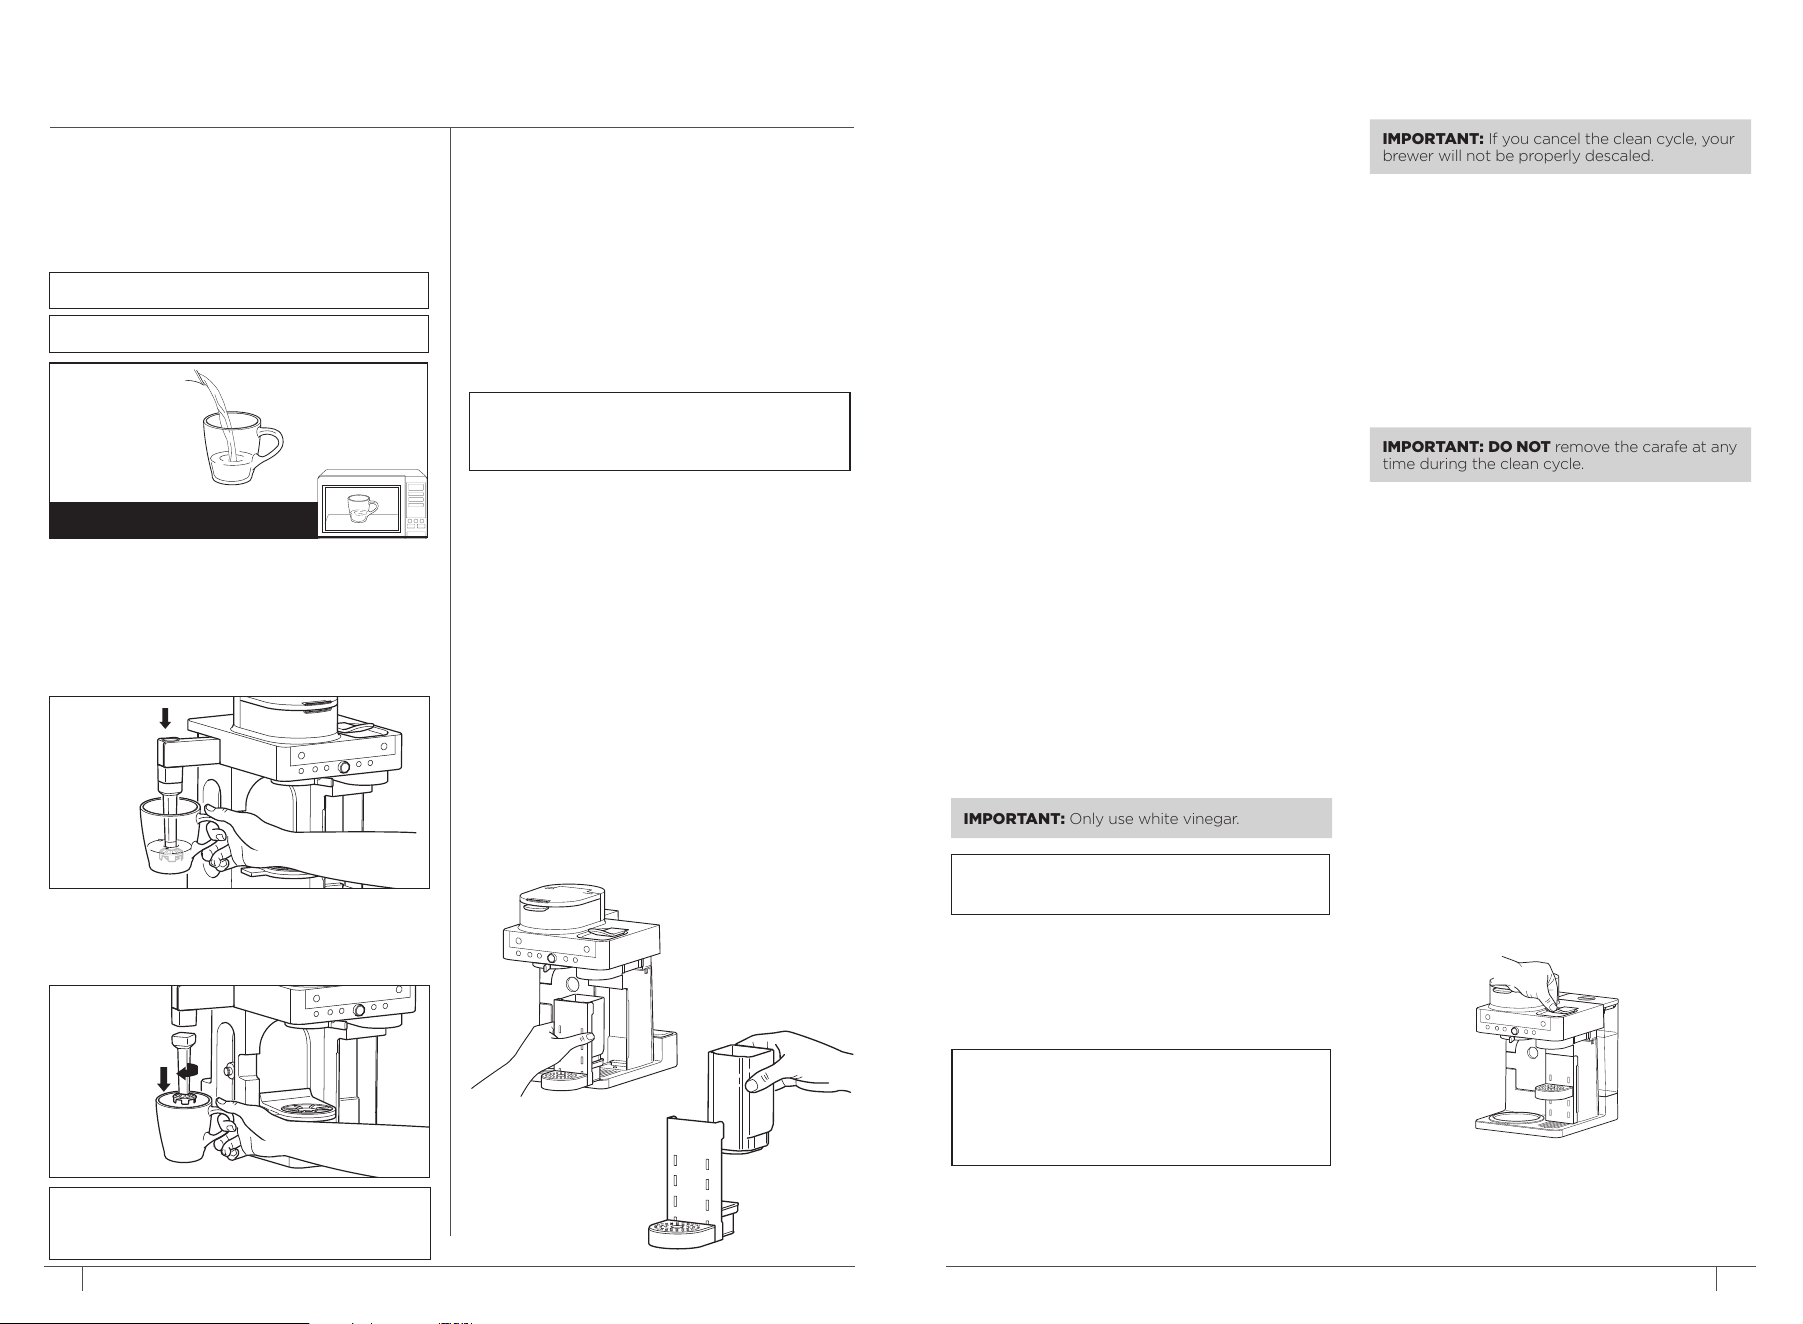
Descaling Filter Coee Side:
1 Place the empty carafe beneath the brew
basket.
2 Use a descaling solution specifically formulated
for coeemaker cleaning and follow the
directions on the package. Fill the water
reservoir up to, but not exceeding, the Full line.
OR
Fill the water reservoir to the Travel Mug line
(475 ml) with white vinegar, then fill the rest of
the reservoir with water up to, but not
exceeding, the Full line.
3 Once the water reservoir is filled with the
cleaning solution and water mixture, press
the Filter Coee Button then press the CLEAN
button.
4 Press START BREW to begin the cleaning cycle.
IMPORTANT: Only use white vinegar.
NOTE: Running a water-only clean cycle will
not descale the brewer properly.
NOTE: To cancel the clean cycle, press the
Power button or CLEAN button once. The
brewer will beep and stop brewing through
the cleaning mixture. Continue to follow the
instructions starting at Step 6.
5 The clock will count down the remaining
clean cycle time, which takes approximately
75 minutes to complete. The brewer will
deliver a small amount of cleaning solution to
distribute it through the system. It will then
pause, deliver additional cleaning solution,
and repeat this process for 75 minutes. The
extended pauses allow for maximum cleaning
and descaling.
6 Upon completion, the brewer will beep, the
clock will display End, and the Intelligent Clean
Cycle Indicator will turn o.
7 Empty the contents of the carafe and place
it under the brew basket. Clean the water
reservoir with warm, soapy water to remove
any cleaning solution that could aect the
flavour of your coee.
8 Fill the reservoir with fresh water up to, but not
exceeding the Full line.
9 Flush the system by running a water-only Full
Carafe Classic brew cycle. After the cycle is
complete, discard the water and thoroughly
clean the carafe and brew basket.
Descaling Capsules Side:
If typical capsules you brew are taking
significantly longer time to brew, run a capsule
clean cycle. If the clock is displaying “Add
Wtr”, ensure the water tank is filled and fully
seated, then try again. If “Add Wtr” persists,
try running a water-only brew with the lever
closed. If “Add Wtr” still persists, run a capsule
clean cycle.
1 Ensure the lever is closed and no capsule is
inserted.
IMPORTANT: If you cancel the clean cycle, your
brewer will not be properly descaled.
IMPORTANT: DO NOT remove the carafe at any
time during the clean cycle.
USING THE NINJA® PRESTIGE
DUALBREW SYSTEM – CONT.
WARNING: To avoid contact with steam and hot
surfaces. DO NOT reach across top of brewer
to froth.
INTEGRATED FROTHER
The Integrated Frother does not heat milk.
1 Add milk to your cup until it is about
1
/3 full.
• For cold froth, continue to Step 2.
• For hot froth, microwave for
45–60 seconds.
NOTE: Frother does not heat liquid.
NOTE: For additional recipes, see Quick
Start Guide
4 Remove the frother whisk by twisting it to the
left. Keep your cup below the whisk while you
carry it to your sink or dishwasher for easy
cleaning.
FOR HOT FROTH
2 Swing the arm of the frother toward the front
of the brewer. Install the frother whisk by
twisting it to the right.
3 Hold the cup under the frother and submerge
the whisk just above the bottom of the cup.
Press and hold the button on top of the
frother and froth for 30–45 seconds.
14
ninjakitchen.co.uk
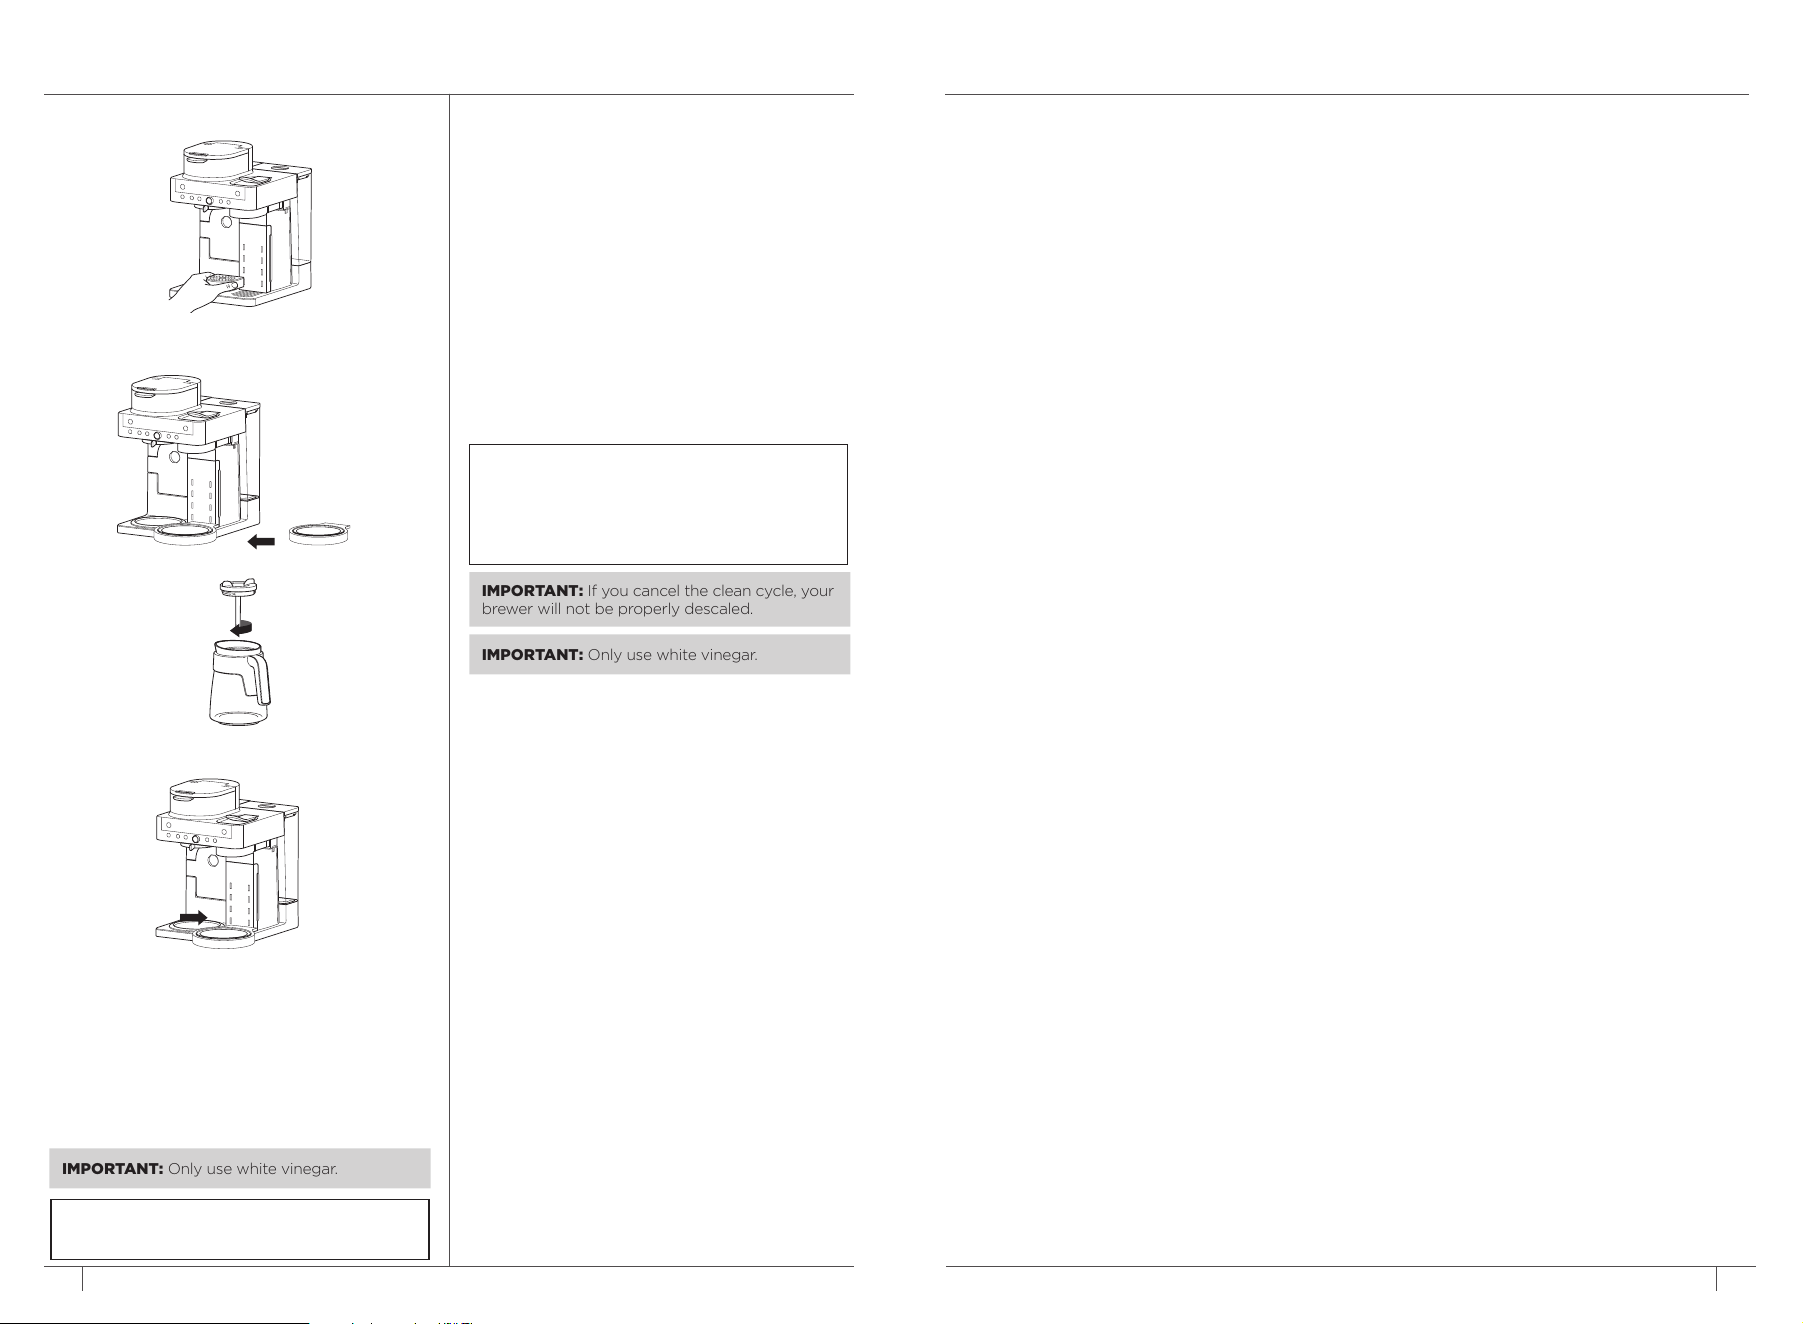
CLEANING & MAINTENANCE – CONT.
2 Remove the Adjustable Cup Tray.
3 Place the Capsule Clean Cycle Platform on the
front right base of the brewer.
3 Remove the brew-through lid from the carafe.
4 Place the carafe on the Capsule Clean
Cycle Platform.
5 Use a descaling solution specifically formulated
for coeemaker cleaning and follow the
directions on the package. Fill the water
reservoir up to, but not exceeding, the Full line.
OR
Fill the water reservoir to the Travel Mug line
(475 ml) with white vinegar, then fill the rest of
the reservoir with water up to, but not
exceeding, the Full line.
6 Once the water reservoir is filled with the
cleaning solution and water mixture, press the
Capsule Button then press the CLEAN button.
7 Press START BREW to begin the cleaning cycle.
8 The clock will count down the remaining
clean cycle time, which takes up to 2 hours
to complete. The brewer will deliver a small
amount of cleaning solution to distribute it
through the system. It will then pause, deliver
additional cleaning solution, and repeat this
process for up to 2 hours. The extended pauses
allow for maximum cleaning and descaling.
9 Upon completion, the brewer will beep, the
clock will display End, and the Intelligent Clean
Cycle Indicator will turn o.
10 Empty the contents of the carafe and place
it back under the spout. Clean the water
reservoir with warm, soapy water to remove
any cleaning solution that could aect the
flavour of your coee.
11 Fill the reservoir with fresh water up to at least
the Cup line.
12 Flush the system by running three water-only
Lungo brews. After the cycle is complete,
discard the water and thoroughly clean the
carafe.
IMPORTANT: Only use white vinegar.
NOTE: To cancel the clean cycle, press the
Power button or CLEAN button once. The
brewer will beep and stop brewing through
the cleaning mixture. Continue to follow the
instructions starting at Step 6.
IMPORTANT: If you cancel the clean cycle, your
brewer will not be properly descaled.
NOTE: Running a water-only clean cycle will
not descale the brewer properly.
15ninjakitchen.co.uk
Can’t select Keep Warm.
• Keep Warm can be turned on manually by pressing WARM while in Filter Coee mode with Classic or
Rich, and any Carafe size selected. If brewing a smaller size into the carafe, after the brew has finished
select Classic or Rich and turn the dial to any carafe size, then press WARM.
There’s sediment in my coee.
• Sediment in coee can contribute to a more full-bodied and satisfying mouthfeel. The presence of
coee grounds can enhance the perceived richness and boldness of the brew.
• To reduce the amount of sediment in the brewed coee, use a slightly coarser grind or use a paper filter.
NOTE: DO NOT use a paper filter in conjunction with a permanent filter, as water and/or coee can
back up and clog the filter basket.
Over Ice Brew is not cold.
• Ensure your cup, travel mug, or carafe is filled all the way to the top with ice cubes before brewing.
Brewer will brew at elevated temperatures to lock in the best flavour, then the ice will cool the brewed
coee to the perfect temperature. Lower volumes of coee will be brewed to account for some ice melt.
Coee is too weak.
• For stronger coee, use the Rich brew setting. For an even bolder flavour, you can add more coee
grounds to the filter.
Brew cycle is too slow.
• The brew time will vary based on size and brew style. Full carafe sizes and Rich brews will take longer
to brew than single-serve and classic brews. The progress bar on the control panel will indicate brew
status.
Cup or travel mug overflowed.
• Refer to the Approximate Brew Volumes chart on page 9.
Brew basket overflowed.
• The bottom of the brew basket may be clogged. This can happen with finely ground coee or too
many coee grounds in the filter. Medium-grind coee is recommended.
• Using both the permanent filter and a paper filter can cause grounds to clog and water to back up in
the brew basket. Use only the permanent filter or a paper filter.
• Decaf coee grounds absorb water dierently, so use fewer scoops when using decaf.
There is water left in the reservoir.
• When the reservoir is filled to a specific size and then that size is brewed, there will be some water left
in the reservoir. This is normal to ensure the reservoir does not run dry for the best performance of the
pump and brew system.
Brewer is leaking.
• After removing the water reservoir, there may be a small amount of water in the reservoir valve. This
can be easily removed with a dry cloth.
• If the leak is coming from above the brew basket, refer to “Brew basket overflowed.” above.
• If the leaking is coming from below the brew basket, close the drip stop. Refer to page 11
for more information.
• If the leaking is coming from the capsule side, ensure the adjustable cup tray is in place to catch any
excess drips.
• If the leak is coming from the bottom of the brewer, call Customer Service at
0800 862 0453.
Intelligent Clean Cycle Indicator is illuminating orange.
• Run a clean cycle. If you have recently completed a clean cycle, you may need to run another cycle to
remove additional mineral buildup that occurs naturally over time and is common in hard-water areas.
Make sure you are using vinegar or a descaling solution and follow the cleaning instructions on pages
13 and 14.
Coee is not hot enough.
• If brewing into the carafe, ensure Keep Warm is on. The Intelligent Warming Plate temperature can be
adjusted between Low, Medium, and High (see Adjusting Brew Temperature on Page 10.)
• Adding cold milk or creamer to coee will eect the temperature.
• We recommend prewarming the cup with hot water before brewing.
Capsule output volume is low.
• This may occur when using third-party capsules. Try switching to Nespresso® Original capsules.
Capsule doesn’t fit / Capsule is getting crushed
• Ensure the capsule is being inserted in the correct orientation as shown on the unit
• The Capsule Bin may be full. See page 13 for how to remove Capsule Bin.
Brewer is loud
• This brewer uses a high pressure pump in order to evenly saturate and extract flavour of the capsules.
TROUBLESHOOTING GUIDE
2 Remove the Adjustable Cup Tray.
3 Place the Capsule Clean Cycle Platform on the
front right base of the brewer.
3 Remove the brew-through lid from the carafe.
4 Place the carafe on the Capsule Clean
Cycle Platform.
5 Use a descaling solution specifically formulated
for coeemaker cleaning and follow the
directions on the package. Fill the water
reservoir up to, but not exceeding, the Full line.
OR
Fill the water reservoir to the Travel Mug line
(475 ml) with white vinegar, then fill the rest of
the reservoir with water up to, but not
exceeding, the Full line.
IMPORTANT: Only use white vinegar.

16
ninjakitchen.co.uk
Lever not closing completely
• Empty the Capsule Bin. Ensure all used capsules are removed and no capsule is blocked. See page 13.
Coee is splattering.
• Some splatter is normal. Use the cup tray when possible to reduce the distance between the cup and
the coee outlet.
Water reservoir is unstable.
• Ensure the water reservoir is installed securely on the hook.
CLOCK DISPLAY MESSAGES:
End
• The brew cycle is complete.
PrE
• While brewing capsules, once START BREW has been pressed the clock display may show “PrE”.
This indicates the brewer is preheating and the brew will automatically start once the brewer is up to
temperature.
Add Wtr
• Ensure water is in the reservoir. If the reservoir is empty, add fresh water to the reservoir and then
press START BREW to resume the brew.
• If the reservoir is filled with water, remove and reseat the reservoir and then press START BREW to
resume the brew.
• If brewing capsules, try removing the capsule and brewing again. If the issue persists, run a clean
cycle on the capsule side following the instructions on page 14 and 15.
• If brewing grounds and the issue persists, contact Customer Service at 0800 862 0453.
CLn
• The system has detected that a clean cycle needs be run immediately to remove calcium scale
buildup in the heater. See ‘Cleaning & Descaling Your Brewing System’ for instructions.
StOP
• A brew cycle was cancelled.
ERROR MESSAGES:
Er
• If the clock displays “Er” and then a number (ex. “Er 03”), contact Customer Service at 0800 862 0453.
To order additional parts and accessories, visit ninjakitchen.co.uk/ninja-parts-accessories/
or contact Customer Service at 0800 862 0453.
REPLACEMENT PARTS
PRODUCT REGISTRATION
Please visit registeryourninja.com or call 0800 862 0453 to register your new Ninja® product within
twenty-eight (28) days of purchase. You will be asked to provide the store name, date of purchase,
and model number along with your name and address.
The registration will enable us to contact you in the unlikely event of a product safety notification.
By registering, you acknowledge you have read and understood the instructions for use and warnings
set forth in the accompanying instructions.
17ninjakitchen.co.uk
TROUBLESHOOTING GUIDE – CONT. MANUFACTURER’S GUARANTEE
The Ninja® 2 Year Guarantee
When a consumer buys a product in the UK, they get the benefit of legal rights relating to the quality
of the product (your “legal rights”). You can enforce your legal rights against your retailer, including
Ninja® if you bought your Ninja® kitchen appliance from ninjakitchen.co.uk. However, at Ninja® we are so
confident about the quality of our products that we give the owner an additional, free parts and labour
manufacturer’s guarantee of up to 2 years.
The guarantee it comes with is an important consideration - and reflects how much confidence the
manufacturer has in its product and manufacturing quality.
The manufacturer’s guarantee does not aect your legal rights.
How long are new Ninja® machines guaranteed for?
Our manufacturer’s guarantee lasts for one year from the date of purchase as standard, or for two years if
you register your purchase with us within 28 days.
How do I register my Ninja® guarantee?
If you have purchased your Ninja® kitchen appliance directly from ninjakitchen.co.uk your guarantee is
registered automatically. If you bought it from anywhere else in the UK, you can register your guarantee
online within 28 days of purchase.
• To register online, please visit www.ninjakitchen.co.uk/register-guarantee or scan the QR code on the
back cover.
• Keep a note of the date you purchased the machine.
IMPORTANT:
• Keep your receipt if you bought your Ninja® kitchen appliance from anywhere except ninjakitchen.co.uk.
You will need it to claim under your guarantee.
• The free Ninja® guarantee only applies in the UK.
What are the benefits of registering my free Ninja® guarantee?
When you register your guarantee, you will get an extra year of cover. We’ll also have your details to hand
if we ever need to get in touch. If you further agree to receive communications from us, you can also
receive tips and advice on how to get the best out of your Ninja® kitchen appliance and hear the latest
news about new Ninja® technology and launches.
What is covered by the free Ninja® guarantee?
Repair or replacement (at Ninja®’s discretion) of your Ninja® machine, including all parts and labour.
What is not covered by the free Ninja® guarantee?
• Normal wear and tear.
• Accidental damage or faults caused by negligent use or care, misuse, neglect, careless operation or
handling of the Ninja® kitchen appliance which is not in accordance with the Ninja® Operating Manual
supplied with your machine.
• Damage caused by use of the Ninja® kitchen appliance for anything other than normal domestic
household purposes.
• Damage caused by use of parts not assembled or installed in accordance with the operating
instructions.
• Damage caused by use of parts and accessories which are not Ninja® Genuine Components
• Faulty installation (except where installed by Ninja®).
• Repairs or alterations carried out by parties other than Ninja® or its agents.
How can I claim under the free Ninja® guarantee?
Contact our customer service helpline on 0800 862 0453. For service hours please visit our website
under ‘Contact Us’. It’s free to call, and you’ll be put straight through to a Ninja® representative. You’ll
also find online support at https://support.ninjakitchen.co.uk/. The Ninja® representative will go
through some troubleshooting with you, and if we conclude that the item has failed, we will send you a
replacement part or a returns label to send the defective item back to us free of charge. When you have
delivered the defective product to us, we will send you a replacement.
Please remember that the item will need to be boxed when you return it to us. It can be any suitable
box, it does not have to be the original packaging.
Where can I buy genuine Ninja® spares and accessories?
Ninja® spares and accessories are developed by the same engineers who developed your Ninja® kitchen
appliance. You’ll find a full range of Ninja® spares, replacement parts and accessories for all Ninja®
machines at www.ninjakitchen.co.uk. Please remember that damage caused by the use of non-Ninja®
spares may not be covered under your guarantee.

18
ninjakitchen.co.uk
19ninjakitchen.co.uk
NOTESNOTES

THANK YOU
for purchasing the Ninja® Prestige DualBrew System
TECHNICAL SPECIFICATIONS
Voltage: 220-240V~ 50-60Hz
Power: 1550W
Water Reservoir
Capacity: 1.8L
The standby power consumption is 0.6W.
The appliance reaches Standby mode
automatically after 15 minutes of inactivity.
RECORD THIS INFORMATION
Model Number: �������������������������
Serial Number: ��������������������������
Date of Purchase: ������������������������
(Keep receipt)
Store of Purchase: �����������������������
REGISTER YOUR PURCHASE
ninjakitchen.co.uk/registerguarantee
0800 862 0453
Scan QR code using mobile device
PLEASE READ CAREFULLY AND KEEP FOR FUTURE REFERENCE.
These instructions are designed to help you get a complete understanding of your new
Ninja® Prestige DualBrew System. If you have any questions, please call our Customer Service line
at 0800 862 0453.
TIP: You can find the model and serial numbers on the
QR code label located on the back of the machine by
the power cord.
Illustrations may dier from actual product. We are constantly striving to improve our products, therefore
the specifications contained herein are subject to change without notice.
NINJA is a registered trademark in the United Kingdom of SharkNinja Operating LLC.
© 2025 SharkNinja Operating LLC.
CFN802UK�IB�MP�Mv6
@ninjakitchenuk
Importer: SharkNinja Europe Ltd.
1st/2nd Floor Building 3150,
Thorpe Park, Century Way,
Leeds, England, LS15 8ZB,
NIP: PL5263721774
ninjakitchen.co.uk
Exporter: SharkNinja (Hong Kong)
Company Limited, Unit 606,
6TH Floor Alliance Building,
133 Connaught Road Central,
Hong Kong
SharkNinja Germany GmbH,
Rotfeder-Ring 9,
60327 Frankfurt am Main,
Germany
ninjakitchen.eu