INSTALLATION
INSTRUCTIONS
REV.072025.TGC32CT/TGC36CT
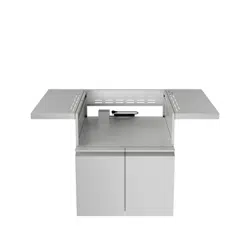
Gas Grill Cart
TG32CT
TG36CT

USE AND CARE MANUAL
TG32CT
TG36CT
GAS GRILL CART

3
TABLE OF CONTENTS
IMPORTANT: PLEASE READ AND FOLLOW …………….....................…..……..................…………04
ATTACHING THE GRILL TO THE CART..........................................................................................05
INSTALLING THE SIDE TABLES................................................................................................... 09
DIMENSIONS ………………………………………………………………………….......................................10
WARRANTY ……………………………………………..............................………………...................……………….14

4
IMPORTANT: PLEASE READ AND FOLLOW
• Before beginning, please read these instructions completely and carefully.
• Do not remove permanently affixed labels, warnings, or plates from product.
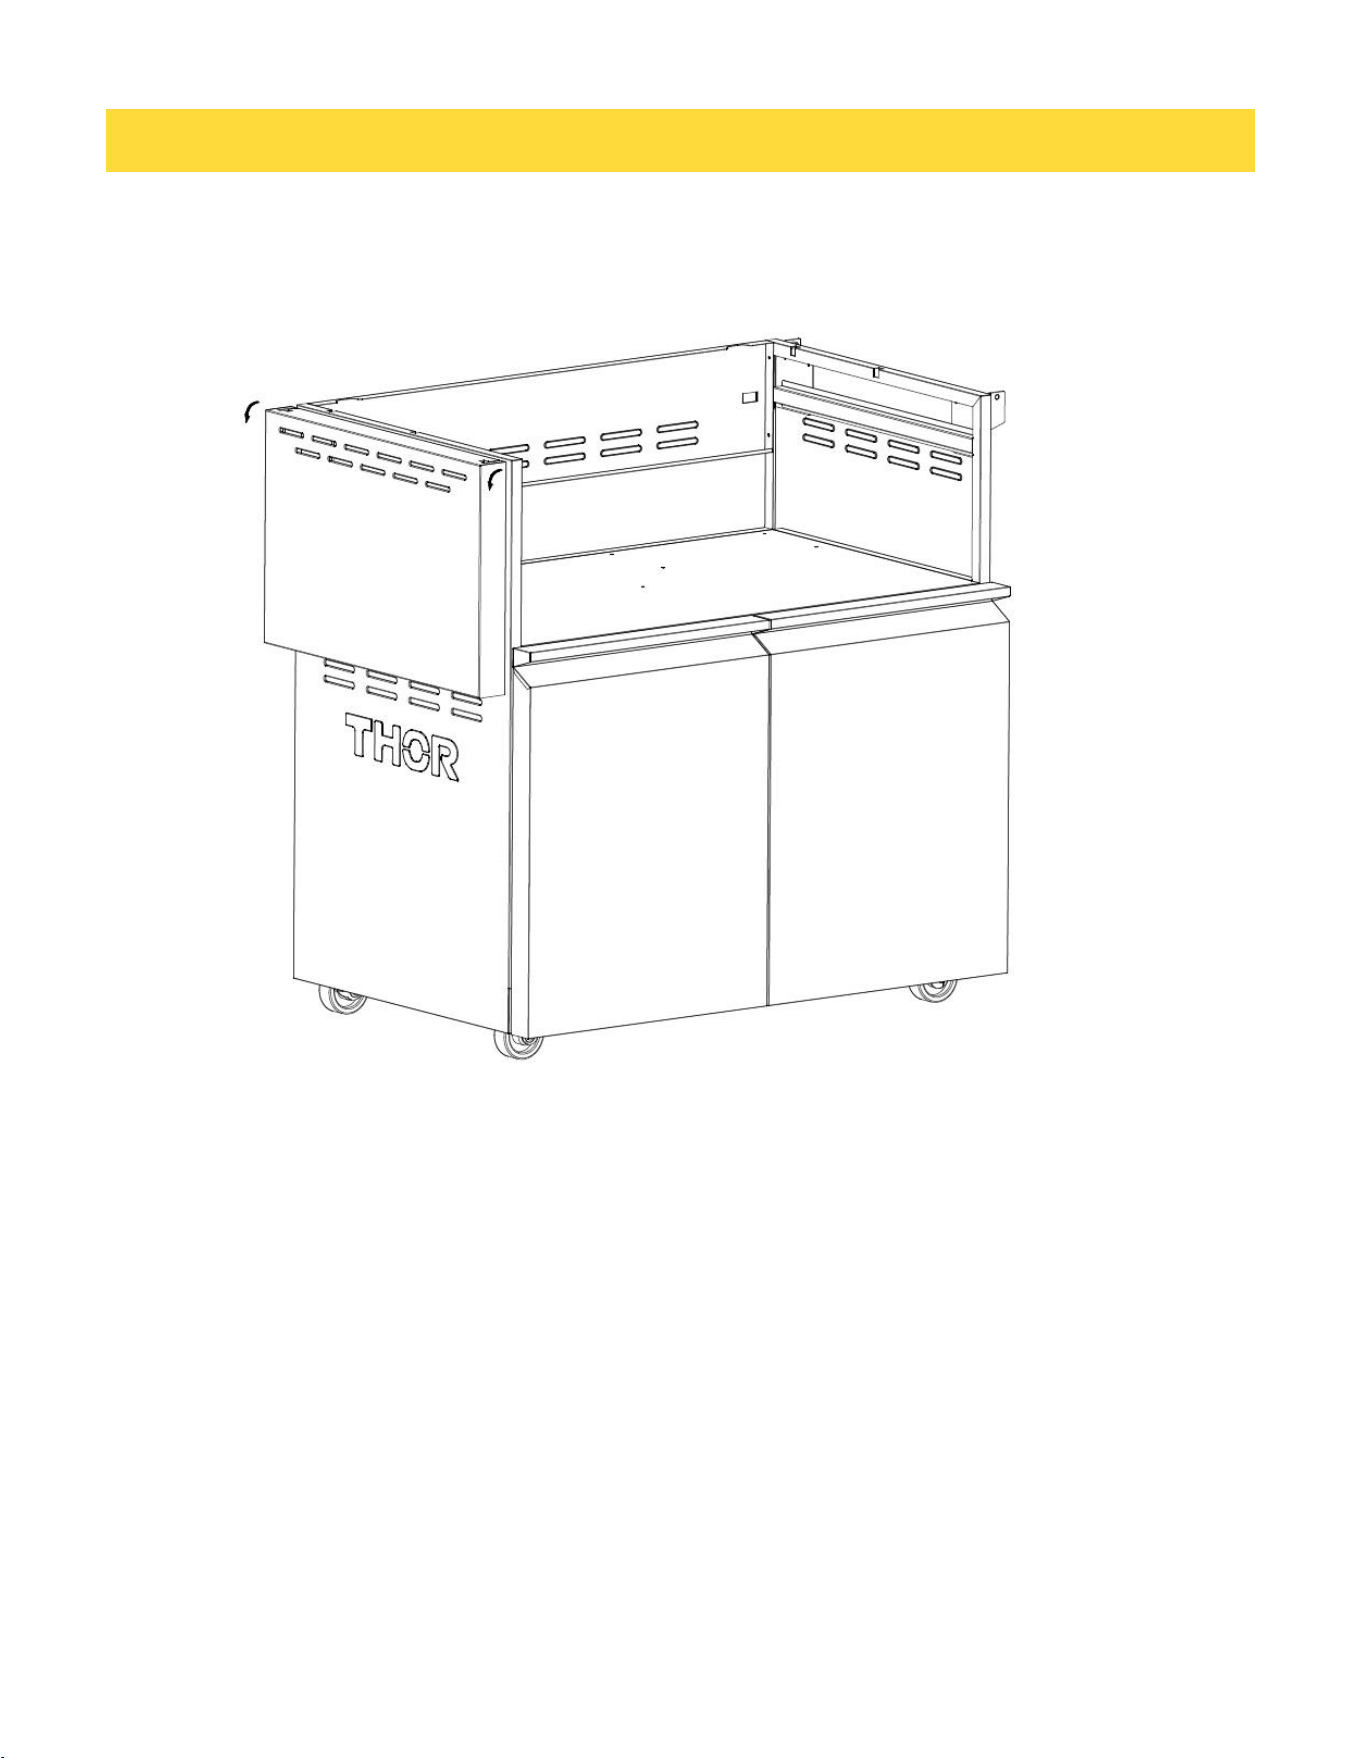
BEFORE INSTALLING GRILL TO CART: Remove drip tray, grill grates, flavor grids, and warming
racks from the grill.
To remove side tables (optional):
The side shelves on the cart can be removed if needed. This must be done before installing the grill on
the cart. With the shelf in the up position, remove the screws in the shelf support bracket. This will
allow you to remove both the brackets and the shelf.
To mount grill to cart for 32”/36”:
Always wear gloves when handling the gas grill. Although the grill is deburred prior to shipment,
some edges may still be sharp enough to cause injury during handling. With a minimum of two (2)
people, place the grill in the cart with about 3 to 4 inches hanging out the front making sure that the
male fitting on the bottom of the grill is inside the cart. Push the grill back until the front sides of the
cart are flush with the back of the landing ledge on the grill.
Be careful: the grill unit is very heavy!
5
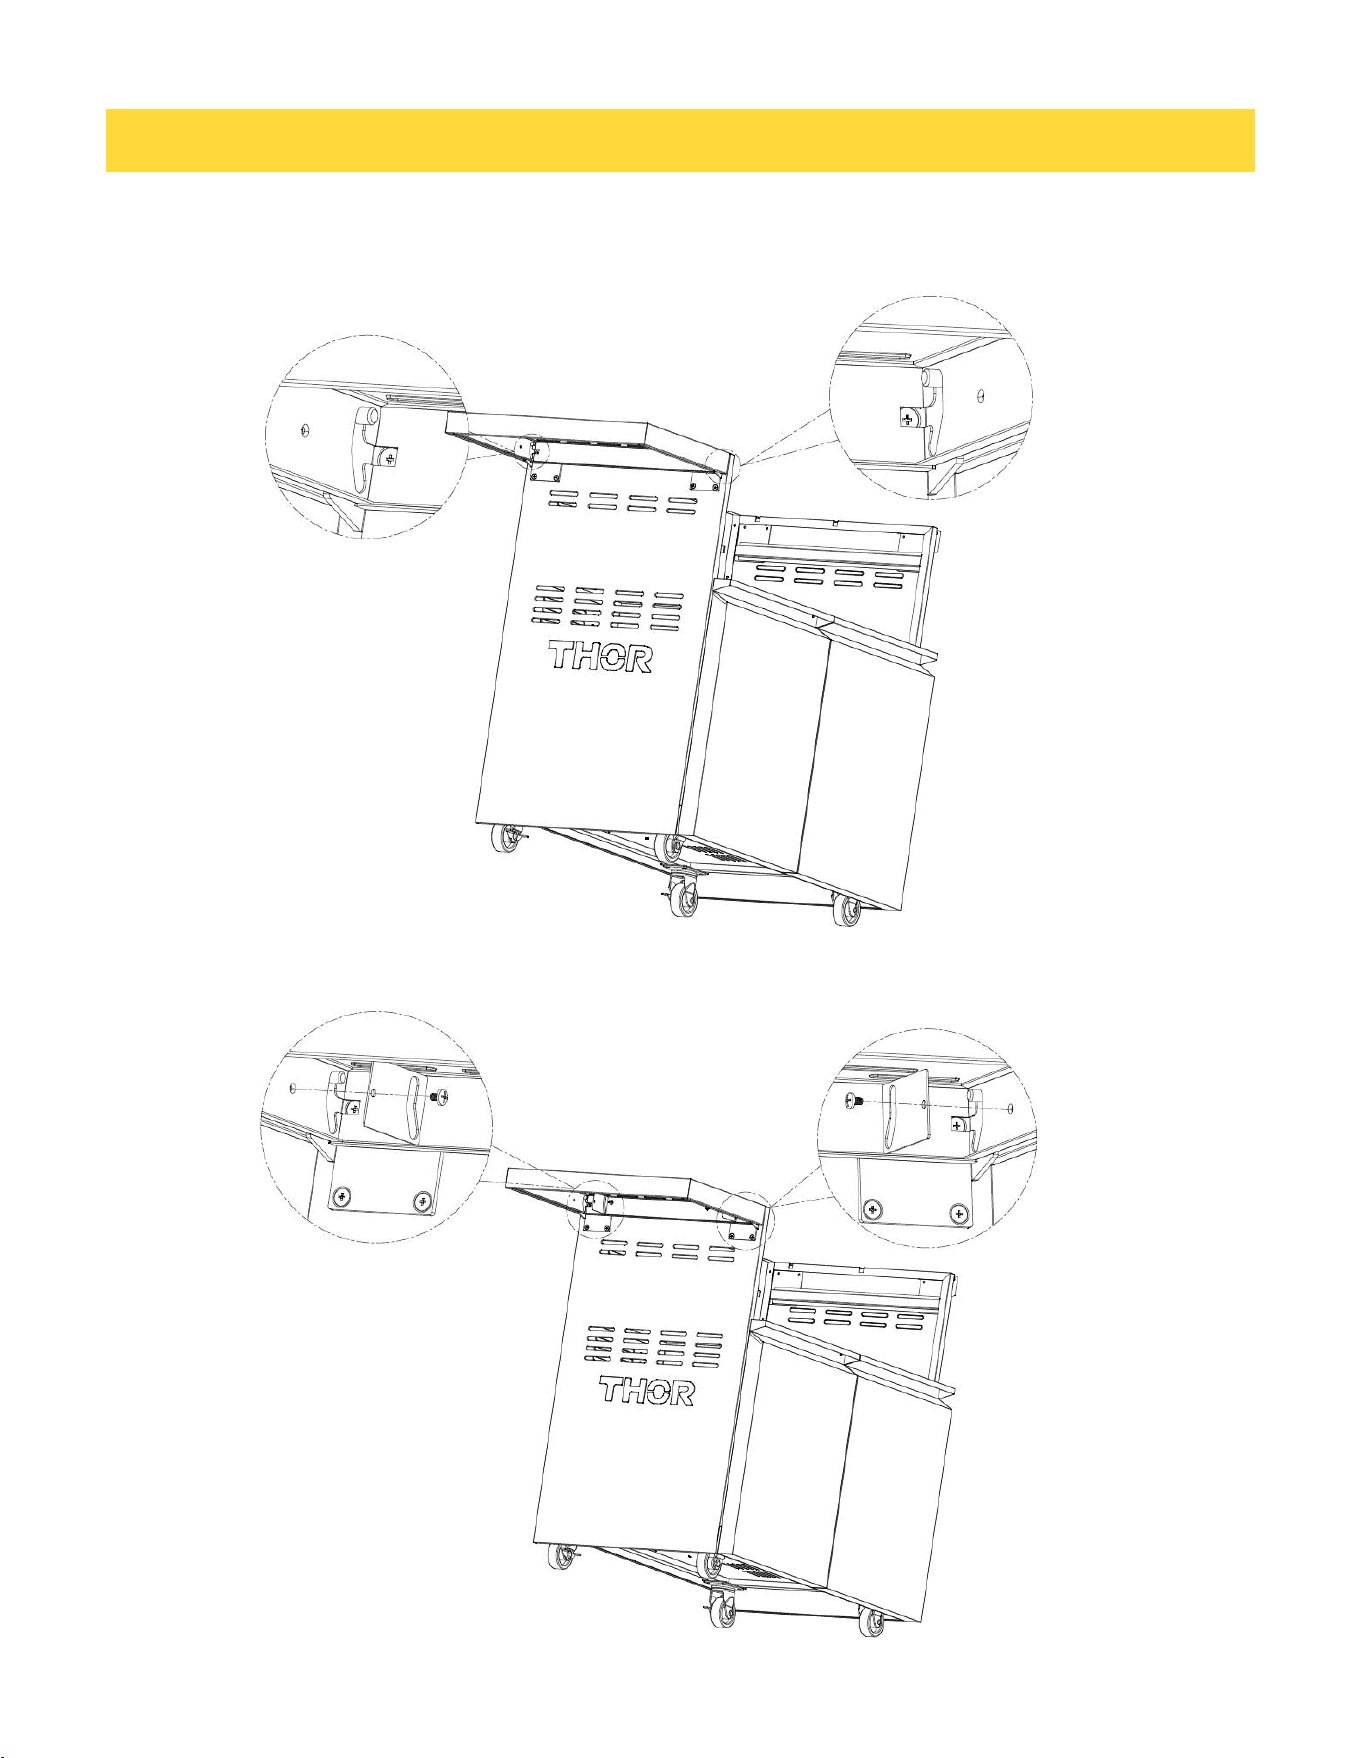
INSTALLING THE SIDE TABLES
Step 1: As shown in the figure, align the notches on both sides of the side table with the
fixed plates on the side tables.
Step 2: As shown in the figure, push the notches on both sides of the side table inward
along the fixed plates on the side tables until they reach the bottom of the limit notches.
6
INSTALLING THE SIDE TABLES
Step 3: Press the side table downward until it reaches the upper position of the side
table's limit slot.
Step 4: Take two side table limit clips and two 5/32"*6 screws.
7
INSTALLING THE SIDE TABLES
Step 5: Secure the side table limit clips on both sides to hold the side table in place and
prevent it from coming off.
Step 6: Lift the side table upward until it reaches the lower position of the side table.
8
INSTALLING THE SIDE TABLES
Step 7: Rotate the side frame 90 degrees downward to fold it. Install the other side
using the same method.
9
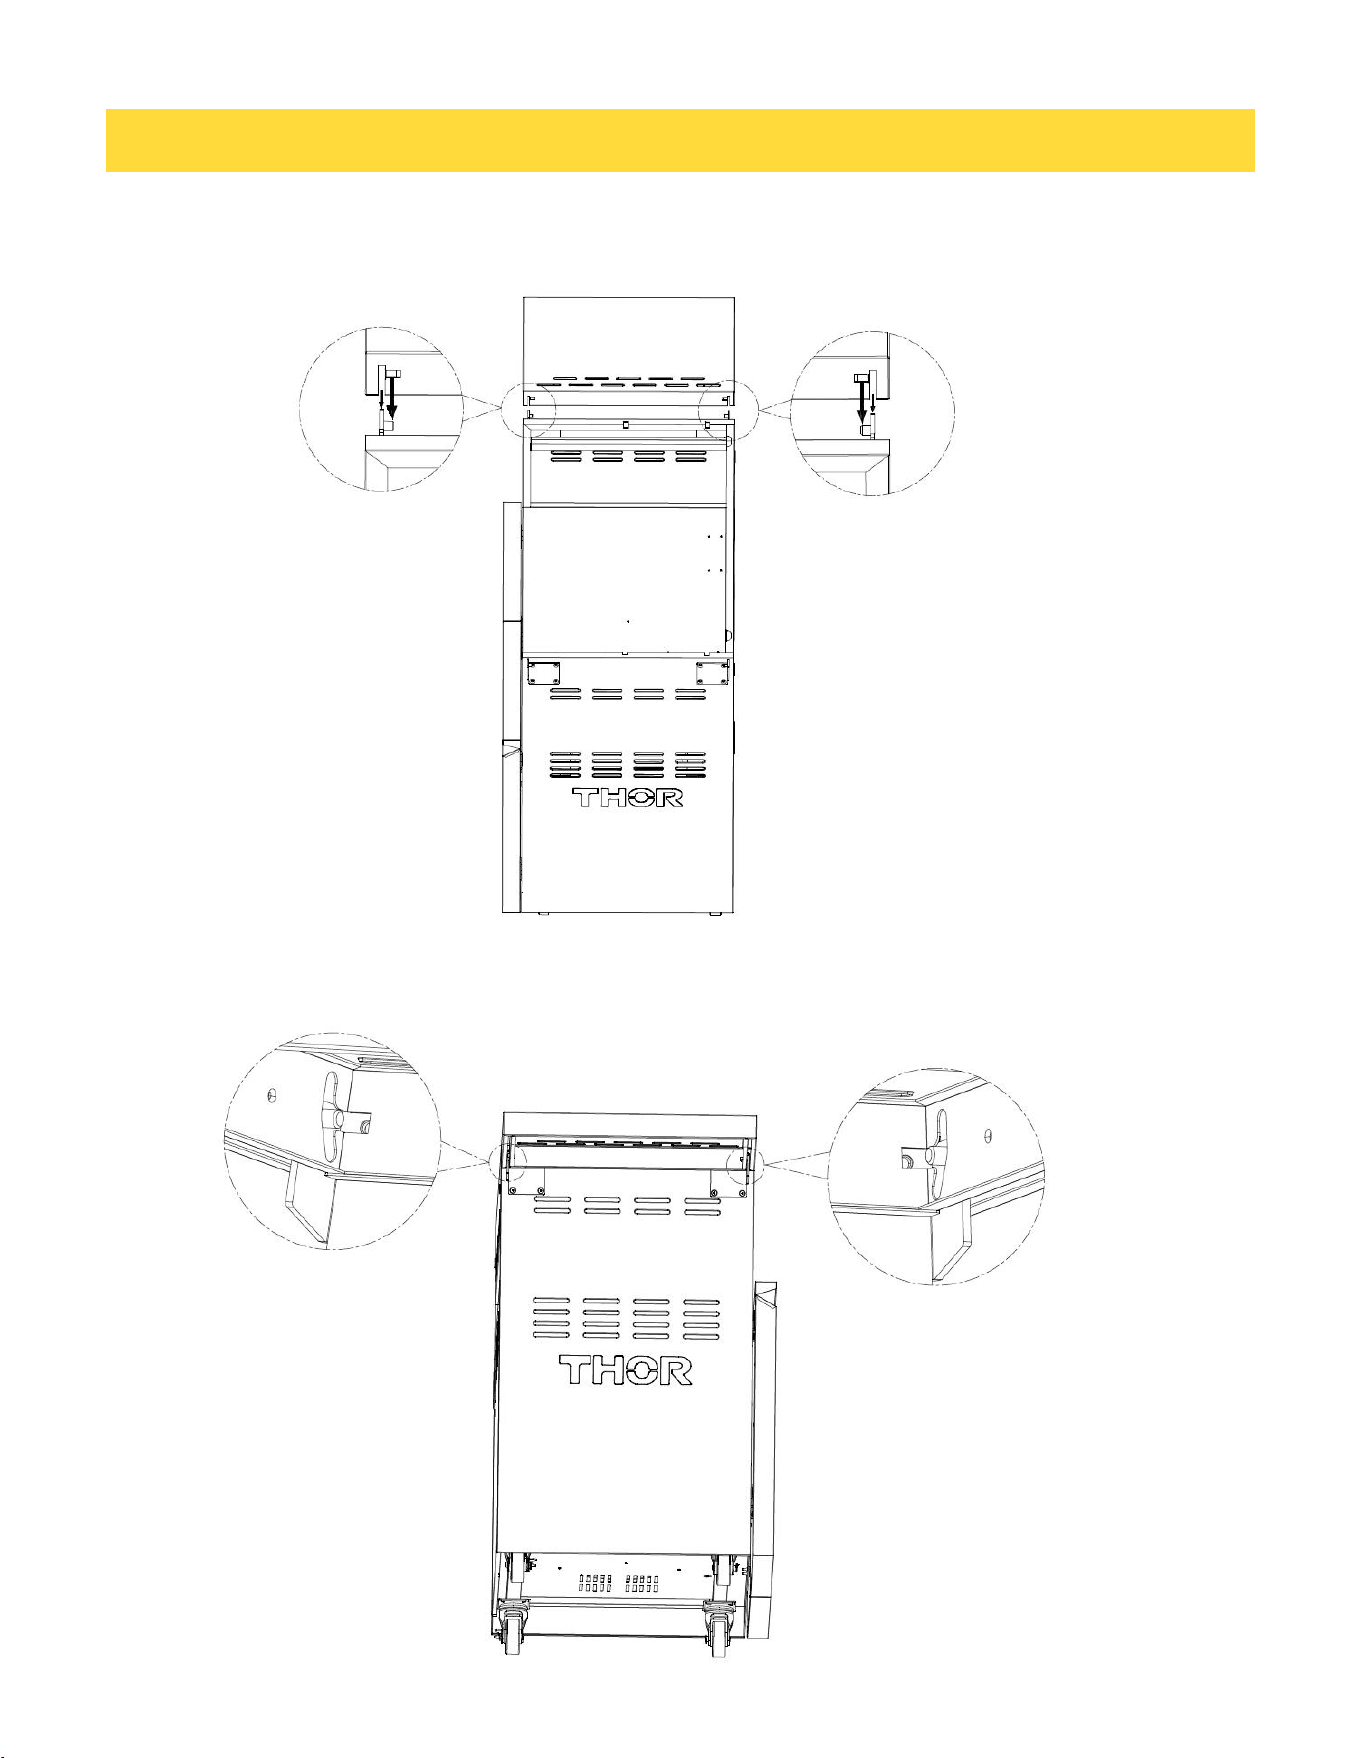
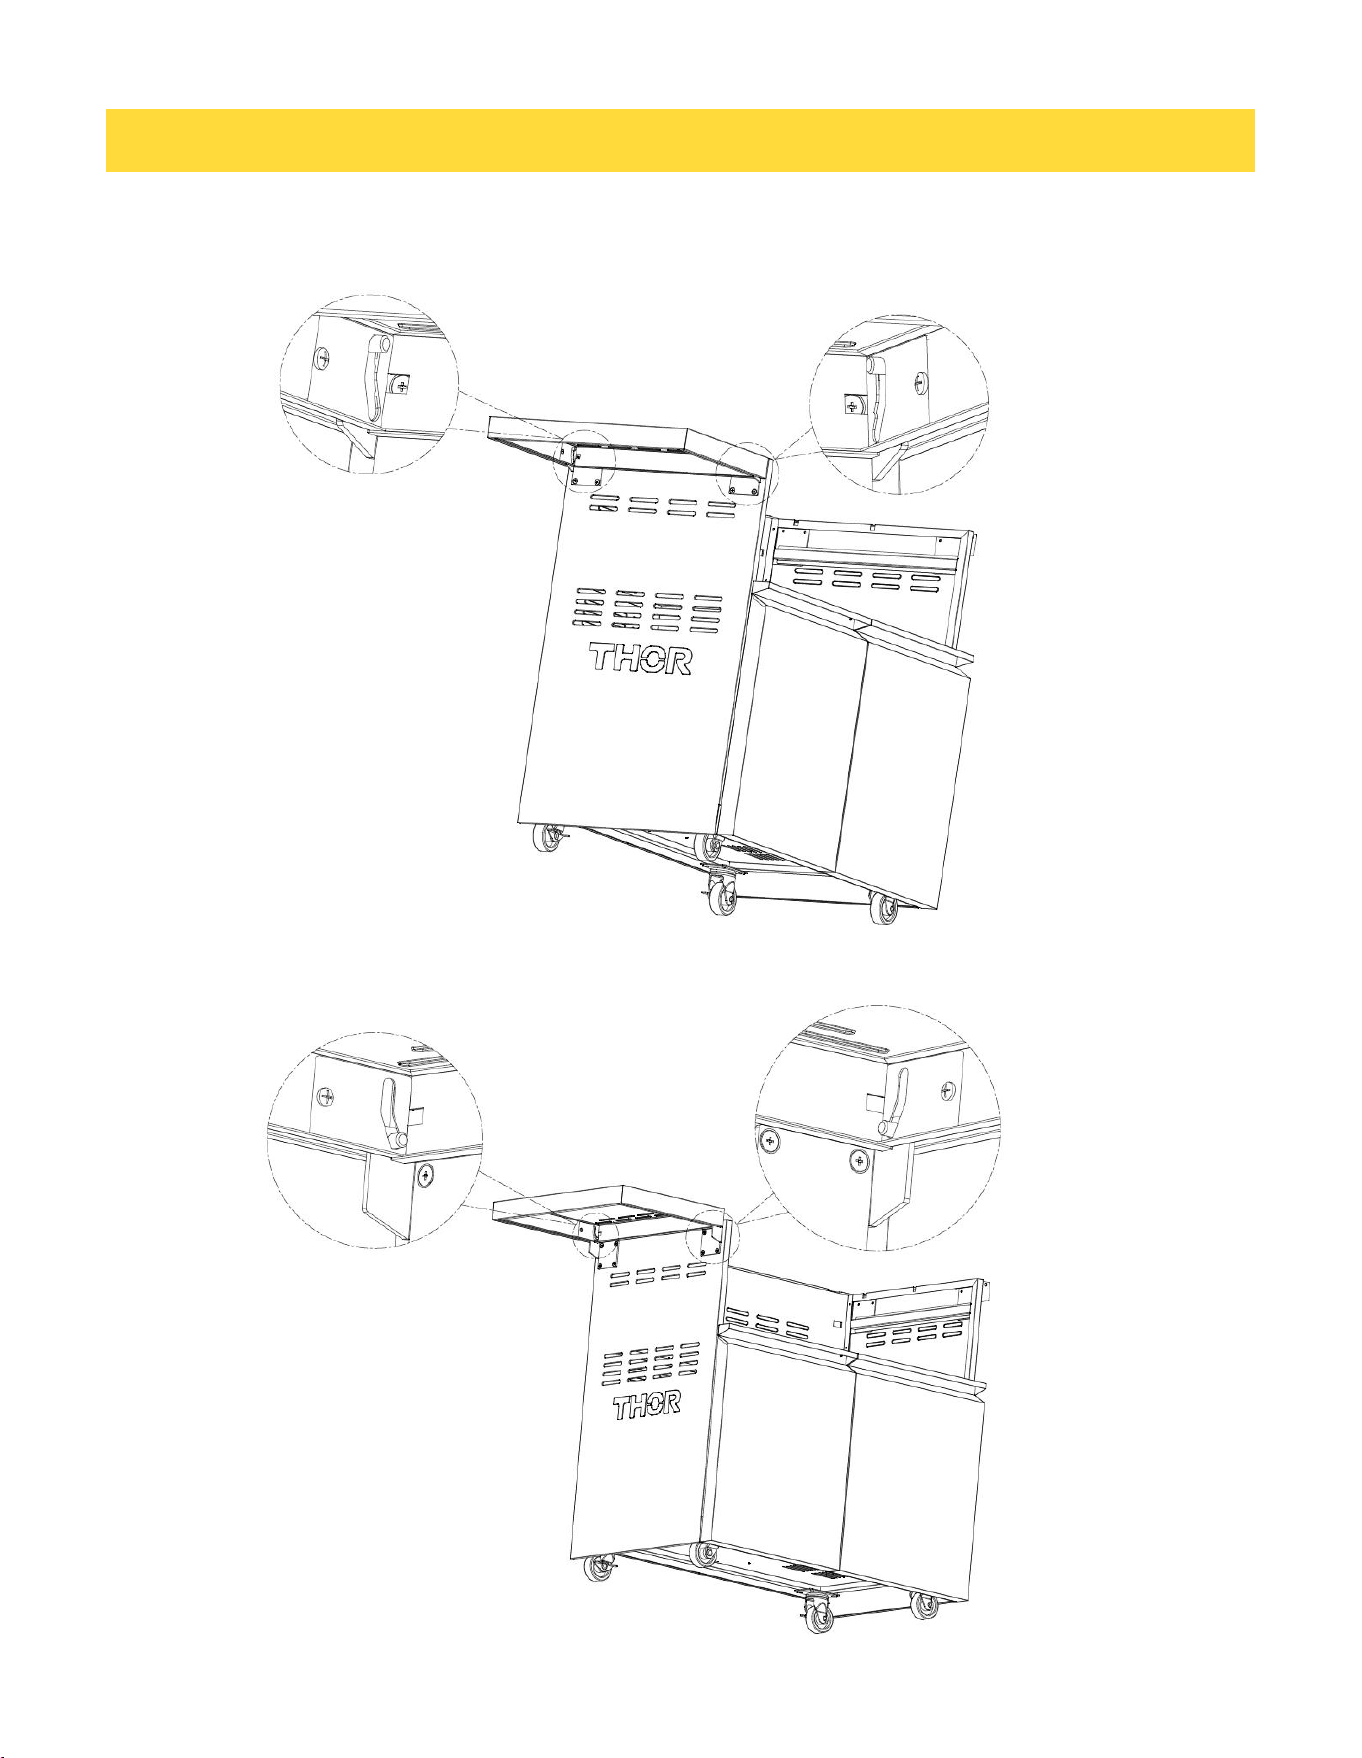
ATTACHING THE GRILL TO THE CART
Once the grill has been mounted on the cart, the back of the landing ledge should be flush with
the front sides of the cart. The 5/8” (1.6 cm) hole on the top front corners of the cart should be
aligned with the receiving holes in the grill heat shields. If your grill does not have the receiving
holes in the heat shield, you will need to drill them out with a 9/64” (.14 cm) drill bit. With the
grill and cart mounted together, place the drill bit in the 5/8 hole and center in the 1/4”x3/8” slot.
Drill through the heat shield. Take the #10X3/4”(1.9 cm) sheet metal screws (A) supplied with
the cart and attach the cart sides to the grill.
After securing the grill to the cart, snap the hole covers (B) supplied with the cart into the 5/8”
(1.6 cm) holes in the cart corners.
R B G 3 2 0 1 - G ( G a s G r i l l M o d e l ) + T G 3 2 C T
T P G 3 6 0 1 - G ( G a s G r i l l M o d e l ) + T G 3 6 C T
10
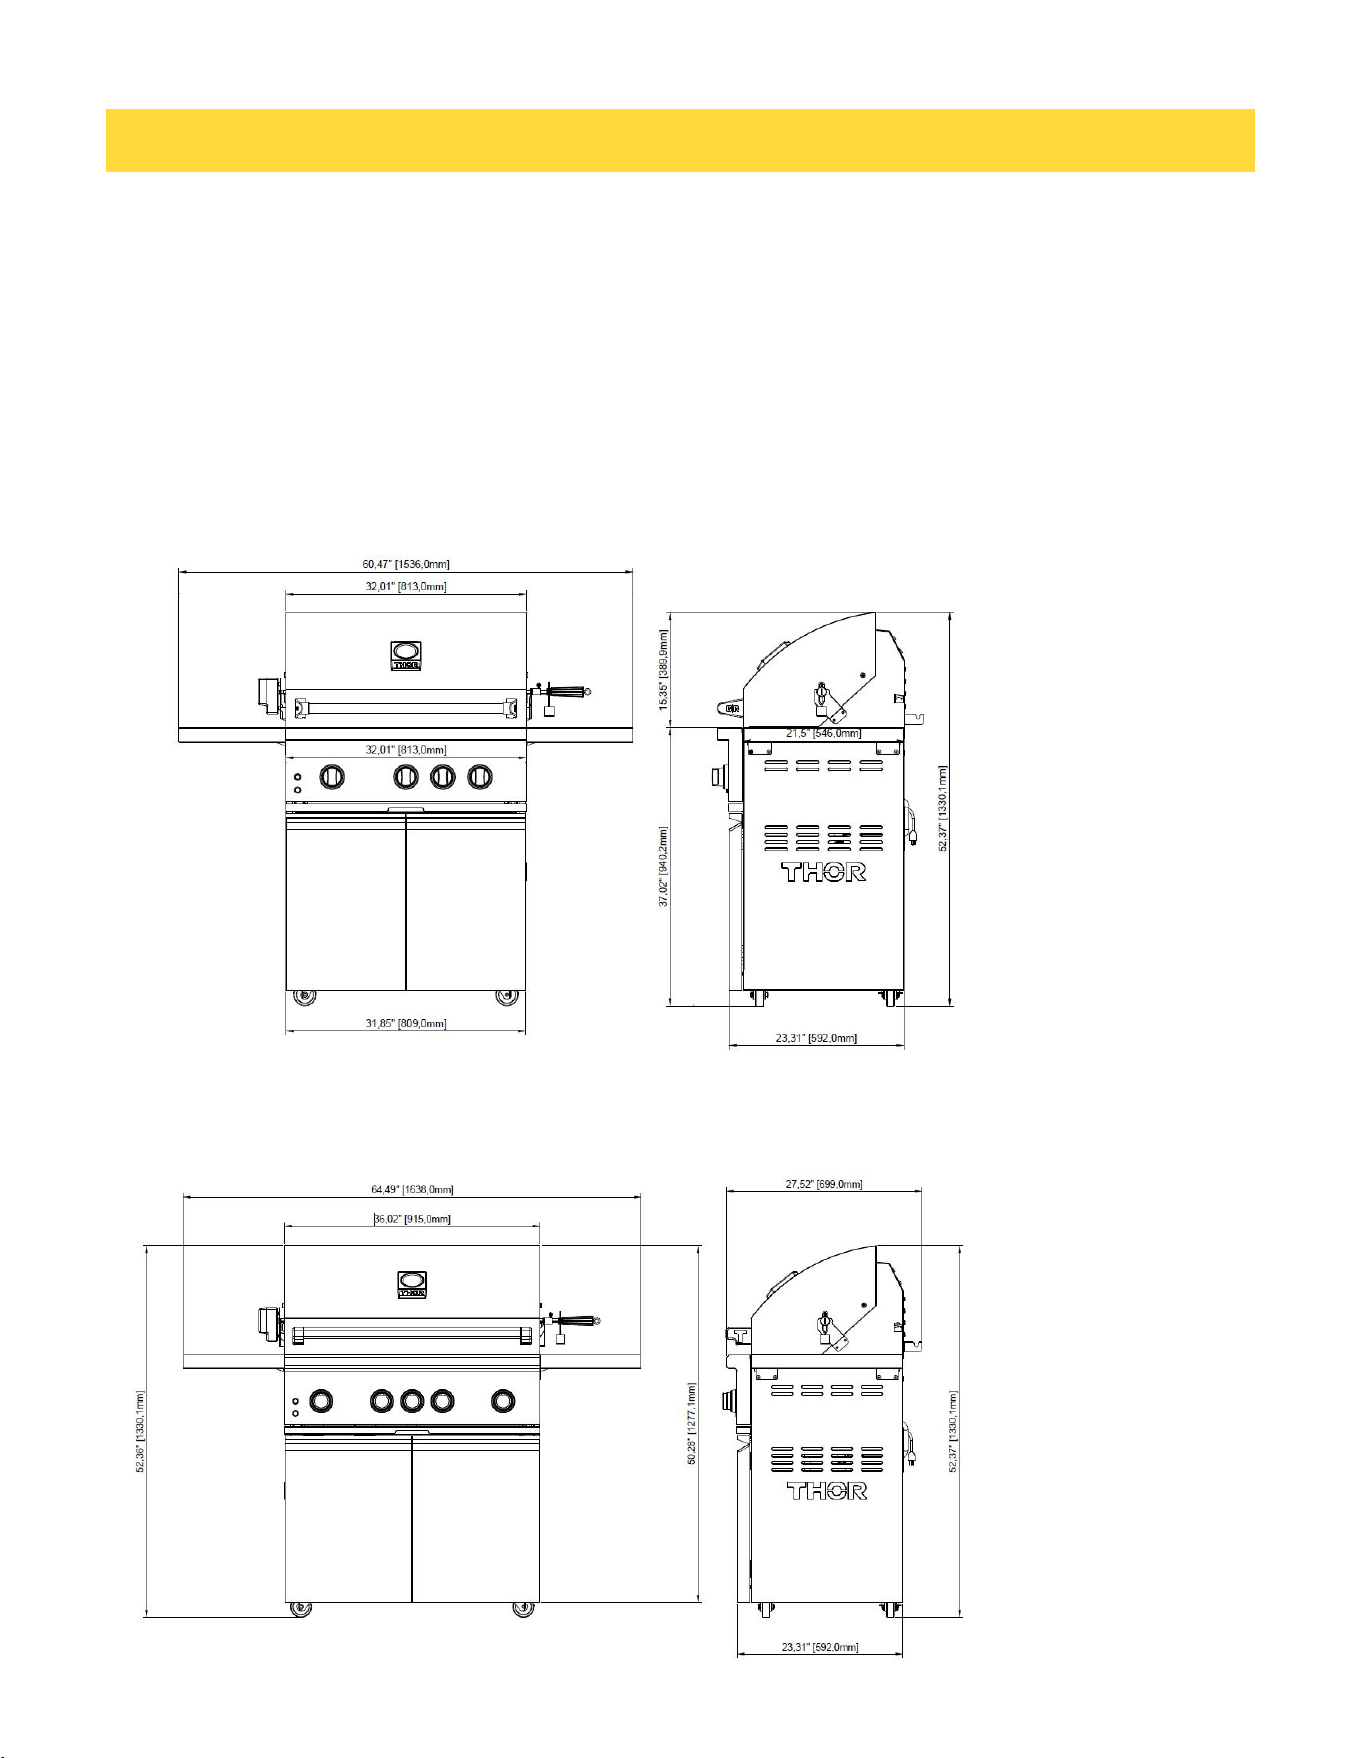
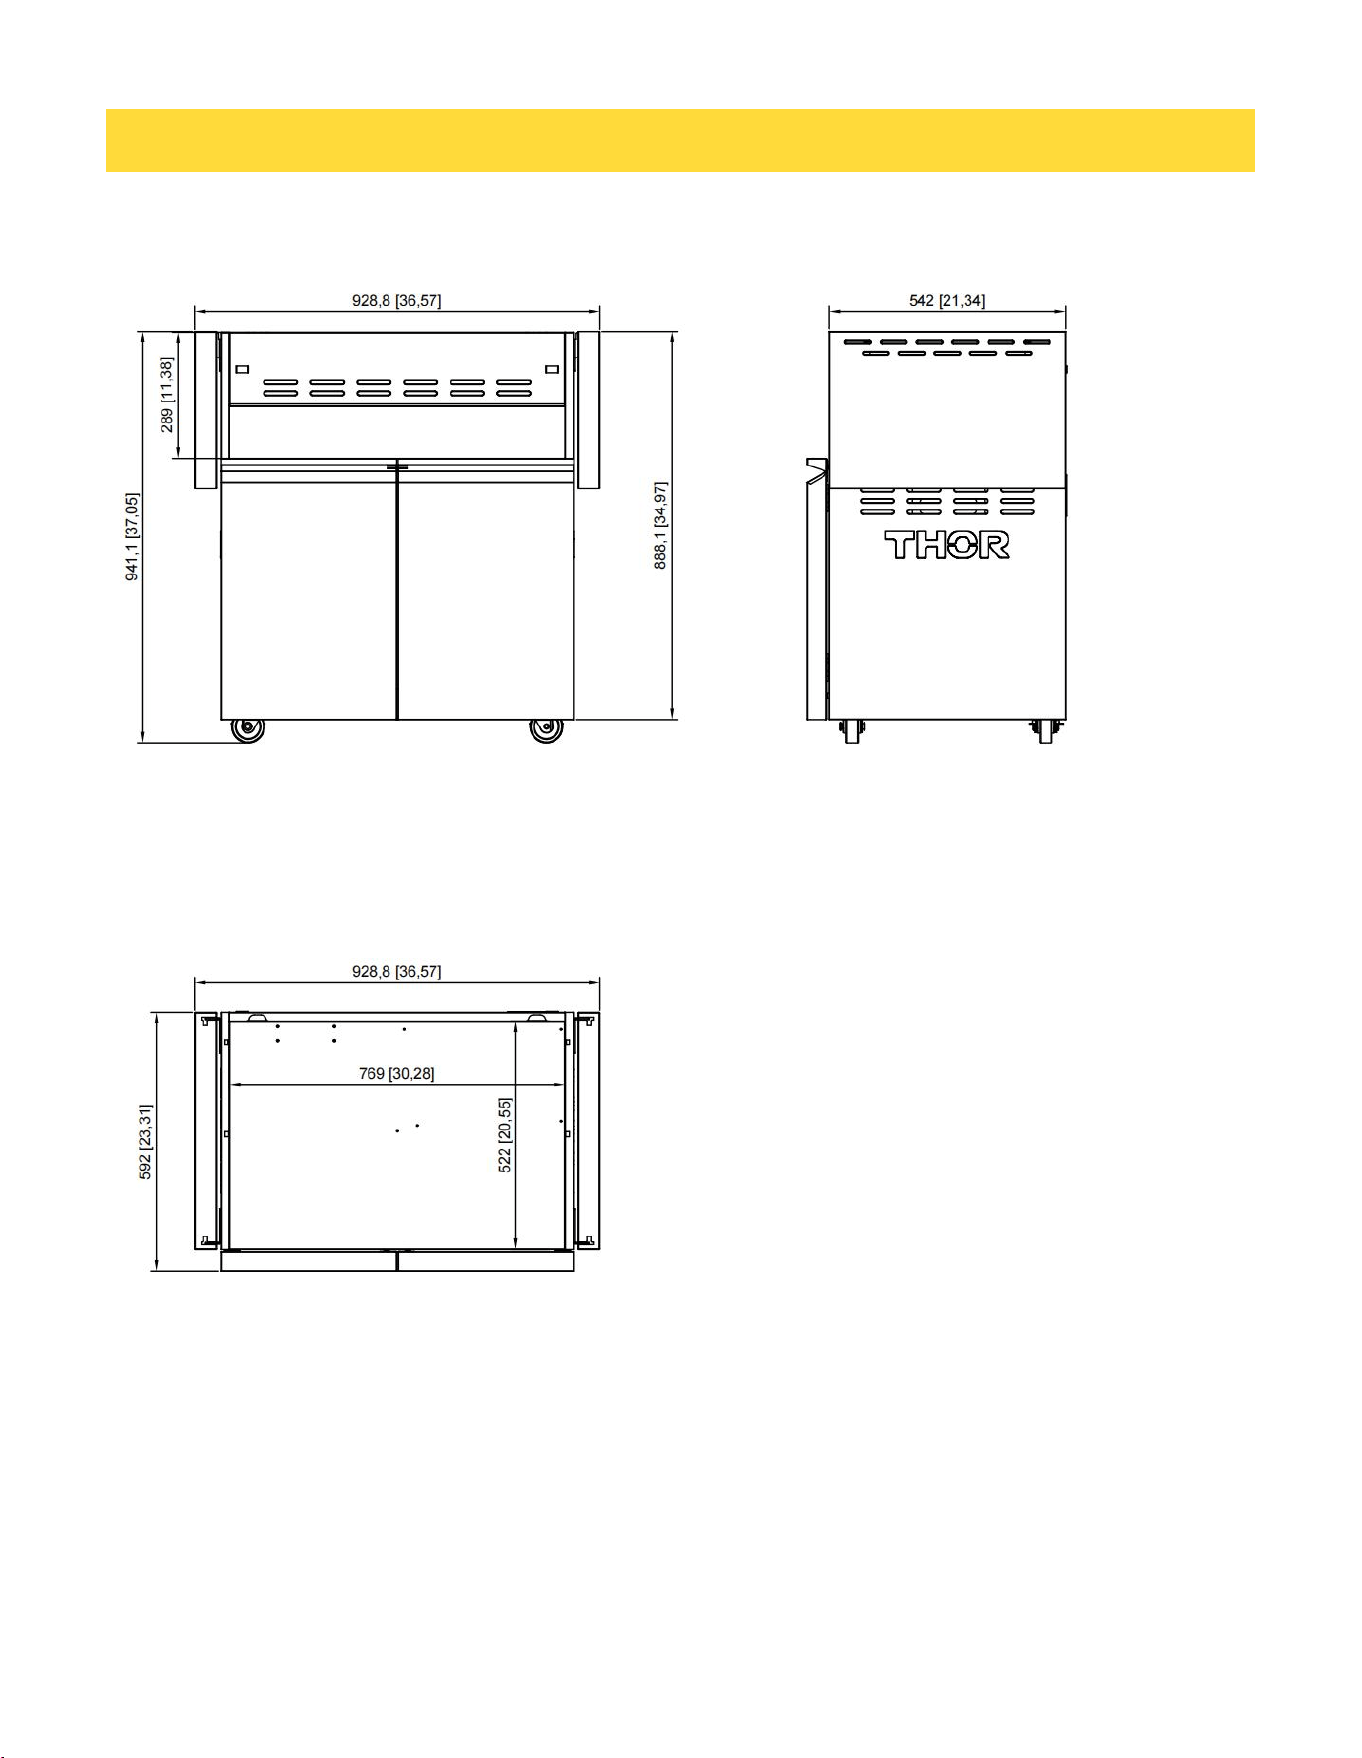
TG32CT – Front & Side View
TG32CT – Top View
DIMENSIONS
11
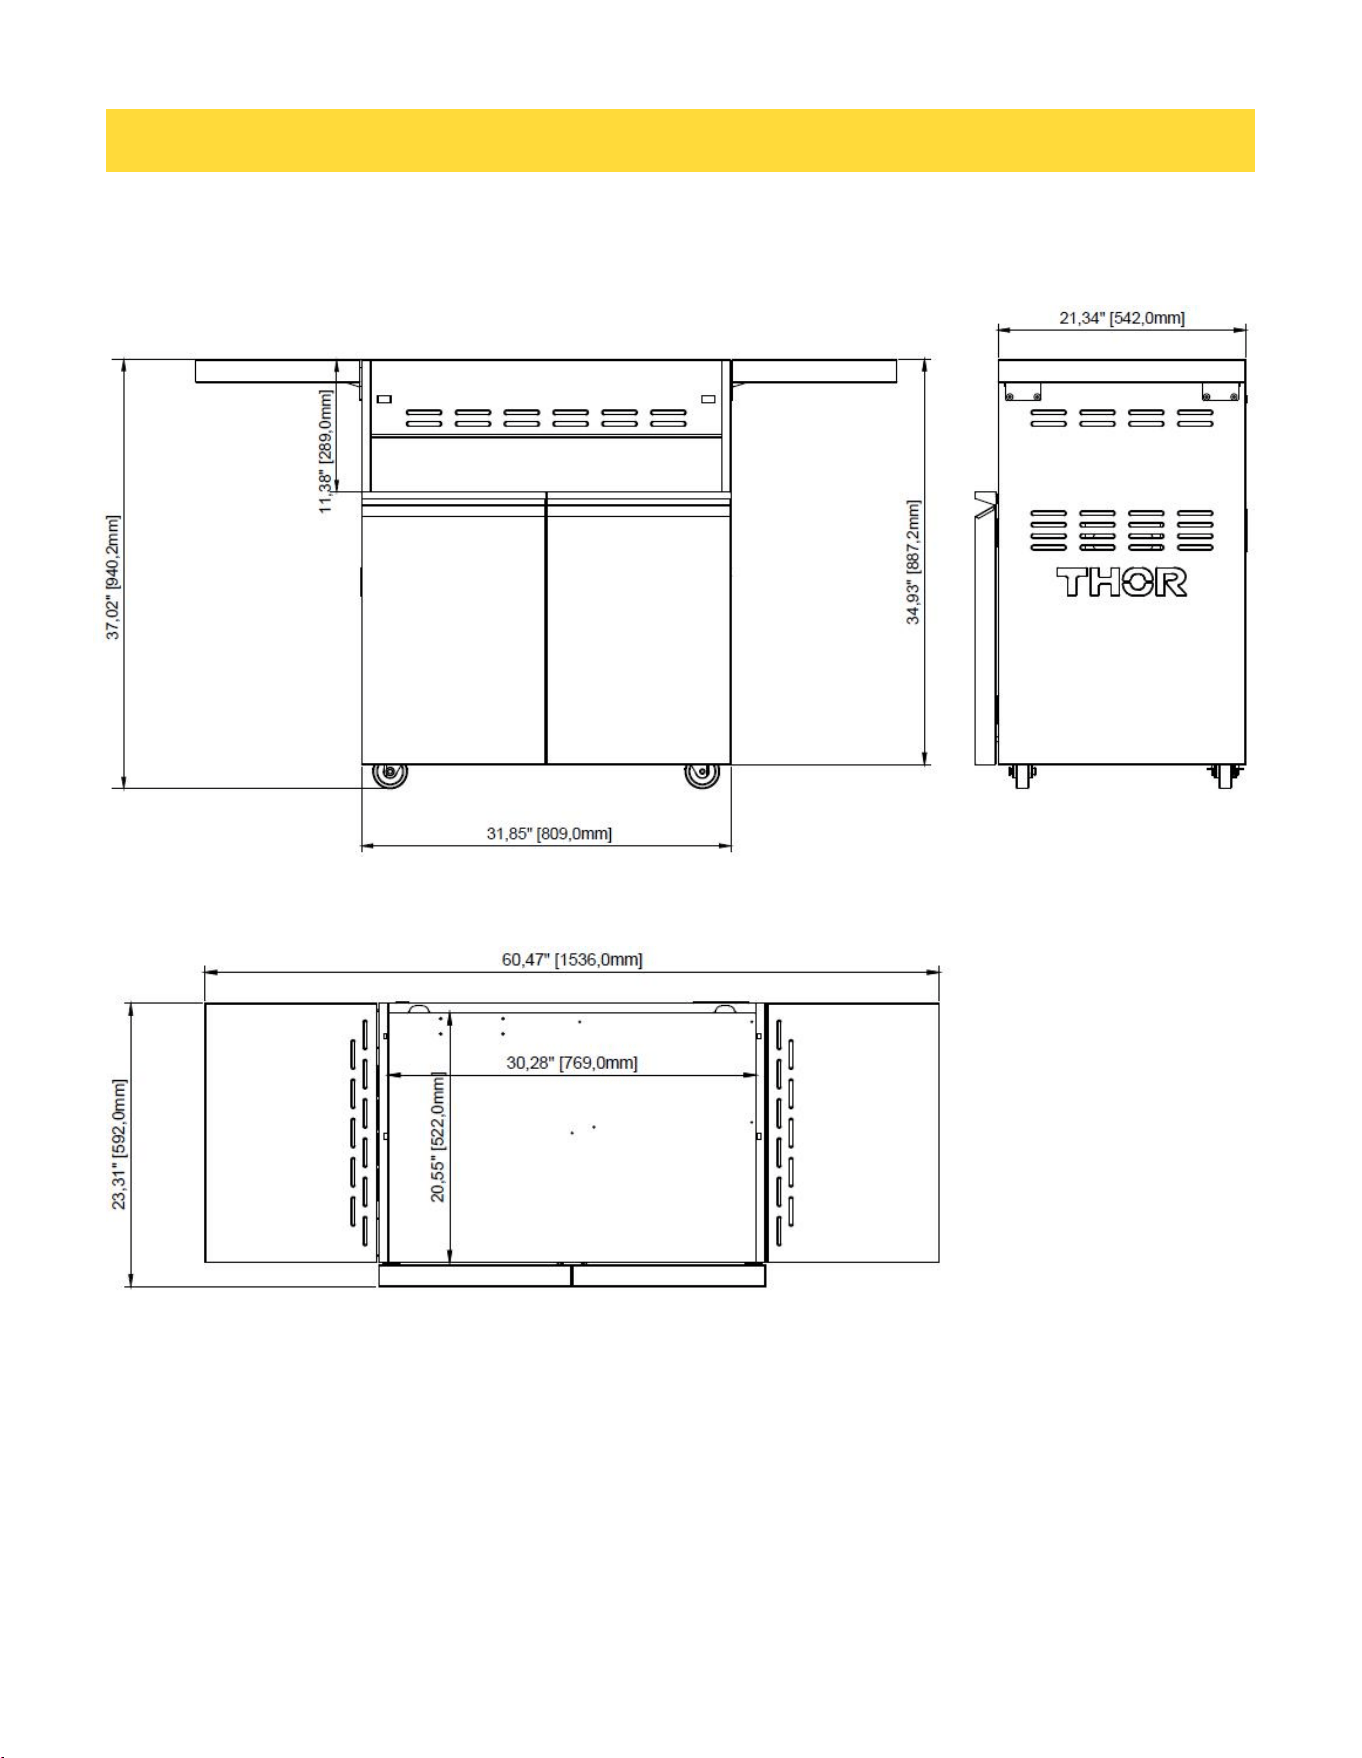
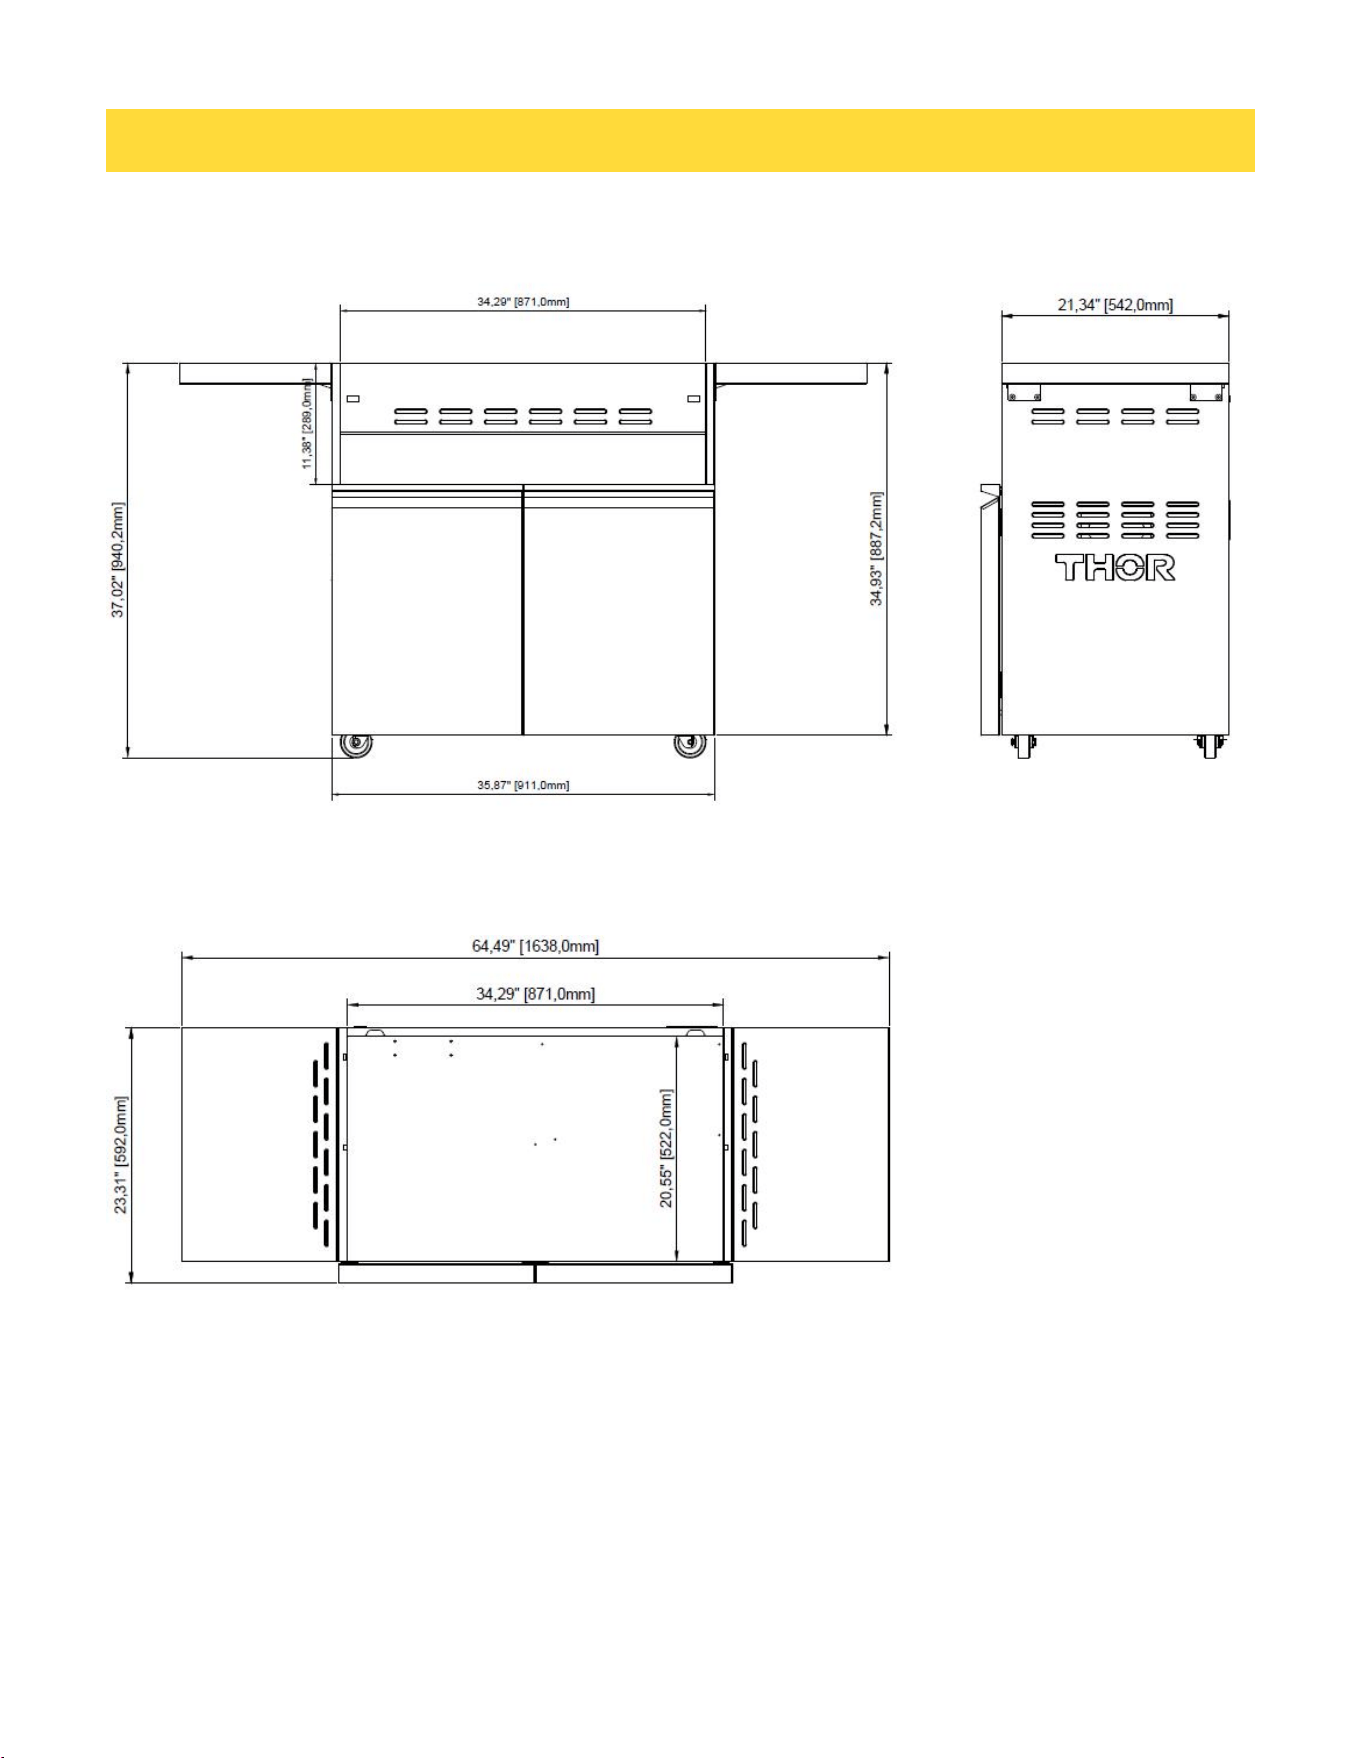
TG32CT – Front & Side View (Side Table Folding)
TG32CT – Top View (Side Table Folding)
DIMENSIONS
12
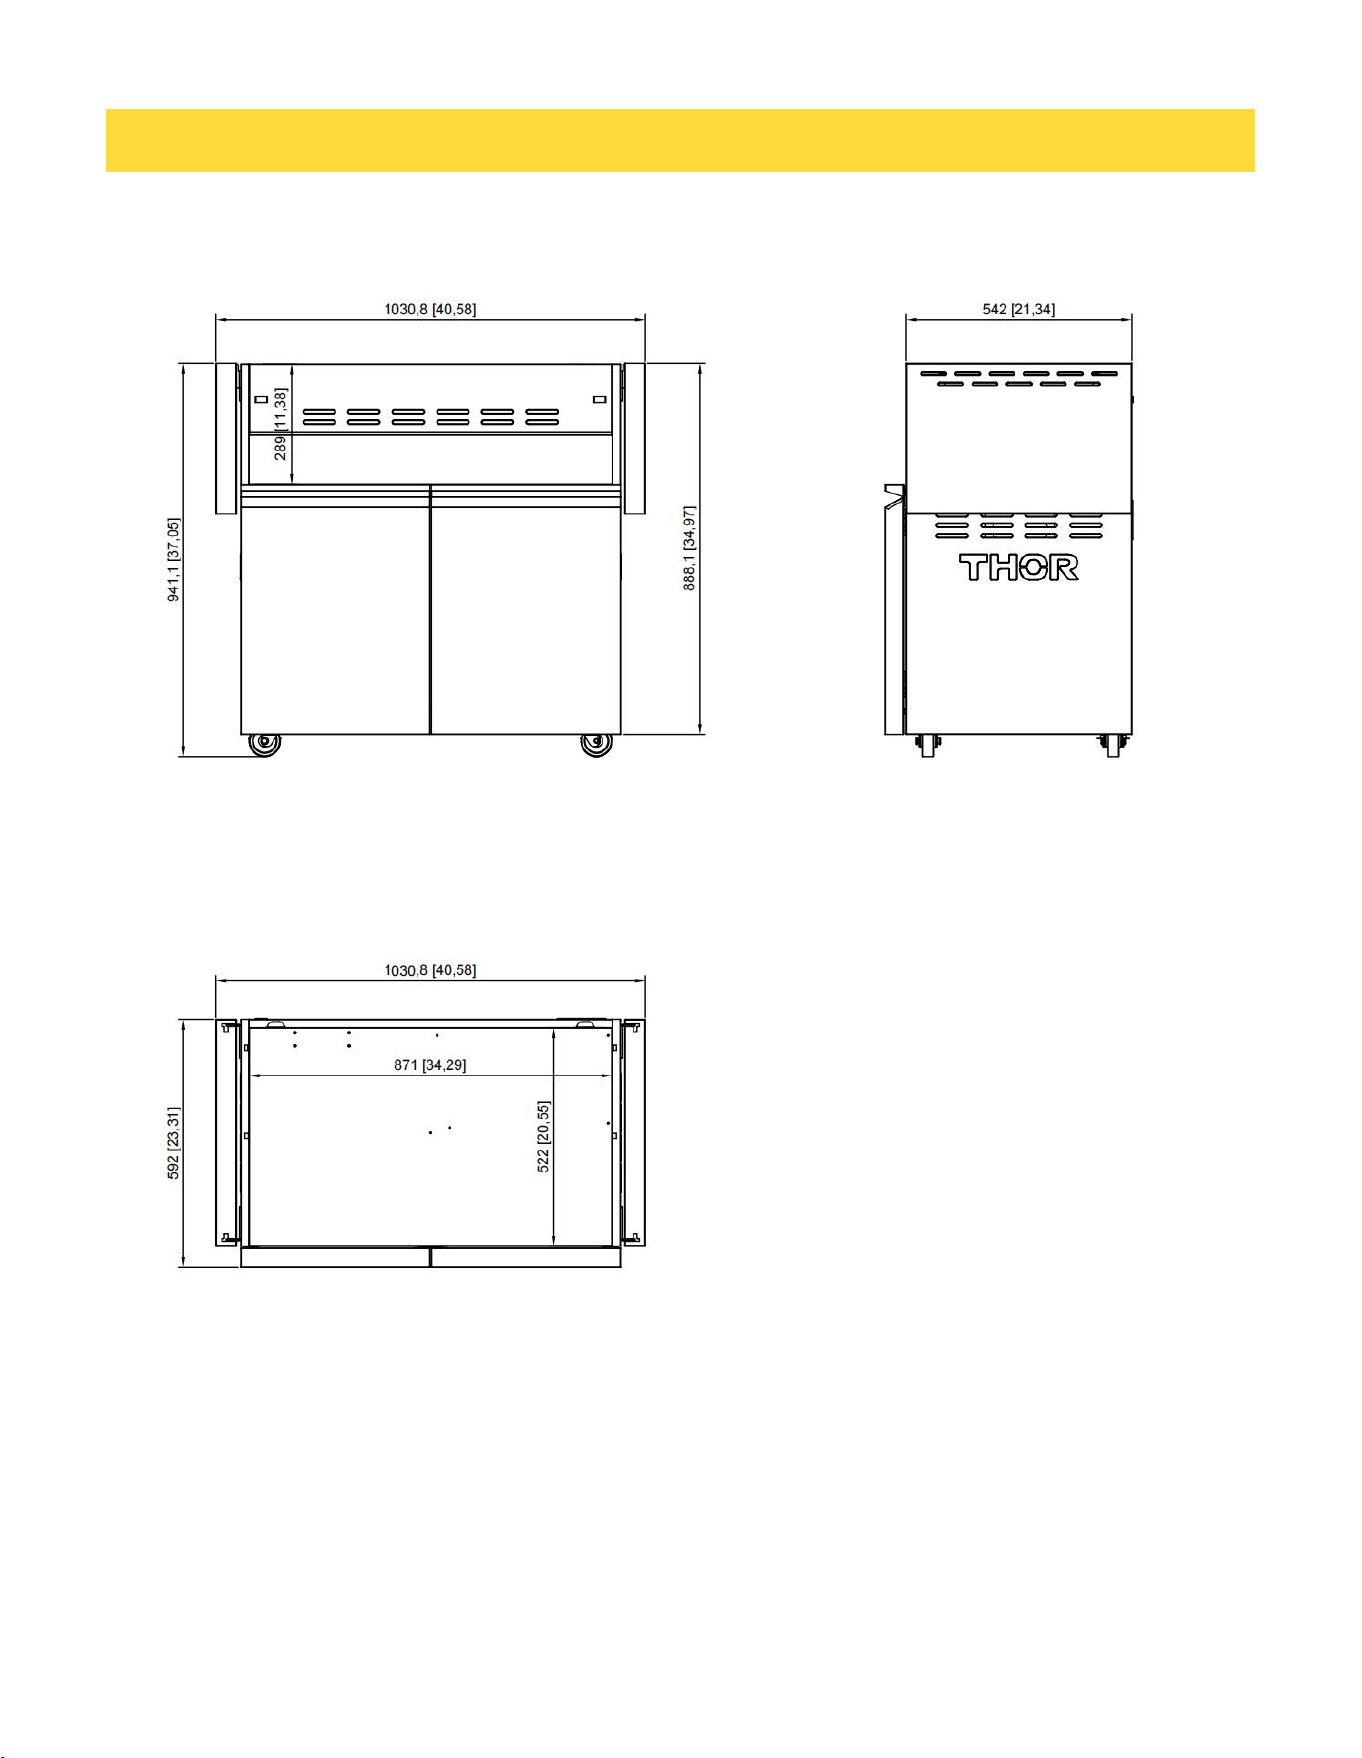
DIMENSIONS
TG36CT – Front & Side View
TG36CT – Top View
13
TG36CT – Front & Side View (Side Table Folding)
TG36CT – Top View (Side Table Folding)
DIMENSIONS

14
Warranty&Service
This product has been manufactured by Thor International, 4651 E Airport Dr, Ontario, CA 91761
For Customer Service, please call (877) 288 - 8099
For the most up to date warranty and service policy, please refer to our website
WWW.THORKITCHEN.COM/WARRANTY-REGISTRATION
For in-warranty service requests, please visit our website at
WWW.THORKITCHEN.COM/SERVICE
Please Note: You must provide proof of purchase or installation date for any in- warranty
service requests
WARRANTY

Warranty Registration
Made Easy.
We Stand Behind
the Quality of Our
Appliances.
Reliability and customer satisfaction are our top priorities. We offer a
solid two-year warranty on both parts and labor. Enjoy professional-grade
performance with the condence that we’ve got you covered.
01
02
03
Scan the QR Code or visit thorkitchen.
com/register-your-product.
Input your purchase and product
information and select register.
That’s it. You’re all set.
Enjoy!
WARRANTY
PARTS
Questions: [email protected]
