1
FOR YOUR SAFETY: Do not store or use gasoline or other ammable vapors and
liquids in the vicinity of this or any other appliance.
WARNING: Improper installation, operation, service or maintenance can cause
property damage, injury or death. Read and understand these instructions
thoroughly before positioning, installing, maintaining or servicing this equipment.
Initial heating of appliance may generate smoke or fumes and must be done in a well ventilated area.
Overexposure to smoke or fumes may cause nausea or dizziness.
APW Wyott
®
cooking equipment has been engineered to provide you with year-round dependable
service when used according to the instructions in this manual and standard commercial kitchen
practices.
APW Wyott Food Service Equipment Company
265 Hobson St. • Smithville, TN 37166
Telephone: (800) 527-2100 www.apwwyott.com
INSTALLATION AND OPERATING INSTRUCTIONS
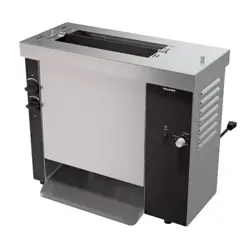
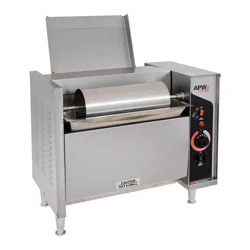
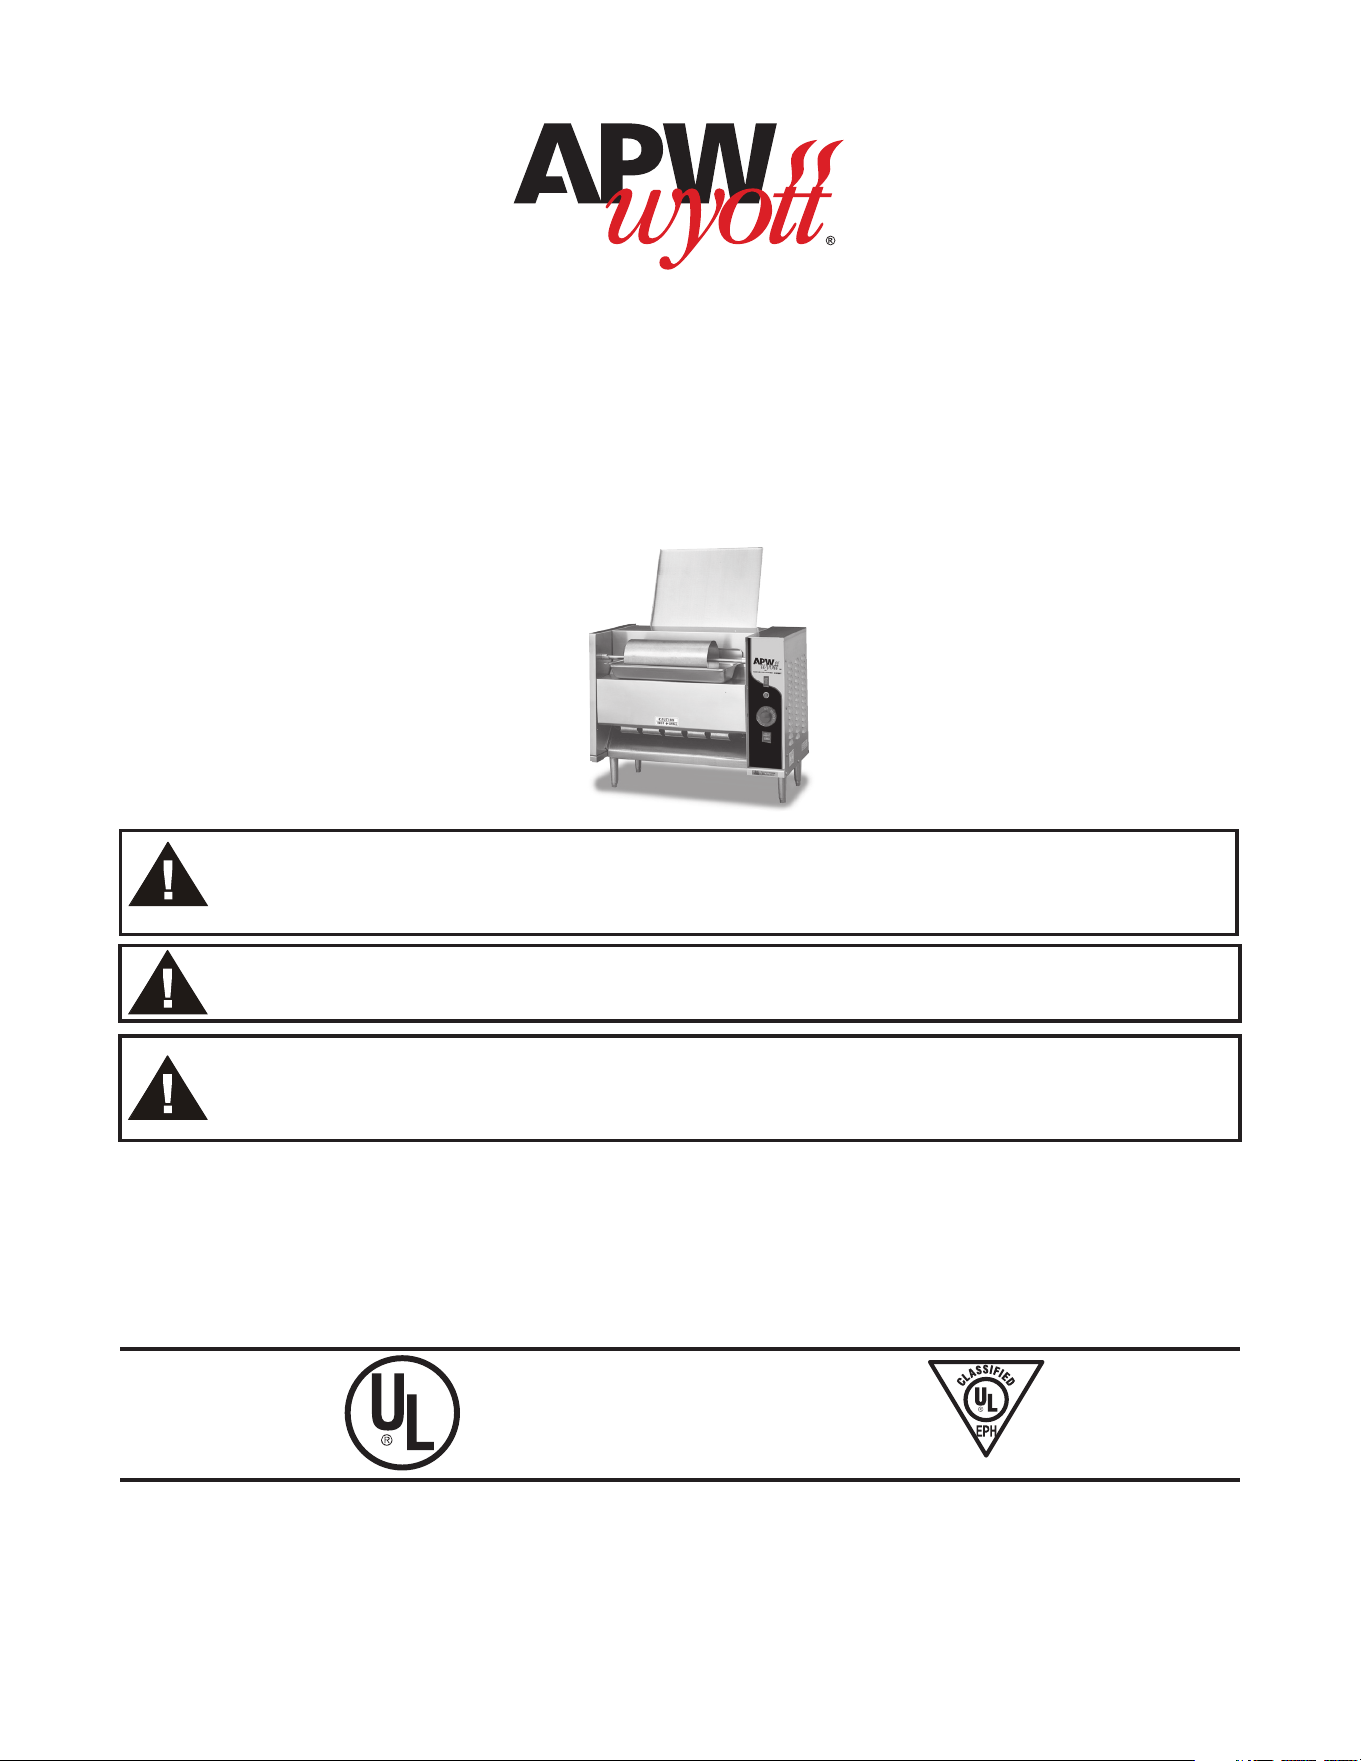
Contact Bun Toaster
Model: M-95
INTENDED FOR OTHER THAN HOUSEHOLD USE
2M-70200001 REV C 02/21
ANSI/NSF4
WARNING: California Residents Only. This product can expose you to chemicals including
chromium which is known to the State of California to cause cancer and birth defects or
other reproductive harm. For more information go to www.P65Warnings.ca.gov.
DESIGNED SMART. BUILT SOLID.
®
2
TABLE OF CONTENTS
SECTION ITEM ..................PAGE
1 Safety Precautions .......... 2
2 Important Safety Instructions . . 2
3 General Information ......... 4
4 Installation Instructions ....... 4
5 Location .................. 5
6 Operation Instructions ........ 6
SECTION ITEM ..................PAGE
7 Cleaning Instructions ........ 6
8 Troubleshooting ............. 9
9 Wiring Diagram ............. 9
10 Parts List with Exploded View . 10
11 Warranty ................. 13
1. SAFETY PRECAUTIONS
Before installing and operating this equipment be sure everyone involved in its operation is fully trained
and is aware of all precautions. Accidents & problems can result by a failure to follow fundamental
rules and precautions.
The following words and symbols, found in this manual, alert you to hazards to the operator, service
personnel or the equipment. The words are dened as follows:
DANGER: This symbol warns of imminent hazard which will result in serious injury
or death.
WARNING: This symbol refers to a potential hazard or unsafe practice, which could
result in serious injury or death.
CAUTION: This symbol refers to a potential hazard or unsafe practice, which may
result in or moderate injury or product or property damage
NOTICE: This symbol refers to information that needs special attention or must be
fully understood even though not dangerous.
2. IMPORTANT SAFETY INSTRUCTIONS
IMPORTANT: Read the following important safety instructions to avoid personal
injury or death, and to avoid damage to the equipment or property.
WARNING: APW Wyott toasters are designed, built, and sold for commercial use.
If positioned where the general public can use them, make sure that all cautions,
warnings, and operating instructions are clearly posted near each unit to insure
proper operation, reduce the chance of personal injury and/or equipment damage.
WARNING: Plug unit into a properly grounded electrical outlet of the correct voltage,
size and plug conguration. If the plug and receptacle do not match, contact a
qualied electrician to determine the proper voltage and size and install the proper
electrical outlet.
WARNING: Unit is not waterproof. DO NOT submerge in water. Do not operate if it
has been submerged in water. Do not clean the unit with a water jet.
3
WARNING: To avoid any injury, turn the power switch o at the fuse disconnect
switch/circuit breaker or unplug the unit from the power source and allow to cool
completely before performing any maintenance or cleaning.
WARNING: For safe and proper operation, the unit must be located a reasonable
distance from combustible walls and materials. If safe distances are not maintained,
discoloration or combustion could occur.
WARNING: To avoid electrical shock or personal injury, do not steam clean or use
excessive water on the unit.
WARNING: If service is required on this unit, contact your authorized APW Wyott
Service Agent, or contact the APW Wyott Service Department directly at
(972) 908-6100 or (800) 527-2100; fax (214) 565-0976.
WARNING: This product has no “user” serviceable parts. To avoid damage to the
unit or injury to personnel, use only Authorized APW Wyott Service Agents and
genuine APW Wyott Parts when service is required.
WARNING: Genuine APW Wyott Replacement Parts are specied to operate safely
in the environments in which they are used. Some aftermarket or generic replacement
parts do not have the characteristics that will allow them to operate safely in APW Wyott
equipment. It is essential to use APW Wyott Replacement Parts when repairing APW
Wyott equipment. Failure to use APW Wyott Replacement Parts may subject operators
of the equipment to hazardous electrical voltage, resulting in electrical shock or burn.
CAUTION: Some exterior surfaces on the unit will get hot. Use caution when
touching these areas to avoid injury.
CAUTION: Locate the unit at the proper counter height, in an area that is convenient
for use. The location should be level to prevent the unit or its contents from
accidentally falling, and strong enough to support the weight of the unit and food.
CAUTION: The National Sanitation Foundation (NSF) requires that units over 36”
(91 cm) in length or weighing more than 80 lbs. (36 kg) to be either sealed or raised
on the installation surface. If this unit cannot be sealed at the point of use, 4”
(10 cm) legs are included to allow for proper cleaning access below unit
CAUTION: Use only non-abrasive cleaners. Abrasive cleaners could scratch
the nish of your unit, marring its appearance and making it susceptible to dirt
accumulation.
WARNING: Failure to provide clearances will cause unit failure and invalidate
warranty claims (see installation instructions).
NOTICE: Do not use toppings (butter, etc.) on product as product is inverted during
normal operation.
NOTICE: Operating toaster without legs invalidates any warranty claims.
NOTICE: Neglecting to keep fan opening clean could result in toaster failure.

4
3. GENERAL INFORMATION
Check the rating label for your model designation and electrical rating. The Rating Label is located on
the bottom front of the control panel.
Overall dimensions with feeder: 25 15/16” x 23 1/2” x 17 1/2”
Electrical ratings: M952: 208VAC, 2780W, 13.4Amps, 60Hz or 240VAC, 2780W, 11.6Amps, 60Hz
Cordset Conguration: 208/250V:NEMA6-20P Plug, 4 foot, 3 wire grounded cord.
If the supply cord is damaged, the manufacturer or an authorized service agent or a similarly qualied
person must replace it to avoid a hazard or warranty.
Shipping Weight: 97 lbs (44.1Kg)
4. INSTALLATION INSTRUCTIONS
1. Examine carton for damage. The freight carrier has assumed responsibility for its safe transit and
delivery. If equipment is received damaged, either apparent or concealed, a claim must be made
with delivering carrier.
A. Apparent damage or loss must be noted on the freight bill at the time of delivery. The carrier
representative (Driver) must sign the freight bill. If this is not done, the carrier may refuse the
claim. The carrier can supply the necessary forms.
B. Concealed damage or loss if not apparent until after the toaster is removed from carton, a
request for inspection must be made to the carrier within 15 days. The carrier should arrange
an inspection. Be sure to save all contents and packaging material.
2. Verify Parts
After removing unit from the shipping carton, unwrap loose parts and remove any packing tape,
plastic wrap and nylon tie-down. Verify the following parts:
Item Packaging Qty
Legs In plastic bag 4
Conveyor In individual carton 1
Instruction Manual Loose in carton 1
NOTE: PRIOR TO INITIAL START-UP, ALL REMOVABLE PARTS AND THE GRILL SURFACE SHOULD
BE CLEANED WITH WARM SOAPY WATER TO REMOVE MANUFACTURING OILS, THEN RINSED
AND DRIED THOROUGHLY. Apply oil (vegetable oil) to the conveyor chain after washing. (Bun oil can
be used if it contains no animal fats, salts, or dairy products.)
3. Assemble Legs
Lay the toaster on its back and install the four adjustable legs into the threaded holes on the
bottom of the toaster. Hand tighten the legs by gripping the steel shank and turning until it
is seated rmly against the bottom of the toaster. Set the toaster upright on a at surface.
Unscrewing the lower, chrome insert of each leg levels the unit. Flats are provided to allow use of a
wrench. “Precise” leveling is not required for proper operation
5
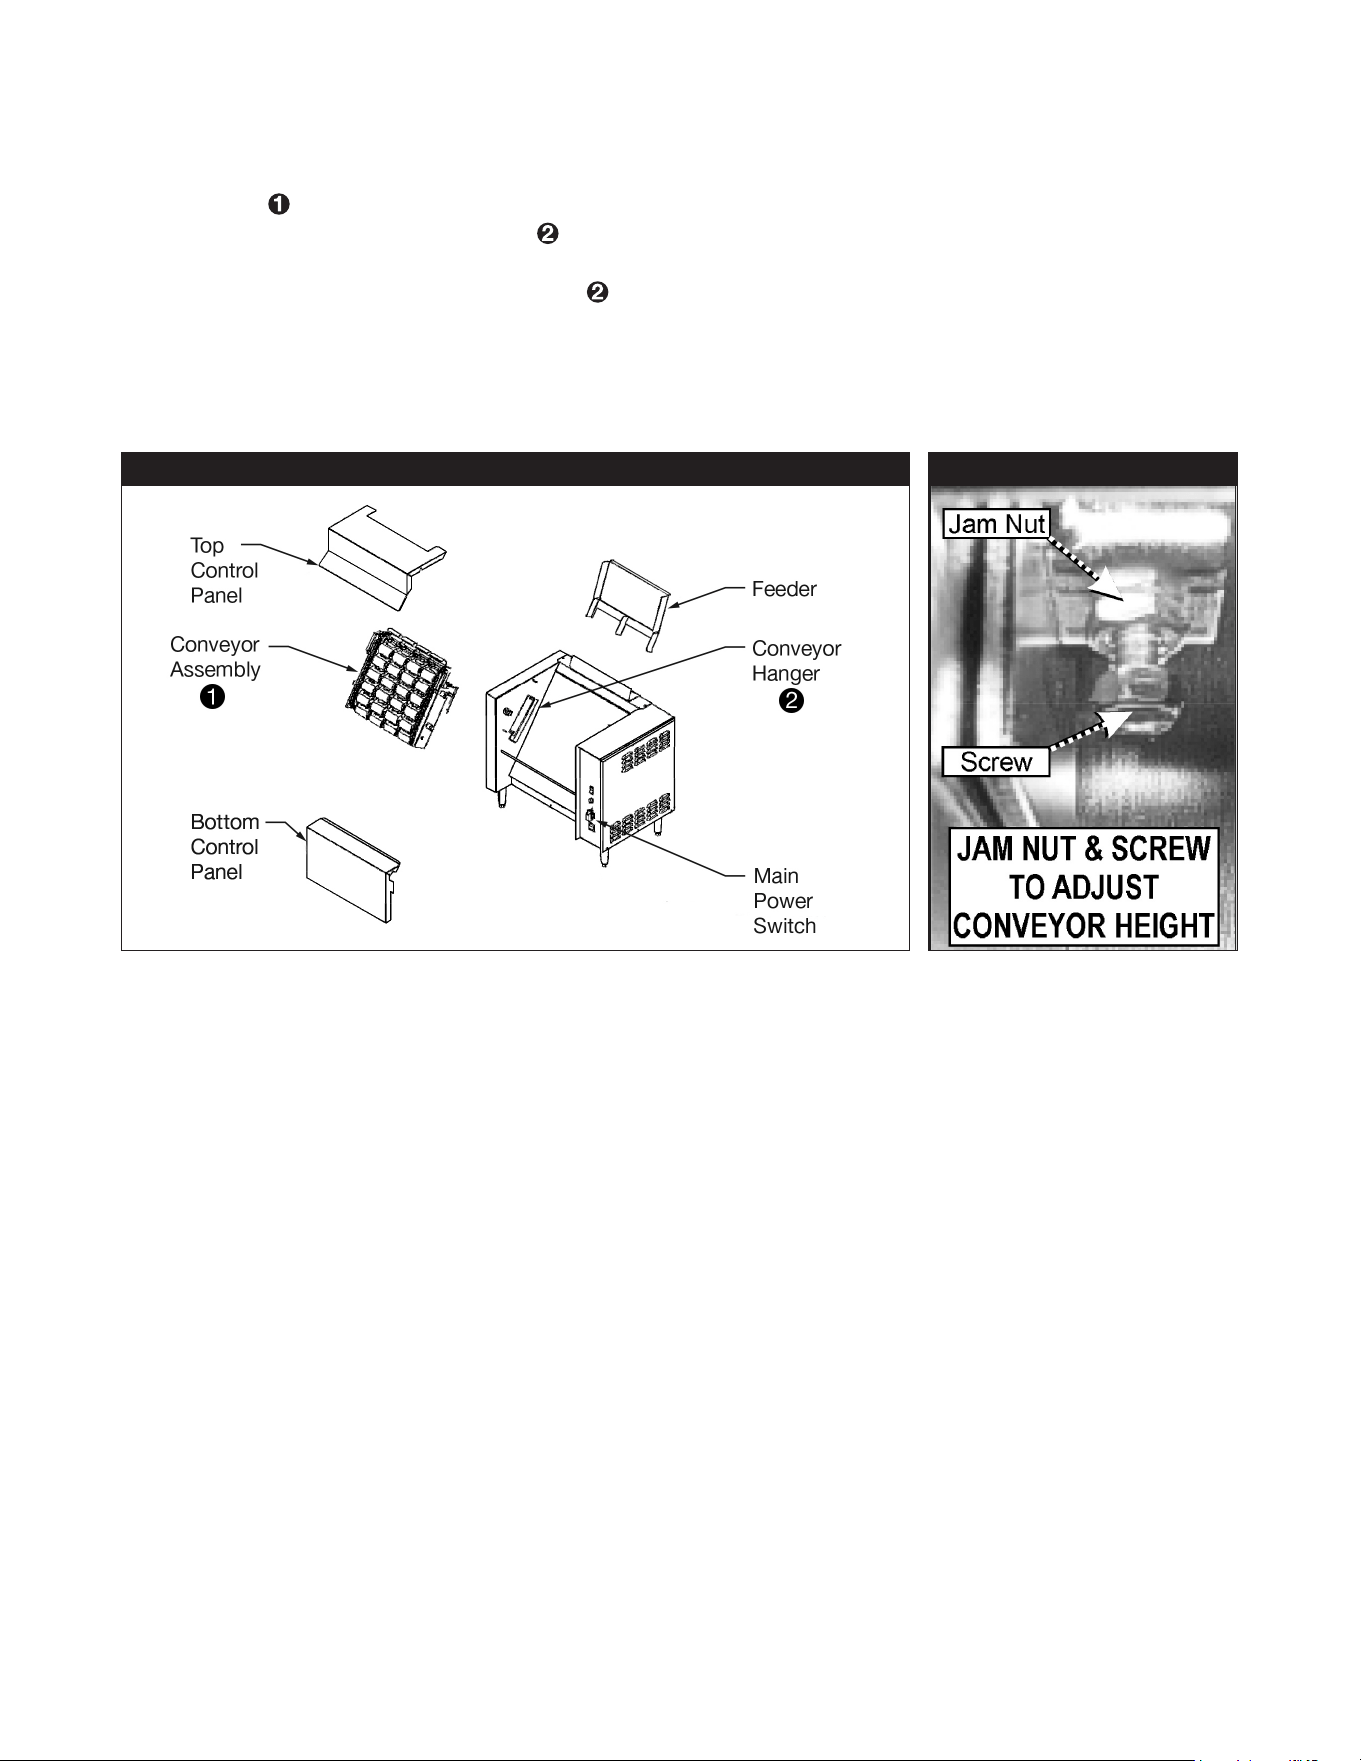
FIGURE 1 FIGURE 2
4. Conveyor Installation
Remove the top and bottom control panels by lifting it straight up. (See Figure 1) Lift conveyor
assembly
by using “U” shaped handles on each conveyor side bracket. Lower the conveyor into
the two conveyor hanger brackets
above the grill plate on each side, so the four spacers on the
sides of the conveyor rest on the bottom ange and the bottom spacers are against the adjustment
screws. The conveyor hanger brackets
are factory adjusted. However, before reinstalling the
front panels apply power to the unit and run the conveyor to insure proper gear engagement. If
gears are not properly engaged adjust the conveyor by loosening the jam nuts on the conveyor
hanger brackets and adjusting the screw (see Figure 2) to set the conveyor to the correct height.
Re-tighten jam nuts after adjustment is complete.
a. To adjust the conveyor up into the drive gear, turn the conveyor adjustment screw clockwise.
Use a 7/16-end wrench to tighten the jam nut.
b. To adjust the conveyor away from the drive gear, turn the conveyor adjustment screw
counterclockwise. Use a 7/16-end wrench to tighten the jam nut.
5. Replace top and bottom control panels
5. LOCATION
Place the toaster on a at surface. Locate the toaster near a wall receptacle of the proper
conguration. DO NOT USE AN EXTENSION CORD. Plug the power cord into an outlet (receptacle) of
the specied voltage on the rating label. Outlets must be properly grounded.
6
6. OPERATION INSTRUCTIONS
6. Wet operation. (using oil) Season the toaster grill by applying a light coating of oil to entire grill
surface (Fry oil can be used). When toasting using oil, any high-quality cooking oil may be used
with this toaster (do not use oils that contain dairy products such as butter). Allow the griddle to
heat up for 20 minutes. After 20 minutes season the grill surface again by applying another coating
of oil to the entire grill surface. Fill the Butter Pan 2/3 full of warmed cooking oil. The oil should
spread evenly over the surface of the roller.
a. Turn Main Power Switch on. Set Temperature Control knob to 450 degrees Fahrenheit. Allow
Pilot Light to cycle at least two times (on/o). When the light is on, the grill is heating. Heat up
time is about 15-20 minutes.
b. Turn on motor switch. Conveyor should start to turn.
c. Holding the bun half in the palm of the hand, slap the face (cut side) of the bun on the turning
Butter Roller surface.
d. Place bun halves on feeder cut side down (facing grill surface). Try several buns to determine
the correct pressure and time to achieve the desired browning and temperature of bun. Using
too little oil will cause the bun surface to be cool and uneven in color. It will also cause the bun
to stick to the grill. Using too much oil will give the bun a yellow un-toasted look. Toast time is
approximately 36 seconds depending on bun height and diameter. Increase or decrease the
temperature setting to achieve desired brownness and temperature.
NOTE: Should the temperature setting be changed, allow several cycles for the grill
plate to adjust. Once the desired setting has been achieved, note the temperature
and keep it set there.
.
7. CLEANING INSTRUCTIONS
WARNING: Make sure the toaster is in the o position and has been o at least
15 -30 minutes. Do not attempt this cleaning procedure if the toaster components
are too hot to touch. Never spray water on the toaster or controls. Damage to the
toaster as well as injury could occur. Severe injury and burns may occur if you do
not follow this instruction sheet.
WARNING: Do not use a grill brick or grill screen to clean the griddle plate. Use
of these products will scrape the plating o of the griddle surface causing buns to
stick to the grill plate.
Disassembly
Turn o main power switch and conveyor switch. Disconnect the power supply cord from the wall
outlet. The toaster will be hot when turned o. Allow the toaster to cool for at least 15-30 minutes
before handling. USE CAUTION during disassembly and cleaning. Grasp the left side of the Butter
Roller Shaft. Lift up and to the left to remove from drive assembly. Remove the Butter Pan. Remove
the Top and Bottom Control Panels.
NOTE: Do not use any chloride or chlorine-based products to clean or rinse toaster
or toaster parts.
7
Daily Parts Cleaning:
The Butter Roller, Butter Pan, Feeder, and Top and Bottom Control Panels can be placed in a
dishwasher or sink and washed with mild detergent and warm water.
Daily Conveyor Cleaning:
Conveyor may be hot and is heavy, use caution when lifting and removing. Remove conveyor
assembly by simply pushing back on the top row of paddles on conveyor. Conveyor should loosen
from gears and you should grab handles and pull upward. Pull out gently placing it in a sink with
the drain stopped, or in a suitable container to soak over night. Conveyor can be placed in the sink
or container while warm. Use caution when handling a hot conveyor. The soak solution is a mix of
10 parts hot water (120ºF or more) to 1 part (minimum) “INSIDE OUT” brand 3-IN-1. Fill the sink or
suitable container with the solution, to completely cover the conveyor by approximately one inch.
Allow the conveyor to soak in the solution overnight. Remove the conveyor from the solution. Use a
sti non-metal brush or plastic pad to remove residual bun oil. Insure the chains are clean and free
from debris. Use a brush to remove any soil or debris remaining on the chain. Rinse conveyor with
plain hot water and allow to drain. Lubricate both chains thoroughly with vegetable oil. Bun oil may be
used if it contains no animal fats, salts or dairy products. Note: Chain Lubrication is critical to chain
life. Oil the chain daily. Gently replace conveyor into toaster. Discard used soak solution. Clean and
sanitize sink or container after over night use!
Replace all removed toaster parts. Plug power supply cord into wall outlet. Turn main power switch
on. Turn conveyor switch on.
NOTE: The conveyor must stay clean to optimize speed and bun temperature.
Daily Griddle Cleaning:
Wet Operation:
It is not necessary to completely remove residue, as long as the grill surface is smooth and free of
burned on bread that may cause buns to stick. To remove baked-on-bread use the cleaning procedure
below.
Tools needed for cleaning:
Scotch-Brite
TM
Quick Clean Small Appliance Cleaner No. 702 or Equivalent
Scotch-Brite
TM
Multi-Purpose Pad Holder No. 405 or Equivalent
Scotch-Brite
TM
Squeegee No. 410 or Equivalent
Scotch-Brite
TM
Griddle Polishing Pad No. 46 or Scotch-Brite™ General Purpose Scrubbing Pad No.
9650 or Equivalent
Also needed:
(Wet) terry towel
Catch pan for food soil (Butter Pan can be used)
Common kitchen scraper
8
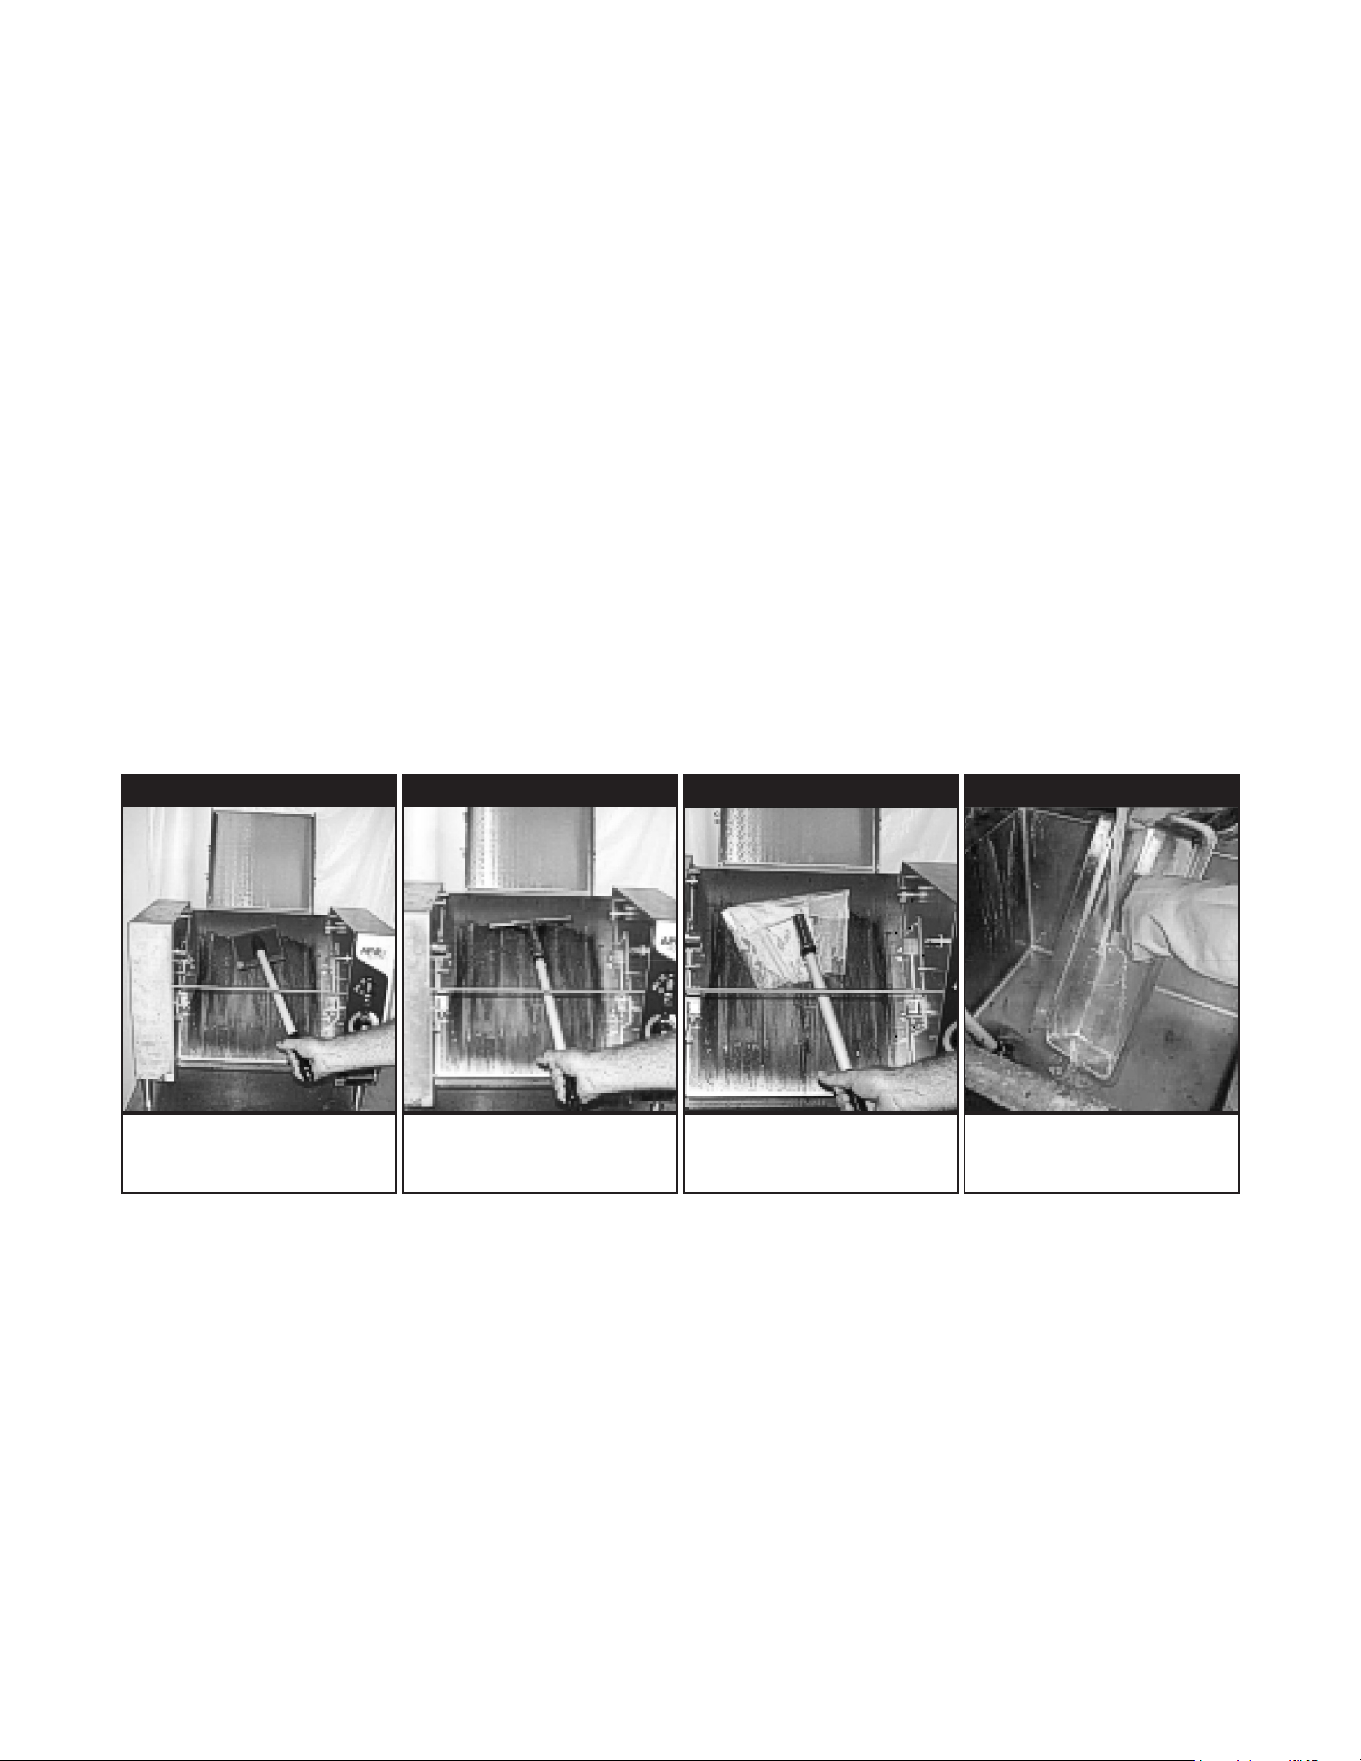
If PTFE sheet is installed remove it when Bun Grill Toaster is cool.
Step 1. Set the toaster temperature to 350°F.
Step 2. Scrape loose food particles with scraper into Butter Pan under grill plate.
Step 3. Squeeze 1 to 2 ounces of Scotch-Brite
TM
Quick Clean Small Appliance Cleaner No. 702 or
equivalent into measuring reservoir of bottle. Pour cleaner onto pad. Do not pour directly
onto grill surface.
Step 4. Scour using Scotch-BriteTM Multi-Purpose Pad Holder No. 405 or equivalent, and
Scotch- BriteTM Griddle Polishing Pad No. 46 (or 9650). (See Figure 3).
Step 5. After scouring, squeegee the surface clean with the Scotch-BriteTM Squeegee No. 410
(See Figure 5).
Step 6. Turn o Bun Grill Toaster and wipe surface with clean wet towel. If the surface is still hot,
use the Scotch-BriteTM Multi-Purpose Pad Holder to move the towel over the surface. (See
Figure 5).
Step 7. Dry the grill thoroughly. Season the grill plate by applying a light coating of cooking oil to
the grill plate. Allow the griddle to heat up for 20 minutes. After 20 minutes season the grill
surface again by applying another coating of oil to the entire grill surface.
Step 8. Rinse all cleaning tools with hot water. (See Figure 6).
Step 9. Wipe down all external stainless steel surfaces with a damp cloth.
FIGURE 3 FIGURE 4 FIGURE 5 FIGURE 6
Re-Assembly
Before assembling the conveyor check the following: Fasteners on the Conveyor Assembly hardware
should be tight with no signs of wear. Conveyor shaft gear and the Motor Shaft gear are tight. Hanger
Bracket screws are tight and the brackets have not shifted during use.
Scour grill. Clean grill surface with
squeegee
Wipe the grill with
clean wet towel.
Rinse tools with water.
9
8. TROUBLESHOOTING GUIDE
Always ask and check the following:
1. Is the unit connected to a live power source of the proper voltage?
2. Check the circuit breaker.
3. Is power switch “ON” and pilot light glowing?
4. Check the rating label. Is the unit connected to the correct power source?
If the above checks out, and you still have problems, call an APW Wyott authorized service agent.
APW SERVICE HOT LINE: (800) 527-2100
The Problem The Cause The Solution
Buns will not toast Wrong temperature setting
Excessive cupping of bun surface
Increase temperature setting and allow two cycles to warm up.
Verify bun cut to bun specication
Check conveyor adjustment Buns are stale, use fresher buns.
Buns toast
unevenly
Excessive cupping of bun surface
Conveyor pressure too light
Buns are stale, use fresher buns.
Adjust conveyor tension
Buns stick to grill Doughy buns or excessive sugar and
moisture, plus grill temperature too high.
Build up on Grill Surface
Reduce grill temperature
Allow buns to age.
Clean Grill per instructions
No power No power at the wall receptacle
Power cord disconnected
Main switch
Check circuit breaker or fuse
Check plug at receptacle
Check that switch is ON and operative
Conveyor will not
turn (Motor turns)
Drive gears not engaged
Gear set screws not tight
Check gear alignment and engagement
Check screws and tighten if required
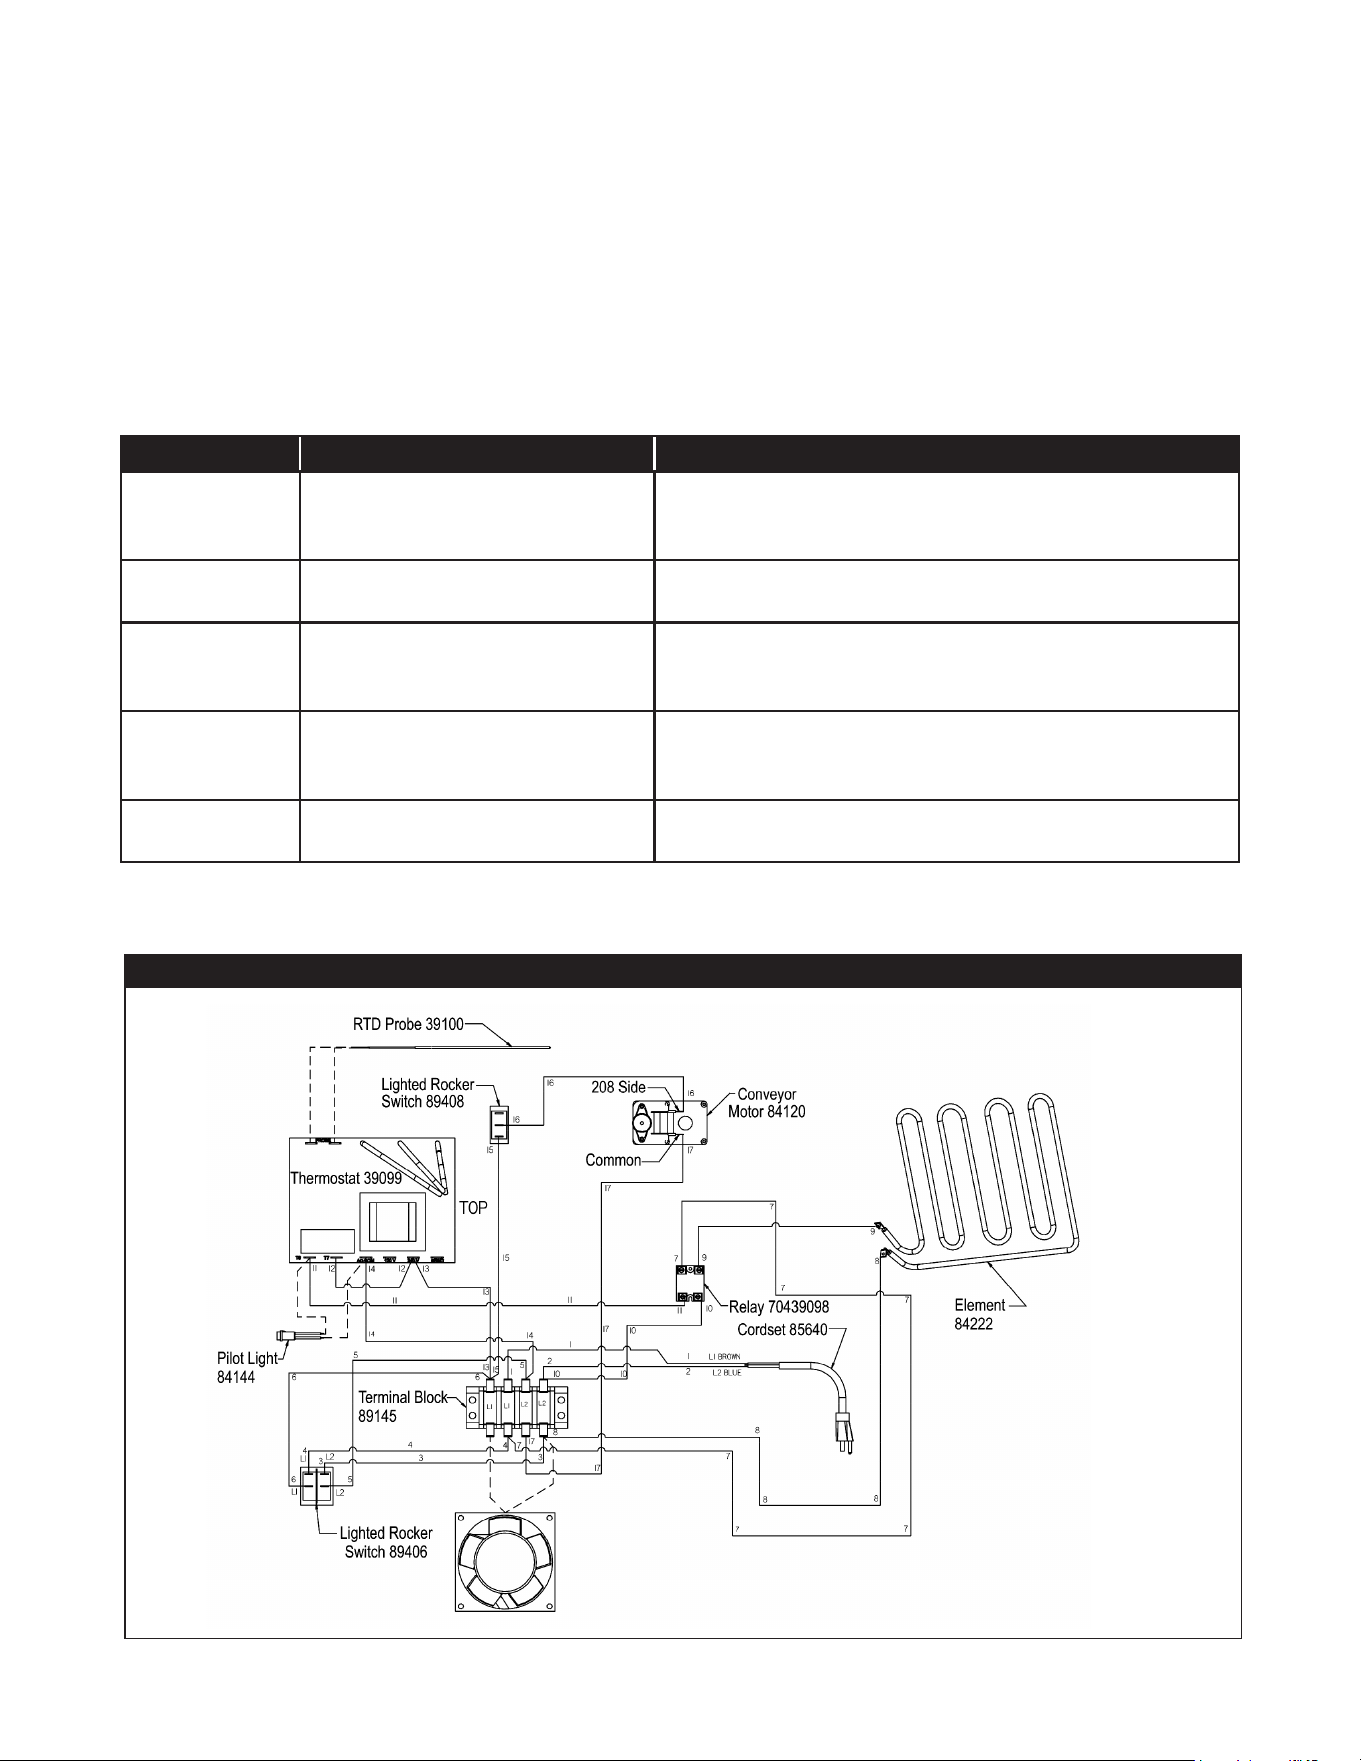
WIRING DIAGRAM – M-95
9. WIRING DIAGRAM
10
EXPLODED VIEW- M-95
10. EXPLODED VIEW
Item P/N Description Qty
1 84229 ASSY WELD BASE WTB M 952 1
2 84217 ASSY WELD PANEL, LEFT SIDE 1
3 84118 ASSY WELD RIGHT SIDE HOUSING 1
4 84220 ASSY WELD, GRILL PLATE 1
5 84146 COVER RIGHT SIDE HOUSING 1
6 84213 PLATE COVER, LEFT SIDE 1
7 83065 ASSY CHAIN HANGER LEFT SIDE 1
8 83061 ASSY WELD HANGER ARM RIGHT SIDE 1
9 89301 LABEL, M-95 JIB CONTROL 1
10 84164 PANEL, CONTROL M-95 JIB 1
11 85281 FAN,COOLING, 3” DIA, 208/230V 1
12 89408 SWITCH, LIGHTED ROCKER 1
13 89491 SWITCH, ROCK, DPST, 20A 250VAC, BLK (TEXT) 1
14 56530 LIGHT PILOT 1
15 85282 GUARD, 3.15 Sq. Fan 1
16 84155 BRACE, GRILL 2
17 84151 PLATE MOTOR MOUNTING 1
18 84120 MOTOR, 208/240 60HZ 1 RPM CONVEYOR 1

11
Item P/N Description Qty
19 89059 WASHER #10 EXTERNAL LOCK 6
20 88993 SCREW 10-32X3/8 TRS HD PHILLIPS NYLK MS 12
21 89143 PLUG, HYCO # DP-187 3
22 88923 SCREW, 8-32x1-3/4 SLT PAN MS SS 4
23 89063 NUT, HEX 8-32 4
24 89145 TERMINAL BLOCK 300V-30AMPS 1
25 89054 NUT, KEPS 6-32 2
26 85640 CORDSET, 14/3 600V .440 HSJO 620P 1
27 89111 BUSHING, STRAIN RELIEF SR-7W-2 1
28 70439098 RELAY, SLD ST 50A 280V OUT,90-280VAC IN 1
29 39099 T’STAT, FASTRON G6 1
30 88901 SCREW 6/32 X 1/4 PAN HD M/S BLKZC 2
31 88705 KNOB 039-266 8A BLACK 1
32 88894 STUD PRESS THREADED 10
33 84127 S/ASS’Y, CHAIN WEIGHT CONVEYOR 1
34 84211 ASSY WELD PLATE ATTACHMENT LEFT SIDE 1
35 84212 ASSY WELD PLATE ATTACHMENT RIGHT SIDE 1
36 87320 LEG, 4” PLASTIC ADJ. 4
37 88947 WASHER FLAT PLATED 3/8” SAE 3
38 88932 BOLT, 3/8” - 16 HEX HEAD X 1 LG. 3
39 84222 ELEMENT, HEATING 1
40 39100 PROBE, THERMOSTAT 1
41 89120 CLIP, JIFFY 2
42 84219 PLATE, ELEMENT CLAMP 1
43 89061 NUT, HEX 10-24 31
44 84226 INSULATION, ELEMENT COVER 1
45 84121 ASSY BACK COVER 1
46 84221 COVER, ELEMENT 1
47 84227 INSULATION, COVER GRILL 1
48 84163 BRACKET REAR GRILL SEAL 1
49 84232 BRACKET, GRILL GUARD, M952 WTB 1
50 89032 SCREW, 10-32X3/8 3
51 89039 SCREW, 8-32X5/16 PH PAN SS 13
52 84216 COVER, GRILL 1
53 89026 NUT, 10-24 PLATED 4
54 88889 SCREW #8 X 1/2 AB SMS PHL TRUSS LGM NI PLT 6
55 85033 GEAR, 13 TOOTH 3/8 BORE 1
56 85043 GEAR, 19 TOOTH 1
57 84145 COVER BOTTOM FRONT 1
58 84215 COVER, TOP FRONT 1
59 89071 WASHER, #10 FLAT 15
60 89076 WASHER, LOCK 1/4 INTERNAL 10
61 89060 NUT, FULL HEX 1/4-20 10
62 84559 PLUG, HOLE HEYCO #DP687 1
63 88995 SCREW, 10-32x.375 HEX WASHER HEAD 2
64 88961 NUT, HEX 10-24, GREEN 3
65 83733 ROD, FRONT AND TOP 1

12
IMPORTANT FOR FUTURE REFERENCE
Please complete this information and retain this manual for the life of the equipment.
For Warranty Service and/or Parts, this information is required.
Model Number Serial Number Date Purchased
Notes

13
LIMITED EQUIPMENT WARRANTY
APW warrants to the original purchaser of new APW's products to be
free from defects in material or workmanship, under normal and proper
use and maintenance service as specified by APW and upon proper
installation and start-up in accordance with the instructions
supplied with each APW unit. APWs’ obligation under this warranty is
limited to a period of one [1] year from the date of original installation, or
eighteen [18] months from original invoice date, whichever occurs first.
Defects that occur as a result of normal use, within the time period and
limitations defined in this warranty, will at APWs’ discretion have the parts
replaced or repaired by APW or a APWs-authorized service agency.
THIS WARRANTY IS SUBJECT TO ALL LISTED CONDITIONS
Repairs performed under this warranty are to be performed by an
APW authorized service agency. APW will not be responsible for
charges incurred or service performed by non-authorized repair
agencies. In all cases, the nearest APW-authorized service agency must be
used. APW will be responsible for normal labor charges incurred in
the repair or replacement of a warrantied product within 50 miles
(80.5 km) of an authorized service agency. Time and expense charges
for anything beyond that distance will be the responsibility of the owner.
All labor will need to be performed during regular service hours. Any
overtime premium will be charged to the owner. For all shipments
outside the U.S.A. and Canada, please see the International Warranty
for specific details. It is t
he responsibility of the owner to inspect
and report any shipping damage claims, hidden or otherwise, promptly
following delivery. No mileage or travel charges will be honored on any
equipment that is deemed portable. In general, equipment with a cord
and plug weighing less than 50 lb. (22.7 kg) is considered portable and
should be taken or shipped to the closest authorized service agency,
transportation prepaid.
CONTACT
Should you require any assistance regarding the operation or maintenance
of any APW Manufacturing; phone or email our service department. In all
correspondence provide the model number and serial number of the unit
needing service; include the voltage or gas type.
Normal Business Hours: 8:00 a.m. to 4:30 p.m. Central
Telephone: 800-264-7827 Tech Service Option 2
Email: [email protected]
www.apwwyott.com
WARRANTY EXCLUSIONS
THE FOLLOWING WILL NOT BE COVERED UNDER WARRANTY.
APWs’ sole obligation under this warranty is limited to either repair
or replacement parts, subject to the additional limitations
detailed below. This warranty neither assumes nor authorizes any
person to assume obligations other than those expressly
covered by this warranty.
• Any product which has not been used, maintained, or installed in
accordance with the directions published in the appropriate
installation sheet and/or owner’s manual, including incorrect gas or
electrical connection. APW is not liable for any unit which has been
mishandled, abused, misapplied, subjected to harsh chemicals,
modified by unauthorized personnel, damaged by flood, fire, or other
acts of nature [or God], or which have an altered or missing serial
number.
• Installation, labor, and job checkouts, ca
libration of heat controls,
air and gas burner/bypass/pilot adjustments, gas or electrical system
checks, voltage and phase conversions, cleaning of equipment, or
seasoning of griddle surface.
• Replacement of fuses or resetting of circuit breakers, safety
controls, or reset buttons.
• Replacement of broken or damaged glass components, quartz
heating elements, and light bulbs.
• Labor charges for all removable and consumable parts in gas
charbroilers and hotplates, including but not limited to burners,
grates, and radiants.
• Any labor charges incurred by delays, waiting time, or operating
restrictions that hinder a service technician’s ability to perform
service.
• Replacement of parts that fail or are damaged due to normal wear
or labor for replacement of parts that can be replaced during a daily
cleaning routine, such as but not limited to silicone belts, PTFE non-
stick sheets, control labels, knobs, bulbs, fuses, quartz heating
elements, baskets, racks, and grease drawers.
• Any economic loss of business or profits.
• Non-OEM parts. Use of non-OEM parts without APWs’ approval
will void the warranty.
• Units exceeding one [1] year from original installation date, or more
than eighteen [18] months from original invoice date, whichever
comes first.
ADDITIONAL WARRANTIES
• Specific/chain-specific equipment may have additional and/or
extended warranties.
The foregoing warranty is in lieu of any and all other warran�es
expressed or implied and cons�tutes the en�re warranty.