

WonderLink™ - Compatible eufy Devices
Check this list to find a eufy device that works with Wonderlink™.
Wall Light Cam
Wired Wall Light Cam S100
Solar Wall Light Cam S120
Video Smart Lock
Video Smart Lock S330
Video Smart Lock E330
eufyCam
eufyCam S330 (eufyCam 3)
eufyCam S300 (eufyCam 3C)
eufyCam S221 (eufyCam 2 Pro)
eufyCam S220 (eufyCam 2C Pro)
eufyCam 2
eufyCam S210 (eufyCam 2C)
eufyCam E
eufyCam
Video Doorbell
Video Doorbell E340 (Battery Powered)
Video Doorbell S330
Video Doorbell S220
Video Doorbell S210
Video Doorbell C210
Video Doorbell C220
Video Doorbell (Wired) S330
Indoor Cam
Indoor Cam S350
Solo IndoorCam C24
Indoor Cam E220
Solo IndoorCam C22
Solo IndoorCam P22
Indoor Cam Mini
SoloCam
SoloCam S340
SoloCam S220
SoloCam C110
SoloCam C120
SoloCam E210
SoloCam E220
SoloCam S230 (S40)
Outdoor Cam
Outdoor Cam E210
Outdoor Cam E220
Floodlight Cam
Floodlight Camera E340
Floodlight Cam E220
Floodlight Cam E221
Floodlight Cam S330
4G Cam eufy 4G LTE Cam S330
Garage-Control Cam
Garage-Control Cam E110
Garage-Control Cam E120
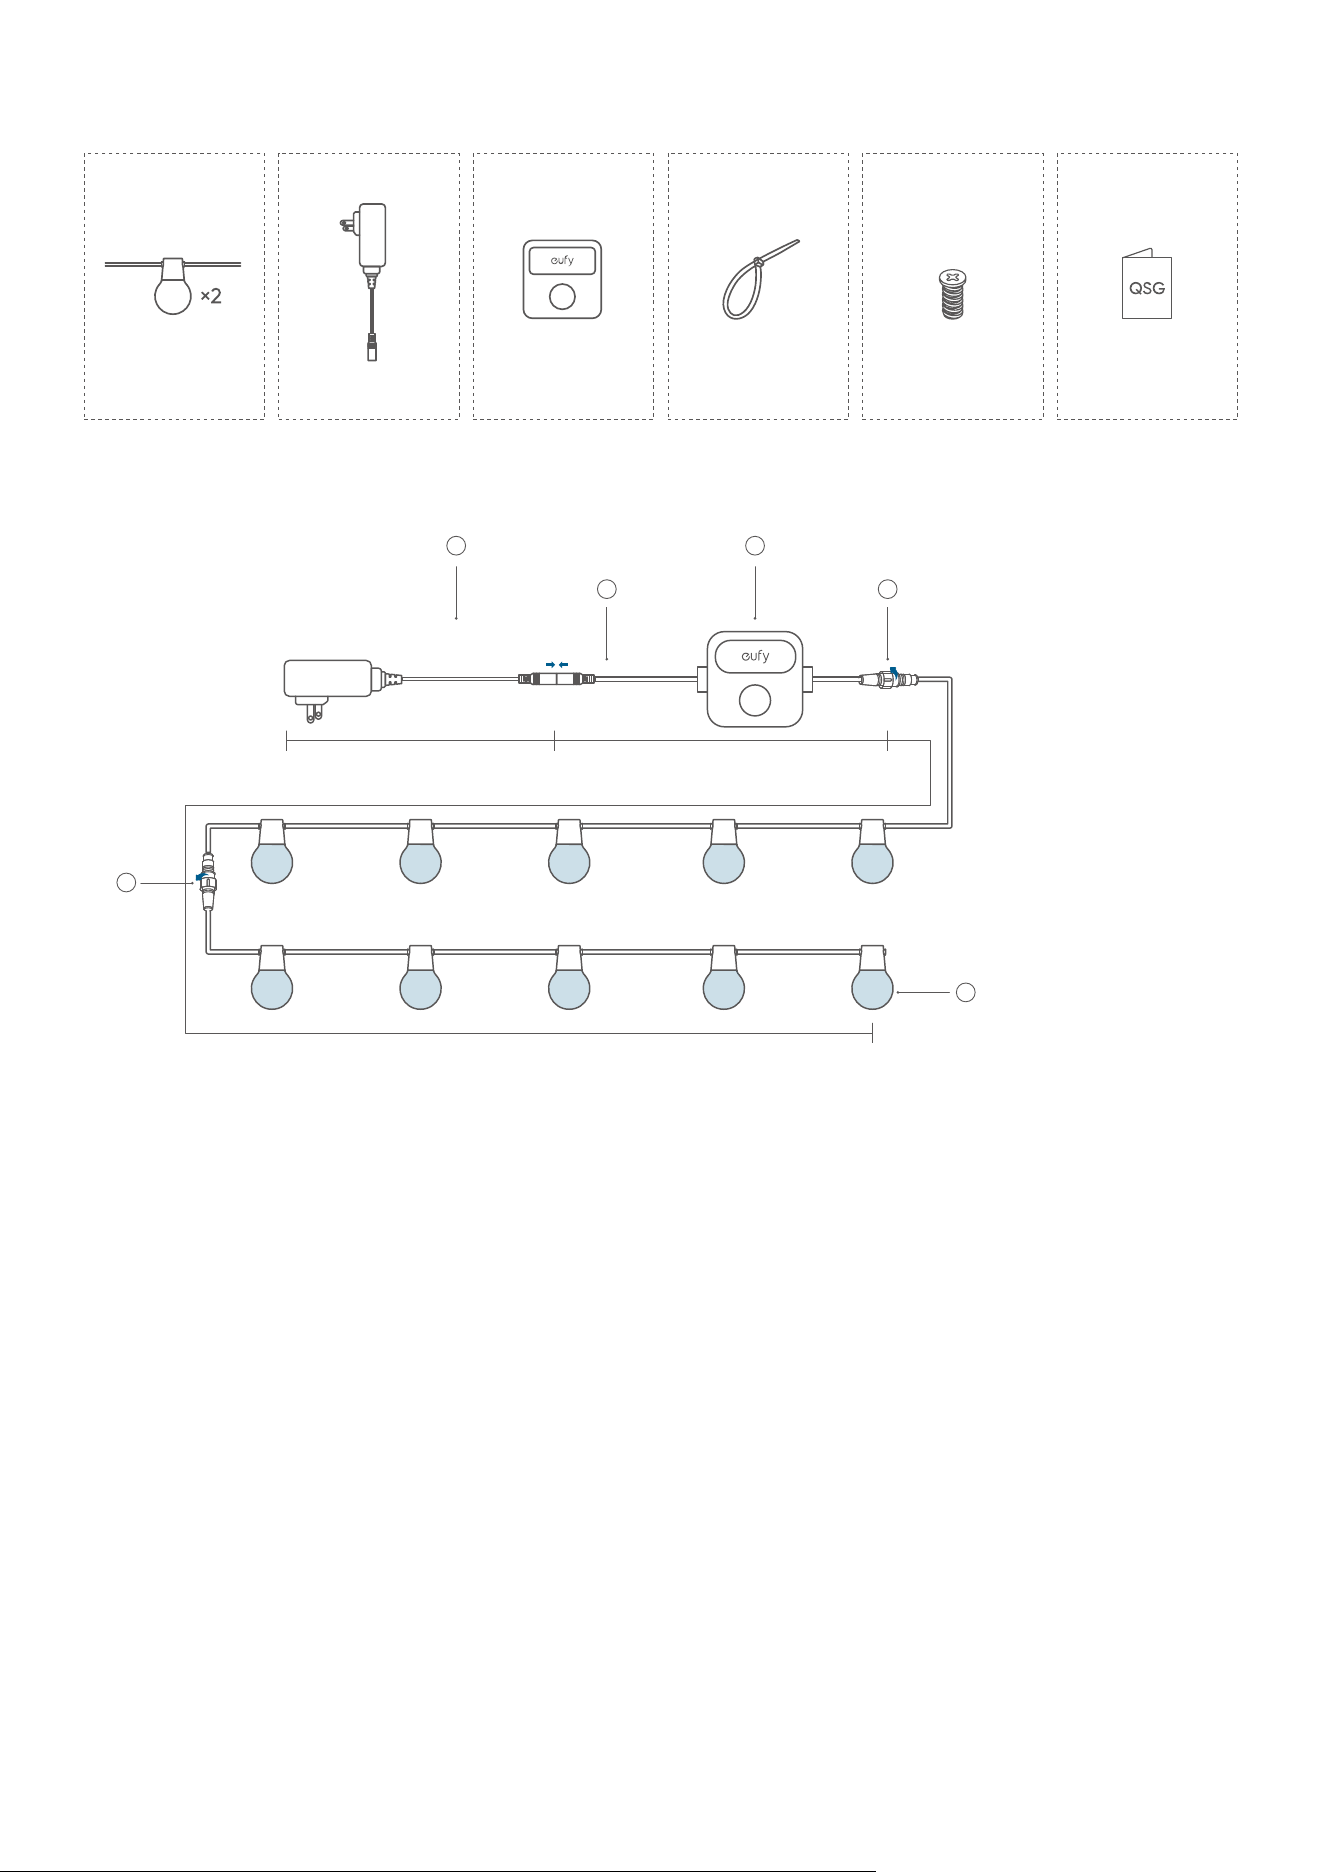
What's in the Box
String Light
(30 bulbs)
Control UnitPower Adapter
Zip Tie ×35
Screw ×35 Quick Start Guide
At a Glance
2
3
4
5
1
2
0.9 ft (0.3m)
98.4 ft (30 m), 49.2 ft (15m) for each
13.4 ft (4.1m)
①
Bulbs
②
Waterproof Connectors
③
Control Unit (Power Button)
• Press to turn on the light or switch between dierent light eects.
• Press and hold for 2 seconds to turn o the light.
④
Power Connector
⑤
Power Adapter
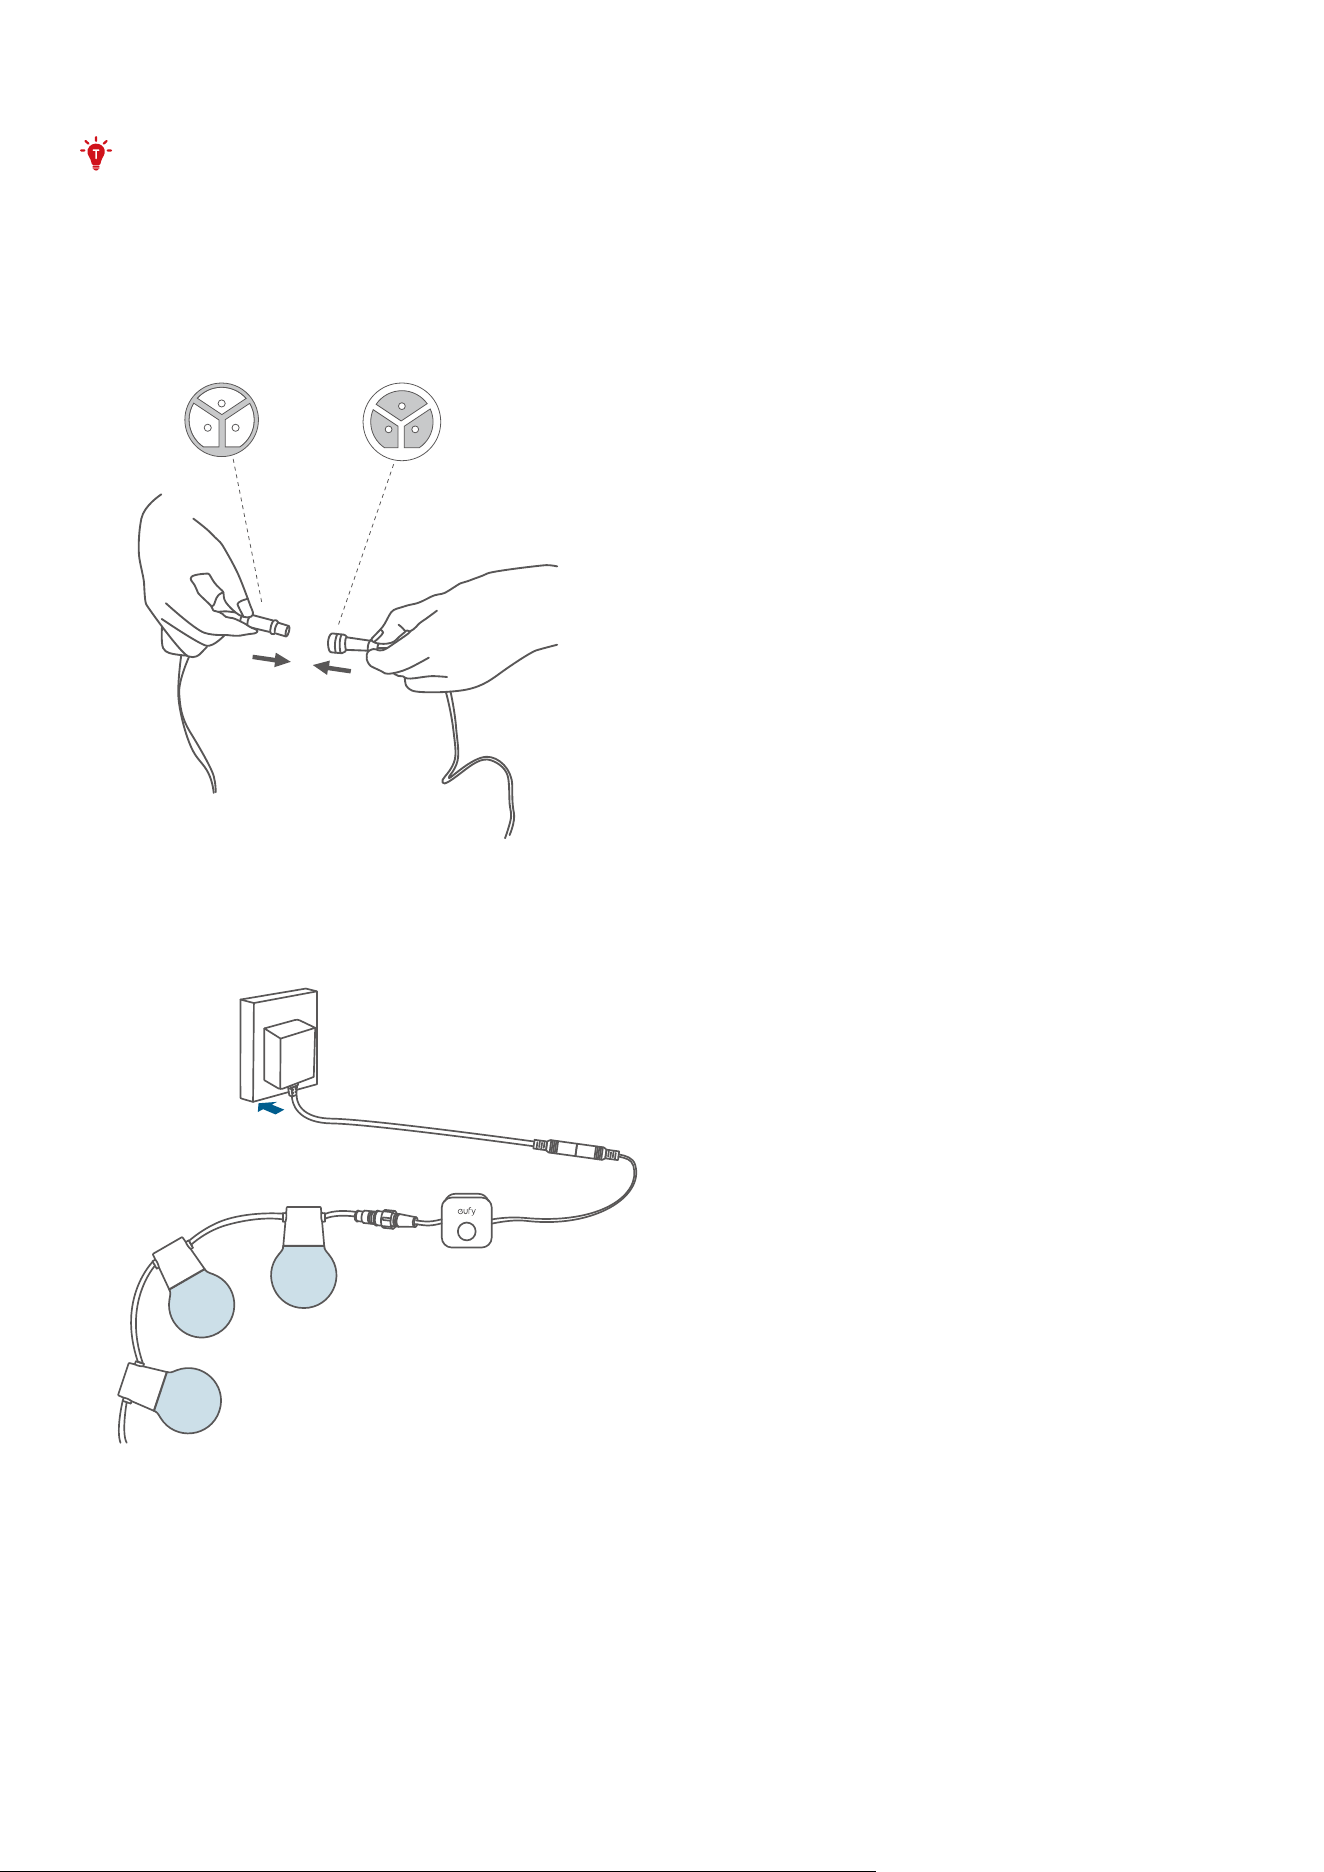
Testing the Lights
• Connect the light strings with the adapter unplugged. Avoid connecting while the
adapter is plugged. If you connect the light strings while adapter is plugged, the strings
may not light up.
• A maximum of 2 light strings (15 bulbs for each string) can be connected to the power
adapter.
1. Connect all light strings together, then connect them to the control box and power adapter.
Secure the waterproof caps for each connection and the end of the last light string.
2. Plug in the power supply to verify that each light string is working properly.
• If some of the light strings do not light up, unplug and replug the power adapter. Make sure
the light strings are working properly before proceeding to the next step.
• See "Troubleshooting" for other lighting problems that may occur.
Setting up the System
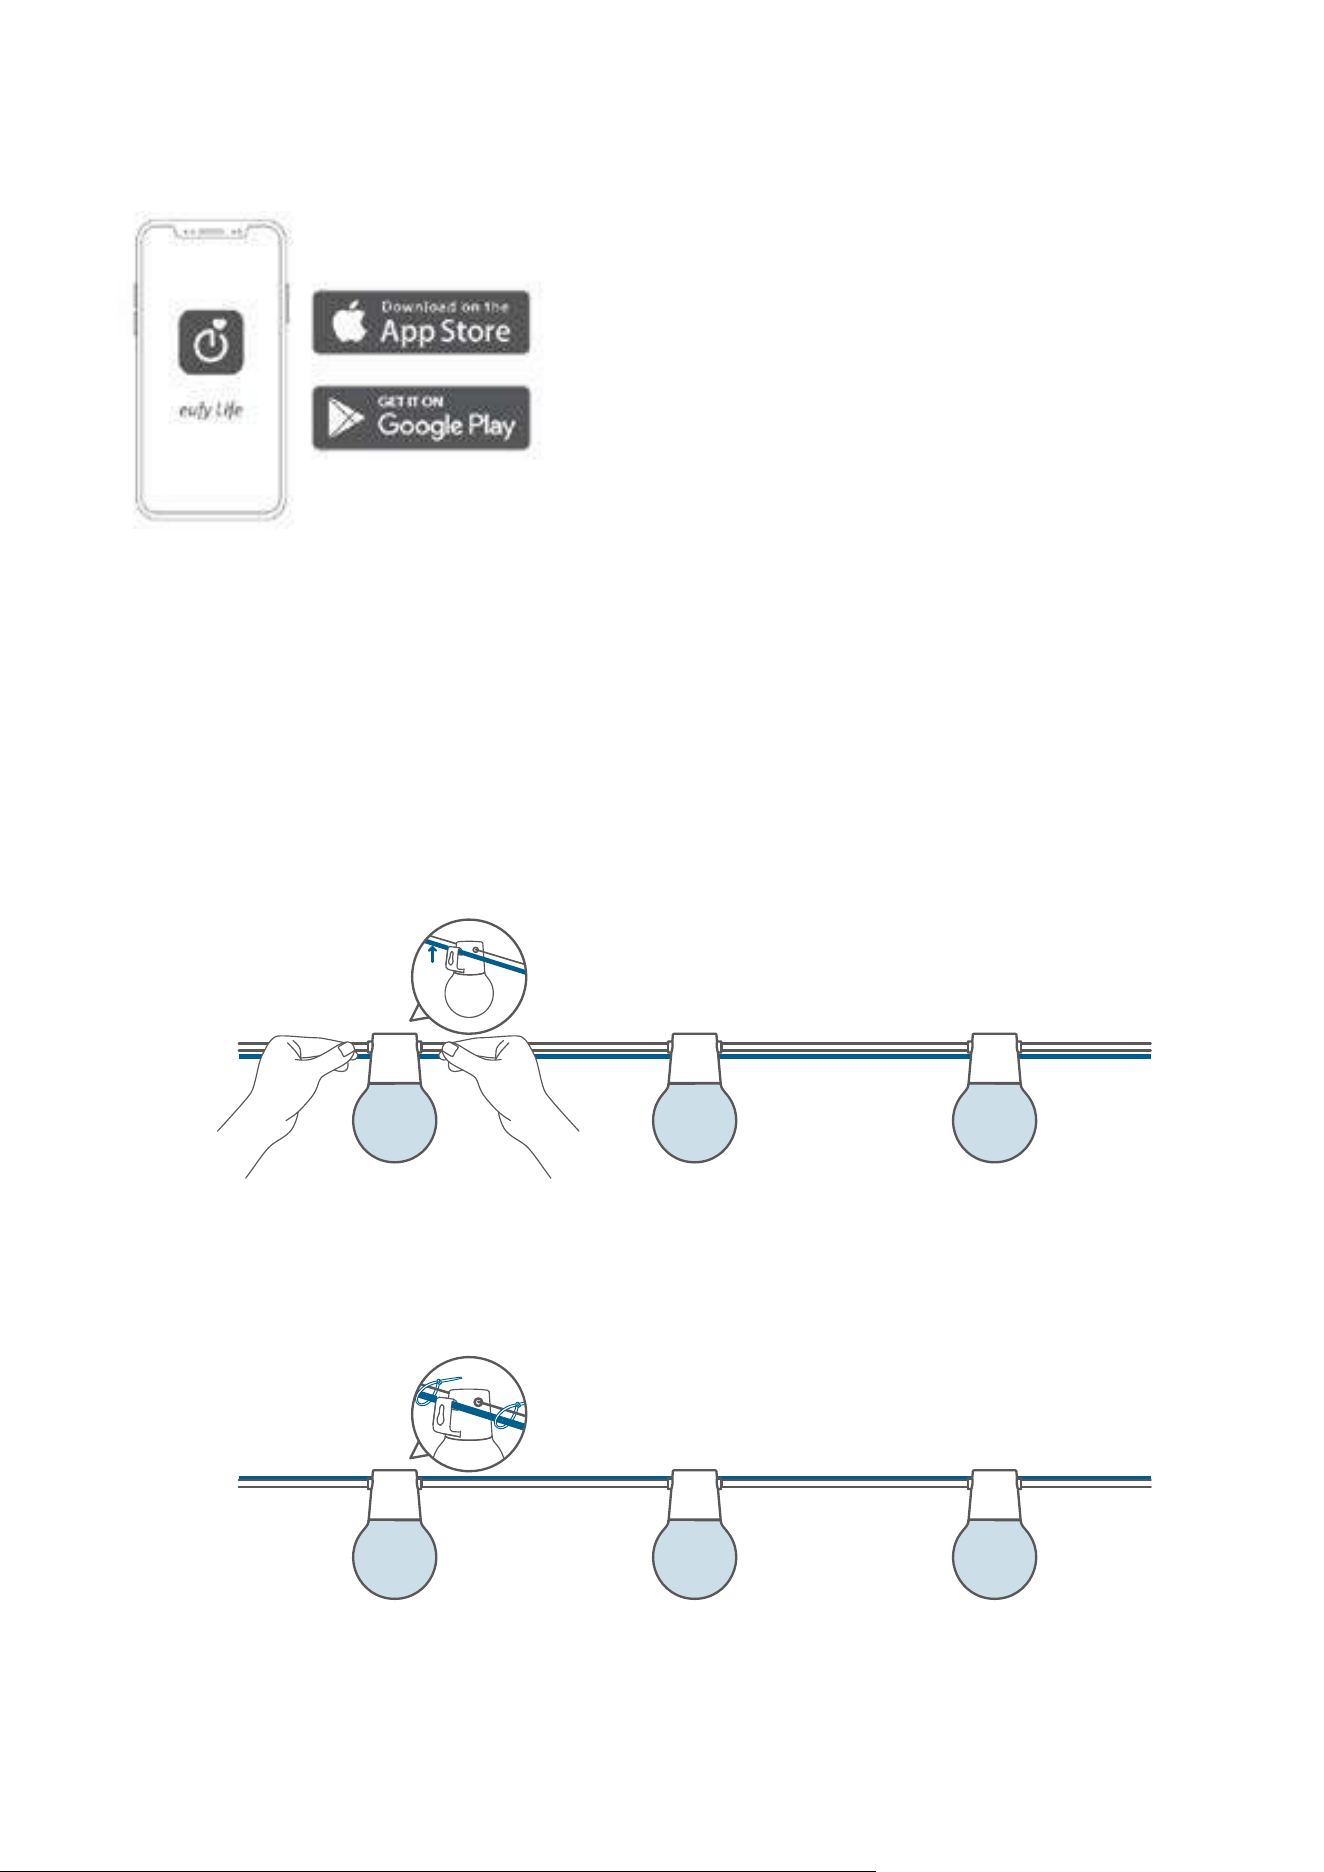
1. Download and install the eufy Life app, then sign in or create an account.
• Make sure that the eufy Life app is version 2.11.0 or later to support this light strip.
2. Follow the in-app instructions to add this device and complete the setup.
Installing your Outdoor Light
The installation will take approximately 10 minutes. There are 3 ways to install your string lights.
If you are installing the lights on the left side of the power outlet, option 2 is recommended.
Option 1 Install with Hooks
Install a guide wire (recommended diameter: 3mm to 5mm) at your desired location, and attach
the bulb to the guide wire using the hook.
❶
Option 2 Install with Zip Ties
Install a guide wire (recommended diameter: 3mm to 5mm) at your desired location, and tie the
string light cable to the guide wire with zip ties.
❷
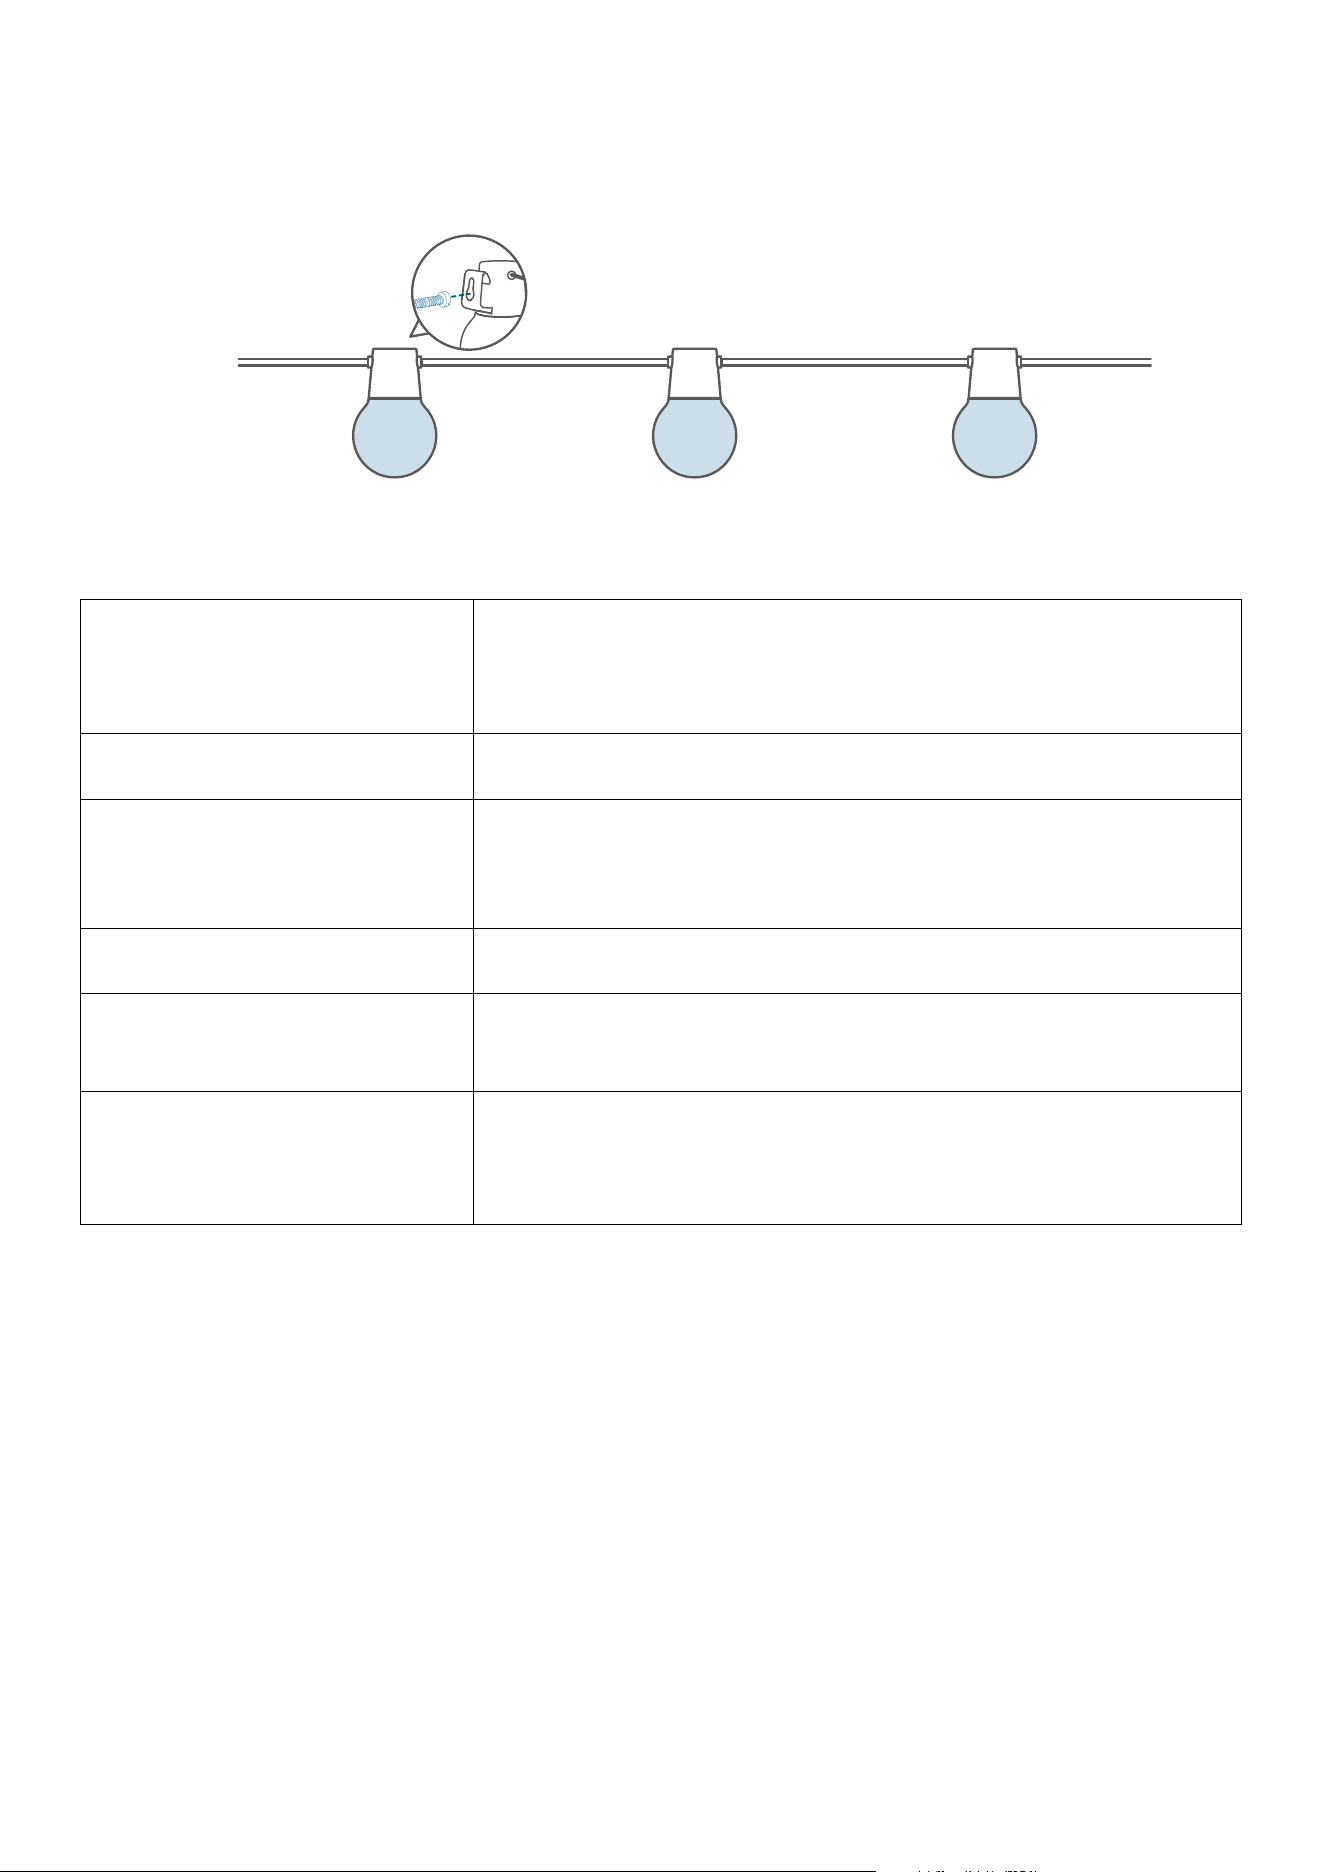
Option 3 Install with Screws
Install a guide wire (recommended diameter: 3mm to 5mm) at your desired location, and tie the
string light cable to the guide wire with zip ties.
❸
Specifications
Input (Power Adapter)
24W
120V AC ~, 50/60Hz (US)
100-240V AC ~, 50/60Hz (EU, UK, Australia)
Input (Lights) 24V
⎓
1A
Component Length
Light Strings: 98.4 ft (30 m), 49.2 ft (15m) for each
Control Unit Cable: 13.4 ft (4.1m)
Power Adapter: 0.9 ft (0.3m)
Light Displaying Technology RGBWWIC
Working Temperature
Whole Device: -20°C to 40°C (-4°F to 104°F)
Light Strings: -20
℃
to 60
℃
(-4°F to 140°F)
IP Ratings
Light Strings: IP65
Control Unit: IP65
Power Adapter: IP44
Troubleshooting
1. Cannot connect to Wi-Fi.
• The 5GHz network is not supported. Please set the router to 2.4GHz and then reset it.
• Do not skip the Wi-Fi connection steps in the app.
• Make sure you have entered the correct Wi-Fi name and password.
• Connect the hotspot of your phone to the product.
2. Light doesn't glow at all / Some lights do not glow.
• If only the first string glows while the power adapter is plugged in, unplug the power adapter
and plug it in again.
• If some lights don't glow, disconnect all components and reconnect all components and
plug the power adapter in again, or press the control unit to reset the light string.
• To reset the lights, unplug the power supply, reconnect it and wait for 1 minute. Press
and hold the control unit for 5 seconds, and the white lights start to blink on and o for 5
repeated runs, indicating the device is reset successfully.

• If any of the selected light eects are not fully displayed, contact eufy support team for
further analysis or product replacement.
Customer Service
• Lifetime Technical Support
• 18-month Limited Warranty
Important Safety Instructions
• The power adapter is IP44 rated. An outdoor socket with a waterproof cover is preferred.
• Ensure that all waterproof connectors are tightly secured when installing the string light.
• The lamp bead and other internal parts of the product cannot be replaced. If damaged,
please contact eufy@support.com for a product replacement.
• Do not allow children to assemble or install this product.
• Avoid installing this product in a closed environment or near large heat sources.
• The recommended temperature range for devices and accessories is -20°C to 40°C (-4°F to
104°F).
• Unless specifically indicated that it is safe to do so in the user guide or instruction manual,
do not use this device in an environment that exceeds the recommended low or high
temperature.
• Unless specifically indicated that it is safe to do so in the user guide or instruction manual,
avoid exposing your device to direct sunshine or excessively wet environments.
• For pluggable equipment, the socket outlet should be easily accessible.
• Use only the adapter provided by the manufacturer. Using unauthorized adapters may
cause danger and violate the authorized use of the device or the warranty article. External
dimmers cannot be used with this product.
• Ensure the cables are installed without overstretching.