1
USER MANUAL
Before using, please read the operating instructions carefully to
ensure proper application and achieve satisfactory results.
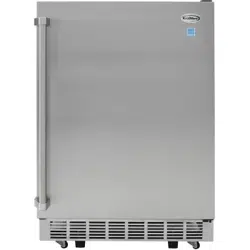
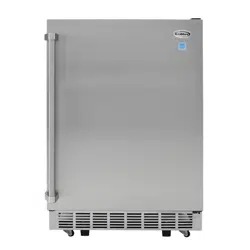
KoolMore Built in Outdoor Refrigerator
with Double Drawer For Outdoor Home
Kitchen
Models: KM-OKS-RD2
REFRIGERATOR

2
Stay informed with the latest information
for your KoolMore Appliance.
If you need any assistance or have questions, our customer
support team is here to help.

3
Contents
Safety ..............................................................................4
Parts List ...........................................................................7
Operation ........................................................................8
Cleaning ..........................................................................9
Installation ......................................................................9
Maintenance ...............................................................10
Troubleshooting ..........................................................11
Warranty ........................................................................12

4
Safety
When using any electrical appliance, basic safety precautions must be followed to reduce the risk of
re, electrical shock, and injury to persons or property. Before using your refrigerator, please read this
owner's manual carefully and observe the following safety tips.
Use this appliance only as described in this owner's manual.
DANGER: Risk of Child Entrapment
Before disposing of your old refrigerator or freezer:
• Remove the doors.
• Leave the shelves in place to prevent children from easily climbing inside.
Installation
Ensure the appliance is correctly installed and connected to the power supply according to the instal-
lation instructions before use. (See: "HOW TO INSTALL").
• Keep all ventilation openings in the appliance enclosure or in the built-in structure clear of obstruc-
tions.
• Do not use mechanical devices or other means to accelerate the defrosting process, other than
those recommended by the manufacturer.
• Do not damage the refrigerant circuit.
• Do not use electrical appliances inside the food storage compartments of the appliance unless
they are of the type recommended by the manufacturer.
This appliance is intended for use in household and similar applications such as:
• Staff kitchen areas in shops, oces, and other environments
• Farmhouses and by clients in hotels, motels, and other residential settings
• Bed and breakfast type environments
• Catering and similar non-retail applications
• Do not store explosive substances such as aerosol cans with a ammable propellant in this appli-
ance.
The main power supply must be properly grounded. Never remove the ground prong from the plug
and never use a two-prong adapter.
Do not run cords over carpeting or other heat insulators. Do not cover the cord. Keep cords away from
WARNING

5
trac areas, and do not submerge in water. If the supply cord is damaged, it must be replaced by the
manufacturer, its service agent, or a similarly qualied person to avoid a hazard. Repair or replace
immediately any electric service cords that have become frayed or otherwise damaged. Do not use a
cord that shows cracks or abrasion damage along its length, the plug, or the connector end.
This refrigerator must be positioned so that the plug is accessible. Never unplug the unit by pulling on
the power cord. Always grasp the plug rmly and pull straight out from the outlet.
Do not use an extension cord as this can negatively affect the performance of the unit. If you must
use an extension cord, use 18AWG minimum size and rated no less than 1875 watts.
When transporting the refrigerator, keep the unit in the upright position. Do not tilt the appliance be-
yond 45° or place the unit in an upside-down position. Do not tip over.
Do not touch the cooled surfaces while the appliance operates, especially not with wet hands, be-
cause the skin may stick to the cold surfaces.
It is recommended that the refrigerator be positioned away from combustible sources such as gas,
petrol, alcohol, lacquer, and banana oil. These ammable objects should not be stored in the refrigera-
tor under any circumstances.
If the unit fails to cool properly, dispose of spoiled food as needed.
Unplug your unit rst before cleaning or before making any repairs. If for any reason this product
requires service, we strongly recommend that a certied technician perform the work. Requests by
non-qualied personnel will void the warranty.
Do not defrost with an electric appliance other than those recommended by the manufacturer. Never
scrape ice or frost with sharp tools.
The rating plate is inside the appliance or outside on the rear or side wall.
This appliance is not intended for use by persons (including children) with reduced physical, sensory,
or mental capabilities, or lack of experience and knowledge, unless they have been given supervi-
sion or instruction concerning use of the appliance by a person responsible for their safety. Children
should be supervised to ensure that they do not play with the appliance.
Please dispose of the appliance according to local regulations as the appliance contains ammable
gas and refrigerant.
Follow local regulations regarding disposal of the appliance due to ammable refrigerant and gas.
All refrigeration products contain refrigerants, which under the guidelines of federal law must be re-
moved before disposal. It is the consumer’s responsibility to comply with federal and local regulations
when disposing of this product.
Do not operate your refrigerator in the presence of explosive fumes.
WARNING: Do not use ame or catch re near the unit.
Safety Instructions for Refrigerant
DANGER: Risk of Fire or Explosion. FLAMMABLE REFRIGERANT Used. Do not use mechanical devices
to defrost the refrigerator. Do not puncture refrigerant tubing.

6
DANGER: Risk of Fire or Explosion. FLAMMABLE REFRIGERANT Used. To be repaired only by trained
service personnel. Do not puncture refrigerant tubing.
CAUTION: Risk of Fire or Explosion. FLAMMABLE REFRIGERANT Used. Consult repair manual/own-
er’s guide before attempting to service this product. All safety precautions must be followed.
CAUTION: Risk of Fire or Explosion. Dispose of property in accordance with federal or local regula-
tions. Flammable refrigerant used.
CAUTION: Risk of Fire or Explosion due to puncture of refrigerant tubing. Follow handling instructions
carefully. FLAMMABLE REFRIGERANT Used.
7
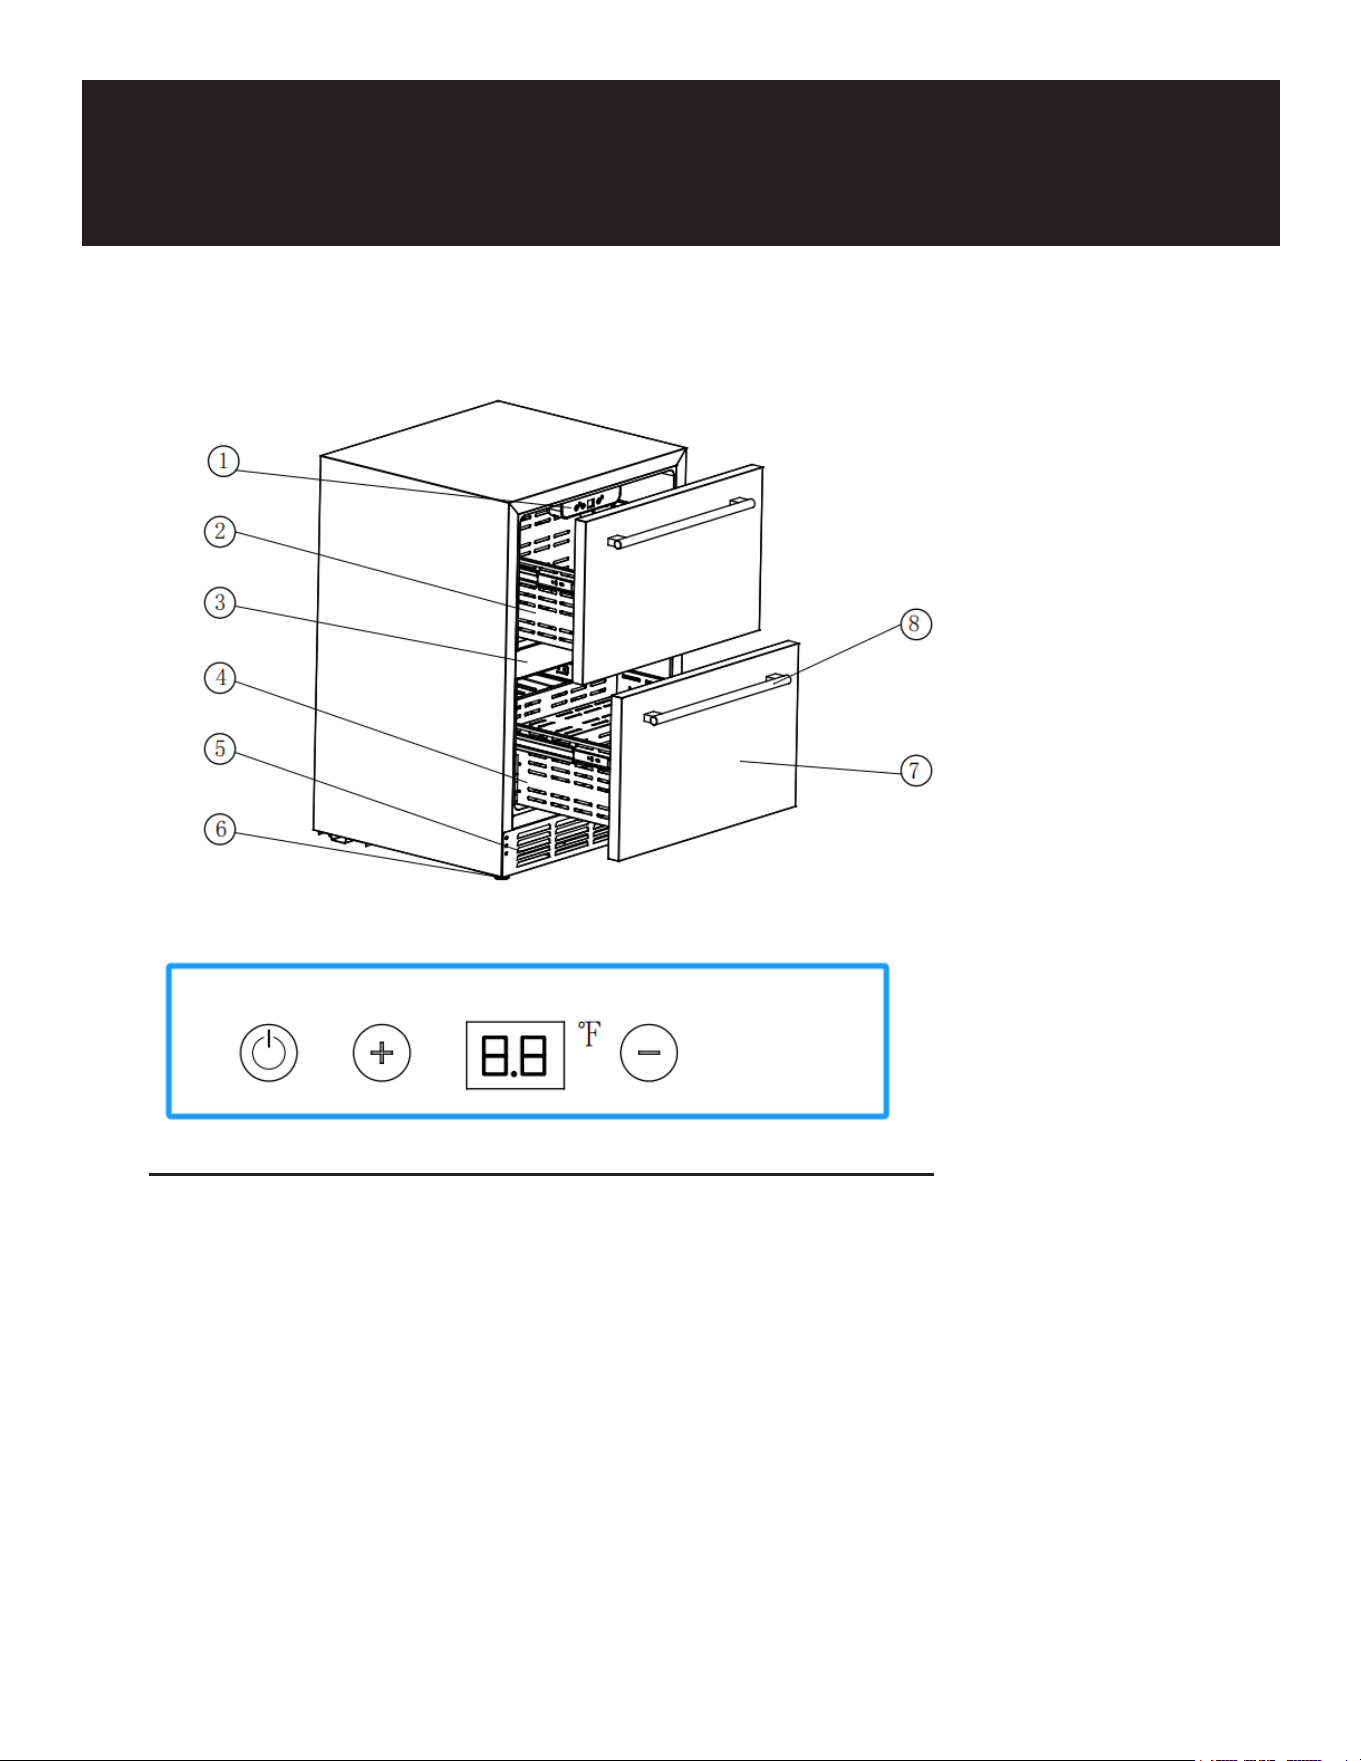
1. Operation Panel
2. Up Drawer
3. Middle Support of Two Drawers
4. Bottom Drawer
5. Hot Air Outlet Frame
6. Height Adjustable Feet
7. Door of Drawer
8. Drawer Handle (Needs to be assembled by yourself)
Parts
8
Operation
Starting Your New Refrigerator
Important:
If the unit is brought in from outside during the winter season, allow it a few hours to warm up to
room temperature before plugging it in.
After transportation and moving of the unit, please wait at least 4 hours before plugging in the unit.
1. Remove the packaging material.
2. Clean the unit thoroughly. Wipe the outside with a soft, dry cloth, and the interior with a clean,
moist cloth.
3. Connect the power cord to a standard wall outlet. You will hear a beep, which is normal. The dis-
play on the control panel will show the actual internal temperature.
4. Do not put food into the unit within two hours after powering it on.
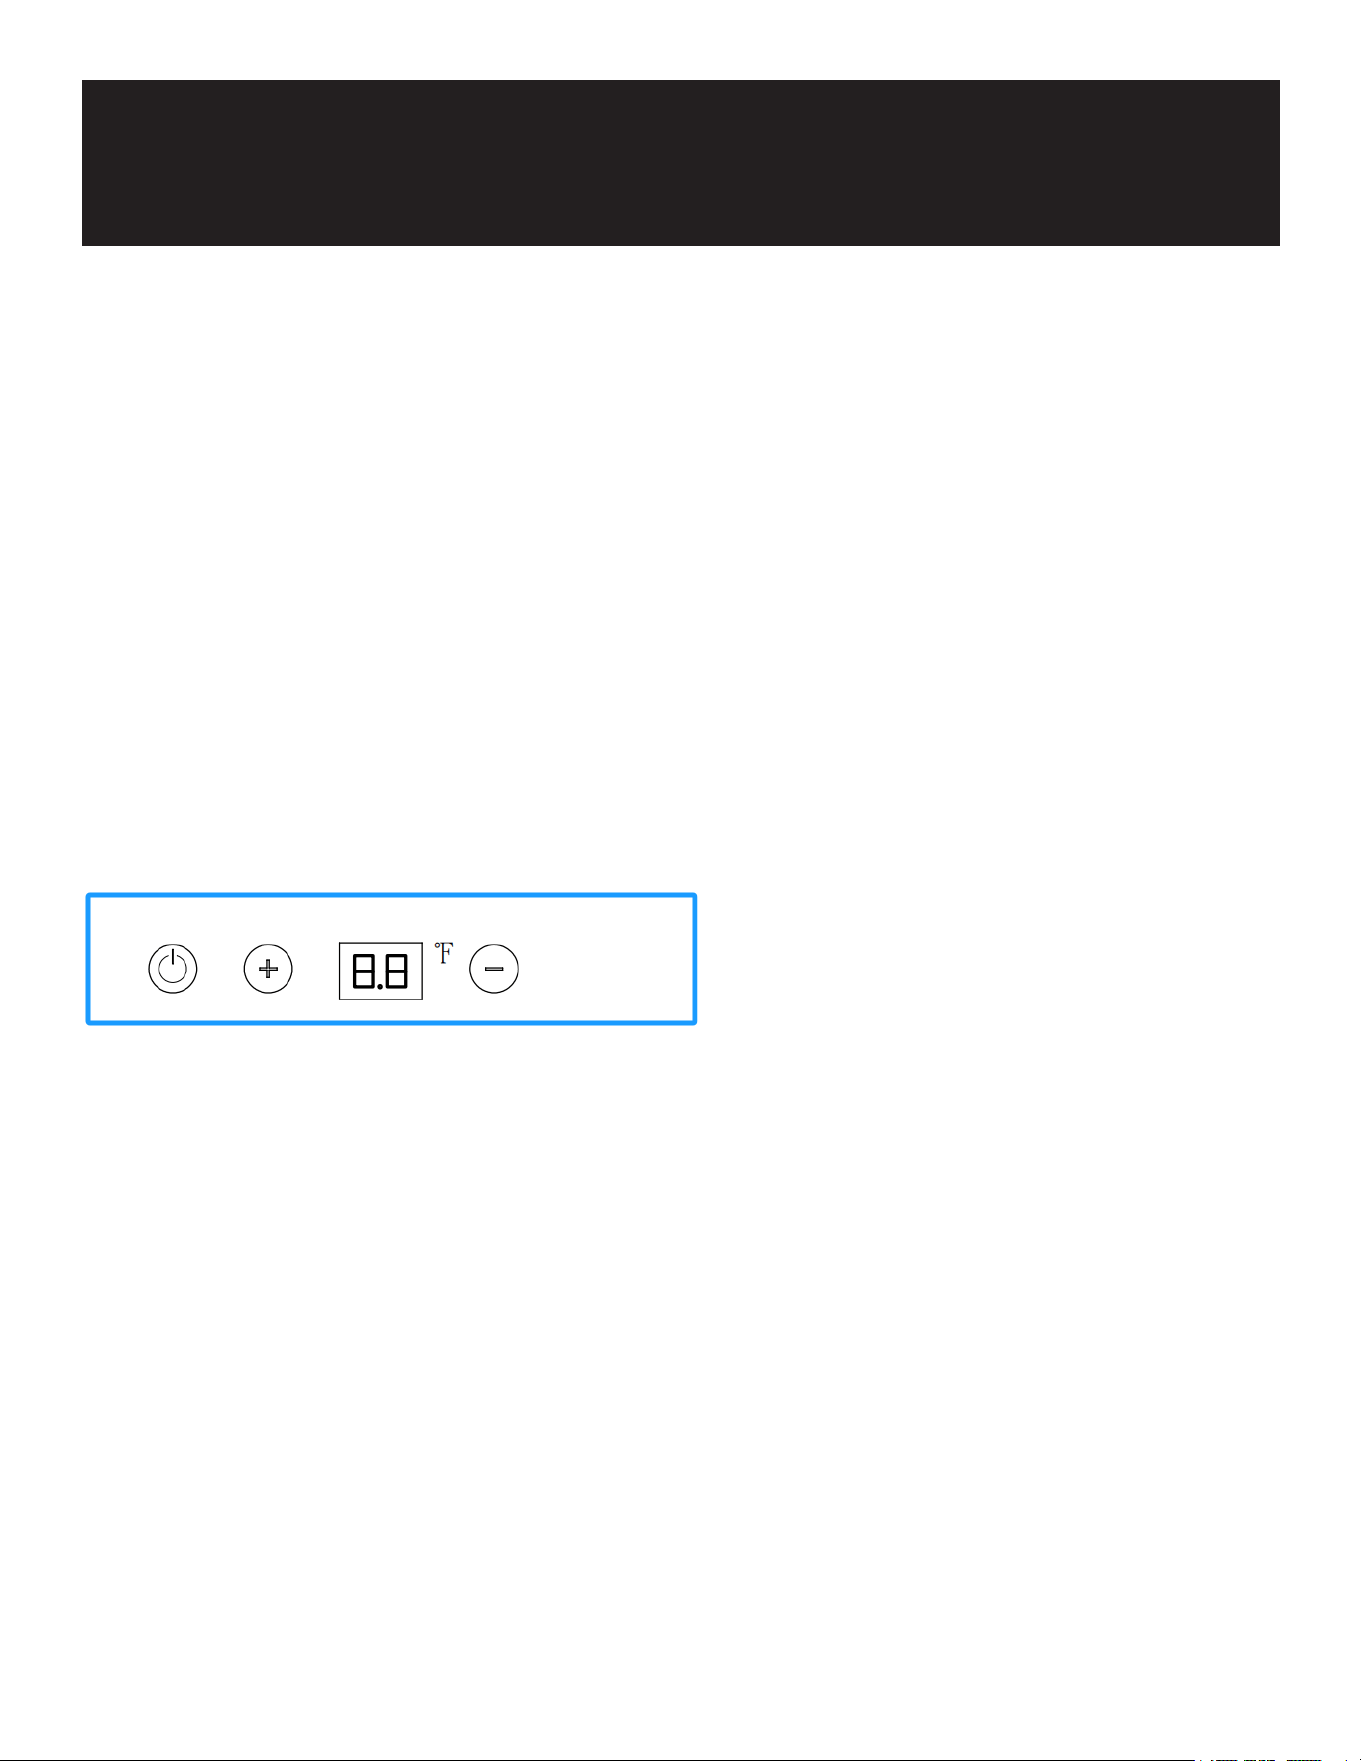
Operation Button Panel
There are three buttons and a temperature display window on the control panel, allowing you to oper-
ate your unit and reach your desired settings.
Temperature Adjustment
Press two buttons:
"+" and "-"
To adjust the set temperature to your desired value. Each press changes the temperature by 1 Fahren-
heit.
Setting Range: 32-50 Fahrenheit. The default setting is 39 Fahrenheit.
ON/OFF Button
• Plug in the unit, it will turn on automatically.
• When the unit is on, always press the power button for more than 3 seconds to turn off the unit.
And when the unit is off, press the power button once, and the unit will recover to run again.
Note: Wait 3-5 minutes before restarting if you unplug the refrigerator. The unit may fail to operate
properly if restarted too quickly.
9
HOW TO CLEAN
Cleaners:
Never use harsh, abrasive cleaners, heavy-duty cleaners, or solvents on any surface.
Exterior:
Wipe with a damp, sudsy cloth, rinse, and dry. For stubborn stains and for periodic waxing, use silicon
wax.
Refrigeration Section:
Wash shelves and other removable parts in warm sudsy water, rinse and dry.
Wash interior with a baking soda solution (3 tablespoons to 1 liter of water) or warm sudsy water,
rinse and dry.
Magnetic Door Seals:
Wash with warm sudsy water.
The Finishing Touch:
Replace all parts and return thermostat dial to the desired setting.
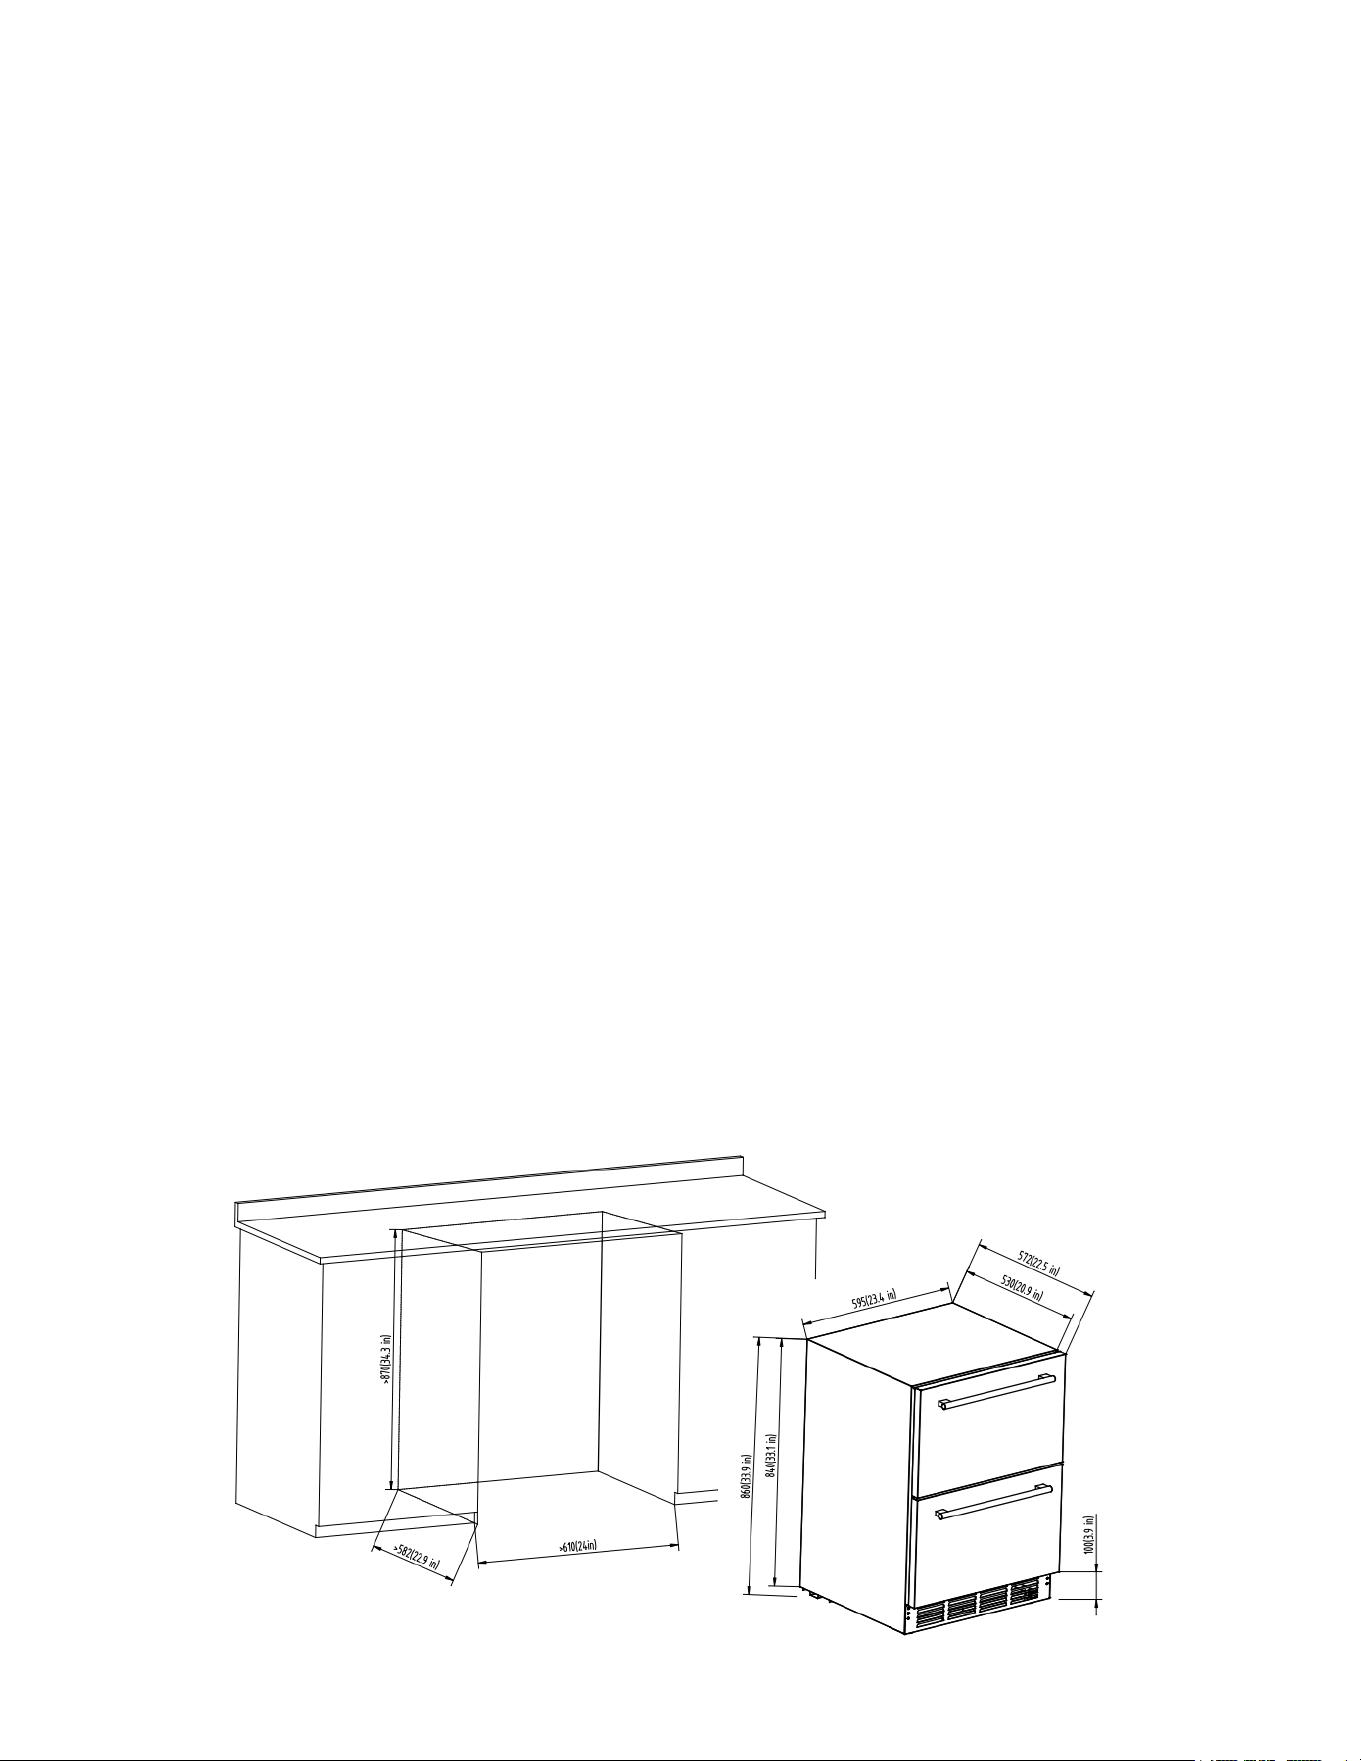
HOW TO INSTALL
• This appliance can either stand alone or be built in. The front grille must not be obstructed.
• Install the unit in a convenient location away from extreme heat and cold. This unit should be far
away from heating sources, such as stoves, heaters, or radiators, and be prevented from direct
sunlight. Allow sucient clearance between the unit and sidewall so the door will open without
obstruction. This refrigerator is designed for recessed or built-in installation.
• Place the unit on a level surface that will be strong enough to support the unit when it is fully load-
ed. Not recommended for carpeting or other soft/uneven surfaces. To level your fridge, adjust the
front feet located at the bottom of the unit.
• For under-counter built-in installation, please follow the diagram provided, and leave enough space
for the unit.

10
For free-standing installation, allow 2 inches of space between the unit's sides, rear, and the wall.
Additionally, sucient clearance (160°) should be maintained to allow the door to open properly and
completely.
The appliance must be correctly connected to the power supply, 115V/60Hz, and properly grounded.
Note: The refrigerator is not designed to be installed in an outdoor area such as a garage or a porch.
Ambient temperatures below 50°F or above 90°F will hinder the performance of the appliance.
CARE AND MAINTENANCE
The refrigerator should be cleaned on a regular basis. (See: "HOW TO CLEAN")
It is necessary to have adequate ventilation space around the refrigerator to attain proper perfor-
mance, dissipation of heat, maintain eciency, and low power consumption. A clearance of a mini-
mum of 2 inches should be maintained at the rear and sides of the unit. Do not obstruct the front hot
air outlet frame. (See: "HOW TO INSTALL")
To attain proper performance, ensure the appliance is plugged into a properly grounded 115V/60 Hz
outlet.
Do not modify the power cord under any circumstance to allow the unit to be plugged into a
non-grounded outlet. To avoid heat damage to the power cord, please ensure that it does not come in
proximity or in direct contact with the compressor of the refrigerator.
Please avoid installing the refrigerator in a location where the appliance will come in contact with
water or moisture to minimize rusting of metal parts.
The refrigerator should not be installed near any heat source or in a location where it will come in
direct contact with the sunlight.
The components, if need to be replaced, should be replaced with like components, and should be
replaced by the manufacturer or its service agent or a similarly qualied person in order to avoid a
hazard and to minimize the risk of possible ignition and also to decrease the cooling performance
due to incorrect parts or improper service.,
11
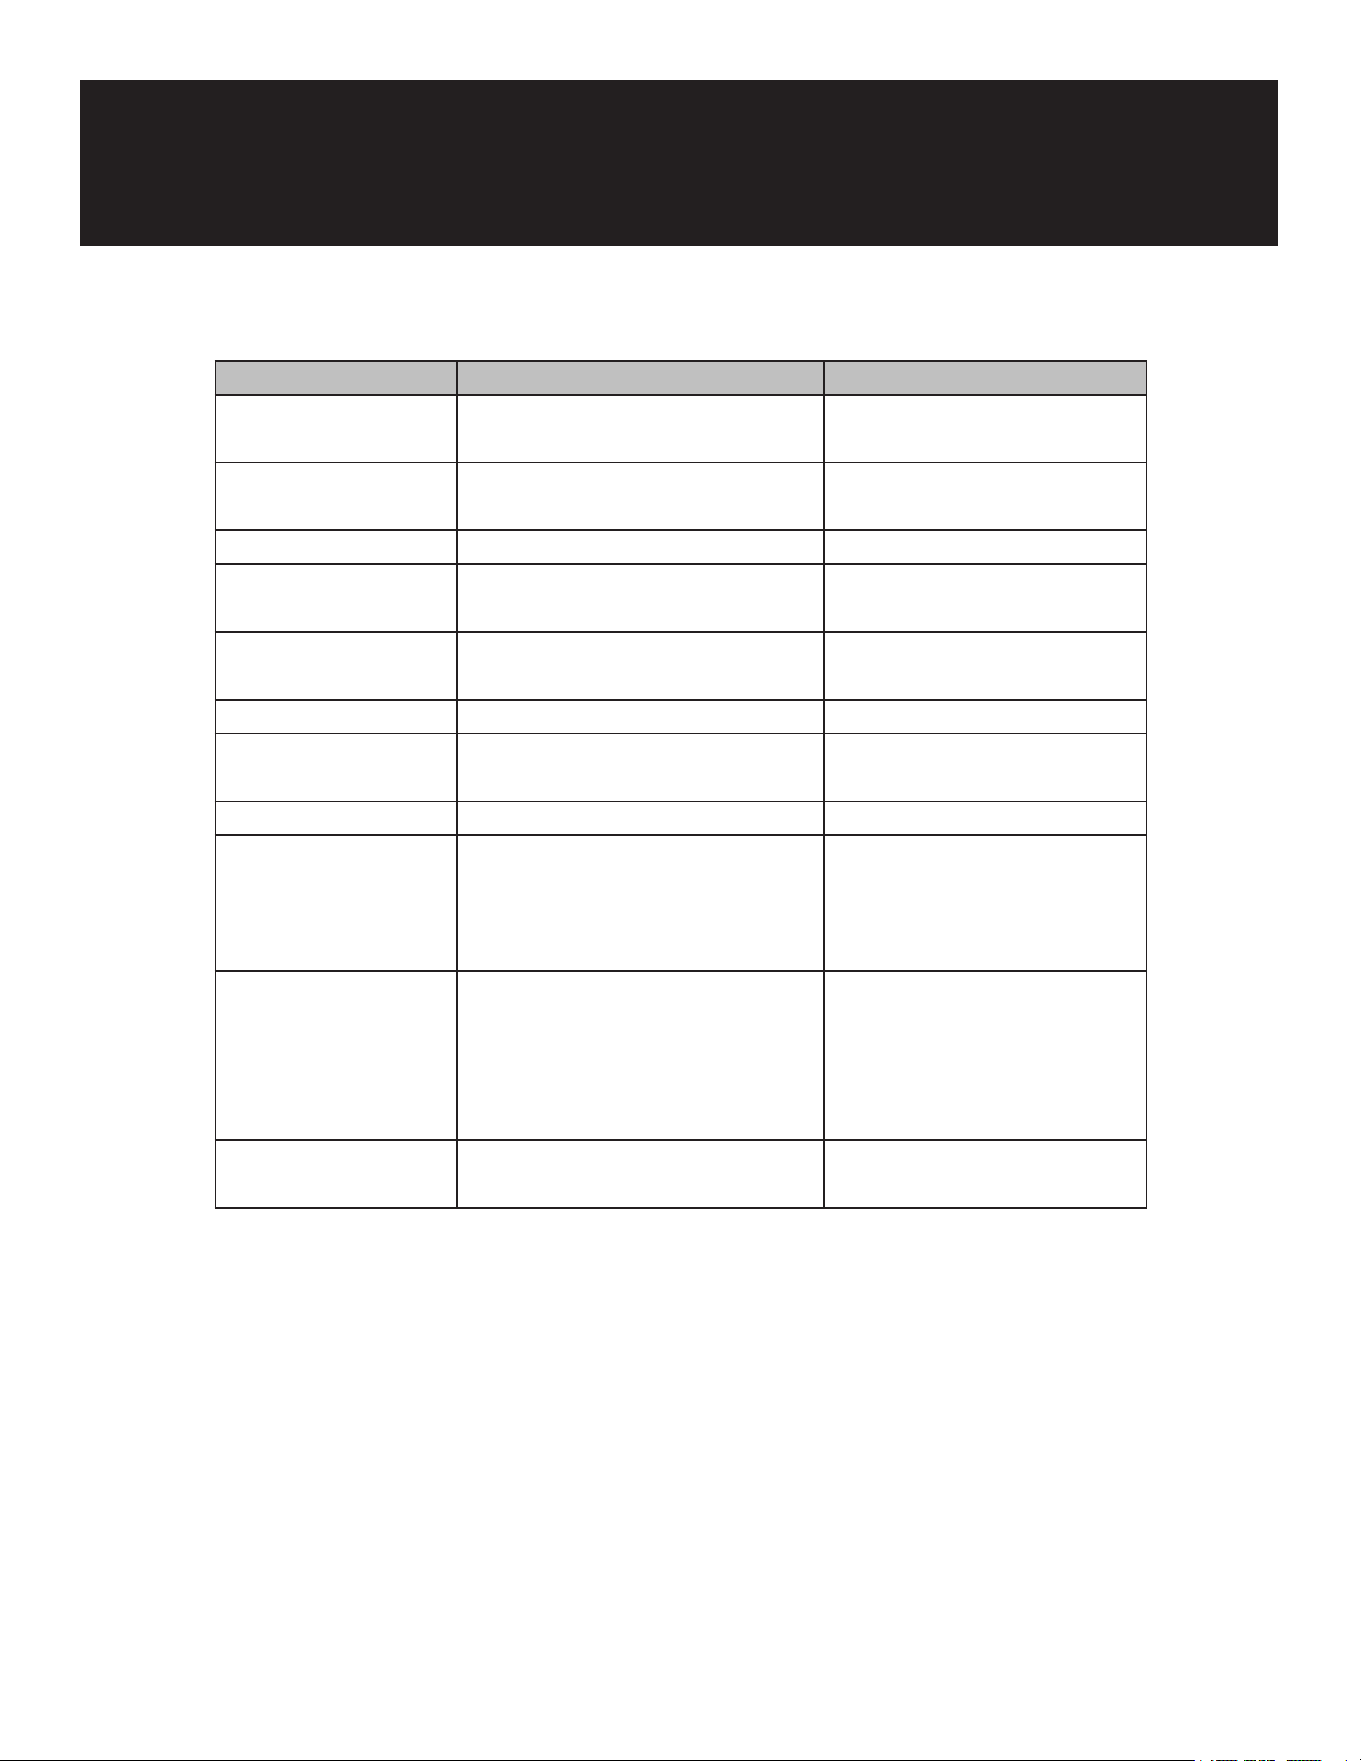
Troubleshooting
Trouble Possible Fault Reasons How to Solve
The motor does not
rotate
- The power cable is not
connected correctly
- Check for power wire
connection
- Broken power fuse, power off - Check for power supply and
fuse
- The power switch is damaged - Replace the power switch
The motor startup is
slow
- 150uF/300V start capacitor - Replace the start capacitor
- Circuited or damaged - Replace the centrifugal
switch
- Broken centrifugal switch
The motor is weak - 20uF/500V run capacitor is
damaged
- Replace the power switch
- The motor coil is damaged
The motor does
not stop after the
power switch is
disconnected
- The power switch is damaged - Replace the power switch
The motor is jammed;
the reducer does not
work or severe noise
is heard
- Planetary gears are broken - Replace the gear
- Due to abnormal overloading
operation

12
WARRANTY
LIMITED WARRANTY
Koolmore Supply, Inc. extends a limited warranty to the original purchaser, guaranteeing that this Koolmore
product is free from manufacturing defects in material or workmanship for one year from the date of
purchase.
Should you discover any such defect within the warranty period, Koolmore Supply, Inc., reserves the right to
repair or replace the product without charge, or to cover the cost of replacement parts and repair labor needed
to correct defects present at the time of purchase or resulting from regular usage, when the appliance has been
installed, operated, and maintained as per the instructions provided.
At its sole discretion, Koolmore Supply Inc. may decide to replace the product. In such an event, your replace-
ment
appliance will carry the warranty for the remaining term of the original unit's warranty period.
This warranty is valid exclusively to the original purchaser of the product and only applicable within the United
States. The warranty commences from the date of original consumer purchase. Proof of the original purchase
date will be required to obtain service under this warranty.
Under this limited warranty, your sole and exclusive remedy will be product repair, as outlined above. All
services must be provided by a Koolmore-designated service company.
To claim warranty or request repair service:
Email support@koolmore.com. Please include your name, address, phone number, warranty repair request,
and a copy of your proof of purchase receipt. Alternatively, visit koolmore.com and use the contact us page. A
Koolmore customer service representative will promptly arrange service for your appliance.
We thank you for choosing Koolmore.
WARRANTY EXCLUSIONS
This limited warranty will not cover:
1. Failure of the product to perform during power failures or interruptions,
or due to inadequate electrical service.
2. Damage incurred during transportation or handling.
3. Damage caused by accidents, vermin, lightning, winds, re, oods, or acts of God.
4. Damage resulting from accidents, alterations, misuse, abuse, improper installation, repair, or maintenance.
This includes using any external device that alters or converts the voltage or frequency of
electricity.
5. Unauthorized product modications, repairs by unauthorized centers, or use of non-approved
replacement parts.
6. Abnormal cleaning and maintenance not aligned with the user's manual.
7. Use of incompatible accessories or components.
8. Any costs associated with repairs or replacements under these excluded circumstances shall be the
responsibility of the consumer.

13

14