USER GUIDE
BELLING 100/110cm ELECTRIC INDUCTION (ALL MODELS)

Table Of Contents
INTRODUCTION ......................................................................................................... 3
MODELS COVERED BY THIS DOCUMENT .......................................................... 3
COUNTRIES OF DESTINATION: ......................................................................... 4
CONTACT INFORMATION: ................................................................................. 4
EUROPEAN DIRECTIVES ................................................................................... 4
DISPOSAL OF PACKAGING MATERIAL .............................................................. 5
SAFETY & WARNING INFORMATION ........................................................................ 6
ELECTROMAGNETIC INTERFERENCE .............................................................. 13
GETTING TO KNOW YOUR PRODUCT ...................................................................... 14
CONTROL PANEL .............................................................................................. 14
HOB OVERVIEW ................................................................................................ 15
COMPARTMENT OVERVIEW ............................................................................. 16
INDUCTION HOB CONTROLS (Touch models) ................................................. 16
ABOUT THE INDUCTION HOB (TOUCH CONTROLS) ....................................... 17
INDUCTION SYMBOLS AND CODES ................................................................ 23
MAXIMUM OPERATING TIMES FOR INDUCTION HOB ZONES ........................ 25
GRILL CONTROL DIAL ..................................................................................... 25
MAIN OVEN OVERVIEW .................................................................................. 25
CONVENTIONAL OVEN OVERVIEW ................................................................ 27
USING THE GRILL .................................................................................................... 28
GRILL PAN AND TRIVET .................................................................................. 29
USING THE MAIN OVEN .......................................................................................... 30
MAIN OVEN FUNCTIONS ................................................................................. 34
OVEN FURNITURE ........................................................................................... 36
USING THE PROGRAMMABLE TIMER ..................................................................... 37
CLEANING YOUR APPLIANCE ................................................................................ 42
CLEANING AND CARE GUIDANCE .................................................................. 43
APPLIANCE MAINTENANCE ................................................................................... 47
CHANGING THE LIGHTBULB ........................................................................... 47
OVEN SHELVES ................................................................................................ 48
REMOVING AND REPLACING SHELF GUIDES ................................................. 48
REMOVING AND RE-FITTING CONTROL KNOBS, SPRINGS AND BEZELS ..... 49
FAQs .......................................................................................................................... 51
KEY PARTS AND OPTIONAL ACCESSORIES ........................................................... 52
LOCATING THE MODEL AND SERIAL NUMBERS .................................................... 56
TECHNICAL DATA .................................................................................................... 57
ENERGY DATA TABLE .............................................................................................. 58
ENERGY SAVING TIPS FOR HOBS ................................................................... 59
ENERGY SAVING TIPS FOR OVENS ................................................................. 59
SERVICE CONTACT DETAILS .................................................................................... 61
2
INTRODUCTION
Congratulations and thank you for
purchasing your new Stoves range cooker.
We hope you will enjoy many years of
excellent cooking performance and service.
This user guide is designed to help you to
care for and get the best out of your new
product.
Please read it carefully before you
start using your appliance, as we have
endeavoured to answer as many questions
as possible and provide you with as much
support as we can.
General information, spares and service
information is available from our website.
If you should find something missing from
your product or have any questions that
are not covered in this user guide, please
contact us (see contact information on the
back cover).
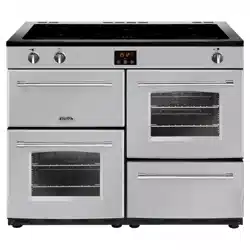
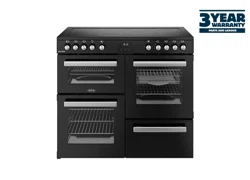
MODELS COVERED BY THIS
DOCUMENT
Model
Number:
Model
Description:
444411801 BEL RCA
COOKCENTRE
100Ei BLK
444411802 BEL RCA
COOKCENTRE
100Ei STA
444411807 BEL RCA
COOKCENTRE 110Ei
BLK
444411808 BEL RCA
COOKCENTRE 110Ei
STA
444411831 BEL RCA
FARMHOUSE 100Ei
ANT
444411832 BEL RCA
FARMHOUSE 100Ei
BLK
444411833 BEL RCA
FARMHOUSE 100Ei
CRM
444411840 BEL RCA
FARMHOUSE 110Ei
ANT
444411841 BEL RCA
FARMHOUSE 110Ei
BLK
444411842 BEL RCA
FARMHOUSE 110Ei
CRM
3
COUNTRIES OF DESTINATION:
GB- Great Britain
IE - Ireland
DE - Germany
FR - France
PL - Poland
NL - Netherlands
SE - Sweden
NZ - New Zealand
AU - Australia
CONTACT INFORMATION:
Customer Care Helpline:
0344 815 3746
Alternatively, use the contact form
on our website
www.belling.co.uk
Details about warranty registration
and spares & service information are
also available on our website.
Calls are charged at the basic rate, please
check with your telephone service provider
for exact charges.
Your new appliance comes with our FREE
3 year warranty (UK only), protecting you
against electrical and mechanical breakdown.
To register your new appliance for its
warranty (UK only) please visit our website
www.belling.co.uk. For full terms & conditions
of the manufacturer's guarantee, please refer
to the website above.
In addition, you may wish to purchase an
extended warranty. Details of how to do this
are also on our website www.belling.co.uk.
Our policy is one of constant development
and improvement, therefore we cannot
guarantee the strict accuracy of all of our
illustrations and specifications. Changes may
have been made subsequent to publishing.
Glen Dimplex Home Appliances, Element,
Temple Court, Risley, Warrington, WA3 6GD.
EUROPEAN DIRECTIVES
This appliance is produced in accordance
with all applicable local and international
standards and regulations.
As a producer and a supplier of cooking
appliances we are committed to the
protection of the environment and are in
compliance with the WEEE directive.
All our electric products are labelled
accordingly with the crossed out wheeled bin
symbol. This indicates, for disposal purposes
at the end of their working life, that these
products must be taken to a recognized
collection point, such as local authority sites/
local recycling centres.
By ensuring that this product is disposed
of correctly, you will help prevent potential
negative consequences for the environment
and human health, which could otherwise be
caused by inappropriate waste handling of
this product.
4

For more detailed information about recycling
of this product, please contact your local
authority, household waste disposal service,
or the retailer from whom you purchased this
appliance.
This appliance complies with European
Community Directives (CE) for household
and similar electrical appliances and Gas
appliances where applicable.
This appliance conforms to European
Directive regarding Eco design requirements
for energy-related products. Our policy is one
of constant development and improvement,
therefore we cannot guarantee the strict
accuracy of all of our illustrations and
specifications - changes may have been made
subsequent to publishing.
DISPOSAL OF PACKAGING
MATERIAL
DISPOSAL OF PACKAGING MATERIAL
Some of the materials used to package this appliance can be recycled. Please
dispose of the packaging materials in the appropriate containers at your local
waste disposal facility.
5

SAFETY & WARNING INFORMATION
Please read the following information
carefully:
WARNINGS
Warning
We strongly recommend
that this appliance is
connected by a competent
person who is a
member of a 'Competent
Person Scheme', who will
comply with the required
regulations.
Any servicing,
maintenance or repair
work on the appliance
must only be carried out
by authorised personnel.
Installation, maintenance
and repair work that
is carried out by
unauthorised persons
could be dangerous
and could invalidate the
manufacturer's warranty.
Warning
This appliance can be
used by children aged
from 8 years and above
and persons with reduced
physical, sensory or
mental capabilities or
lack of experience and
knowledge if they have
been given supervision or
instruction concerning use
of the appliance in a safe
way and understand the
hazards involved.
Children shall not play
with the appliance.
Cleaning and user
maintenance shall not be
made by children without
supervision.
Young children should be
supervised to ensure they
do not play with this
appliance.
Do not store items
of interest to children
in cabinets above
the appliance. Children
climbing on the appliance
could be seriously injured.
Warning
If the hotplate surface is
cracked, switch off the
appliance and do not use
it to avoid the possibility
of electric shock.
6
Warning
During use the appliance
becomes hot. Care should
be taken to avoid touching
heating elements inside
the oven.
Warning
The appliance and its
accessible parts become
hot during use.
Care should be taken to
avoid touching heating
elements, and hot external
and internal surfaces,
including doors.
Use oven gloves.
Children less than 8 years
of age shall be kept
away unless continuously
supervised.
Warning
The cooker must be
switched off before
removing the guard and,
after cleaning, the guard
must be replaced in
accordance with the
instructions.
Warning
A steam cleaner is not to
be used on this appliance.
Warning
Metallic objects such as
knives, forks, spoons and
lids should not be placed
on the hob surface since
they can get hot.
Any spillage should be
removed from the lid
before opening and the
hob surface should be
allowed to cool before
closing the lid (if fitted).
Warning
Ensure that the appliance
is switched off before
replacing the lamp to
avoid the possibility of
electric shock.
Warning
Unattended cooking on a
hob with fat or oil can be
dangerous and may result
in fire. Risk of burns and
scalds.
NEVER try to extinguish a
fire with water, but switch
off the appliance and then
cover the flames e.g. with
a lid or a fire blanket.
Warning
Danger of fire: do not
store items on the cooking
surfaces or in the oven
cavities.
7
Warning
Use only hob guards
designed by the
manufacturer of the
cooking appliance or
indicated by the
manufacturer of the
appliance in the
instructions for use as
suitable or hob guards
incorporated in the
appliance. The use of
inappropriate guards can
cause accidents.
Warning
Never place food, or
dishes on the base of the
main oven, the element
is here, and it will cause
overheating.
Warning
Do not place articles on or
against the appliance.
Warning
The appliance must
never be disconnected
from the mains supply
during use, as this
will seriously affect the
safety and performance,
particularly in relation
to surface temperatures
becoming hot and gas
operated parts not
working efficiently.
The cooling fan (if fitted)
is designed to run on after
the control knob has been
switched off.
Warning
Do not store or use
flammable liquids or items
in the vicinity of this
appliance.
Do not allow curtains,
paper or other flammable
items to come into contact
with the cooker.
Do not spray aerosols
in the vicinity of the
appliance while it is in
operation.
Warning
Do not modify this
appliance.
Warning
Do not operate the
appliance without the
glass door panels
correctly fitted.
Warning
Accessible parts may
become hot when the grill
is in use. Children should
be kept away.
Warning
If a lid is fitted to your
appliance any spillage
should be removed from
the lid before opening and
the hob surface should
be allowed to cool before
closing the lid.
8
Warning
This appliance must be
earthed.
Warning
The grill MUST be used
with the door OPEN.
Warning
This appliance must not
be used as a space heater.
Warning
Never use cooking vessels
on the hob that overlap its
edges.
Saucepan handles may
become hot during use.
Keep pan handles out of
the reach of children.
Warning
If the electrical connection
cable becomes damaged,
it must be replaced by a
suitably-qualified person.
The cable must not
be replaced by an
unauthorised person.
CAUTIONS
Caution
In order to avoid a
hazard due to inadvertent
resetting of the thermal
cut-out, this appliance
must not be supplied
through an external
switching device, such
as an external timer, or
connected to a circuit that
is regularly switched on
and off by the utility.
9
Caution
Do not use harsh abrasive
cleaners or sharp metal
scrapers to clean the
oven door glass / the
hob surface / the glass of
hinged lids of the hob
(as appropriate), since
they can scratch the
surface, which may result
in shattering of the glass.
Always ensure that the
appliance is switched
off before cleaning
or carrying out user
maintenance.
Do not clean the appliance
with a steam cleaner.
Always clean up food
spillages immediately,
after switching the
appliance off, taking care
to avoid burning yourself.
Do not use scourers,
sharp metal scrapers or
any abrasive or corrosive
cleaning agents - risk
of damage and glass
breakage.
Do not remove the
data badge labels or
clean them with corrosive
cleaners.
Do not allow pans to boil
dry - risk of damage to
ceramic glass surface.
Do not use pans with
jagged edges or drag pans
across the ceramic glass
surface as this can scratch
the glass and lead to
breakage.
Do not attempt to cook
on a broken ceramic
glass hotplate -risk of
electric shock. Switch the
appliance off immediately
at the mains power supply
and call the service
department.
Do not operate hob zones
without a pan in place.
Do not place or drop
heavy objects onto the
ceramic hob surface.
Do not stand on the hob
surface.
Do not allow any part of
your body, hair, clothing,
etc. to come into contact
with the ceramic glass
surface until it has cooled.
Caution
Only use the temperature
probe recommended for
this oven.
Caution
After use, switch off the
hob zone by its control
knob or touch control,
and do not rely on the
pan detector on induction
hobs.
After use, ensure that
all touch controls are
switched off and that all
control knobs are in the
off position.
Caution
This appliance is not
intended to be operated
by means of an external
timer or separate remote
control system.
10
Caution
The cooking process must
be supervised. A short-
term cooking process
has to be supervised
continuously.
Caution
Accessible parts may be
hot when the grill and/or
the oven are in use. Young
children shall be kept
away.
Caution
Our policy is one of
constant development and
improvement, therefore
we cannot guarantee the
strict accuracy of all
of our illustrations and
specifications. Changes
may have been made
subsequent to publishing.
Caution
Make sure that you have
removed all packaging
and wrapping from the
outside and inside of the
appliance before it is
used.
Some of the items inside
this appliance may have
additional wrapping.
It is advised that you turn
the ovens and/or grill on
for a short while. This
will burn off any residues
left from manufacturing.
There may be a smell
which accompanies this
process - but this is
nothing to worry about
and is harmless.
It is recommended that
you wash the oven
shelves, grill pan, and grill
pan trivet before their
first use in hot soapy
water. This will remove the
protective oil coating used
during storage.
Caution
When using the grill, the
oven door must be kept
OPEN.
Caution
This appliance is designed
for cooking purposes only.
It must not be used
for other purposes, for
example room heating.
11
Caution
When opening oven
doors, grip the handle in
the centre and hold it from
underneath.
Caution
Do not cover the
appliance.
Caution
Take care if moving the
appliance, panel edges
could be sharp. Failure to
use caution could result
in injury or cuts. Do not
attempt to lift or move
the appliance by pulling
on the door handles.
Caution
If you will not be using
the appliance for some
time, switch off the power
supply at the isolator
switch on the wall.
OTHER SAFETY ADVICE
DO
• Always take care when removing food from
the oven as the area around the cavity may
be hot.
• Always use oven gloves when handling any
cookware that has been in the oven as it will
be hot.
• Always make sure that the oven shelves are
resting in the correct position between two
runners.
• Always use the Minute Minder (if fitted) if
you are leaving the oven unattended - this
reduces the risk of food burning.
DO NOT
•
Never place dishes or other items on
the door while it is open. Do not apply
downward pressure to open oven doors. Do
not allow children to climb onto open oven
doors. Do not slam the oven doors shut.
When shutting oven doors, ensure there is
nothing obstructing them from closing. Risk
of breakage.
•
Never wrap foil around the oven shelves or
allow foil to block the flue. Do not line the
oven cavities or grill pan with aluminium
foil - risk of fire. Do not use liners on the
oven floors - risk of build-up of trapped
heat which can cause permanent damage to
the oven enamel.
•
Never drape tea towels, dishcloths or
clothes, etc. near the oven or from the door
handles while it is on; this will cause a fire
hazard.
•
Never pull heavy items, such as turkeys or
large joints of meat, out from the oven on
the shelf, as they may overbalance and fall.
•
Never use this appliance to heat anything
other than food items and do not use it for
heating the room.
FIRE SAFETY ADVICE
Most kitchen fires occur when people are
distracted or leave things unattended. Don’t
let yourself be distracted while cooking. If
you’re called away from the cooker, either
take pans o the heat, or switch o your hob.
If you do have a fire in the kitchen, don’t take
any risks - get everyone out of your home and
call the Fire Brigade.
If a pan catches fire:
•
Do not move it - it is likely to be extremely
hot.
•
Turn o the heat if it’s safe to do so - but
never lean over a pan to reach the controls.
•
If you have a fire blanket, put it over the
pan. If you have put the fire out, leave the
pan to cool completely.
Deep-fat frying presents more dangers in your
kitchen.
12

•
Never fill a chip pan (or other deep fat
fryer) more than one-third full of oil.
•
Do not use a fire extinguisher on a pan of
oil - the force of the extinguisher can spread
the fire and create a fireball.
If you have an electrical fire in the kitchen:
•
Pull the plug out, or switch o the power at
the fuse box - this may be enough to stop
the fire immediately.
•
Smother the fire with a fire blanket, or use a
dry powder or carbon dioxide extinguisher.
•
Remember: never use water on an electrical
or cooking oil fire.
ELECTROMAGNETIC
INTERFERENCE
The functions of the hob comply with
the applicable standard on electromagnetic
interference.
Your induction cooking hob thus complies
fully with the statutory requirements
(Directive 2014/30/EU). It is designed to
not interfere with the functioning of other
electrical equipment as long as these also
comply with the same regulations.
Your induction hob generates magnetic fields
in its immediate vicinity.
So that there is no interference between your
cooking hob and a pacemaker, the pacemaker
must be designed in compliance with the
appropriate regulations.
In this respect we can only guarantee the
compliance of our own product. You can ask
the pacemaker manufacturer or your doctor
about the compliance or any incompatibilities
of your pacemaker.
13
GETTING TO KNOW YOUR PRODUCT
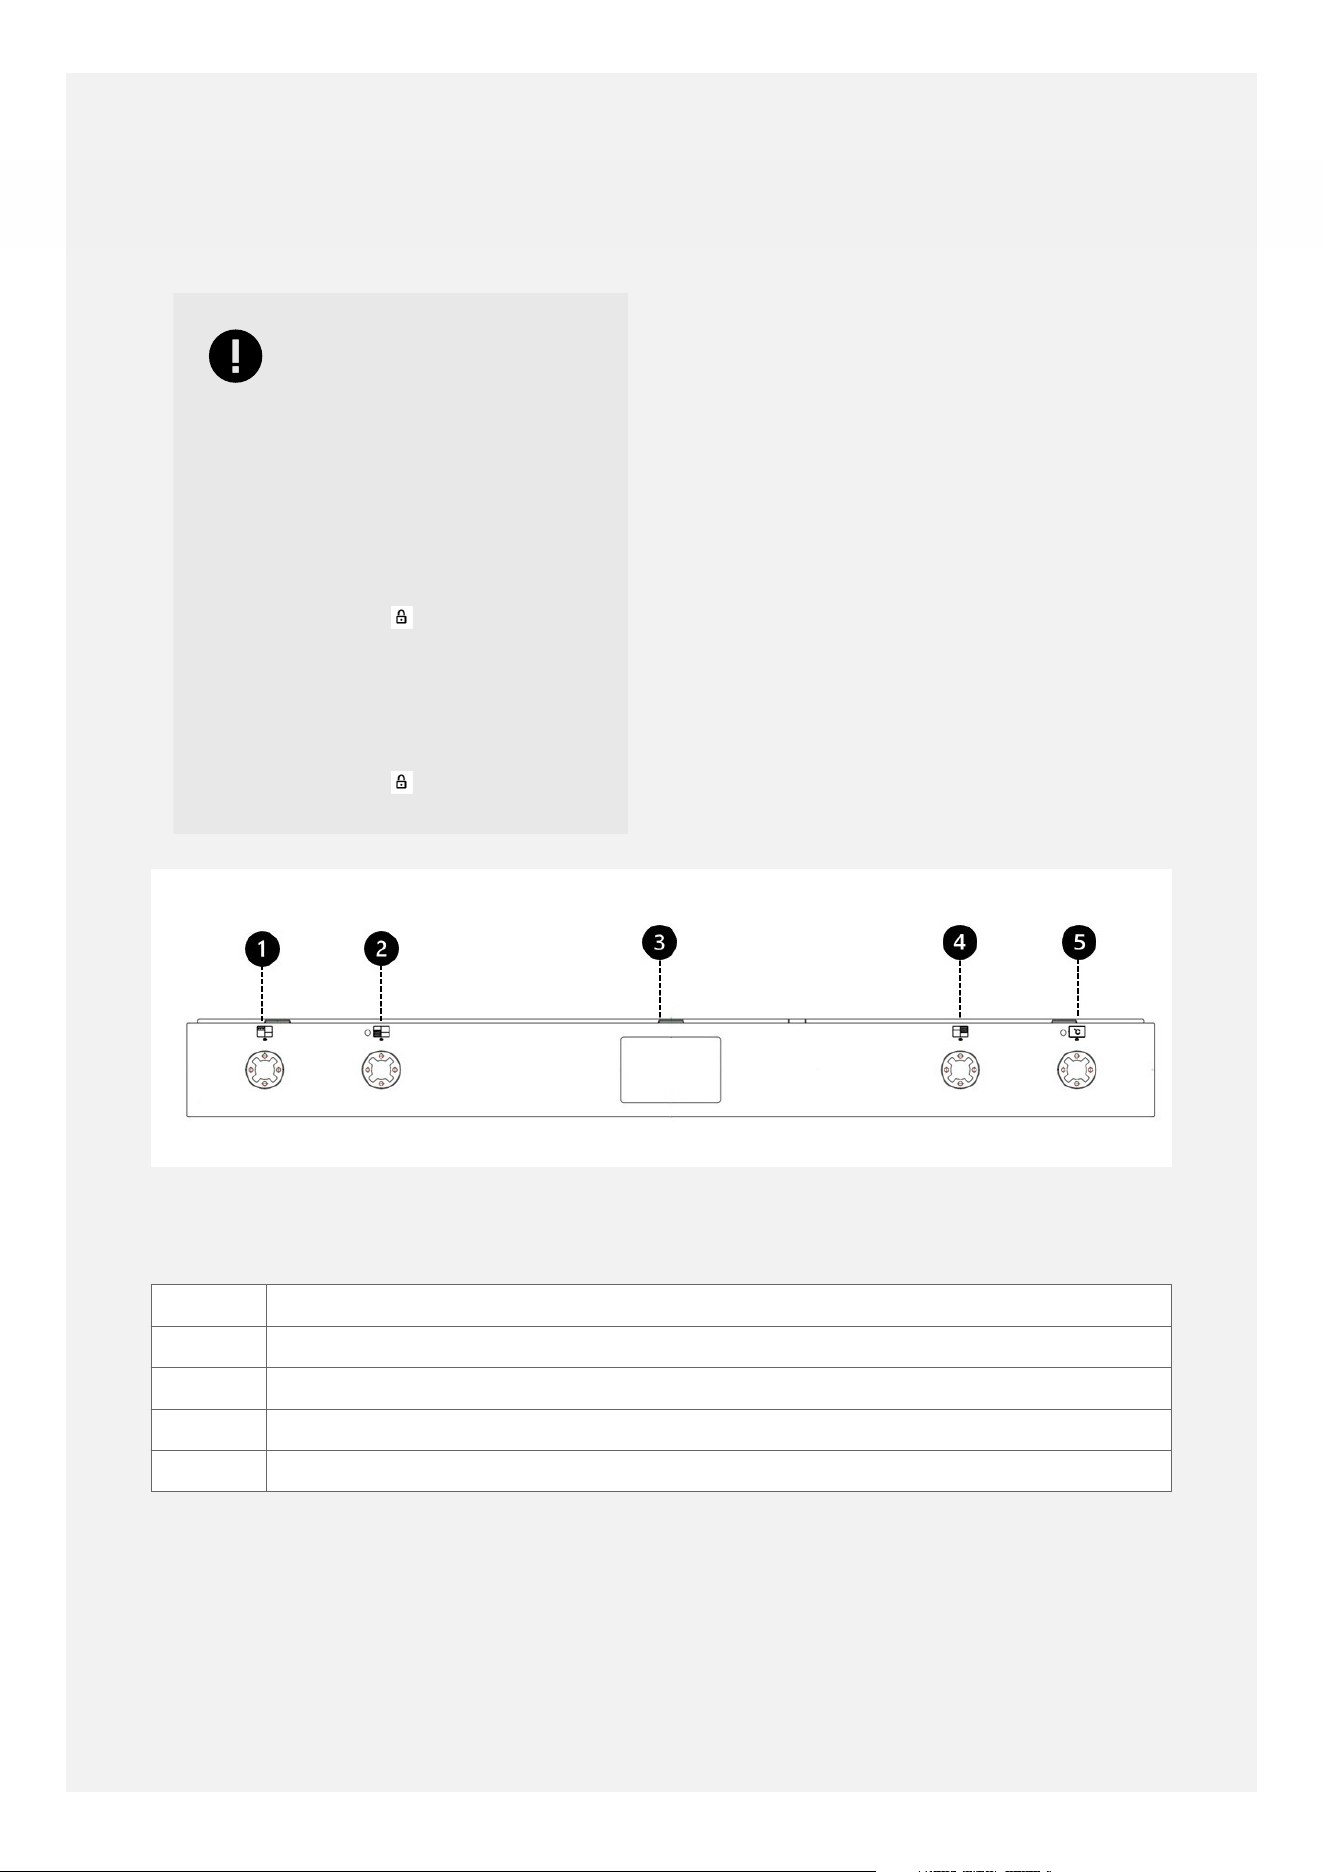
Important
If the clock/programmer
is locked, it must be
unlocked before the main
fanned oven can be used.
To unlock the clock/
programmer press and
hold the '+' key for 5-10
seconds, until the padlock
symbol disappears.
To lock the clock/
programmer press and
hold the '+' key for 5-10
seconds, until the padlock
symbol appears.
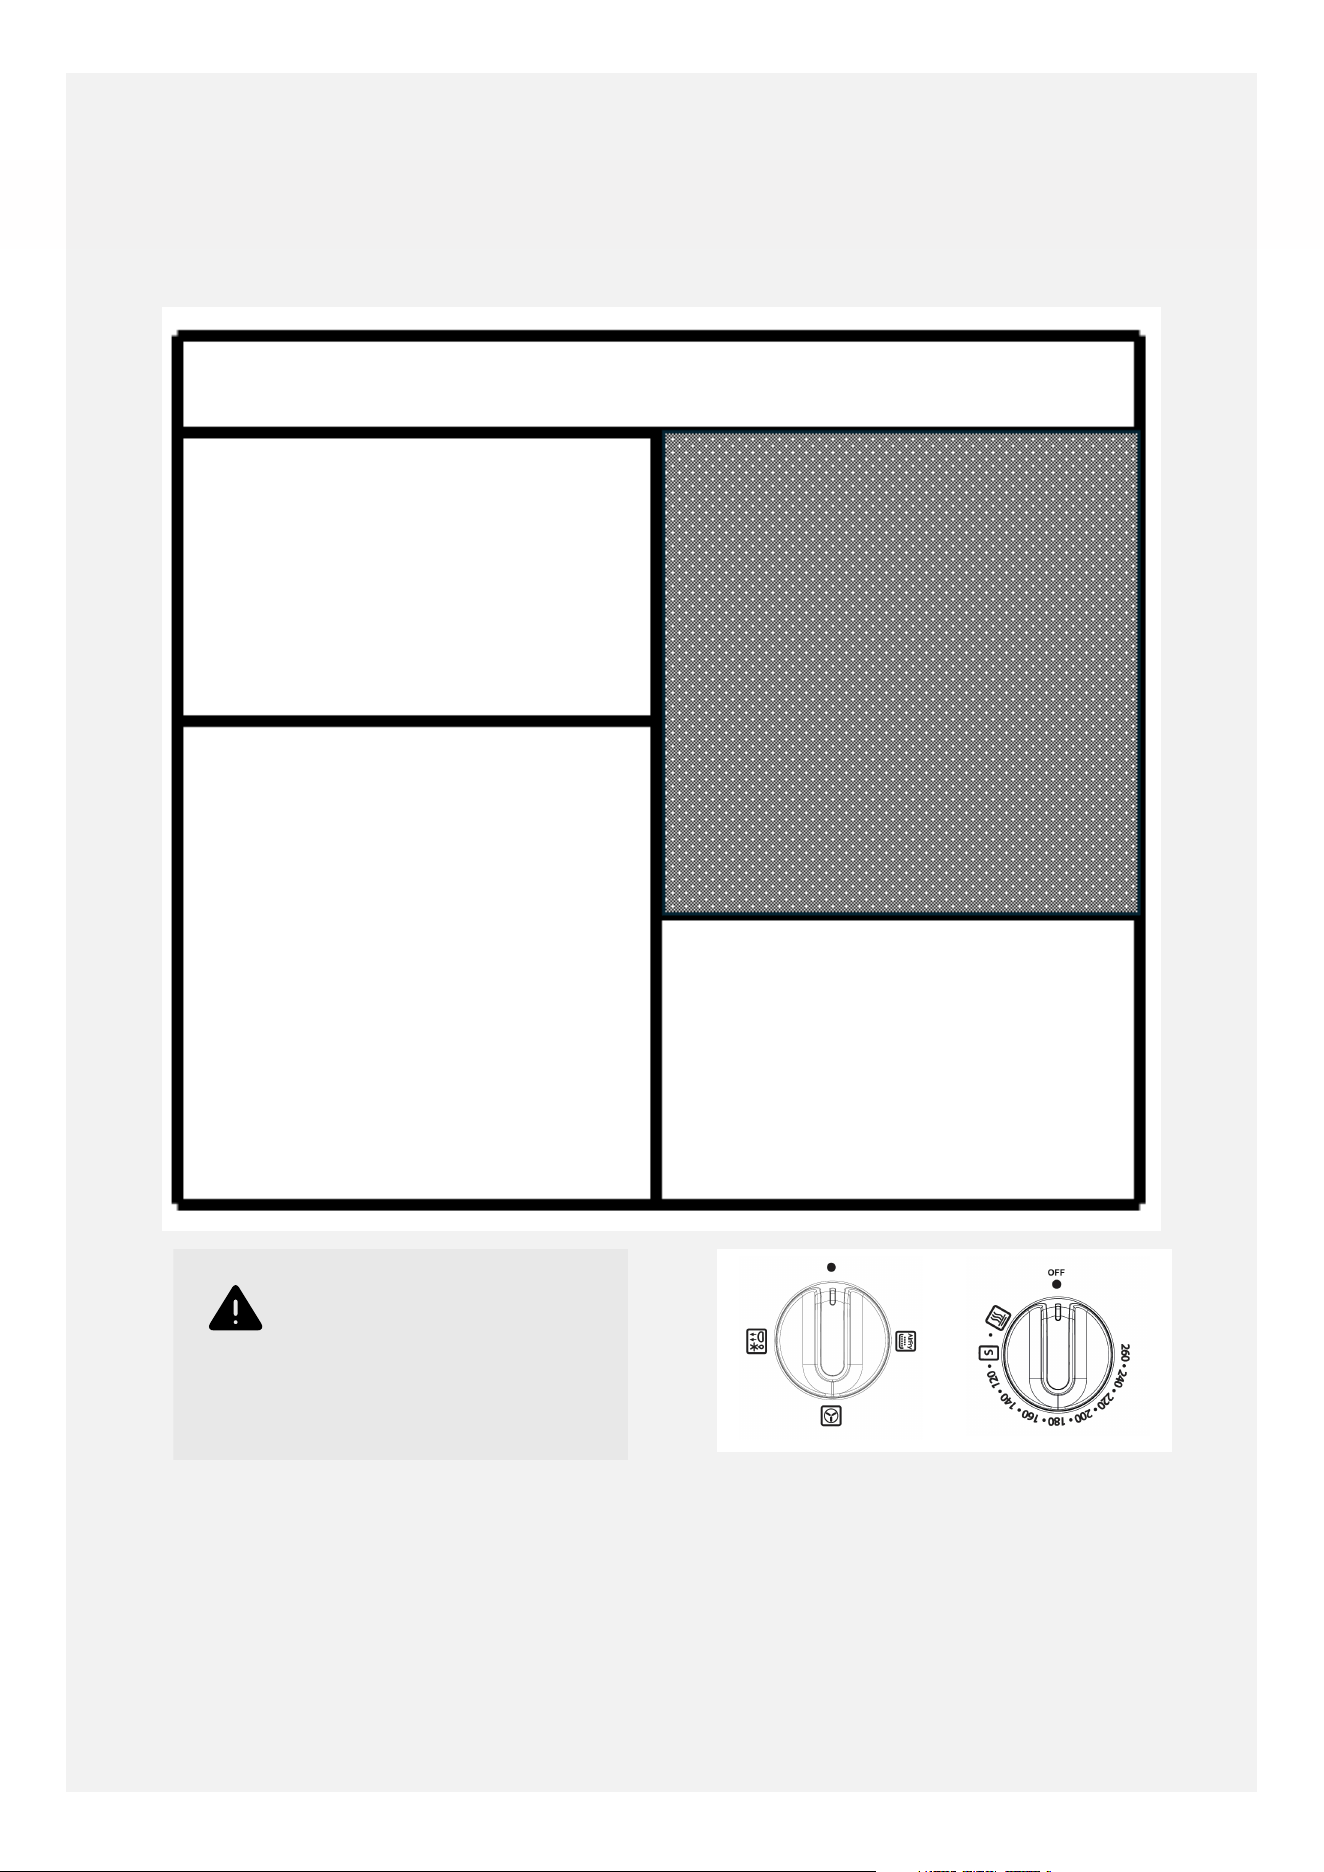
Your appliance layout may dier depending
on the model.
CONTROL PANEL
1 Grill regulator control
2 Conventional Oven control
3 Clock / Programmer
4 Main fanned oven function control
5 Main fanned oven temperature control
14
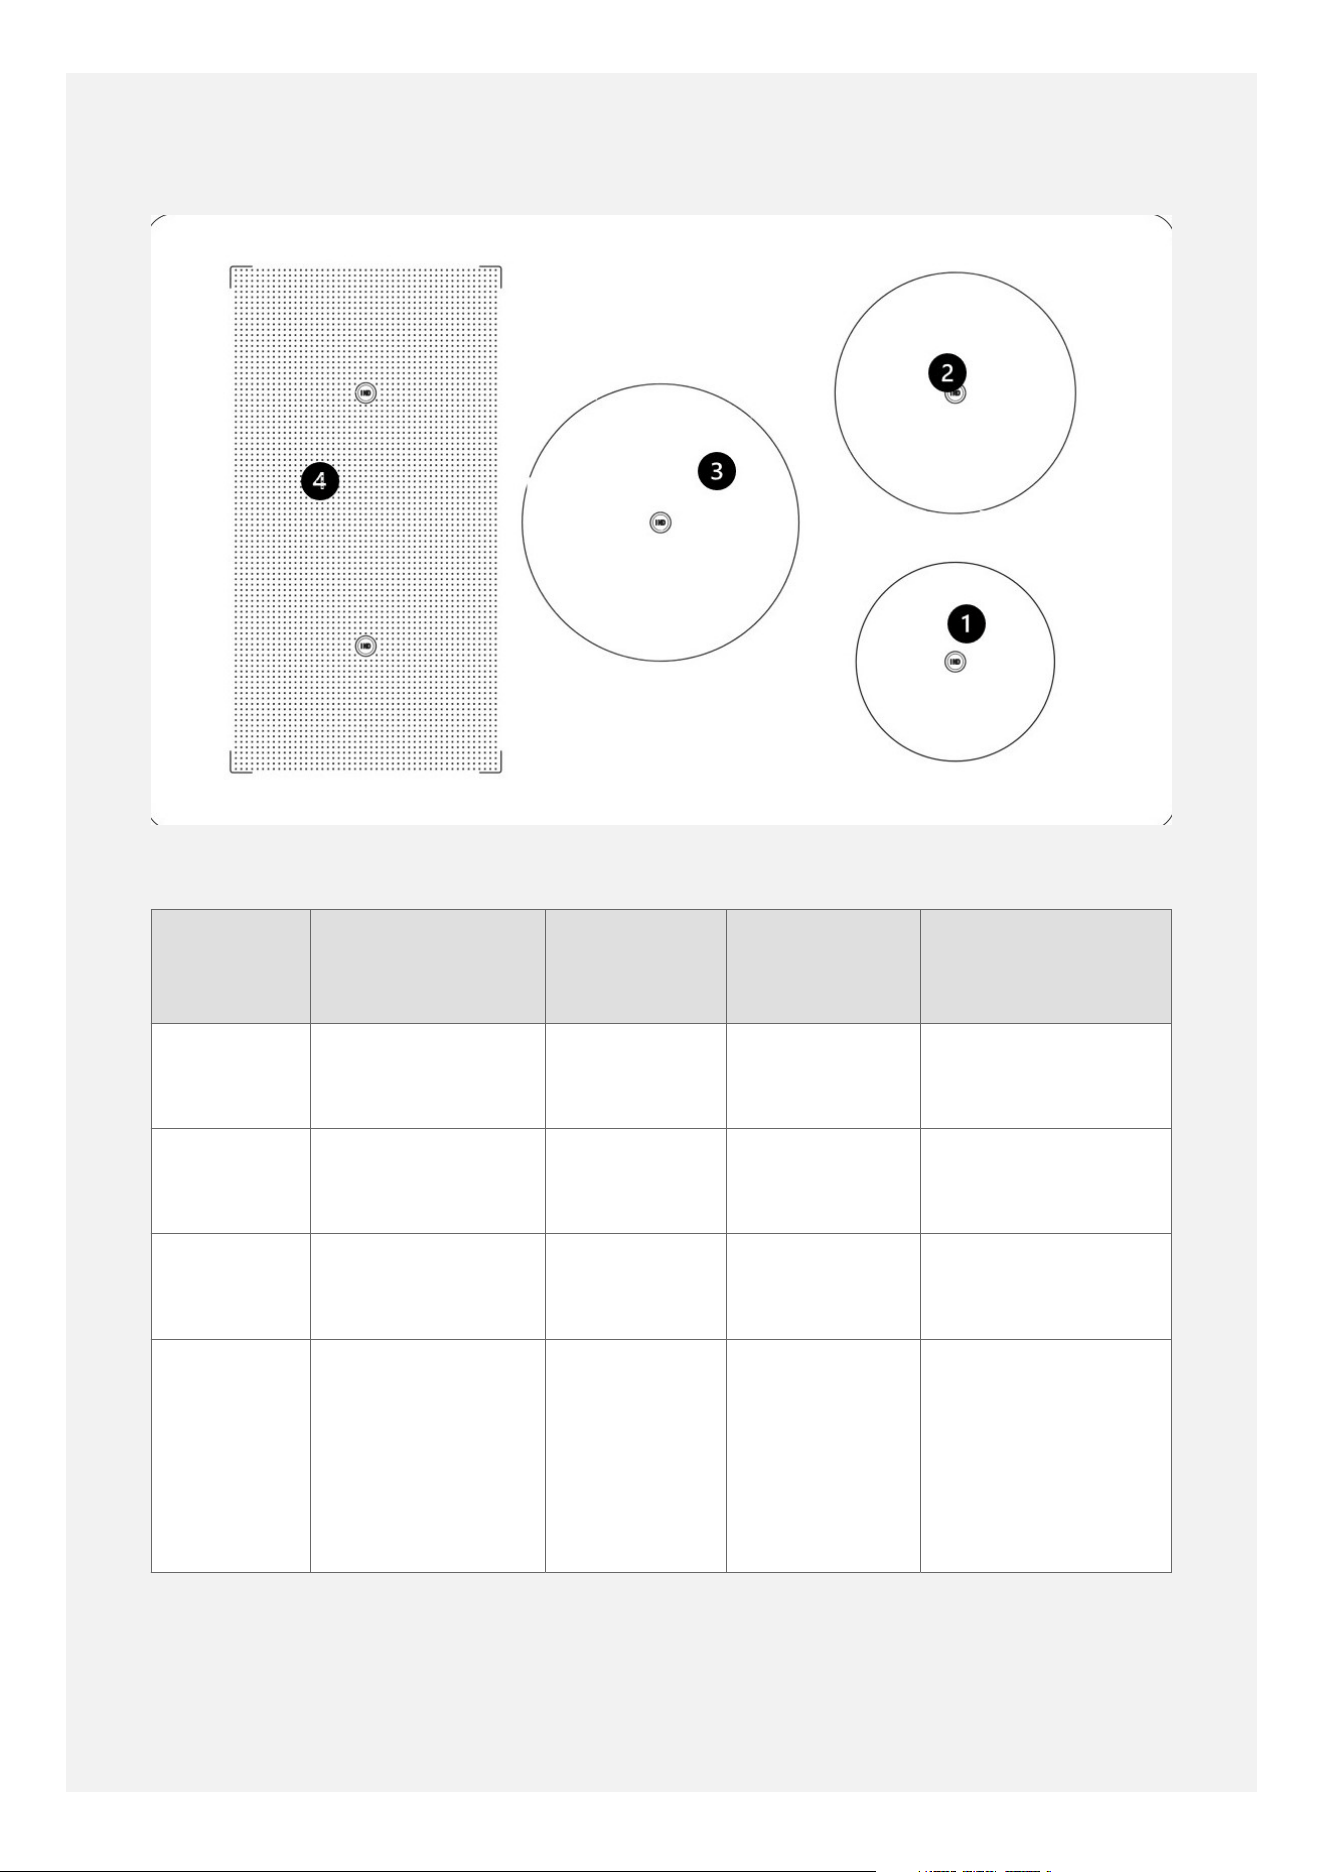
HOB OVERVIEW
Key
Number
SIze Location Power Recommended
minimum pan
size
1 Small - 160mm
diameter
Front-right 1.2 kW
(boost to 1.5
kW)
160mm
2 Medium -
180mm
diameter
Back-right 1.8 kW
(boost to 2.1
kW)
180mm
3 Large - 210mm
diameter
Centre 2.3 kW
(boost to 3.0
kW)
210mm
4 Can be used as
two zones, each
215mm wide by
190mm long, or
as one zone
215mm wide by
380mm long.
Left-hand
bridged
induction
zone
Each zone is
1.8 kW
(boost to 2.1
kW)
180mm
Smaller pans than the diameters indicated
can be used. Pans must have a smooth, flat,
magnetic base.
Generally, induction hobs cannot recognise
pans with smaller base diameters than
100mm.
15
For best results, use pans with base diameters
which are the same size as the printed ring, or
up to 30mm larger or smaller.
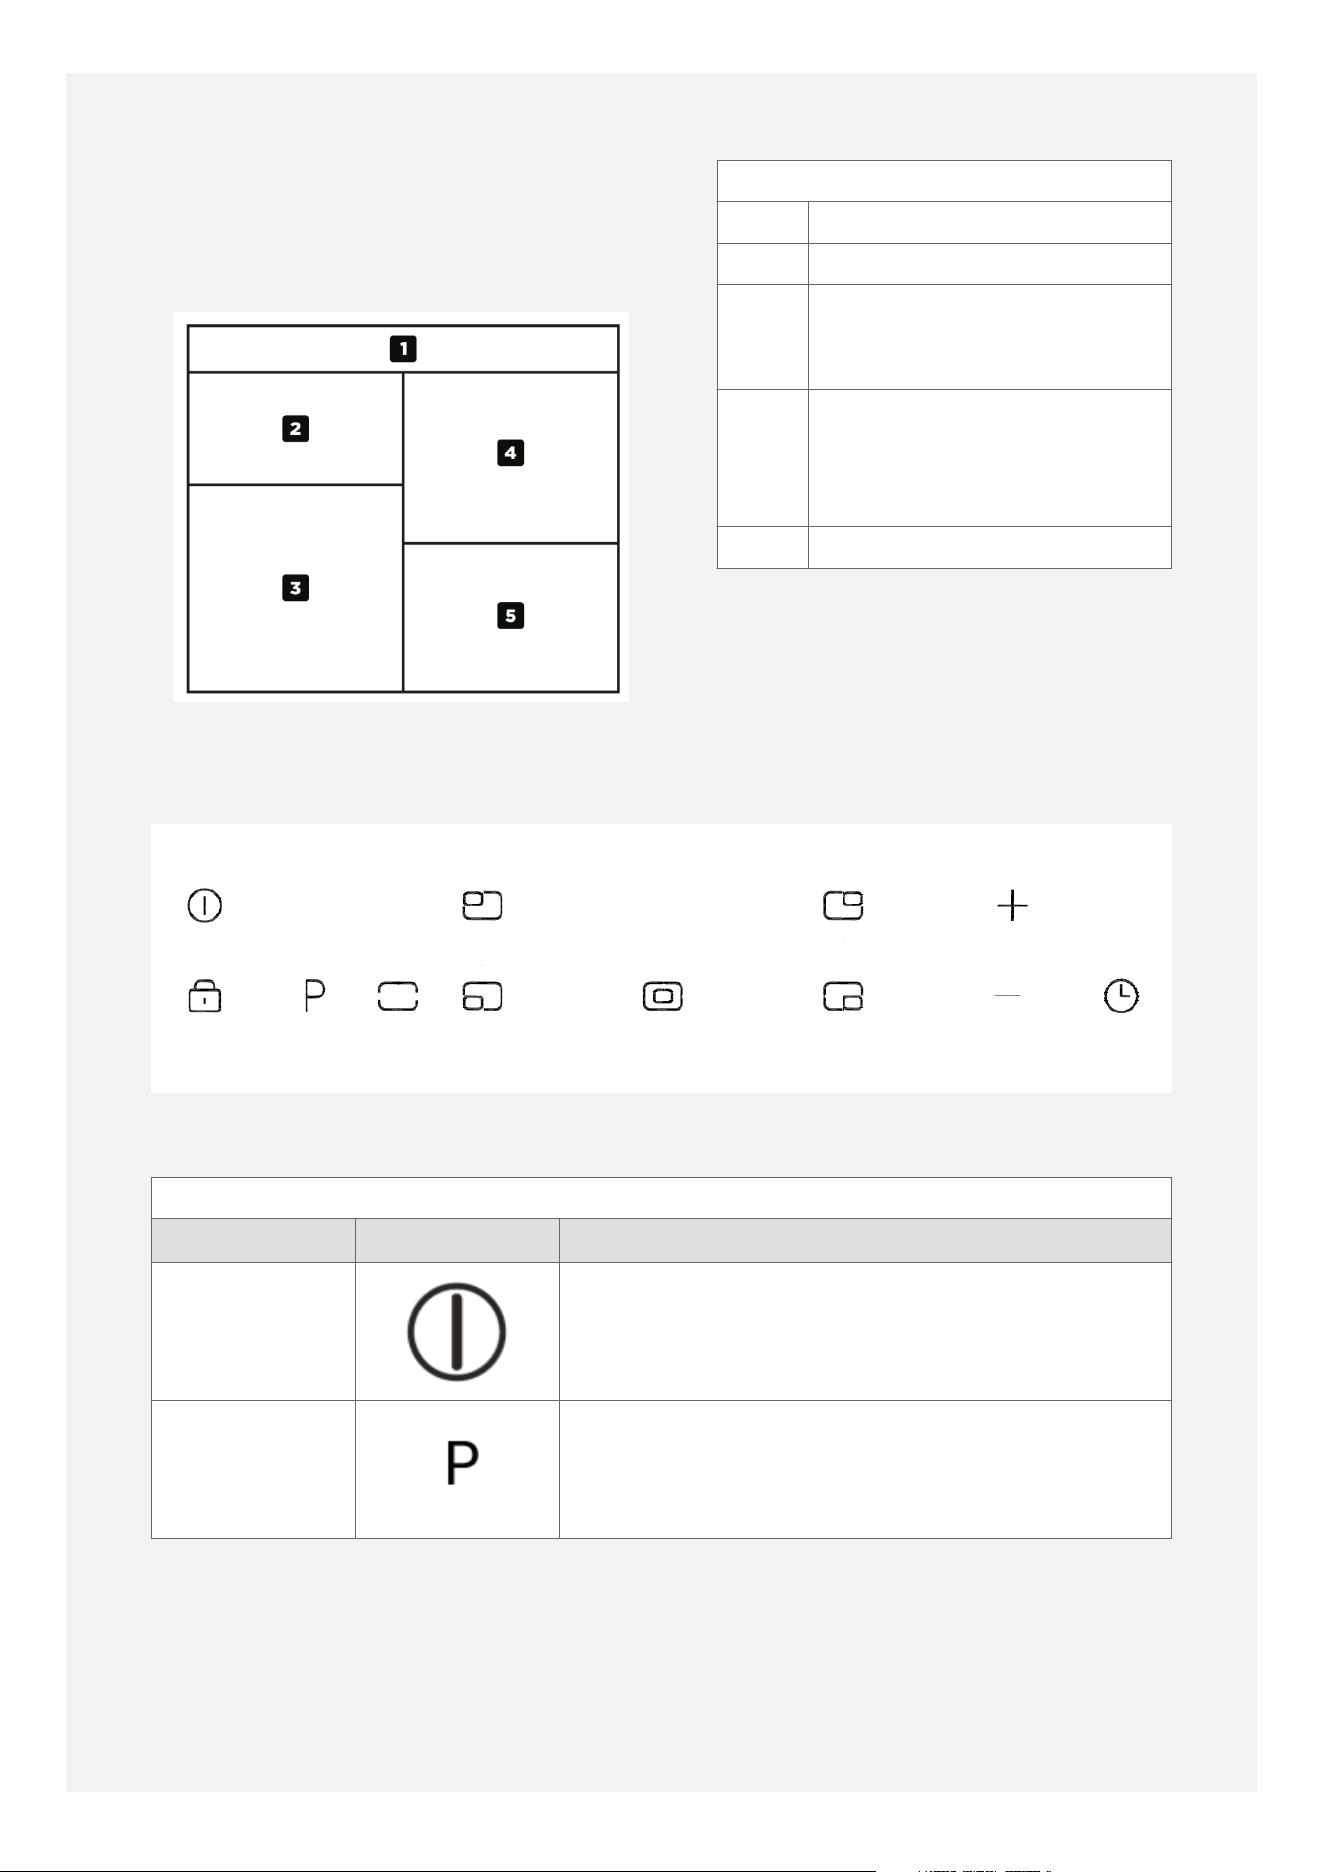
COMPARTMENT OVERVIEW
CAVITY OVERVIEW
1 Control panel
2 Grill
3 Conventional Oven - place
the food in the middle shelf
position
4 Fanned Oven with air-fry
function - the main oven
which can be controlled by
the timer
5 Storage Compartment
INDUCTION HOB CONTROLS
(Touch Models)
INDUCTION CONTROLS ON HOB
(Layout may vary slightly dependent upon model)
INDUCTION CONTROLS (Touch models)
Feature Symbol Description
Power On/
O
Power On/O key for the whole induction hob.
Power Boost Temporarily boost the power to a cooking zone.
16
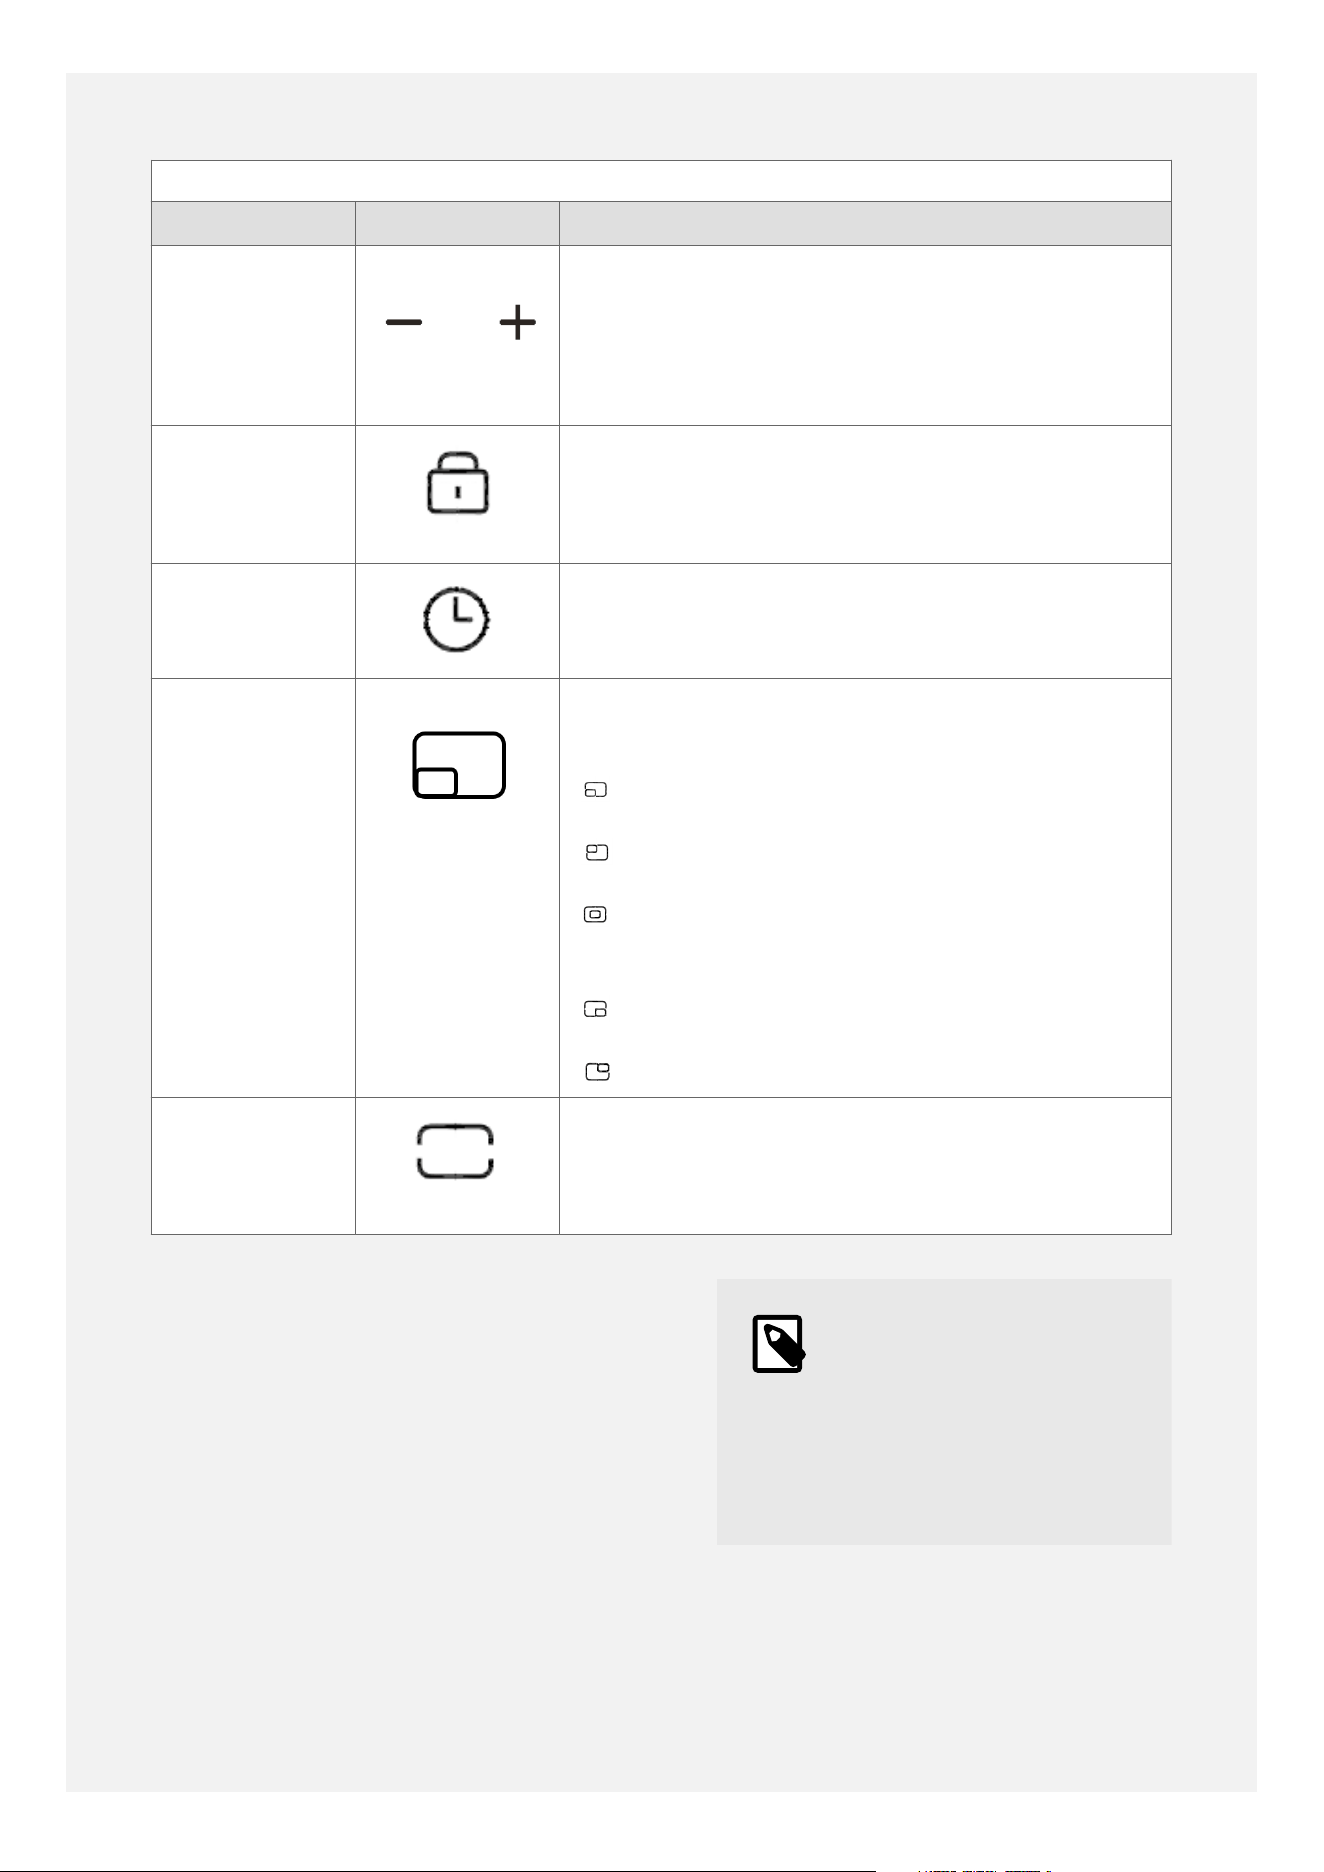
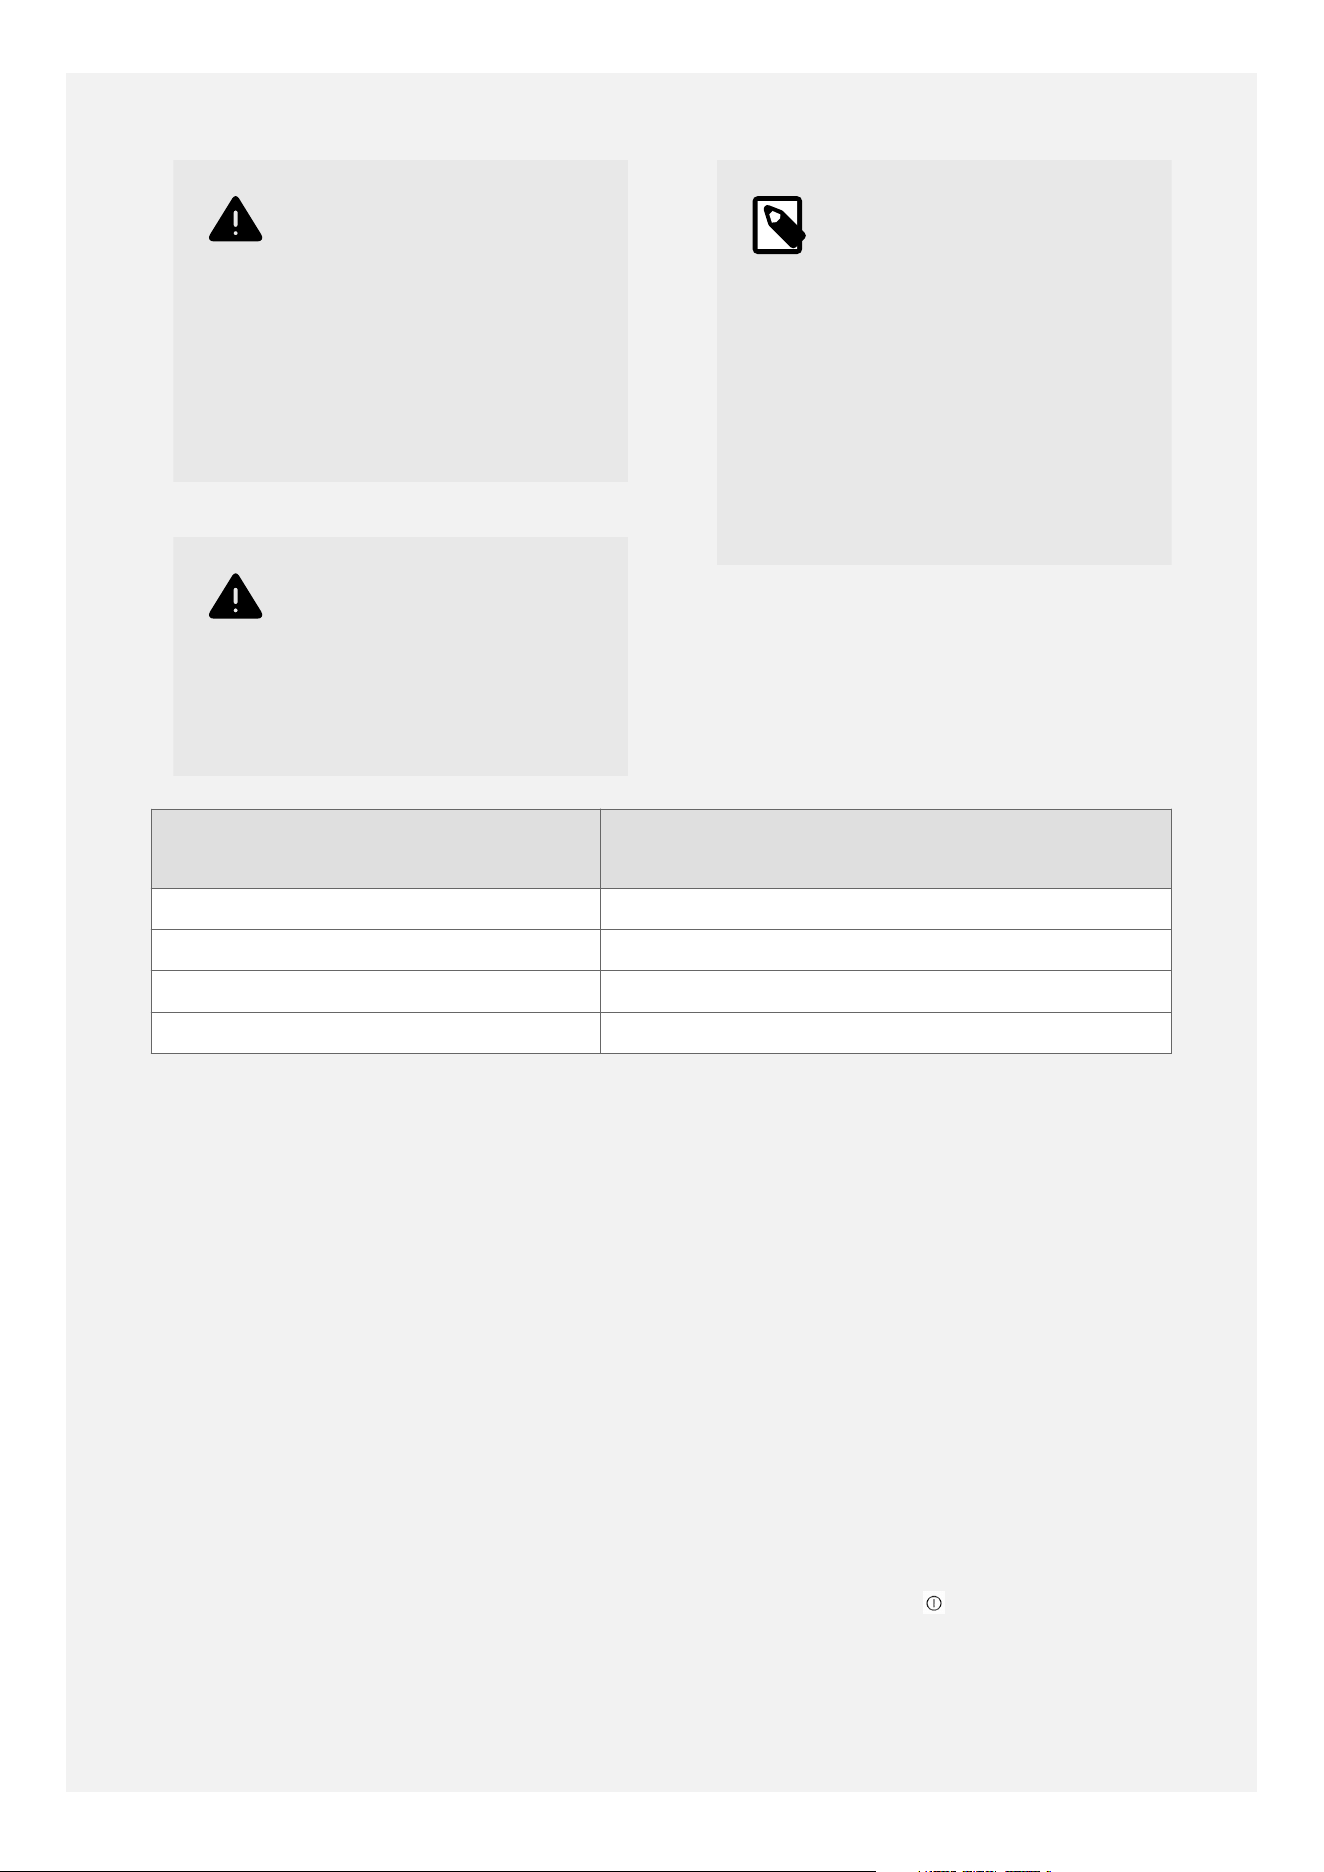
INDUCTION CONTROLS (Touch models)
Feature Symbol Description
Adjustment
key (Heat &
Timer)
Used to adjust the power level and cooking times.
Key Lock Child-lock - to prevent the hob being accidentally
turned on. Can also be used to prevent power
level settings being accidentally changed during
use.
Timer On/O Used to select the minute minder function and
cook-to-o timers.
Cook Zone
selection keys
Used to select the relevant cooking zone before
adjusting the power level or cooking time.
Front-left zone
Back-left zone
Central zone - applicable to 90cm, 100cm and
110cm-wide range cookers only
Front-right zone
Back-right zone
Bridging
function key
Used to activate the bridging function, so that
the front-left and back-left zones can be used
together as one large zone - applicable to 90cm,
100cm and 110cm-wide range cookers only.
ABOUT THE INDUCTION HOB
(TOUCH CONTROLS)
The induction hob provides the most energy-
ecient hob technology available.
The induction system provides superior heat
up and cool down times for pans - you get
fast, precise, repeatable power control.
As induction only heats up the pan, there is no
lost heat from the cooking process, which in
turn, limits the heat generated in the kitchen.
Note
Please use pans with
a smooth flat magnetic
base. Generally, induction
hobs cannot recognise
pans with a base diameter
of less than 100mm.
17
Warning
Don't leave pans on the
hob when you're not
around- take them off the
heat if you have to leave
the kitchen (even if you
think it will only be for a
moment, while you answer
the door or phone).
Warning
Never leave the hob
unattended when in use,
even when you have set
the timer to turn off the
cook zone.
Note
The safety temperature
control of the pans
is only possible with
quality flat bottomed
pans suitable for induction
cooking. Poor quality
pans can create air gaps
between the glass and
the pan, which affects
the accuracy of the
temperature control.
Approximate Glass Surface
Temperature (°C)
Intelligent hob safety system
200 Reduces Power Boost setting to Power Level 9.
250 Reduces power to 60% of power level setting.
270 Switches cook zone o.
300 Switches whole appliance o.
TOUCH CONTROLS
The touch controls for your induction hob
have been designed to provide you with finger
touch control of your hob, providing accurate
and repeatable power settings for cooking
and an easy clean surface that can be easily
wiped over.
Each cook zone displays it's individual power
setting.
USING THE TOUCH CONTROLS
When using the touch controls, use the flat
of your finger, not the tip or finger nail. The
controls respond to touch, so you don't need
to apply any pressure.
Once you have powered on the induction hob,
you then have a few seconds to select the
cooking zone keys or timer key. If no further
keys are selected within a few seconds, the
hob will switch o again to save energy. If the
red dashes disappear from the display, simply
press the power key again to switch the hob
on again.
Always ensure the control area is clean, dry
and free from any objects (e.g. utensils,
tea towels and cloths). Spillages and water,
grease or fingerprints may make the controls
less responsive.
POWERING THE HOB ON AND
OFF
Touch the power key for a couple of
seconds to turn the hob on. The display lights
up with some red dashes (-).
18
The hob can be switched o by touching the
power key for a couple of seconds. The
display goes dark. The hob will also switch
itself o automatically a short time after
turning o the hob cooking zones, or if the
hob is switched on but no cooking zones or
timer are selected.
SELECTING A COOKING ZONE
AND ADJUSTING A POWER
LEVEL
Power on the hob as above. Touch the relevant
cooking zone key to select it (for example
for the front-left zone). '0' flashes in the
display for the relevant zone.
While the '0' is flashing, touch the plus and/or
minus keys to set the required power
level (with 1 being the most gentle simmer
and 9 being the most rapid boil).
Tip
If you touch the plus key
first, the power level
will default to level 5
and can be adjusted from
there.
If you touch the minus
key
first, the power
level will default to level 9
and can be adjusted from
there.
A few seconds after the last touch of a key,
the power level is accepted and the zone
continues to cook at the selected power level.
When you wish to adjust the power level,
touch the relevant cooking zone key again to
select it. The current power level will flash
in the display for the relevant zone. While
the display is flashing, touch the plus and/or
minus keys to adjust the power level.
Adjusting the power level down to 0 switches
the cooking zone o. You can also touch the
power key to switch all of the cooking
zones o.
POWER BOOST
The power boost function can be used to
temporarily boost the power to a cooking
zone by 'borrowing' extra power from an
adjacent zone.
All the cooking zones can be boosted, but not
all at the same time. You cannot boost two
zones on the same side of the hob at the same
time.
After powering on the hob, touch the relevant
cooking zone key to select it (for example
for the front-left zone). '0' flashes in the
display for the relevant zone.
While the '0' is flashing, touch the power
boost key ; 'P' appears in the display to show
that power boost is active.
The power boost function runs for
approximately 5 minutes and then the cooking
zone will change to power level 9. The power
boost function can also be cancelled at any
time by selecting a dierent power level or by
turning the cooking zone o.
19
Note
The Power Boost function
will only operate for a
limited time and is also
under thermal control.
This means that Power
Boost will deactivate
automatically if the
product gets too hot,
to protect the internal
electronic components
of the hob and to
prevent the cookware
from overheating.
If using two pans on the
same side of the hob,
if one zone is on power
boost the other zone's
power level may need to
be limited to a lower
power level to prevent
the appliance drawing
too much power. For
this reason, you may see
cooking zone power levels
reduce automatically.
Pans tend to heat up
quickly on induction hobs.
Please do not overfill pans
to prevent boiling over,
especially when using the
power boost function. Do
not leave pans unattended
when using the power
boost function.
BRIDGING FUNCTION
The bridging function allows the front-left and
back-left cooking zones to be used as one
large zone to accommodate larger pans. This
function is available on the 90cm, 100cm and
110cm-wide range cooker versions.
After switching the hob on, touch the bridge
key to activate the bridging function. '0'
flashes in the back-left zone display and '='
shows in the front-left zone display.
While the '0' is flashing, touch the plus and/or
minus keys to set the required power
level. You can also touch the power boost key
to select power boost when the zones are
bridged. The power level will be displayed in
the back-left zone display.
The bridging function can be cancelled at any
time by touching the bridge key again.
The front-left and back-left zones can then be
used as two separate zones again.
ACTIVATING AND
DEACTIVATING THE CHILD
LOCK
The lock function can be used in two ways
- to prevent the hob cooking zones being
accidentally turned on, for example by a child,
and to prevent the power settings from being
accidentally changed in use, for example
while simmering.
To prevent the hob zones being turned on
accidentally, touch the padlock key
for a
few seconds, until 'LO' appears in the hob
timer display.
If the hob is now switched on by the
power key , 'LO' flashes in the hob timer
display and the hob cooking zones cannot be
switched on.
To deactivate the child lock, after switching
the hob on, touch the padlock key for a
few seconds until 'LO' disappears from the
timer display. The hob can now be operated
as usual.
To prevent the power settings from being
changed accidentally, after setting the
required simmer power levels, touch the
padlock key for a few seconds until 'LO'
appears steadily in the hob timer display. The
hob touch control keys are now locked so that
the simmer power levels cannot be adjusted.
The hob can still be switched o using the
power key .
To deactivate the in-use lock, touch the
padlock key for a few seconds until 'LO'
disappears from the timer display. The touch
controls can then be operated as usual.
20
Please note the child lock function is
maintained even after powering the hob o
and on via the power key .
USING THE MINUTE MINDER
The hob minute minder can be used to remind
you to check or stir the food, but does not
switch a cooking zone o automatically.
Note
The hob minute minder is
only available if at least
one hob cooking zone is in
use.
Set the cooking zone power levels first. While
none of the cooking zones are currently
selected (that is, the zone power level
displays are steady and not flashing), touch
the clock key
. '00' flashes in the hob timer
display.
While the '00' is flashing, use the plus and/or
minus keys
to set the required minute
minder duration time (between 1 minute and
99 minutes).
Tip
Short touches of the plus
and minus keys
increase/decrease the
minute minder duration
time by one minute at a
time.
Long touches of the plus
and minus keys
increase/decrease the
minute minder duration
time by ten minutes at a
time.
A few seconds after the last key press, the
duration time is accepted and starts counting
down.
If you need to amend or cancel the minute
minder time, touch the clock key again. The
remaining duration time flashes and you can
adjust the duration time using the plus and/or
minus keys . Adjusting the duration time
down to 0 cancels the minute minder function.
When the minute minder duration time has
elapsed, the alarm sounds for approximately
30 seconds. You can silence the alarm by
touching the clock key . The hob cooking
zone(s) will need to be turned o manually.
USING THE COOK-TO-OFF
TIMER
The cook-to-o timer allows one or
more cooking zones to be switched o
automatically after a certain amount of
time, for example after a certain period of
simmering.
After switching the hob on, touch the relevant
zone key (for example for the front-left
zone).
While the power level is flashing in the
display, use the plus and/or minus keys
to set the required power level.
While the power level is still flashing in the
display, touch the clock key . (If the power
level has stopped flashing in the display,
simply touch the relevant zone key again to
make the display flash again). '00' flashes in
the hob timer display.
While '00' is flashing in the hob timer display,
use the plus and/or minus keys to set
the required timer duration time (between 1
minute and 99 minutes).
21
Tip
Short touches of the
plus and minus
keys increase/decrease
the timer duration time by
one minute at a time.
Long touches of the
plus and minus
keys increase/decrease
the timer duration time by
ten minutes at a time.
A few seconds after the last key press, the
timer duration time is accepted and starts
counting down. A dot appears next to the
relevant cooking zone power level display to
show that the zone is being controlled by the
timer.
If you need to amend or cancel the timer
duration time, touch the relevant zone key
(
) to select the zone. Then touch
the clock key . The current remaining timer
duration time flashes in the display. While the
duration time is flashing, use the plus and/or
minus keys to adjust the timer duration time.
Adjusting the timer duration time down to
0 will cancel the cook-to-o timer function.
Please note, in this case the cooking zone
would need to be switched o manually.
When the cooking duration time has elapsed,
the cooking zone is switched o and the alarm
sounds for approximately 30 seconds. You can
silence the alarm by touching the clock key .
Note
All of the cooking zones
can be controlled by the
cook-to-off timer. Repeat
the above steps if you
wish to use the cook-to-
off timer on another zone
simultaneously.
The hob timer display can
only display the remaining
duration time for one
cooking zone timer or
minute minder at a time.
To indicate for which zone
the remaining time is
being displayed, a flashing
dot will show next to
the relevant cooking zone
power level display. A
steady dot next to a
cooking zone power level
display indicates that the
cooking zone is being
controlled by the timer,
but the timer display
is not currently showing
the remaining duration
time for that zone. Touch
the relevant zone key to
briefly see the remaining
duration time for that
zone in the hob timer
display.
If there are zone cook-
to-off timers and the
minute minder running
concurrently, the minute
minder takes priority and
shows in the hob timer
display. To check the
remaining duration time
for the zone cook-to-off
timers, touch the relevant
zone key to briefly see the
remaining duration time
for that zone in the hob
timer display.
22

INDUCTION SYMBOLS AND
CODES
The hob display can show information codes,
and codes to alert you to any issues which
may need to be resolved.
23

Induction Symbols And Codes
Symbol /
Code
Meaning Description
Pan missing, or
unsuitable pan.
If the electronics cannot detect the pan,
because it is too small or does not have
a magnetic base, then the hob display
will show the missing or unsuitable pan
symbol.
Residual heat
indicator.
When the hob is switched o after
use, if the glass surface is still hot,
the residual heat indicator will be
displayed. The residual heat symbol will
automatically go out when the glass
surface temperature cools (to below
approximately 45°C). The cooling fan
runs for a while after the hob is switched
o to help cool the hob electronics.
Power boost. Power boost is active.
ER03 Obstruction. Something is covering the hob control
area, such as a pan, utensil or cloth, or
even just water, grease or finger prints .
Remove any items and clean the area
before using the hob again. Do not touch
any of the hob touch control keys for
more than 10 seconds.
E1 or E2 Over-heat indicator. The hotplate may have over-heated,
possibly because an empty pan has been
heated for too long or a pan has boiled
dry. Remove the pans and allow the
hob to cool down for about 30 minutes
before trying to use it again.
E3 or E4 Possible issue with
electricity supply.
The electrical voltage supplying the
cooker may be too high or too low.
Switch the cooker o at the wall and
contact your local electricity board for
assistance.
LO Child lock. The child lock has been activated.
24
For other codes, please switch the appliance
o at the wall for a few minutes to let the
electronics reset. If the code reappears when
the power is restored, please contact our
customer support team using the details on
the back cover.
MAXIMUM OPERATING TIMES
FOR INDUCTION HOB ZONES
For safety reasons, an induction hob zone
cannot operate for longer than a maximum
time before switching o and cooling down.
Maximum Operation Times For
Induction Hob Zones
Power
level
Maximum
operating time
1 6 hours
2 6 hours
3 6 hours
4 3 hours
5 3 hours
6 3 hours
7 2 hours
8 2 hours
9 1.5 hours
Power
Boost
5 minutes (plus a
further 90 minutes at
power level 9)
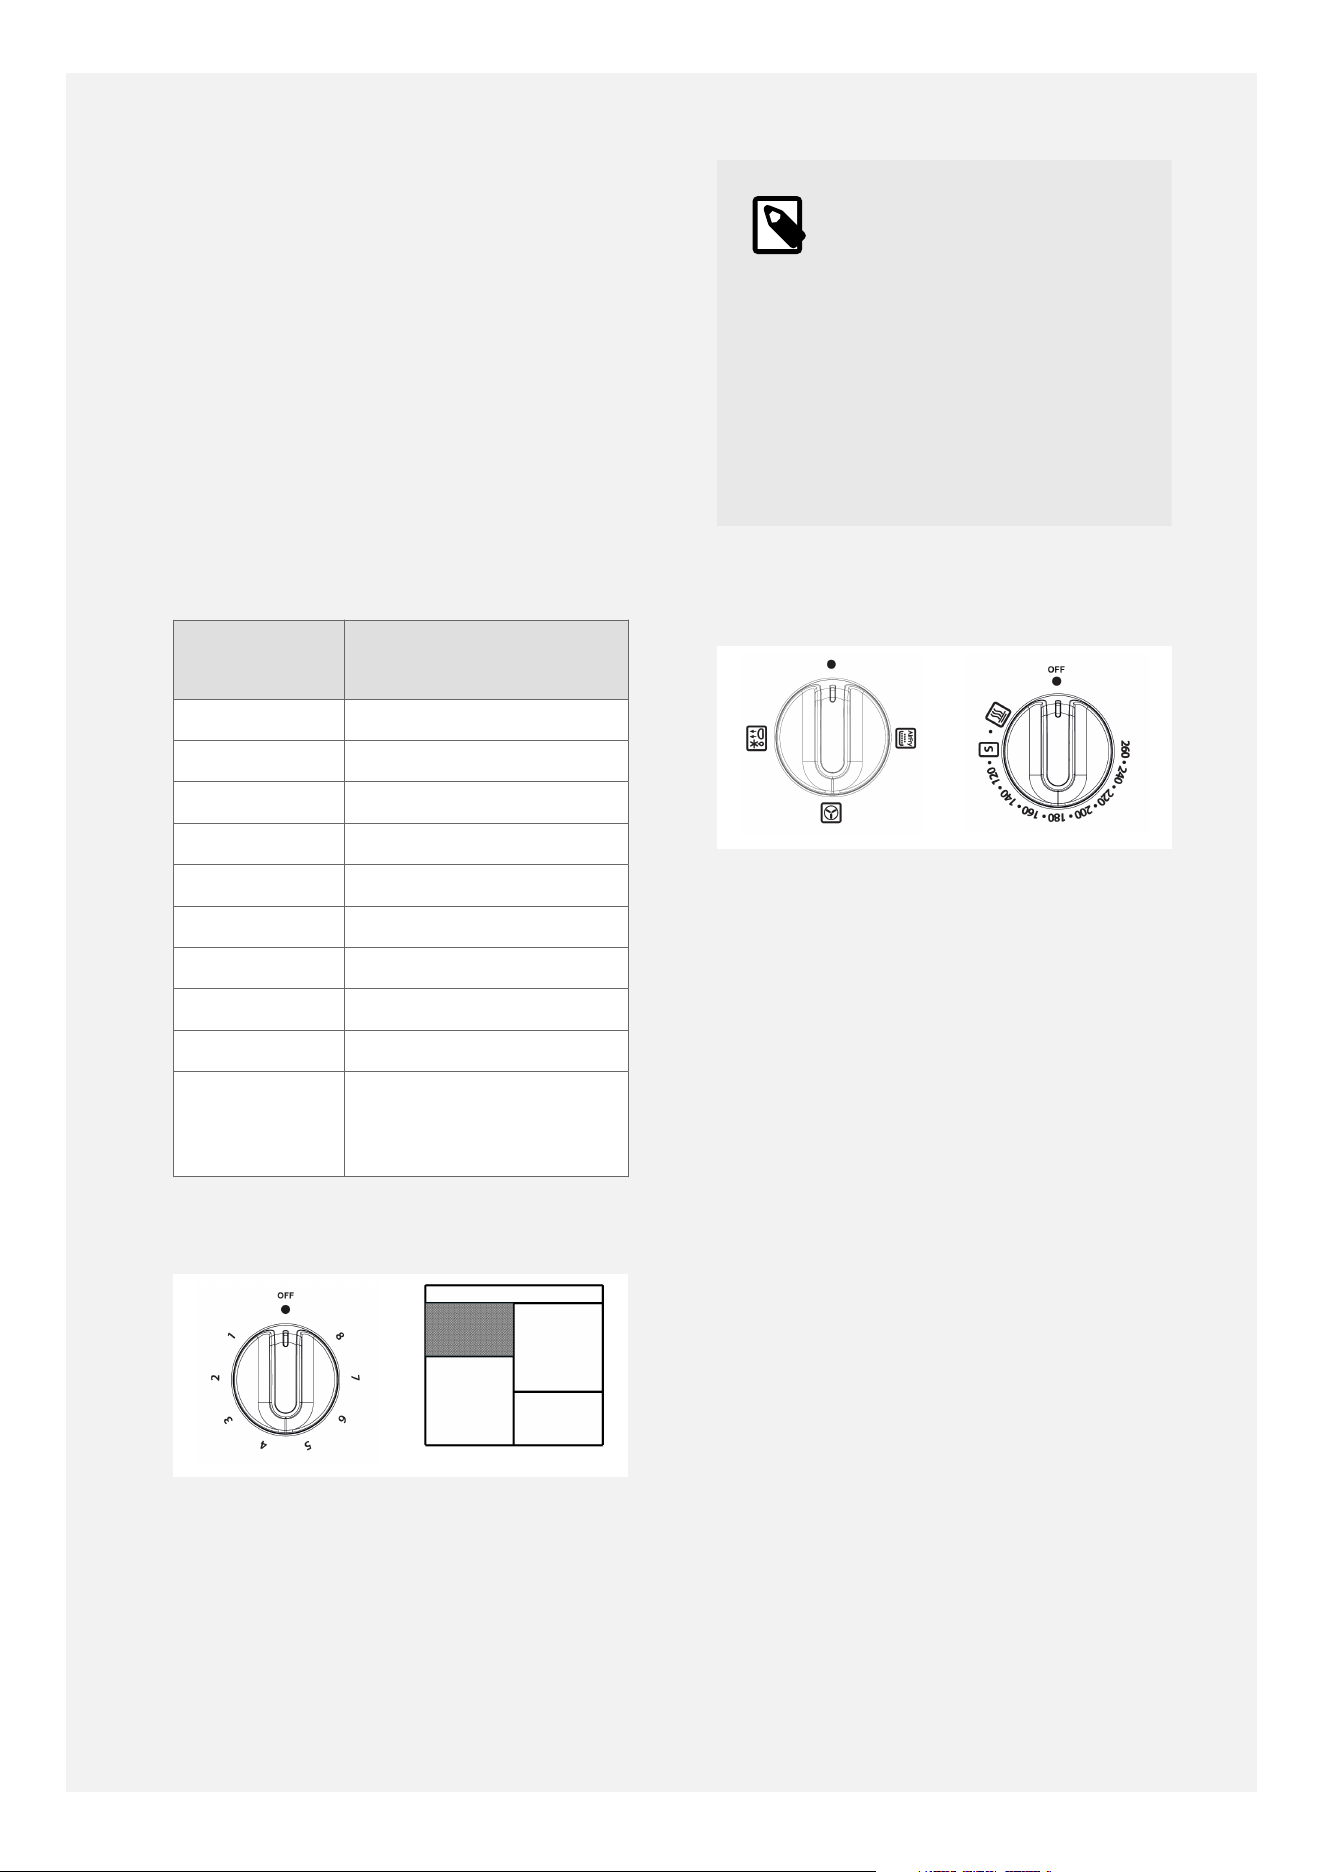
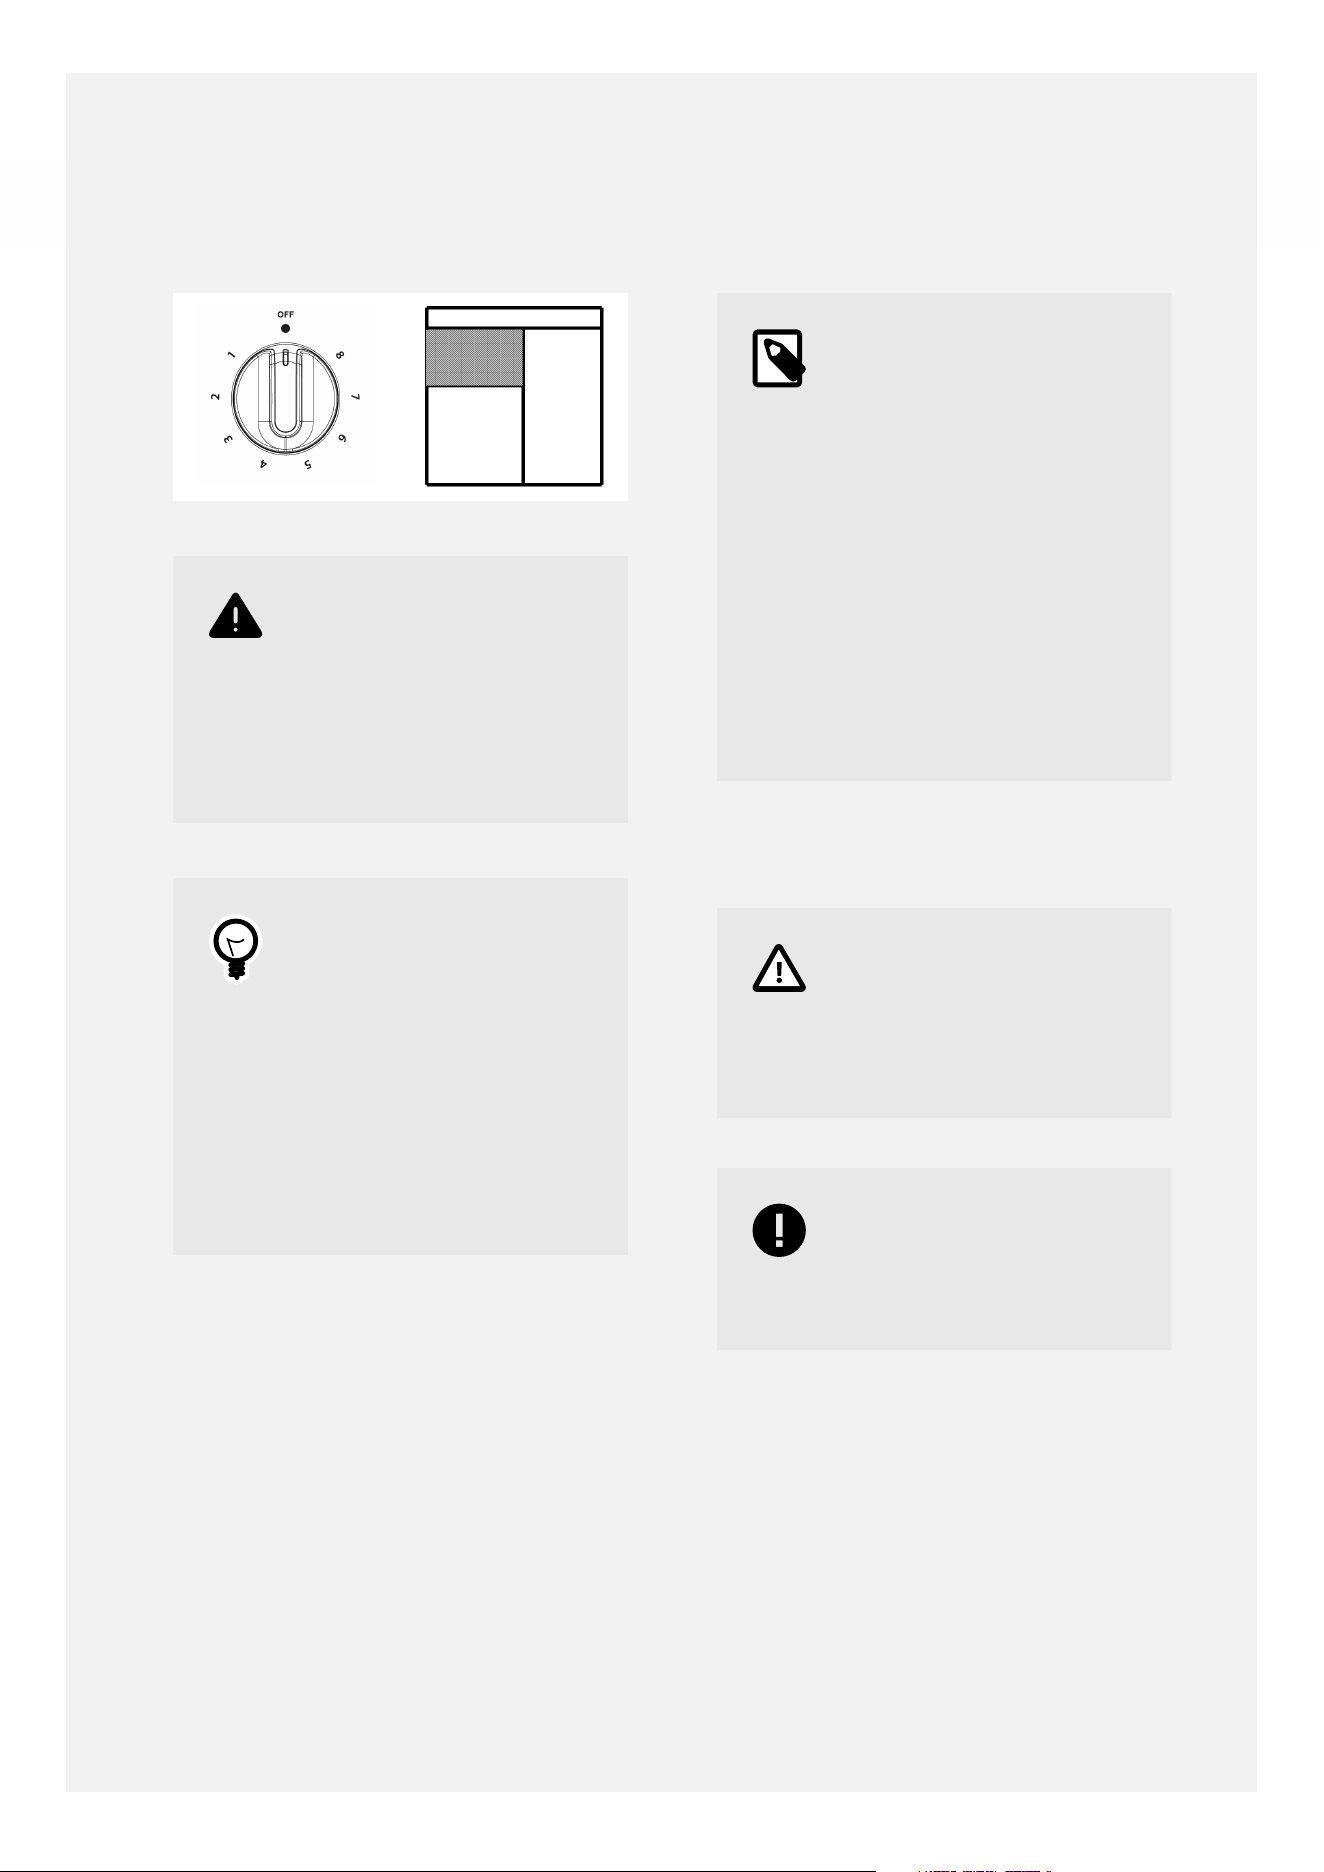
GRILL CONTROL DIAL
Note
1 is for the lowest heat
output; 8 is for the highest
heat output.
Use the grill with the door
open.
For best results, pre-heat
the grill for 3-5 minutes
before use.
MAIN OVEN OVERVIEW
To operate the main oven please select a
cooking function with the left-hand control
knob and a temperature with the right-hand
control knob.
25

MAIN OVEN COOKING FUNCTIONS AND SETTINGS
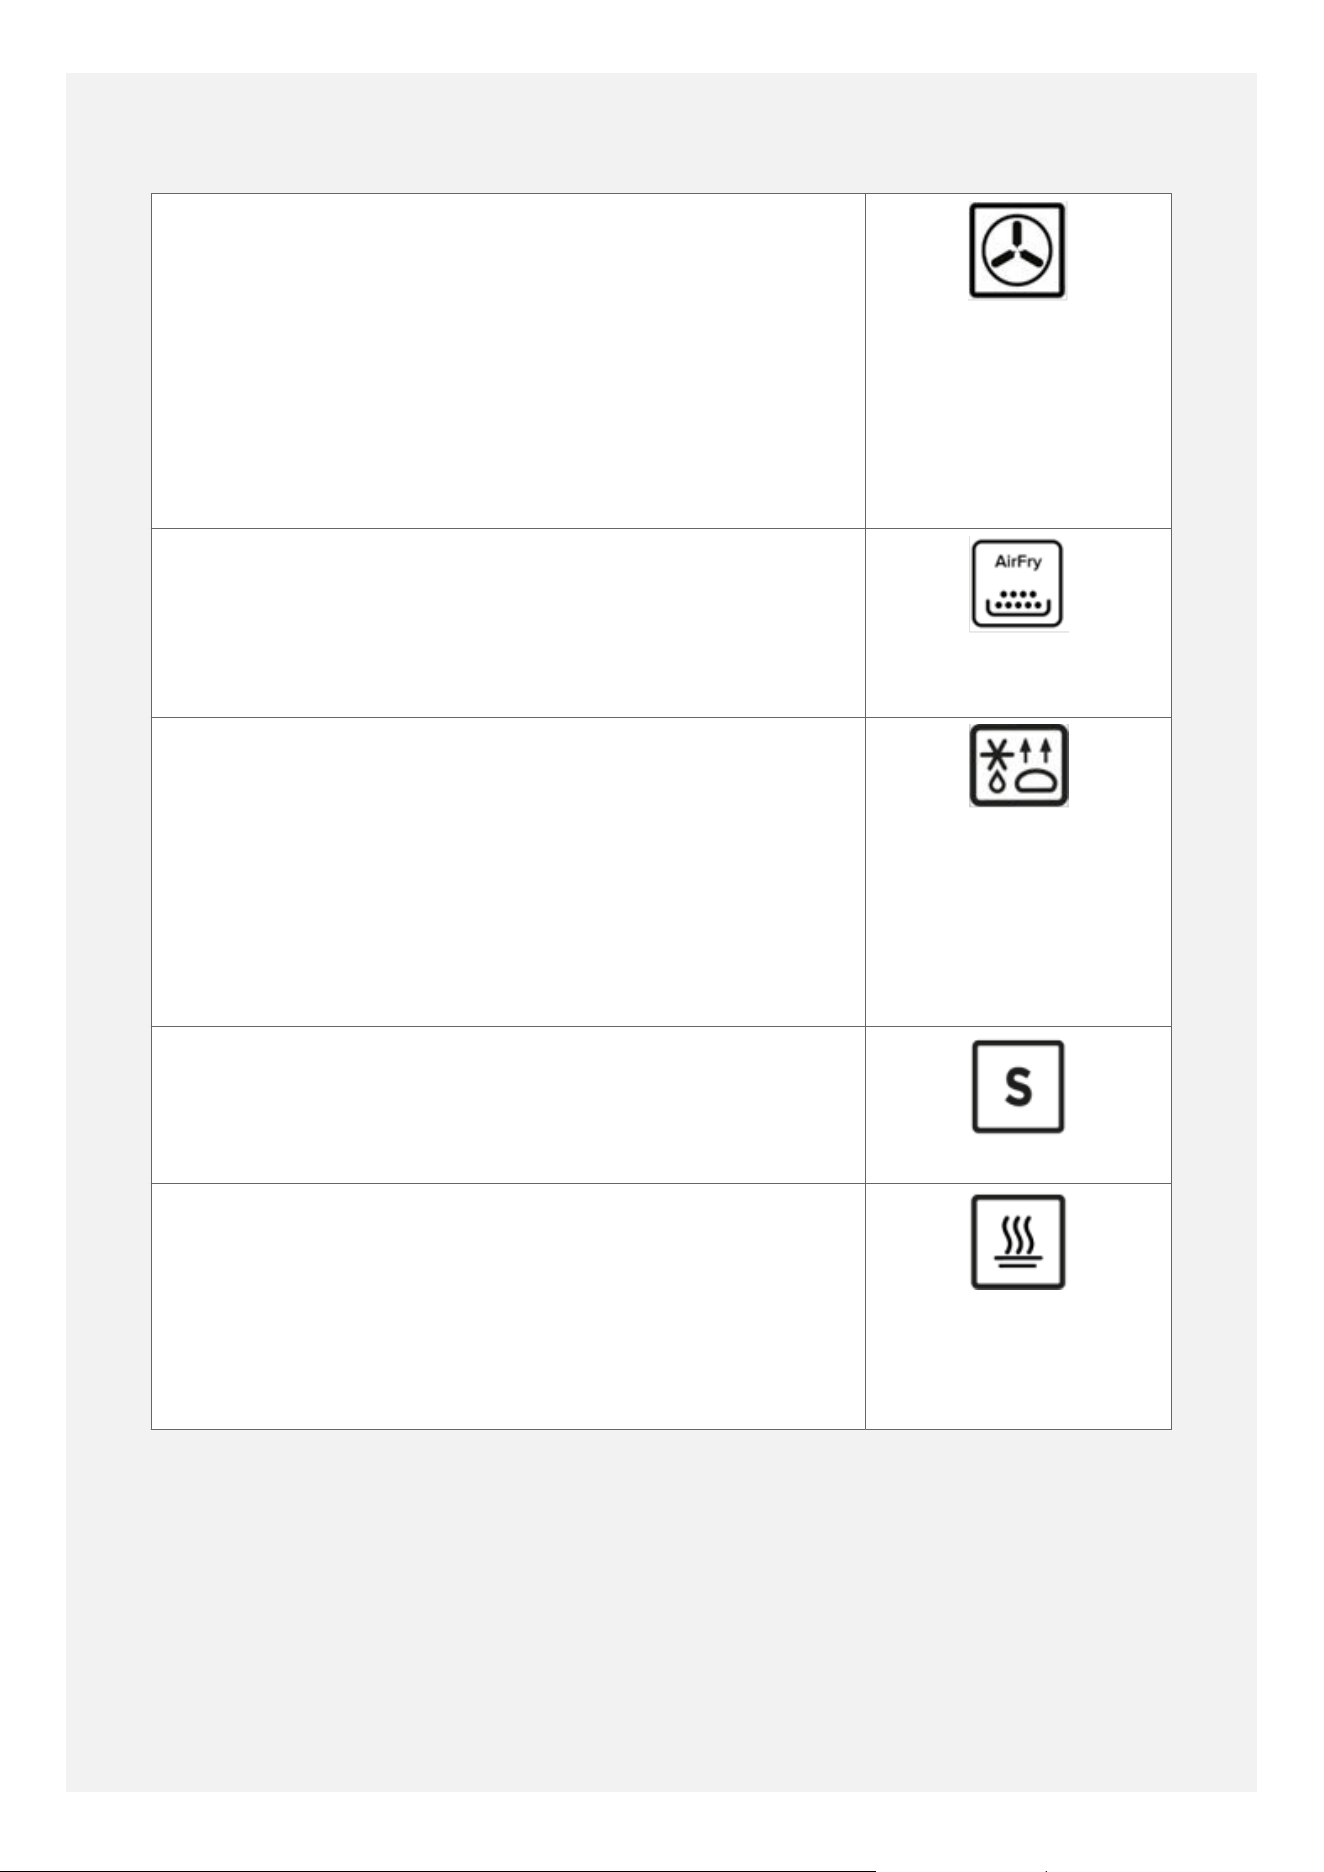
Symbol Function
Fanned Oven
Use any suitable shelf position.
Can batch bake on more than one level simultaneously - leave enough
room for baking to rise.
Requires little to no pre-heating.
Reduce the temperature by around 20°C and reduce cooking time a
little compared to conventional ovens. Ensure food is thoroughly cooked
through prior to serving.
Air-Fry function
For best results, lay out the food in one layer on the air-fryer tray, as
evenly-spaced as possible.
Insert the air-fryer tray into the middle shelf position of the main oven.
Insert the grill pan into the lower shelf position of the main oven,
beneath the air-fryer tray, to catch any drips.
Turn the main oven function control dial to the air-fry function and turn
the main oven control dial to 220°C.
For best results, when consulting recipes and cooking instructions on
food packaging, please look for the conventional oven timings, not
the worktop air-fryer timings or regular fanned oven timings. Reduce
the conventional oven timings by about 30%. Ensure that the food is
thoroughly cooked prior to serving.
The air-fry function is great for cooking chips, potato wedges,
vegetables, chicken pieces, chicken nuggets, and any foods which you
would normally grill.
However, the air-fry function is not suitable for baking cakes, pastries or
breads, as they may become tough, and is not designed for frying foods
in a wet batter.
Defrost / dough-proving
Leave the main oven temperature control in the o position.
Use with the door closed to defrost frozen bread or gateaux, or when
leaving dough to rise prior to baking.
Use with the door open to cool cooked food prior to refrigerating.
26
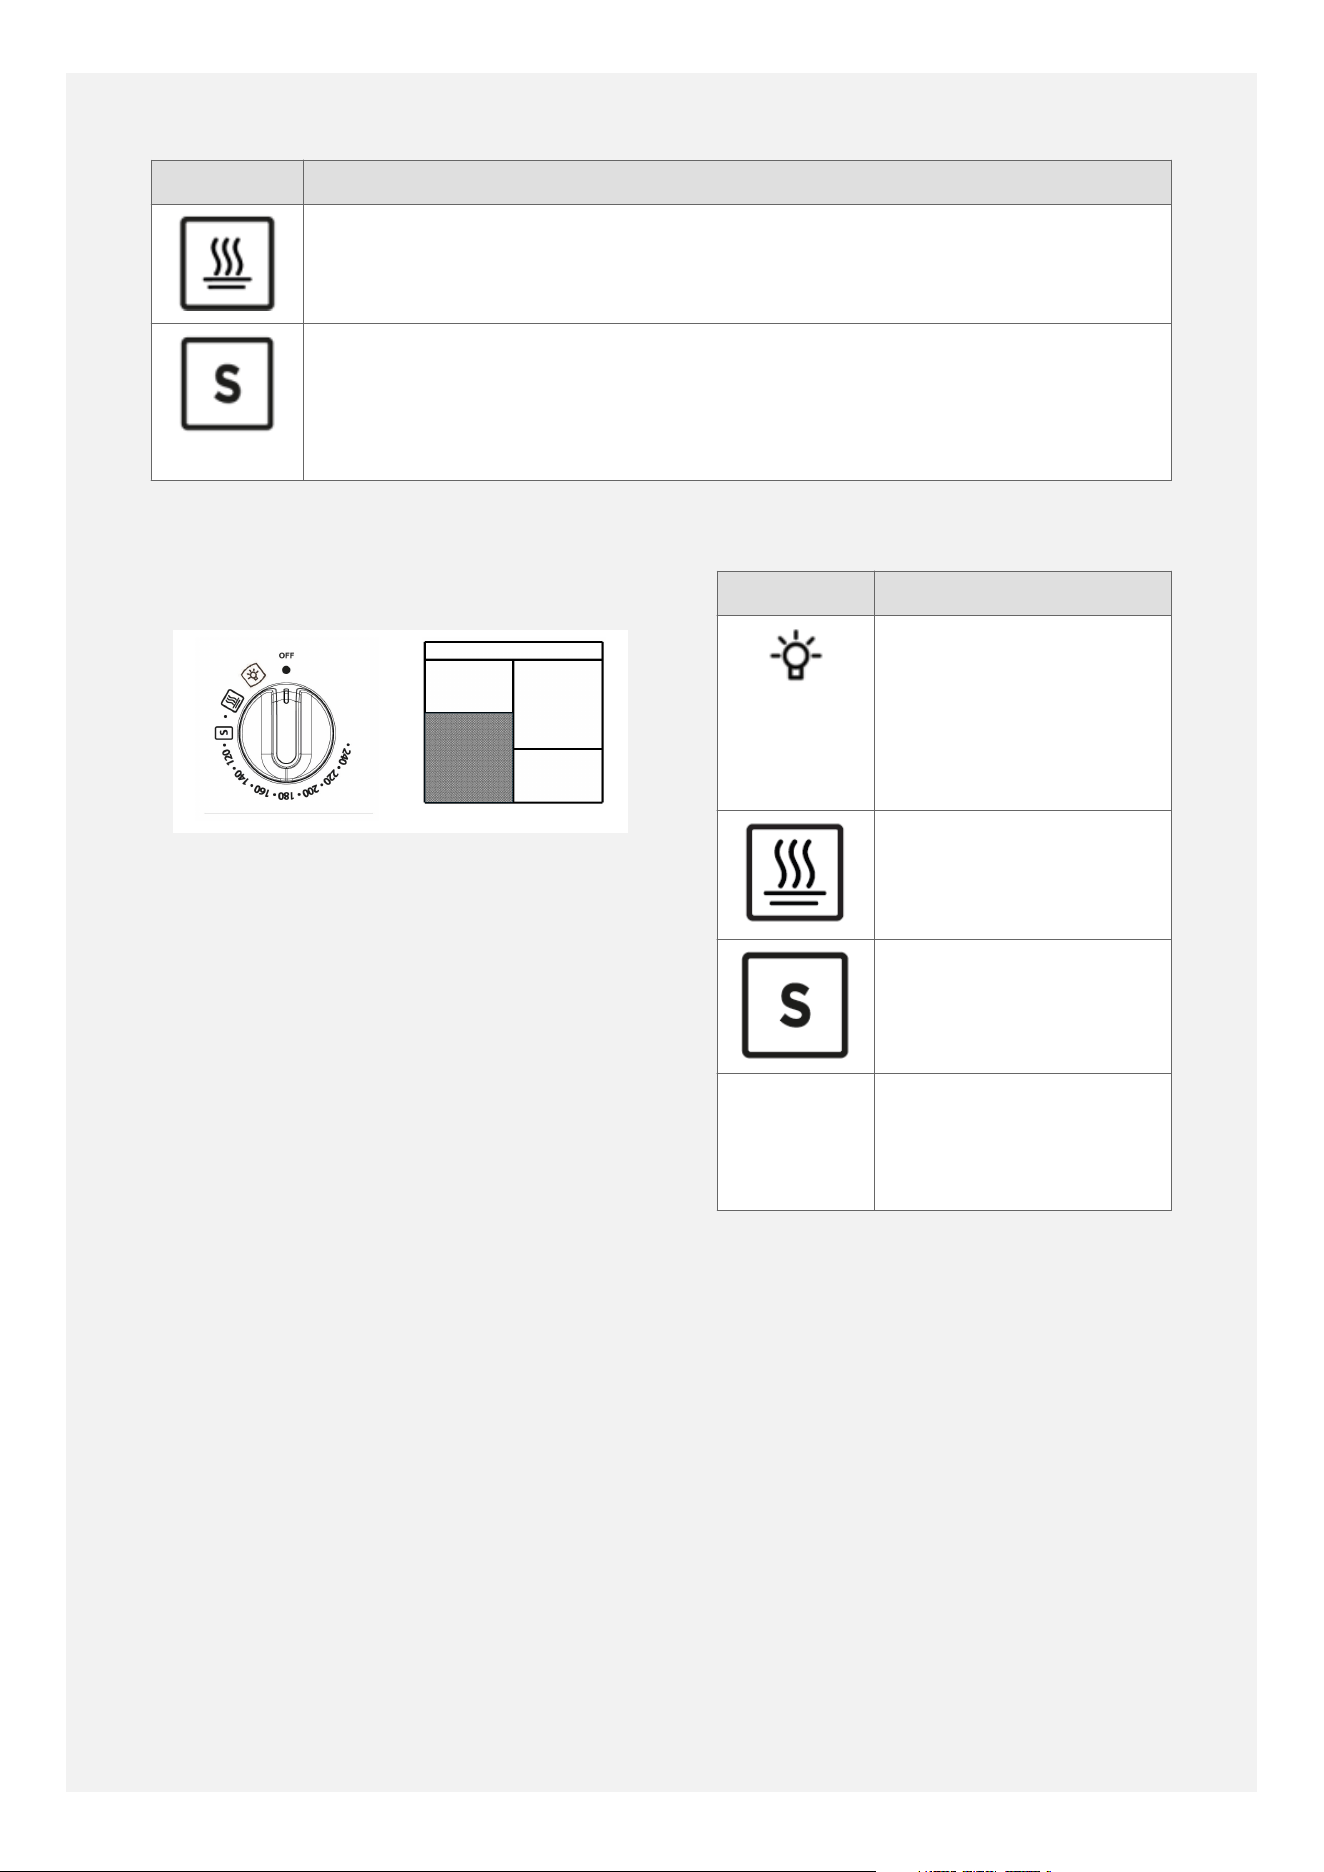
Symbol Function
Keep warm temperature setting - 70°C
Use in conjunction with the fanned oven function.
Slow cook temperature setting - 100°C
Used for slow cooking of casseroles, chillis, stews, etc.
Use in conjunction with the fanned oven function.
CONVENTIONAL OVEN
OVERVIEW
For best results, pre-heat the oven for 10-15
minutes until the temperature indicator light
goes out.
For best results, use the middle shelf position
and cook on one level only. If baking on two
shelves, it is better to use the fanned oven.
If baking on two shelves in the conventional
oven it would be necessary swap over the
positions of the baking trays part way through
cooking.
In the conventional oven, the oven will be
hotter at the top and cooler at the bottom.
These zones of heat can be useful for
traditional roasting, for example, with the
meat placed closer to the middle of the oven
and roast potatoes placed closer to the top for
extra crispiness.
Conventional Oven Settings
Symbol Description
Lamp only.
Puts the oven lamp on
without the heating
- useful when wiping
round the oven cavity.
Keep warm setting -
70°C
Slow cook setting -
100°C
120 to
240
Temperature settings
for the conventional
oven (120°C to
240°C)
27
USING THE GRILL
Warning
Never cover the grill
pan or grill trivet with
aluminium foil, or allow
fat to build up in the grill
pan, as this creates a fire
hazard.
Tip
For best grilling results
pre-heat the grill for up
to 5 minutes, and choose
a suitable mid-to-high
shelf position to bring the
food close to the grill
element, while leaving
enough space so that the
food does not touch the
grill element.
THE COOLING FAN
During use the fan may cycle on and o, this is
normal.
When the grill is switched on, the cooking fan
may not come on immediately, but will then
come on to keep the fascia and control knobs
cool during grilling. The fan may continue to
operate for a period after the grill has been
switched o.
Note
The cooling fan may
run for around 1 hour
after use. This is normal
to ensure the exterior
parts of the cooker fully
cool down and because
the oven cavity is very
well-insulated to prevent
heat escaping during the
cooking process. Please
do not switch the cooker
off at the wall before the
cooling fan has stopped
completely.
USING THE GRILL
Caution
Accessible parts may be
hot when the grill is used-
young children should be
kept away.
Important
The grill door must be
fully open when the grill is
used.
1. Open the grill door. Turn the control knob
to the required setting. 1 is the lowest
heat and 8 is the highest heat. For best
cooking results, we recommend that you
preheat the grill for about 5 minutes.
2. Place the food centrally on the grill pan
trivet.
3. Push the grill pan in to position it under
the grill.
4. To switch o return the control knob to
the o position.
28
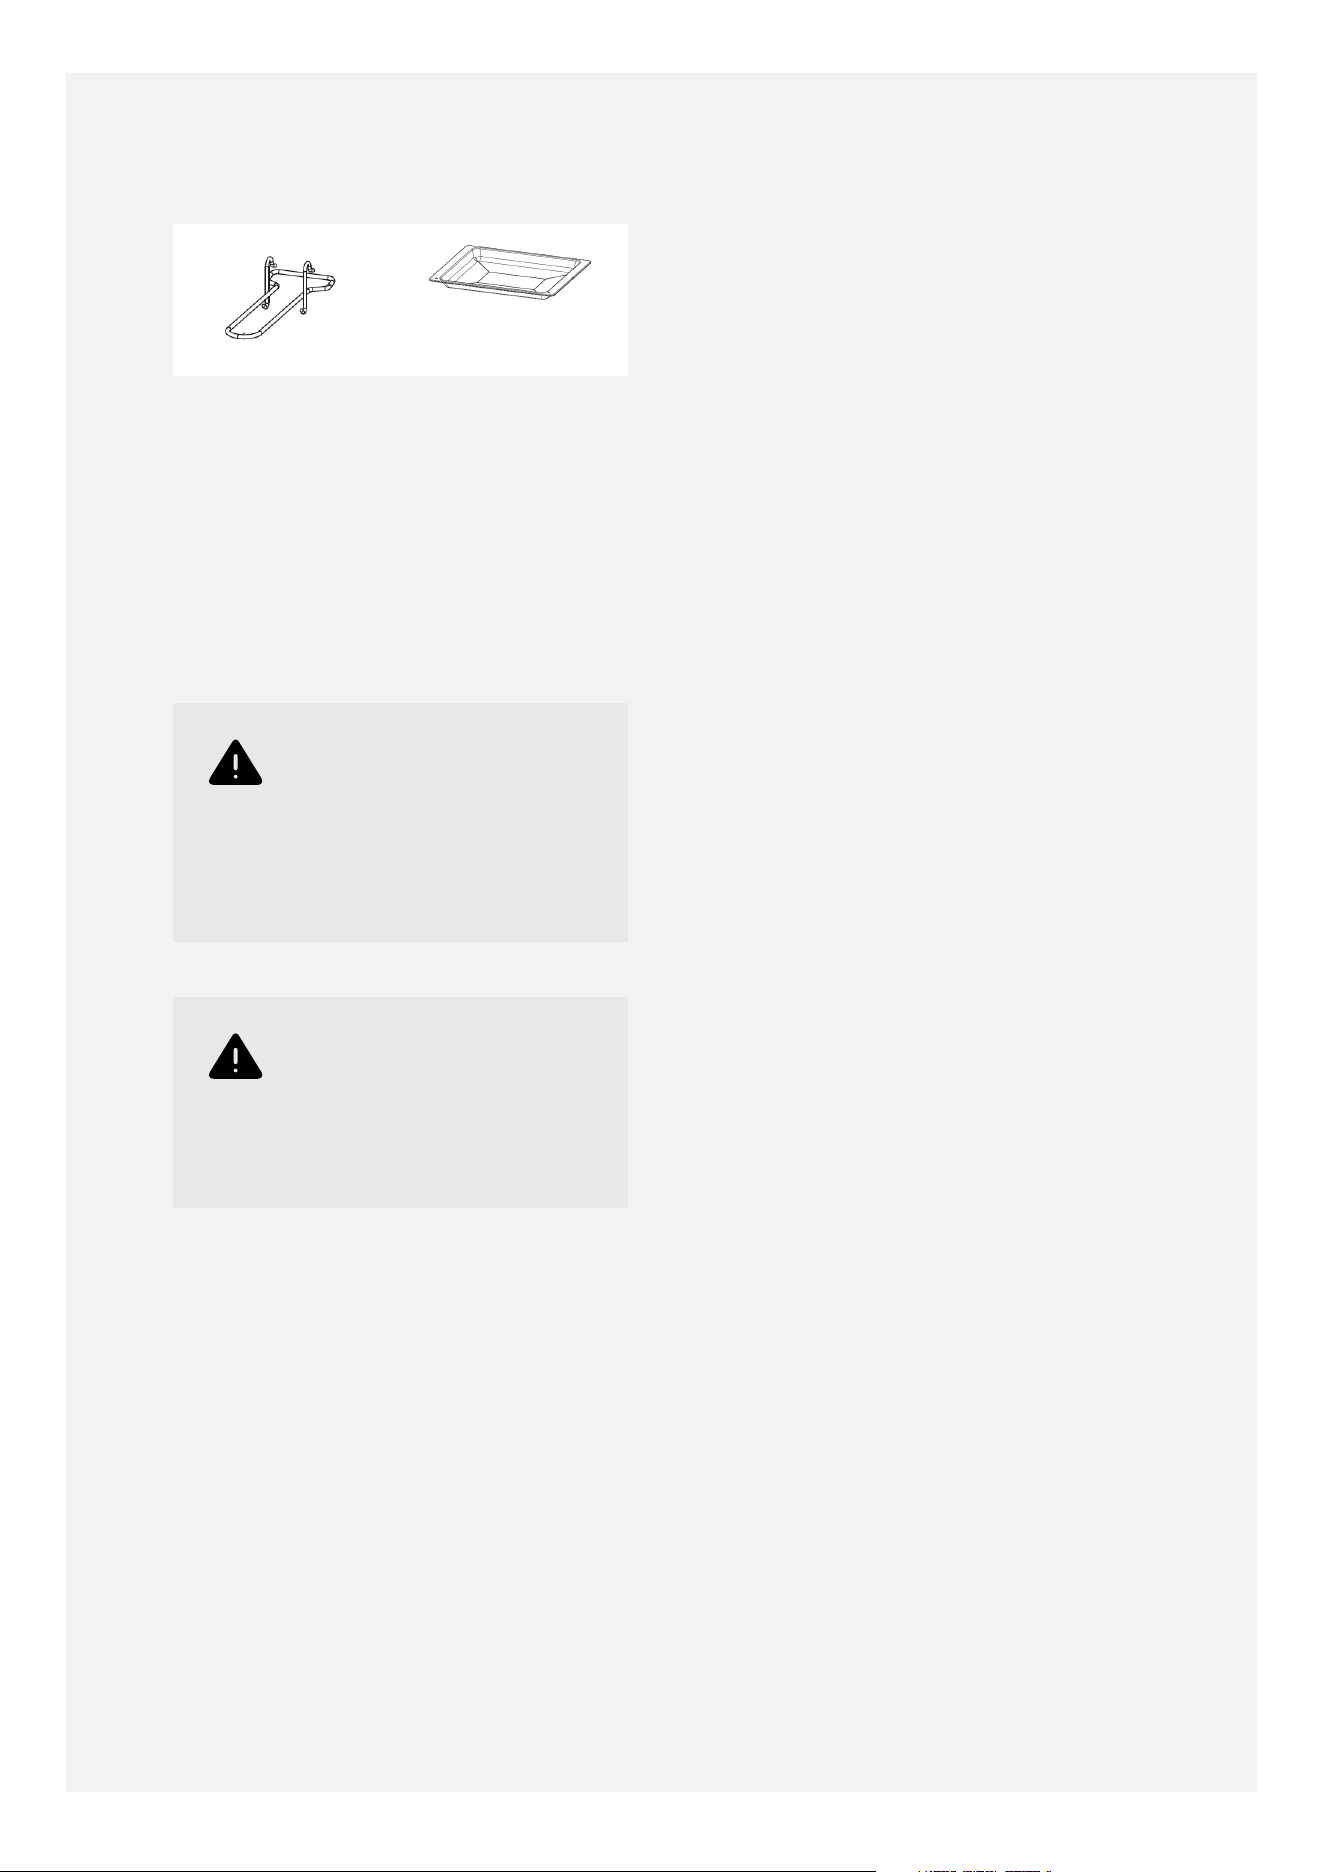
GRILL PAN AND TRIVET
The trivet sits inside the grill-pan.
The holes and the sloping lip of the grill-pan
go at the back.
The grill-pan handle clips over the front of
the grill-pan. Ensure that the grill-pan handle
prongs are at the top, and the wider support
piece sits underneath the grill-pan.
Warning
The grill-pan handle is
designed for sliding the
grill-pan in and out. Do
not attempt to carry the
grill pan by the handle.
Warning
The top oven/grill door
must be open when
the grill is used for
conventional grilling.
29
USING THE MAIN OVEN
Warning
Accessible parts may be
hot when the oven is used.
Young children should be
kept away.
SETTING A HEATING OPERATION
To start a heating operation, a heating
function and a heating temperature must be
selected.
Setting a heating function
• Rotate the function control to select the
desired heating function.
30
To modify or cancel the heating function:
•
Rotate the function control to select
another heating function.
•
Rotate the function control to the o
position to cancel the heating function.
Setting a heating temperature:
•
Rotate the temperature control to select the
desired heating temperature.
To modify or cancel the heating temperature:
•
Rotate the temperature control to select
another heating temperature.
•
Rotate the temperature control to the o
position to cancel the heating temperature.
PREHEATING
The oven starts preheating when a heating
function and heating temperature have been
set.
The neon light next to the main oven
temperature control knob lights up when the
oven is pre-heating, and goes out when it has
reached temperature.
COOKING WITH A FANNED OVEN
Caution
As this is a high efficiency
oven, you may notice the
emission of steam from
the oven when the door is
opened. Please take care
when opening the door.
If you are used to cooking with a conventional
oven you will find a number of dierences to
cooking with a fan oven which will require a
dierent approach.
Tip
Foods are cooked at a
lower temperature than
a conventional oven,
so conventional recipe
temperatures may have
to be reduced by about
20°C.
Tip
Preheating is generally
not necessary as a fan
oven warms up quickly.
Tip
There is no flavour
transference in a fan
oven, which means you
can cook strong smelling
foods such as fish at the
same time as mild foods-
e.g. milk puddings.
Tip
When batch baking foods
that will rise during
cooking- e.g. bread,
always ensure that enough
space has been left
between the shelves to
allow for the rise.
• There are no zones of heat in a fan oven as
the convention fan at the back of the oven
ensures an even temperature throughout
the oven. This makes it ideal for batch
baking - e.g. when planning a party as all
the items will be cooked within the same
length of time.
31
Note
When 2 or more shelves
are being used, it may be
necessary to increase the
cooking time slightly.
Note
Because the 2 oven
shelves are wider than in
many ovens, it is possible
to cook 2 items per shelf.
Note
When roasting meats,
you will notice that
fat splashing is reduced,
which is due in part to the
lower oven temperatures,
and will help keep
cleaning of the oven to a
minimum.
Note
There is no need to
interchange dishes onto
different shelf levels part
way through cooking, as
with a conventional oven.
DEFROSTING AND COOLING IN THE MAIN
OVEN
To defrost frozen foods, turn the oven control
to the defrost position, place the food in the
centre of the oven and close the door. Leave
the temperature selector in the o position.
To cool foods after cooking prior to
refrigerating or freezing, turn the main oven
control to the defrost position and open the
door. Leave the temperature selector in the o
position.
DEFROSTING TIMES
Note
Small or thin pieces of
frozen fish or meat-
e.g. fish fillets, prawns
or mince will take
approximately 1-2 hours.
Note
Placing food in a single
layer will reduce the
thawing time.
Note
A medium sized casserole
or stew will take
approximately 3-4 hours.
Note
A 1½kg/ 3lb oven
ready chicken will take
approximately 5 hours,
remove the giblets as
soon as possible.
Caution
BE SAFE:
Do not defrost stuffed
poultry using this method.
Do not defrost larger
joints of meat and poultry
over 2kg/ 4lb using this
method.
USING THE DOUGH-PROVING FUNCTION
32
• After kneading the dough, add the dough to
a suitably-sized greased bread-baking tin.
The dough should roughly half-fill the tin.
• Cover the baking tin with cling film.
•
Tip
It is a good idea to
brush the underside of
the cling film with a
little vegetable oil to
help prevent the dough
sticking to the cling film
when it rises.
• Place the covered baking tin in the cold
oven and close the door.
• Select the dough-proving function on
the function selector. Do not select
a temperature - leave the temperature
selector control in the 'o' position.
• Leave the dough in the oven for
approximately 1-2 hours to allow time for
the dough to rise, roughly doubling in size
and filling the baking tin.
• Remove the cling film and bake the dough
as usual.
USING THE AIRFRY FUNCTION
Simply choose the AirFry setting on the main
oven, then place your chips, vegetables or
chicken on the specially designed air fryer
tray.
The tray allows more air to circulate speeding
up cooking time, reducing the need for any
extra oils making cooking healthier.
AirFry is great for cooking chips, meat and to
prepare foods that you would normally grill.
There's a few things which don't AirFry well
including cakes, pastries and breads as they
can become dry or tough. Foods in a wet
batter also can not be cooked by AirFrying.
1. Select the AirFry function on the main
oven and set the temperature to 220°C.
2. Position the metal Airfry tray on the 3rd
(centre) shelf position from the bottom.
Food should be evenly spaced on the
AirFry tray in a single layer to allow for
even cooking.
3. Place a baking tray on the shelf position
below the AirFry tray to catch any crumbs
or drips.
Warning
For recipes with 30
minutes or longer
cooking time a 5-10
minute pre-heat time is
recommended.
Frozen or dense foods
may require additional
cooking time.
Note
If you're using a non-
air fryer recipe, make
sure you shorten the
cooking time as food will
cook faster than in a
conventional oven.
Important
• Air Frying in a large
oven cavity allows for
more food to be air-
fried simultaneously,
so longer cooking
times are to be
expected compared to a
worktop air fryer. Please
adjust cooking times
accordingly.
• For best results, when
consulting recipes and
cooking instructions
on food packaging,
please look for the
conventional oven
timings, not the worktop
air fryer timings or
regular fanned oven
timings.
• Reduce the conventional
oven timings by around
30%.
• Ensure that the food is
thoroughly cooked prior
to serving.
33

Note
It may be necessary to
lightly spray the AirFry
tray with oil to avoid food
sticking to it.
Important
Greasy foods may cause
smoke during the AirFry
cycle, maintaining a clean
oven and using a baking
tray below to catch debris
is recommended.
MAIN OVEN FUNCTIONS
With the exception of defrost/dough-proving,
both a cooking function and a temperature
must be selected in order for the main oven to
work.
34
Fanned Oven
Use any suitable shelf position.
Can batch bake on more than one level - please leave
enough space between shelves to allow baking to rise.
Does not generally require pre-heating.
Reduce cooking temperature by around 20°C, and reduce
the cooking time a little, compared to conventional ovens.
Air Fryer
Place the air fryer tray in the middle shelf position.
Place the grill pan below it to catch any drips or food
particles.
Defrost/Dough proving
Leave the main oven temperature control in the o
position.
Use with the door closed for defrosting frozen items (such
as bread and gateaux).
Use with the door open for cooling cooked food prior to
refrigeration.
Slow Cook - 100°C
For the slow cooking of casseroles, stews, chillis, etc.
Used in conjunction with the fan oven setting.
Keep Warm - 70°C
For keeping cooked food warm prior to serving.
Not suitable for reheating cooked food which has already
gone cold.
Used in conjunction with the fan oven setting.
35
OVEN FURNITURE
•
Extra shelves may be ordered from our
spares website - please see website address
on the back cover.
Ordering Extra Shelves
Type
of
shelf
Type of
model
Cavity Part
number
50cm Belling
RCA
Cookcentre
and
Farmhouse
range
cookers
All
cavities
except
right-
hand
tall
oven
cavity
on
90cm
models.
094108600
40cm Belling
RCA
Cookcentre
and
Farmhouse
range
cookers -
90cm
models
only
Only
for
right-
hand
tall
oven
cavity
on
90cm
models.
094108602
Baking trays and roasting tins:
For best cooking results and even browning,
the recommended size of baking trays and
roasting tins that should be used are as
follows;
•
Baking tray 350 mm x 250 mm This size of
baking tray will hold up to 12 small cakes.
•
Roasting tin 370 mm x 320 mm
Position baking trays and roasting tins on the
middle of the shelves, and leave one clear
shelf-position between shelves, to allow for
circulation of heat.
36
USING THE PROGRAMMABLE TIMER
Notice
If the clock/programmer
is locked, it must be
unlocked before the main
oven can be used.
To lock/unlock the clock/
programmer, press and
hold the '+' key for
5-10 seconds until the
padlock symbol appears/
disappears.
The main oven will not
work until the time of day
has been set.
Please be aware that only the main fanned
oven is controlled by the programmer.
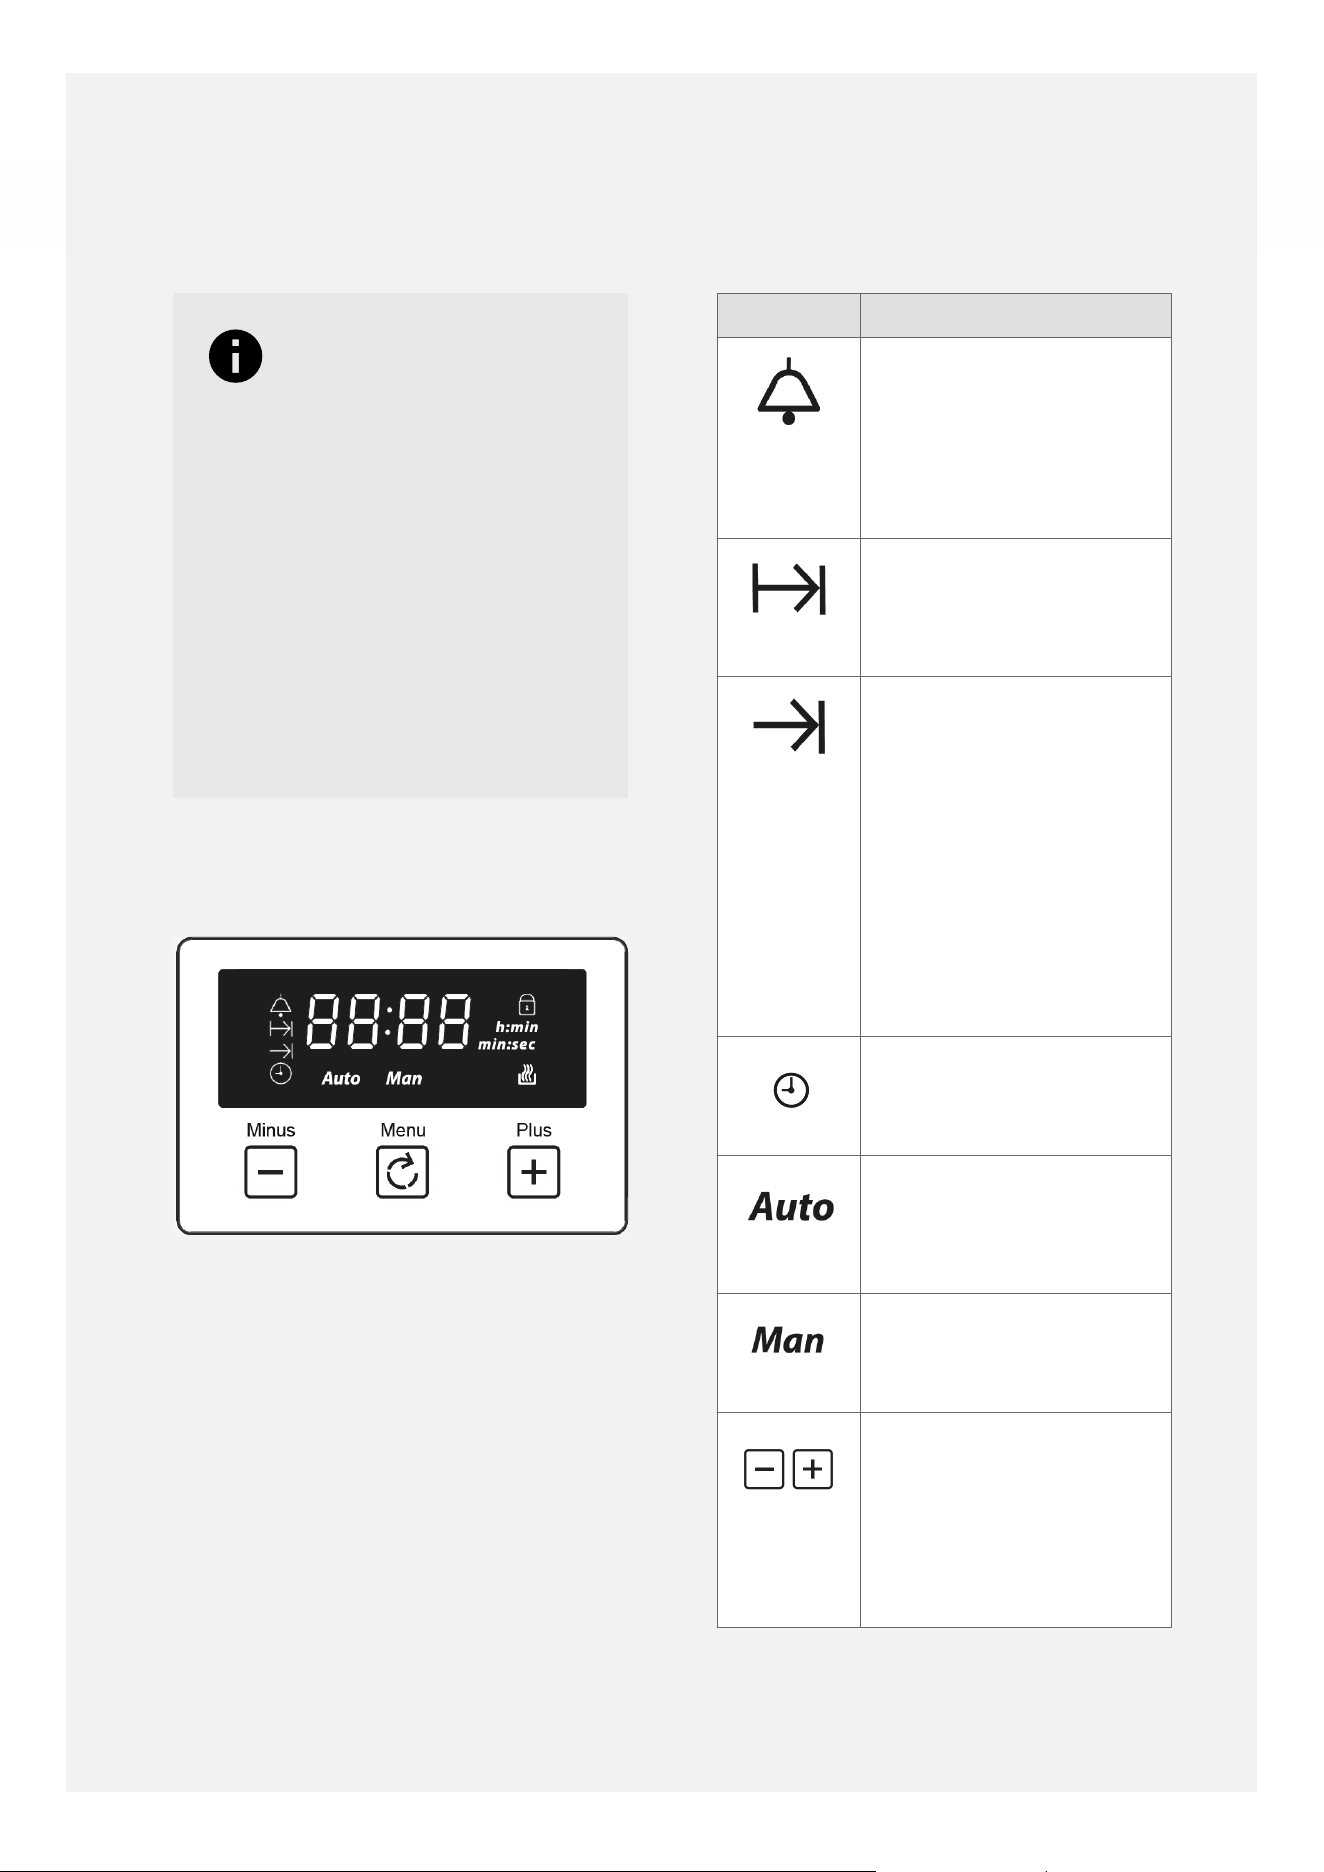
Symbol Description
Alarm (Minute Minder)
- reminds you to check,
turn, stir or baste food
after a set time, but
does not switch the
oven o automatically.
Cooking duration time
- allows the main
oven to switch o
automatically.
End of Cooking time
- used in conjunction
with the cooking
duration time, allows
the main oven to
switch on and o
automatically, so you
can put food in the
oven before going out
and have it ready for
your return.
Clock - for setting the
time of day.
Automatic Cooking
Mode - the main oven
will switch o (or on
and o) automatically.
Manual Cooking Mode -
the main oven can be
used manually.
Adjustment Keys
For adjusting the
volume level and times.
Left key: minus/
decrease.
37

Symbol Description
Right key: plus/
increase.
Menu key (function
key) - allows you
to select the timer
functions. Each press
of the menu key
scrolls through the
timer functions menu
in the following order:
minute minder; set
cooking duration time;
set cooking end time;
set time of day; adjust
volume level.
Units of time (hours:
minutes, or minutes:
seconds).
Time Display. The main
oven will not work until
the time of day has
been set.
Heating indicator. The
main oven is in use.
Child-lock is active -
the timer keys will not
respond and the main
oven will not work
until the child-lock is
deactivated.
To lock/unlock the
clock/ programmer,
press and hold
the '+' key for
5-10 seconds until
the padlock symbol
appears/disappears.
Timer volume / pitch -
L1 is the quietest level,
L3 is the loudest level.
SETTING THE TIME OF DAY
When the cooker is first connected to the
power supply, or following a power cut, the
clock symbol will be flashing on the display.
The main oven will not work until the time of
day has been set.
While the clock symbol is flashing, use the
plus and/or minus keys to select the current
time of day, using the 24 hour format.
Tip
If you hold down the plus
or minus key the time will
change more quickly.
The time of day will be accepted a few
seconds after the last key press and the clock
symbol will stop flashing.
To adjust the time of day, for example at the
beginning and end of daylight saving time,
touch the 'Menu' key four times until the
clock symbol starts to flash.
While the clock symbol is flashing, use the
plus and/or minus keys to select the current
time of day, using the 24 hour format.
The time of day will be accepted a few
seconds after the last key press and the clock
symbol will stop flashing.
Notice
The main oven functions
will not work until the
clock time of day has been
set.
38

Notice
A short time after the
last touch of a timer
key (after approximately
60 seconds), the timer
display will dim a little.
This is an energy-saving
function.
Pressing any timer key will
brighten the timer display
again.
MANUAL MODE
If you do not wish to set a cooking
duration time or cooking end time on the
programmable timer, then the main oven
can be switched on and o manually using
the function control and temperature control
knobs.
To operate the main oven manually, the time
of day must be set on the clock, the child
lock must not be activated on the timer, and
the display must show to indicate manual
mode.
If necessary, touch the menu key twice until
'Man' appears steadily in the display.
MINUTE MINDER
The minute minder function sounds an alarm
after a set time to remind you to check, turn,
stir or baste food. It does not switch the main
oven o automatically.
Touch the middle 'Menu' key once. The
minute minder bell symbol flashes.
While the bell symbol is flashing, use the plus
and/or minus keys
to set the required time
(up to a maximum of 99 minutes).
After a few seconds, the time entered is
accepted, the bell symbol stops flashing and
shows steadily, and the remaining minute
minder time counts down in the display.
When the time has elapsed, the alarm sounds.
Touch the middle 'Menu' key to silence the
alarm, or the alarm will stop automatically
after about 5 minutes.
If you want to change or cancel the minute
minder time, touch the 'Menu' key again
until the bell symbol flashes.
While the bell symbol is flashing, use the plus
and/or minus keys to adjust the required
time, or take the time down to 00:00 (h: min)
to cancel the minute minder function.
SEMI-AUTOMATIC COOKING
Notice
The timer can only
operate the main
oven automatically when
a function and a
temperature have been
selected.
Semi-automatic cooking switches the oven o
after a set time.
Ensure that the time of day has been set.
Place the food in the main oven and select a
cooking function and temperature.
Touch the 'Menu' key twice until the
cooking duration symbol flashes.
While the cooking duration symbol is flashing,
use the plus and/or minus keys to set the
time required (up to a maximum of 23 hours
and 59 minutes).
After a few seconds, the time entered
is accepted, the duration symbol stops
flashing and shows steadily.
The display shows 'Auto' along with the
cookpot symbol .
If you want to check the remaining duration
time, change it or cancel it, touch the 'Menu'
key twice again until the duration symbol
flashes. The remaining time appears briefly on
the display.
39
While the duration symbol is flashing, you can
use the plus and/or minus keys to adjust
the duration time, or take the time down to
00:00 (h: min) to cancel the semi-automatic
cooking function.
When the duration time has elapsed, the
alarm sounds and the oven heating is turned
o.
Touch the 'Menu' key
once to silence the
alarm. 'Man' flashes in the display.
Remember to turn the function selector and
temperature selectors o. Then touch the
'Menu' key again to return to manual mode.
'Man' appears steadily in the display.
FULLY-AUTOMATIC COOKING
With fully-automatic cooking you can place
the food in the oven before going out. The
timer will switch the main oven on and o
automatically using set times so that the food
is ready for your return.
Ensure that the time of day has been set.
Place the food in the main oven and select a
cooking function and temperature.
Set the cooking duration time as described
above.
Touch the 'Menu' key
three times until the
cooking end time symbol flashes.
While the cooking end time symbol is
flashing, use the plus and/or minus keys to
set the required end time.
After a few seconds, the end time is accepted,
the end time symbol stops flashing and
shows steadily.
The display shows 'Auto' .
The timer will calculate the required start
time (for example, a cooking duration time
of 1 hour and a required end time of 18.00 =
required start time of 17.00).
If you want to check the end time, change it or
cancel it, touch the 'Menu' key three times
again until the end time symbol flashes. The
end time appears briefly on the display.
While the end time symbol is flashing, you
can use the plus and/or minus keys to
adjust the end time, or take the time down
to the current time of day to cancel the fully-
automatic cooking function.
When the required start time arrives, the
cookpot symbol lights up and the oven
heating is switched on.
When the end time arrives, the alarm sounds
and the oven heating is turned o.
Touch the 'Menu' key once to silence the
alarm. 'Man' flashes in the display.
Remember to turn the function selector and
temperature selectors o. Then touch the
'Menu' key again to return to manual mode.
'Man' appears steadily in the display.
Notice
When entering times,
the time entered is
automatically accepted
around 5 seconds after the
last key touch.
Notice
The minute minder counts
down in the foreground.
The cooking duration
time and cooking end
times count down in
the background while the
display shows the current
time of day.
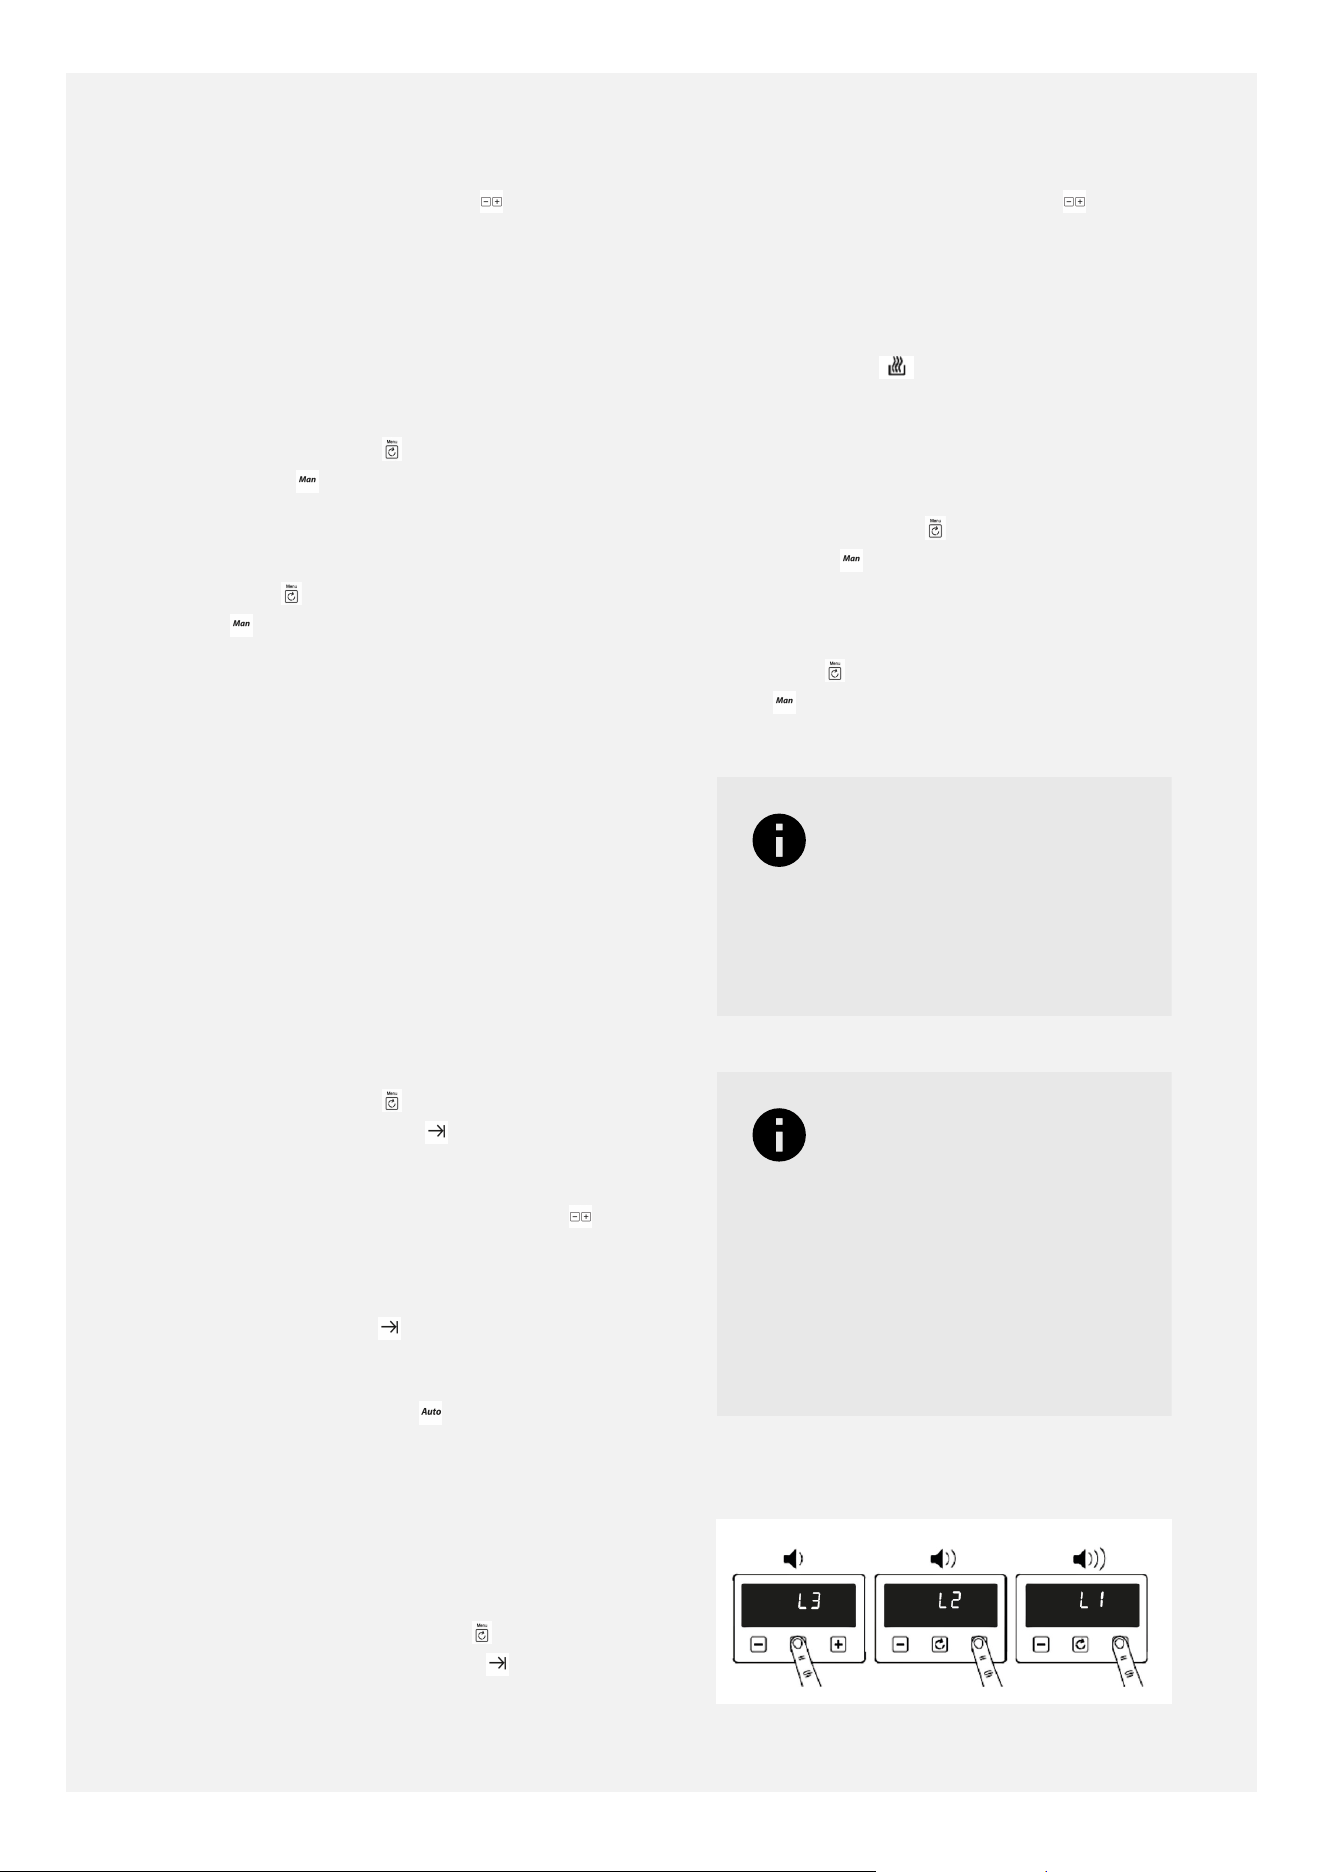
ADJUSTING THE VOLUME LEVEL
40

To adjust the volume level, touch the menu
key fiive times until 'L1', 'L2' or 'L3' appears
on the display.
Use the plus and/or minus keys to select
a volume level, which changes the pitch.
L1 is the quietest level; L3 is the loudest level.
ACTIVATING AND
DEACTIVATING THE CHILD-
LOCK
To activate the timer child-lock, press and
hold the plus key for 5-10 seconds until the
padlock symbol appears in the display.
While the child-lock is active pressing the
timer keys has no eect and the main oven
cannot be turned on.
To deactivate the timer child-lock, press and
hold the plus key for 5-10 seconds until
the padlock symbol disappears from the
display.
The timer can now be operated again
normally.
41
CLEANING YOUR APPLIANCE
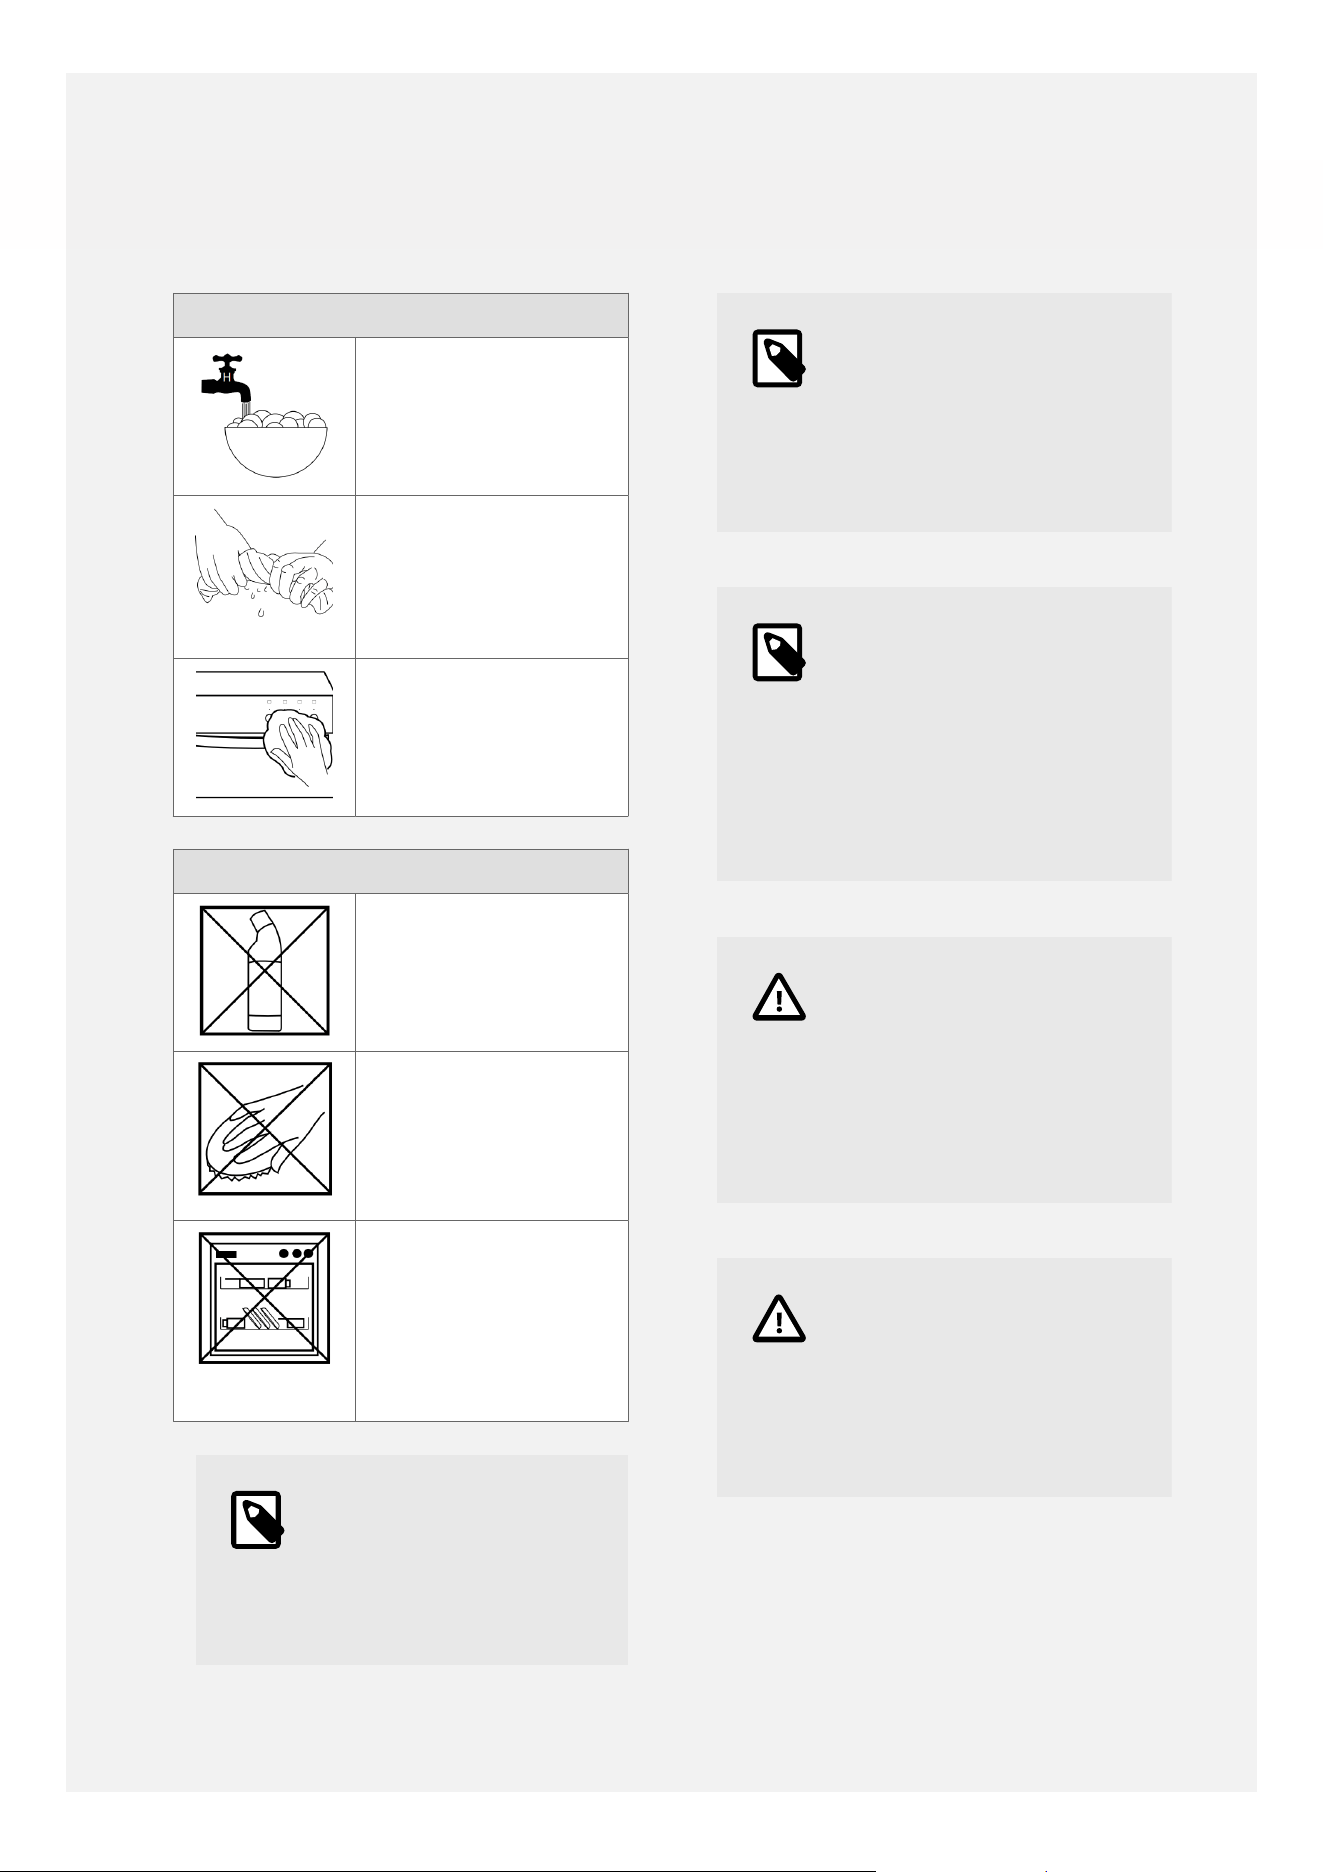
Cleaning: Do's
Use warm, soapy
water
Wipe the appliance
with a damp cloth
•
Clean the cloth
regularly
Dry with a soft dry
cloth
Cleaning: Don'ts
Don't use undiluted
bleaches or
Chloride products
Don't use Wire
Wool, Abrasive
cleaners, Nylon
pads or Steam
Cleaners
Do not wash
the cast iron
griddle, wok cradle,
pan supports or
telescopic sliders in
the dishwasher
•
Note
Always switch off your
appliance and allow it
to cool down before you
clean any part of it.
Note
Please take extra care
when cleaning over the
symbols on the control
panel, as this can lead to
them fading.
Note
Tips: Some foods can
mark or damage the
metal or paint work e.g;
Vinegar, fruit juices and
salt. Always clean food
spillages as soon as
possible.
Caution
It is important to clean
your appliance regularly
as a build up of fat
can affect its performance
or damage it and may
invalidate your guarantee.
Caution
In addition to the above,
do not use metal scrapers
to clean the oven door
glass, ceramic hob surface
or any glass lids.
42

CLEANING AND CARE
GUIDANCE
Area of
appliance /
material
Cleaning guidance Example
products
Ceramic glass
hotplates
•
Clean with a ceramic hotplate cleaner/
conditioner, applied with kitchen
paper, following the instructions on
the package.
•
Rinse with a damp, well-wrung out soft
cloth.
•
Polish dry with a microfibre cloth.
•
If you do ever use a hob scraper to
remove stubborn marks or deposits,
please apply some ceramic hob
cleaner onto the ceramic glass surface
first, so that the hob scraper blade can
glide across, at a 45° angle, without
scratching the surface.
•
Please note that the cooker
manufacturer cannot accept
responsibility for scratches or damage
to the ceramic glass surface caused by
the use of a hob scraper.
•
Kitchen foil and spillages of sugary
foods must not be allowed to bake
onto the ceramic glass surface as they
may cause pitting of the glass.
•
They must be removed immediately,
even if the hob is still hot, taking care
not to burn yourself.
•
Please be aware that pans with
aluminium in the base can tend to
leave marks on ceramic glass surfaces.
•
New hobs can sometimes show white
'bloom' marks which are related to
manufacturing residues.
•
Apply some lemon juice to the glass
surface and leave to soak for a while
before cleaning with ceramic hob
cleaner, rinsing and drying.
•
Do not clean ceramic hobs with
washing-up liquid as it can sometimes
leave behind a blue sheen.
•
Ceramic hob
cream cleaner.
•
Microfibre
cloths.
43

Area of
appliance /
material
Cleaning guidance Example
products
Chrome oven
shelves, grill
pan trivets,
shelf guides and
telescopic sliders
•
Immerse a soft cloth in warm soapy
water, wring out and wipe the shelves
and shelf guides.
•
For heavier soiling, soak in warm
soapy water, then clean with a non-
scratch sponge.
•
Wave-shaped sponges can be useful
for cleaning chrome shelves and grill
pan trivets.
•
Wipe telescopic sliders with a damp
cloth. Do not wash them in the
dishwasher as the detergent will
remove the lubricant from the runners
which can prevent gliding and make
them sti.
•
Washing-up
liquid.
•
Wave-shaped
sponge.
Control knobs and
bezels
•
Wipe with a damp cloth.
•
On most models control knobs can be
removed for more through cleaning in
warn soapy water.
•
Please refer to the section for
removing and replacing the knobs,
bezels and the springs that go in
between them.
•
It is a good idea to keep the user guide
handy, or to take some photographs
before you start removing the control
knobs, so that you will be able to see
which knob and bezel goes in which
position when you are refitting them.
•
Do not attempt to remove control
knobs from pyrolytic oven models, or
from models with retractable control
knobs.
•
Washing-up
liquid.
Enamelled oven
cavities and grill
pans
•
Wash with warm soapy water.
•
For heavier soiling, use a proprietary
oven cleaner spray or gel, leave to
work for as long as recommended in
the instructions, then wipe away and
rinse.
•
Do not allow oven cleaners to come
into contact with stainless steel,
aluminium or chrome parts, shelves,
shelf supports, door seals, heating
•
Washing-up
liquid.
•
Proprietary
oven cleaner.
•
Non-stick PTFE
cooking liners.
44

Area of
appliance /
material
Cleaning guidance Example
products
elements, or fascias with printed
markings.
•
Do not allow fat to build up in grill
pans and do not line grill pans with
aluminium foil as this presents a risk of
fire.
•
Grill pans can be lined with special
non-stick PTFE cooking liners.
•
Non-stick PTFE cooking liners can
reduce soiling in ovens.
•
Place these liners on the lower shelf,
below the shelf where the food is
being cooked, not on the floor of
the oven cavity as this could block
heat from the base element and cause
damage.
Glass door parts
•
Wash with warm soapy water.
•
To remove grease from inner glass
panels, use a proprietary oven cleaner
spray or gel, leave to work for as long
as recommended in the instructions,
then wipe away and rinse.
•
Polish with a soft microfibre cloth.
•
Do not allow oven cleaners to come
into contact with stainless steel,
aluminium or chrome parts, shelves,
shelf supports, door seals, heating
elements, or fascias with printed
markings.
•
Washing-up
liquid.
•
Proprietary
oven cleaner.
•
Microfibre
cloths.
Grill compartment
•
It is a good idea to leave the grill
element on for a few minutes after
finishing cooking to burn o any
grease on the heating element.
•
Do not leave a grill-pan containing
grease under the grill element during
this procedure.
•
Once the grill compartment has cooled
down, it can be wiped down with a
damp wrung-out cloth which has been
soaked in warm soapy water.
•
Wave-shaped sponges can be useful
for cleaning chrome shelves, grill pan
trivets, and for cleaning the roof of the
•
Washing-up
liquid.
•
Wave-shaped
sponges.
45

Area of
appliance /
material
Cleaning guidance Example
products
grill cavity, getting in between the grill
element.
Rubber door seals
•
Clean with warm soapy water.
•
Do not attempt to clean fibreglass
door seals on pyrolytic ovens.
•
Washing-up
liquid.
Steel - fascia
control panels,
electric hotplate
frames, door
fronts
•
Clean steel parts with warm soapy
water and a soft sponge.
•
Do not scrub fascias / control panels as
the markings could start to wear away.
•
Rinse with warm water and a soft
cloth.
•
Polish dry with a microfibre cloth.
•
Washing-up
liquid.
•
Microfibre
cloths.
46

APPLIANCE MAINTENANCE
CHANGING THE LIGHTBULB
1. Switch the cooker o at the wall. Remove
the oven shelves, grill pan and air fry tray.
2. Unscrew the lens cover by turning
anticlockwise.
3. Remove the old bulb and replace it with
a new one. Handle the new bulb with a
piece of kitchen paper as skin oils can
damage halogen bulbs.
4. Replace the lens cover and put the oven
shelves back.
•
Warning
Switch off the power
before you change the
light bulb.
•
Note
Not all appliances have
the same number and
type of bulbs. Before
you replace your bulb,
check to see what type
you have. Usually a 25
watt G9 halogen capsule
bulb - part number
082650920.
Please remember that
bulbs are not covered
by the manufacturer's
warranty.
47
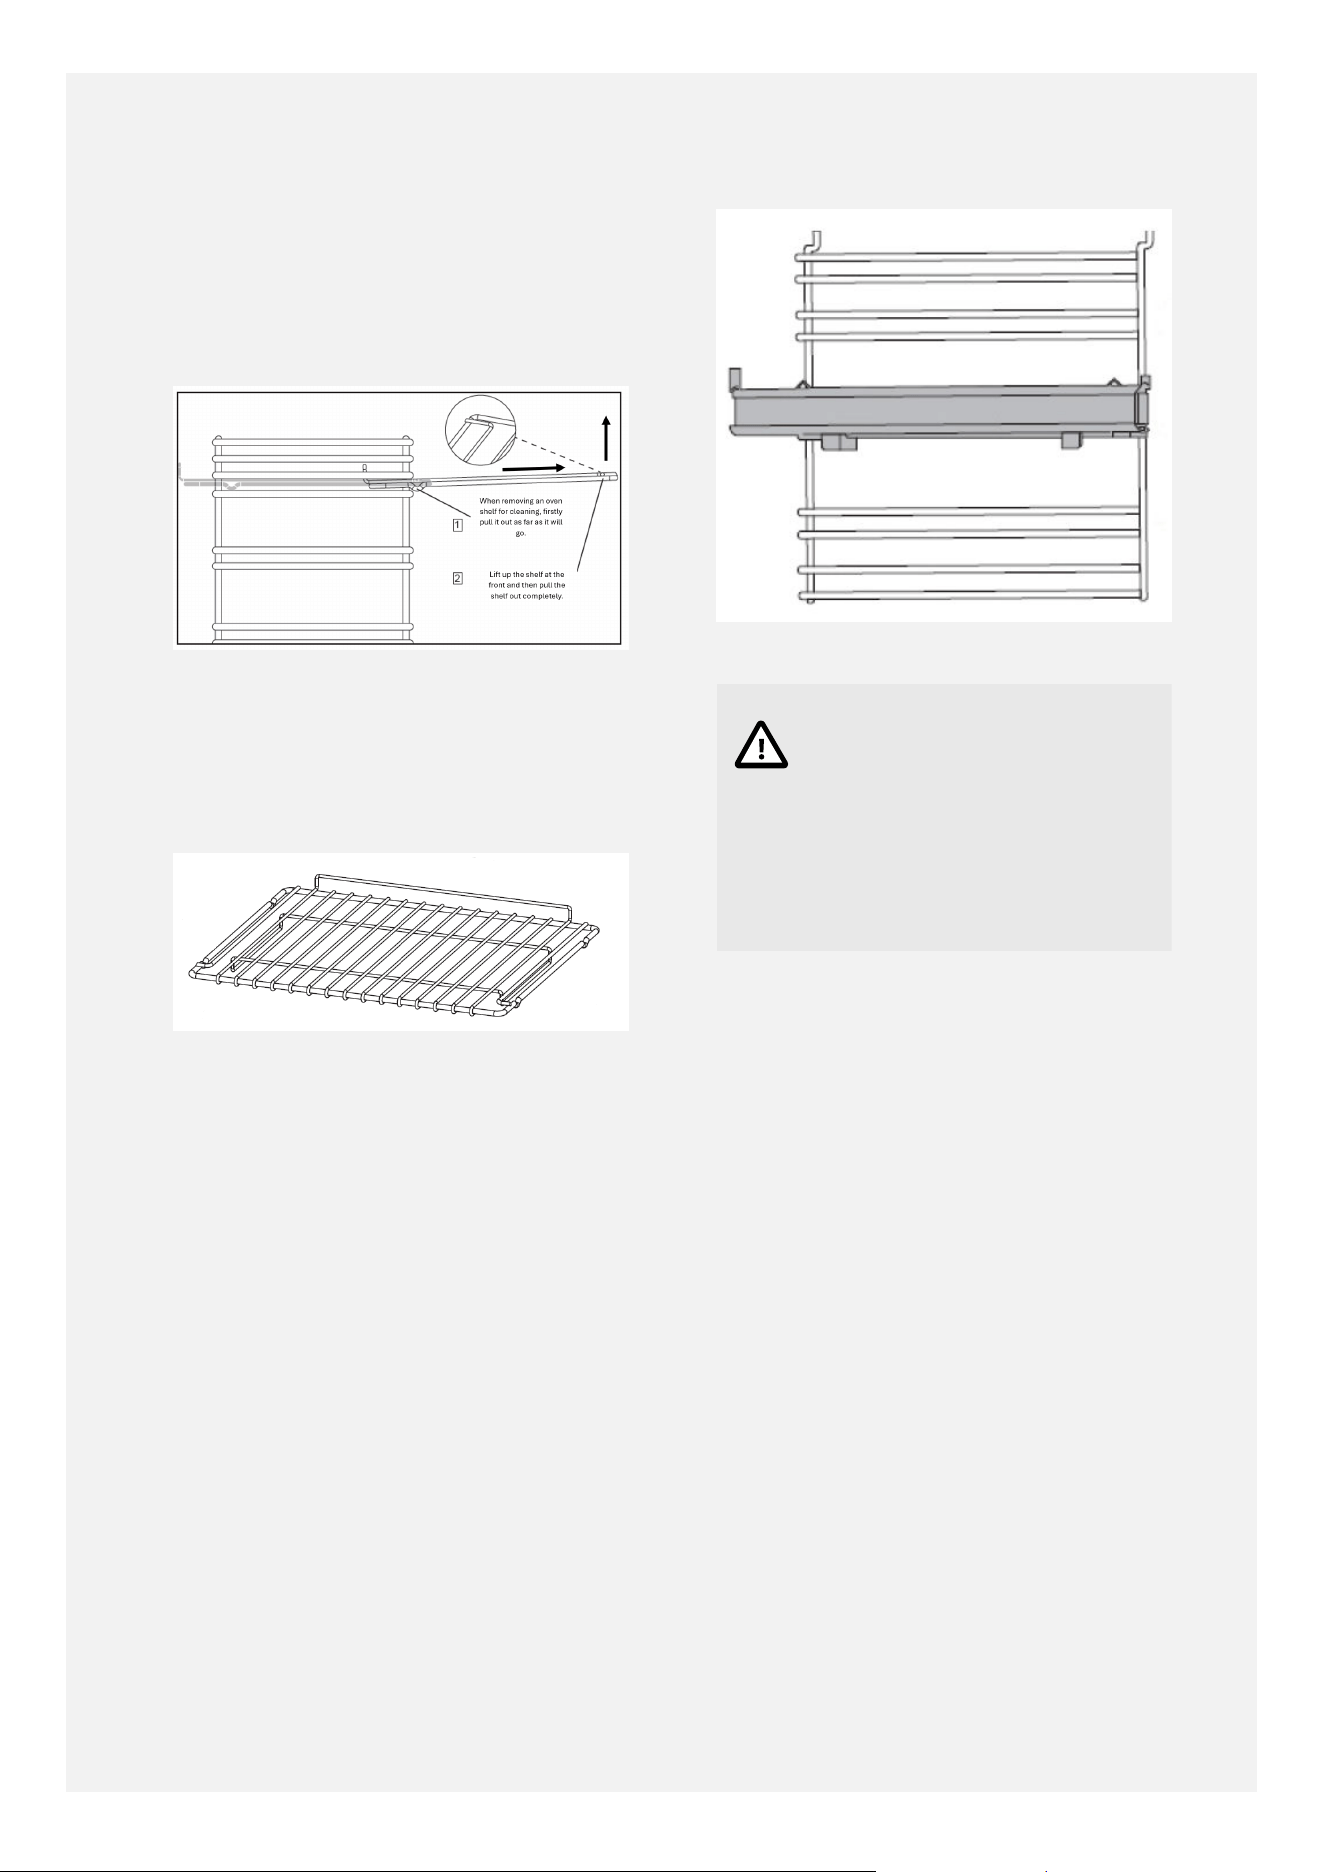
OVEN SHELVES
The oven shelves use anti-tip notches to
prevent them being accidentally pulled out
fully with hot food and cookware on them, to
help prevent accidents.
Shelves With Anti-Tip Notches.
To remove the shelves fully, for cleaning or to
reposition them, pull the shelf out as far as it
will go, then lift upwards at the front to pull
out fully.
Shelves.
When inserting the shelves into the shelf
guides, ensure that the upstand piece is at
the back of the shelf and is pointing upwards.
(Not all shelf types have an upstand).
The anti-tip notches should always be
pointing downwards, and should be towards
the back of the shelf.
Shelf Guides.
Caution
Each shelf guide position
consists of an upper and
a lower wire. Please insert
the shelf between the two
wires, and not sitting on
top of the upper wire.
REMOVING AND REPLACING
SHELF GUIDES
•
The shelf guides have lugs which attach into
holes on the side of the oven cavity.
•
The shelf guide wires at the bottom clip
under retainers to keep the shelf guides in
position.
•
The retainers look like small cotton reels or
bobbins which are attached to the side of
the oven cavity,
48
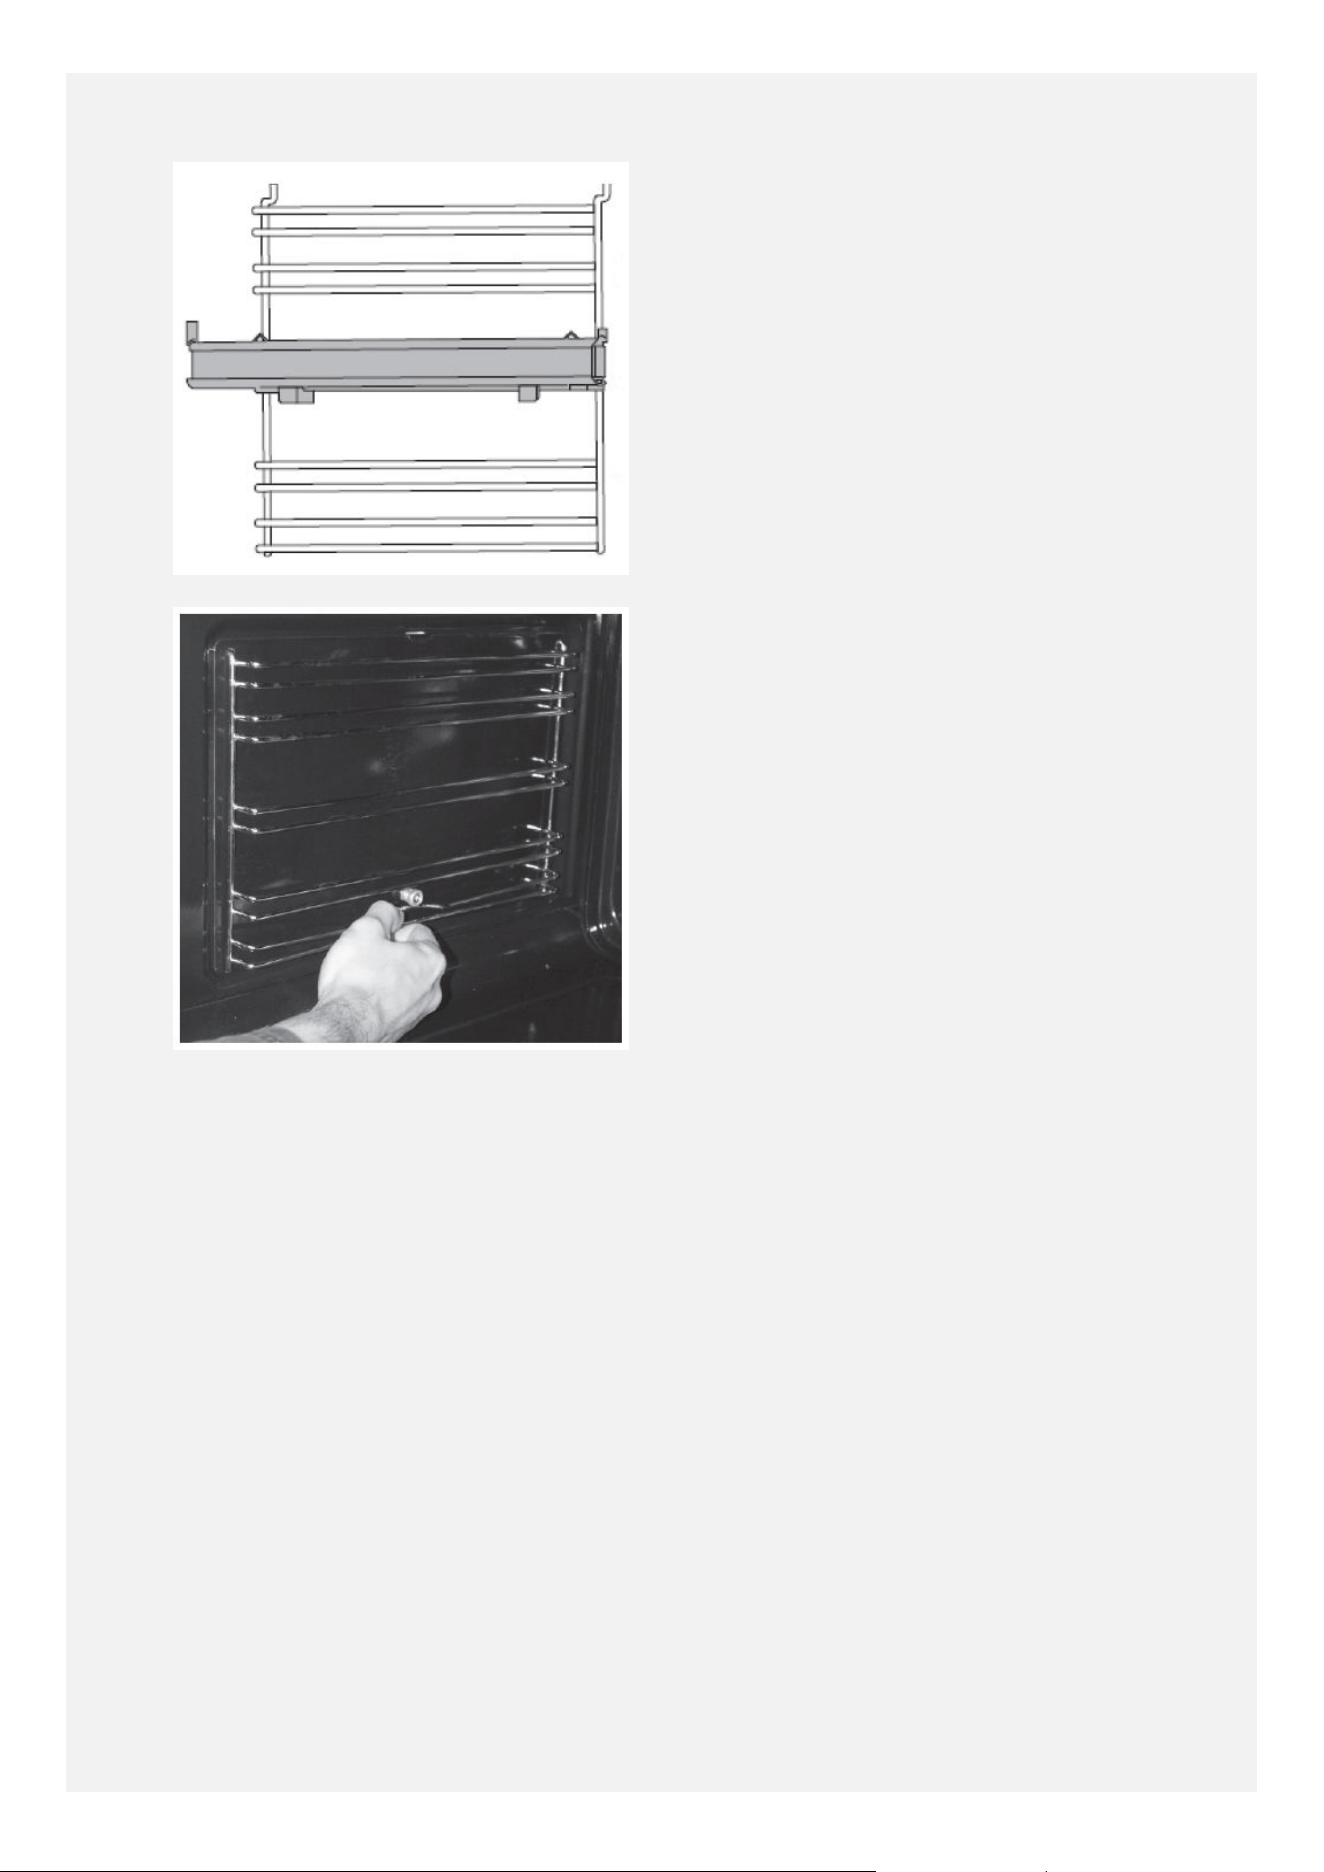
•
To remove the shelf guides for cleaning,
firstly please remove the shelves, grill pan
and air fry tray as appropriate.
•
Gently stretch the shelf guide wire at
the bottom, pulling down and away from
the retainer to release the wire from the
retainer.
•
The shelf guide can then be pulled away
from the side of the oven cavity. The shelf
guide lugs will come out of the holes in the
side of the cavity.
•
The shelf guide is replaced in the opposite
manner.
•
Insert the lugs into the holes on the side of
the oven cavity.
•
Then gently stretch the guide wire at the
bottom to loop it under the retainer.
REMOVING AND RE-FITTING
CONTROL KNOBS, SPRINGS
AND BEZELS
• The control knob assembly consists of the
knob at the front, a bezel with markings
around the knob, and a spring between the
knob and the bezel.
• For cleaning, the bezels can be carefully slid
forward to allow easy cleaning of the fascia
control panel behind with a cloth.
• The bezels will spring back into position
when you let go.
• For more thorough cleaning, the knobs,
bezels and springs can be removed as
follows.
• Firstly, please take a moment to note the
positions of the dierent types of bezels
on the cooker, take some photographs or
have the appliance user guide handy. This
will help you to replace the controls in the
correct positions after cleaning.
• Ensure that all of the control knobs are in
the 'o' position, and that the cooker is
turned o at the wall.
• Push the control knob in towards the bezel.
• Then. holding the knob and bezel together,
pull them both towards you and o the
cooker spindle.
• Be careful not to lose the spring, or the
small silver clip which is inside the control
knob shaft.
• To re-fit the control knobs, bezels and
springs after cleaning, please follow these
steps:
• Place the bezel face up on a surface.
• The flat side of the D-shaped hole and the
printed dot for the 'o' position should be
at the top.
• Place the spring over the hole in the middle
of the bezel.
• Ensure that the knob is facing upwards, with
the indicator mark at the top.
• Place the knob firmly over the spring,
ensuring that the shaft on the back of the
knob is located through the middle of the
spring.
• The flat side of the D-shaped shaft at the
back of the knob should be lined up with
the flat side of the D-shaped hole in the
middle of the bezel.
49

•
Press down on the knob to push it into the
bezel and keep it held down.
•
The flat side of the D-shaped shaft at the
back of the knob should be facing upwards.
•
While holding the knob and bezel together,
push the control knob assembly on to the
cooker spindle.
•
The cooker spindle is also D-shaped, so
ensure that the flat side of the D-shaped
shaft at the back of the knob is aligned with
the flat side of the spindle.
•
The control knob assembly has now been
correctly installed and the controls can be
used as normal.
50


KEY PARTS AND OPTIONAL
ACCESSORIES
Please see below for useful part numbers for
your cooker, in case you require a replacement
part or wish to purchase additional shelves or
optional telescopic sliders, for example.
For any queries relating to parts missing
on delivery of a new cooker, or relating to
replacement parts during the manufacturer's
warranty period, please contact our customer
care team using the telephone number on the
back cover.
To purchase additional shelves, sliders,
consumables or parts outside of the
manufacturer's warranty period, please refer
to the Spare Parts section of our website - the
website address is on the back cover.
52
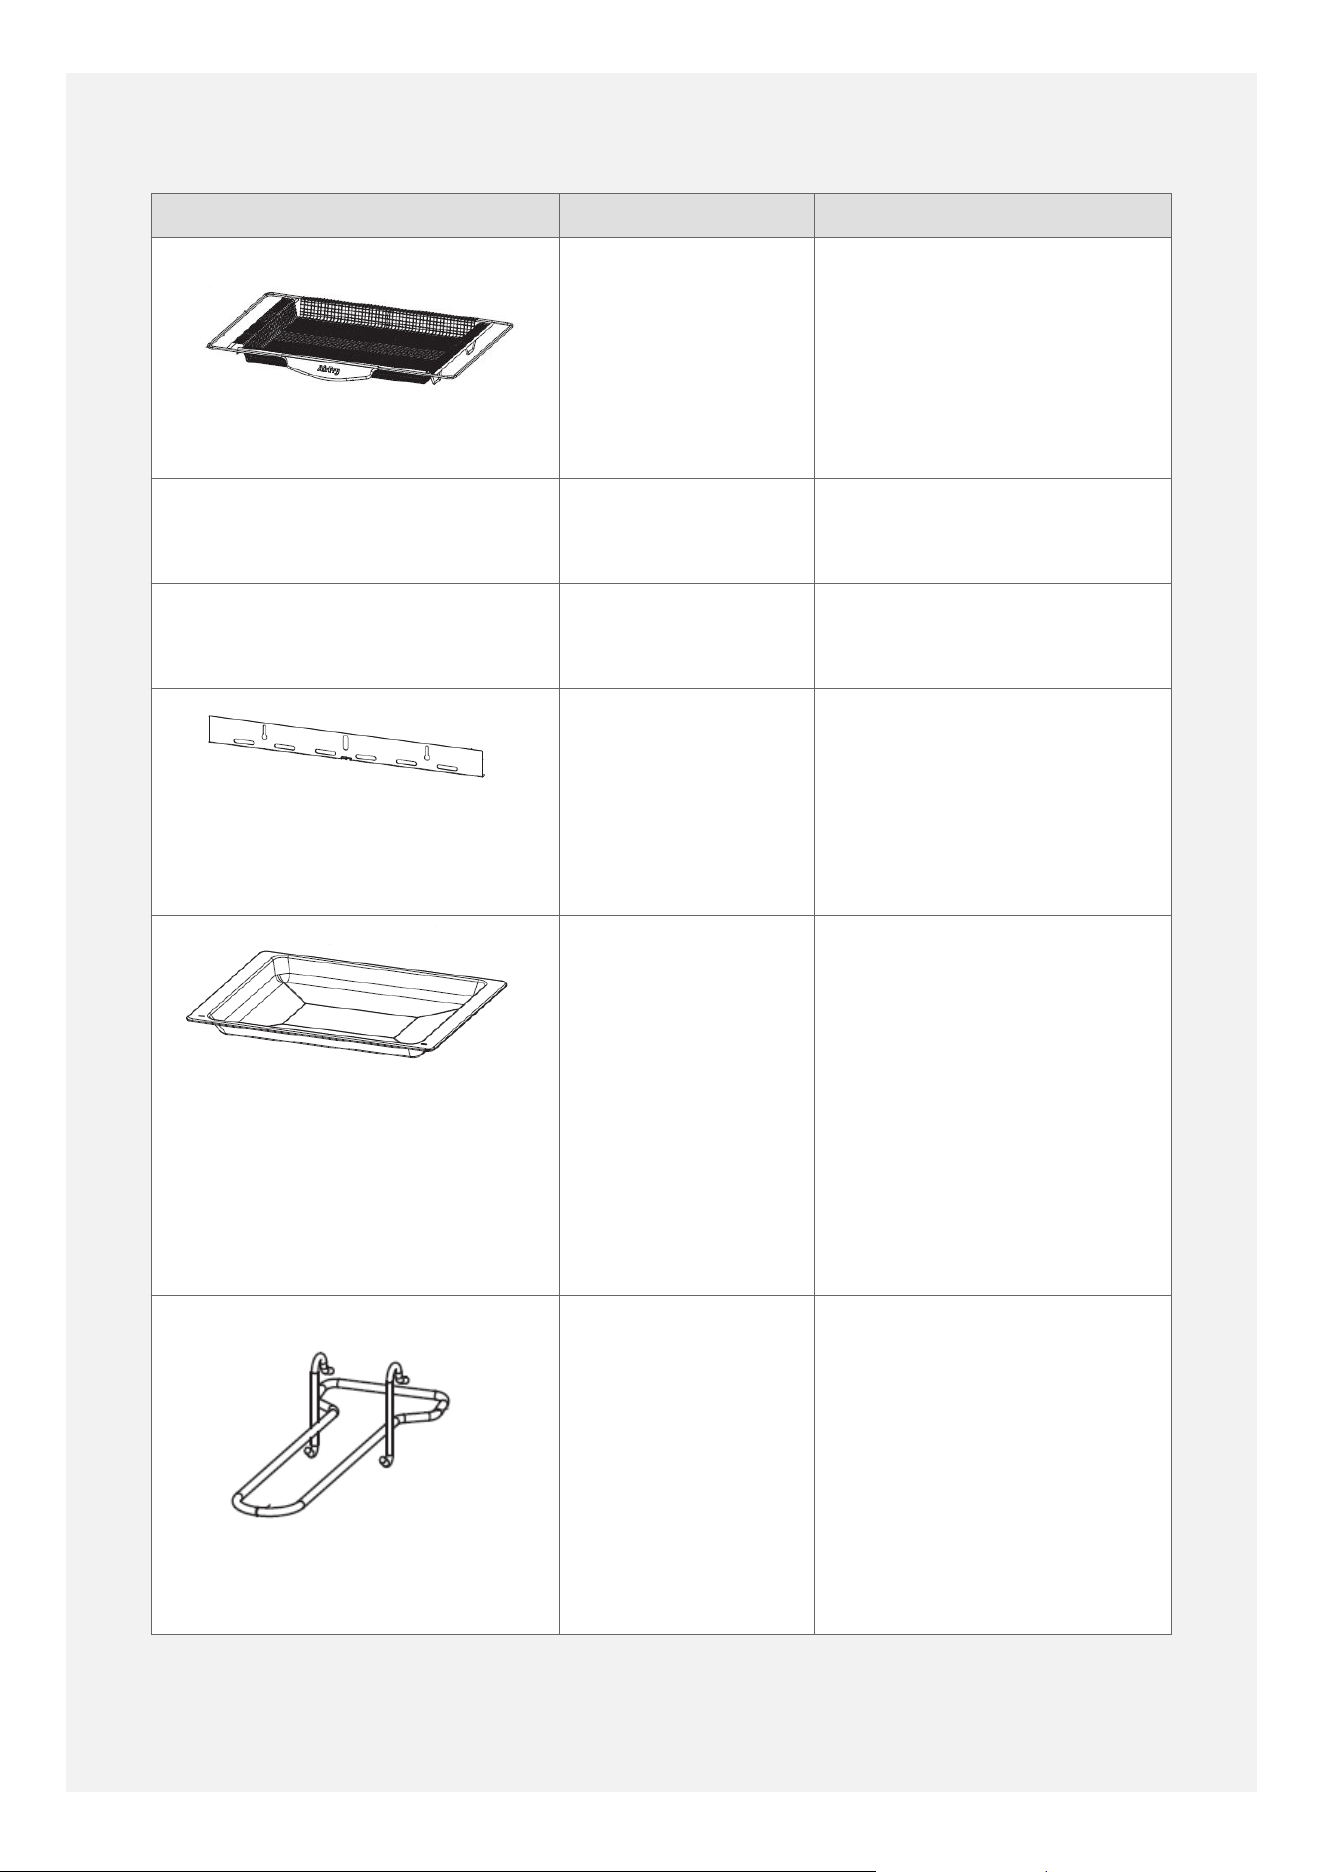
Part Part Number Notes
Air fry basket
094108700 Quantity 1 is supplied with
the cooker.
Used in the main fanned
oven in air-fry mode.
Clip-in door seal - main ovens
(bottom-left and top-right)
094103502 Clips in - does not usually
require an engineer service
visit.
Clip-in door seal - grill and
storage compartment (top-left)
094103500 Clips in - does not usually
require an engineer service
visit.
Decorative cover plinth - black
094108207 for
100cm wide
cookers
094108208 for
110cm wide
cookers
Quantity 1 is supplied with
the cooker.
Only required to be fitted
if the cooker feet are fully
extended to accommodate
taller worktops.
Deep grill pan
094106100 Quantity 1 is supplied with
the cooker.
Can be used in the top grill,
or as a baking tray/roasting
tin in the fanned oven or
the conventional oven.
Place the grill-pan on the
level below the air-fry tray
to catch any drips when
using the air-fry function.
Grill pan handle
094111300 Quantity 1 is supplied with
the cooker.
53
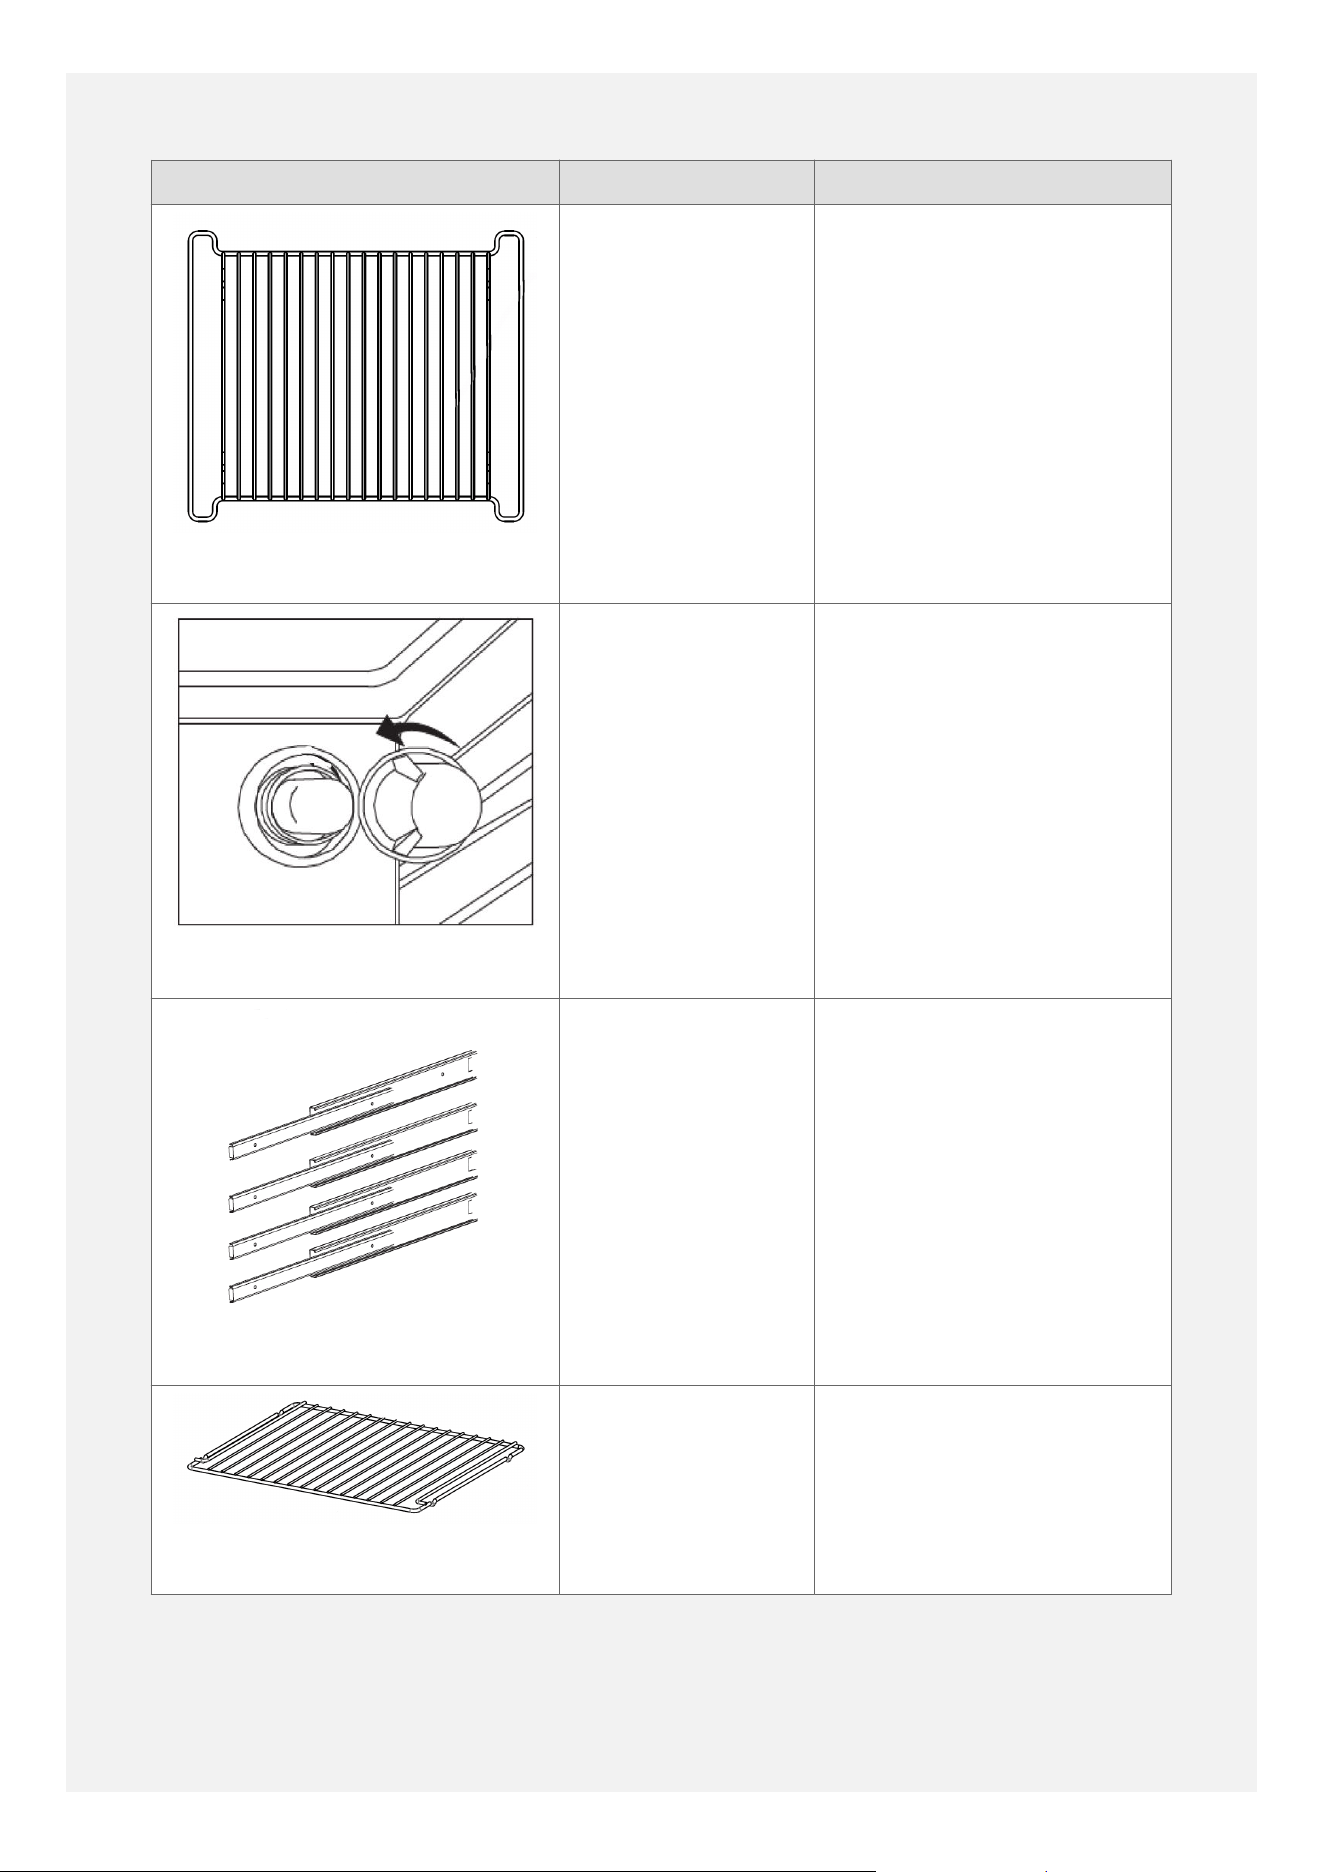
Part Part Number Notes
Grill pan trivet
094117000 Quantity 1 is supplied with
the cooker.
Lamp bulb
082650920 Type - 25 watt G9 halogen
capsule bulb.
Please note that
replacement bulbs are
not covered under the
manufacturer's warranty.
Telescopic Sliders
Left hand side
slider: 1 x
094109802
Right hand side
slider: 1 x
094109803
You need 1 x
094109802 and 1
x 094109803 to
make a pair.
Available to buy as an
optional extra.
Can be used in the
main fanned oven or the
conventional oven.
Do not attempt to use
them in positions where
the shelf guide wires are
close together (i.e. in the
grill compartment).
Shelf (50)
094108600 Quantity 5 are supplied
with the cooker.
Can be used in the top
grill, main fanned oven or
conventional oven.
54
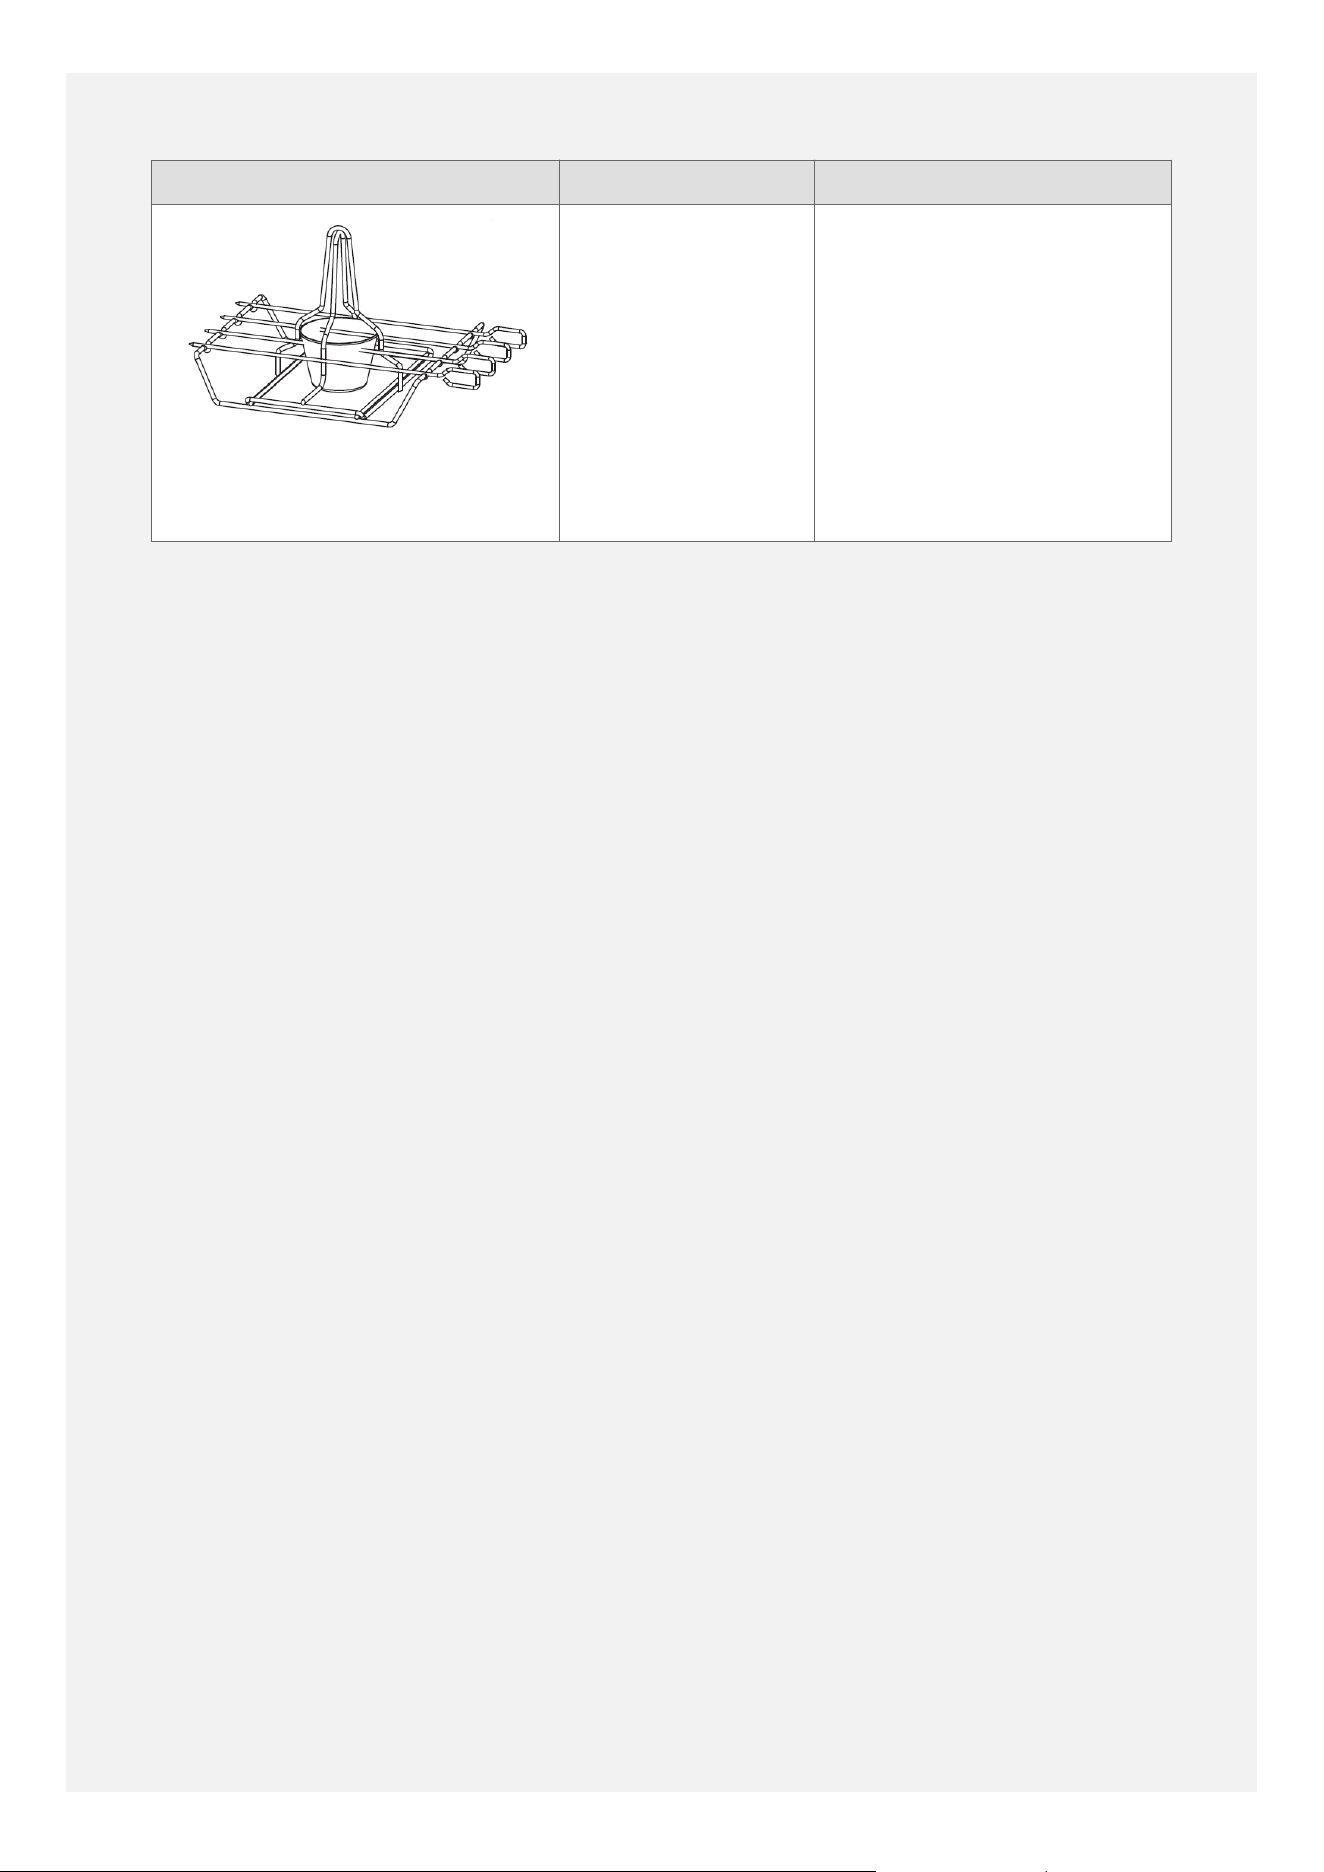
Part Part Number Notes
Steam & Infuse Kit (Vertical
roasting system)
094109600 Can be purchased as an
optional extra.
Can be used in the main
fanned oven (in true fan
oven mode).
55
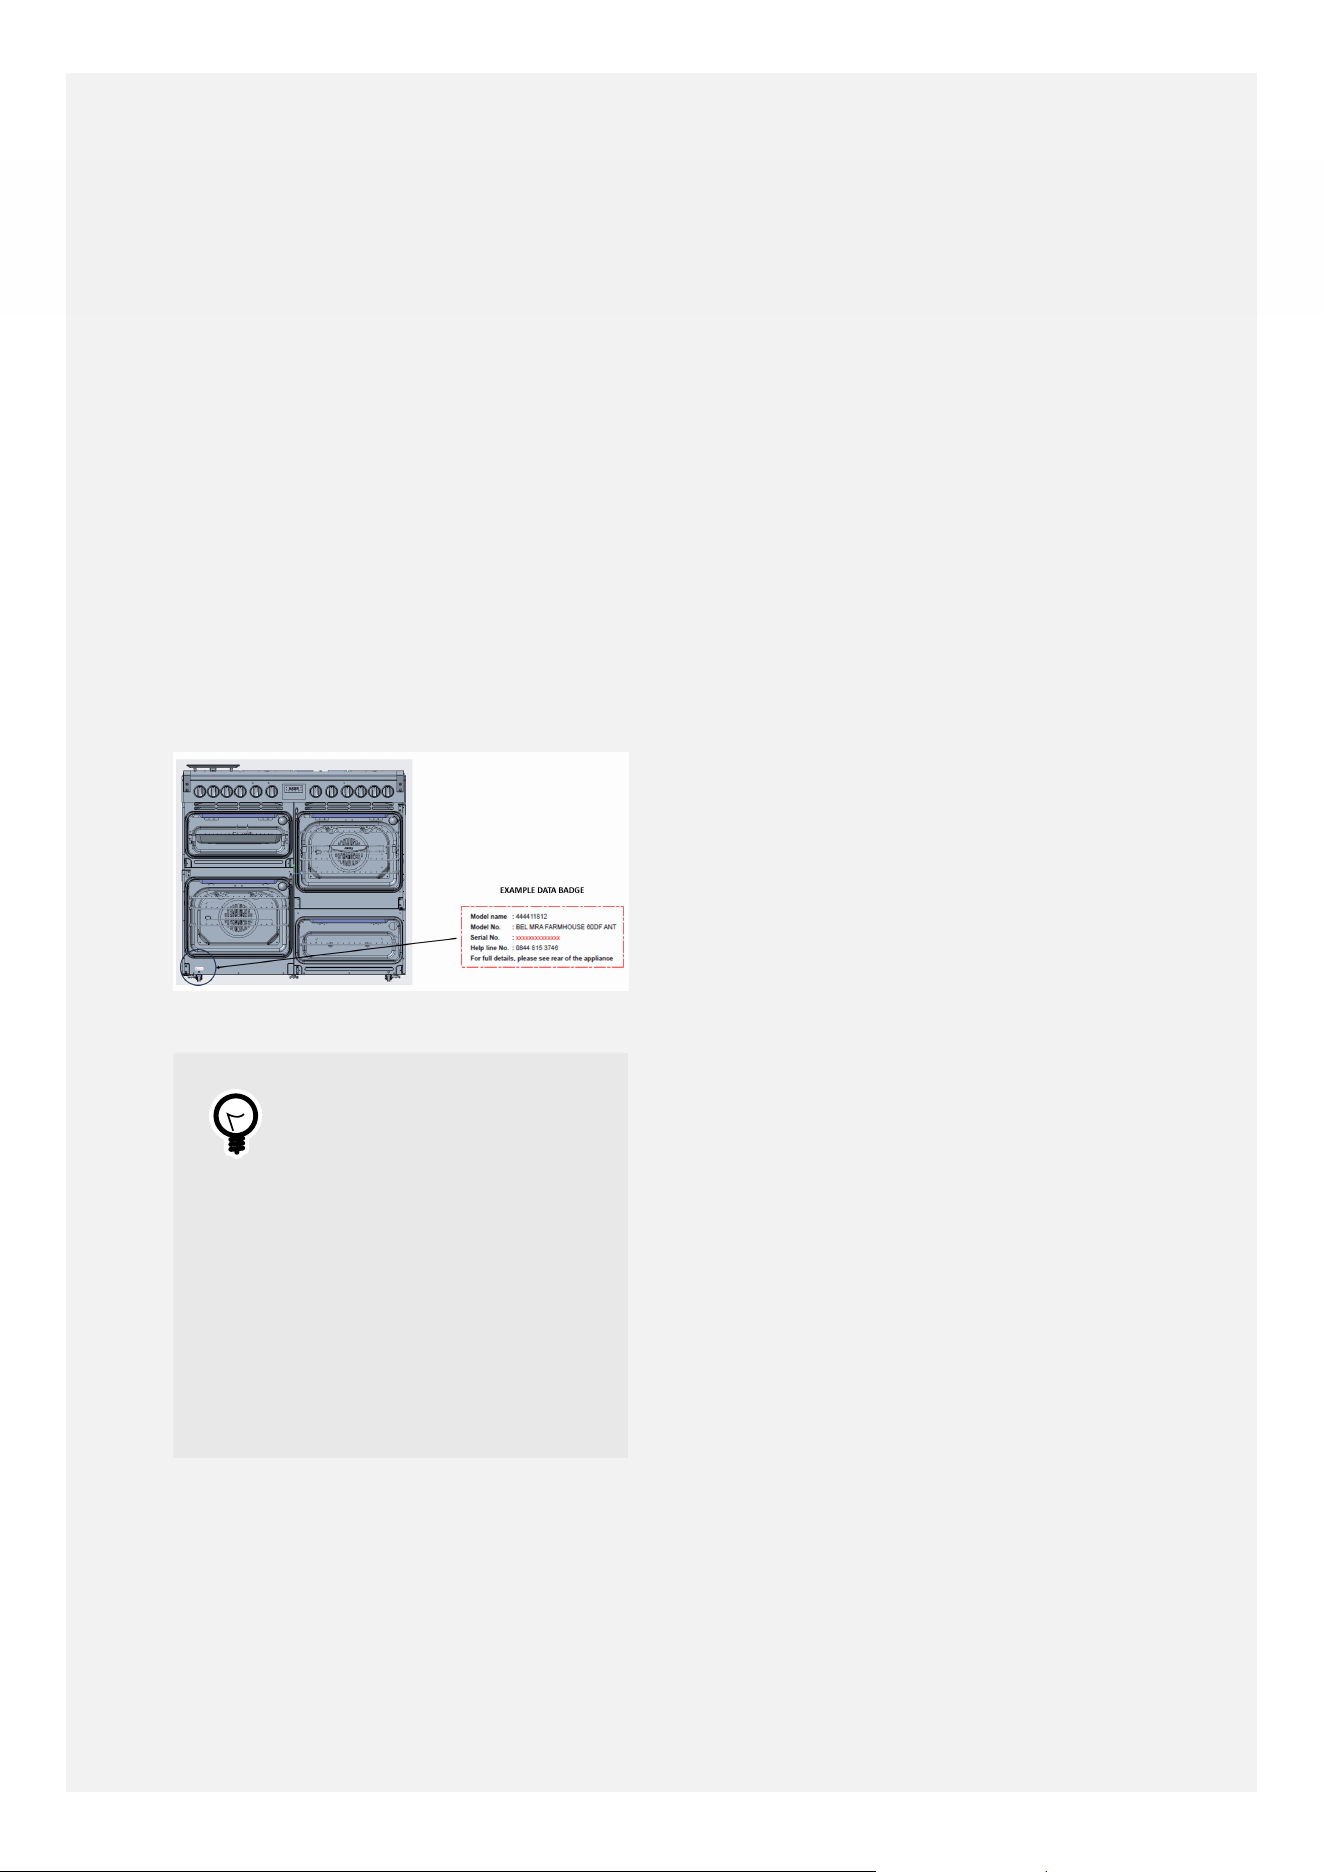
LOCATING THE MODEL AND SERIAL
NUMBERS
•
Please open the bottom-left oven door to
locate the data badge on the front frame,
close to the door seal.
•
Please quote the model number and serial
number should you ever require an engineer
service visit or need to order spare parts.
•
The model number (also known as the SKU
number) is 9 digits long, beginning with
44...
•
The serial number is printed as a string of
17 digits - the first 8 digits are the serial
number and the remaining 9 digits are the
model number.
Tip
It is a good idea to
take a photo of the
data badge or to make
a written note of the
model number and serial
number on your quick
start guide, especially
if the decorative cover
plinth is going to be fitted
to accommodate taller
worktops.
56
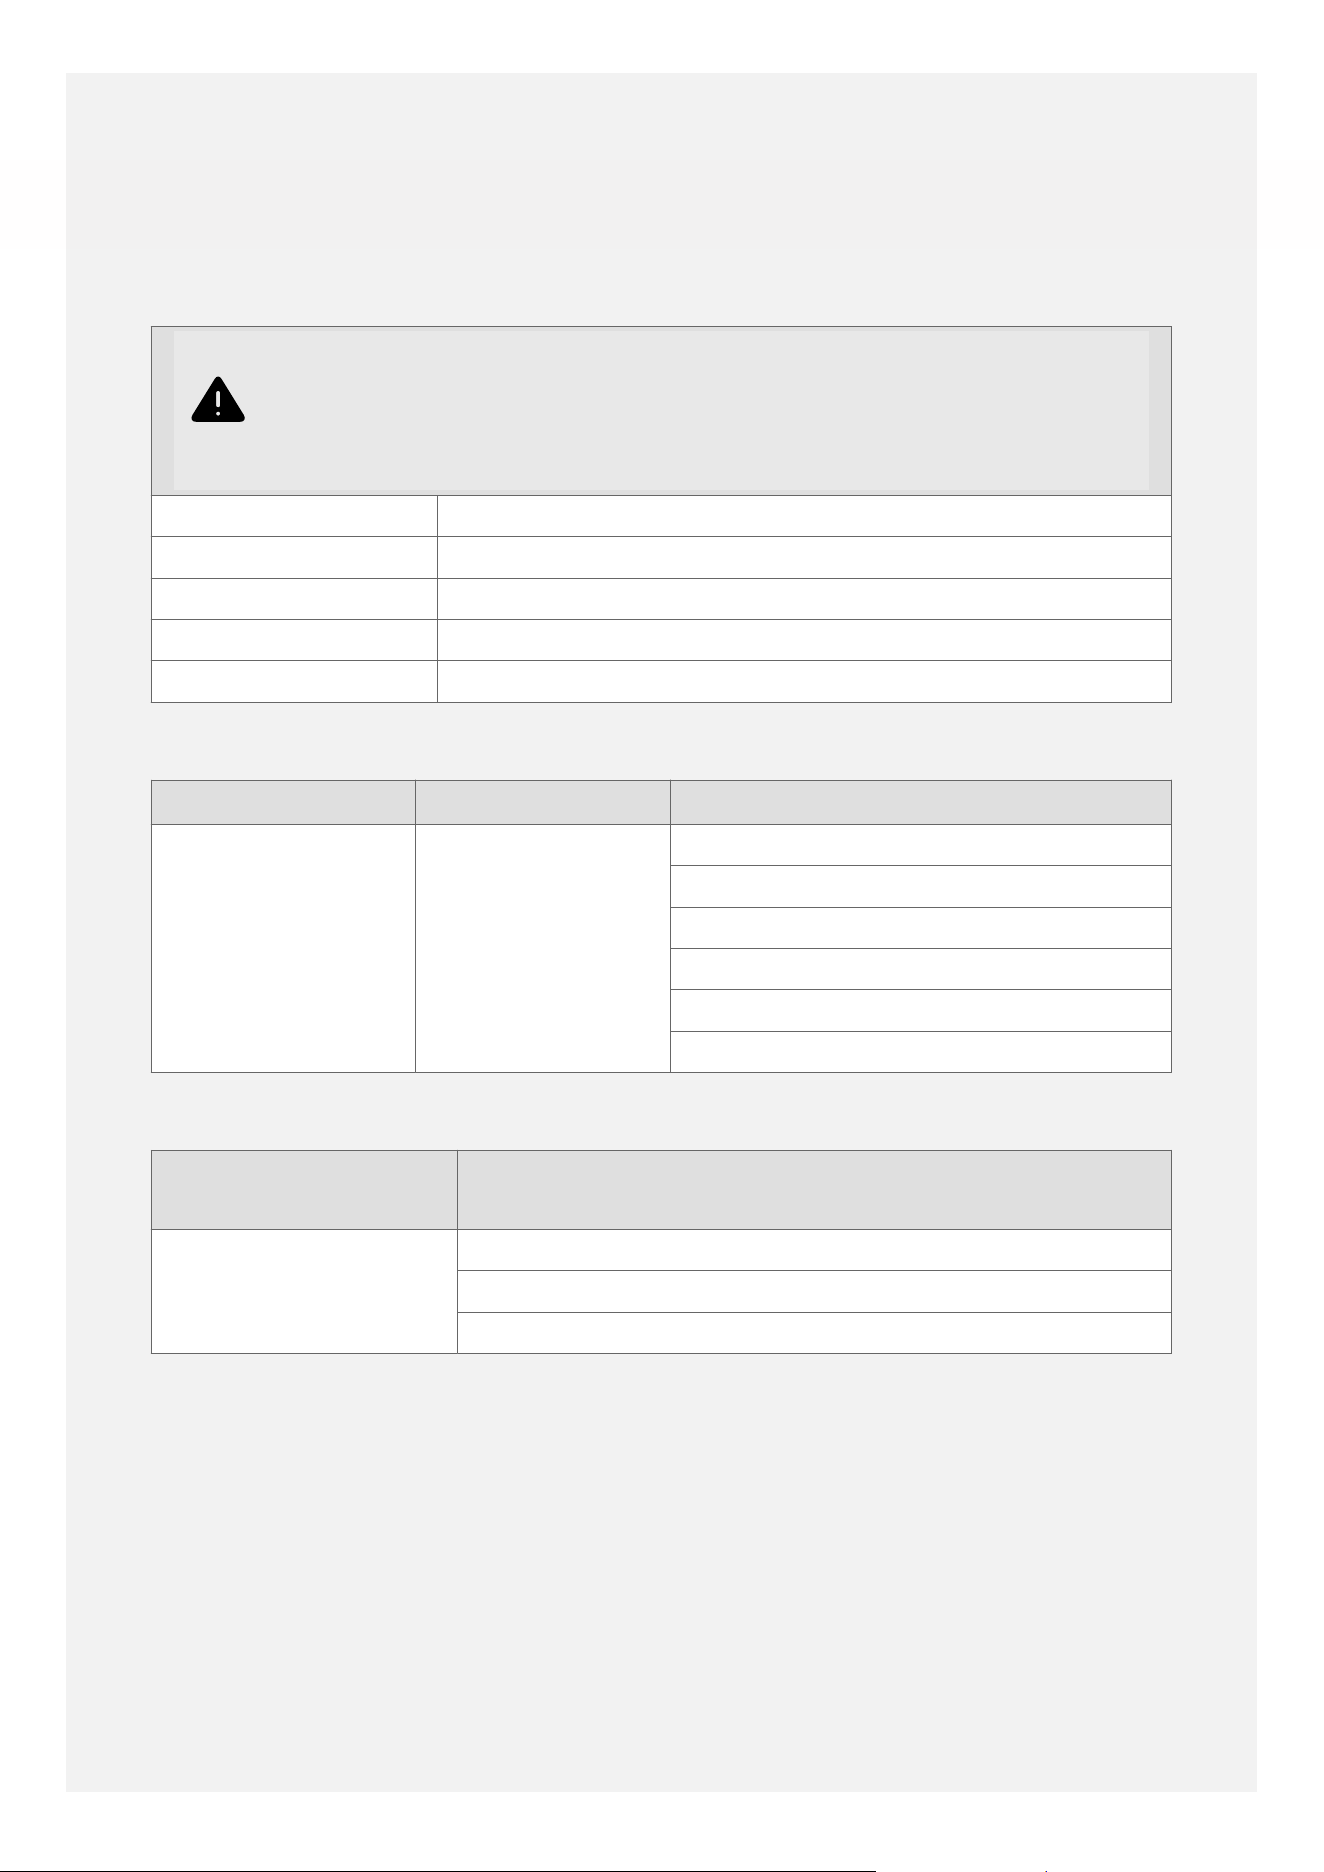
TECHNICAL DATA
Warning
This cooker must be earthed.
Data badge Lower part of the front frame
Appliance class Class 1 - freestanding cooker
Electrical supply 230 - 400V ~3N ~ 50 Hz
Load 17220W (Induction Unit 10200W)
Standard Oven Light 25W
Hob Top Hotplate Electrical Supply Zone Load (W)
Electric 230V Left hand front 1800W (2100W Boost)
Left hand rear 1800W (2100W Boost)
Right hand front 1200W (1500W Boost)
Right hand rear 1800W (2100W Boost)
Centre 2300W (3000W Boost)
N/A
Appliance Electrical
Supply
Oven Cavity & Function Load (W)
230V Left-hand main oven: Conventional Oven 2229W
Right hand main cavity: Fanned Oven- Air Fry 3166W
Top cavity: Single grill 1561W
57
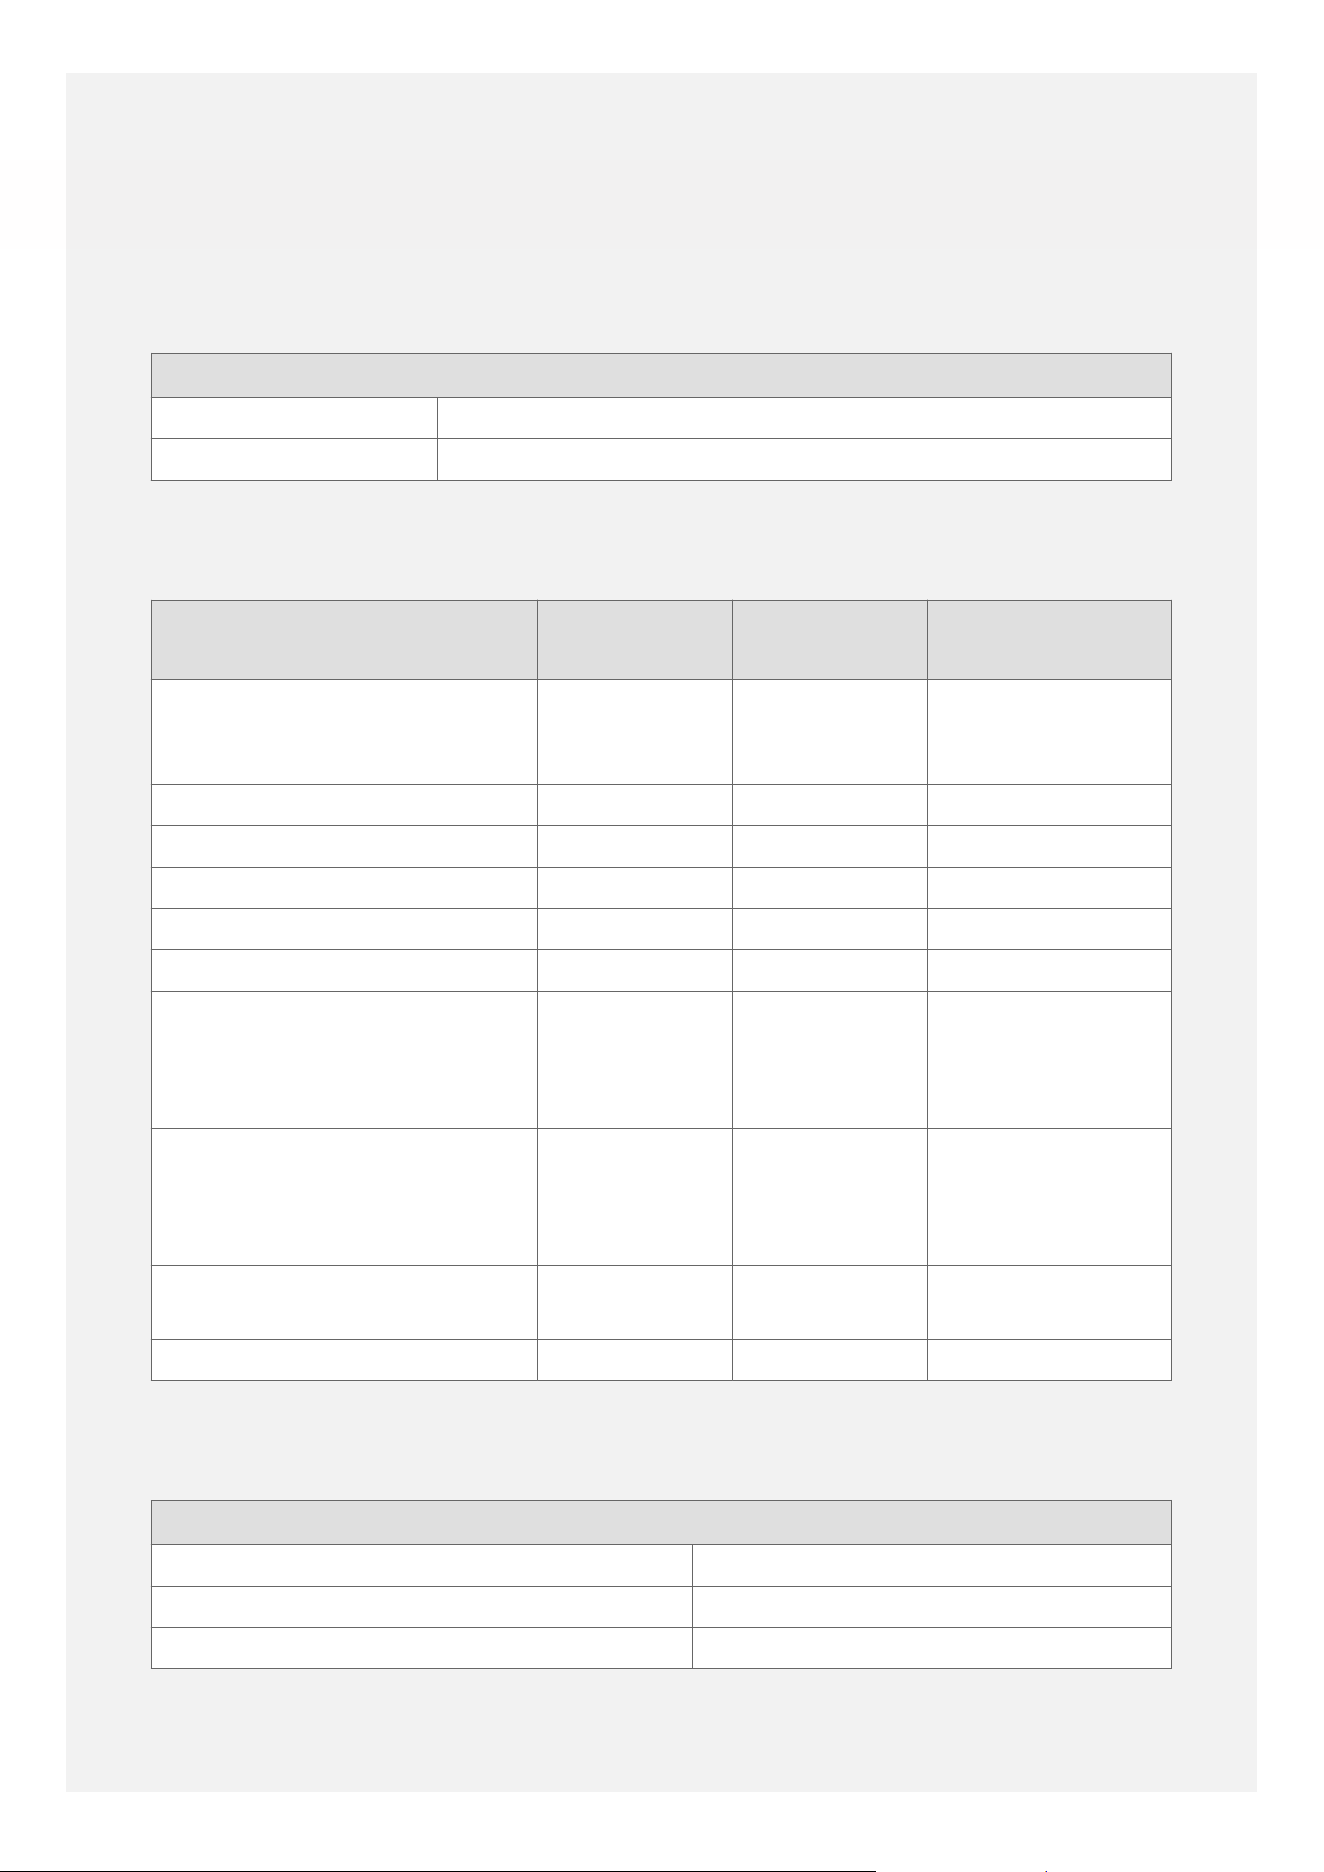
ENERGY DATA TABLE
Regulation (EU) 66/2014:
Model Identification:Belling 100/110cm Electric Induction : All Models
Brand: Belling
Size: 100cm or 110cm
Energy Eciency For Oven
Oven Cavity 1 Cavity 2 Cavity 3 (if
applicable)
Mass of the appliance (M):
102.0 kg for 100cm models;
110.0 kg for 110cm models
Number of cavities: 2
Location: Bottom-left Top-right N/A
Type of oven: Electric Oven Electric Oven N/A
Heat source per cavity: Electricity Electricity N/A
Volume per cavity (V): 64 Litres 60 Litres N/A
Energy consumption
(electricity consumed) per
cycle in conventional mode
(EC
electric cavity
):
0,75 kWh N/A N/A
Energy consumption
(electricity consumed) per
cycle in fan-forced convection
mode (EC
electric cavity
):
N/A 0,74 kWh N/A
Energy eciency index per
cavity (EEI
cavity
):
91,5 92,5 N/A
Energy eciency class: A A N/A
Energy Eciency For Hob
Hob
Type of hob: Electric
Number of cooking zones and/or areas: 7
Heating technology: Induction cooking zones and areas
58

Electric
Zone:
Location: Useful surface area
per electric heated
cooking zone:
Energy consumption
per cooking zone or
area (EC
electric cooking
):
Zone 1 Front-left 21.5cm wide by
19.0cm long
191.3 Wh/kg
Zone 2 Back-left 21.5cm wide by
19.0cm long
194.2 Wh/kg
Zone 3 Centre 23.0 cm diameter 189.6 Wh/kg
Zone 4 Back-right 20.0 cm diameter 190.7 Wh/kg
Zone 5 Front-right 16.5cm diameter 194.0 Wh/kg
Zone 6 Left-hand
bridged area
21.5cm wide by
38.0cm long
195.6 Wh/kg
Energy consumption for the hob (EC
electric hob
): 192.6 Wh/kg
Energy consumption measured in accordance
with EN 60350-1 and EN 60350-2
ENERGY SAVING TIPS FOR
HOBS
Tip
Use pans with flat bases.
Use pans which are
suitably-sized for the size
of the cooking zone.
Use pans with lids.
Minimise the amount of
liquid or fat when cooking.
When liquid starts boiling,
reduce the power level to
a simmer.
Using a pan with a base
diameter a little larger
than the diameter of
the cooking zone gives
the most energy-efficient
cooking results.
ENERGY SAVING TIPS FOR
OVENS
Tip
Cook separate meals
together, if possible.
Keep the pre-heating time
as short as possible.
Do not elongate the
cooking time.
Do not forget to turn the
oven off at the end of
cooking.
Do not open the oven
door during the cooking
process.
If the oven has a
programmable timer, use
the timer to switch the
oven heating off at the
end of cooking.
If cooking for longer
periods, turning the oven
heating off 10 minutes
59

before the end of cooking
can save energy by
using the residual heat
to finish the cooking
process. Always ensure
that food is thoroughly
cooked through.
60

SERVICE CONTACT DETAILS
Ireland Tel: +353 (0) 1 8428222
Service e-mail: serviceireland@glendimplex.co
Spare parts enquiries e-mail: sparesireland@glendimplex.com
www.glendimplexireland.com
Glen Dimplex Ireland UC, Airport Road, Cloghran, Co. Dublin, K67 DT89
United
Kingdom
Stoves Service Tel: +44 (0) 344 815 3740
www.stoves.co.uk
Belling Service Tel: +44 (0) 344 815 3746
www.belling.co.uk
Glen Dimplex Home Appliances, Element, Temple Court, Risley,
Warrington, WA3 6GD
61

This page is intentionally left blank.
62

This page is intentionally left blank.
63
Glen Dimplex Home Appliances, Element, Temple Court, Risley,
Warrington, WA3 6GD.
0344 815 3746
www.belling.co.uk
GDHA Part Number: 094114101