See reverse side for more information
9/22
BC746
WARNING
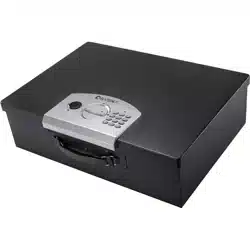
Manual for Keypad Safe
Read all instructions before using this safe
- For security purposes, change the factory default code as
soon as possible. Default code: 159
- Safe can be opened by either Pin code and/or
Emergency Keys.
- Test and Store emergency keys in a secure place, NOT
inside of the safe.
- Avoid leaving safe door open and unattended; it will allow
unauthorized individuals to reprogram the safe, gaining full
access to the safe and the contents.
- To maximize the security and performance of the safe, test
pin code every 6 months.
- Test and make sure the safe works properly before mounted.
Once tested, mount the safe before use.
- Keep children away from safe; they should not play with or
around the safe at any time. Children at play could
accidentally pull on the safe or accidentally pull on the safe
door causing safe to tip over if not properly mounted.
OPENING SAFE WITH ACCESS KEY
1. Remove the cover: Push the left side of cover to expose
the key access.
2. Insert emergency key into key access and turn key
counter-clockwise. Hold the key to open position and turn
the knob clockwise to open the door.
NOTE: Once operation is finished, please pull out the
Emergency Key and Keep it in a safe place; NOT INSIDE of
the safe.
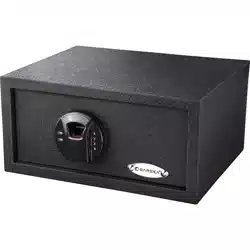
A. Bolts
B. Battery Cover and
Battery Compartment
C. Initialization Button
D. Knob (Master Key)
E. Emergency Lock Cover
PARTS OF THE SAFE
F. Emergency Key Access
(remove lock cover to expose)
G. External Power Supply: 9V battery
(remove lock cover to expose)
H. Key Pad
I. Indicate Light
BC
A
FD HG
I
INSTALL BATTERIES
1. With the door open, remove the battery cover by sliding
the cover.
2. Insert 4 AA batteries by lining them up in a manner as
indicated by the “+” and “- “signs.
3. Put the arrow of the battery cover align to the arrow on
the compartment, slide the batteries cover back into
place. Restore the battery compartment cover.
NOTE:
DO NOT use any other type of non-alkaline battery.
DO NOT mix new and old batteries.
External Battery Source
9V battery can be used as an external power source. (9V
battery not included) Please remove emergency key access
cover, then place 9V battery, touching the metal contacts.
Safe should power up, if not switch the polarity of 9V
battery.
NOTE:
Only for emergency use
LOCK/UNLOCK SAFE
Unlock Safe with Pin Code
1. On the keypad enter registered pin code 3-8 digits and press
" # " to confirm, the indicate light turns green with 2 beeps.
2. Turn the knob clockwise and pull the door outwards within 5
seconds to unlock the safe.
Lock Safe
Turn the knob counter- clockwise to close the door.
SETTING USER CODE
Default code:159
1. With the safe open, press and release initialization button
located inside of battery compartment, the blue light will be on.
2. On the keypad input new desired Pin Code 3-8 digits and
press “#” to confirm.
3. 2 beeps and the blue light flashes Twice. New Pin Code
registration is completed.
SETTING MASTER CODE
1. With the safe open, Press “00” on keypad.
2. Press and release initialization button, the blue light will
be seen.
3. On the keypad input new desired Pin Code 3-8 digits and press
“#” to confirm.
4. 2 beeps and the blue light flashes Twice. New Master code
registration is completed.
RESET TO FACTORY DEFAULT MODE
Open the safe door and press initialization button for over 5
seconds, a long beep will be heard.
The safe is back to factory default condition.
NOTE: Factory Default Code is "159"
E
LOCK OUT MODE
1. THREE WRONG Pin code entered consecutively, the keypad
will be locked and the warning beep and blue light flash will be
lasting for 20 seconds.
2. Another THREE WRONG pin code entered consecutively, the
keypad will be locked and the warning beep and blue light flash
will be lasting for 5 minutes.
3. During the Lockout period, the keypad will be disabled. Only
Emergency key can access the safe.
NOTE:
1. The keypad would be disabled during the warning beeps and
blue light flashes. You can stop the beeps and lock out period
by using emergency key, then power-cut by removing
the battery.
2. When keypad is in Sound Off mode during lock out period,
warning beep is disable, only Blue light flashing.
SOUND OFF/ON
Press " 00 " , sound is disable.
Press " 66 " , sound is active.
LOW BATTERY WARNING
After entering correct pin code and red light is flashing this
indicates the batteries are low. Please follow steps under
“INSTALL BATTERIES” to change new batteries.
Note: Safe may still be opened in low battery state depending on
battery voltage. If safe cannot be opened please use emergency
key. All registered pin codes remain stored.
MOUNTING METHOD
The safe may be mounted to a wall or floor. Be aware of the load
bearing. Failure to do so can result in personal injury and/or
damage to property. Use appropriate tools when performing work
and always use eye protection.
Wall Mounting
Do not mount the safe without anchoring to the wall.
- Find the studs in the wall, at your desired location. Most studs
are 16 inches or 24 inches apart.
- Check the wall for concealed wires or pipes.
- Measure the location of the pre-set drill holes; mark their exact
position onto the wall ensuring that the studs or anything else
behind will not interfere.
- Drill the appropriate size holes for the anchors you are using.
- Carefully press the anchor into the holes at this time.
- Mount the safe by running screws from inside of the safe
and securing to anchors; ensure the safe is mounted securely.
Floor Mounting
- Use proper drill tools depending on the type of floor you are
mounting the safe (wood, tile, or concrete).
www.barska.com
BC750 10/22
1 YEAR LIMITED WARRANTY
Note: All information, feature, and specification displayed
herein are based on the data available at the time of
publishing, thus they are subject to change without notice.
All product pictures displayed herein are for illustration
purposes only. The actual product may vary due to
different circumstances
- Measure the location of the pre-set drill holes; mark their
exact position onto the floor.
- Drill the appropriate size holes for the anchors you
are using.
- Carefully press the anchor into the holes at this time.
- Mount the safe by running screws from inside of the safe
and securing to anchors; ensure the safe is
mounted securely
CARE AND MAINTENANCE
- Keep liquids away from the control panel. Spills on the
control panel will cause damage and possibly
electric shock.
- Secure safe in a proper area to prevent from falling and
causing damage or injury.
- DO NOT disassemble the product. For all repairs, contact
BARSKA Customer Service.
- DO NOT use chemicals or cleaning agents to clean
the safe
SAFE/LOCK BOX
BARSKA warrants this new safe/lock box to be free of defects
in material and/ or workmanship under normal use for a period
of twelve (12) months from the date product is purchased. This
limited warranty is delimited to repair or replacement only. This
warranty does not cover damage caused by improper
installation or maintenance. BARSKA disclaims all liability for
incidental or consequential damages resulting from misuse,
abuse, accident (such as dropping), fire, flood, service or
repairs other than those performed by BARSKA, acts of
nature, or arising out of any breach of this warranty. Altering
the product under any circumstances will automatically void
the warranty.
For service under this limited warranty, please have available
the proof of purchase and the purchase date and location as
well as a detailed description of the problem. This warranty is
not transferable and only applies to the original purchaser with
a proof of purchase from BARSKA or from an authorized
dealer. This warranty applies only to products purchased
within the United States, excluding the Hawaiian Islands and
all U.S. territories in the Caribbean and the Pacific.
BARSKA will examine and go through troubleshooting
procedures, product repair or replacement of defective part(s)
or units with new part(s) or provide a new unit, if necessary,
during the warranty
period. Reasonable shipping/handling
charges may apply and are based on Barska sole discretion.
Purchaser shall be required to prepay Shipping/handling
charges with a check or money order to BARSKA at time
product is returned. The Return Merchandise Authorization
Number (RMA#) and shipping/handling charge MUST be
obtained from BARSKA in advance of return. BARSKA shall
not be liable for damages or loss occurring during shipping.
Please visit via www.barska.com or call 1.888.666.6769 to
obtain the RMA#, Shipping/handling amount, and for more
information.
BARSKA reserves the right to modify or discontinue, without
prior notice to the purchaser, any model or style of the product.
BARSKA will determine, at its sole discretion, whether a
product will be repaired or replaced. BARSKA reserves the
right to discontinue or change any feature of its products at
any time. If an exact replacement or product is not available,
BARSKA reserves the right to provide a part or product that
matches as closely as possible.
LIMITATION OF REMEDIES
BARSKA disclaims any warranties, express or implied,
whether of merchantability or fitness for a particular use,
except as expressly set forth herein. The sole obligation of
BARSKA under this limited warranty shall be to repair or
replace the covered product, in accordance with the terms set
forth herein. BARSKA
expressly disclaims any lost profits,
general, special, indirect or consequential damages which
may result from breach of any warranty, or arising out of the
use or inability to use any BARSKA product. Any warranties
which are implied and which cannot be disclaimed shall be
limited in duration to a term of one year from the date of
original retail purchase.
Some states do not allow the exclusion or limitation of
incidental or consequential damages or limitation on how long
an implied warranty lasts, so the above limitations and
exclusions may not apply to you.
BARSKA
855 Towne Center Drive, Pomona, CA 91767