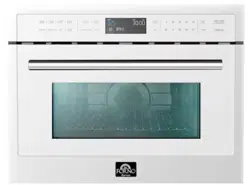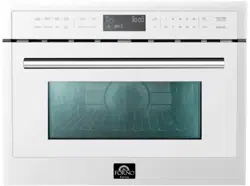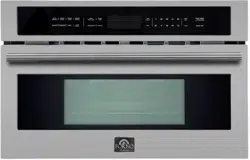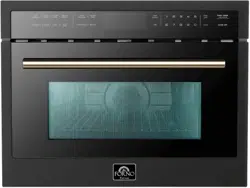
MODEL:
Read these instructions carefully before using your
microwave oven , and keep it carefully.
If you follow the instructions, your oven will provide you with
many years of good service.
SAVE THESE INSTRUCTIONS CAREFULLY
BUILT-IN COMBINATION OVEN WITH HOT AIR
AND MICROWAVE
OPER ATION MANUAL
FMWDR3093-24BLK
FMWDR3093-24WHT

TABLE OF CONTENTS
Precautions to avoid possible exposure
To excessive microwave energy
5
Important safety instructions 6
Warranty
Customer Care
2
3-4
Causes of damage 9
9Installation
Your new appliance 11
12Before using the appliance for the first time
12Setting the oven
13The microwave
14Express cooking
14Multi-stage cooking
15Automatioc programmes
15Defrosting programmes
17Sensor cooking
19Broil
19Setting the time-setting options
Childproof lock 20
Care and cleaning 21
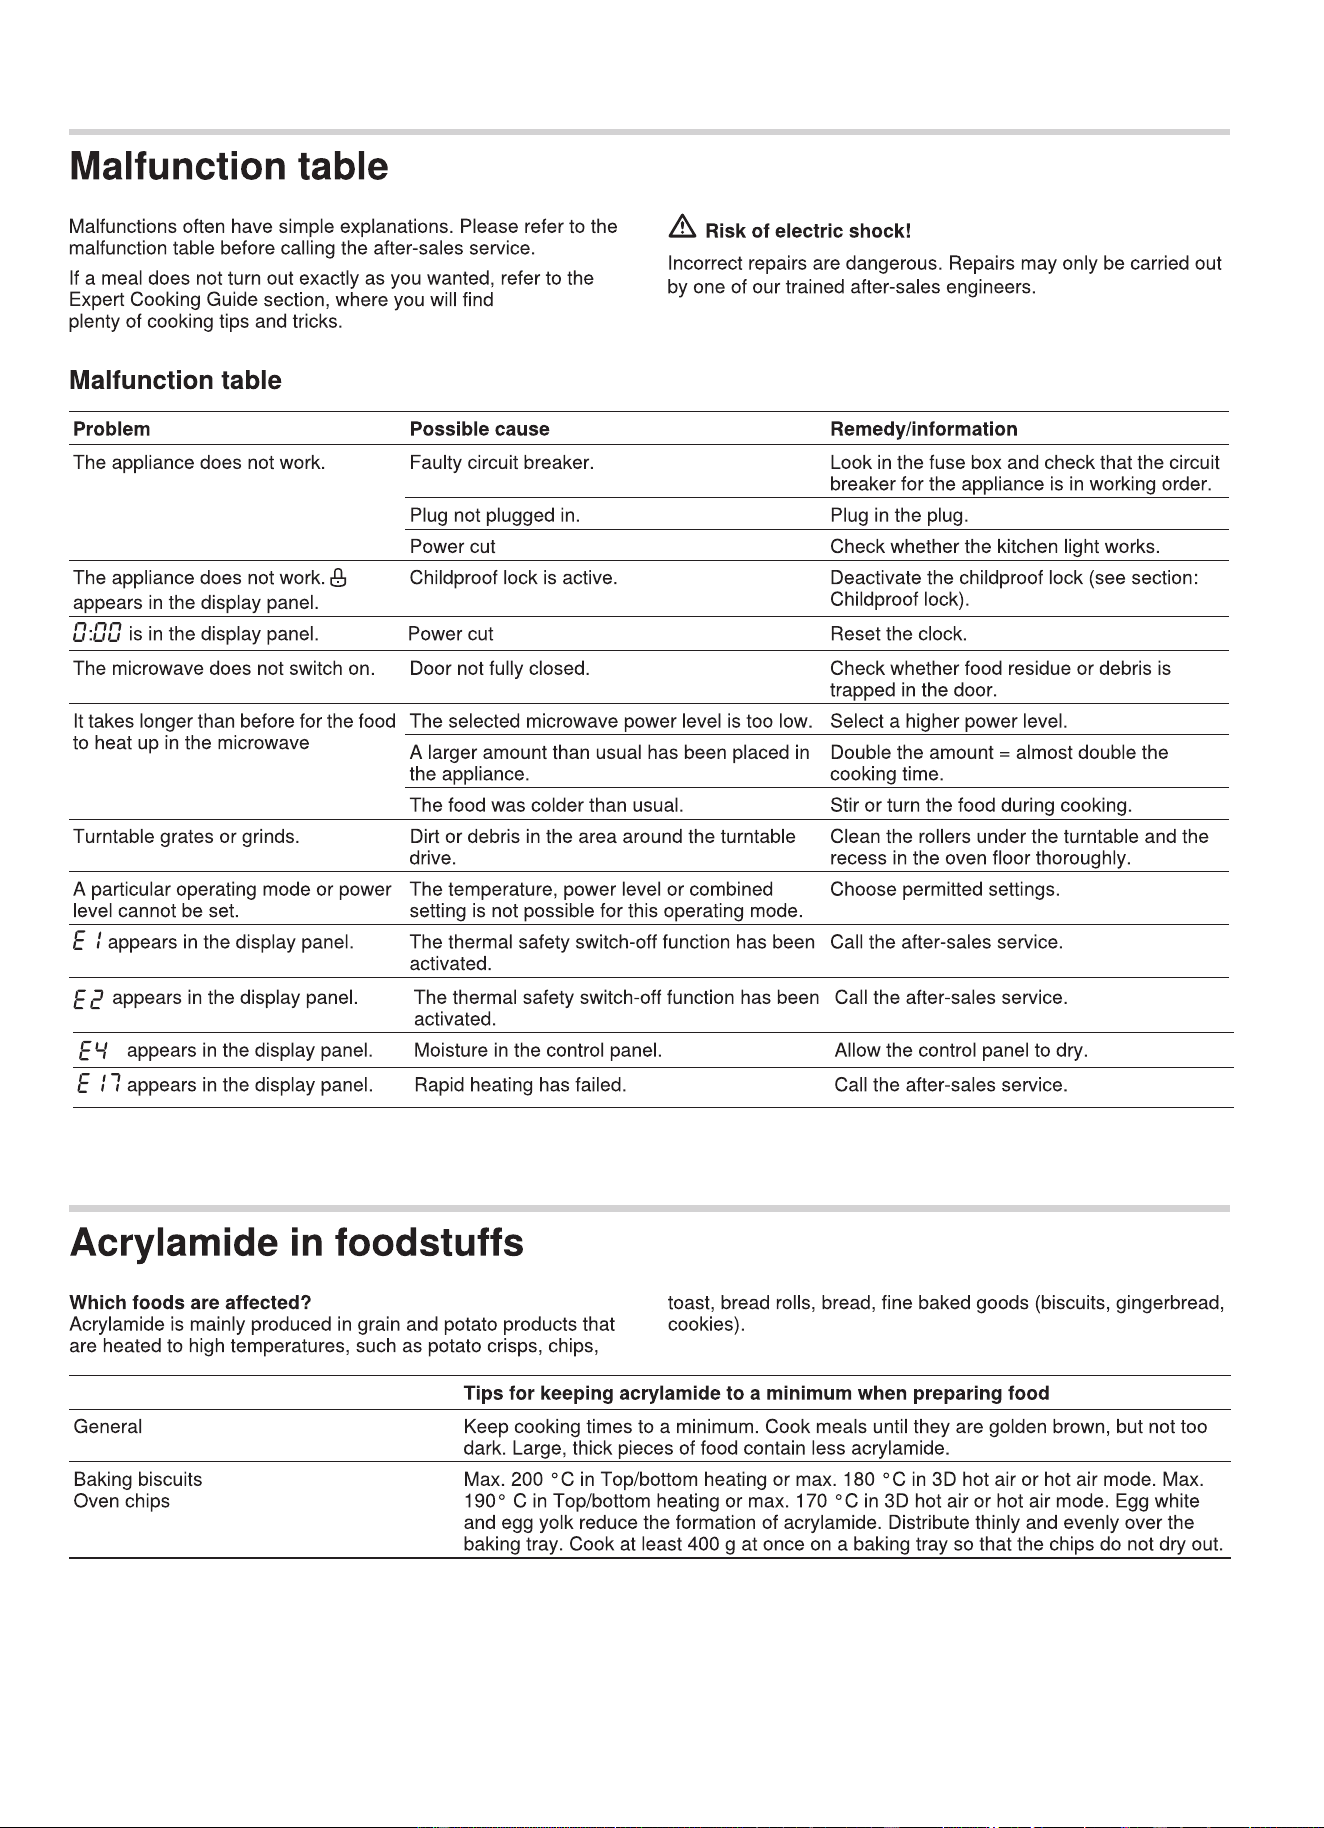
22Malfunction table
23Energy and environment tips
23Expert Cooking Guide
25Cleaning and Maintenance

EN-2
Thank you for purchasing a Frono product. Please read the entire instruction manual before operating your new
appliance for the first time. Whether you are an occasional user or an expert, it will be beneficial to familiarize yourself
with the safety practices, features, operation and care recommendations of your appliance.
Both the model and serial number are listed inside the product. For warranty purposes, you will also need the date of
purchase .
Services in Canada and Untied States
Keep the instruction manual handy to answer your questions. If you don’t understand something or need more
assistance, please visit our website for fast support. Please provide us your name, number, address,serial number
of the product that troubleshooting, proof of purchase, and a short description of the issue. A customer service
representative will contact you as soon as possible. All warranty work needs to be authorized by FORNO customer
service. All our authorized service providers are carefully selected and rigorously trained by us.
Product Information Service Information
Model Number : _________________________________________
Use these numbers in any
correspondence or services calls
concerning your product.
If you received a damaged product,
immediately contact Forno.
To save time and money, before
you call for serviced, check the
troubleshooting guide. It listed the
causes of minor operation problems
that you can correct yourself.
Serial Number : __________________________________________
Date of Purchase :________________________________________
Purchase Address And Phone : _____________________________
_______________________________________________________
_______________________________________________________
Customer Care
“Need some quick help? Simply scan the qr code and get access
to our fast support form. We’re always here to assist you with any
questions or concerns you may have. So, don’t hesitate to reach out!”
EN-3
EN-4

(a) Do not attempt to operate this oven with the door open since this can
result in
break or tamper with
(b) Do not place any object between the oven front face
and the door or allow
soil or cleaner
detarepo eb ton tsum nevo eht ,degamad era slaes rood ro rood eht fI :GNINRAW )c(
If the apparatus is not maintained in a good state of cleanliness, its surface could
be degraded and
situation.
PRECAUTIONS TO AVOID POSSIBLE EXPOSURE
TO EXCESSIVE
ADDENDUM
MICROWAVE ENERGY
exposure to microwave energy. It is important not to
interlocks.
residue to accumulate on sealing surfaces.
it has been repaired by a competent person.
aect the lifespan of the apparatus and lead to a dangerous
harmful
the safety
until
EN-5
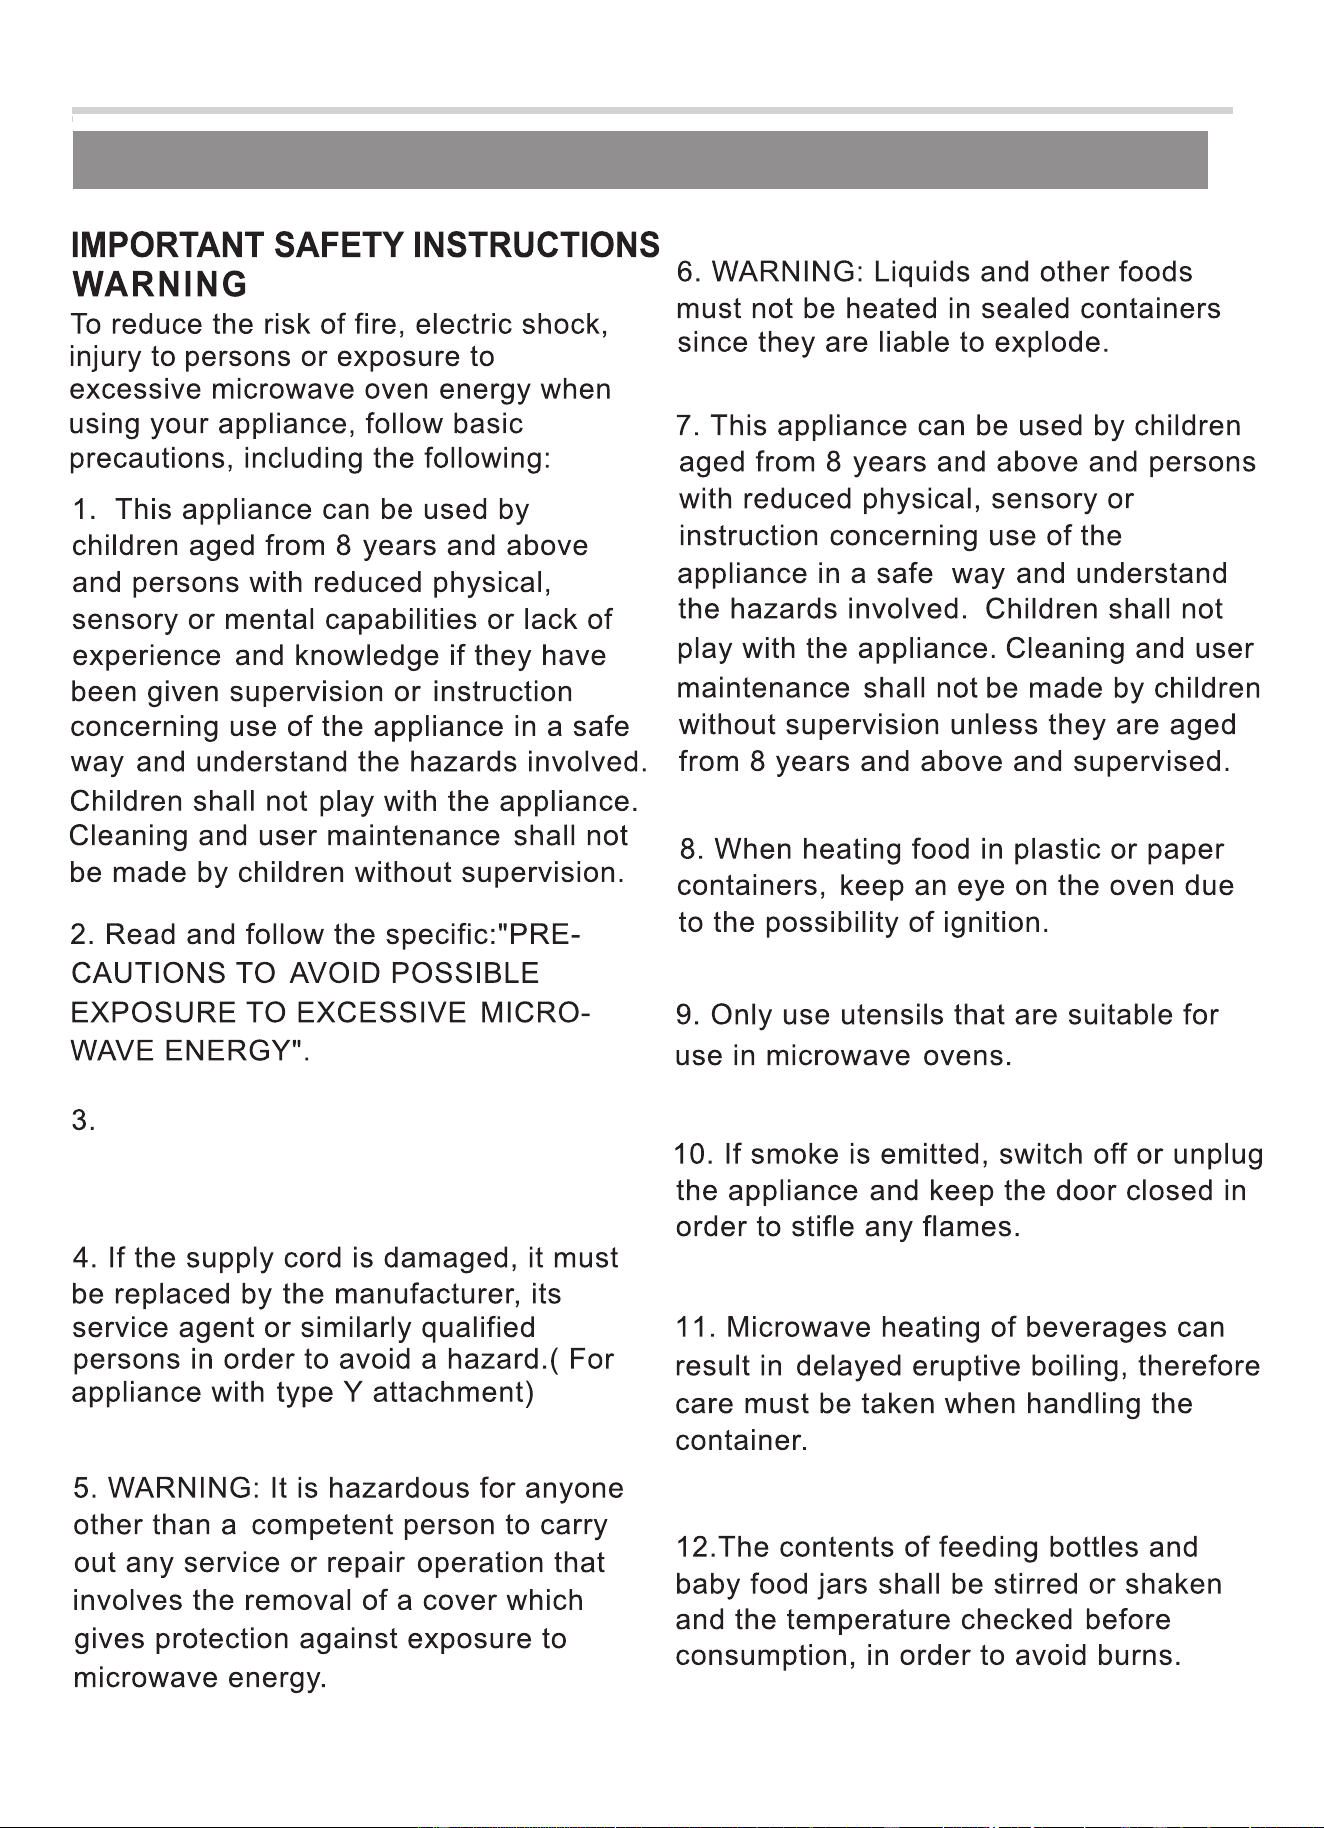
IMPORTANT SAFETY INSTRUCTIONS
IMPORTANT SAFETY INSTRUCTIONS
reach of children
less than8years.
Keep the appliance and its cord out of
EN-6
EN-7
or
oven
scratch the
result in shattering
29. Do not use harsh abrasive cleaners
sharp
metal
scrapers
to
clean
the
door
nac yeht ecnis ssalg
surface,
which
may
of the glass.
WARNING: When the appliance is
adult
combination mode, children
should only use the oven under
32.
operated in the
supervision due to the temperatures generated.
EN-8
33.HOT CONTENTS CAN CAUSE SEVERE
BURNS. DO NOT ALLOW CHILDREN TO
USE THE MICROWAVE. Use caution when
removing hot items.
READ CAREFULLY AND KEEP FOR
REFERENCE
FUTURE
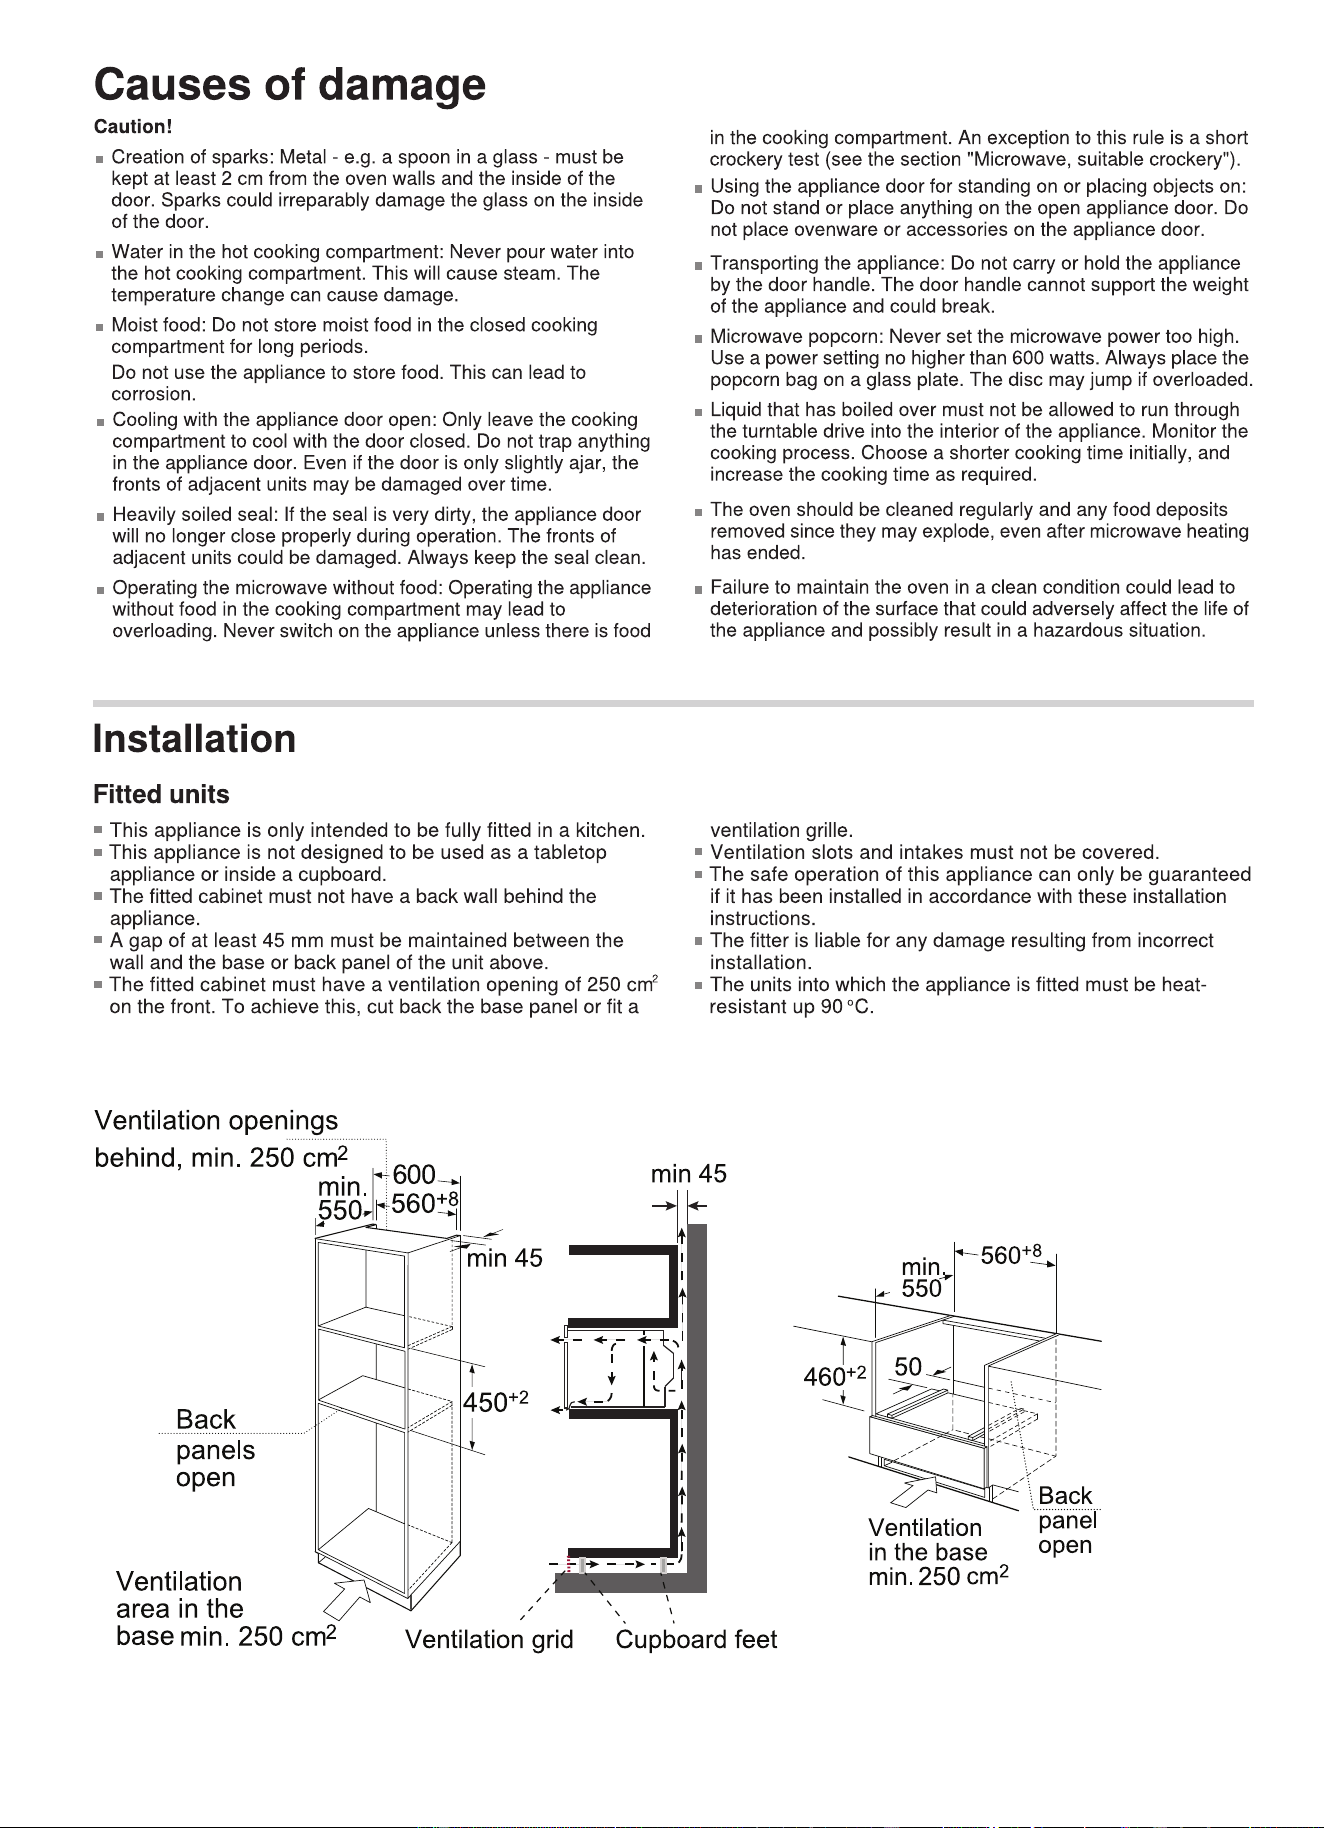
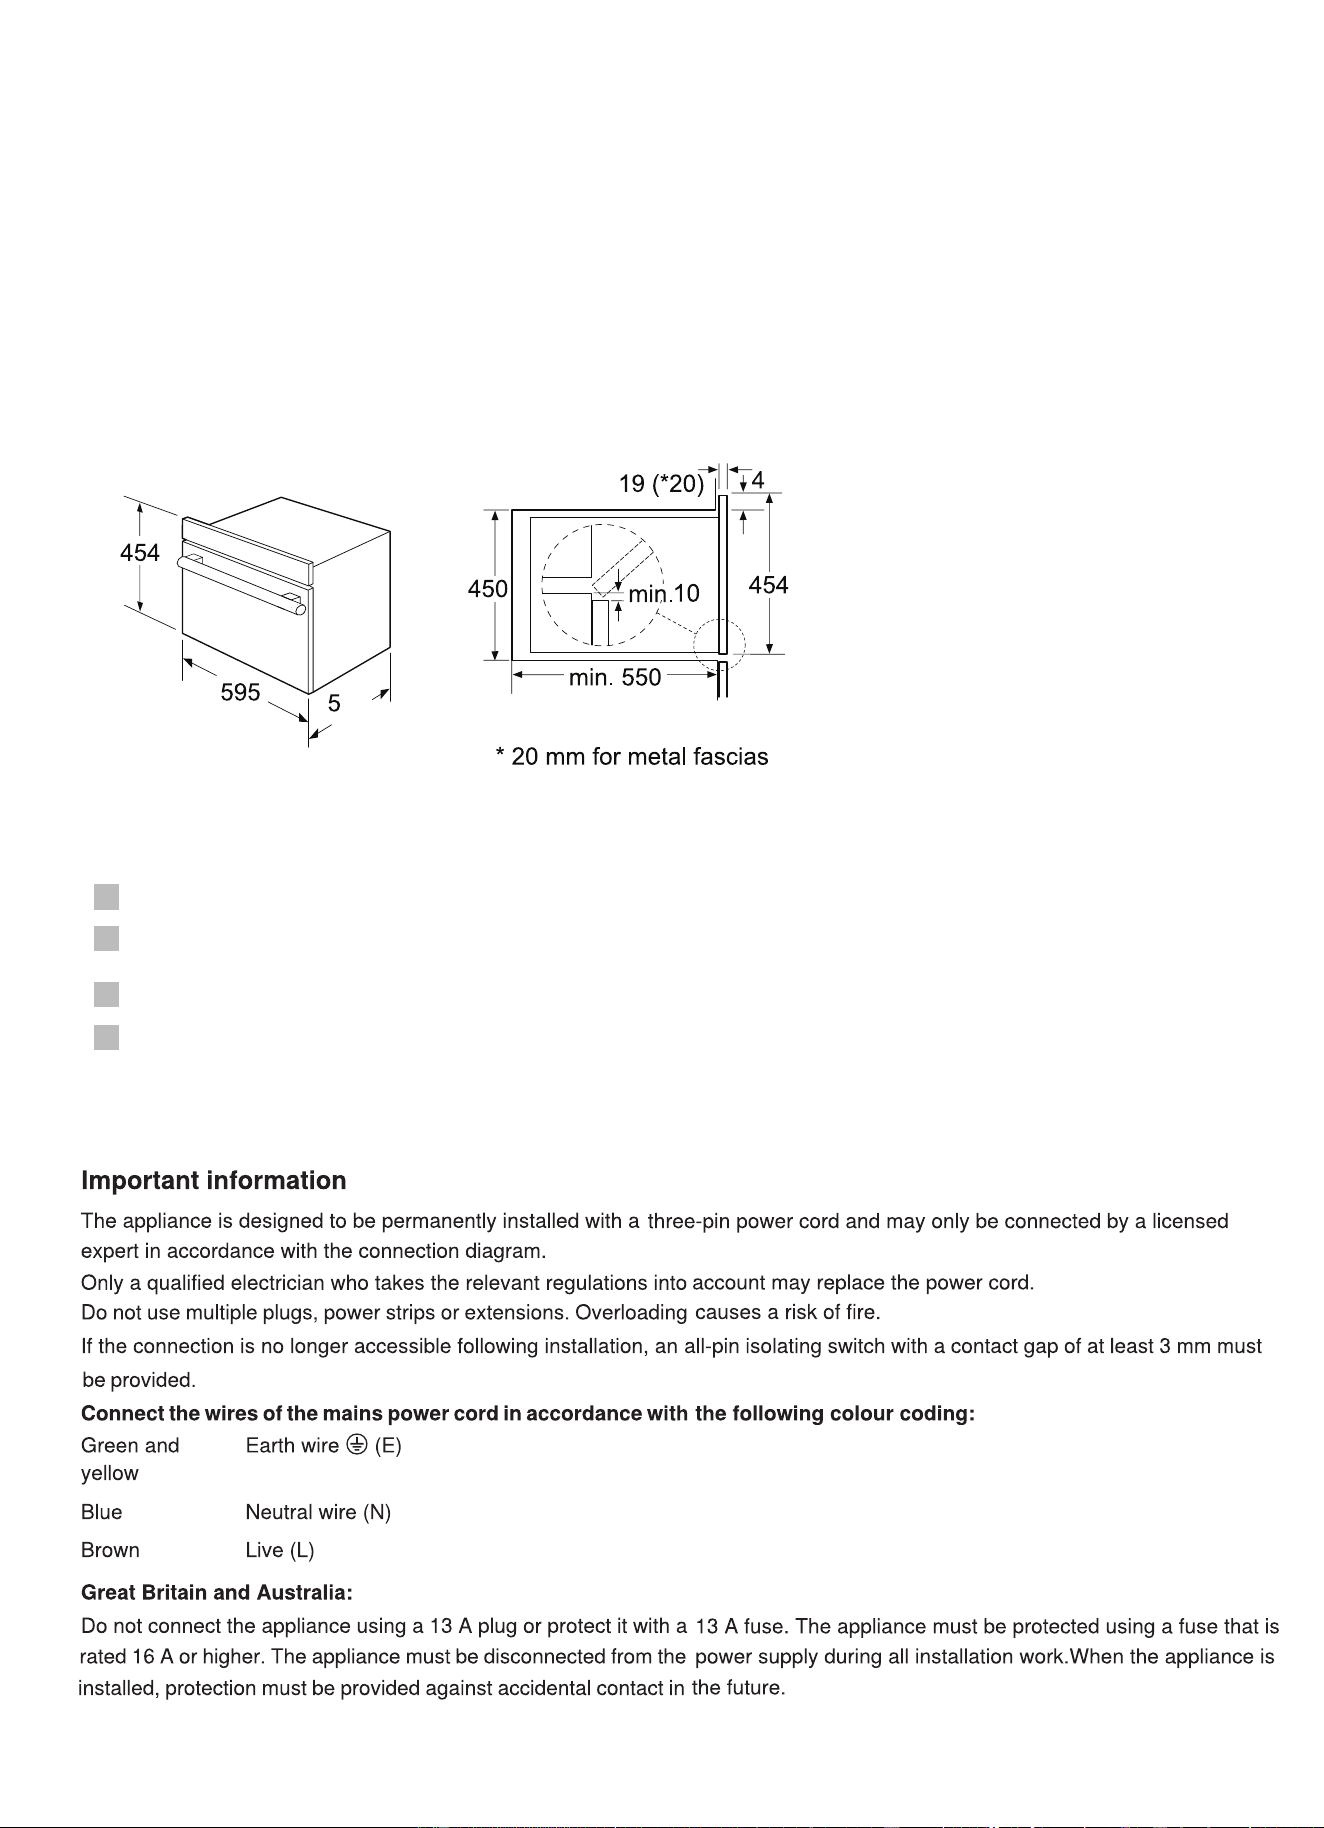
Note: There should be gap above the oven.
Installation dimensions
EN-9
• Do not hold or carry the appliance by the door handle. The door handle cannot hold
the weight of the appliance and may break o.
1. Carefully push the microwave into the box, making sure that it is in the centre.
2. Open the door and fasten the microwave with the screws that were supplied.
Building in
Fully insert the appliance and centre it.
Do not kink the connecting cable.
Screw the appliance into place.
The gap between the worktop and the appliance must not be closed by
additional battens.
68
EN-10
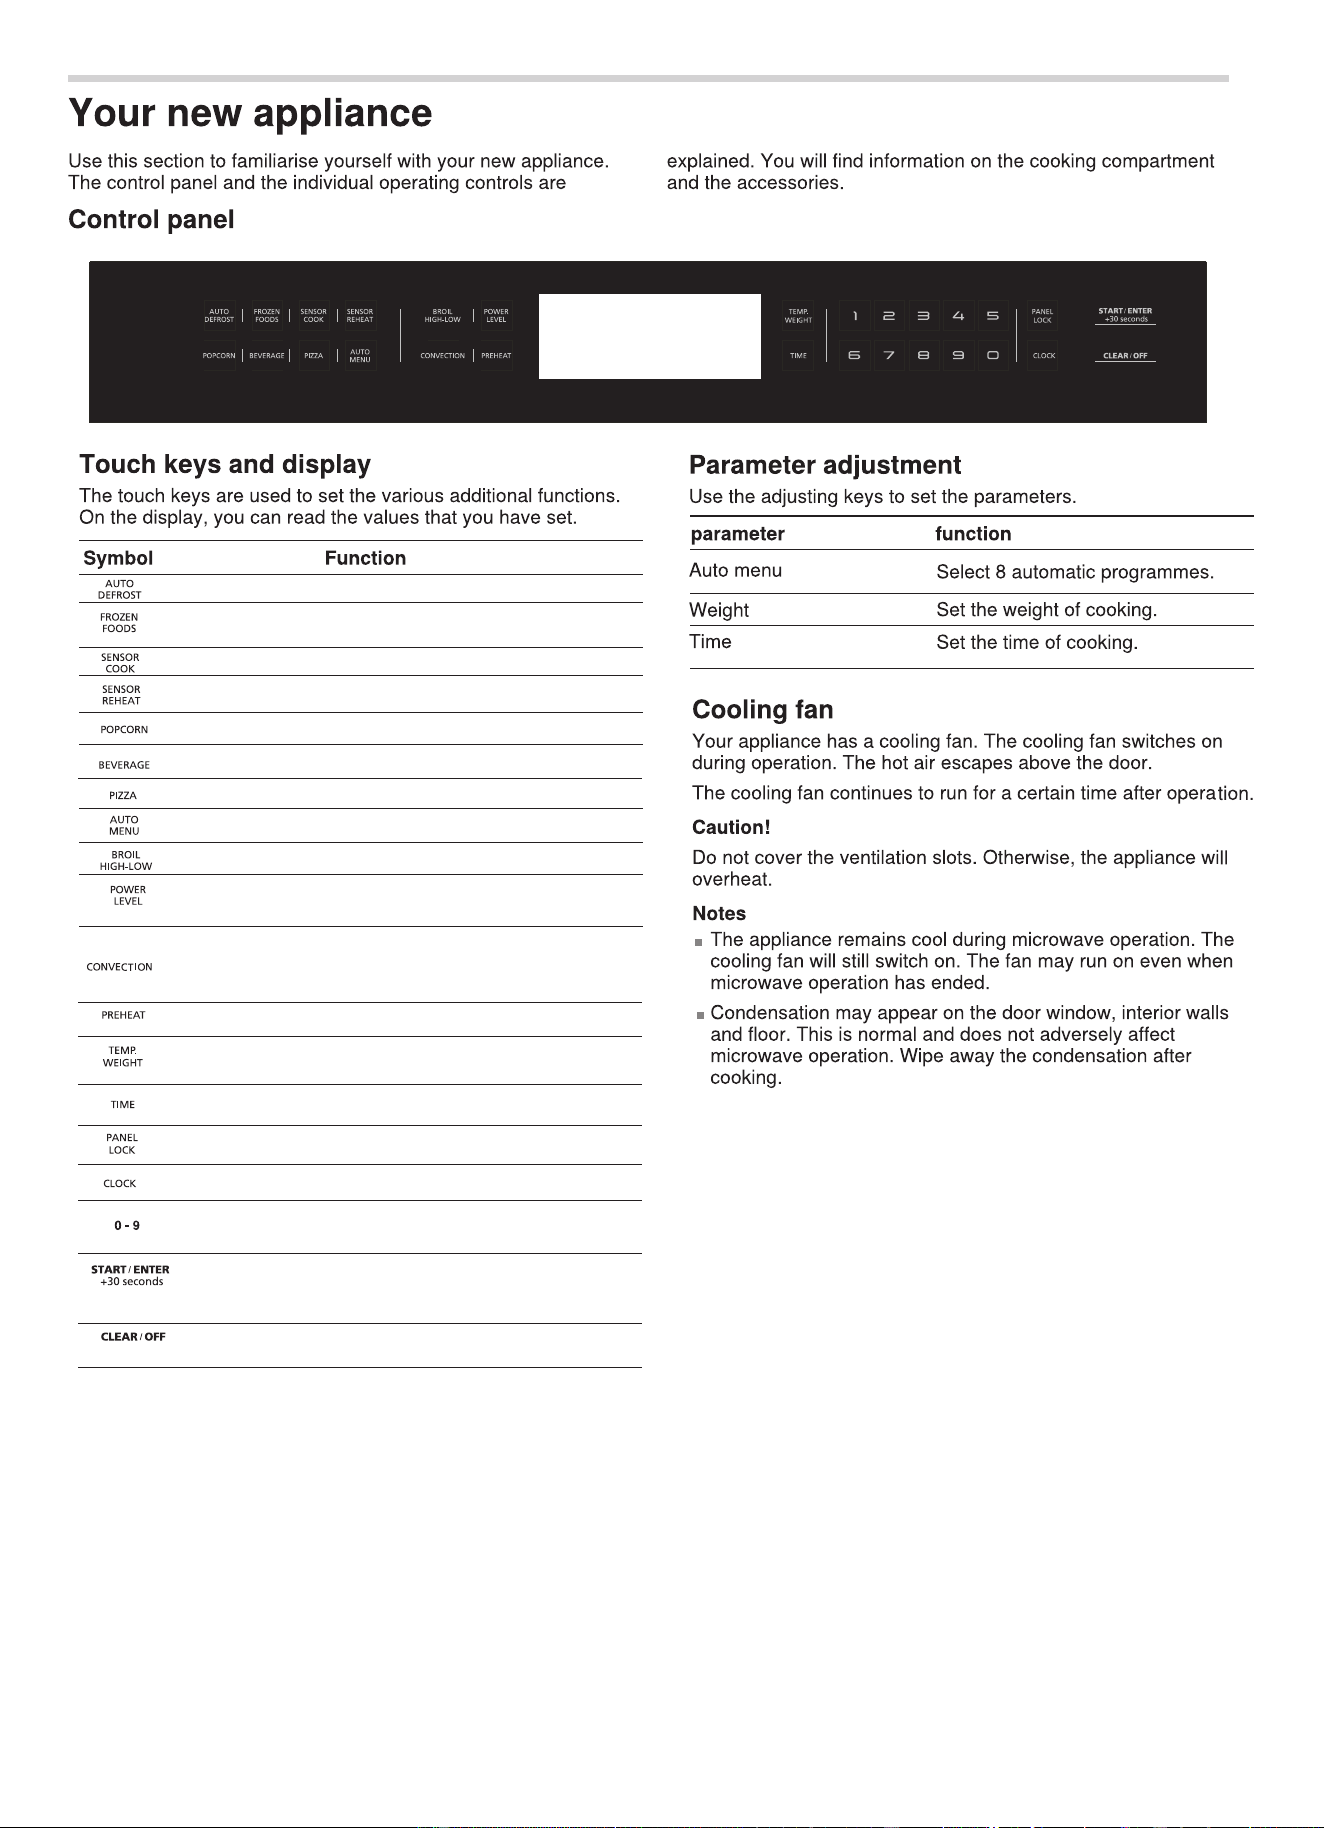
Select Auto Defrost programs
Start cooking programs for frozen
convenience foods
Select Sensor Cook programs
Select Sensor Reheat programs
Cook popcorn
Heat beverages
Select pizza programs
Select auto menu programs
Set Broil modes (Hi/ Lo)
Set power level for microwave
operation
Select pheheat programs
Use the number keys to enter
customized values
Confirm entered values/ Start
cooking mode
Add 30 seconds
Clear entered value
/ turn appliance off
Set time of day
Activate/ deactivate child lock
Set Temp. or weight of cooking
Set cooking time
Select Bake Cook programs
Select Roast Cook programs
EN-11
1.
Touch Clock.
2.
Enter the correct time using the number keys.
Example: To set the clock to 12:41 type in 1 2 4 1.
3.
Touch Start/Enter to confirm.
To remove the new oven smell, heat up the appliance
when it is empty and closed. One hour with Convection
at 350° F (180 ° C) is ideal. Ensure that no packaging
remnants have been left in the oven cavity.
1.
Touch Convection
2.
Enter the numbers 3 5 0 with the number keys.
Touch Start/Enter to start cooking.
5.
once to enter bake mode.
The oven light turns on and the appliance starts
heating.
EN-12
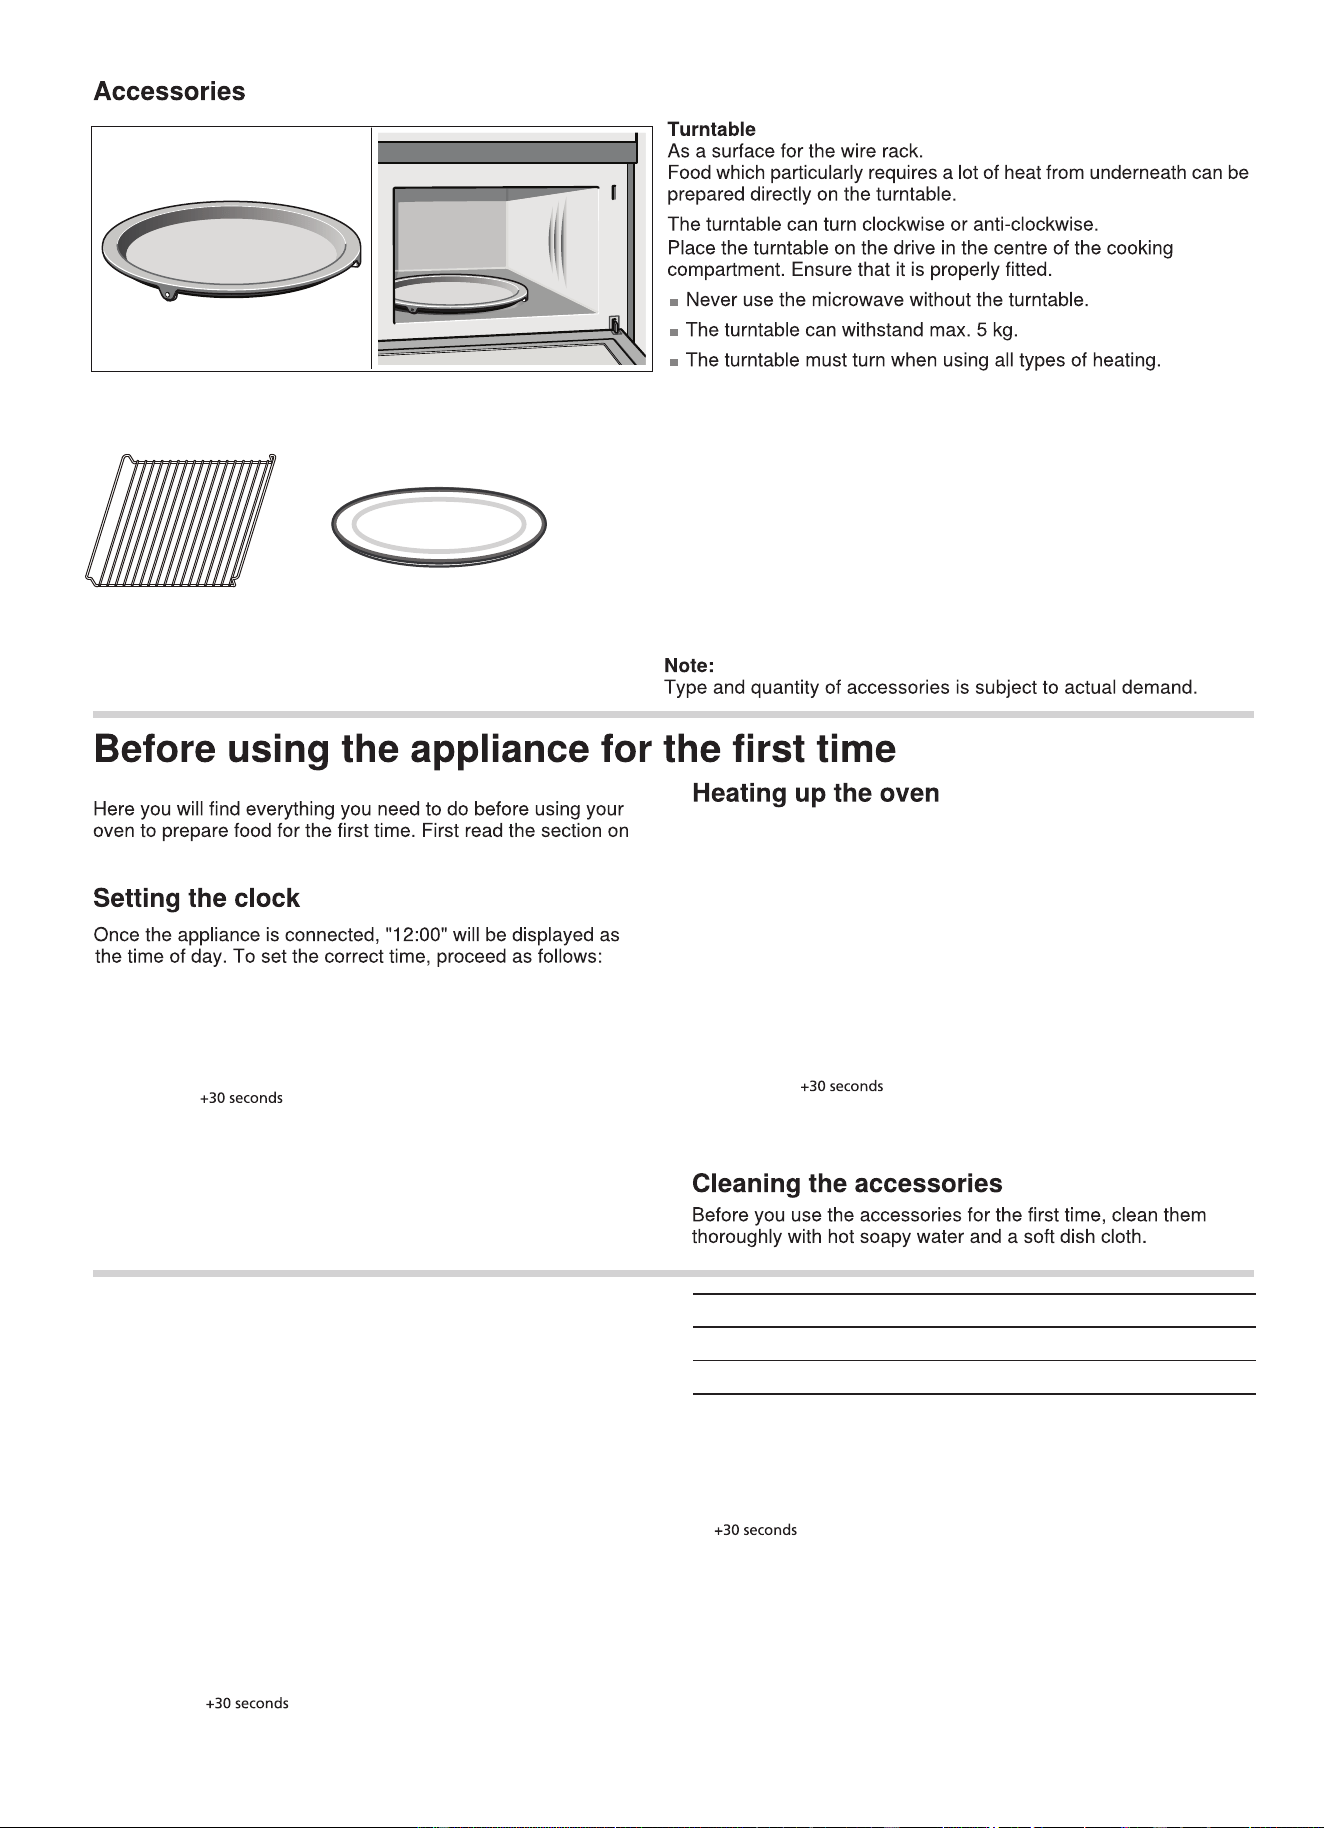
Wire rack
For grilling, e.g. steaks, sausages and for toasting bread.
As a support for shallow dishes.
Ceramic tray
For microwave cooking and conventional cooking. You can place food,
like a popcorn bag or potatoes, directly on the ceramic tray.
The ceramic tray will get hot during convection cooking. Place the
ceramic tray on top of the metal tray turntable. The ceramic tray can
remain in the oven for all cooking modes, unless “Bake on Metal Tray”
is required.
IMPORTANT SAFETY INSTRUCTIONS.
3.
Touch
to adjust the cooking time.
TIME
Enter the numbers 6 0 0 0 with the number keys.
4.
Setting the oven
There are various ways in which you can set your oven. Here we
will explain how you can select the desired type of heating and
temperature or grill setting. You can also select the
oven cooking
time for your dish. Please refer to the section on
Setting the time-
setting options
.
Setting Convection mode
Opening the oven door during operation
Operation is suspended. After closing the door, touch the
key. Operation continues.
Cancelling operation
1.
Touch Convection
Example: Roast 350 for 20 minutes
° F
twice to enter roast mode.
2.
Enter the numbers 3 5 0 with the number keys.
3.
Touch
to adjust the cooking time.
TIME
Enter the numbers 2 0 0 0 with the number keys.
4.
Touch Start/Enter to start cooking.
5.
Start/Enter
Touch Clear/Off to cancel the operation.
The cooling fans may continue to run for a while and then
switch off automatically.
Program Touch Convection key Temperature range
Bake once 250~400
℉
300~450℉twiceRoast
Note: If you do not need to adjust the time, skip Step 3-4.
PREHEAT
Enter the temperature setting with the number keys.
The input temperature should be within 100 to 450 .
° F
Start/Enter
Clear/Off
Power
level
Microwave
output
Use for
100% Boiling water
Cooking ground meat
Making candy
Cooking fresh fruit & vegetables
Cooking fish & poultry
Preheating browning dish
Reheating beverages
Cooking bacon slices
90% Reheating meat slices quickly
Saute onions,
celery & green peppers
80% All reheating
Cooking scrambled eggs
70% Cooking breads & cereal products
Cooking cheese dishes
Cooking muffins,
brownies & cupcakes
Cooking whole poultry
60% Cooking
pasta
Clear/Off
50% Cooking meat
Cooking custard
Cooking spare ribs,
rib roast & sirloin roast
EN-13
Microwave power settings
You can select from 11 different microwave power levels.
If you do not set a power level, the microwave will
automatically operate at the highest power level.
The table below provides suggested power levels for
various types of food that can be prepared in the
microwave.
PWR100
PWR90
PWR80
PWR70
PWR60
PWR50

40% Cooking less tender cuts of meat
Reheating frozen packaged foods
30% Thawing meat, poultry & seafood
Cooking small quantities of food
Finish cooking casseroles,
stew & some sauces
Melting chocolate
20% Softening butter & cream cheese
10% Softening ice cream
Raise yeast dough
Power
level
Microwave
output
Use for
1.
Enter the desired cook time with the number keys. The
timer display will fill in from right to left.
Example: To set a microwave time of 20 minutes and
30 seconds, enter the numbers 2 0 3 0.
2.
You can start microwave operation with the default
-or -
you can set a different power level. Touch
Power Level
.
3.
Enter the desired power level using the number keys.
4.
Touch Start/Enter to start microwave operation.
The microwave ti
mer will start to count down.
Start/Enter
Speedy microwave cooking
Use the key to quick-start your
microwave at the highest power level. You can touch the
key repeatedly to increase the microwave time in
increments of 30 seconds.
Touching this key during microwave operation will add
30 seconds to the remaining microwave time.
Start/Enter
1.
In waiting state, touch number keys 1 to 9 to start
100% microwave cooking in 1 to 9 minutes.
2.
If the door is closed, the oven will start to cook
automatically after 2 seconds.
1.
Enter the desired cook time with the number keys. The
timer display will fill in from right to left.
2.
Touch
Power Level
.
3.
Enter the desired power level using the number keys.
Touch
Power Level
.
4.
Enter the desired power level using the number keys.
5.
Touch
.
6.
Start/Enter
Enter the desired cook time with the number keys.
7.
Touch Start/Enter to start microwave operation.
8.
The buzzer will sound 3 times when the first stage cooking
is finished and enter to the second stage.
EN-14
PWR40
PWR30
PWR20
PWR10
PWR0
0% Work with fan for no power
Remove the odour of the oven.
power level PWR100 by touching Start/Enter,
Cancelling operation
Touch Clear/Off to cancel the operation.
The cooling fans may continue to run for a while and then
switch off automatically.
Touch Auto Defrost once or twice to choose "GROUND
MEAT" or "MEAT PIECES".
Enter the weight of the food you want to defrost using
the number keys.
Touch Start/Enter to start defrosting.
3.
-
1.
Touch
2.
Touch
repeatedly to scroll through
all Auto menu .
Auto menu
.
Auto menu
Touch Start/Enter to start cooking.
4.
Opening appliance door during operation
Opening the appliance door during operation will
interrupt the current mode. Close the appliance door and
then touch Start/Enter to resume operation.
Program Weight range Food placement
1 - Chicken Breasts 0.5 - 3.0 lbs Wire rack,
facing down
2 - Chicken Thigh 0.5 - 3.0
3 - Whole Poultry 1.5 - 4.5 lbs Turntable
4 - Beef Roast 0.5 - 3.25 lbs
5 - Pork Tenderloin 1.0 - 3.0 lbs
6 - Pork Chops 0.5 - 3.0 lbs
7 - Meatloaf 1.0 - 3.25 lbs
8 - Fish Fillets 0.5 - 2.0 lbs
Wire rack,
facing down
Turntable
Wire rack,
facing down
Turntable
Wire rack,
facing down
Wire rack,
facing down
lbs
EN-15
Cancelling operation
Touch Clear/Off to cancel the operation.
The cooling fans may continue to run for a while and then
switch off automatically.
Touch number keys
3.
to adjust the weight of food.
lbs
Popcorn
CAUTION
Do not leave oven unattended while popping corn.
Popcorn may ignite and cause fire.
The popcorn feature lets you pop 3 different bag sizes of
commercially packaged microwave popcorn. Use the
following table to determine the setting to use:
Setting Popcorn mode
1.
Touch Popcorn.
The cook time is displayed.
2.
Touch Popcorn repeatedly or touch number
key 1 to 3 to choose the desired weight.
Bag size Touch Popcorn key
1.2 oz. once
2.5 oz. twice
3.5 oz. 3 times
3.
Touch Start/Enter.
The microwave timer starts counting down.
When the microwave time has elapsed, a beep will
sound.
Beverage
The beverage feature heats 0.5 to 2 cups of a beverage.
Use the table below to determine the setting to use.
Setting Beverage mode
1.
Touch Beverage.
The cook time is displayed.
2.
Touch Beverage
When the microwave time has elapsed, a beep will
sound.
Amount Touch Beverage key
0.5 cups (about 4 oz.) once
1 cup (abo
ut 8 oz.) twice
1.5 cups (about 12 oz.) 3 times
2 cups (about 16 oz.) 4 times
Frozen Foods
Use the Frozen Foods feature to prepare frozen
convenience foods, like chicken nuggets, french fries,
fish sticks, using bottom heat and Convection.
Place the food you want to cook directly on the metal tray
turntable.
You can set a temperature range from 200 to 450° F
(100 to 230° C).
Setting Frozen Foods
1.
Touch Frozen Foods.
2.
You can change the temperature by using the number
keys. You can enter a temperature between 200 and
450° F (100 - 230° C).
repeatedly or touch number
key 1 to 4 to choose the desired amount.
3.
Touch Start/Enter.
The microwave timer starts counting down.
Touch Start/Enter
4.
to start cooking.
Pizza
You can use the Pizza mode to bake three different types
of pizza:
Mode no. Pizza type Bake on
1 Frozen pizza Metal tray
2 Fresh pizza Metal tray
3 Microwave pizza Ceramic tray
Pizza tips
Check pizza before minimum time, pizza may cook
faster compared to a traditional oven.
For fresh pizza use a pizza paddle for sliding the pizza
on and from the metal turntable.
If using a pizza paddle, sprinkle the paddle liberally
with cornmeal for ease in transferring the dough to the
metal turntable.
Maximum size is 12 inches for fresh and frozen pizzas.
Avoid using a pizza stone as it can damage the oven.
The metal turntable can be used for cutting pizza into
slices. Remove the turntable from the oven after the
pizza is baked.
Setting Pizza mode for fresh or frozen pizza
You can set a temperature range from 375 to 450° F
(190 to 230° C) for fresh and frozen pizza modes.
You can bake fresh or frozen pizza directly on the metal
tray turntable.
1.
Touch Pizza.
2.
Touch Pizza repeatedly to scroll through all pizza
modes.
3.
Touch Start/Enter.
EN-16
Cancel operation
Touch Clear/Off to cancel the operation.
The cooling fans may continue to run for awhile and then
switch off automatically.
Opening appliance door during operation
Opening the appliance door during operation will
interrupt the current mode. Close the appliance door and
then touch Start/Enter to resume operation.
3.
Touch
the cooking time.
TIME
and then touch number keys to adjust

Sensor cooking
You can select two sensor cooking modes. Sensor
cooking allows you to cook many of your favorite foods
without selecting cooking times and power levels. The
microwave oven automatically determines the required
cooking time for each food item.
For best results for cooking by sensor, follow these
recommendations:
Food cooked with the sensor system should start from
normal storage temperature.
Turntable tray, ceramic tray and outside of container
should be dry.
Foods should always be covered loosely with
microwavable plastic wrap, wax paper or lid.
Do not open the door or touch Clear/Off key during
sensing time. When sensing time is over, the oven
beeps once and the remaining cooking time will
appear in the display. At this time you can open the
door to stir, turn or rearrange the food.
Sensor Reheat
The Sensor Reheat feature lets you reheat dinner plates
or casseroles (8-16 oz.) for your cooking convenience.
Setting Sensor Reheat
1.
Touch Sensor Reheat.
2.
Touch Start/Enter.
sensing is displayed. The mic
rowave operates during
sensing.
3.
When sensing is complete, a beep will sound and the
calculated cook time will start to count down.
Note: Do not open the door during the sensing
process, or the program will be cancelled.
Notes
Cover with vented plastic wrap or wax paper.
Reheat food on a microwaveable dinner plate.
EN-17
The appliance starts preheating.
The set temperature is reached once the preheat bar has
filled up completely and a beep sounds.
Start/Enter
Opening appliance door during operation
Opening the appliance door during operation will
interrupt the current mode. Close the appliance door and
then touch Start/Enter to resume operation.
4. You can change the temperature by using the number
keys. And you also can change the cooking time by
touching TIME and then touching number keys.
5. Touch to confirm.
Setting Pizza mode for microwave pizza
Place the microwave pizza on the ceramic tray and put it
in the oven following package directions.
Note: Do not open the door during the sensing
process, or the program will be cancelled.
Once the calculated cook time is displayed, you can
open the door to stir, turn or rearrange the food. Touch
Start/Enter to resume operation.
Opening appliance door during operation
Opening the appliance door during operation will
interrupt the current mode. Close the appliance door and
then touch Start/Enter to resume operation.
1.
Touch Pizza.
2.
Touch Pizza repeatedly until “MICROWAVE PIZZA”
is displayed.
3.
Touch
The appliance starts sensing.Start/Enter.
When sensing is complete, a beep will sound and the
calculated cook time will start to count down.
4.
Once the calculated cook time is displayed, you can
open the door to stir, turn or rearrange the food. Touch
Start/Enter
to resume operation.
When sensor reheat is finished, a beep will sound.
Reheat cooking suggestions
Food Directions Quantity
Dinner plate Use only pre-cooked, refrigerated foods. Cover plate with vented
plastic wrap or waxed paper, tucked under plate. If food is not hot
enough after heating with the Reheat feature, continue heating using
manual time and power level setting.
Contents:
3-4 oz. meat, poultry or fish (up to 6 oz. with bone)
1/ 2 cup starch (potatoes, pasta, rice, etc.)
1/ 2 cup of vegetables (about 3-4 oz.)
1 serving (1 plate)
Casserole, Pasta Cover plate with lid or vented plastic wrap. If food is not hot enough
after heating with the Reheat feature, continue heating using manual
time and power level setting.
Stir foods once before serving.
Contents:
Casserole: refrigerated foods (such as beef stew or lasagna)
Pasta: Canned spaghetti and ravioli, refrigerated foods
1 to 4 servings
Sensor Cook
Sensor Cook allows you to cook many of your favorite
foods without selecting cooking times and power levels.
The microwave oven automatically determines the
required cooking time for each food item.
Sensor Cook programs
Sensor Cook
Program
Quantity Cooking tips
1 - Baked
Potato
1 - 4 potatoes
(8 - 32 oz.)
Pierce skin with a fork.
Do not cover.
After cooking, allow to
stand wrapped in foil
for 5 minutes.
3 - Fresh
Vegetables
4 - 16
oz.
(0.25 - 1 lbs)
No water is needed if
vegetables have just
been washed. Add
2 tablespoons water
per 8 ounces of fresh
vegetables.
Meat
8 - 24 oz.
(0.5 - 1.5 lbs)
After cooking, allow to
stand, covered,
for 3 - 4 minutes.
Seafood
8 - 20 oz.
(0.5 -
1.25 lbs)
Roll thin edges
underneath. Arrange in
a ring around micro-
waveable dish.
Entrees
10 - 20 oz. Follow package
instructions for venting,
cutting plastic film, etc.
2 - Ground
4 - Fish/
5 - Frozen
Setting Sensor Cook
The appliance must be turned off.
Example: Set Sensor Cook for Ground Meat.
1.
Touch Sensor Cook.
EN-18
2.
Touch Sensor Cook repeatedly to select Ground Meat.
3.
Touch Start/Enter.
The program will start sensing with the microwave
operating.

When sensing is complete, a beep will sound and the
calculated cook time will start to count down.
Note: Do not open the door during the sensing
process, or the program will be cancelled.
Once the calculated cook time is displayed, you can
open the door to stir, turn or rearrange the food. Touch
Start/Enter to resume operation.
1.
Touch Clock.
2.
Enter the correct time using the number keys.
Example: To set the clock to 12:41 type in 1 2 4 1.
3.
Touch Start/Enter to confirm.
Clock
Clock
2.
Enter the correct time using the number keys.
3.
Touch Start/Enter to confirm.
EN-19
When sensor cook is finished a beep will sound.
Opening appliance door during operation
Opening the appliance door during operation will
interrupt the current mode. Close the appliance door and
then touch Start/Enter to resume operation.
Cancel operation
Touch Clear/Off to cancel the active oven mode.
The cooling fans may continue to run for awhile and then
switch off automatically.
Opening the appliance door during operation will
interrupt the current mode. Close the appliance door and
then touch Start/Enter to resume operation.
Broil
The Broil feature uses intense heat radiated from the
upper element.
You can set two intensity levels:
Broil high
Broil low
Setting Broil mode
The appliance must turned off.
1.
Touch
2.
Touch
Broil low mode.
Broil HIGH-LOW again , to change
to
Touch Start/Enter to start operation.
Note: Always use a broil pan when cooking in Broil
mode (see optional accessories).
Opening appliance door during operation
Cancel operation
Touch Clear/Off to cancel the operation.
The cooling fans may continue to run for awhile and then
switch off automatically.
.
Broil HIGH-LOW
Enter the desired cooking time with the number keys.
3.
4.

Panel lock
Panel lock
EN-20
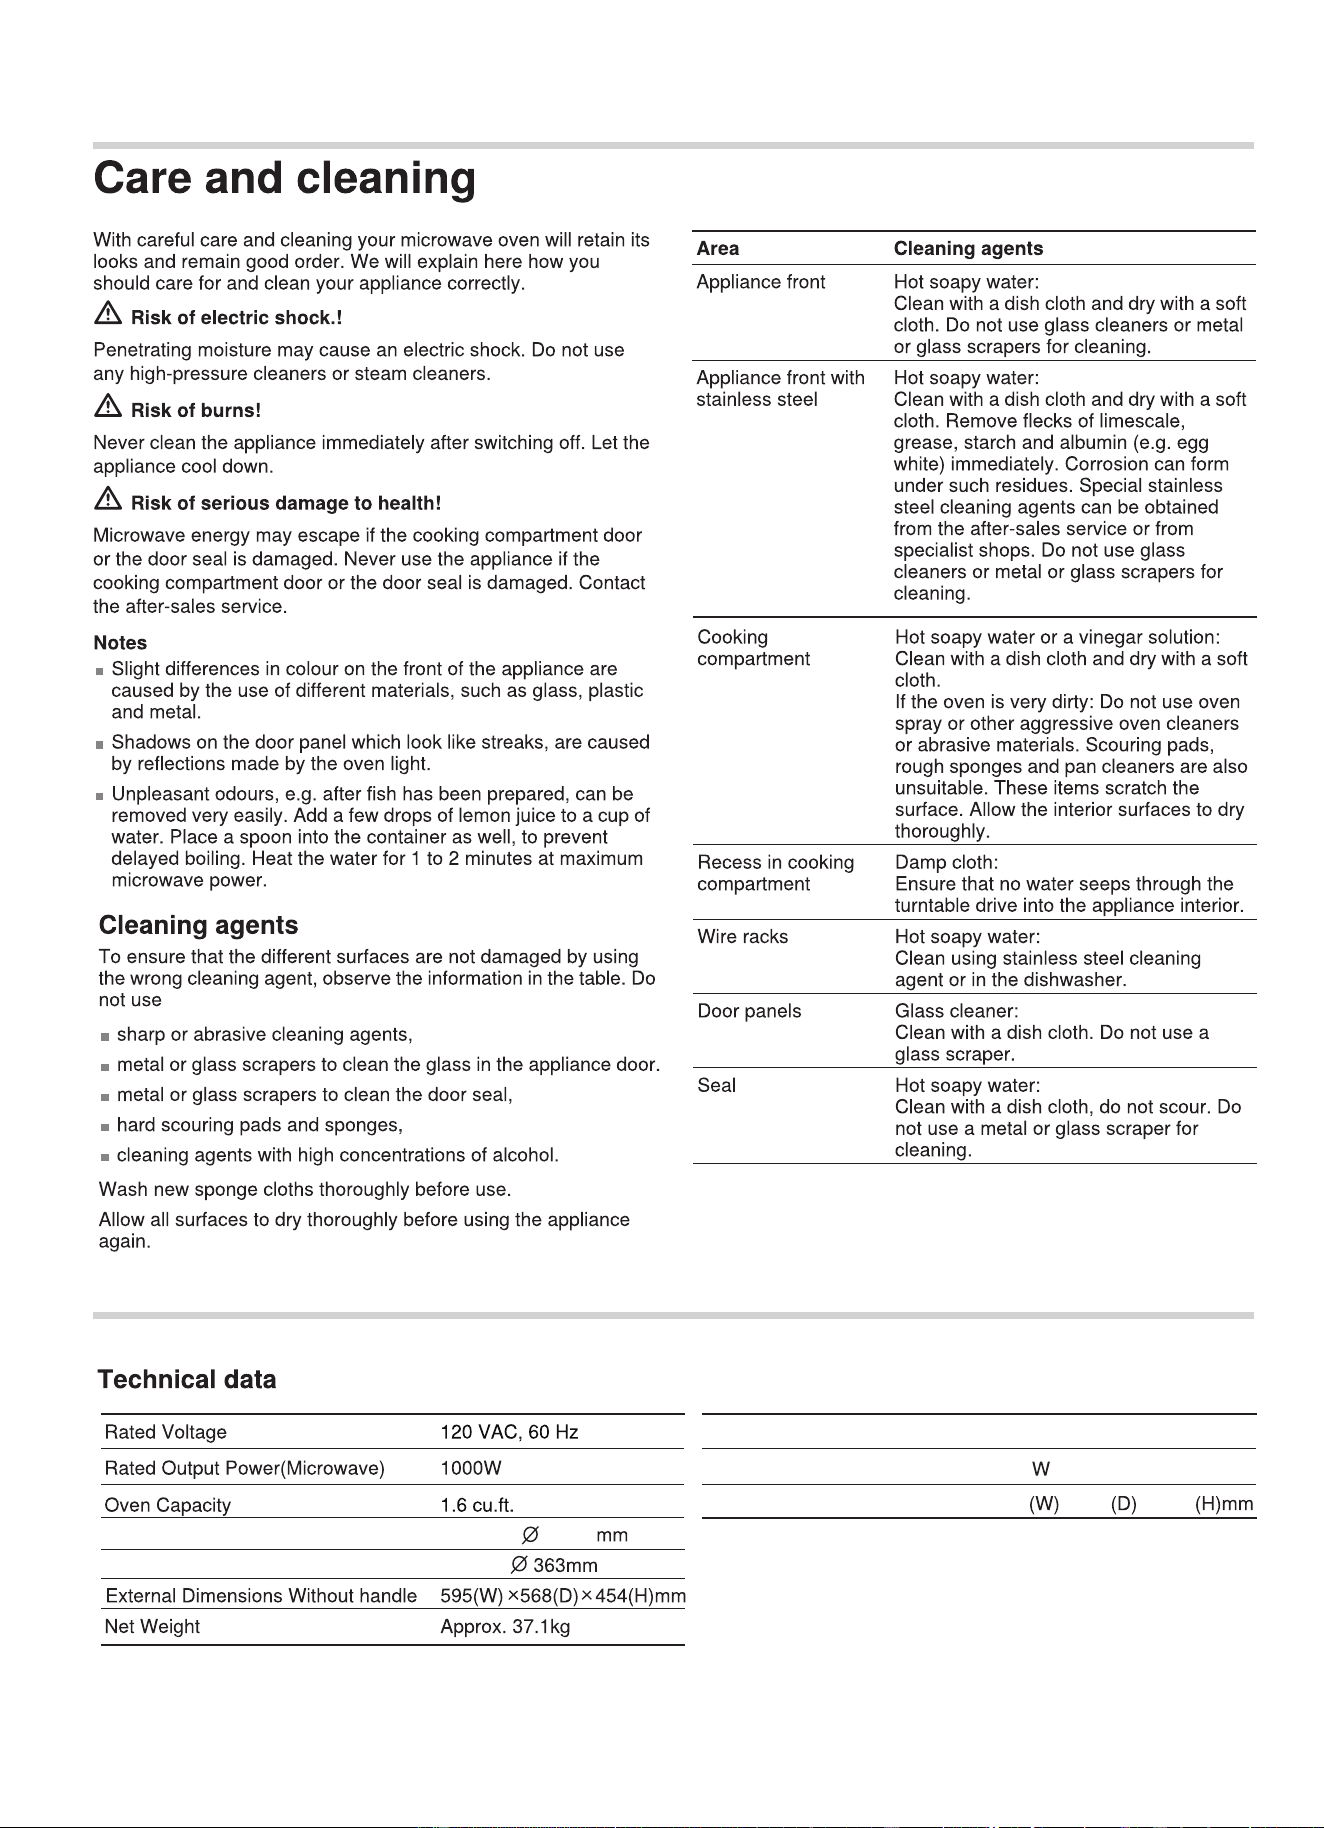
EN-21
1700 W
1750
x34.5410.1 x391.1
Convection power
Broil High & Low Power
350.413.937”/
14.29”/
Ceramic turntable Diameter
Metal turntable Diameter
Wire rack dimension
EN-22

The charts can be used as a guide. Follow package or recipe directions.
Broil
Place pan of food on the wire rack with the recess facing
up.
Food Oven tem-
perature
Cooking time
(minutes)
Internal tem-
perature
Cooking tip / Procedure
Hamburgers,
" to 1", medium
High Side 1: 9 - 11
Side 2: 10 - 12
160° F
(71° C)
Use pan that allows fat to drain away from the
food.
High fat meat causes more spattering.
Lamb chops,
1", medium
High Side 1: 9 - 11
Side 2: 10 - 12
160° F
(71° C)
Use pan that allows fat to drain away from the
food.
Slit fat to prevent curling.
Sausage, fresh High Side 1: 9 - 11
Side 2: 8 - 10
160° F
(71° C)
Use pan that allows fat to drain away from the
food.
Steaks,
" to 1",
medium rare
High Side 1: 9 - 11
Side 2: 10 - 12
145° F
(63° C)
Use pan that allows fat to drain away from the
food.
Slit fat to prevent curling.
Steaks, " to 1",
medium
High Side 1: 9 - 11
Side 2: 10 - 12
160° F
(71° C)
Use pan that allows fat to drain away from the
food.
Slit fat to prevent curling.
Toasting bread Low 3 - 5 - Check at minimum time.
Top browning cas-
seroles
Low 3 - 5 - Use only metal or glass ceramic dishes such as
Corning Ware®
Convection Broil
Place pans of food on the wire rack with the recess
facing up.
Food Oven
temperature
Cooking time
(minutes)
Internal
temperature
Cooking tip / Procedure
Chicken breasts,
bone-in
Low Side 1: 9 - 11
Side 2: 10 - 12
170° F
(76° C)
Start breast side down.
Fish filets,
" to 1"
Low 11 - 15 145° F
(63° C)
No turning of fish.
Turn thin ends under.
Brush with olive oil or butter to prevent sticking.
EN-23
Convection
Preheat the oven before adding foods. Once the oven is
preheated, place the food in the oven quickly to minimize
loss of heat. Place pans of food on the wire rack with the
recess facing down.
Food Oven
temperature
Cooking time
(minutes)
Cooking tip / Procedure
Biscuits 350° F (175° C) 13 - 20 A dark or dull baking sheet will result in a browner,
crisper crust.
Cake, 13"x9" 350° F (175° C) 23 - 28 For a tender, light golden brown crust, use light,
shiny
metal bakeware.
Cookies 350 - 375° F
(175 - 190° C)
8 - 14 A dark or dull baking sheet will result in a browner,
crisper crust.
Cornbread 425 - 450° F
(220 - 230° C)
25 - 30 Use a square baking pan.
Cupcakes 350° F (175° C) 18 - 21 Ideal for ready-made mixes. Prepare according to
package directions.
Dinner rolls 400° F (205° C) 12 - 18 Use with fresh or frozen dinner rolls.
Fresh fruit pie 375° F (190° C) 50 - 60 A dark or dull baking pie pan will result in a browner
,
crisper crust.
Muffins 400° F (205° C) 10 - 18 Ideal for ready-made mixes. Prepare according
to package directions.
Roasted vegetables 425 - 450° F
(220 - 230° C)
15 - 20 Use dark or dull metal pan. Stir once.
Shortcakes 450° F (230° C) 10 - 18 Best for individual shortcakes. Use dark coated pan.
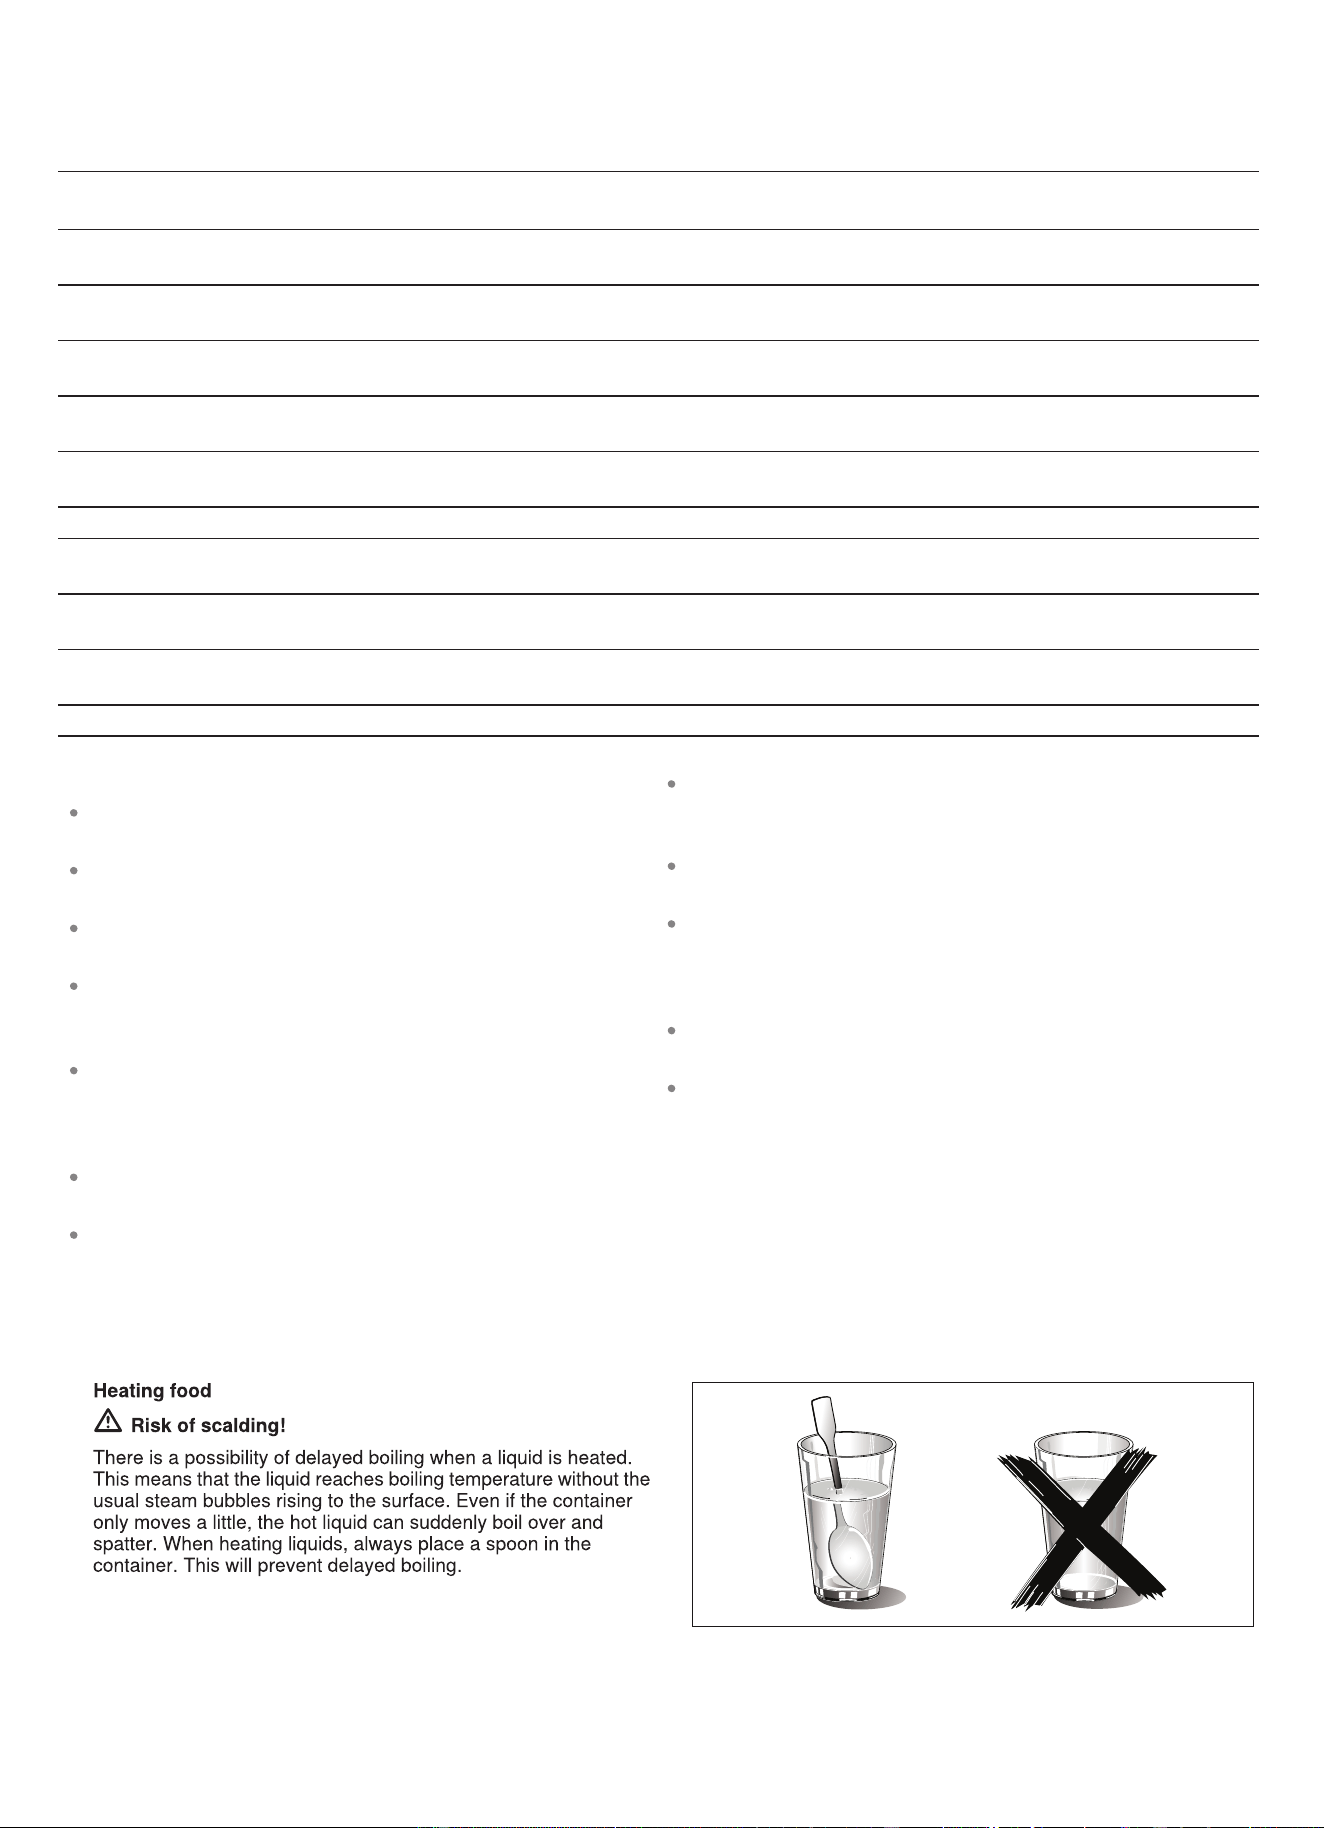
Cooking eggs in your microwave
Never cook eggs in the shell and never warm hard-
cooked eggs in the shell; they can explode.
Always pierce yolk on whole eggs to keep them from
bursting.
Cook eggs just until set; they will become tough if
overcooked.
Cooking scrambled eggs is safe.
Cooking vegetables in your microwave
Vegetables should be washed just before cooking.
Rarely is extra water needed. If dense vegetables such
as potatoes or carrots are being cooked, add about
¼ cup of water.
Small vegetables (sliced carrots, peas, lima beans,
etc.) will cook faster than larger vegetables.
Whole vegetables, such as potatoes, acorn squash or
corn on the cob, should be arranged in a circle on the
turntable before cooking. They will cook more evenly if
turned over halfway through cooking.
Always place vegetables like asparagus and broccoli
with the stem ends pointing towards the edge of the
dish and the tips toward the center.
When cooking cut vegetables, always cover the dish
with a lid or vented microwavable plastic wrap.
Whole, unpeeled vegetables such as potatoes, sweet
potatoes, squash, eggplant, etc., should have their
skin pricked in several locations before cooking to
prevent them from bursting.
For more even cooking, stir or rearrange whole
vegetables halfway through the cook time.
Most of the time, the denser the food, the longer the
required standing time. For example, a baked potato
should stand for 5 minutes before serving, while a dish
of peas may be served immediately.
EN-24
Cooking seafood in your microwave
Be sure to place fish on a microwave-safe roasting rack
in a microwave-safe dish. Be sure to always cook fish
until it flakes easily with a fork. Use a tight cover to steam
fish; a lighter cover of wax paper or paper towel provides
less steaming. And be sure not to overcook fish; check it
for doneness at a minimum cooking time before cooking
longer.
Cleaning and Maintenance
WARNING
Be sure the entire appliance has cooled and grease
has solidified before attempting to clean any part of
the appliance.
Cleaning Guide
For best performance and for safety reasons, keep the
oven clean inside and outside. Take special care to
keep the inner door panel and oven front frame free of
food and grease build–up.
Never use abrasive scouring powder or pads on the
microwave. Wipe the microwave oven inside and out
with a soft cloth and warm (not hot) mild detergent
solution. Then rinse and wipe completely dry.
Wipe spatters immediately with a wet paper towel,
especially after cooking greasy foods like chicken or
bacon.
Clean your microwave oven weekly or more often, if
needed.
Never operate the microwave oven without food in the
oven cavity, unless pre-heating with Convection, Pizza,
Frozen Foods and Keep Warm mode; this can
damage the magnetron tube or ceramic tray. You may
wish to leave a cup of water standing inside the oven
when it is not in use to prevent damage if the oven is
accidentally turned on.
Seafood Power level Cook time Directions
Fish steaks up to
1½ lbs
medium high (7) 7–11 min. / lb Arr
ange fish on roasting rack with meaty portions
towards the outside of rack. Cover with wax paper.
Turn over and rearrange halfway through cook time.
Cook until fish flakes easily with fork.
Let stand 3–5 mins.
Fish fillets up to
1½ lbs.
medium high (7) 7–11 min. / lb Arrange fillets in a baking dish, turning any thin pieces
under. Cover with wax paper. If over ½ inch thick, turn
over and rearrange halfway through cook
time. Cook
until fish flakes easily with fork.
Let stand 2–3 mins.
Shrimp up to
1½ lbs.
medium high (7) 7–11 min. / lb Arrange shrimp in a baking dish without overlapping or
layering. Cover with wax paper. Cook until firm and
opaque, stirring 2 or 3 times.
Let stand 5 mins.
Part Recommendations
Oven cavity Keep inside (cavity) of the oven clean. Food particles and spilled liquids can stick to the oven
walls, causing the oven to work less efficiently.
Wipe up spills immediately. Use a damp, clean cloth and mild soap. DO NOT use harsh deter-
gents or abrasive cleaners.
To help loosen baked–on food particles or liquids, heat 2 cups of water (add the juice of
1 lemon if you desire to keep the oven fresh smelling
) in a 4 cup measuring glass at High
power for 5 minutes or until boiling. Let stand in oven cavity for 1 or 2 minutes.
For baked-on grease spatters, wash with hot, soapy water, rinse and dry.
Wire rack Wash with soapy water. Rinse thoroughly and dry, or gently rub with cleansing powder or soap-
filled pads as directed. The wire rack can also be washed in the dishwasher.
Metal turntable tray Remove metal turnta
ble tray from the oven when cleaning the oven cavity and tray.
Wash the metal turntable tray in warm sudsy water or in the dishwasher.
Ceramic tray Clean with warm, soapy water or in the dishwasher.
Door seal Wipe with damp cloth.
EN-25

Door glass Wash with soap and water or glass cleaner. Apply Fantastik® or Formula 409® to a clean
sponge or paper towel and wipe clean. Avoid using powder cleaning agents, steel wool pads
and oven cleaners.
If steam accumulates inside or outside the oven door, wipe with a soft cloth. Steam can accu-
mulate when operating the oven in high humidity and in no way indicates microwave leakage.
Painted surfaces Clean with hot
soapy water or apply Fantastik® or Formula 409® to a clean sponge or paper
towel and wipe clean. Avoid using powder cleaning agents, steel wool pads and oven cleaners.
Stainless steel sur-
faces/ exterior sur-
faces
Always wipe or rub in the direction of the grain. Clean with a soapy sponge, then rinse and dry,
or wipe with Fantastik® or Formula 409® spray on a paper towel. Protect and polish with Stain-
less Steel Magic® and a s
oft cloth. Remove water spots with a cloth dampened with white vine-
gar.
Plastic & Controls When cool, clean with soapy water, rinse and dry.
Printed areas
(words & numbers)
Do not use abrasive cleaners or petroleum based solvents.
Part Recommendations
EN-26