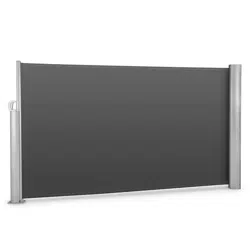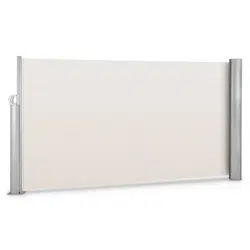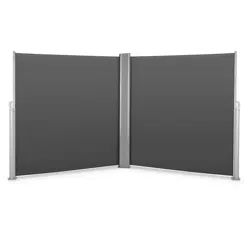
Bari
Seitenmarkise
Side Awning
Cortavientos
Pare-vue
Tenda laterale
10028008 10028013 10028014 10028015
10028016 10028017 10028018 10028019
Sehr geehrter Kunde,
wir gratulieren Ihnen zum Erwerb Ihres Gerätes.
Lesen Sie die folgenden Hinweise sorgfältig durch und
befolgen Sie diese, um möglichen Schäden vorzubeugen.
Für Schäden, die durch Missachtung der Hinweise und
unsachgemäßen Gebrauch entstehen, übernehmen wir
keine Haftung. Scannen Sie den folgenden QR-Code,
um Zugriff auf die aktuellste Bedienungsanleitung und
weitere Informationen rund um das Produkt zu erhalten:
Dear Customer,
Congratulations on purchasing this device. Please read
the following instructions carefully and follow them to
prevent possible damages. We assume no liability for
damage caused by disregard of the instructions and
improper use. Scan the QR code to get access to the
latest user manual and more product information.
Estimado cliente,
Le felicitamos por la adquisición de este producto.
Lea atentamente las siguientes instrucciones y sígalas
para evitar posibles daños. No asumimos ninguna
responsabilidad por los daños causados por el
incumplimiento de las instrucciones y el uso inadecuado.
Escanee el siguiente código QR para obtener acceso a
la última guía del usuario y más información sobre el
producto.
Chère cliente, cher client,
Toutes nos félicitations pour l’acquisition de ce nouvel
appareil. Veuillez lire attentivement et respecter les
instructions de ce mode d’emploi an d’éviter d’éventuels
dommages. Nous ne saurions être tenus pour responsables
des dommages dus au non-respect des consignes et à la
mauvaise utilisation de l’appareil. Scannez le QR-Code
pour obtenir la dernière version du mode d‘emploi et des
informations supplémentaires concernant le produit.
Gentile cliente,
La ringraziamo per aver acquistato il dispositivo. La
preghiamo di leggere attentamente le seguenti istruzioni
per l’uso e di seguirle per evitare possibili danni. Non ci
assumiamo alcuna responsabilità per danni scaturiti da
una mancata osservazione delle avvertenze di sicurezza
e da un uso improprio del dispositivo. Scansionare il
codice QR seguente, per accedere al manuale d’uso più
attuale e per ricevere informazioni sul prodotto.

3
DE
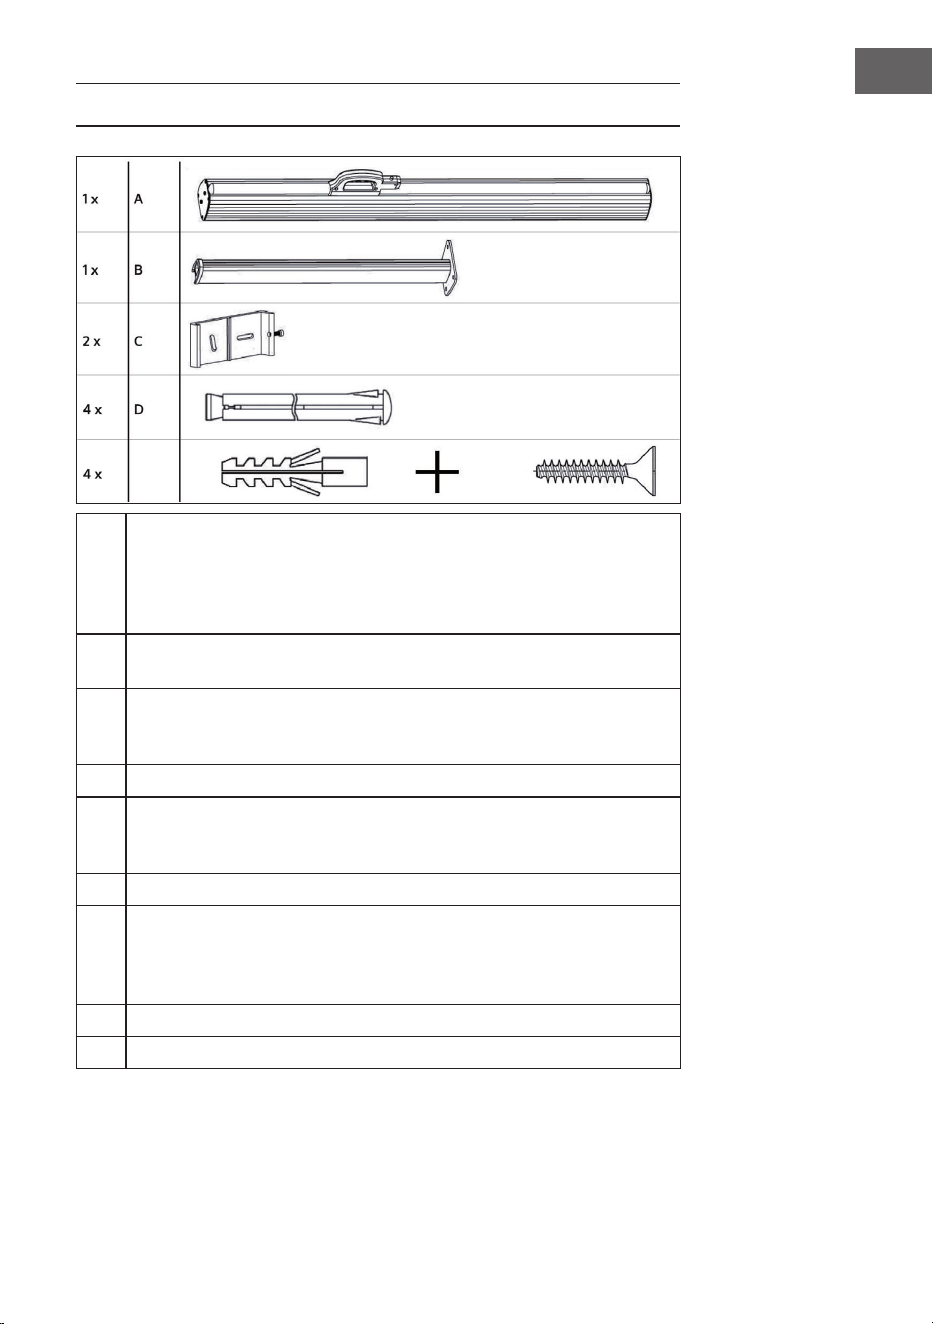
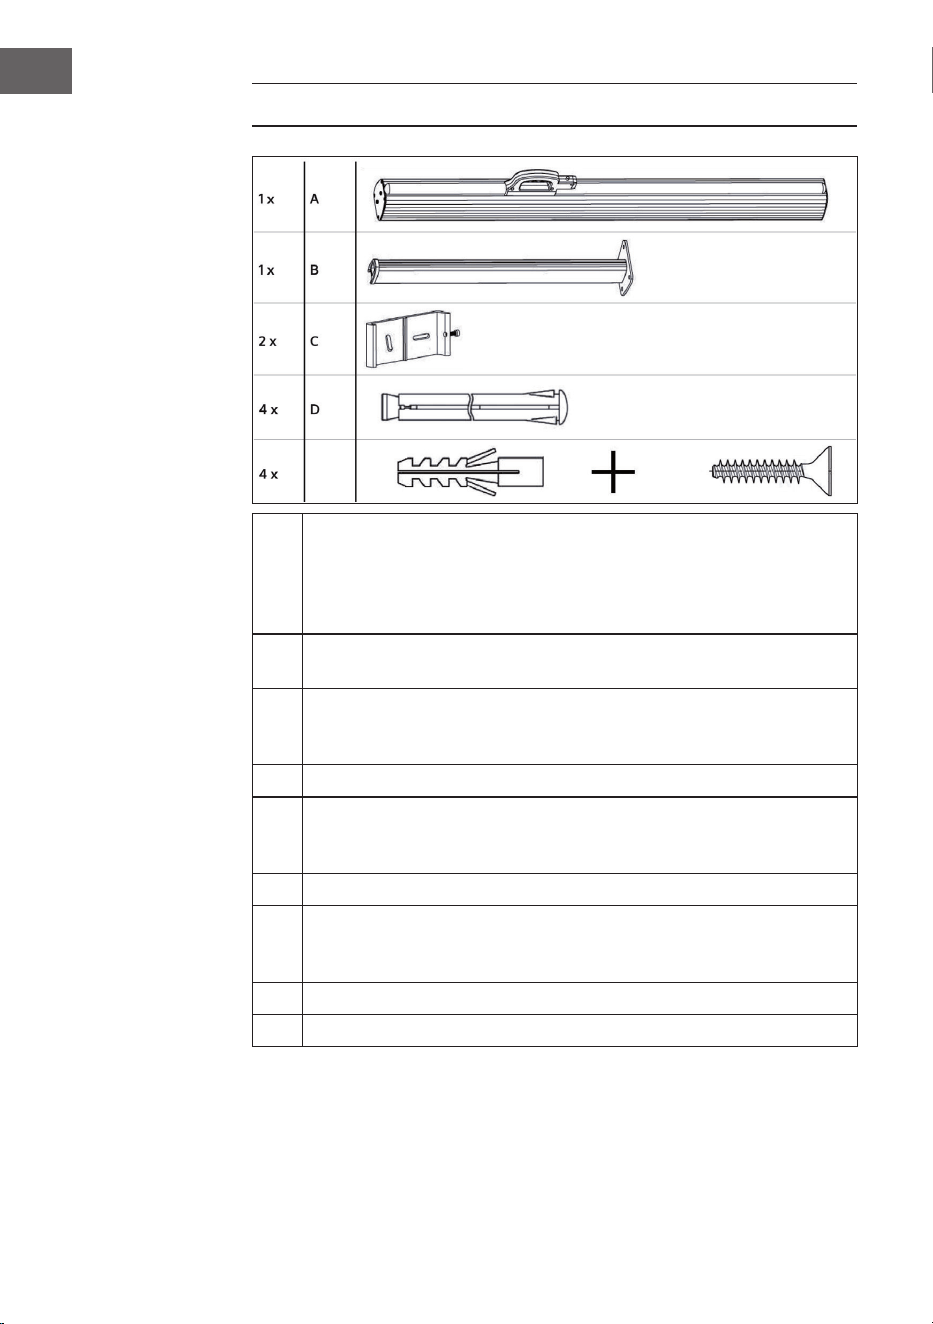
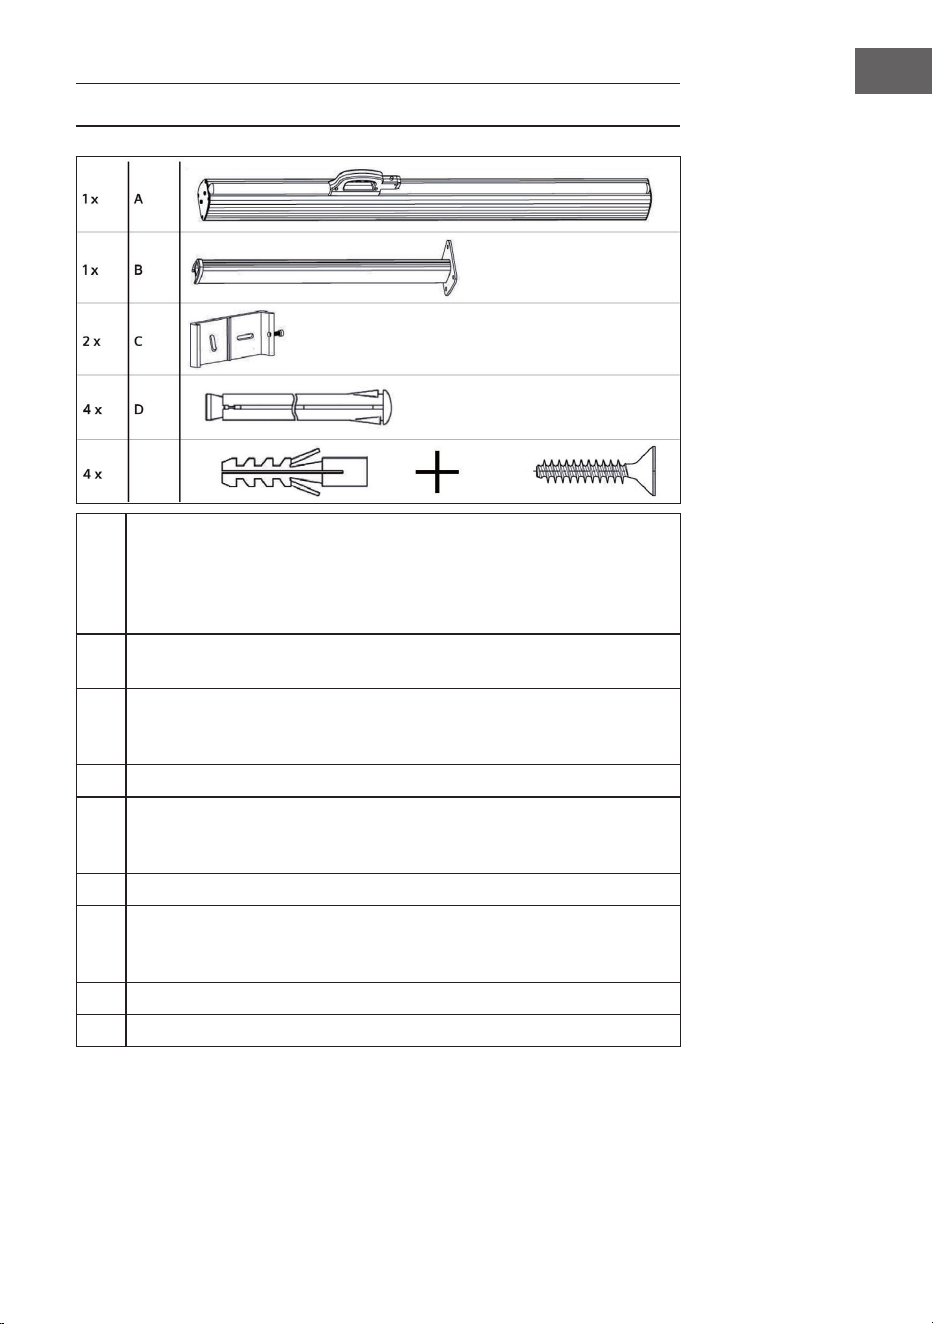
LIEFERUMFANG UND AUFBAU
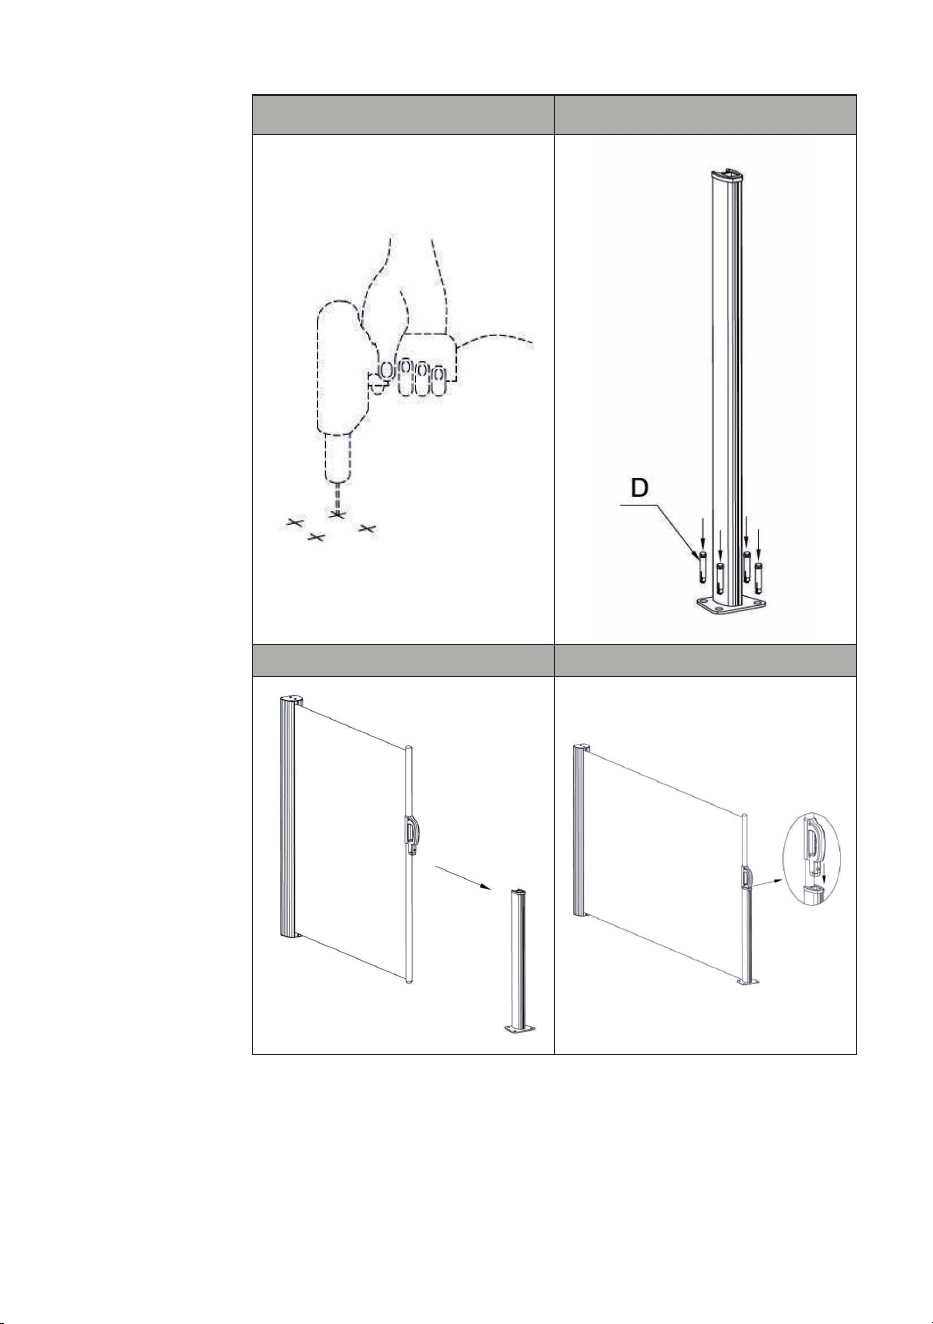
1 Zeichnen Sie Bohrlöcher an der Wand vor, an der die Markise
aufgehangen werden soll. Nutzen Sie dazu die Klammern (C)
als Schablone. Die untere Klammer sollte etwa 20-30cm über
dem Boden angebracht werden, die zweite in Höhe von 120cm
(10028008/13/14), 140cm (10028015/16/17) bzw. 160cm
(10028018/19).
2 Bohren Sie mit einem 6mm-Bohrer. Stellen Sie zuvor unbedingt
sicher, dass in der Wand keine Gas-, Wasser- oder elektrische
Leitungen verlaufen.
3 Bringen Sie die Montageklammern (C) mit den mitgelieferten Schrauben
und Dübeln (oder mit einer für den speziellen Untergrund besser
geeignete Alternative) wie in der Skizze zu sehen an der Wand an.
4 Hängen Sie die Markise in die Montageklammern ein.
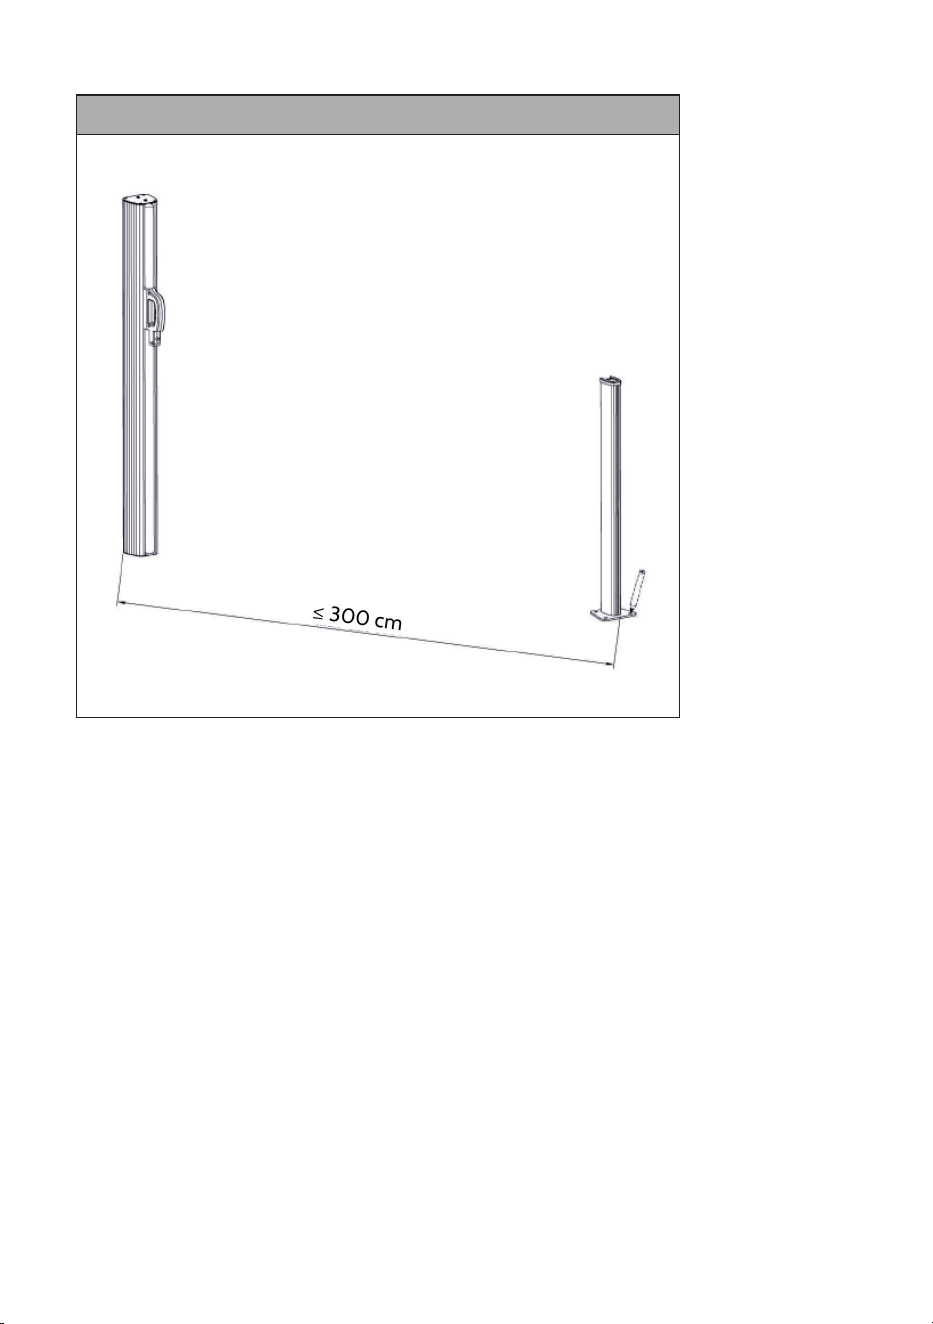
5 Stellen Sie den Pfahl (B) an die gewünschte Stelle, maximal 3 Meter
von der Wandhalterung entfernt (= Länge der Markise) auf und
nutzen Sie seine Bodenplatte als Schablone für die Bohrlöcher im
Boden.
6 Bohren Sie mit einem 6mm-Bohrer, der für den Untergrund geeignet ist.
7 Die mitgelieferten M6-Metallrahmendübel sind geeignet für Beton,
Voll-, Lochstein und Porenbeton, auch mit Holz- oder ähnlicher
Vertäfelung. Schrauben Sie damit den Pfahl an den Boden.
8 Ziehen Sie die Markise aus.
9 Haken Sie sie im Pfahl ein.

4
EN
SCOPE OF DELIVERY AND ASSEMBLY
1 Premark drill holes on the wall where the sunblind is to be hung.
Use the brackets (C) as a template. The lower bracket should be
placed about 20-30 cm above the ground, the second at a height of
120 cm (10028008/13/14), 140 cm (10028015/16/17) or 160 cm
(10028018/19).
2 Drill with a 6 mm drill bit. Make absolutely sure beforehand that there
are no gas, water or electrical lines running in the wall.
3 Attach the mounting brackets (C) to the wall with the screws and dowels
provided (or with an alternative more suitable for the specic surface) as
shown in the sketch.
4 Attach the sunblind to the mounting brackets.
5 Place the pole (B) at the desired location, maximum 3 metres from
the wall bracket (= length of the awning) and use its base plate as a
template for the drill holes in the ground.
6 Drill with a 6 mm drill bit suitable for the substrate.
7 The M6 metal frame plugs supplied are suitable for concrete, solid,
perforated brick and aerated concrete, also with wood or similar
panelling. Use it to screw the pole to the ground.
8 Extend the sunblind.
9 Hook it into the pole.
5
FR
CONTENU DE LA LIVRAISON ET MONTAGE
1 Dessinez des trous de perçage sur le mur où le store doit être
accroché. Pour ce faire, utilisez les attaches (C) comme gabarit.
La pince inférieure doit être placée à environ 20-30 cm du sol, la
deuxième à une hauteur de 120 cm (10028008/13/14), 140 cm
(10028015/16/17) ou 160 cm (10028018/19).
2 Percez avec un foret de 6 mm. Assurez-vous au préalable qu'aucune
conduite de gaz, d'eau ou d'électricité ne passe dans le mur.
3 Fixez les supports de montage (C) au mur à l'aide des vis et des chevilles
fournies (ou d'une alternative mieux adaptée au support spécique)
comme indiqué sur le schéma.
4 Accrochez le store dans les pinces de montage.
5 Placez le piquet (B) à l'endroit souhaité, à 3 mètres maximum du
support mural (= longueur du store) et utilisez sa plaque de base
comme gabarit pour les trous de perçage dans le sol.
6 Percez avec un foret de 6 mm adapté au support.
7 Les chevilles pour cadres métalliques M6 fournies conviennent pour
le béton, la brique pleine, la brique perforée et le béton cellulaire,
même avec un lambris en bois ou similaire. Utilisez-les pour visser le
piquet à la base.
8 Déployez le store.
9 Accrochez-le au piquet.
6
ES
CONTENIDO DE LA ENTREGA Y EL MONTAJE
1 Marque los agujeros de perforación en la pared donde se va a colgar
el toldo. Utilice los corchetes (C) como plantilla. El soporte inferior
debe colocarse a unos 20-30 cm del suelo y el segundo a una altura
de 120 cm (10028008/13/14), 140cm (10028015/16/17) o 160cm
(10028018/19).
2 Utiliza una broca de 6 mm. Asegúrate de antemano de que no hay
líneas de gas, agua o electricidad en la pared.
3 Fija los soportes de montaje (C) a la pared con los tornillos y tacos
suministrados (o con una alternativa adecuada para la supercie
especíca) como se muestra en el croquis.
4 Engancha el toldo en los soportes de montaje.
5 Coloca el poste (B) en el lugar deseado, a un máximo de 3 metros del
soporte de pared (= longitud del toldo) y utiliza la placa base como
plantilla para los agujeros de perforación en el suelo.
6 Utiliza una broca de 6 mm adecuada al sustrato.
7 Los tacos metálicos M6 suministrados son adecuados para hormigón,
ladrillo macizo, perforado y hormigón celular, también con madera o
paneles similares. Utilízalo para atornillar el poste al suelo.
8 Saca el toldo.
9 Engánchalo en el poste.
7
IT
AMBITO DI CONSEGNA E MONTAGGIO
1 Segnare i fori sul muro dove si intende appendere la tenda. Usate
una staffa (C) come modello. La staffa inferiore deve essere
posizionata a circa 20-30 cm da terra, la seconda a un'altezza di
120 cm (10028008/13/14), 140 cm (10028015/16/17) o 160 cm
(10028018/19).
2 Forare con una punta da 6 mm. Prima di farlo, assicurasi che, nel muro,
non ci siano tubi del gas, dell'acqua o cavi elettrici.
3 Fissare le staffe di montaggio (C) alla parete con le viti e i tasselli forniti (o
con un'alternativa più adatta alla supercie specica) come mostrato nel
disegno.
4 Agganciare la tenda da sole alle staffe di montaggio.
5 Posizionare l'inserto (B) nel punto desiderato, al massimo a 3 metri
dal supporto a muro (= lunghezza della tenda) e utilizzare la sua
piastra di base come sagoma per i fori sul pavimento.
6 Forare con una punta da 6 mm adatta al terreno.
7 I tasselli di metallo M6 forniti sono adatti a calcestruzzo, mattoni
pieni e forati e calcestruzzo aerato, anche se rivestiti in legno o simili.
Usalo per ssare l'inserto al terreno.
8 Estrarre la tenda da sole.
9 Agganciarla all'inserto.
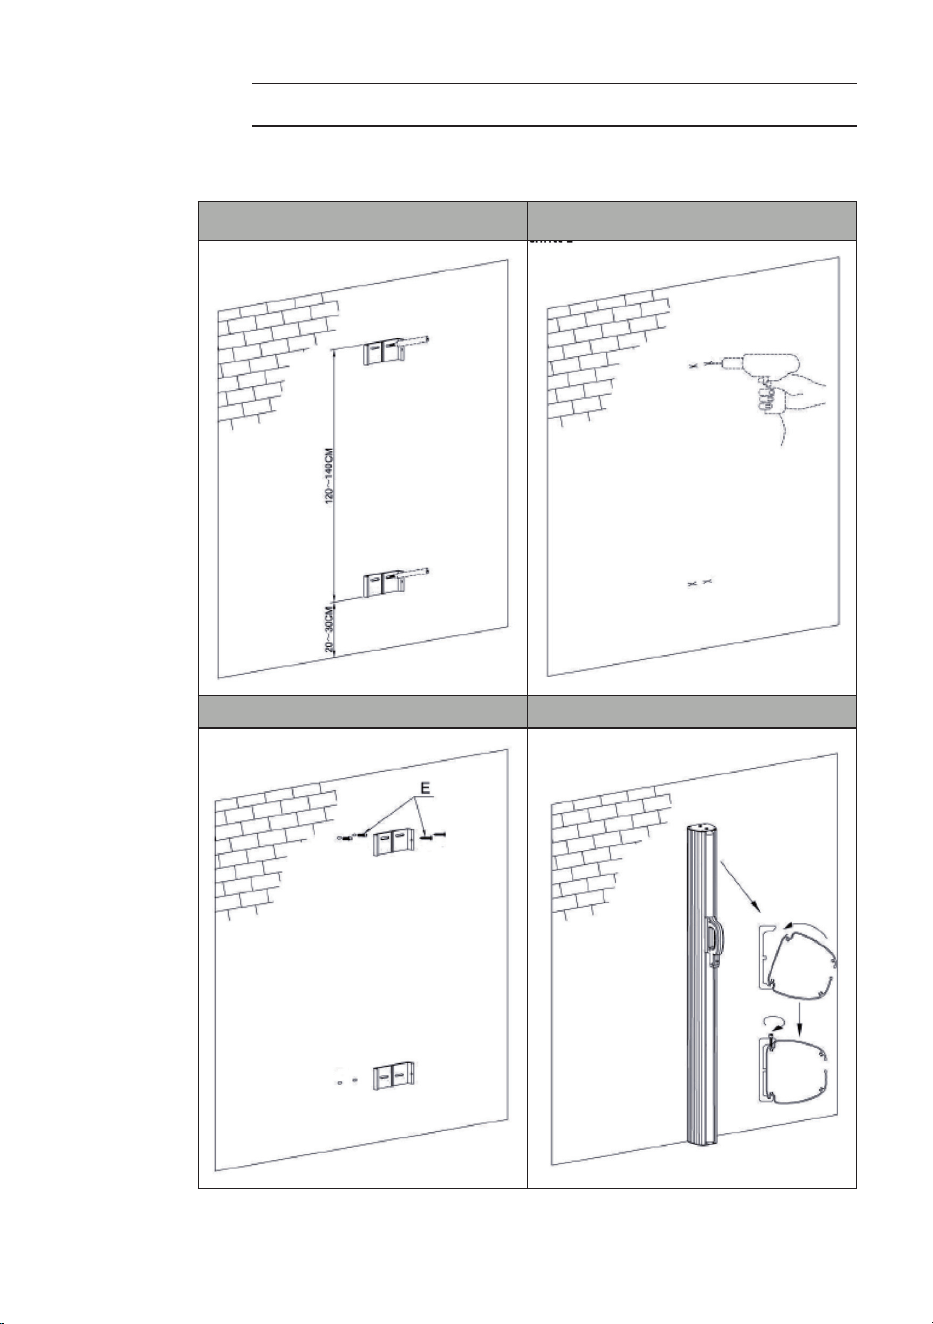
ZUSAMMENBAU
Assembly | Ensamblaje | Assemblée | Assemblaggio
1 2
3 4
5
6 7
8 9

HERSTELLER
Manufacturer | Fabricante | Fabricant | Produttore
Chal-Tec GmbH, Wallstraße 16, 10179 Berlin, Deutschland (Germany).
IMPORTEUR FÜR GROSSBRITANNIEN
Importer for Great Britain | Importador para Gran Bretaña | Importateur
pour la Grande Bretagne | Importatore per la Gran Bretagna
Berlin Brands Group UK Limited
PO Box 42
272 Kensington High Street
London, W8 6ND
United Kingdom