Ver.04 Rev. 04/06/2020 Ver.04 Rev. 04/06/2020 Ver.04 Rev. 04/06/2020 Ver.04 Rev. 04/06/2020
Ver.04 Rev. 04/06/2020 Ver.04 Rev. 04/06/2020
-1- -2- -3-
-4- -5-
Ver.04 Rev. 04/06/2020
480x400mm folding to 120x200mm
Ver.04 Rev. 04/06/2020
Ver.04 Rev. 04/06/2020 Ver.04 Rev. 04/06/2020 Ver.04 Rev. 04/06/2020 Ver.04 Rev. 04/06/2020
-7--6-
-8- -9- -10- -11-
Ver.04 Rev. 04/06/2020 Ver.04 Rev. 04/06/2020 Ver.04 Rev. 04/06/2020 Ver.04 Rev. 04/06/2020
-13--12- -14- -15-
Model:100019624
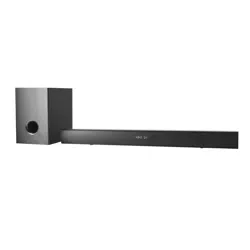
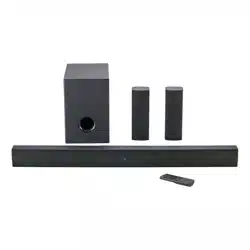
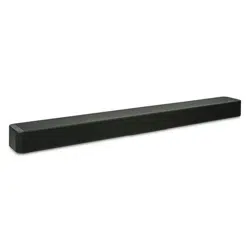
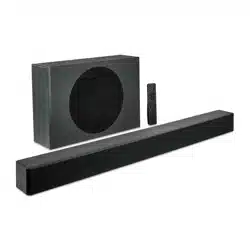
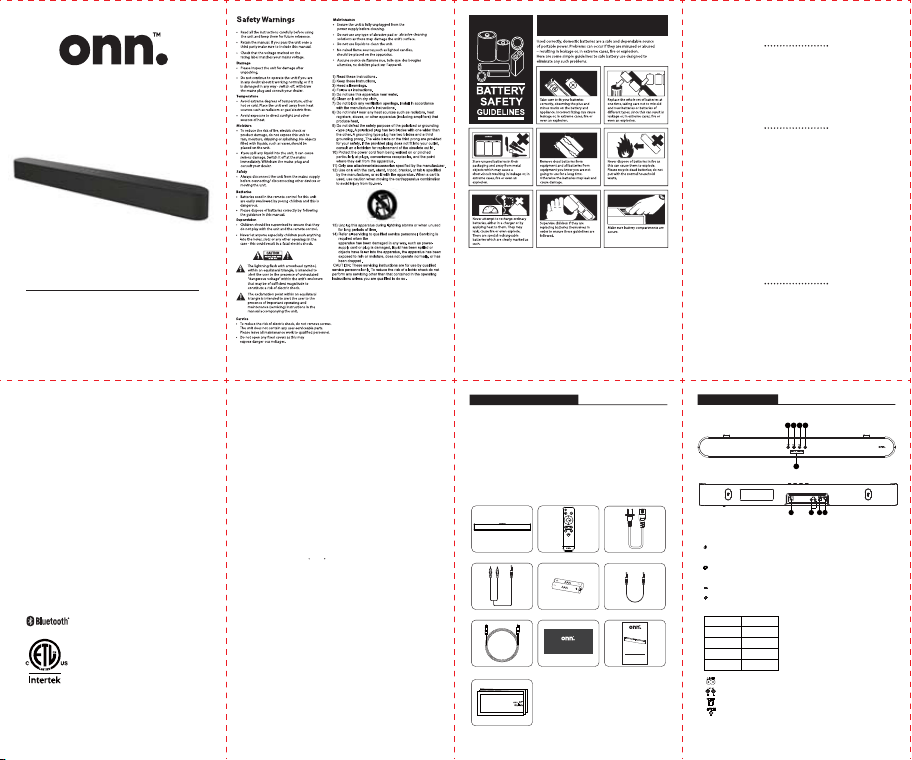
30” 2.0-Channel Soundbar
User Manual
Check the package contents
Remove all items from the packing. Retain the packaging. If you dispose of it, please do
so according to local regulations.
The following items are included:
1. Soundbar 2. Remote control
3.
Power Cord
5.
Batteries
7.
9.
User manual
Optical cable
4.
Line in cable
6.
3.5 mm AUX cable
8.
Quick Start Guides
10.
Wall Mount Template
Power Cord
User manual
Soundbar Remote control
Line in cable
Batteries
3.5 mm AUX cable
Optical cable
Wall Mount Template
Quick Start Guides
Product description
1 2
5
3 4
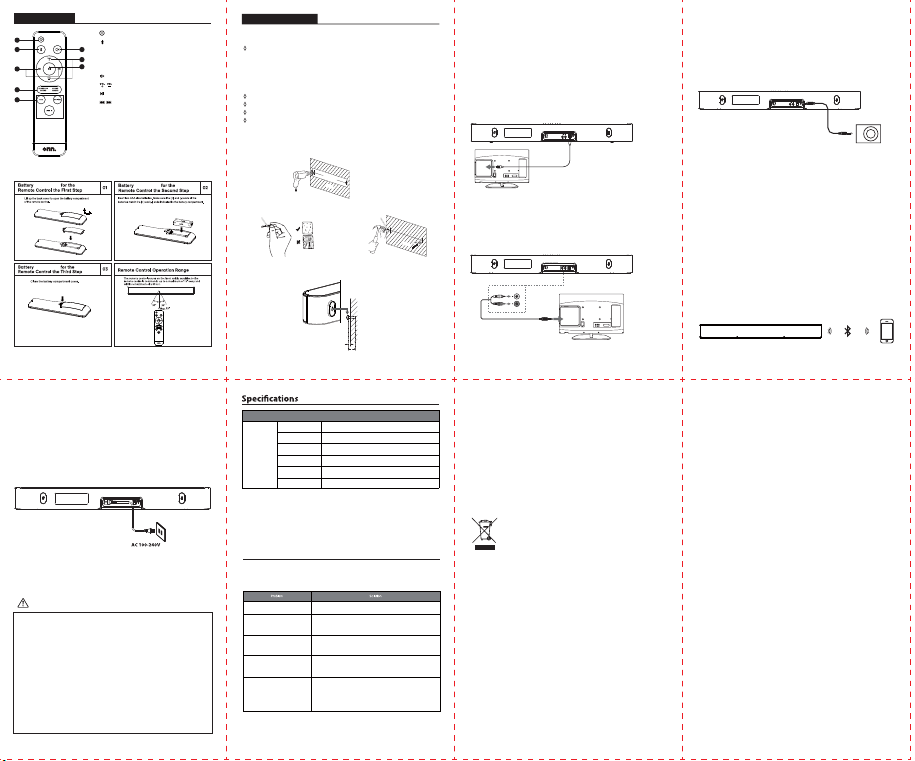
1. button: Switch between Power or Standby mode.
-Press and hold 1 second for Power ON.
2. button: Select the input source.
-LINE IN, AUX IN,OPTICAL
3. button, Volume down.
4. button, Volume up.
5. LED indicator
6. AC power jack.
7. LINE IN jack (L/White, R/Red)
8. Optical jack.
9. Aux-in 3.5mm stereo jack.
-Use to connect Aux out/Headphone on an external device.
76 8 9
State Indicator
Bluetooth
Blue
Line in Green
Optical Red
Aux White
Installation Installation
Installation
1. Press the unit between ON and Standby.
2. Bluetooth input button.
-Press and hold Bluetooth button until Blue LED
flashing at the main unit for Pairing to another
Bluetooth device.
3. Press to mute the sound, press again resume.
4. Press to turn Volume up or Down.
5.
Play/pause/resume playback in Bluetooth mode.
6. Skip backwards to the beginning of the track
or to the previous track in Bluetooth mode.
7. EQ mode :
Sound modes button : Music/Movie/Talk.
Standard sound button : Standard sound eect mode;
-Press the button to select a desired sound eect.
8. Input Button: LINE IN / AUX IN / OPTICAL.
Remote control
2 3
5
4
6
7
8
1.Align the Sound bar in the chosen location.
Use the template provided for the drilling position.
Product installation
Wall Mounting
Precautions :
Installation must be carried out by qualified personnel only. Incorrect assembly
can result in severe personal injury and property damage.
If you are going to install this soundbar yourself, you must have studied installations,
such as electrical wiring and plumbing that may be buried inside the wall.
It is installer's responsibility to verify that the wall safely support the total load of
the Soundbar.
Additional tools (excluded) are required for the installation.
Do not overtighten screws.
Keep this user manual for future reference.
Use an electric stud finder to check the wall type before drilling and mounting.
3.Firmly fix dowel (excluded) into each in the wall if necessary.
4. Insert a screw (excluded) into each dowel. Make sure to leave a 5mm gap
between the wall and the screw's head. Lift the Bar over the heads of the
screws
2.Drill 2 parallel holes ( according to wall type) in the wall.
as marked in Step 1.
540mm
W
ALL
5mm
30-40mm
W
ALL
Dowels
Solid wall(i.e., Solid brick,
Solid concrete, Solid wood,
Solid wooden battens)
Drywall, Plaster wall,
Lath wall, etc.
Dowels
Line in cable
white
red
Audio device
3.5 mm AUX cable
For those TVs without optical out port, please use the Line-in cable (included) to
connect the TV’s stereo RCA jack and the soundbar via Line in jack.
Press the LINE IN button on the remote control or press the Input button on the
sound bar to choose the
Line in
function.
-Use the 3.5mm audio cable (included) to connect the MP3 player, smartphone
or other audio equipment
-Then press the Aux button on the remote control or press the Input button on
the sound bar to choose the Aux function.
-Then press the Aux button on the remote control or press the Input button on
the sound bar to choose the Aux function.
Using the Optical Connection
- You will need: An audio source with an optical audio output and a digital
Optical cable (included)
- Connect the Digital Optical Audio cable to the optical output on the audio
source and to the Optical Input on the speaker bar.
- Press the Input/Source button on Sound bar or on the remote control to the
OPTICAL button on the remote control to switch to Optical input mode.
- Using the native controls on your connected device, make sure the audio
settings are set to PCM or Optical Audio and are turned on.
-
Audio from the connected audio source will now be played through the Soundbar.
Using the Bluetooth wireless connection
- Enable your Bluetooth device and keep at least 1 meter away from Sound bar.
- Press and hold the Bluetooth button on the remote control or press the Input
button on the sound bar until the indicator light is flashing blue.
- Select the Bluetooth search function on your device. Your device should
discover the Sound bar called “onn. 30” Soundbar”
- Select “onn. 30” Soundbar”. Your device is paired with the Sound bar when the
blue indicator light stops flashing and becomes solid blue.
- If the connected device goes out of range, the Sound bar will attempt to
connect for 3 minutes. When the device comes into range, the Sound bar will
reconnect again automatically.
- To remove a paired device using only the Sound bar, Press and hold the
Bluetooth button on the remote or Input button at Bluetooth mode. The
Bluetooth indicator will begin the indicator ligth is flashing blue.
Optical cable
Connecting to the Mains Supply
Ensure that the power supply voltage is in the voltage of 100V~240V.
Attaching the power cable:
Slot the end of the power cable into the power
socket on the back of the Soundbar.
Plugging the Sound Bar in: Slot the plug on the end of the power cable into a wall
socket and turn the power on if required.
Note: Ensure the power supply voltage corresponds to the voltage stated on the
back or underside of the Sound Bar.
Before plugging the Sound Bar in, ensure that all other connections have been
completed.
Factory Default Resetting
• Holding vol-&vol+ at the same time for 10s to reset the soundbar, and Go to
Restart the unit.
Notes for battery disposal
The batteries used with this product contain chemicals that are harmful to the
environment. To preserve our environment, dispose of used batteries according to
your local laws or regulations. Do not dispose of batteries with normal household
waste.
For more information, please contact the local authority or your retailer where you
purchased the product.
Warning:
Changes or modifications to this unit not expressly approved by the party
responsible for compliance could void the user's authority to operate the
equipment.
Handling the Battery
• Improper or incorrect use of batteries may cause corrosion or battery leakage, which
could cause fire, personal injury or damage to property.
• Only use the battery type indicated in this manual.
• Do not install new batteries with used ones and do not mix dierent types of batteries.
• Do not dispose of used batteries as domestic waste. Dispose of them in accordance
with local regulations.
Handling the Remote Control
• Do not drop the remote control.
• Do not allow anything to impact the remote control.
• Do not spill water or any liquid on the remote control.
• Do not place the remote control on a wet object.
• Do not place the remote control under direct sunlight or near sources of excessive heat.
• Remove the battery from the remote control when not in use for a long period of time,
as corrosion or battery leakage may occur and result in physical injury, and / or property
damage, and / or fire.
• When the battery is exhausted, the remote control will not function.
Ver.03 Rev. 29/05/2020
30” 2.0-Channel Soundbar
Model:100019624
User Manual
30” 2.0-Channel Soundbar
Quick Start Guide
1
Important Safety Instructions:
2 x 15W (RMS)
120W
36W
762 x 87 x 87mm
2.2 kg
SOME DOS AND DONTS ON THE SAFE USE OF EQUIPMENT
This equipment has been designed and manufactured to meet international
safety standards but like any electrical equipment, care must be taken rf you are
to obtain the best results and safety is to be assured.
Service
How to get service:
• Call 1-800-925-6278. contact:WalmartInc.Walmart.com,Bentonville,AR72716
• Please have your original purchase receipt or proof of purchase (bill of sale or
receipted invoice), the units date of purchase, place of purchase and model/serial
number ready. The model/serial number information can be found on the back of
your unit.
• A representative will troubleshoot your problem over the telephone. If it is determined
that your unit requires service, the service location will be at the sole discretion of
Walmart, Inc. based upon the Walmart, Inc. Limited Warranty Statement.
• At the sole discretion of Walmart, Inc., item will either be repaired at an Authorized
Service Centre or directly exchanged for a new or refurbished/remanufactured unit. If
repaired at an Authorized Service Center, a pre-paid shipping label will be provided
and Walmart, Inc. will pay for return shipping.
• Proof of purchase in the form of a bill of sale or receipted invoice from an Authorized
Dealer which is evidence that the product is within the warranty period must be
presented to obtain warranty service.
• PRE-AUTHORIZATION MUST BE OBTAINED BEFORE SENDING ANY PRODUCT TO AN
AUTHORIZED SERVICE CENTER.
•
30” 2.0-Channel Soundbar that has been modified or incorporated into other products.
• A unit purchased or serviced outside the USA.
• A unit sold in "As-ls", "Factory Reconditioned", "Factory Re-Certified", or "Refurbished"
condition or with faults.
• Acts of nature or God, such as but not limited to earthquake or lightning damage.
• Special, incidental or consequential damages.
FCC Statement:
• This device complies with Part 15 of the FCC Rules. Operation is subject to the
following two conditions:( 1 )this device may not cause harmful interference, and
(2 )this device must accept any interference received, including interference that
may cause undesired operation.
• This equipment has been tested and found to comply with the limits for a Class
B digital device, pursuant to Part 15 of the FCC Rules. These limits are designed to
provide reasonable protection against harmful interference in a residential
installation. This equipment generates, uses and can radiate radio frequency
energy and, if not installed and used in accordance with the instructions, may
cause harmful interference to radio communications. However, there is no
guarantee that interference will not occur in a particular installation. If this
equipment does cause harmful interference to radio or television reception, which
can be determined by turning the equipment o and on, the user is encouraged
to try to correct the interference by one or more of the following measure.
—Reorient or relocate the receiving antenna.
—Increase the separation between the equipment and receiver.
—Connect the equipment into an outlet on a circuit dierent from that to which
the receiver is connected.
—Consult the dealer or an experienced radio/TV technician for help.
FCC RF Radiation Exposure Statement Caution:To manintain compliance with the
FCC‘s RF exposure guidelines,place the product at least 20cm from nearby
persons, working ambient 0 C ~35 C , voltage input range 100V~240V.
Warning: Changes or modifications to this unit not expressly approved by the
party responsible for compliance could void the user's authority to operate the
equipment
CAUTION: Risk of explosion if the battery is replaced by an incorrect type;
CAUTION: replacement of a battery with an incorrect type that can defeat a
safeguard;
CAUTION: disposal of a battery into fire or a hot oven, or mechanically crushing or
cutting of a battery, that can result in an explosion;
CAUTION: leaving a battery in an extremely high temperature surrounding
environment that can result in an explosion or the leakage of flammable liquid or
gas;
CAUTION: a battery subjected to extremely low air pressure that may result in an
explosion or the leakage of flammable liquid or gas;
Where a plug on the power supply cord is used as the disconnect device, the
installation instructions shall state that for pluggable equipment the socket-out-
let shall be easily accessible. For pluggable equipment intended for installation
by an ordinary person, the installation instructions shall be made available to the
ordinary person.
The Bluetooth® word mark and logos are registered trademarks owned by the
Bluetooth SIG, Inc. and any use of such marks by Walmart Inc. is under license.
Other trademarks and trade names are those of their respective owners.
Keep at least 1 inch of ventilation space between the apparatus and all other
surfaces.
Please use this product in moderate climate.
read the operating instructions before you attempt to use the equipment,
ensure that all electrical connections (including the mains plug, extension
leads and inter-connections between the pieces of equipment) are
properly made and in accordance with the manufacturer's instructions.
Switch o and withdraw the mains plug before making or changing
connections.
consult your dealer if you are ever in doubt about the installation,
operation or safety of your equipment.
be careful with glass panels or doors on the equipment.
route the mains lead so that it is not likely to be walked on, crushed,
chafed, or
subjected to excessive wear and tear or heat.
remove any fixed cover as this may expose dangerous voltages.
obstruct the ventilation openings of the equipment with items such as
newspapers, tablecloths, curtains, etc. Overheating will cause damage
and shorten the life of the equipment.
allow electrical equipment to be exposed to dripping or splashing, or
objects filled with liquids, such as vases.
place hot objects or naked flame sources such as lighted candles or
nightlights on, or close, to equipment. High temperatures can melt plastic
and lead to fires.
use makeshift stands and NEVER fix legs with wooden screws.To ensure
complete safety always fit the manufacturer's approved stand or legs with
the fixings provided and according to the instructions.
use equipment such as personal stereos or radios that will distract you
from the requirements of trac safety.
listen to headphones at high volume, as such use can permanently
damage your hearing.
leave equipment switched on when it is unattended unless it is specifically
stated that is designed for unattended operation or has a stand-by mode.
Switch o using the ON/OFF switch on the equipment or at the mains
socket, and make sure that your family knows how to do this. Special
arrangements may need to be made for infirm or handicapped people.
continue to operate the equipment if you are in any doubt about it
working normally, or if it is damaged in any way - switch o, remove the
mains plug from the mains socket and consult your dealer.
NEVER let anyone especially children push anything into holes, slots or any
other opening in the equipment - this could result in a fatal electric shock.
NEVER guess or take chances with electrical equipment of any kind. It is
better to be safe than sorry!
DO
DO
DO
DO
DON’T
DON’T
DON’T
DON’T
DON’T
DON’T
DON’T
DON’T
-
-
ABOVE ALL
30” 2.0-Channel Soundbar(General)
internal power supply input 100-240V AC 50/60HZ US standardPower supply
Peak Power
Power Consumption
Soundbar
Hints and Tips
Features and specifications are subject to change without prior notice.
If a problem occurs, it may often be due to something very minor.
The following table contains various tips:
The remote control is not functioning.
Loud hum or noise is heard.
Cannot find
“onn. 30" Soundbar”
on my Bluetooth - device.
Sound is not produced.
No power.
•Ensure the AC cord is connected securely at both ends.
•Make sure that the ON mode is selected.
•Ensure the Bluetooth function is activated on your Bluetooth device.
•Ensure you have paired your unit with the Bluetooth device.
•Adjust the volume.
•When you are using connection with a external device (set top box,
Bluetooth device etc.), adjust volume level of the device.
•Press mute button or adjust the volume level to cancel the mute function.
•Check the input source and select the correct input source.
•The plugs and sockets are dirty. Wipe them with a cloth slightly moistened
with an appropriate non-abrasive cleaning solution.
•Use the remote control near the unit.
•Point the remote control at the remote sensor on the unit.
•Replace the battery in the remote control with a new one.
•Remove any obstacles between the remote control and the unit.
Speaker Output Power
Net Weight
Dimension
The above mark is in compliance with the Waste Electrical and Electronic
Equipment Directive 2012/19/EU (WEEE).
The mark indicates the requirement NOT to dispose the equipment including
any spent or discarded batteries as unsorted municipal waste, but use the
return and collection systems available. If the batteries or accumulators included
with this equipment display the chemical symbol Hg, Cd or Pb, then it means that
the battery has a heavy metal content of more than 0.0005% Mercury, or more
than 0.002% Cadmium or more than, 0.004% Lead.
In the unlikely event of a problem developing, please contact the store where you purchased your
equipment.
We continually strive to improve our products; specifications may change without prior notice. For
advice on where to purchase accessories, please contact the store where you purchased your
equipment.
All trademarks are the property of their respective owners and all rights are acknowledged.
LIMITATION OF WARRANTY
• THE WARRANTY STATED ABOVE IS THE ONLY WARRANTY APPLICABLE TO THIS
PRODUCT. NO VERBAL OR WRITTEN INFORMATION GIVEN BY WAL-MART
STORES, INC., ITS AGENTS OR EMPLOYEES SHALL CREATE A GUARANTEE OR IN
ANY WAY INCREASE OR MODIFY THE SCOPE OF THIS WARRANTY.
• REPAIR OR REPLACEMENT AS PROVIDED UNDER THIS WARRANTY IS THE
EXCLUSIVE REMEDY OF THE CONSUMER. WAL-MART STORES, INC. SHALL NOT
BE LIABLE FOR SPECIAL, INCIDENTAL, OR CONSEQUENTIAL DAMAGES RESULT-
ING FROM THE USE OF THIS PRODUCT OR ARISING OUT OF ANY BREACH OF
ANY EXPRESS OR IMPLIED WARRANTY ON THIS PRODUCT. THIS DISCLAIMER OF
WARRANTIES AND LIMITED WARRANTY ARE GOVERNED BY THE LAWS OF THE
STATE OF ARKANSAS. EXCEPT TO THE EXTENT PROHIBITED BY APPLICABLE LAW,
ANY IMPLIED WARRANTY OF MERCHANTABILITY OR FITNESS FOR A PARTICULAR
PURPOSE ON THIS PRODUCT IS LIMITED TO THE APPLICABLE WARRANTY AND
WARRANTY PERIOD SET FORTH ABOVE. THIS WARRANTY IS SUBJECT TO
CHANGE WITHOUT NOTICE.
How State Law relates to this warranty:
• Some states do not allow the exclusion or limitation of incidental or conse-
quential damages, or limitations on how long an implied warranty lasts, so the
above limitations or exclusions may not apply to you.
• This warranty gives you specific legal rights, and you also may have other
rights that vary from state to state.
If you purchased your unit outside the United States or seek warranty cover-
age outside the United States: This warranty does not apply. Contact your
store for warranty information.
Service calls which do not involve defective materials or workmanship are not
covered by this warranty. Costs of such service calls are the sole responsibility
of the purchaser.
Walmart, Inc. Limited Warranty
Warranty
CONFORMS TO
3144480
UL STD. 60065
CERTIFIED TO
CSA STD. C22.2
NO. 60065
Connections for TV set Connection for other audio equipment
Ver.04 Rev. 04/06/2020 Ver.04 Rev. 04/06/2020 Ver.04 Rev. 04/06/2020 Ver.04 Rev. 04/06/2020
Ver.04 Rev. 04/06/2020 Ver.04 Rev. 04/06/2020
-1- -2- -3-
-4- -5-
Ver.04 Rev. 04/06/2020
480x400mm folding to 120x200mm
Ver.04 Rev. 04/06/2020
Ver.04 Rev. 04/06/2020 Ver.04 Rev. 04/06/2020 Ver.04 Rev. 04/06/2020 Ver.04 Rev. 04/06/2020
-7--6-
-8- -9- -10- -11-
Ver.04 Rev. 04/06/2020 Ver.04 Rev. 04/06/2020 Ver.04 Rev. 04/06/2020 Ver.04 Rev. 04/06/2020
-13--12- -14- -15-
Model:100019624
30” 2.0-Channel Soundbar
User Manual
Check the package contents
Remove all items from the packing. Retain the packaging. If you dispose of it, please do
so according to local regulations.
The following items are included:
1. Soundbar 2. Remote control
3.
Power Cord
5.
Batteries
7.
9.
User manual
Optical cable
4.
Line in cable
6.
3.5 mm AUX cable
8.
Quick Start Guides
10.
Wall Mount Template
Power Cord
User manual
Soundbar Remote control
Line in cable
Batteries
3.5 mm AUX cable
Optical cable
Wall Mount Template
Quick Start Guides
Product description
1 2
5
3 4
1. button: Switch between Power or Standby mode.
-Press and hold 1 second for Power ON.
2. button: Select the input source.
-LINE IN, AUX IN,OPTICAL
3. button, Volume down.
4. button, Volume up.
5. LED indicator
6. AC power jack.
7. LINE IN jack (L/White, R/Red)
8. Optical jack.
9. Aux-in 3.5mm stereo jack.
-Use to connect Aux out/Headphone on an external device.
76 8 9
State Indicator
Bluetooth
Blue
Line in Green
Optical Red
Aux White
Installation Installation
Installation
1. Press the unit between ON and Standby.
2. Bluetooth input button.
-Press and hold Bluetooth button until Blue LED
flashing at the main unit for Pairing to another
Bluetooth device.
3. Press to mute the sound, press again resume.
4. Press to turn Volume up or Down.
5.
Play/pause/resume playback in Bluetooth mode.
6. Skip backwards to the beginning of the track
or to the previous track in Bluetooth mode.
7. EQ mode :
Sound modes button : Music/Movie/Talk.
Standard sound button : Standard sound eect mode;
-Press the button to select a desired sound eect.
8. Input Button: LINE IN / AUX IN / OPTICAL.
Remote control
2 3
5
4
6
7
8
1.Align the Sound bar in the chosen location.
Use the template provided for the drilling position.
Product installation
Wall Mounting
Precautions :
Installation must be carried out by qualified personnel only. Incorrect assembly
can result in severe personal injury and property damage.
If you are going to install this soundbar yourself, you must have studied installations,
such as electrical wiring and plumbing that may be buried inside the wall.
It is installer's responsibility to verify that the wall safely support the total load of
the Soundbar.
Additional tools (excluded) are required for the installation.
Do not overtighten screws.
Keep this user manual for future reference.
Use an electric stud finder to check the wall type before drilling and mounting.
3.Firmly fix dowel (excluded) into each in the wall if necessary.
4. Insert a screw (excluded) into each dowel. Make sure to leave a 5mm gap
between the wall and the screw's head. Lift the Bar over the heads of the
screws
2.Drill 2 parallel holes ( according to wall type) in the wall.
as marked in Step 1.
540mm
W
ALL
5mm
30-40mm
W
ALL
Dowels
Solid wall(i.e., Solid brick,
Solid concrete, Solid wood,
Solid wooden battens)
Drywall, Plaster wall,
Lath wall, etc.
Dowels
Line in cable
white
red
Audio device
3.5 mm AUX cable
For those TVs without optical out port, please use the Line-in cable (included) to
connect the TV’s stereo RCA jack and the soundbar via Line in jack.
Press the LINE IN button on the remote control or press the Input button on the
sound bar to choose the
Line in
function.
-Use the 3.5mm audio cable (included) to connect the MP3 player, smartphone
or other audio equipment
-Then press the Aux button on the remote control or press the Input button on
the sound bar to choose the Aux function.
-Then press the Aux button on the remote control or press the Input button on
the sound bar to choose the Aux function.
Using the Optical Connection
- You will need: An audio source with an optical audio output and a digital
Optical cable (included)
- Connect the Digital Optical Audio cable to the optical output on the audio
source and to the Optical Input on the speaker bar.
- Press the Input/Source button on Sound bar or on the remote control to the
OPTICAL button on the remote control to switch to Optical input mode.
- Using the native controls on your connected device, make sure the audio
settings are set to PCM or Optical Audio and are turned on.
-
Audio from the connected audio source will now be played through the Soundbar.
Using the Bluetooth wireless connection
- Enable your Bluetooth device and keep at least 1 meter away from Sound bar.
- Press and hold the Bluetooth button on the remote control or press the Input
button on the sound bar until the indicator light is flashing blue.
- Select the Bluetooth search function on your device. Your device should
discover the Sound bar called “onn. 30” Soundbar”
- Select “onn. 30” Soundbar”. Your device is paired with the Sound bar when the
blue indicator light stops flashing and becomes solid blue.
- If the connected device goes out of range, the Sound bar will attempt to
connect for 3 minutes. When the device comes into range, the Sound bar will
reconnect again automatically.
- To remove a paired device using only the Sound bar, Press and hold the
Bluetooth button on the remote or Input button at Bluetooth mode. The
Bluetooth indicator will begin the indicator ligth is flashing blue.
Optical cable
Connecting to the Mains Supply
Ensure that the power supply voltage is in the voltage of 100V~240V.
Attaching the power cable:
Slot the end of the power cable into the power
socket on the back of the Soundbar.
Plugging the Sound Bar in: Slot the plug on the end of the power cable into a wall
socket and turn the power on if required.
Note: Ensure the power supply voltage corresponds to the voltage stated on the
back or underside of the Sound Bar.
Before plugging the Sound Bar in, ensure that all other connections have been
completed.
Factory Default Resetting
• Holding vol-&vol+ at the same time for 10s to reset the soundbar, and Go to
Restart the unit.
Notes for battery disposal
The batteries used with this product contain chemicals that are harmful to the
environment. To preserve our environment, dispose of used batteries according to
your local laws or regulations. Do not dispose of batteries with normal household
waste.
For more information, please contact the local authority or your retailer where you
purchased the product.
Warning:
Changes or modifications to this unit not expressly approved by the party
responsible for compliance could void the user's authority to operate the
equipment.
Handling the Battery
• Improper or incorrect use of batteries may cause corrosion or battery leakage, which
could cause fire, personal injury or damage to property.
• Only use the battery type indicated in this manual.
• Do not install new batteries with used ones and do not mix dierent types of batteries.
• Do not dispose of used batteries as domestic waste. Dispose of them in accordance
with local regulations.
Handling the Remote Control
• Do not drop the remote control.
• Do not allow anything to impact the remote control.
• Do not spill water or any liquid on the remote control.
• Do not place the remote control on a wet object.
• Do not place the remote control under direct sunlight or near sources of excessive heat.
• Remove the battery from the remote control when not in use for a long period of time,
as corrosion or battery leakage may occur and result in physical injury, and / or property
damage, and / or fire.
• When the battery is exhausted, the remote control will not function.
Ver.03 Rev. 29/05/2020
30” 2.0-Channel Soundbar
Model:100019624
User Manual
30” 2.0-Channel Soundbar
Quick Start Guide
1
Important Safety Instructions:
2 x 15W (RMS)
120W
36W
762 x 87 x 87mm
2.2 kg
SOME DOS AND DONTS ON THE SAFE USE OF EQUIPMENT
This equipment has been designed and manufactured to meet international
safety standards but like any electrical equipment, care must be taken rf you are
to obtain the best results and safety is to be assured.
Service
How to get service:
• Call 1-800-925-6278. contact:WalmartInc.Walmart.com,Bentonville,AR72716
• Please have your original purchase receipt or proof of purchase (bill of sale or
receipted invoice), the units date of purchase, place of purchase and model/serial
number ready. The model/serial number information can be found on the back of
your unit.
• A representative will troubleshoot your problem over the telephone. If it is determined
that your unit requires service, the service location will be at the sole discretion of
Walmart, Inc. based upon the Walmart, Inc. Limited Warranty Statement.
• At the sole discretion of Walmart, Inc., item will either be repaired at an Authorized
Service Centre or directly exchanged for a new or refurbished/remanufactured unit. If
repaired at an Authorized Service Center, a pre-paid shipping label will be provided
and Walmart, Inc. will pay for return shipping.
• Proof of purchase in the form of a bill of sale or receipted invoice from an Authorized
Dealer which is evidence that the product is within the warranty period must be
presented to obtain warranty service.
• PRE-AUTHORIZATION MUST BE OBTAINED BEFORE SENDING ANY PRODUCT TO AN
AUTHORIZED SERVICE CENTER.
•
30” 2.0-Channel Soundbar that has been modified or incorporated into other products.
• A unit purchased or serviced outside the USA.
• A unit sold in "As-ls", "Factory Reconditioned", "Factory Re-Certified", or "Refurbished"
condition or with faults.
• Acts of nature or God, such as but not limited to earthquake or lightning damage.
• Special, incidental or consequential damages.
FCC Statement:
• This device complies with Part 15 of the FCC Rules. Operation is subject to the
following two conditions:( 1 )this device may not cause harmful interference, and
(2 )this device must accept any interference received, including interference that
may cause undesired operation.
• This equipment has been tested and found to comply with the limits for a Class
B digital device, pursuant to Part 15 of the FCC Rules. These limits are designed to
provide reasonable protection against harmful interference in a residential
installation. This equipment generates, uses and can radiate radio frequency
energy and, if not installed and used in accordance with the instructions, may
cause harmful interference to radio communications. However, there is no
guarantee that interference will not occur in a particular installation. If this
equipment does cause harmful interference to radio or television reception, which
can be determined by turning the equipment o and on, the user is encouraged
to try to correct the interference by one or more of the following measure.
—Reorient or relocate the receiving antenna.
—Increase the separation between the equipment and receiver.
—Connect the equipment into an outlet on a circuit dierent from that to which
the receiver is connected.
—Consult the dealer or an experienced radio/TV technician for help.
FCC RF Radiation Exposure Statement Caution:To manintain compliance with the
FCC‘s RF exposure guidelines,place the product at least 20cm from nearby
persons, working ambient 0 C ~35 C , voltage input range 100V~240V.
Warning: Changes or modifications to this unit not expressly approved by the
party responsible for compliance could void the user's authority to operate the
equipment
CAUTION: Risk of explosion if the battery is replaced by an incorrect type;
CAUTION: replacement of a battery with an incorrect type that can defeat a
safeguard;
CAUTION: disposal of a battery into fire or a hot oven, or mechanically crushing or
cutting of a battery, that can result in an explosion;
CAUTION: leaving a battery in an extremely high temperature surrounding
environment that can result in an explosion or the leakage of flammable liquid or
gas;
CAUTION: a battery subjected to extremely low air pressure that may result in an
explosion or the leakage of flammable liquid or gas;
Where a plug on the power supply cord is used as the disconnect device, the
installation instructions shall state that for pluggable equipment the socket-out-
let shall be easily accessible. For pluggable equipment intended for installation
by an ordinary person, the installation instructions shall be made available to the
ordinary person.
The Bluetooth® word mark and logos are registered trademarks owned by the
Bluetooth SIG, Inc. and any use of such marks by Walmart Inc. is under license.
Other trademarks and trade names are those of their respective owners.
Keep at least 1 inch of ventilation space between the apparatus and all other
surfaces.
Please use this product in moderate climate.
read the operating instructions before you attempt to use the equipment,
ensure that all electrical connections (including the mains plug, extension
leads and inter-connections between the pieces of equipment) are
properly made and in accordance with the manufacturer's instructions.
Switch o and withdraw the mains plug before making or changing
connections.
consult your dealer if you are ever in doubt about the installation,
operation or safety of your equipment.
be careful with glass panels or doors on the equipment.
route the mains lead so that it is not likely to be walked on, crushed,
chafed, or
subjected to excessive wear and tear or heat.
remove any fixed cover as this may expose dangerous voltages.
obstruct the ventilation openings of the equipment with items such as
newspapers, tablecloths, curtains, etc. Overheating will cause damage
and shorten the life of the equipment.
allow electrical equipment to be exposed to dripping or splashing, or
objects filled with liquids, such as vases.
place hot objects or naked flame sources such as lighted candles or
nightlights on, or close, to equipment. High temperatures can melt plastic
and lead to fires.
use makeshift stands and NEVER fix legs with wooden screws.To ensure
complete safety always fit the manufacturer's approved stand or legs with
the fixings provided and according to the instructions.
use equipment such as personal stereos or radios that will distract you
from the requirements of trac safety.
listen to headphones at high volume, as such use can permanently
damage your hearing.
leave equipment switched on when it is unattended unless it is specifically
stated that is designed for unattended operation or has a stand-by mode.
Switch o using the ON/OFF switch on the equipment or at the mains
socket, and make sure that your family knows how to do this. Special
arrangements may need to be made for infirm or handicapped people.
continue to operate the equipment if you are in any doubt about it
working normally, or if it is damaged in any way - switch o, remove the
mains plug from the mains socket and consult your dealer.
NEVER let anyone especially children push anything into holes, slots or any
other opening in the equipment - this could result in a fatal electric shock.
NEVER guess or take chances with electrical equipment of any kind. It is
better to be safe than sorry!
DO
DO
DO
DO
DON’T
DON’T
DON’T
DON’T
DON’T
DON’T
DON’T
DON’T
-
-
ABOVE ALL
30” 2.0-Channel Soundbar(General)
internal power supply input 100-240V AC 50/60HZ US standardPower supply
Peak Power
Power Consumption
Soundbar
Hints and Tips
Features and specifications are subject to change without prior notice.
If a problem occurs, it may often be due to something very minor.
The following table contains various tips:
The remote control is not functioning.
Loud hum or noise is heard.
Cannot find
“onn. 30" Soundbar”
on my Bluetooth - device.
Sound is not produced.
No power.
•Ensure the AC cord is connected securely at both ends.
•Make sure that the ON mode is selected.
•Ensure the Bluetooth function is activated on your Bluetooth device.
•Ensure you have paired your unit with the Bluetooth device.
•Adjust the volume.
•When you are using connection with a external device (set top box,
Bluetooth device etc.), adjust volume level of the device.
•Press mute button or adjust the volume level to cancel the mute function.
•Check the input source and select the correct input source.
•The plugs and sockets are dirty. Wipe them with a cloth slightly moistened
with an appropriate non-abrasive cleaning solution.
•Use the remote control near the unit.
•Point the remote control at the remote sensor on the unit.
•Replace the battery in the remote control with a new one.
•Remove any obstacles between the remote control and the unit.
Speaker Output Power
Net Weight
Dimension
The above mark is in compliance with the Waste Electrical and Electronic
Equipment Directive 2012/19/EU (WEEE).
The mark indicates the requirement NOT to dispose the equipment including
any spent or discarded batteries as unsorted municipal waste, but use the
return and collection systems available. If the batteries or accumulators included
with this equipment display the chemical symbol Hg, Cd or Pb, then it means that
the battery has a heavy metal content of more than 0.0005% Mercury, or more
than 0.002% Cadmium or more than, 0.004% Lead.
In the unlikely event of a problem developing, please contact the store where you purchased your
equipment.
We continually strive to improve our products; specifications may change without prior notice. For
advice on where to purchase accessories, please contact the store where you purchased your
equipment.
All trademarks are the property of their respective owners and all rights are acknowledged.
LIMITATION OF WARRANTY
• THE WARRANTY STATED ABOVE IS THE ONLY WARRANTY APPLICABLE TO THIS
PRODUCT. NO VERBAL OR WRITTEN INFORMATION GIVEN BY WAL-MART
STORES, INC., ITS AGENTS OR EMPLOYEES SHALL CREATE A GUARANTEE OR IN
ANY WAY INCREASE OR MODIFY THE SCOPE OF THIS WARRANTY.
• REPAIR OR REPLACEMENT AS PROVIDED UNDER THIS WARRANTY IS THE
EXCLUSIVE REMEDY OF THE CONSUMER. WAL-MART STORES, INC. SHALL NOT
BE LIABLE FOR SPECIAL, INCIDENTAL, OR CONSEQUENTIAL DAMAGES RESULT-
ING FROM THE USE OF THIS PRODUCT OR ARISING OUT OF ANY BREACH OF
ANY EXPRESS OR IMPLIED WARRANTY ON THIS PRODUCT. THIS DISCLAIMER OF
WARRANTIES AND LIMITED WARRANTY ARE GOVERNED BY THE LAWS OF THE
STATE OF ARKANSAS. EXCEPT TO THE EXTENT PROHIBITED BY APPLICABLE LAW,
ANY IMPLIED WARRANTY OF MERCHANTABILITY OR FITNESS FOR A PARTICULAR
PURPOSE ON THIS PRODUCT IS LIMITED TO THE APPLICABLE WARRANTY AND
WARRANTY PERIOD SET FORTH ABOVE. THIS WARRANTY IS SUBJECT TO
CHANGE WITHOUT NOTICE.
How State Law relates to this warranty:
• Some states do not allow the exclusion or limitation of incidental or conse-
quential damages, or limitations on how long an implied warranty lasts, so the
above limitations or exclusions may not apply to you.
• This warranty gives you specific legal rights, and you also may have other
rights that vary from state to state.
If you purchased your unit outside the United States or seek warranty cover-
age outside the United States: This warranty does not apply. Contact your
store for warranty information.
Service calls which do not involve defective materials or workmanship are not
covered by this warranty. Costs of such service calls are the sole responsibility
of the purchaser.
Walmart, Inc. Limited Warranty
Warranty
CONFORMS TO
3144480
UL STD. 60065
CERTIFIED TO
CSA STD. C22.2
NO. 60065
Connections for TV set Connection for other audio equipment