BOUNCE
™
2 WATCH
Owner’s Manual

© 2025 Garmin Ltd. or its subsidiaries
All rights reserved. Under the copyright laws, this manual may not be copied, in whole or in part, without the written consent of Garmin. Garmin reserves the right to change
or improve its products and to make changes in the content of this manual without obligation to notify any person or organization of such changes or improvements. Go to
www.garmin.com for current updates and supplemental information concerning the use of this product.
Garmin
®
, the Garmin logo, Auto Lap
®
, and Auto Pause
®
are trademarks of Garmin Ltd. or its subsidiaries, registered in the USA and other countries. Bounce
™
, Connect IQ
™
, Garmin
Connect
™
, Garmin Express
™
, and Garmin Jr.
™
are trademarks of Garmin Ltd. or its subsidiaries. These trademarks may not be used without the express permission of Garmin.
The BLUETOOTH
®
word mark and logos are owned by the Bluetooth SIG, Inc. and any use of such marks by Garmin is under license. USB-C
®
is a registered trademark of USB
Implementers Forum. Wi‑Fi
®
is a registered mark of Wi-Fi Alliance Corporation. Other trademarks and trade names are those of their respective owners.
M/N: A05001

Table of Contents
Introduction......................................1
Setting Up the Watch.............................. 1
Overview.................................................. 1
Touchscreen Tips....................................2
Locking and Unlocking the Device..... 2
LTE Connected Features........................ 3
Connectivity..................................... 3
Phone Connectivity Features..................3
Pairing the Watch with a Parent's or
Guardian's Phone................................ 3
Tips for Existing Garmin Jr. App
Users................................................ 4
Pairing Multiple Mobile Devices..... 4
Calling from the Watch....................... 4
Messages from the Watch..................5
Sending a Message from the
Watch............................................... 5
Messages from the Garmin Jr.
App....................................................... 5
Sending a Text Message from the
Garmin Jr. App................................. 5
Sending a Voice Message from the
Garmin Jr. App................................. 5
Viewing Notifications.......................... 5
Managing Preset Text Messages.......6
Deleting Message History from the
Garmin Jr. App..................................... 6
Wi‑Fi Connectivity Features.................... 6
Connecting to a Wi‑Fi Network........... 6
Garmin Jr. App........................................ 7
Setting Up Your Child's User
Profile................................................... 7
Garmin Jr. Family................................ 7
Adding Members to a Garmin Jr.
Family............................................... 7
Inviting Connections with the
Garmin Jr. App................................. 8
Adding Messaging Contacts...........8
Syncing Your Watch Data with the
Garmin Jr. App..................................... 8
Viewing History....................................8
Sleep Tracking..................................... 8
App Settings........................................ 9
Managing Watch Activity
Notifications.................................... 9
User and Safety Settings................. 9
Turning On School Mode.............. 10
Using Kid Mode............................. 10
Deleting a Profile........................... 10
Appearance.................................... 10
Watch Face Settings............................. 10
Customizing the Watch Face............11
Creating a Custom Watch Face........11
Glances.................................................. 11
Viewing Glances................................ 12
Customizing the Glance List......... 12
Updating the Weather Location........12
Chores and Rewards......................... 13
Using the Chores Glance...............13
Assigning Chores.......................... 13
Approving Chores.......................... 13
Creating Rewards.......................... 14
Redeeming Rewards..................... 14
Controls................................................. 14
Customizing the Controls Menu.......16
Using the Flashlight Screen.............. 16
Using Do Not Disturb Mode.............. 16
Setting Up a Shortcut............................ 16
Safety and Tracking Features......... 17
Requesting Assistance......................... 17
Adding Assistance Contacts............ 17
LiveTrack............................................... 17
Starting a LiveTrack Session............ 18
Ending a LiveTrack Session..............18
Location Tracking................................. 18
Checking in From the Watch............ 18
Viewing Your Child's Current
Location............................................. 18
Viewing Your Child's Location
History................................................ 18
Boundaries.............................................18
Adding a Boundary............................ 18
Adding a Temporary Boundary.........19
Deleting a Boundary.......................... 19
Turning On and Off Boundary
Alerts.................................................. 19
Apps and Activities.........................19
Table of Contents i

Apps....................................................... 20
Starting a Game.................................21
Game Settings................................... 21
Using Voice Commands................... 21
Watch Voice Commands.............. 22
Activities................................................ 23
Activity Goal....................................... 24
Starting an Activity............................ 24
Tips for Recording Activities.........24
Stopping an Activity...................... 25
Running.............................................. 25
Going for a Run.............................. 25
Going for a Track Run................... 25
Calibrating the Treadmill
Distance......................................... 26
Cycling............................................... 26
Going for a Ride............................. 26
Swimming.......................................... 26
Going for a Pool Swim...................26
Winter Sports..................................... 27
Viewing Your Ski Runs.................. 27
Customizing Activities and Apps......... 27
Customizing the App List..................27
Customizing Your Favorite Activities
List...................................................... 27
Pinning a Favorite Activity to the
List.................................................. 27
Activity Settings.................................... 28
Activity Alerts.....................................29
Setting an Alert.............................. 29
History........................................... 29
Using History......................................... 30
Personal Records.................................. 30
Viewing Your Personal Records....... 30
Restoring a Personal Record............ 30
Clearing Personal Records............... 31
Viewing Data Totals.............................. 31
Clocks............................................ 31
Setting an Alarm....................................31
Editing an Alarm................................ 31
Using the Countdown Timer................. 32
Deleting a Countdown Timer............ 32
Using the Stopwatch............................. 33
Adding a Countdown Event.................. 33
Editing a Countdown Event...............34
Notifications and Alerts Settings.... 34
Customizing Call Alerts........................ 34
Customizing Message Alerts............... 34
Setting Time Alerts............................... 35
Sound & Vibe Settings.................... 35
Display and Brightness Settings..... 35
Music............................................. 35
Setting Up Music on the Watch............ 35
Enabling Music from the Garmin Jr.
App..................................................... 35
Setting Up Music on the Watch........ 36
Connecting Bluetooth Headphones..... 36
Listening to Music.................................36
Music Playback Controls...................... 37
System Settings............................. 37
Date and Time Settings........................ 38
Changing the Units of Measure............38
Customizing the Button Shortcuts....... 38
Device Information......................... 38
About the AMOLED Display.................. 38
Charging the Watch.............................. 39
Specifications........................................39
Battery Information........................... 39
Viewing Device Information................. 40
Viewing E-label Regulatory and
Compliance Information................... 40
Device Care............................................40
Cleaning the Watch........................... 40
Band Replacement................................ 40
Troubleshooting............................. 41
Product Updates................................... 41
Getting More Information..................... 41
Restarting the Watch............................ 41
Resetting All Default Settings...............41
Is my phone compatible with my
watch?....................................................41
My watch is in the wrong language..... 41
My phone will not connect to the
watch..................................................... 42
How do I pair an additional watch with
the Garmin Jr. app?...............................42
ii Table of Contents

Can my child send messages to other
children?................................................ 42
My watch doesn't display the correct
time........................................................ 42
Locating a Lost Watch.......................... 42
How can I undo a lap button press?.... 43
Activity Tracking....................................43
My step count doesn't seem
accurate............................................. 43
Maximizing Battery Life........................ 43
Acquiring Satellite Signals.................... 43
Table of Contents iii

Introduction
WARNING
See the Important Safety and Product Information guide in the product box for product warnings and other
important information.
It is a parent's or legal guardian's responsibility to set up the device before a child uses the device. It is a
parent's or legal guardian's responsibility to read and understand this document and ensure that the child uses
the device in an appropriate and safe manner.
Setting Up the Watch
To take full advantage of the Bounce 2 features, complete these tasks.
1 Hold to turn on the watch.
2 Follow the on-screen instructions to complete the initial setup.
During the initial setup, you can pair your phone with your watch to receive notifications, sync your activities,
and more (Pairing the Watch with a Parent's or Guardian's Phone, page3).
3 Set up the LTE Subscription for the Bounce 2 watch (LTE Connected Features, page3).
4 Set up boundaries (Adding a Boundary, page18).
5 Set up Wi‑Fi
®
networks (Connecting to a Wi‑Fi Network, page6).
6 Charge the watch (Charging the Watch, page39).
7 Check for software updates (Product Updates, page41).
For the best experience, you should keep the software on your watch up to date. Software updates provide
changes and improvements to privacy, security, and features.
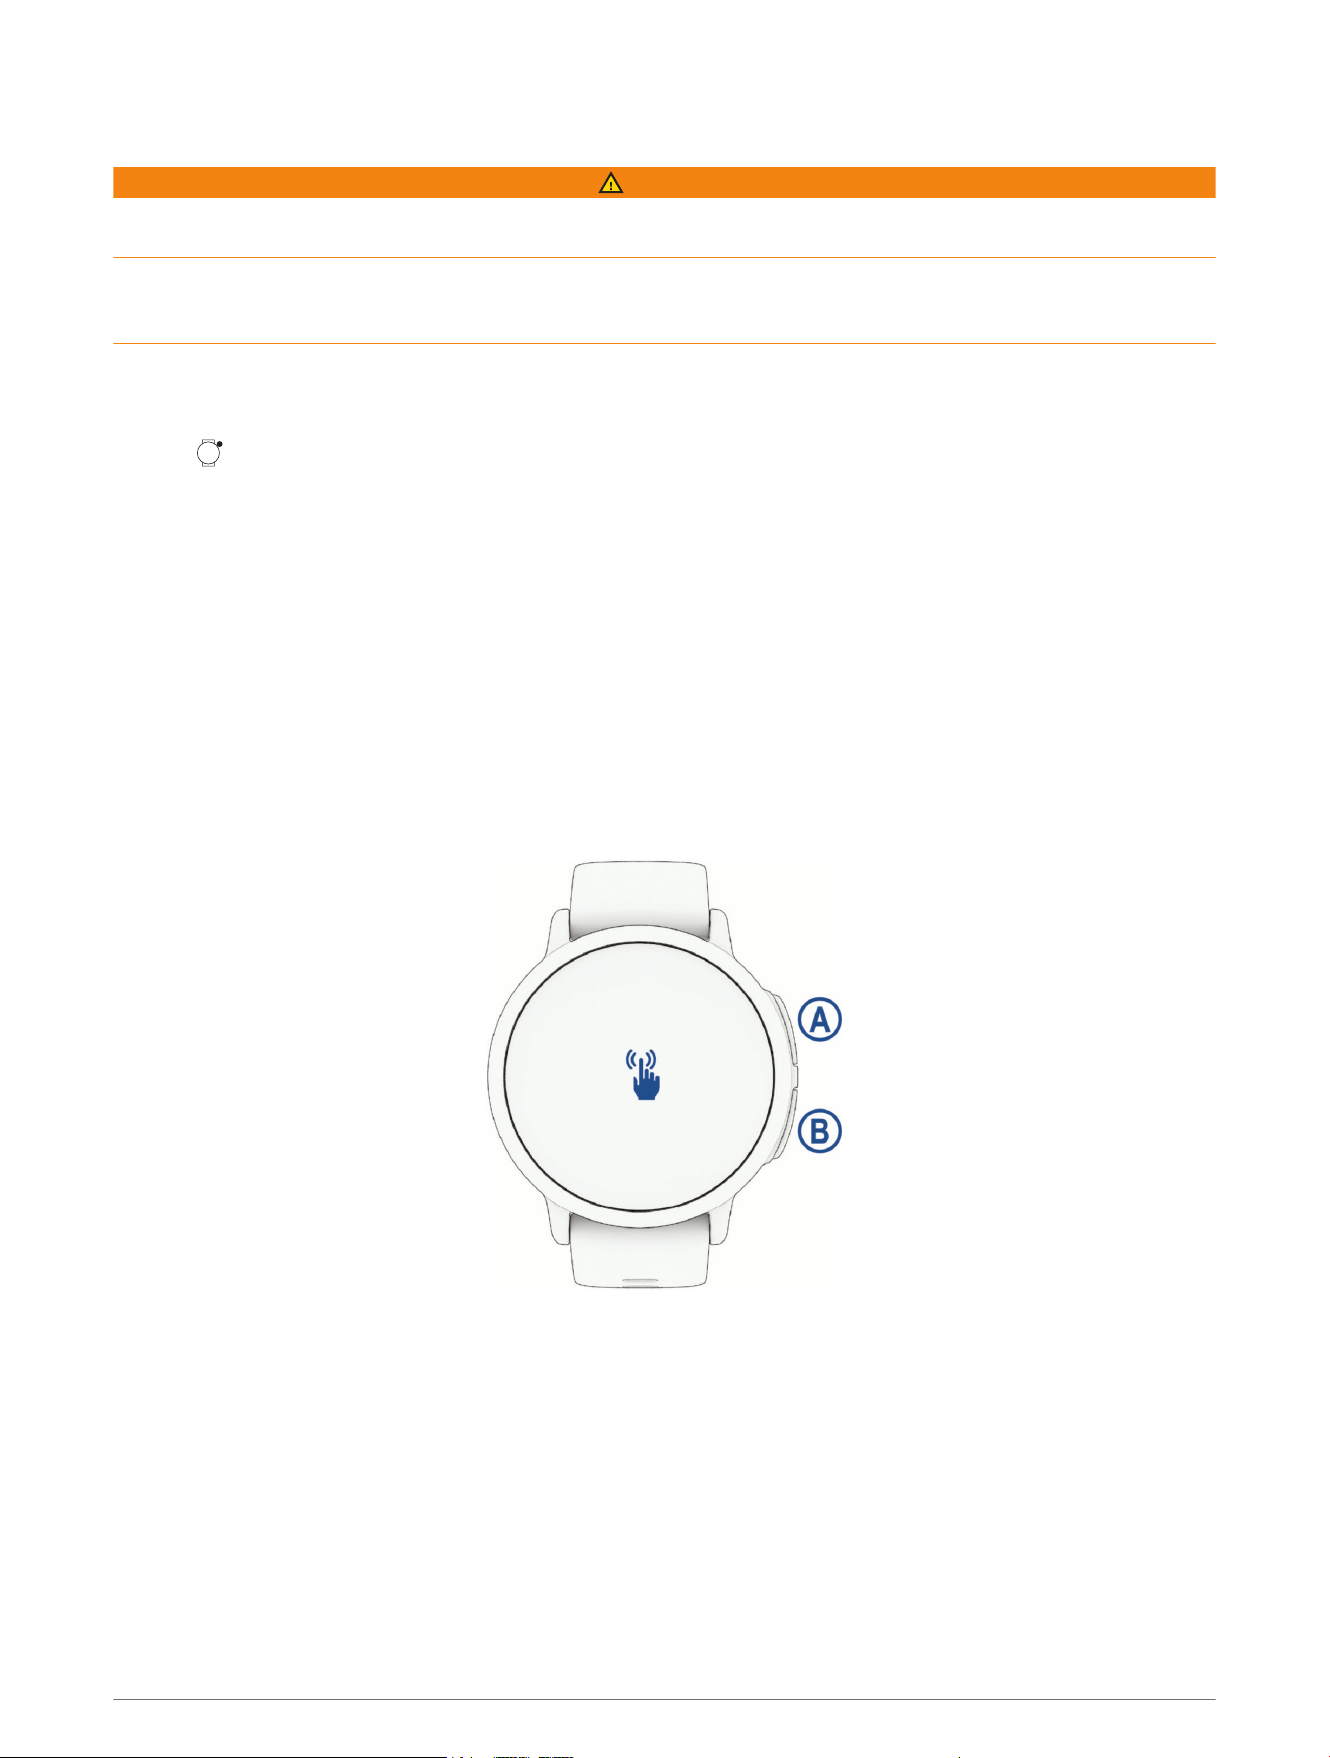
Overview
Introduction 1
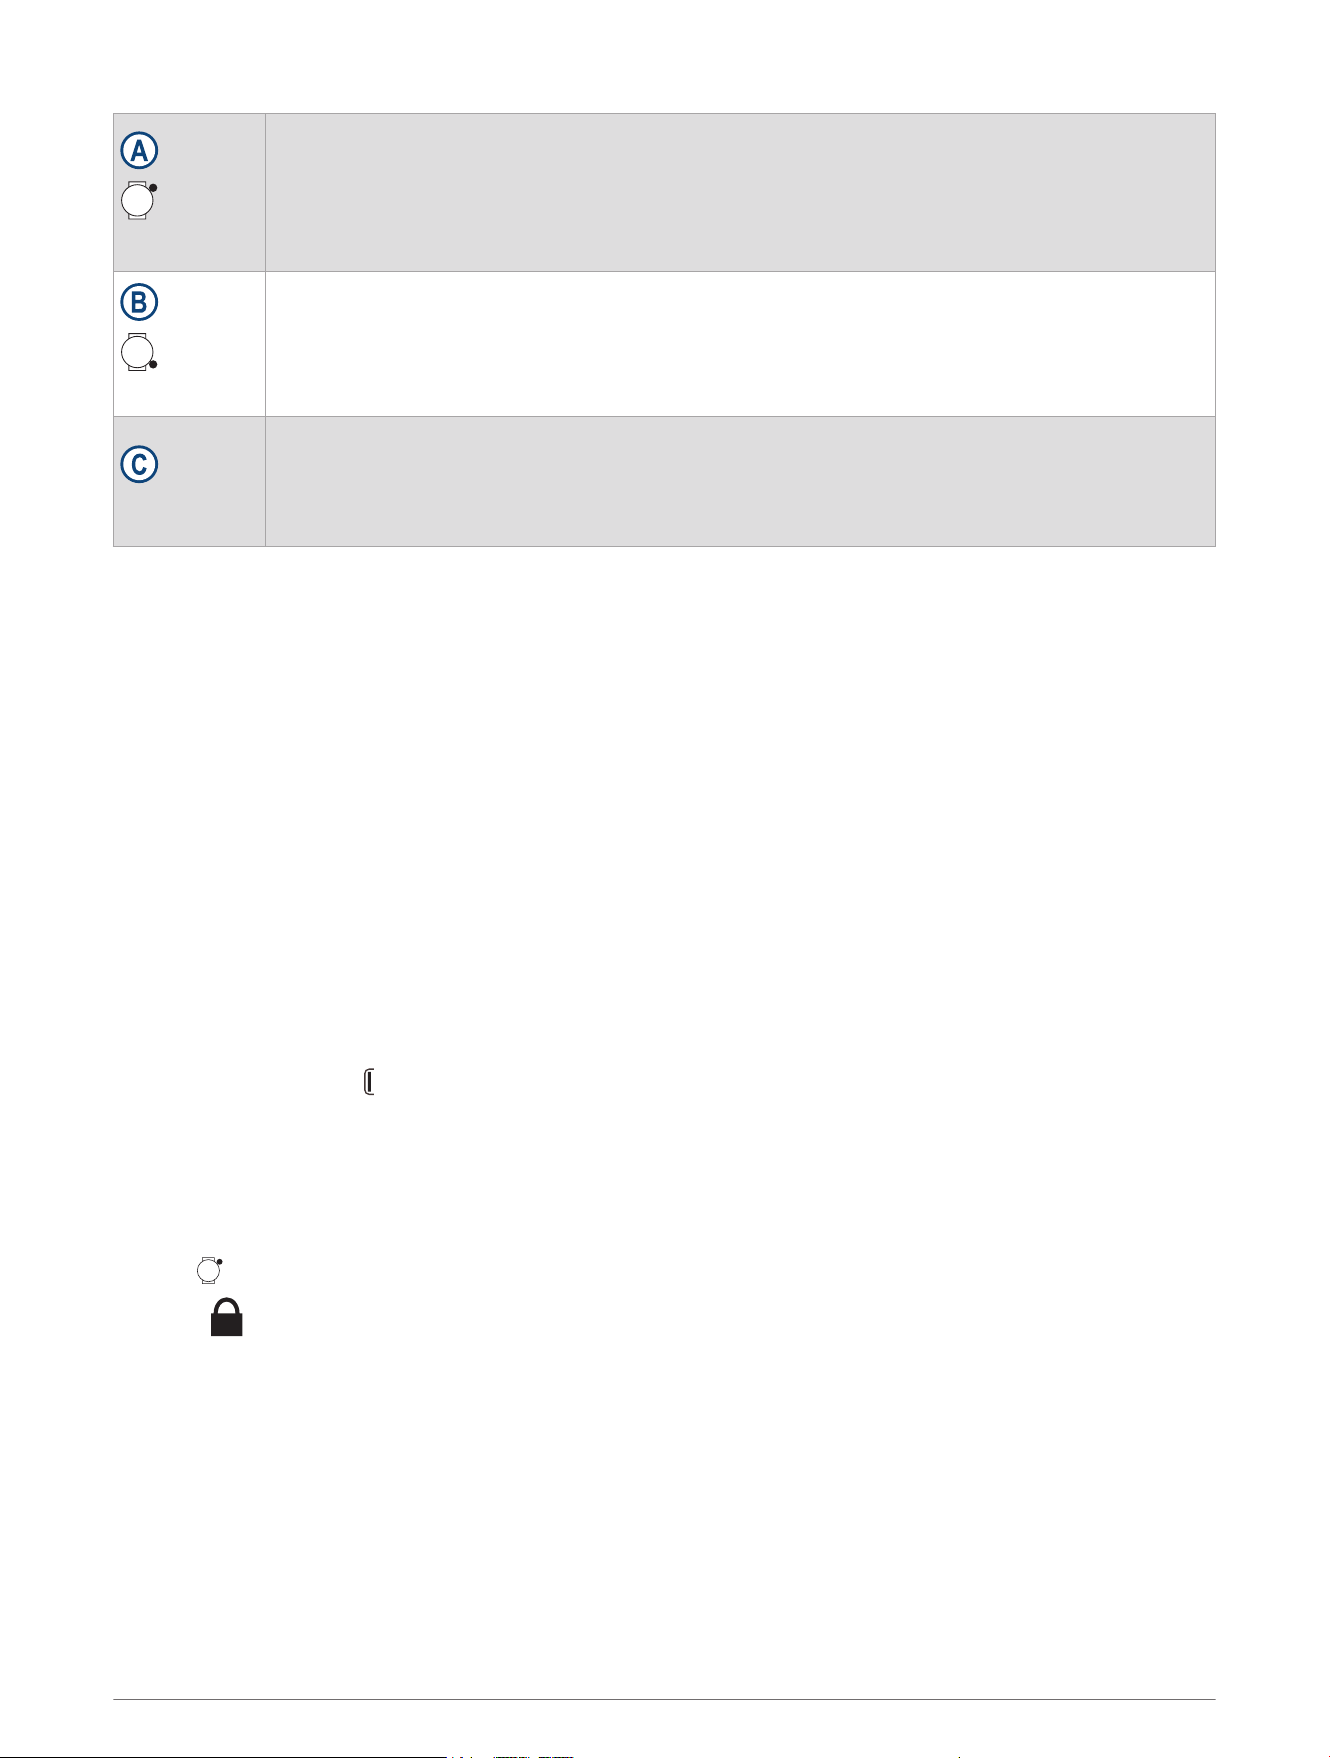
START button
• Hold for 2 seconds to turn on the watch.
• Press to open the activities and apps menu, including watch settings.
• Hold for 2 seconds to view the controls menu, including power.
• Hold until the watch vibrates 3 times to request assistance (Safety and Tracking Features,
page17).
BACK button
• Press to return to the previous page.
TIP: During an activity, on-screen tips appear to explain non-default button behavior.
• Hold to view the custom shortcut feature (Setting Up a Shortcut, page16).
Touchscreen
• Swipe up, down, left, or right to scroll through glances, features, and menus (Touchscreen
Tips, page2).
• Tap to select an option in a menu.
• Swipe right to return to the previous screen.
Touchscreen Tips
• Drag up or down to scroll through lists and menus slowly.
• Tap to select an item.
• Tap to wake the watch.
• From the watch face, swipe up to scroll through the glances on the watch.
• From the watch face, swipe left to view the apps and activities menu, including watch settings.
• From the watch face, swipe down to view the notification center.
• Swipe right to return to the previous screen.
• Tap and hold an item on the watch face to bring up contextual information, such as glances or menus, if
available.
• From the glances or apps menu, hold the watch face to reorder or delete the options.
• During an activity, swipe up or down to view the next data screen.
• During an activity, swipe right to view the watch menu, watch face, and glances.
• During an activity, swipe left to view the music player.
• Cover the screen with your palm to return to the watch face and turn down the screen brightness.
• When available, select or swipe to view menu options.
• Perform each menu selection as a separate action.
Locking and Unlocking the Device
You can lock the device to prevent inadvertent screen touches and button presses.
NOTE: You can customize the controls menu (Customizing the Controls Menu, page16).
1 Hold to view the controls menu.
2
Select .
The device does not respond to touches or button presses until you unlock it.
3 Hold any button to unlock the device.
2 Introduction
LTE Connected Features
CAUTION
The Bounce 2 watch has certain features that require an LTE Subscription and must be set up using the Garmin
Jr.
™
app. For subscription information, go to garmin.com/subscriptions.
The features listed here require an active LTE Subscription and LTE connection.
• Assistance
• Chores and rewards
• LiveTrack
• Text and voice messaging
• Voice calling
Connectivity
Connectivity features are available for your watch when you pair with your compatible phone (Pairing the Watch
with a Parent's or Guardian's Phone, page3). Additional features are available when you connect your watch
to a Wi‑Fi network (Connecting to a Wi‑Fi Network, page6).
Phone Connectivity Features
Phone connectivity features are available for your Bounce 2 watch when you pair it using the Garmin Jr. app
(Pairing the Watch with a Parent's or Guardian's Phone, page3). To communicate with the Bounce 2 watch,
you must have a Garmin Connect
™
account, download the Garmin Jr. app, and be added as a contact for the
child (Adding Messaging Contacts, page8).
• App features from the Garmin Jr. app (Garmin Jr. App, page7)
• Glances (Glances, page11)
• Controls menu features (Controls, page14)
• Safety and tracking features (Safety and Tracking Features, page17)
Pairing the Watch with a Parent's or Guardian's Phone
Before you can pair the Bounce 2 watch with a parent's or guardian's phone, the parent or guardian must have or
create a Garmin Connect account.
CAUTION
The Bounce 2 watch has certain features that require an LTE Subscription and must be set up using the Garmin
Jr. app (LTE Connected Features, page3). For subscription information, go to garmin.com/subscriptions.
The Bounce 2 watch must be paired directly through the Garmin Jr. app, instead of from the Bluetooth
®
settings
on your phone.
1 From the app store on your phone, install and open the Garmin Jr. app.
2 Log on using your Garmin Connect username and password.
3 Follow the instructions in the app to set up your family and add each child.
4 If you previously skipped the pairing process or paired the watch with a different phone, press , and select
Settings > Sync & Pair > Pair to manually enter pairing mode.
5 Follow the instructions in the app to complete the setup process.
NOTE: You can pair multiple mobile devices, such as a tablet or another parent's or guardian's phone (Pairing
Multiple Mobile Devices, page4).
Connectivity 3
Tips for Existing Garmin Jr. App Users
1 From the Garmin Jr. app, select Home.
2 Select > Add a new child or device.
3 Select an option:
• To add a new watch for an existing child, select the child.
• To add a new watch for a new child, select New kid.
4 Follow the on-screen instructions.
Pairing Multiple Mobile Devices
After you complete the initial setup (Pairing the Watch with a Parent's or Guardian's Phone, page3), you can pair
the Bounce 2 watch with up to two additional mobile devices, such as a tablet or another parent's or guardian's
phone.
1 From the app store on your phone or tablet, install and open the Garmin Jr. app.
2 Log on using your Garmin Connect username and password.
3 Follow the instructions in the Garmin Jr. app to join an existing family.
4 Bring your mobile device within 3m (10ft.) of the Bounce 2 watch and 10 m (33 ft.) away from other paired
mobile devices.
NOTE: If you cannot move the devices far enough apart, turn off Bluetooth technology on previously paired
mobile devices.
5 Follow the instructions in the app to complete the pairing process.
REMEMBER: If you turned off Bluetooth technology on previously paired mobile devices, turn it back on.
6 If necessary, repeat steps 1 through 5 for each additional mobile device.
Calling from the Watch
Before you can make a call from the watch, you must activate your LTE Subscription (LTE Connected Features,
page3).
NOTICE
Do not expose the microphone and speaker openings to sunscreen or other chemicals. Doing so could clog or
otherwise adversely affect the microphone and speaker, degrading their performance.
1 Press .
2 Select Phone.
3 Select an option:
• To call a phone number from your contacts, select , select a contact name, and select a phone number
(Adding Messaging Contacts, page8).
• To view recent calls made or received on the watch, swipe up.
TIP: You can select to hang up before the call connects.
4 Connectivity
Messages from the Watch
Sending a Message from the Watch
Before you can send messages from the watch, you must activate your LTE Subscription (LTE Connected
Features, page3).
1 Press .
2 Select Messages > .
3 Select a contact.
4 Select an option:
• To send a text message, select Text.
NOTE: The list of messages and message text can be customized in the Garmin Jr. app (Managing Preset
Text Messages, page6).
• To send a voice message, select Voice > .
• To send a sound emoji, select Sound Emoji.
5 Select a sound emoji or text message, type a custom text message, or record a voice message.
6 Select .
Messages from the Garmin Jr. App
Sending a Text Message from the Garmin Jr. App
1 From the Garmin Jr. app, select Connect.
2 Select your child.
3 Enter a message.
4 Select or to send the text message.
Sending a Voice Message from the Garmin Jr. App
1 From the Garmin Jr. app, select Connect.
2 Select your child.
3 Hold , and continue holding while recording your message.
NOTE: The Garmin Jr. app automatically limits your recording time to approximately 20 seconds.
4 Select an option:
• If necessary, select to play back the message before sending it.
• Select to delete the message and try again.
• Select or to send the message.
Viewing Notifications
You can view calling and messaging notifications on your watch from several menu locations.
• When a new message appears on the watch, swipe left and select Reply or Dismiss.
• When you want to view the list of notifications, select an option:
◦ From the watch face, swipe down to view the notification center.
◦ From the watch face, press , and select Messages to view the messages app.
◦ Hold , and select to view the notifications control.
Connectivity 5
Managing Preset Text Messages
Your child can use the list of preset text messages to communicate with their contacts (Sending a Message
from the Watch, page5).
1 From the Garmin Jr. app, select Connect.
2 Select your child.
3 Select .
4 Select Preset text messages or Manage preset messages.
5 Select an option:
• Select Reorder List, and drag to reorder the list.
• Enter text in a blank message to create a custom message.
• Remove the text from a message to delete it from the list.
• Select > Restore defaults to remove custom messages and sort the messages in the default order.
6 Select .
The list of preset text messages is updated on the watch.
Deleting Message History from the Garmin Jr. App
1 From the Garmin Jr. app, select Connect.
2 Select your child.
3 Select > Delete message history > Delete.
Wi‑Fi Connectivity Features
Activity uploads to your Garmin Jr. account: Automatically sends your activity to your Garmin Jr. account as
soon as you finish recording the activity.
Audio content: Allows you to sync audio content from third-party providers.
Software updates: You can download and install the latest software.
Connecting to a Wi‑Fi Network
Before you can connect to a Wi‑Fi network, you must connect the watch to the Garmin Jr. app on your phone
(Pairing the Watch with a Parent's or Guardian's Phone, page3).
Garmin
®
recommends connecting the watch to a Wi‑Fi network for optimal performance, including improved
battery life.
1 Move within range of a Wi‑Fi network.
2 From the Garmin Jr. app, select Home.
3 Select your child, and select Settings > Wi-Fi > .
4 Select an available Wi‑Fi network, and enter the login details.
6 Connectivity

Garmin Jr. App
The free Garmin Jr. app lets you track your children's daily activity and chore progress.
Activity tracking: Allows you to track your children's daily steps, active minutes, timed activities, and sleep data.
Adventure map: Allows you to view your children's progress each day they reach the 60minute activity goal,
revealing adventures.
Challenges: Allows you to compare steps for the whole family and connections from your Garmin Connect
community.
Chore progress: Allows you to create and manage chores, award coins for chore completion, and redeem coins
for custom rewards.
More: Allows you to customize your family, update app settings, and view help topics and about information.
Rewards: Allows you to create rewards and redeem coins for rewards.
Settings: Allows you to customize the watch and user settings, including alert tones, emergency contact
information, profile pictures, and more.
Sleep tracking: Allows you to view your child's sleep statistics.
Stats: Allows you to view your child's active minutes and steps records.
Steps: Allows you to view your child's step data.
Setting Up Your Child's User Profile
You can update your child's photo, name, avatar, background color, bed time, wake time, birth date, and gender.
1 From the Garmin Jr. app, select Home.
2 Select your child, and select Settings > Edit Profile.
3 Select an option.
Garmin Jr. Family
Your Garmin Jr. family is made up of members who you can designate as guardians or caregivers. Family
members are automatically added as Garmin Jr. contacts.
You can also add connections from your Garmin Connect account to include on your family's steps
leaderboards and add their Garmin device as a contact.
NOTE: Family members can belong to only one Garmin Jr. family.
Adding Members to a Garmin Jr. Family
Before you can add members to a Garmin Jr. family, each user must have or create a Garmin Connect account.
1 From the Garmin Jr. app, select > Family > Invite member.
2 Enter the email address that is associated with the user's Garmin Connect account.
3 Select an option:
• Select Guardian to allow the user to view the child's location and interact with the family and modify kid
settings.
• Select Caregiver to allow the user to view the child's location and interact with the family.
• Select Communicator to allow the user to interact with the family.
4 Select Continue > Send invitation.
The user receives an email invitation to join your Garmin Jr. family.
NOTE: The user's email address appears on the Pending Invitations list until the invitation is accepted. You
can resend or cancel the invitation before it is accepted.
Connectivity 7
Inviting Connections with the Garmin Jr. App
Before you can invite a person as a connection, each person must have or create a Garmin Connect account.
1 From the Garmin Jr. app, select > Family > Connections.
2 Select Find People or .
3 Select an option:
• Enter a name or email to search for a person.
• Select Your Contacts to choose a person from your contacts.
4 Select the person, and select Connect > OK.
The person receives an email invitation to connect with your family.
Adding Messaging Contacts
Before you can add messaging contacts, you must connect to people who have messaging-capable Garmin
devices in the Garmin Jr. app (Inviting Connections with the Garmin Jr. App, page8).
NOTE: Members of your Garmin Jr. family are automatically included in the list of messaging contacts (Adding
Members to a Garmin Jr. Family, page7).
1 From the Garmin Jr. app, select Home.
2 Select your child, and select Settings > Contacts.
3 Select next to an available contact.
4 Select .
Syncing Your Watch Data with the Garmin Jr. App
The Bounce 2 watch periodically syncs data with the Garmin Jr. app automatically. You can also manually sync
data at any time.
1 Bring the watch near the paired phone.
2 Open the Garmin Jr. app.
TIP: The app can be open or running in the background.
3 On the watch, press to view the menu.
4 Select Settings > Sync & Pair > Sync.
5 Wait while the data syncs.
6 View current data in the Garmin Jr. app.
Viewing History
The Bounce 2 watch keeps track of your child's active minutes, sleep, and daily steps. You can view your child's
history in the Garmin Jr. app.
1 From the Garmin Jr. app, select Home.
2 Select your child, and select an option:
• To view active minutes, select Activity.
• To view sleep, select Sleep.
• To view steps, select Steps.
• To view your child's most active days, select Stats.
Data is displayed in daily, 7-day, 4-week, and 12-month increments.
Sleep Tracking
While your child is sleeping, the watch monitors their movement. You can set normal sleep hours in the Garmin
Jr. app settings (User and Safety Settings, page9). You can view sleep statistics in the Garmin Jr. app
(Viewing History, page8).
8 Connectivity

App Settings
You can customize your family and app settings in the Garmin Jr. app. You can also customize user and safety
settings (User and Safety Settings, page9).
From the Garmin Jr. app, select .
Family: Allows you to customize your family settings. For example, you can edit your family name or invite
additional parents or guardians.
App settings: Allows you to set the Garmin Jr. app to kid mode, customize notifications, turn music and sound
effects on or off, and sign out of your account.
Help: Includes watch fit and care, videos, and other helpful information.
About: Allows you to view version and legal information.
Pair a new Garmin device: Allows you to replace a watch for an existing child or add a new watch for a new
child.
Managing Watch Activity Notifications
You can receive notifications on your phone of your child's watch activity, such as location status, device status,
and chore updates.
1 From the Garmin Jr. app on your phone, select > App settings > Notifications.
2 Select the toggle switches to enable the notifications you want to receive.
User and Safety Settings
You can customize your user and safety settings in the Garmin Jr. app.
From the Garmin Jr. app, select Home, select your child, and select Settings.
Edit Profile: Allows you to customize your child's profile information. You can set the child's name, avatar,
background color, bed time, wake time, birth date, and gender (Setting Up Your Child's User Profile, page7).
Display text: Allows you to change the name displayed on the watch face.
Watch faces: Allows you to send more watch faces to the watch.
Alarms: Allows you to set an alarm to send to the watch (Setting an Alarm, page31).
Daily steps goal: Allows you to update the daily steps goal.
Parental controls: Allows you to turn on do not disturb during sleep hours and school mode (Turning On School
Mode, page10).
Contacts: Allows you to add people whom your child may message (Adding Messaging Contacts, page8).
Preset text messages: Allows you to update the preset text messages your child can send from the watch
(Managing Preset Text Messages, page6).
Safety: Allows you to manage family contacts who will receive a notification when your child requests
assistance.
Boundaries: Allows you to update boundaries (Adding a Boundary, page18).
Wi-Fi: Allows you to connect the watch to a Wi‑Fi network (Connecting to a Wi‑Fi Network, page6).
Connectivity: Allows you to view details of your LTE Subscription (garmin.com/subscriptions).
Find my watch: Helps you locate a lost Bounce 2 watch that is paired using Bluetooth technology and currently
nearby (Locating a Lost Watch, page42).
Power off: Allows you to power the watch off from the Garmin Jr. app.
Device details: Allows you to view the model, software version, serial number, and owner's manual. You can also
reset the watch (Resetting All Default Settings, page41).
Pairing: Allows you to register an accessory band, pair a new watch, or unpair the current watch.
Language: Allows you to update the language on the watch.
Connectivity 9
Turning On School Mode
You can use school mode to automatically silence and restrict the watch during school hours. Your child can
use assistance while the watch is in school mode.
1 From the Garmin Jr. app, select Home.
2 Select your child, and select Settings > Parental controls > School mode.
3 Turn on school mode.
4 Select an option:
NOTE: Both options mute vibrations and sounds for all notifications except alarms, assistance, find my
watch, and when school mode turns on or off.
• To silence the watch and allow all features during school hours, select Silent.
• To silence the watch and restrict games and messages during school hours, select Silent & restricted.
5 Select Start time, End time, or Days to update school hours.
Turning Off School Mode
1 From the Garmin Jr. app, select Home.
2 Select your child, and select Settings > Parental controls > School mode.
3 Turn off school mode.
4 Select .
5 Wait for the Garmin Jr. app to sync with the watch.
Using Kid Mode
You can enable kid mode in the Garmin Jr. app to allow a child to mark chores as complete and redeem rewards
without parent or guardian approval. You can also use facial recognition on your phone in place of a passcode
to unlock the kid mode settings.
1 From the Garmin Jr. app, select > App settings > Kid Mode.
2 Turn on kid mode.
3 If necessary, select options to customize kid mode.
4 If necessary, select Change Passcode to change the passcode.
NOTE: The passcode is required to access certain features in the Garmin Jr. app when kid mode is turned
on. The default passcode is 0000.
5 Select .
Deleting a Profile
1 From the Garmin Jr. app, select Home.
2 Select your child.
3 Select Settings > Edit Profile > Delete profile.
Appearance
You can customize the appearance of the watch face and the quick access features in the glance loop and
controls menu.
Watch Face Settings
You can customize the appearance of the watch face by selecting the layout, colors, and additional data. You
can also create custom watch faces in the Garmin Jr. app.
10 Appearance

Customizing the Watch Face
You can customize the watch face information and appearance.
1 Press .
2 Select Watch Face.
3 Scroll up to preview the watch face options.
4 Select Add New to choose from additional watch face options.
5 Select a watch face, and select .
6 Select an option:
NOTE: Not all options are available for all watch faces.
• To activate the watch face, select Apply.
• To change the data that appears on the watch face, select Data.
• To add or change an accent color for the watch face, select Accent Color.
• To change the color of the data that appears on the watch face, select Data Color.
• To remove the watch face, select Delete.
Creating a Custom Watch Face
1 From the Garmin Jr. app, select Home.
2 Select your child.
3 Select Settings > Watch faces > Your designs > Create a watch face.
4 Follow the on-screen instructions.
5 Select Install.
Glances
Your watch comes preloaded with glances that provide quick information (Viewing Glances, page12). You can
swipe up from the watch face to scroll through the glances, and you can select a glance to view details. Some
glances require an LTE Subscription.
Some glances are not visible by default. You can add them to the glances list manually (Customizing the Glance
List, page12).
Appearance 11
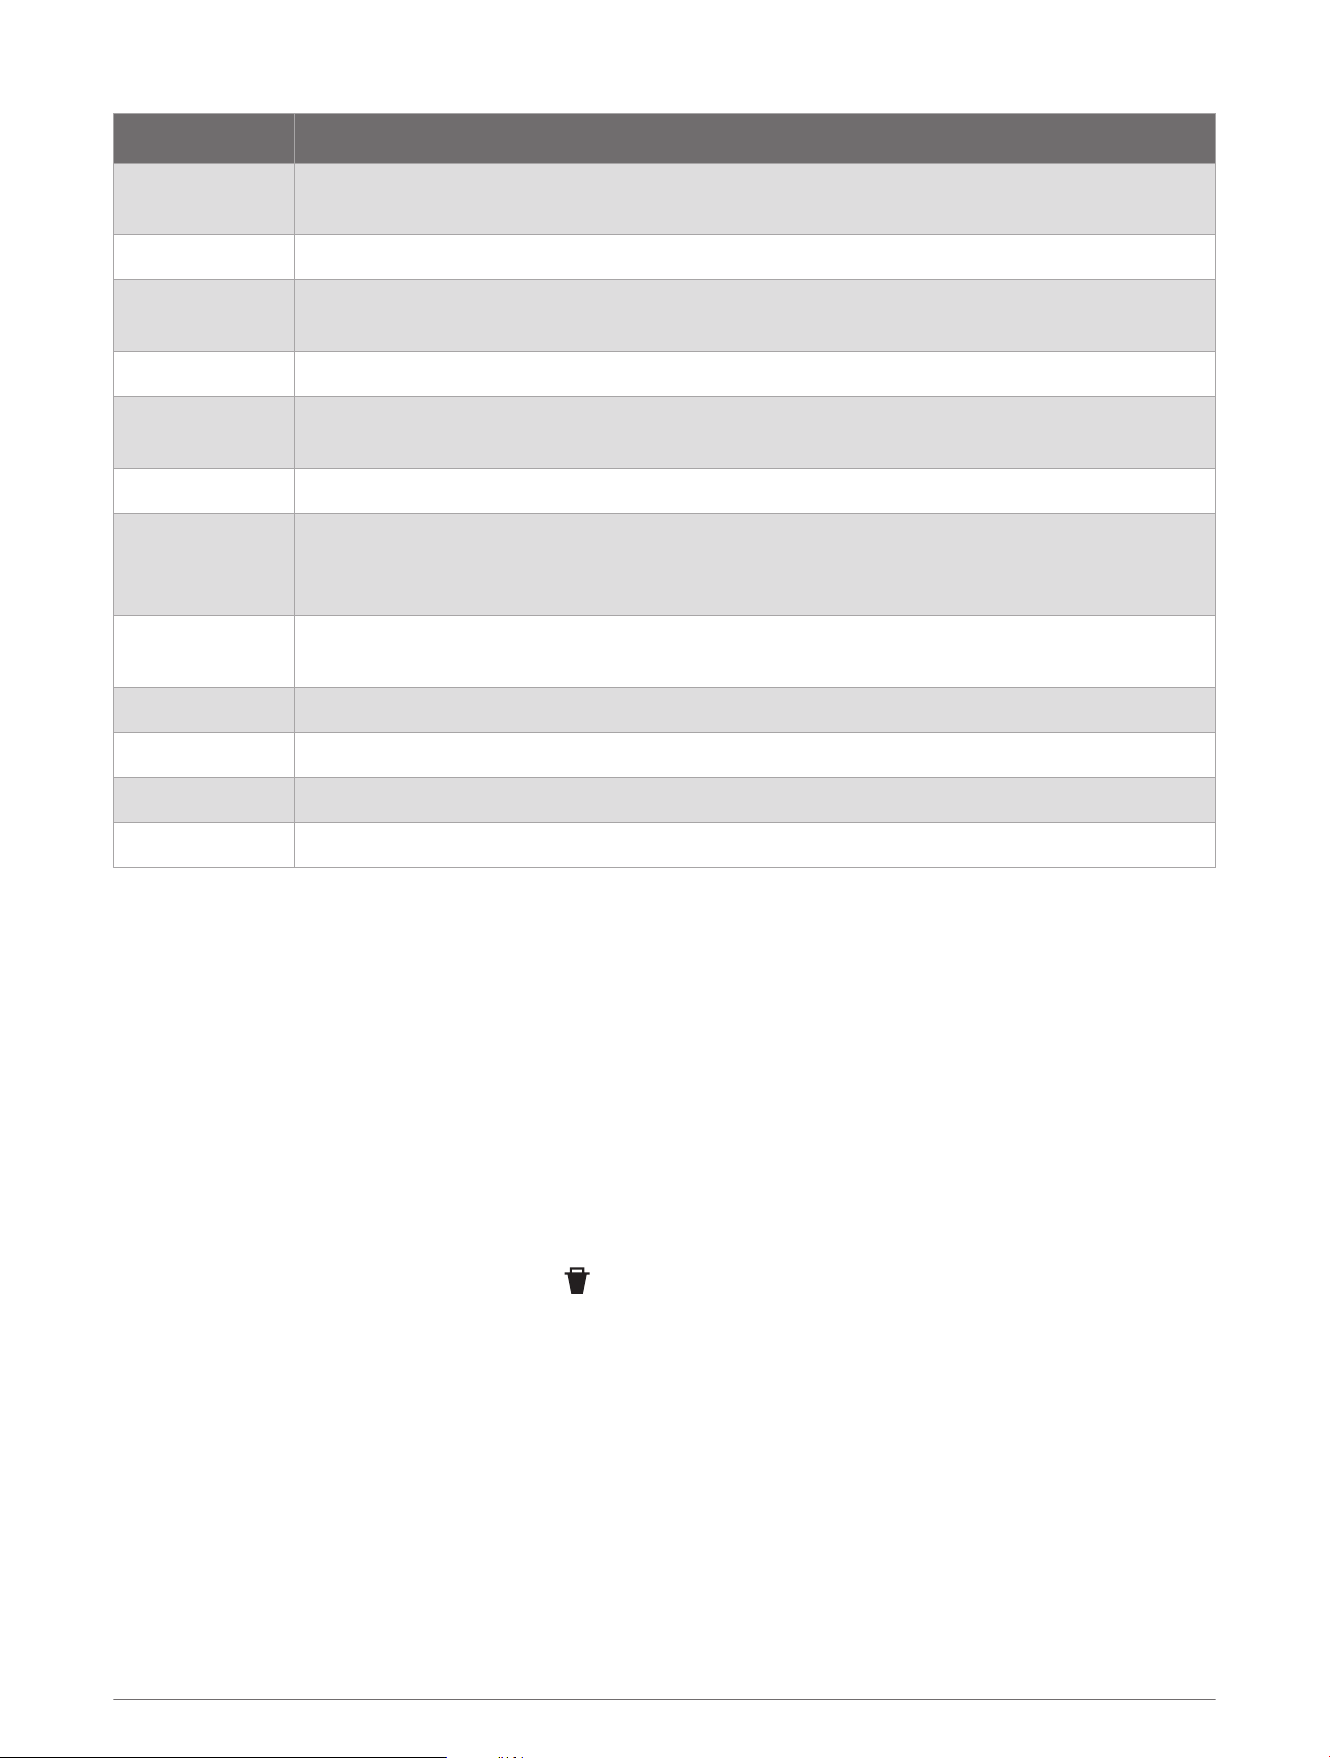
Name Description
Active Minutes
Tracks your time spent participating in moderate to vigorous activities, your weekly active
minutes goal, and progress toward your goal.
Challenges Displays your current leaderboard ranking if you participate in a Garmin Connect challenge.
Chores
Displays a checklist of chores set up in the Garmin Jr. app. You can mark chores as
completed and receive coins with parent or guardian approval.
Countdowns Displays upcoming countdown events.
History
Displays your activity history and a graph of your recorded activities (Viewing History,
page8).
Last Activity Displays a brief summary of your last recorded activity.
Last Ride
Last Run
Last Swim
Displays a brief summary of your last recorded activity and history of the specified sport.
Moon Phase
Displays the moonrise and moonset times, along with the moon phase, based on your GPS
position.
Music Provides music player controls for your watch music.
Steps Tracks your daily step count, step goal, and data for previous days.
Sunrise & Sunset Displays sunrise, sunset, and civil twilight times.
Weather Displays the current temperature and weather forecast.
Viewing Glances
• From the watch face, swipe up.
The watch scrolls through the glance loop.
• Select a glance to view additional information.
• Swipe left to view additional options and functions for a glance.
Customizing the Glance List
1 From the watch face, swipe up.
The watch scrolls through the glance list.
2 Select Edit.
3 Select a glance.
4 Select an option:
• To remove a glance from the list, select .
• To change the location of a glance in the list, select the glance, and drag it to the desired location on the
screen.
5 If necessary, select Add to add a glance to the list.
Updating the Weather Location
1 Swipe up to view the weather glance.
2 Select the glance to view the current weather for your location.
3 Swipe left.
4 Select Weather OptionsUpdate Current Location.
5 Wait while the watch locates satellites (Acquiring Satellite Signals, page43).
12 Appearance
Chores and Rewards
You can create a list of chores in the Garmin Jr. app to send to the watch. Your child can mark the chores as
completed on the watch to earn coins, which can be traded for rewards.
NOTE: An active LTE Subscription is required to use this feature (LTE Connected Features, page3).
Using the Chores Glance
Before you can use the chores glance, you must be assigned chores in the Garmin Jr. app (Assigning Chores,
page13) and have an active LTE Subscription (LTE Connected Features, page3).
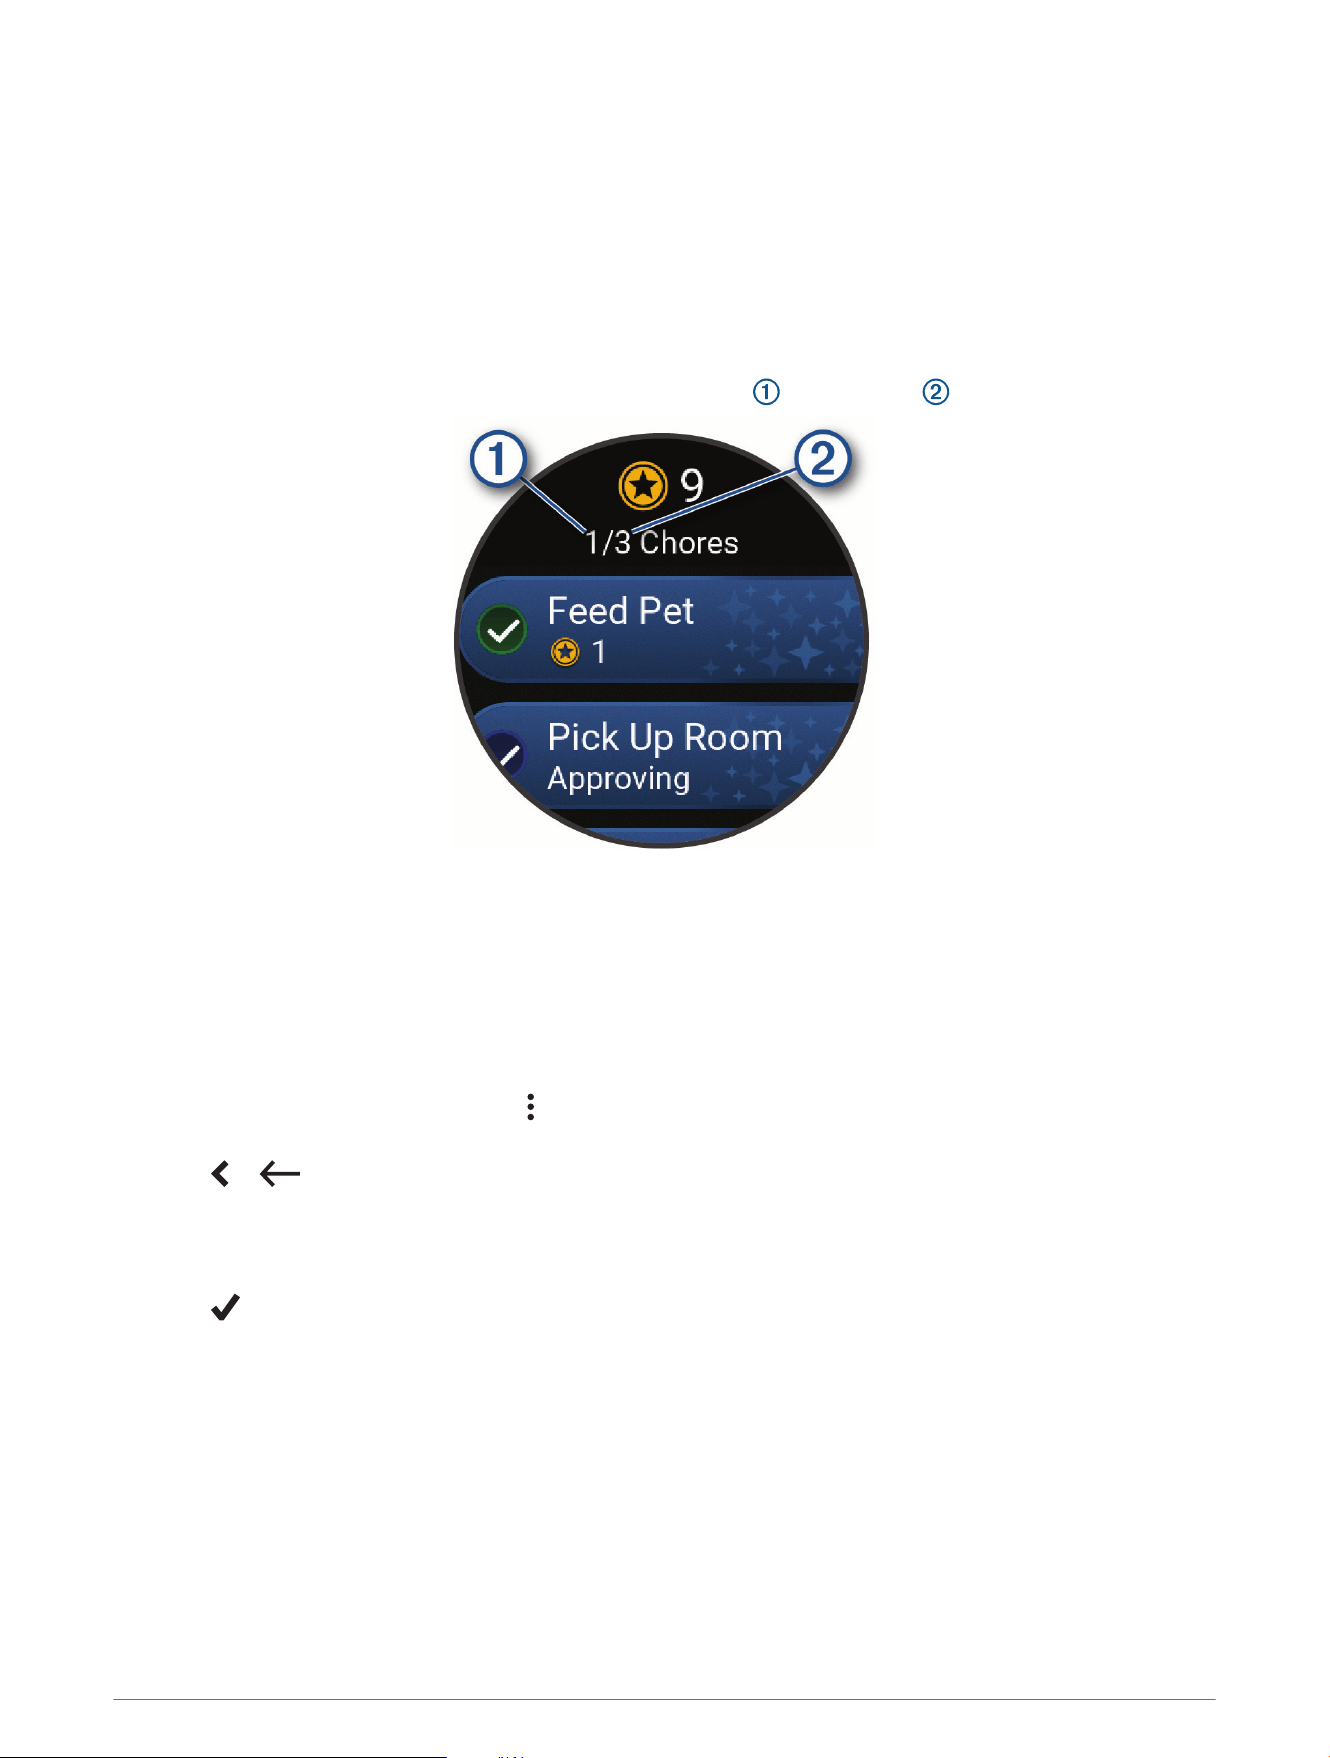
1 Swipe up to view the chores glance.
The watch displays the updated number of chores completed and assigned for the day.
2 Select the chore you completed.
The chore displays Approving until the chore is approved in the Garmin Jr. app (Approving Chores, page13).
After the chore is approved, the watch displays the updated number of coins earned.
Coins are available to be redeemed in the Garmin Jr. app (Redeeming Rewards, page14).
Assigning Chores
You can create a list of chores to send to the watch (Using the Chores Glance, page13).
1 From the Garmin Jr. app, select Home.
2 Select your child, and select Chores > > Add new chore.
3 Enter a name for the chore, or select a chore from the list.
4 Select or .
5 Select the number of coins to award for the chore.
6 If necessary, set the time and days when the chore must be completed.
TIP: You can also turn on an alarm for the chore.
7 Select .
Approving Chores
After completing a chore, your child can request approval from the Bounce 2 watch (Using the Chores Glance,
page13).
1 From the Garmin Jr. app, select Home.
2 Select your child, and select Chores.
3 Select the chore you want to approve.
Your child receives a notification on the watch when chores are approved.
Appearance 13
Creating Rewards
You can create a list of rewards, which your child can purchase with coins.
1 From the Garmin Jr. app, select Home.
2 Select your child, and select Rewards > > Add Name.
3 Enter a name for the reward, or select a reward from the list.
4 Select or .
5 Select Price to set the number of coins your child needs to redeem for the reward.
6 If necessary, update the icon and description.
7 Select .
You can redeem rewards in the Garmin Jr. app for your child (Redeeming Rewards, page14), or your child
can redeem rewards using the Garmin Jr. app in kid mode (Using Kid Mode, page10).
Redeeming Rewards
Your child can redeem coins earned for rewards (Creating Rewards, page14).
1 From the Garmin Jr. app, select Home.
2 Select your child, and select Rewards.
3 Select Redeem on the reward you want to redeem.
NOTE: If necessary, select Request when the Garmin Jr. app is in kid mode and the approval option is turned
on (Using Kid Mode, page10).
Coins are deducted from the coin total.
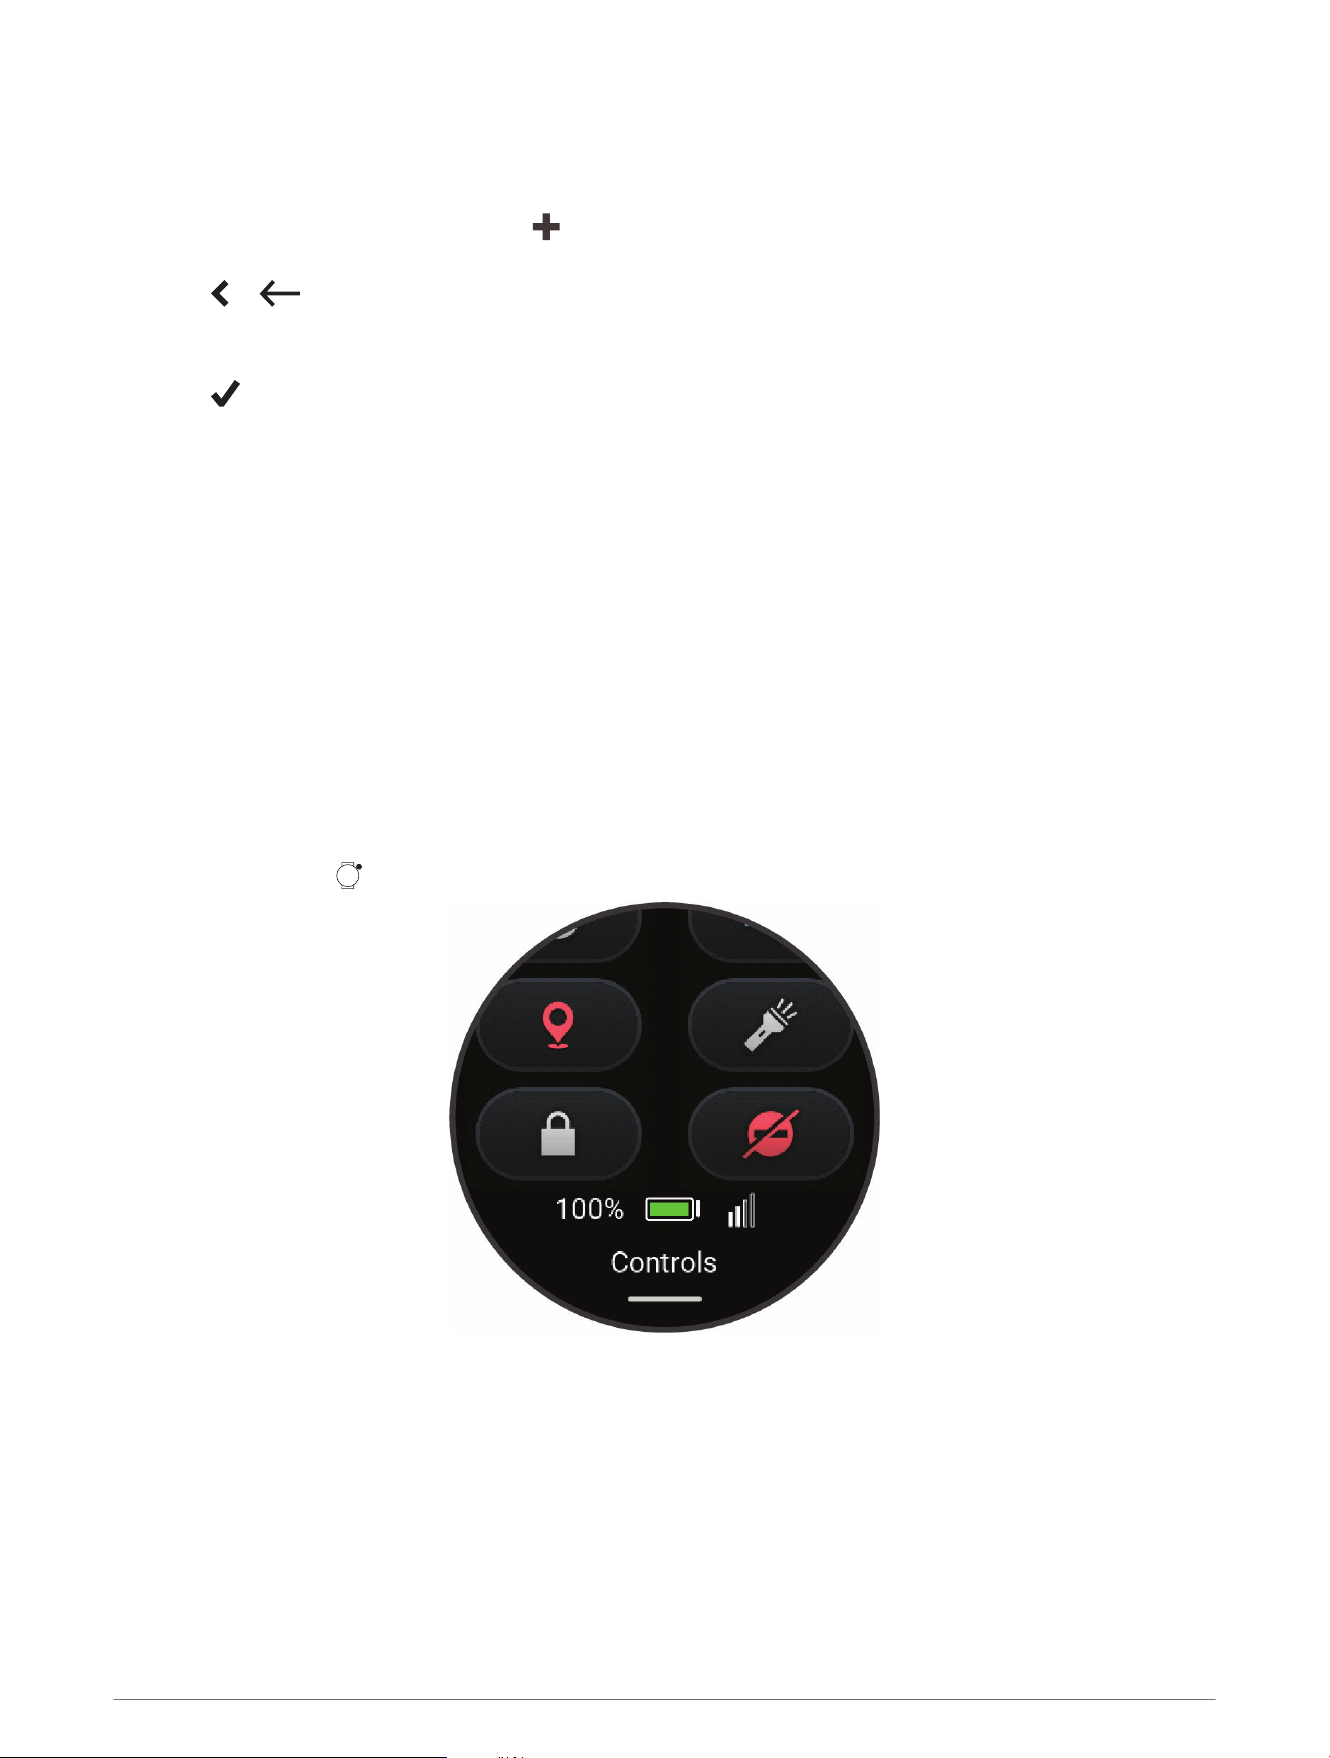
Controls
The controls menu lets you quickly access watch features and options. You can add, reorder, and remove the
options in the controls menu (Customizing the Controls Menu, page16).
From any screen, hold .
14 Appearance
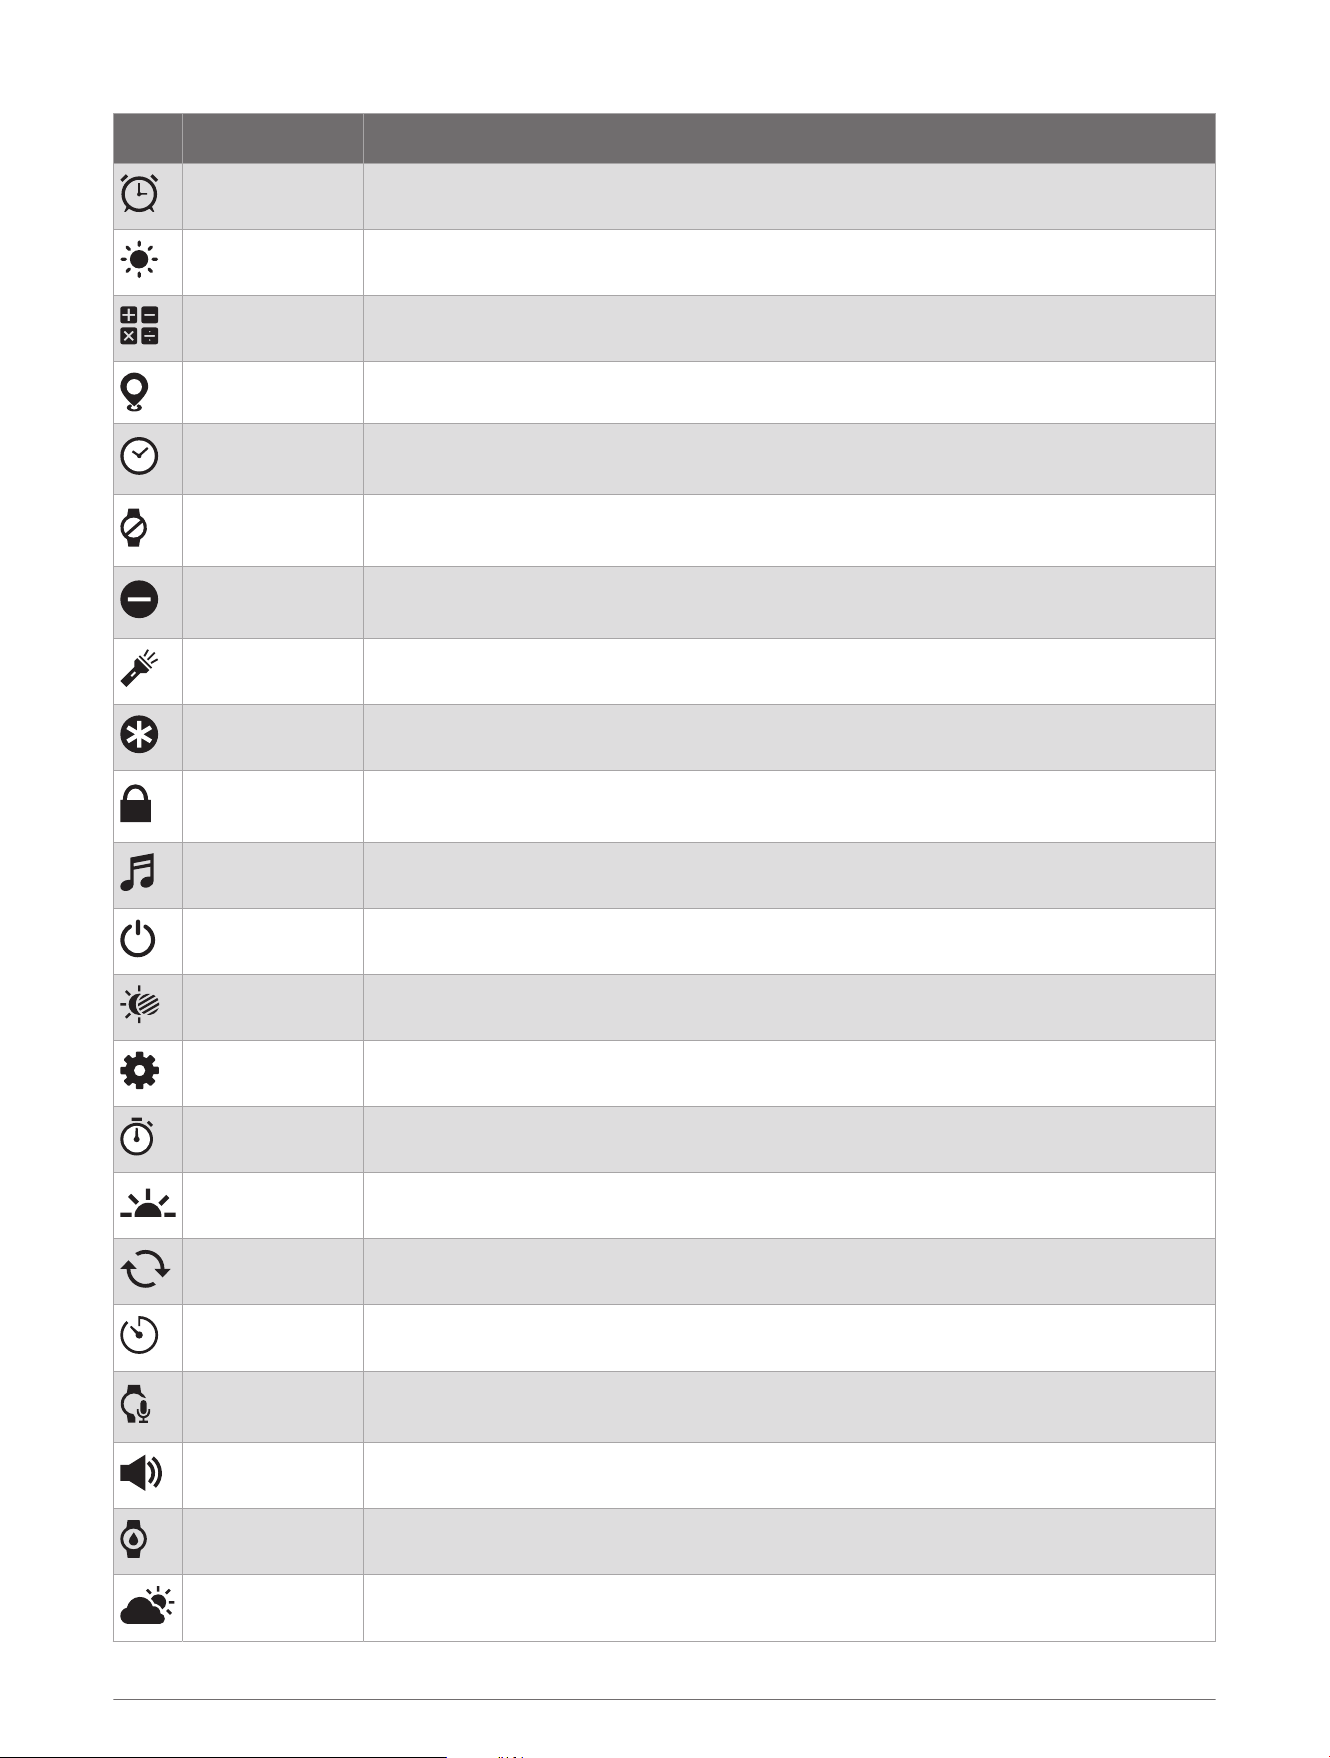
Icon Name Description
Alarm Clock Select to open the alarm clocks app (Setting an Alarm, page31).
Brightness Select to adjust the screen brightness (Display and Brightness Settings, page35).
Calculator Select to use the calculator, including the tip calculator.
Check In Select to check in with your current location (Checking in From the Watch, page18).
Clocks
Select to open the Clocks app to set an alarm, timer, stopwatch, or view alternate
time zones (Clocks, page31).
Display
Select to turn off the screen for alerts and gestures (Display and Brightness Settings,
page35).
Do Not Disturb
Select to enable or disable do not disturb mode to dim the screen and disable alerts
and notifications. For example, you can use this mode while watching a movie.
Flashlight Select to turn on the screen to use your watch as a flashlight.
Get Help Select to send an assistance request (Requesting Assistance, page17).
Lock Device
Select to lock the buttons and the touchscreen to prevent inadvertent presses and
swipes.
Music Select to control music playback on your watch.
Power Off Select to turn off the watch.
Red Shift Select to turn the screen to shades of red to use the watch in low light conditions.
Settings Select to open the settings menu.
Stopwatch Select to start the stopwatch.
Sunrise & Sunset Select to view sunrise, sunset, and twilight times.
Sync Select to sync your watch with your paired phone.
Timer Select to set a countdown timer.
Voice Command
Select to open the voice command app and say a command (Using Voice Commands,
page21).
Volume Select to open the watch volume controls.
Water Ejection Select to play tones to eject water from the speaker and microphone ports.
Weather Select to view the current weather forecast and current conditions.
Appearance 15
Customizing the Controls Menu
You can add, remove, and change the order of the shortcuts in the controls menu (Controls, page14).
1 Hold .
The controls menu appears.
2 Swipe down.
3 Select Edit.
4 Select a shortcut:
• To change the location of the shortcut in the controls menu, drag it to the desired location on the screen,
and select .
• To remove the shortcut from the controls menu, select .
5 If necessary, select Add to add a shortcut to the controls menu.
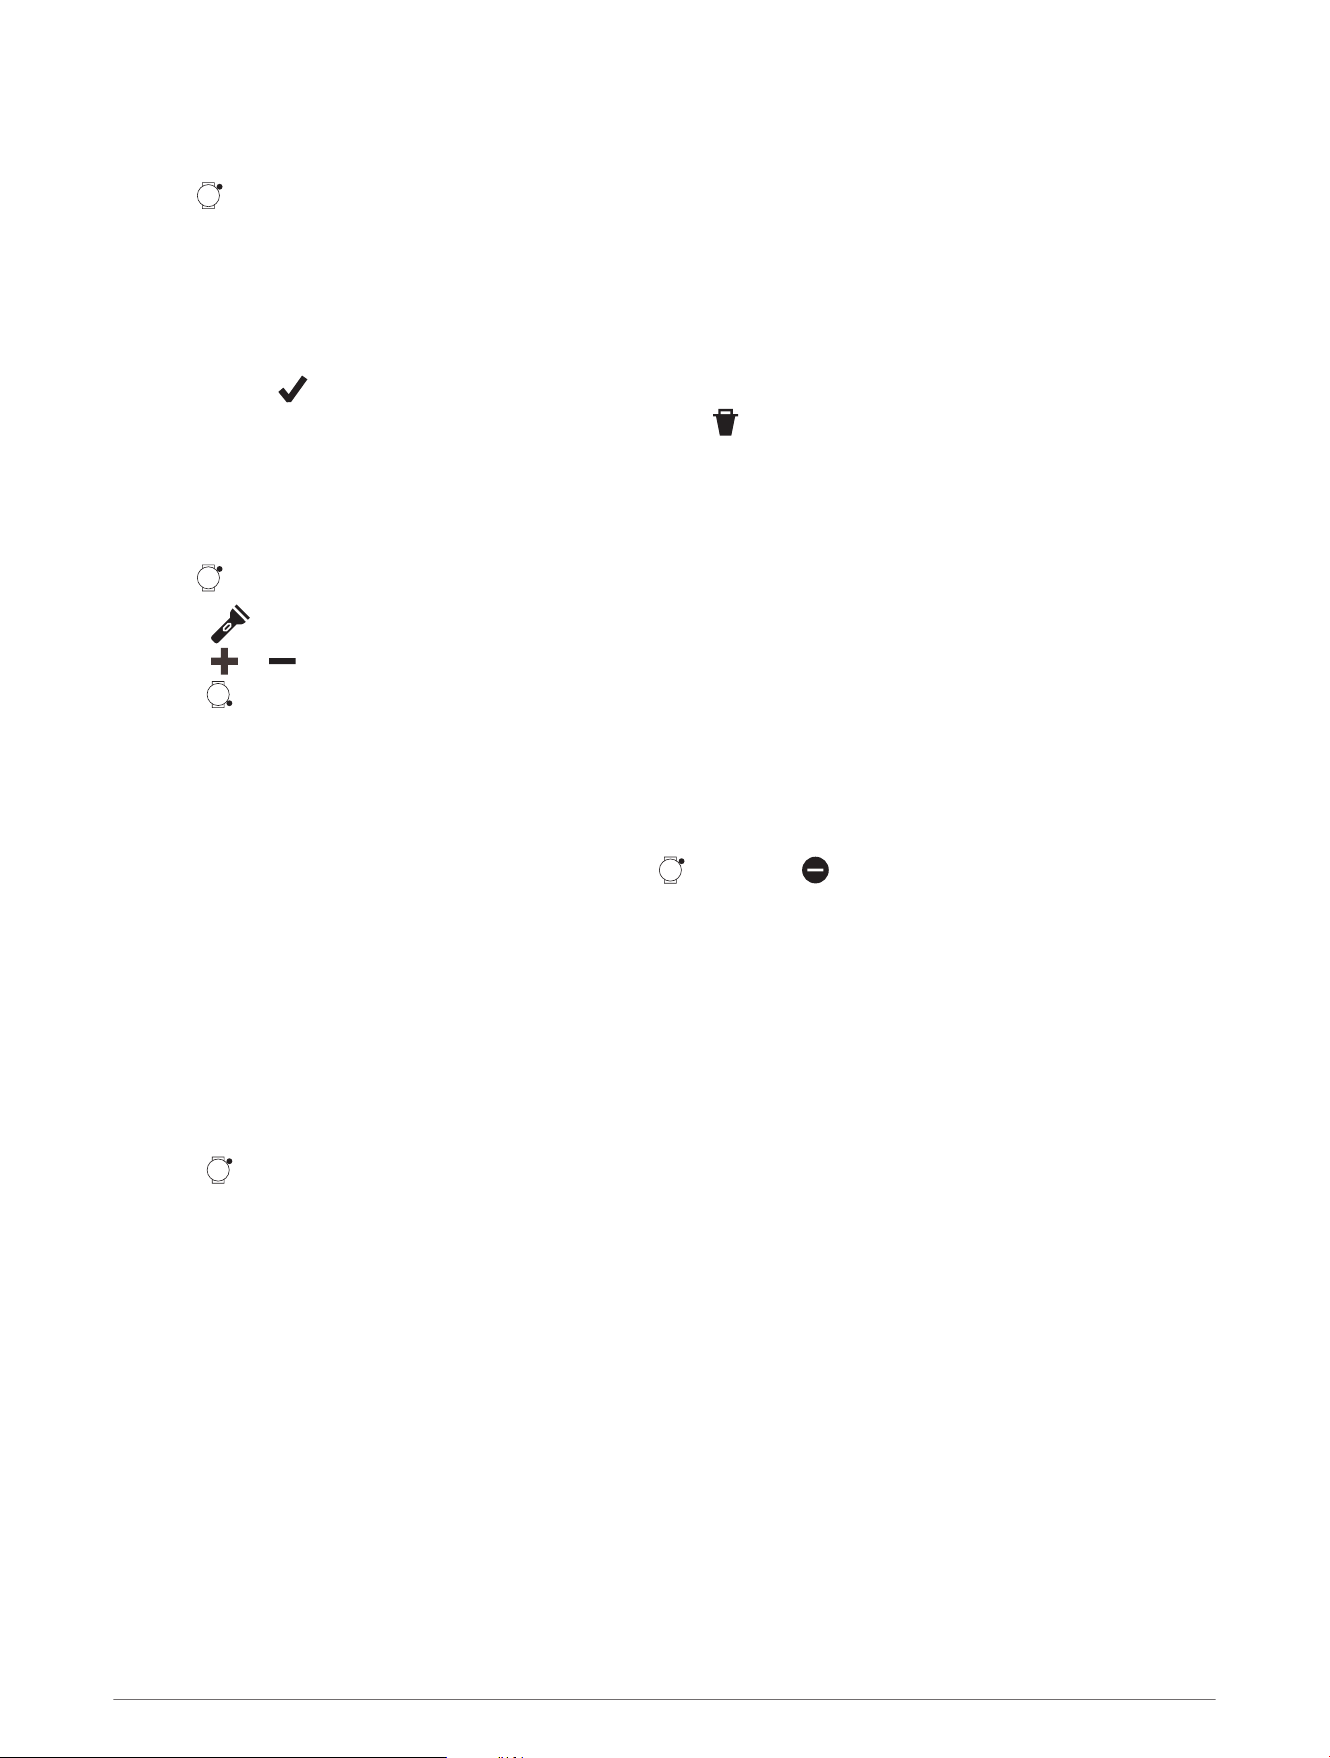
Using the Flashlight Screen
NOTE: Using the flashlight can reduce battery life.
1 Hold to view the controls menu.
2
Select .
3 Select or to adjust the brightness.
4 Press to turn off the flashlight.
Using Do Not Disturb Mode
You can use do not disturb mode to turn off vibrations and the display for alerts and messages. This mode
disables the gesture setting (Display and Brightness Settings, page35). Your child can use the Bounce 2 watch
to request assistance while the watch is in do not disturb mode.
• To manually turn on or off do not disturb mode, hold , and select .
• To automatically turn on do not disturb mode during your child's sleep window, in the Garmin Jr. app (User
and Safety Settings, page9), select your child and select Settings > Parental controls > Do not disturb during
sleep.
You can select Silent to silence the watch and allow access to all watch features, or you can select Silent &
restricted to silence the watch and restrict access to the watch features.
Setting Up a Shortcut
You can set up a shortcut to your favorite app, glance, or control, such as your alarm clock or the music
controls.
1 Press .
2 Select Settings > System > Shortcuts.
3 Select a button or button combination to customize.
16 Appearance
Safety and Tracking Features
CAUTION
The safety and tracking features are supplemental features and should not be relied on as a primary method to
obtain emergency assistance. The Garmin Jr. app does not contact emergency services on your behalf.
The safety and tracking features require an LTE Subscription and must be set up using the Garmin Jr. app. For
subscription information, go to garmin.com/subscriptions.
The Bounce 2 watch has safety and tracking features that require a phone paired with the Garmin Jr. app.
Guardians and caregivers in your Garmin Jr. family are notified when your child requests assistance. You can
manage Garmin Jr. family members in the Garmin Jr. app.
For more information about safety and tracking features, go to www.garmin.com/safety.
Assistance: Allows your child to start a LiveTrack session and send a notification to guardians and caregivers in
your Garmin Jr. family.
LiveTrack: Allows guardians and caregivers in your Garmin Jr. family to send a request to view your child's
location in real time.
Requesting Assistance
CAUTION
Assistance is a supplemental feature and should not be relied upon as a primary method to obtain emergency
assistance. The Garmin Jr. app does not contact emergency services on your behalf.
NOTICE
Before you can request assistance, you must set up emergency contacts in the Garmin Jr. app (Adding
Assistance Contacts, page17). An active LTE Subscription is required to request assistance, and the watch
must be in an area of network coverage where data is available. Your emergency contacts must be able to
receive emails or text messages (standard text messaging rates may apply).
1 Hold .
2 When you feel three vibrations, release the button to activate the assistance feature.
The countdown screen appears.
TIP: Before the countdown is complete, you can hold any button to cancel the message.
Adding Assistance Contacts
Assistance contact phone numbers are used for the safety and tracking features. You can add guardians or
caregivers from your Garmin Jr. family to the assistance call list.
1 From the Garmin Jr. app, select Home.
2 Select your child, and select Settings > Safety.
3 Follow the on-screen instructions.
LiveTrack
CAUTION
It is the responsibility of the user to use discretion when sharing location information with others. Always
ensure you are aware of and comfortable with whom you share your location information.
The LiveTrack feature lets you track your child's current location, recently visited locations, and the path of their
recent travels in real time.
Safety and Tracking Features 17
Starting a LiveTrack Session
Before you can start a LiveTrack session, you must pair the watch with the Garmin Jr. app on your phone
(Pairing the Watch with a Parent's or Guardian's Phone, page3).
1 From the Garmin Jr. app, select Location.
2 Select your child, and select LiveTrack.
LiveTrack continues running in the background.
Ending a LiveTrack Session
The LiveTrack session ends automatically after 30 minutes unless you choose to extend it.
From the Garmin Jr. app, select Location > End LiveTrack.
Location Tracking
Checking in From the Watch
Before your child can check in at a location, you must pair the watch with the Garmin Jr. app on your phone
(Pairing the Watch with a Parent's or Guardian's Phone, page3).
1 Hold to view the controls menu.
2
Select .
3 Select Send.
The watch sends a message to the parent or guardian and vibrates if vibration is turned on (Sound & Vibe
Settings, page35).
Viewing Your Child's Current Location
Before you can locate your child, you must pair the watch with the Garmin Jr. app on your phone (Pairing the
Watch with a Parent's or Guardian's Phone, page3).
1 From the Garmin Jr. app, select Location.
The last reported location of the watch and the time of the report appear.
2 Select Refresh to update the location.
Viewing Your Child's Location History
Before you can view your child's location history, you must pair the watch with the Garmin Jr. app on your phone
(Pairing the Watch with a Parent's or Guardian's Phone, page3).
All approved family members can view your child's location history in the app.
1 From the Garmin Jr. app, select Location > History.
2 Select to view up to seven previous days.
Boundaries
Adding a Boundary
Before you can add a boundary, you must pair the watch with the Garmin Jr. app on your phone (Pairing the
Watch with a Parent's or Guardian's Phone, page3).
1 From the Garmin Jr. app, select Location > > Add a new boundary.
2 If necessary, tap the default address to update the boundary center.
3 If necessary, use the slider to adjust the size of the boundary.
4 Select or .
5 Enter a name for the boundary.
6 Select Alerts to enable alerts when the watch leaves or enters the boundary.
7 Select to save the boundary.
18 Safety and Tracking Features
Adding a Temporary Boundary
You can use a temporary boundary to receive an alert when your child leaves a location. The temporary
boundary is removed after you receive the alert. You can also set a permanent boundary (Adding a Boundary,
page18).
1 From the Garmin Jr. app, select Location.
2 Select your child's location.
3 Swipe up, and select Temporary boundary.
4 If necessary, use the slider to adjust the size of the boundary.
5 Select .
Deleting a Boundary
1 From the Garmin Jr. app, select Location > > Manage boundaries.
2 Select a boundary.
3 Select Delete boundary > Delete.
Turning On and Off Boundary Alerts
When boundary alerts are turned on, parents and guardians receive a notification when the watch enters or exits
a boundary (Adding a Boundary, page18).
1 From the Garmin Jr. app, select Location > > Manage boundaries.
2 Select a boundary.
3 Select Alerts to turn alerts on or off.
Apps and Activities
Your watch includes a variety of preloaded apps and activities.
Apps: Apps provide interactive features for your watch, such as playing games or calling someone from your
watch (Apps, page20).
Activities: Your watch comes preloaded with indoor and outdoor activity apps, including running, cycling, pool
swimming, and more.
For more information about activity tracking and fitness metric accuracy, go to garmin.com/ataccuracy.
Apps and Activities 19
Apps
You can customize your watch using the apps menu, which lets you quickly access watch features and options.
Some apps require an LTE Subscription. Many apps can also be found in the glances (Glances, page11) or
controls (Controls, page14).
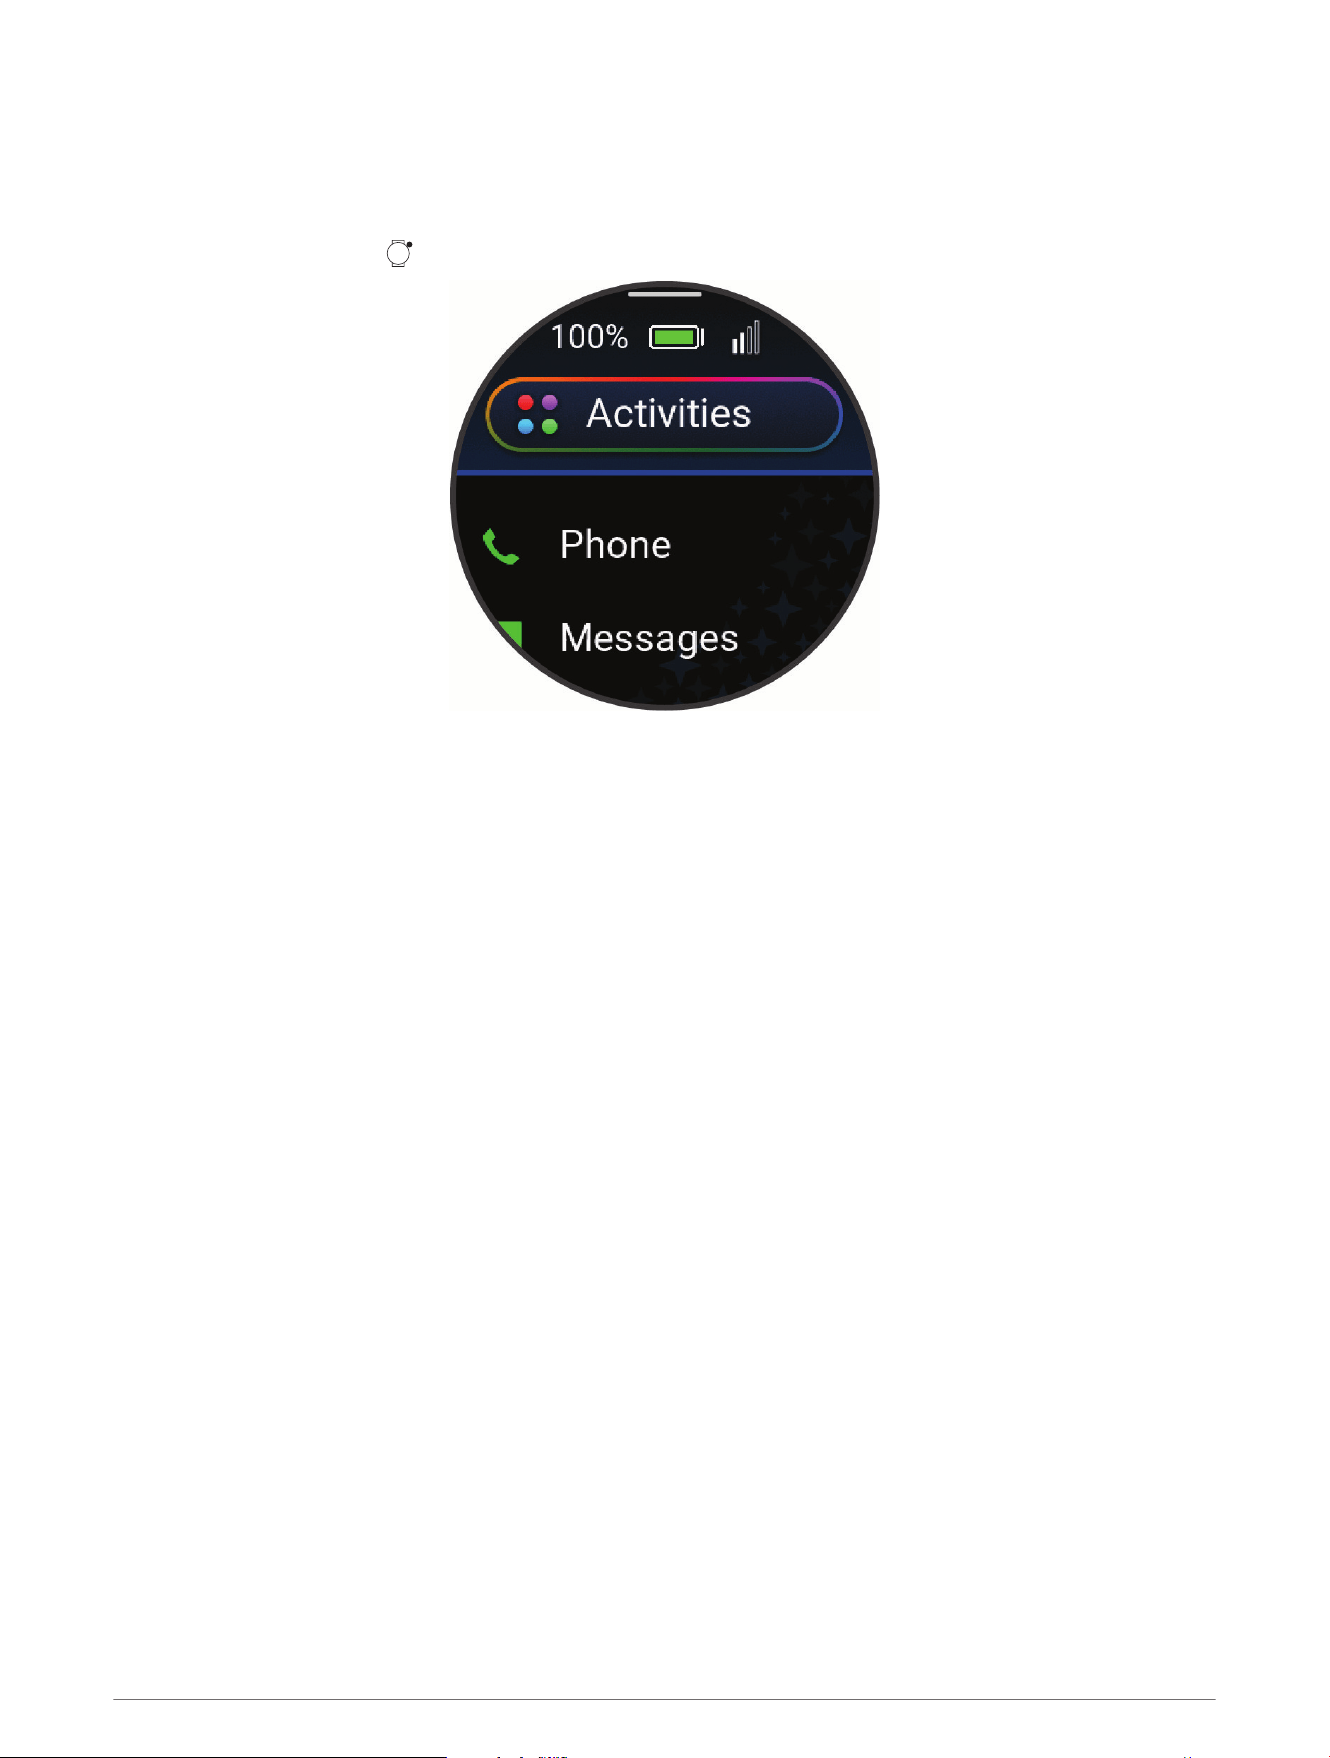
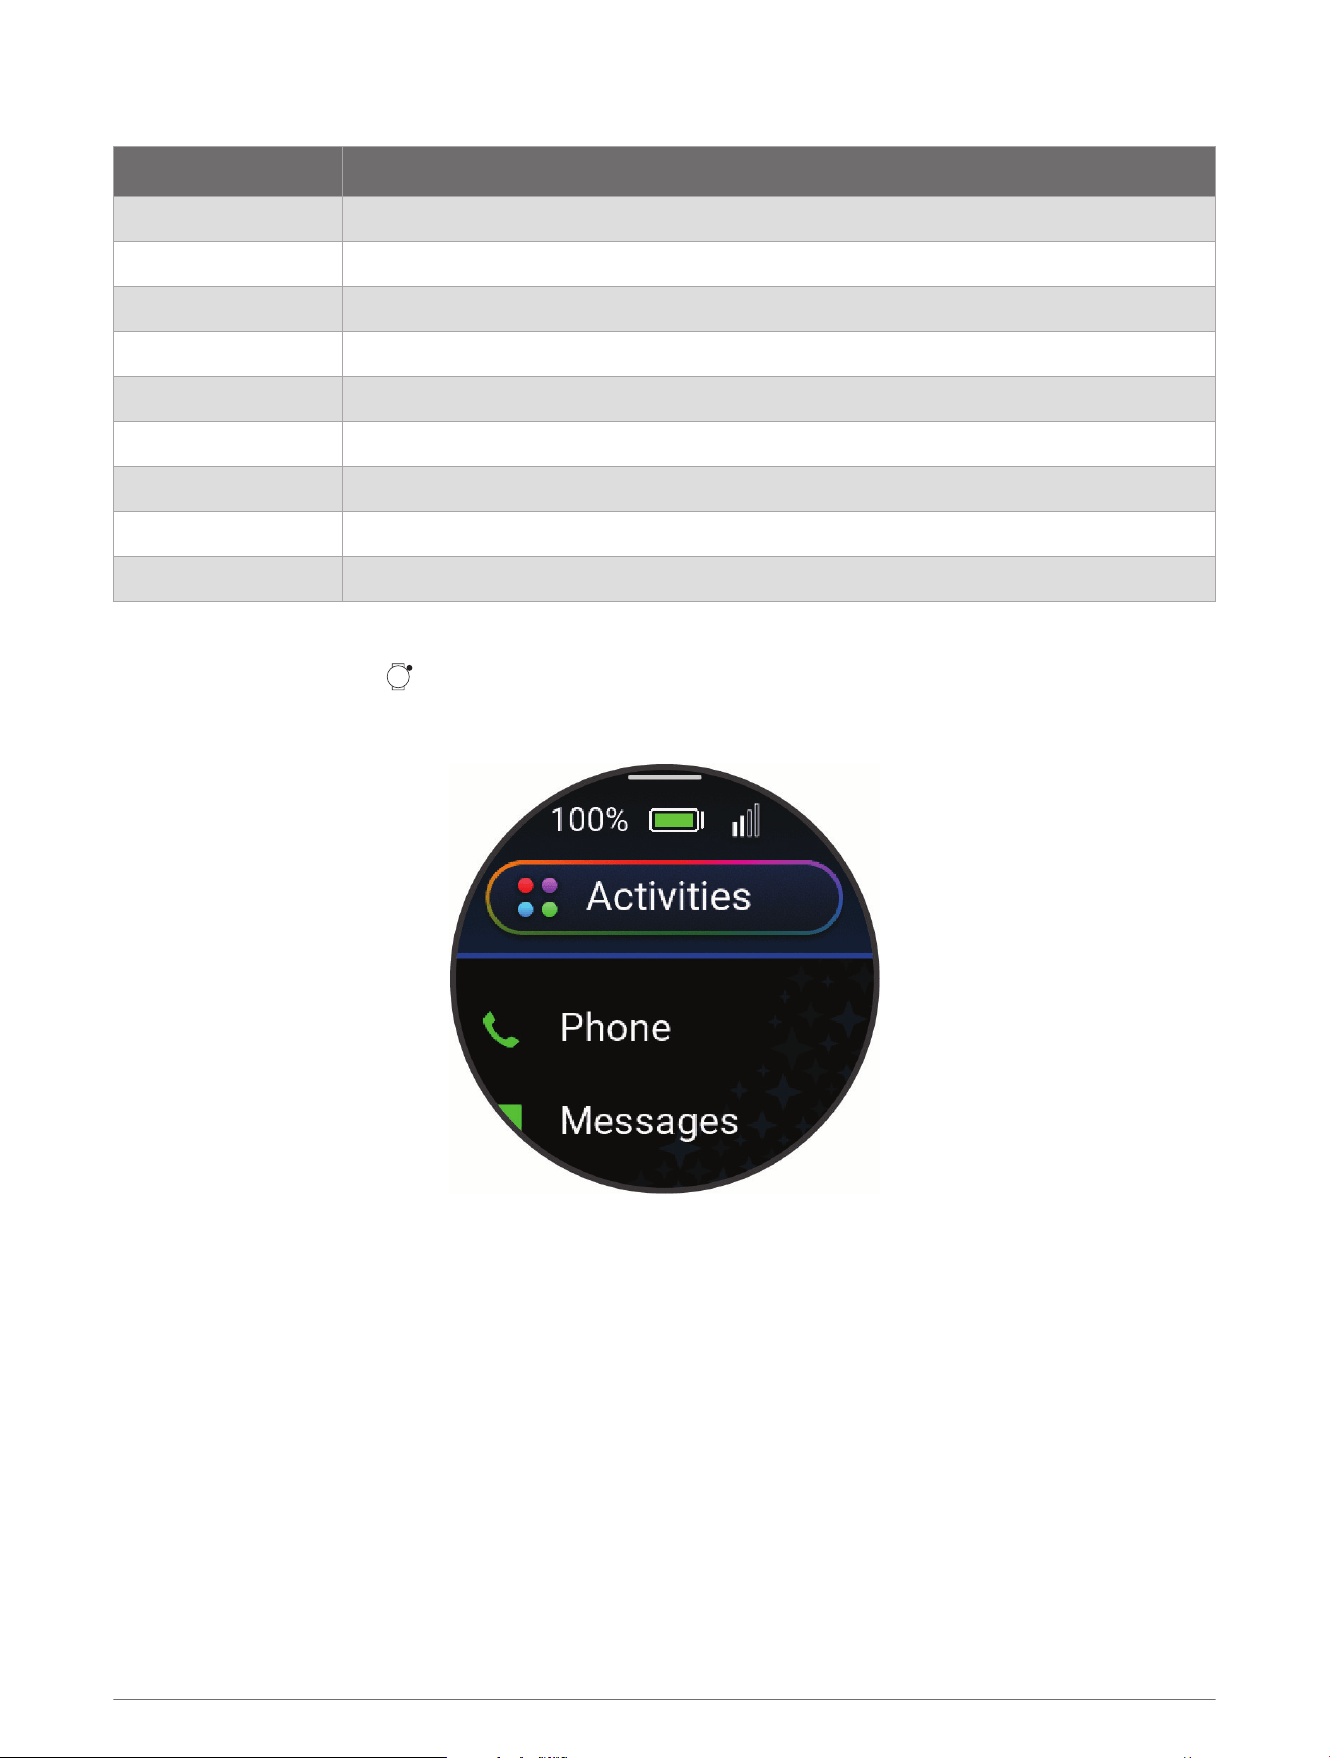
From the watch face, press to view the apps list.
20 Apps and Activities
Name More Information
Calculator Select to use the calculator, including the tip calculator.
Check In Select to check in with your current location.
Clocks
Select to set an alarm, timer, stopwatch, alternate time zone, or countdown event (Clocks,
page31).
Countdowns Displays upcoming countdown events.
Games Select to open a list of games on your watch.
History Select to view your recorded activity history, records, and totals (Viewing History, page8).
Messages Select to send messages or check for new messages.
Moon Phase
Select to view the moonrise and moonset times, along with the moon phase, based on your
GPS position.
Music Select to control audio playback using your watch (Listening to Music, page36).
Phone
Select to open the phone controls, such as contacts and the dial pad (Calling from the
Watch, page4).
Settings Select to open the settings menu.
Steps Select to view your daily step count, step goal, and data for previous days.
Sunrise & Sunset Select to view sunrise, sunset, and twilight times.
Tips
Select to view interactive watch tips and scan a direct link to support.garmin.com to access
the owner's manual for your watch.
Voice Command Select to speak a command for your watch to perform (Using Voice Commands, page21).
Watch Face Select to customize your watch face.
Weather Select to view the current weather forecast and conditions.
Starting a Game
1 Press .
2 Select Games.
3 Select a game.
4 Follow the on-screen instructions.
Game Settings
These settings allow you to customize each preloaded game. Not all settings are available for all game types.
Press , select Games, select a game, select a level, and select .
Timer: Allows you to earn more points by setting a time limit.
Sounds & Vibe: Turns the sounds and vibrations on or off for the game only (Sound & Vibe Settings, page35).
Using Voice Commands
1 Select an option:
• From the watch face, press , and select Voice Command.
• Hold , and select Voice Command.
NOTE: You can customize the controls menu (Customizing the Controls Menu, page16).
2 Say a voice command for the watch to perform (Watch Voice Commands, page22).
Apps and Activities 21
Watch Voice Commands
The voice command system is designed to detect natural speech. This is a list of commonly used voice
commands, but the watch does not require these exact phrases. You can try saying variations of these
commands in a way that is natural to you. Go to garmin.com/voicecommand/tips for voice command tips
and troubleshooting information.
Voice Help Command Function
What can I say? Shows a list of common voice commands
Device and Screen Functions
Voice Command Function
Disable do not disturb Disables do not disturb mode to dim the screen and disable alerts and notifications.
Turn on airplane mode Enables airplane mode to turn off all wireless communications.
Increase brightness Raises the brightness level.
Decrease brightness Lowers the brightness level.
Set brightness to 80 Sets the brightness level to a specified percent. Available numbers are 0-100%.
Clock Functions
Voice Command Function
Set a timer for fifteen minutes Sets a countdown timer for the specified time.
Pause timer Pauses the currently running countdown timer.
Resume timer Resumes the paused countdown timer.
Cancel timer Cancels the currently running countdown timer.
Start stopwatch Starts the stopwatch.
Stop stopwatch Stops the stopwatch.
Wake me up at 3:15 a.m. Sets a one-time alarm for the specified time.
App and Activity Functions
Voice Command Function
Show me the weather Opens the weather app.
Start a run Starts a Run activity.
NOTE: The apps and activities listed are examples, but you can control all of the default apps and activities with
voice commands (Apps, page20), (Activities, page23).
22 Apps and Activities
Media Functions
Voice Command Function
Change volume to 8 Adjusts the volume to the specified level. Available numbers are 0-10 or 0-100%.
Increase volume Raises the audio volume.
Decrease volume Lowers the audio volume.
Play music Plays the currently selected media.
Next song Plays the next media track.
Previous song Plays the previous media track.
Pause music Pauses the currently playing media.
Mute Silences all audio.
Unmute Turns on all audio.
Activities
From the watch face, press , select Activities, and swipe up to scroll through the activities. Your favorite
activities list appears at the top of the list (Customizing Your Favorite Activities List, page27).
NOTE: Some activities appear in more than one category.
Apps and Activities 23
Category Activities
Running Indoor Track, Run, Track Run, Trail Run, Treadmill
Cycling Bike, Bike Commute, Bike Indoor, BMX, eBike, Gravel Bike, MTB, Road Bike
Swimming Pool Swim
Gym
Boxing, Cardio, Elliptical, Jump Rope, Mixed Martial Arts, Row Indoor, Stair Stepper, Walk
Indoor, Yoga
Outdoor Archery, Disc Golf, Hike, Horseback, Inline Skating, Mountaineering, Walk
Winter Sports Ice Skating, Ski, Snowboard, Snowshoe, XC Classic Ski
Water Sports Boat, Kayak, Row, Snorkel, SUP
Team Sports
American Football, Baseball, Basketball, Cricket, Field Hockey, Ice Hockey, Lacrosse, Rugby,
Soccer/Football, Softball, Volleyball, Ultimate Disc
Racket Sports Badminton, Padel, Pickleball, Platform Tennis, Racquetball, Squash, Table Tennis, Tennis
Activity Goal
To improve children's health, organizations such as the U.S. Centers for Disease Control and Prevention
recommend at least 60minutes of physical activity each day. This can include moderate intensity activity,
such as brisk walking, or vigorous intensity activity, such as running.
The watch encourages children to be active by displaying their progress toward the 60minute daily goal.
Starting an Activity
When you start an activity, GPSturns on automatically (if required).
1 From the watch face, press .
2 Select an option:
• Select a pinned activity (Customizing Activities and Apps, page27).
• Select or Activities, and select an activity from your favorites list or an activity category.
3 If the activity requires GPS signals, go outside to an area with a clear view of the sky, and wait until the watch
is ready.
The watch is ready after it acquires GPSsignals (if required).
4 Press to start the activity timer.
The watch records activity data only while the activity timer is running.
Tips for Recording Activities
• Charge the watch before starting an activity (Charging the Watch, page39).
• For some activities, press to record laps, start a new set or pose, or advance to the next workout step.
You can select to discard a lap for certain activities (How can I undo a lap button press?, page43).
• Swipe up or down to view additional data screens.
24 Apps and Activities
Stopping an Activity
Not all options are available for all activity types.
1 Press .
2 Select an option:
• To resume your activity, select Resume.
• To save the activity and view the details, select , and select an option.
• To mark a lap, select Lap.
You can select to discard a lap for certain activities (How can I undo a lap button press?, page43).
• To discard the activity, select , and press .
NOTE: After stopping the activity, the watch saves it automatically after 30 minutes.
Running
Going for a Run
1 Press .
2 Select Activities > Run.
3 Go outside, and wait while the watch locates satellites.
4 Press to start the activity timer.
The watch records activity data only while the activity timer is running.
5 Go for a run.
6 Press to record laps (optional).
7 Swipe up or down to scroll through data screens.
8 After you complete your activity, press , and select .
Going for a Track Run
Before you go for a track run, make sure you are running on a standard-shape, 400 m track.
You can use the track run activity to record your outdoor track data, including distance in meters and lap splits.
1 Stand on the outdoor track.
2 From the watch face, press .
3 Select Activities > Running > Track Run.
4 Wait while the watch locates satellites.
5 If you are running in lane 1, skip to step 8.
6 Select Lane Number.
7 Select a lane number.
8 Press .
9 Run around the track.
10 After you complete your activity, press , and select .
Tips for Recording a Track Run
The Garmin track database contains over 10,000 tracks from all over the world.
• Wait until the watch acquires satellite signals before starting a track run.
• If your watch does not recognize the track, run four laps to calibrate your track distance.
You should run slightly past your starting point to complete the lap.
• Run each lap in the same lane.
NOTE: The default Auto Lap
®
distance is 1600 m, or four laps around the track.
• If you are running in a lane other than lane 1, set the lane number in the activity settings.
Apps and Activities 25
Calibrating the Treadmill Distance
To record more accurate distances for your treadmill runs, you can calibrate the treadmill distance after you run
at least 2.4km (1.5mi.) on a treadmill. If you use different treadmills, you can manually calibrate the treadmill
distance on each treadmill or after each run.
1 Start a treadmill activity (Starting an Activity, page24).
2 Run on the treadmill until your watch records at least 2.4km (1.5mi.).
3 After you finish the activity, press to stop the activity timer.
4 Select an option:
• To calibrate the treadmill distance the first time, select .
The device prompts you to complete the treadmill calibration.
• To manually calibrate the treadmill distance after the first-time calibration, select Calibrate & Save > .
5 Check the treadmill display for the distance traveled, and enter the distance on your watch.
Cycling
Going for a Ride
1 Press .
2 Select Activities > Cycling > Bike.
3 Go outside, and wait while the watch locates satellites.
4 Press to start the activity timer.
The watch records activity data only while the activity timer is running.
5 Start your activity.
6 Swipe up or down to scroll through data screens.
7 After you complete your activity, press , and select .
Swimming
Going for a Pool Swim
NOTE: The touchscreen is not available during swim activities.
1 Press .
2 Select Pool Swim.
3 Select your pool size, or enter a custom size.
4 Press to start the activity timer.
5 Start swimming.
6 Press after each pool length.
7 After you complete your activity, press to stop the activity timer.
8 Select an option:
• To save the activity, hold .
• To discard the activity, hold .
26 Apps and Activities
Winter Sports
Viewing Your Ski Runs
Your watch records the details of each downhill skiing or snowboarding run using the auto run feature. This
feature is turned on by default for downhill skiing and snowboarding. It automatically records new ski runs when
you start moving down hill.
1 Start a skiing or snowboarding activity.
2 Swipe right.
3 Select View Runs.
4 Swipe up to view details of your last run, your current run, and your total runs.
The run screens include time, distance traveled, maximum speed, average speed, and total descent.
Customizing Activities and Apps
You can customize the activities and apps list, data screens, data fields, and other settings.
Customizing the App List
1 Press .
2 Select Edit.
3 Select Add, and select one or more apps to add to the app list.
4 Select an option:
• To change the location of an app in the list, select the app, scroll up or down to move the app, and press
to select the new location.
• To remove an app from the list, select the app, and select .
5 Select .
Customizing Your Favorite Activities List
Your favorite activities list provides quick access to the activities you use the most.
1 Press .
2 Select Activities.
If you have already selected your favorite activities, they appear at the top of the list.
3 Select Edit.
4 Select an option:
• To change the location of an activity in the list, select the activity, scroll up or down to move the activity,
and press to select the new location.
• To remove a favorite activity, select the activity, and select .
• To add a favorite activity, select Add, and select one or more activities.
Pinning a Favorite Activity to the List
You can pin up to three favorite activities to the top of the apps and activities list.
1 Press .
2 Select Activities > Edit.
3 Scroll to a favorite activity (Customizing Your Favorite Activities List, page27).
4 Select next to the favorite activity.
The next time you open the apps and activities list, the pinned activity appears at the top of the list.
Apps and Activities 27
Activity Settings
These settings allow you to customize each preloaded activity based on your needs. For example, you can
customize data screens and enable alerts and training features. Not all settings are available for all activity
types. Some activity types have separate settings lists.
From the watch face, press , select Activities, select an activity, scroll down, and select the activity settings.
Alerts: Sets the training or navigation alerts for the activity (Activity Alerts, page29).
Auto Lap: Sets the options for the Auto Lap feature to automatically mark laps. The By Distance option marks
laps at a specific distance. When you complete a lap, a customizable lap alert message appears. This feature
is helpful for comparing your performance over different parts of an activity.
Auto Pause: Sets the options for the Auto Pause
®
feature to stop recording data when you stop moving or when
you drop below a specified speed. This feature is helpful if your activity includes stop lights or other places
where you must stop.
Auto Run: Automatically detects ski and snowboard runs using the built-in accelerometer (Viewing Your Ski
Runs, page27).
Auto Scroll: Automatically scrolls through all of the activity data screens while the activity timer is running.
Edit Weight: Prompts you to add the weight used for an exercise set during a cardio activity.
Jump Mode: Sets the jump rope activity target to a set time, number of reps, or open ended.
Lane Number: Sets your lane number for track running.
Laps: Configures the settings for the Auto Lap, Lap Key, and Lap Alert options.
Lap Alert: Sets the data fields to show for laps.
Lap Key: Enables the button for recording a lap or rest during an activity.
Rename: Sets the activity name.
Restore Defaults: Resets the activity settings.
Touch Lock: Enables swiping down from the top of the screen to unlock the touchscreen.
28 Apps and Activities

Activity Alerts
You can set alerts for each activity, which can help you to train toward specific goals, to increase your
awareness of your environment, and to navigate to your destination. Some alerts are available only for specific
activities. There are three types of alerts: event alerts, range alerts, and recurring alerts.
Event alert: An event alert notifies you one time. The event is a specific value. For example, you can set the
watch to alert you when you burn a specified number of calories.
Range alert: A range alert notifies you each time the watch is above or below a specified range of values. For
example, you can set the watch to alert you when exceed a certain speed during a cycling activity.
Recurring alert: A recurring alert notifies you each time the watch records a specified value or interval. For
example, you can set the watch to alert you every 30minutes.
Alert Name Alert Type Description
Cadence Range You can set minimum and maximum cadence values.
Calories Event, recurring You can set the number of calories.
Distance Event, recurring You can set a distance interval.
Pace Range You can set minimum and maximum pace values.
Proximity Event You can set a radius from a saved location.
Run/Walk Recurring You can set timed walking breaks at regular intervals.
Speed Range You can set minimum and maximum speed values.
Stroke Rate Range You can set high or low strokes per minute.
Time Event, recurring You can set a time interval.
Track Timer Recurring You can set a track time interval in seconds.
Setting an Alert
1 Press .
2 Select Activities, and select an activity.
NOTE: This feature is not available for all activities.
3 Scroll down, and select the activity settings.
4 Select Alerts.
5 Select an option:
• Select Add New to add a new alert for the activity.
• Select the alert name to edit an existing alert.
6 If necessary, select the type of alert.
7 Select a zone, enter the minimum and maximum values, or enter a custom value for the alert.
8 If necessary, turn on the alert.
For event and recurring alerts, a message appears each time you reach the alert value. For range alerts, a
message appears each time you exceed or drop below the specified range (minimum and maximum values).
History
History includes time, distance, average pace or speed, and lap data.
NOTE: When the device memory is full, your oldest data is overwritten.
History 29
Using History
History contains saved activity data, records, and totals.
The watch has a history glance for quick access to your activity data (Glances, page11).
1 Press .
2 Select History.
A bar graph of your recent activities appears.
3 Swipe left to view options.
4 Select an option:
• To change the time period for the bar graph, select Graph Options.
• To view your personal records by sport, select Records (Personal Records, page30).
• To view your weekly or monthly totals, select Totals (Viewing Data Totals, page31).
5 Press to return to the bar graph.
6 Scroll down to view your activity history.
7 Select an activity.
8 Swipe left to view options.
Personal Records
When you complete an activity, the watch displays any new personal records you achieved during that activity.
Personal records include your fastest time over several typical race distances, highest strength activity weight
for major movements, and longest run, ride, or swim.
Viewing Your Personal Records
1 Press .
2 Select History.
3 Swipe left to view options.
4 Select Records.
5 Select a sport.
6 Select a record.
7 Select View Record.
Restoring a Personal Record
You can set each personal record back to the one previously recorded.
1 Press .
2 Select History.
3 Swipe left to view options.
4 Select Records.
5 Select a sport.
6 Select a record to restore.
7 Select Previous > .
NOTE: This does not delete any saved activities.
30 History
Clearing Personal Records
1 Press .
2 Select History.
3 Swipe left to view options.
4 Select Records.
5 Select a sport.
6 Select an option:
• To delete one record, select a record, and select Clear Record > .
• To delete all records for the sport, select Clear All Records > .
NOTE: This does not delete any saved activities.
Viewing Data Totals
You can view the accumulated distance and time data saved to your watch.
1 Press .
2 Select History.
3 Swipe left to view options.
4 Select Totals.
5 Select an activity.
6 Select an option to view weekly or monthly totals.
Clocks
Setting an Alarm
You can set multiple alarms.
1 Press .
2 Select Clocks > Alarms.
3 Select an option:
• To set and save an alarm for the first time, enter the alarm time.
• To set and save additional alarms, select Add Alarm, and enter the alarm time.
4 Scroll down for more options.
5 Select .
Editing an Alarm
1 Press .
2 Select Clocks > Alarms.
3 Select an alarm.
4 Select an option:
• To turn the alarm on or off, select Status.
• To change the alarm time, select Time.
• To set the alarm to repeat regularly, select Repeat, and select when the alarm should repeat.
• To select the type of alarm notification, select Sound & Vibe.
• To select a description for the alarm, select Label.
• To select an icon for the alarm, select Icon.
• To delete the alarm, select Delete.
Clocks 31

Using the Countdown Timer
1 Press .
2 Select Clocks > Timers.
3 If you have never saved a timer, select a timer or enter a custom timer.
4 If you previously saved a timer, select an option:
• To set a new countdown timer without saving it, select Quick Timer, and enter the time.
• To set and save a new countdown timer, select Edit > Add Timer, and enter the time.
• To set a saved countdown timer, select the saved timer.
5 Press to start the timer.
6 If necessary, select an option:
• To stop the timer with the remaining time, select .
• To restart the timer, select .
• To stop the timer and reset it, swipe left and select Cancel Timer.
• To save the timer, swipe left and select Save Timer.
• To automatically restart the timer after it expires, swipe left and select Auto Restart.
• To customize the timer notification, swipe left and select Sound & Vibe.
Deleting a Countdown Timer
1 Press .
2 Select Clocks > Timers > Edit.
3 Select a timer.
4 Select Delete.
32 Clocks
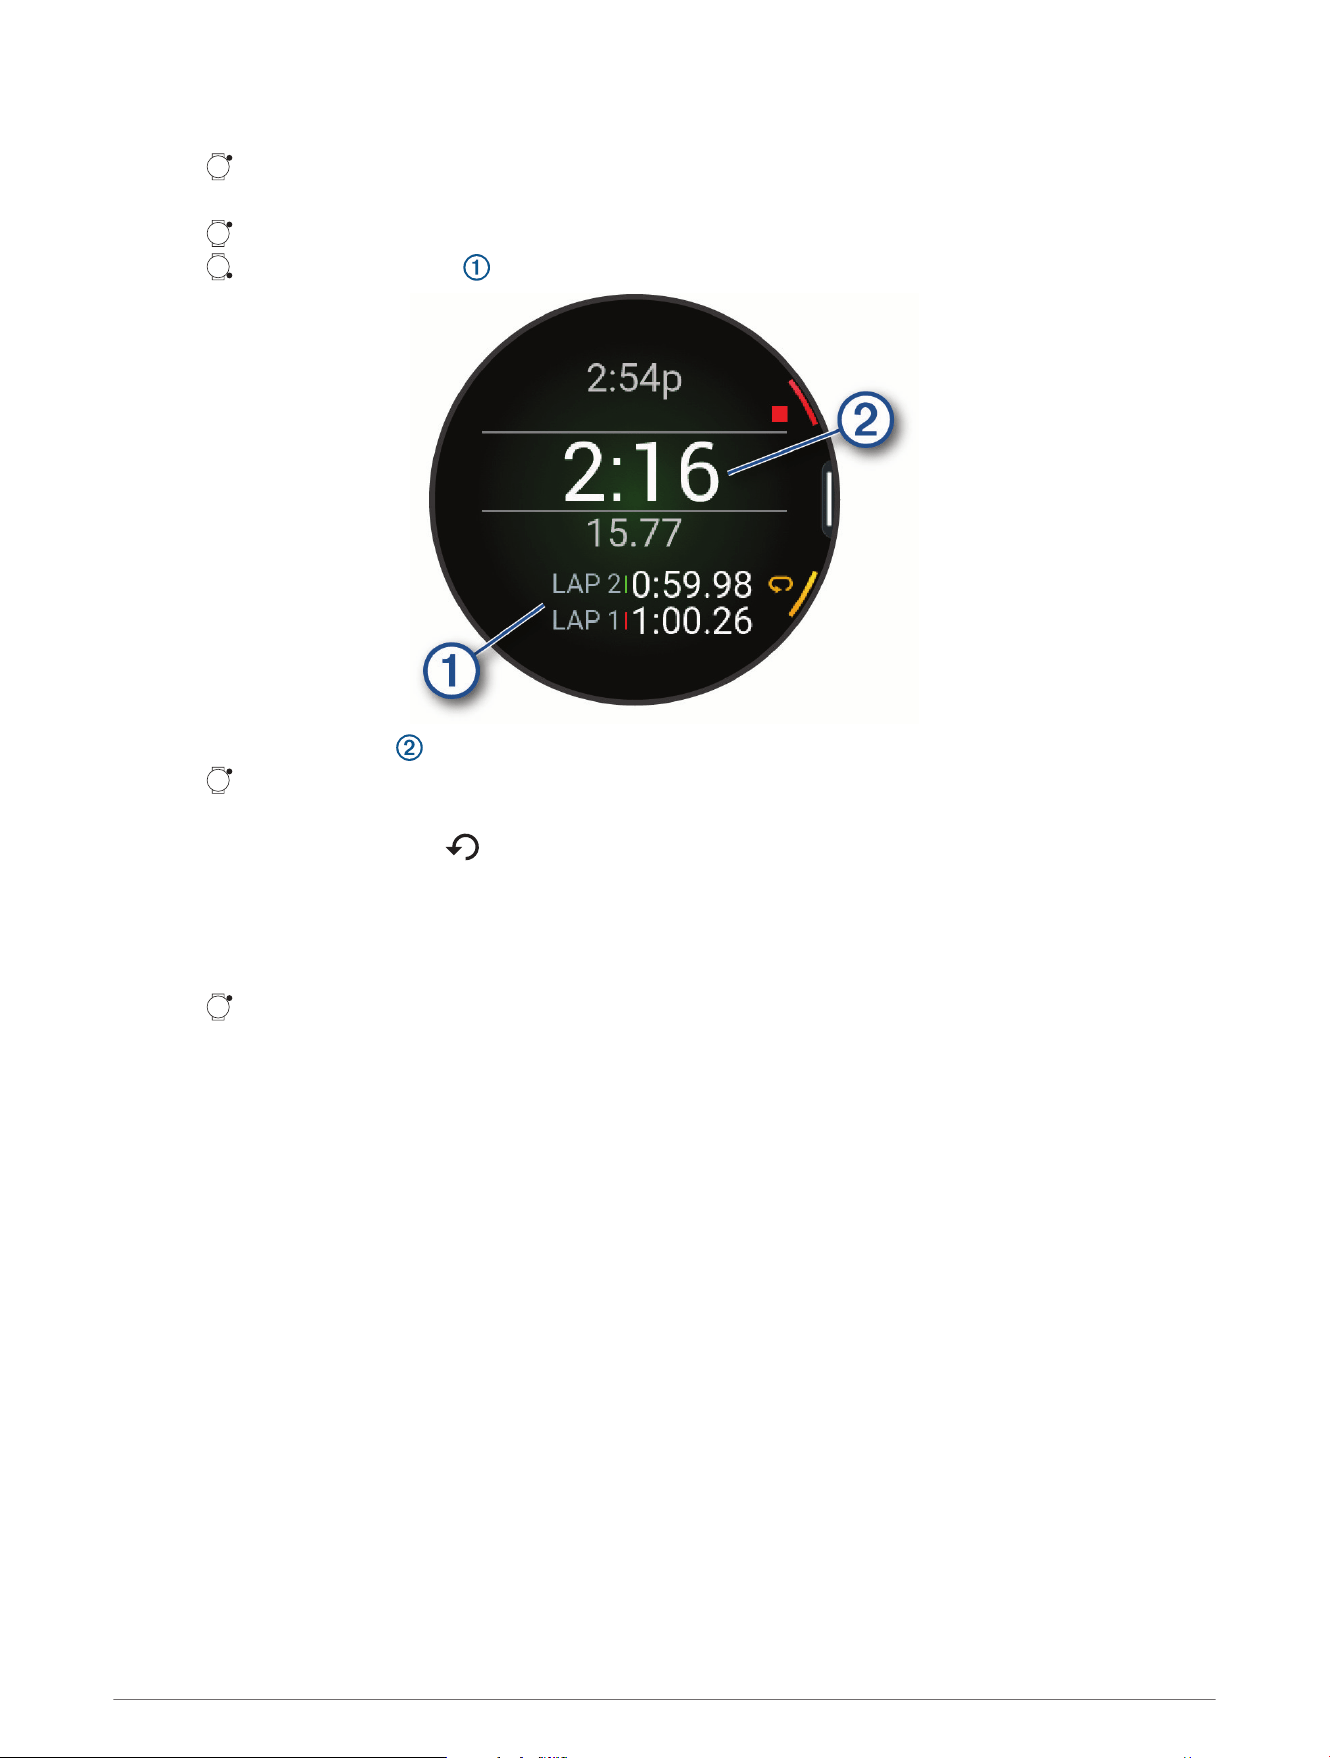
Using the Stopwatch
1 Press .
2 Select Clocks > Stopwatch.
3 Press to start the timer.
4 Press to restart the lap timer .
The total stopwatch time continues running.
5 Press to stop both timers.
6 Select an option:
• To reset both timers, select .
• To save the stopwatch time as an activity, swipe left, and select Save Activity.
• To enable or disable lap recording, swipe left, and select Lap Key.
Adding a Countdown Event
1 Press .
2 Select Clocks > Countdowns > Add.
3 Enter a name.
4 Select a year, month, and day.
5 Select an option:
• Select All Day.
• Select Specific Time, and enter a time.
6 Select an icon.
Clocks 33
Editing a Countdown Event
1 Press .
2 Select Clocks > Countdowns.
3 Select a countdown event.
4 Swipe left, and select Set As Favorite to show the countdown event in the glances list (optional).
5 Swipe left, and select Edit Countdown.
6 Select an option to edit:
• To rename the event, select Name.
• To change the date, select Date.
• To change the time, select Time.
• To change the event type, select Type.
• To add an abbreviated name for the event, select Abbreviation.
• To add event reminders, select Reminders.
• To repeat the event every year, select Repeat Annually.
• To remove the event, select Delete Countdown.
Notifications and Alerts Settings
From the watch face, press , and select Settings > Notifications & Alerts.
Calls
Sets the ringtone and vibrations for incoming call alerts (Customizing Call Alerts, page34).
Texts
Sets the tone and vibrations for incoming text alerts (Customizing Message Alerts, page34).
Time: Sets time alerts (Setting Time Alerts, page35).
Customizing Call Alerts
1 Press .
2 Select Settings > Notifications & Alerts > Calls.
3 Select an option:
• To customize the ringtone for incoming calls, select Ringtone.
• To customize the vibration pattern for incoming calls, select Vibration Options.
Customizing Message Alerts
1 Press .
2 Select Settings > Notifications & Alerts > Texts.
3 Select an option:
• To customize the ringtone for incoming text, voice, or emoji messages, select Ringtone.
• To turn vibrations on or off for incoming text, voice, or emoji messages, select Vibration.
• To customize the vibration pattern for incoming text, voice, or emoji messages, select Vibration Options.
34 Notifications and Alerts Settings

Setting Time Alerts
1 Press .
2 Select Settings > Notifications & Alerts > Time.
3 Select an option:
• To set an alert to sound a specific number of minutes or hours before the actual sunset occurs, select Til
Sunset > Status > On, select Time, and enter the time.
• To set an alert to sound a specific number of minutes or hours before the actual sunrise occurs, select Til
Sunrise > Status > On, select Time, and enter the time.
• To set an alert to sound every hour, select Hourly > On.
Sound & Vibe Settings
From the watch face, press , and select Settings > Sound & Vibe.
Volume: Mutes all sounds or adjusts the speaker volume.
Alert Tones: Plays a tone for alerts.
Button Tones: Plays a tone when you press a button.
Vibration: Sets watch vibrations for the watch, alerts, and button presses.
Display and Brightness Settings
From the watch face, press , and select Settings > Display & Brightness.
: Sets the brightness level of the screen.
Theme
Sets the color theme of the watch display.
Text Size: Adjusts the size of the text on the screen.
Red Shift: Turns the screen to shades of red, green, or orange so that you can use the watch in low light
conditions and help preserve your night vision.
Gesture: Turns on the screen when you raise and turn your arm to look at your wrist.
Timeout: Sets the length of time before the screen turns off.
Touch Lock: Locks the screen to prevent inadvertent screen touches. Turning on this option requires you to
swipe down from the top of the screen to unlock the touchscreen.
Music
On a Bounce 2 watch, you can download audio content to your watch from a third-party provider. To listen
to audio content stored on your watch, you can connect Bluetooth headphones. You can also listen to audio
content directly through the speaker in your watch.
Setting Up Music on the Watch
1 Enable music in the Garmin Jr. app settings (Enabling Music from the Garmin Jr. AppEnabling Music from the
Garmin Jr. App, page35).
2 Select a music provider from the child's settings in the Garmin Jr. app (Setting Up Music on the Watch,
page35).
Enabling Music from the Garmin Jr. App
From the Garmin Jr.app, select > App settings > Music.
Sound & Vibe Settings 35
Setting Up Music on the Watch
1 Enable music in the Garmin Jr. app settings (Enabling Music from the Garmin Jr. AppEnabling Music from the
Garmin Jr. App, page35).
2 Select a music provider from the child's settings in the Garmin Jr. app (Setting Up Music on the Watch,
page35).
Enabling Music from the Garmin Jr. App
From the Garmin Jr.app, select > App settings > Music.
Connecting Bluetooth Headphones
To listen to music loaded onto your Bounce 2 watch, you can connect Bluetooth headphones or use the internal
speaker in the watch.
1 Bring the headphones within 2m (6.6ft.) of your watch.
2 Enable pairing mode on the headphones.
3 Press .
4 Select Music.
5 Select a music provider, and select a playlist.
6 Select > > Audio Output > Add New.
7 Select your headphones.
Listening to Music
Before you listen to music on your watch, a parent or guardian must enable music and add a provider (Setting
Up Music on the Watch, page35).
1 If necessary, connect your Bluetooth headphones (Connecting Bluetooth Headphones, page36).
2 Open the music controls.
3 Select a playlist.
4 Select .
36 Music
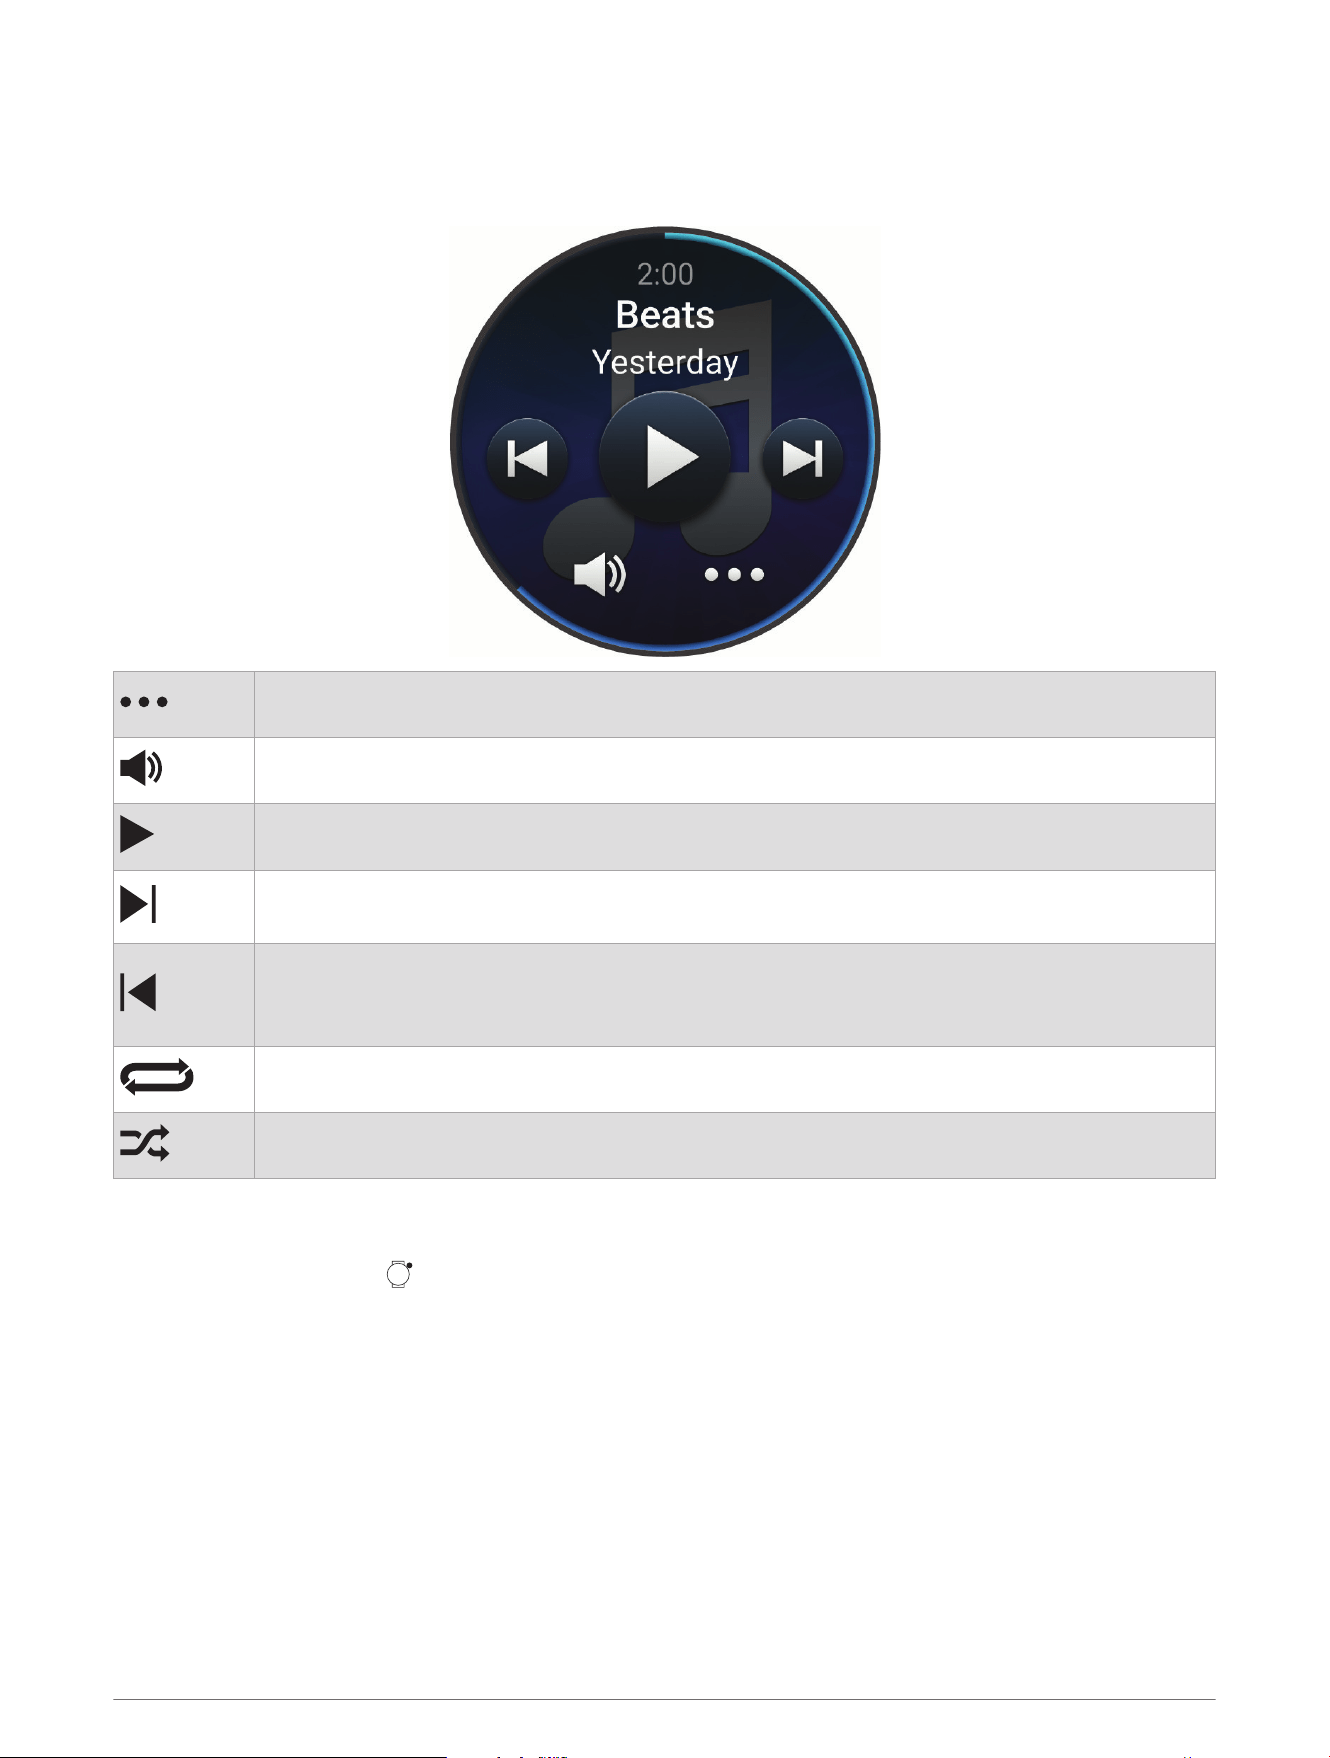
Music Playback Controls
NOTE: During an activity, you can swipe left to view the music playback controls.
Music playback controls may look different, depending on the selected music source.
Select to view more music playback controls.
Select to adjust the volume.
Select to play and pause the current audio file.
Select to skip to the next audio file in the playlist.
Hold to fast forward through the current audio file.
Select to restart the current audio file.
Select twice to skip to the previous audio file in the playlist.
Hold to rewind through the current audio file.
Select to change the repeat mode.
Select to change the shuffle mode.
System Settings
From the watch face, press , and select Settings > System.
Shortcuts: Assigns shortcuts to buttons (Customizing the Button Shortcuts, page38).
Time: Adjusts the time settings.
Units
Sets the units of measure (Changing the Units of Measure, page38).
Do Not Disturb: Enables do not disturb mode to dim the screen and disable alerts and notifications (Using Do
Not Disturb Mode, page16).
Airplane Mode
Enables airplane mode to turn off all wireless communications.
Software Update: Installs downloaded software updates, enables automatic updates, and allows you to
manually check for updates (Product Updates, page41).
About: Displays device, software, license, and regulatory information (Viewing Device Information, page40).
System Settings 37
Date and Time Settings
From the watch face, press , and select Settings > System > Time.
Time Format: Sets the watch to show time in a 12-hour, 24-hour, or military format.
Date Format: Sets the display order for the day, month, and year for dates.
Changing the Units of Measure
You can customize units of measure for distance and temperature.
1 Press .
2 Select Settings > System > Units.
3 Select a measurement type.
4 Select a unit of measure.
Customizing the Button Shortcuts
You can customize the hold function of individual buttons and combinations of buttons.
1 Press .
2 Select Settings > System > Shortcuts.
3 Select a button or combination of buttons to customize.
4 Select a function.
Device Information
About the AMOLED Display
By default, the watch settings are optimized for battery life and performance (Maximizing Battery Life,
page43).
Image persistence, or pixel "burn-in," is normal behavior for AMOLED devices. To extend the display life, you
should avoid displaying static images at high brightness levels for long time periods. To minimize burn-in, the
Bounce 2 display turns off after the selected timeout (Display and Brightness Settings, page35). You can turn
your wrist toward your body, tap the touchscreen, or press a button to wake the watch.
38 Device Information

Charging the Watch
WARNING
This device contains a lithium-ion battery. See the Important Safety and Product Information guide in the product
box for product warnings and other important information.
NOTICE
To prevent corrosion, thoroughly clean and dry the contacts and the surrounding area before charging or
connecting to a computer. Refer to the cleaning instructions.
Your watch comes with a proprietary charging cable. For optional accessories and replacement parts, go to
buy.garmin.com, or contact your Garmin dealer.
1 Plug the cable ( end) into the charging port on your watch.
2 Plug the other end of the cable into a USB-C
®
computer port or AC adapter (5 W minimum power rating).
The watch displays the current battery charge level.
3 Disconnect the watch after the battery charge level reaches 100%.
Specifications
Battery type Rechargeable, built-in lithium-ion battery
Water rating 5ATM
1
Operating and storage temperature range From -20º to 60ºC (from -4º to 140ºF)
USB charging temperature range From 0º to 45ºC (from 32º to 113ºF)
EU wireless frequencies and transmit power
2400 – 2483,5 MHz: < 20 dBm
5150 – 5250 MHz: < 23 dBm
5725 – 5850 MHz: < 20 dBm
LTE (B3, B8, B20): < 25 dBm
EU SAR values < 1,94 W/kg limb, < 0,51 W/kg/head
Battery Information
The actual battery life depends on the features enabled on your watch, such as notifications, GPS, and music.
The estimated battery life is up to 2 days.
1
The device withstands pressure equivalent to a depth of 50m. For more information, go to www.garmin.com/waterrating.
Device Information 39
Viewing Device Information
You can view device information, such as the unit ID, software version, regulatory information, and license
agreement.
1 Press .
2 Select Settings > System > About.
Viewing E-label Regulatory and Compliance Information
The label for this device is provided electronically. The e-label may provide regulatory information, such as
identification numbers provided by the FCC or regional compliance markings, as well as applicable product and
licensing information.
1 Press .
2 From the settings menu, select System.
3 Select About.
Device Care
NOTICE
Do not use a sharp object to clean the device.
Never use a hard or sharp object to operate the touchscreen, or damage may result.
Do not expose the microphone and speaker openings to sunscreen or other chemicals. Doing so could clog or
otherwise adversely affect the microphone and speaker, degrading their performance.
Avoid chemical cleaners, solvents, and insect repellents that can damage plastic components and finishes.
Thoroughly rinse the device with fresh water after exposure to chlorine, salt water, sunscreen, cosmetics,
alcohol, or other harsh chemicals. Prolonged exposure to these substances can damage the case.
Avoid extreme shock and harsh treatment, because it can degrade the life of the product.
Do not store the device where prolonged exposure to extreme temperatures can occur, because it can cause
permanent damage.
Cleaning the Watch
CAUTION
Some users may experience skin irritation after prolonged use of the watch, especially if the user has sensitive
skin or allergies. If you notice any skin irritation, remove the watch and give your skin time to heal. To help
prevent skin irritation, ensure the watch is clean and dry, and do not overtighten the watch on your wrist.
TIP: For more information, go to www.garmin.com/fitandcare.
1 Rinse with water, or use a damp lint-free cloth.
2 Allow the watch to dry completely.
Band Replacement
The adjustable band is designed to fit children 6 and older. The watch is compatible with 20 mm bands. You can
contact Garmin customer support for information about replacement parts.
40 Device Information
Troubleshooting
Product Updates
Your device automatically checks for updates when paired with a phone using Bluetooth technology or when
connected to Wi‑Fi. You can manually check for updates from the system settings (System Settings, page37).
On your computer, install Garmin Express
™
(garmin.com/express). On your phone, install the Garmin Jr. app.
This provides easy access to these services for Garmin devices:
• Software updates
• Data uploads to the Garmin Jr. app on your phone
• Product registration
Getting More Information
You can find more information about this product on the Garmin website.
• Go to support.garmin.com for additional manuals, articles, and software updates.
• Go to buy.garmin.com, or contact your Garmin dealer for information about optional accessories and
replacement parts.
Restarting the Watch
If the watch stops responding, you may need to restart it. This does not erase any of your data.
1 Hold until the watch displays .
NOTE: You must keep holding to avoid sending an assistance alert (approximately 10 seconds).
2 Release .
The watch restarts.
Resetting All Default Settings
You can reset all of the watch settings to the factory default values.
NOTE: Resetting the watch also clears all data, such as activities. You should sync the watch with the Garmin
Jr. app to upload activity data before you reset the watch.
1 From the Garmin Jr. app, select Home.
2 Select your child.
3 Select Settings > Device details > Remotely reset Bounce 2 > Reset now > Reset.
Is my phone compatible with my watch?
The Bounce 2 watch is compatible with phones using Bluetooth technology.
Go to www.garmin.com/ble-jr for Bluetooth compatibility information.
Go to for voice functionality compatibility information.
My watch is in the wrong language
You must change the watch language in the Garmin Jr. app.
1 From the Garmin Jr. app, select Home, select your child, and select Settings > Language.
2 Select a language.
3 Select .
The watch language updates the next time the watch syncs with the Garmin Jr. app.
Troubleshooting 41
My phone will not connect to the watch
If your phone will not connect to the watch, you can try these tips.
• Turn off your phone and your watch, and turn them back on again.
• Enable Bluetooth technology on your phone.
• Update the Garmin Jr. app to the latest version.
• Remove your watch from the Garmin Jr. app and the Bluetooth settings on your phone to retry the pairing
process.
• If you bought a new phone, remove your watch from the Garmin Jr. app on the phone you intend to stop
using.
• Bring your phone within 10m (33ft.) of the watch.
• On your phone, open the Garmin Jr. app, and select > Garmin Devices > Add Device to enter pairing
mode.
• From the watch face, press , and select Settings > Sync & Pair > Pair.
How do I pair an additional watch with the Garmin Jr. app?
If you have already paired a watch with the Garmin Jr. app, you can add a new child and watch from the kid
menu. You can pair up to eight watches.
NOTE: You must remove a watch from a child before adding a new watch for that child.
1 Open the Garmin Jr. app.
2 Select Home > > Add a new child or device.
3 Select an option:
• To add a new watch for an existing child, select the child.
• To add a new watch for a new child, select New kid.
4 Follow the on-screen instructions.
Can my child send messages to other children?
Other children must be set up as contacts in the Garmin Jr. app (Adding Messaging Contacts, page8).
My watch doesn't display the correct time
The watch updates the time and date when it syncs with a paired phone or when the watch acquires GPS
signals. You should sync the watch to receive the correct time when you change time zones and to update for
daylight saving time.
• Press , and select Settings > Sync & Pair > Sync.
• Go outdoors to an open area with a clear view of the sky, start an activity, and wait while the watch acquires
satellite signals.
Locating a Lost Watch
You can use this feature to help locate a lost Bounce 2 watch that is within range of a paired phone.
TIP: If you are unable to find the watch nearby, try to view the current location of the watch (Viewing Your Child's
Current Location, page18).
1 From the Garmin Jr. app, select Home.
2 Select your child, and select Settings > Find my watch.
The phone begins searching for the paired Bounce 2 watch. The watch vibrates and also beeps if audible
tones are turned on (Sound & Vibe Settings, page35).
3 Press on the watch to stop searching.
42 Troubleshooting

How can I undo a lap button press?
During an activity, you might accidentally press the lap button. In most cases, appears on the screen next
to a button, and you will have a few seconds to press the button and discard the most recent lap. The lap undo
feature is available for activities that support manual laps, such as running and walking. The lap undo feature is
not available for activities that trigger automatic laps, runs, rests, or pauses, such as skiing and pool swimming.
Activity Tracking
For more information about activity tracking accuracy, go to garmin.com/ataccuracy.
My step count doesn't seem accurate
If your step count doesn't seem accurate, you can try these tips.
• Go to garmin.com/ataccuracy.
• Wear the watch on your non-dominant wrist.
• Carry the watch in your pocket when actively using your hands or arms only.
NOTE: The watch may interpret some repetitive motions, such as clapping your hands or brushing your teeth,
as steps.
Maximizing Battery Life
You can do several things to extend the life of the battery.
• Reduce the display brightness and timeout (Display and Brightness Settings, page35).
• Turn off wrist gestures (Display and Brightness Settings, page35).
• Reduce the vibration level (Sound & Vibe Settings, page35).
Acquiring Satellite Signals
The watch may need a clear view of the sky to acquire satellite signals.
1 Go outdoors to an open area.
The front of the watch should be oriented toward the sky.
2 Wait while the watch locates satellites.
It may take 30 to 60 seconds to locate satellite signals.
Troubleshooting 43

support.garmin.com
GUID-ED045F09-4EC3-41F5-AAAC-42B3A3836894 v1September 2025