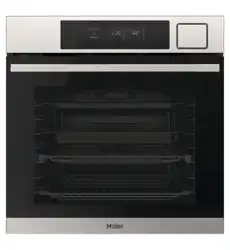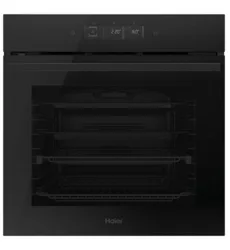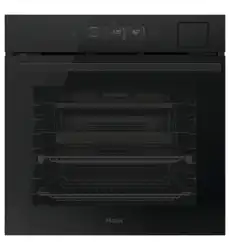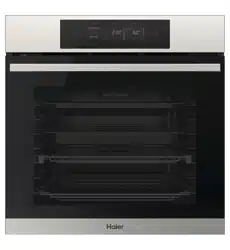

HWO60 models
60cm Ovens
INSTALLATION GUIDE NZ AU


3
CONTENTS
Safety and warnings ................................................................................4
Components required .............................................................................9
Product and cavity dimensions . . . . . . . . . . . . . . . . . . . . . . . . . . . . . . . . . . . . . . . . . . . . . . . . . . . . . . . . . . . . . . . 10
Check cavity ......................................................................................... 12
Connect power ..................................................................................... 13
Fit the product ...................................................................................... 14
Installer checklist .................................................................................. 15
4
SAFETY AND WARNINGS
WARNING!
Electric Shock Hazard
Failure to follow this advice may result in electric
shock or death.
• Do not cook on a broken or cracked cooktop. If the
cooktop surface should break or crack, switch the
appliance off immediately at the mains power supply
(wall switch) and contact a qualified technician.
• Switch the appliance off before cleaning
or maintenance.
WARNING!
Fire Hazard
Failure to follow this advice may result in serious
burns or death.
• Unattended cooking on a hob with fat or oil can be
dangerous and may result in fire.
• Cover flame, eg with a lid or fire blanket, or use dry
chemical or foam-type extinguisher.
• Do not store items on cooking surfaces.
WARNING!
Cut Hazard
Failure to follow this advice could result in injury
and cuts.
• The razor sharp blade of a cooktop scraper is exposed
when the safety cover is retracted. Use with extreme
care and always store safely and out of the reach
of children.
5
WARNING!
Hot Surface Hazard
Failure to follow this advice could result in burns and
scalds.
• Do not touch surface units or areas near units. Surface
units maybe hot even though they are dark in colour.
• Surfaces of the appliance may become hot enough to
cause burns.
• During and after use, do not touch or let clothing or
other flammable materials contact heating elements
until they have had sufficient time to cool.
• Handles of saucepans may be hot to touch. Check
saucepan handles do not overhang other cooking zones
that are on. Keep handles out of reach of children.
• Never leave metal objects (such as kitchen utensils) or
empty pans on the cooktop as they can become very
hot quickly.
SAFETY AND WARNINGS

6
SAFETY AND WARNINGS
READ AND SAVE THIS GUIDE
Only use the oven for its intended purpose, that is only for the cooking of foods: any other use, for
example as a heat source, is considered improper and therefore dangerous. The manufacturer cannot
be held responsible for any damage resulting from improper, incorrect or unreasonable usage.
General warnings
z
Do not use a steam cleaner for cleaning operations.
z
CAUTION: in order to avoid a hazard due to inadvertent resetting of the thermal cut-out, this
appliance must not be supplied through an external switching device, such as a timer, or connected to
a circuit that is regularly switched on and off by the utility.
z
During use the appliance become hot. Care should be taken to avoid touching heating elements inside
the oven.
Use limitations
z
The appliance can be used by children aged from 8 years and above and persons with reduced
physical, sensory or mental capabilities or lack of experience and knowledge if they have been given
supervision or instruction concerning use of the appliance in a safe way and understand the hazards
involved. Children shall not play with the appliance. Cleaning and maintenance shall not be made by
children without supervision.
z
This appliance is not intended to be used by persons (including children) with reduced physical,
sensory or mental capabilities, or lack of experience and knowledge, unless they have been given
supervision or instruction concerning use of the appliance by a person responsible for their safety.
z
Children should be supervised to ensure that they do not play with the appliance.
z
WARNING: the appliance and its accessible parts become hot during use. Care should be taken to
avoid touching heating elements.
z
Children less than 8 years of age shall be kept away unless continuously supervised.
z
WARNING: Accessible parts may become hot during use. Young children should be kept away.
Installation warnings
z
The oven can be located high in a column or under a worktop.
z
Before fixing, you must ensure good ventilation in the oven space to allow proper circulation of the
fresh air required for cooling and protecting the internal parts. Make the openings specified on the
illustrations according to the type of fitting. Always fix the oven to the furniture with screws provided
with the appliance.
z
No additional operation/setting is required in order to operate the appliance at the rated frequencies.
z
The appliance must not be installed behind a decorative door in order to avoid overheating.
z
During installation the oven should be disconnected from the mains electricity supply.
z
If the assistance of the manufacturer is required to rectify faults arising from incorrect installation,
this assistance is not covered by the guarantee. The installation instructions for professionally
qualified personnel must be followed.
z
Incorrect installation may cause harm or injury to people, animals or belongings. The manufacturer
cannot be held responsible for such harm or injury.
z
Installation must be carried on by a qualified technician who must know and respect the laws in force
in the country of installation and the manufacturer’s instruction.
z
After unboxing the appliance, always check it is not damaged, in case of issue contact the customer
service before installing and do not connect to the power supply.
z
Remove the packaging material before operating the appliance.
z
During installation do not use the oven door’s handle to lift and move the oven.

7
z
The installation furniture and the adjacent ones must with stand temperatures of 95°C.
z
Do not install the product in open environments exposed to atmospheric agents.
z
This appliance is designed to be used at altitude lower than 2000m.
z
It is recommended to wear protective gloves during installation to avoid cut injuries.
Electrical warnings
z
The socket must be suitable for the load indicated on the tag and must have ground contact
connected and in operation. The earth conductor is yellow-green in colour. This operation should be
carried out by a suitably qualified professional.
z
Connection to the power source can be made by plug or by fixed wiring placing an omnipolar breaker,
with contact separation compliant to the requirements for overvoltage category III, between the
appliance and the power source that can bear the maximum connected load and that is in line with
current legislation.
z
ln case of incompatibility between the socket and the appliance plug, ask a qualified electrician to
substitute the socket with another suitable type. The plug and the socket must be conformed to the
current norms of the installation country.
z
The yellow-green earth cable should not be interrupted by the breaker. The socket or omnipolar
breaker used for the connection should be easily accessible when the appliance is installed.
z
lf the supply cord is damaged, it must be replaced by the manufacturer, its service agent or similarly
qualified persons in order to avoid a hazard. For any repairs, refer only to the Customer Care
Department and request the use of original spare parts.
z
Disconnect the appliance from the mains electricity supply before carrying out any work or
maintenance on it.
z
WARNING: ensure that the appliance is switched off before replacing the bulb, to avoid the possibility
of electric shocks.
z
The oven must be switched off before removing the removable parts. After cleaning, reassemble
them according the instructions.
z
The use of any electrical appliance implies the observance of some fundamental rules:
z
do not pull on the power cable to disconnect the appliance from the power source;
z
do not touch the appliance with wet or damp hands or feet;
z
in general the use of adaptors, multiple sockets and extension cables is not recommended;
z
in case of malfunction and/or poor operation, switch off the appliance and do not tamper with it.
z
NOTE: as the oven could require maintenance work, it is advisable to keep another wall socket
available so that the oven can be connected to this if it is removed from the space in which it
is installed.
z
Any repair, installation and maintenance not carried out correctly can seriously endanger the user.
z
The manufacturing company hereby states that it does not assume any responsibility for direct
or indirect damages caused by incorrect installation, maintenance, or repair work. Furthermore,
it is not liable for damages caused by the absence or interruption of the grounding system
(e.g. electric shock).
z
CAUTION: in order to avoid a hazard due to inadvertent resetting of the thermal cut-out, this
appliance must not be supplier through an external switching device, such as a timer, or connected to
a circuit that is regularly switched on and off by the utility.
z
The appliance is not designed to be activated by an external timer or separate remote control system.
SAFETY AND WARNINGS

8
Use and maintenance
z
Wash all accessories before first use with a solution of hot water and washing up liquid.
z
The dripping pan collects the residues that drip during cooking.
z
When you place the grid or air fry tray on the side racks, make sure that the shorter section of the
side (between the stop and the extremity) is directed towards the interior of the oven. If the grid has
a decorative metal bar, pay attention to position it on the exterior of the oven so that the brand logo
can be visible and readable. For the correct positioning refer also to the image in the Accessories
section of this user manual.
z
Do not use harsh abrasive cleaners or sharp metal scrapers to clean the oven door glasses, since they
can scratch the surface, which may result in shattering of the glass.
z
During cooking, moisture may condense inside the oven cavity or on the glass of the door. This is
a normal condition. To reduce this effect, wait 10-15 minutes after turning on the power before
putting food inside the oven. ln any case, the condensation disappears when the oven reaches the
cooking temperature.
z
Cook the vegetables in a container with a lid instead of an open tray.
z
Avoid leaving food inside the oven after cooking for more than 15/20 minutes.
z
A long power supply failure during an occurring cooking phase may cause a malfunction of the
monitor. ln this case contact customer service.
z
WARNING: Do not line the oven walls with aluminium foil or single-use protection available from
stores. Aluminium foil or any other protection, in direct contact with the hot enamel, risk melting and
deteriorating the enamel of the insides.
z
WARNING: Never remove the oven door seal.
z
CAUTION: Do not refill the cavity bottom with water during cooking or when the oven is hot.
z
For a correct use of the oven it is advisable not to put the food in direct contact with the racks and
trays, but to use oven papers and/or special containers.
z
WARNING: Risk of burn and damage to the appliance: Using the steam function the released steam
can cause burns: Open the door carefully to avoid injury after using a cooking function with steam.
z
Use only drinking water to fill in the cavity bottom during the steam function.
Pyro warnings (Does not apply to all models)
z
Excess spillage must be removed before cleaning.
z
WARNING: before initiating the automatic cleaning cycle:
z
Clean the oven door;
z
Remove large or coarse food residues from the inside of the oven using a damp sponge. Do not
use detergents;
z
Remove all accessories and the sliding rack kit (where present);
z
Do not place tea towels in the oven.
z
During the pyrolytic cleaning process (if available), the surfaces may get hotter than usual and
children should be kept away.
z
If a hob has been fitted above the oven, never use the hob while the Pyrolizer is working, this will
prevent the hob from overheating.
SAFETY AND WARNINGS

9
COMPONENTS REQUIRED
TOOLS
Supplied
F Screws (2)
F Screw bumper plates (2)
Not supplied
F Powered driver
F Cross-head screwdriver
10
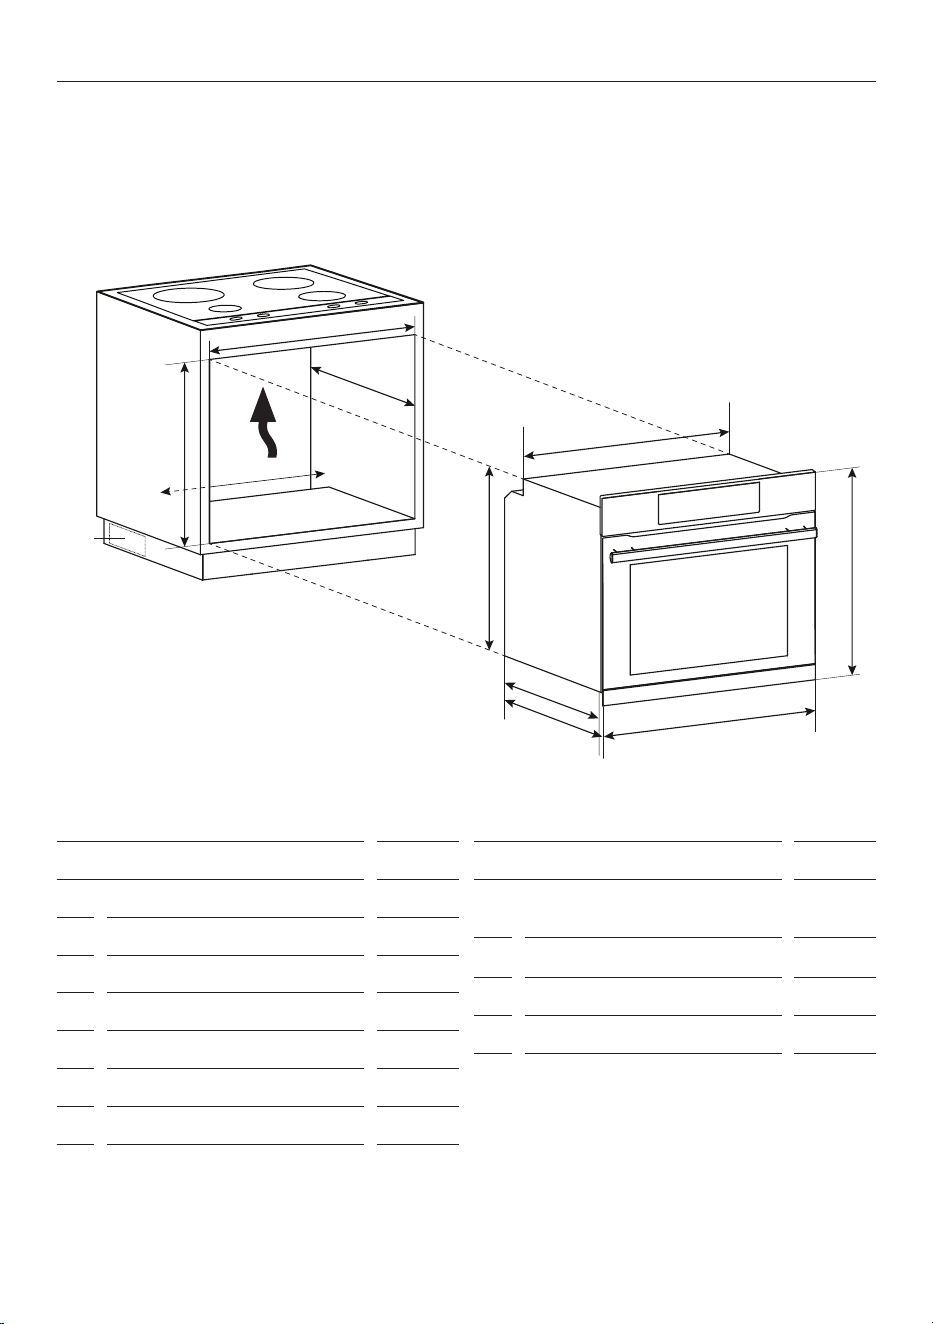
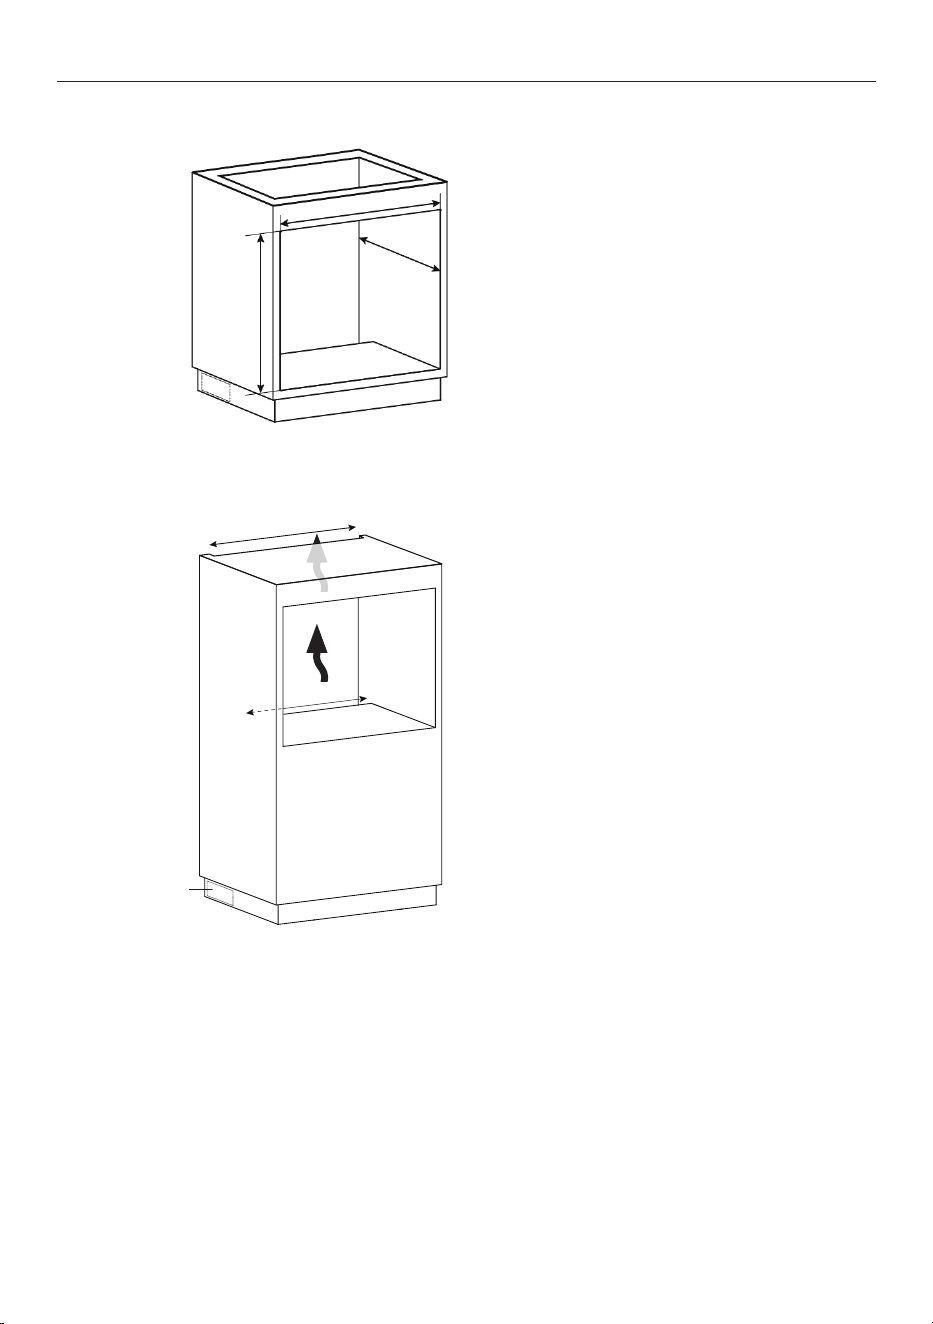
PRODUCT AND CAVITY DIMENSIONS
Product Dimensions
mm
1
Overall height of oven
595
2
Overall width of oven
595
3
Overall depth of oven
568
4
Height of chassis
575
5
Width of chassis
550
6
Depth of chassis
548
7
Depth of door / control panel
20
Mounting under cooktop
The cabinetry should follow the dimensions shown. This allows for sufficient airflow behind the oven and
between the oven and cooktop for cooling. If the cabinetry base is fully sealed, an opening should be
provided to allow cool air to enter.
Minimum Clearances
mm
8
Minimum inside height of cavity
(includes a 5mm air exit gap)
600
9
Minimum inside width of cavity
560
10
Minimum inside depth of cavity
560
11
Air exit vent
560 x 45
Air
entry
1
2
3
4
5
6
7
8
9
!0
!1
11
PRODUCT AND CAVITY DIMENSIONS
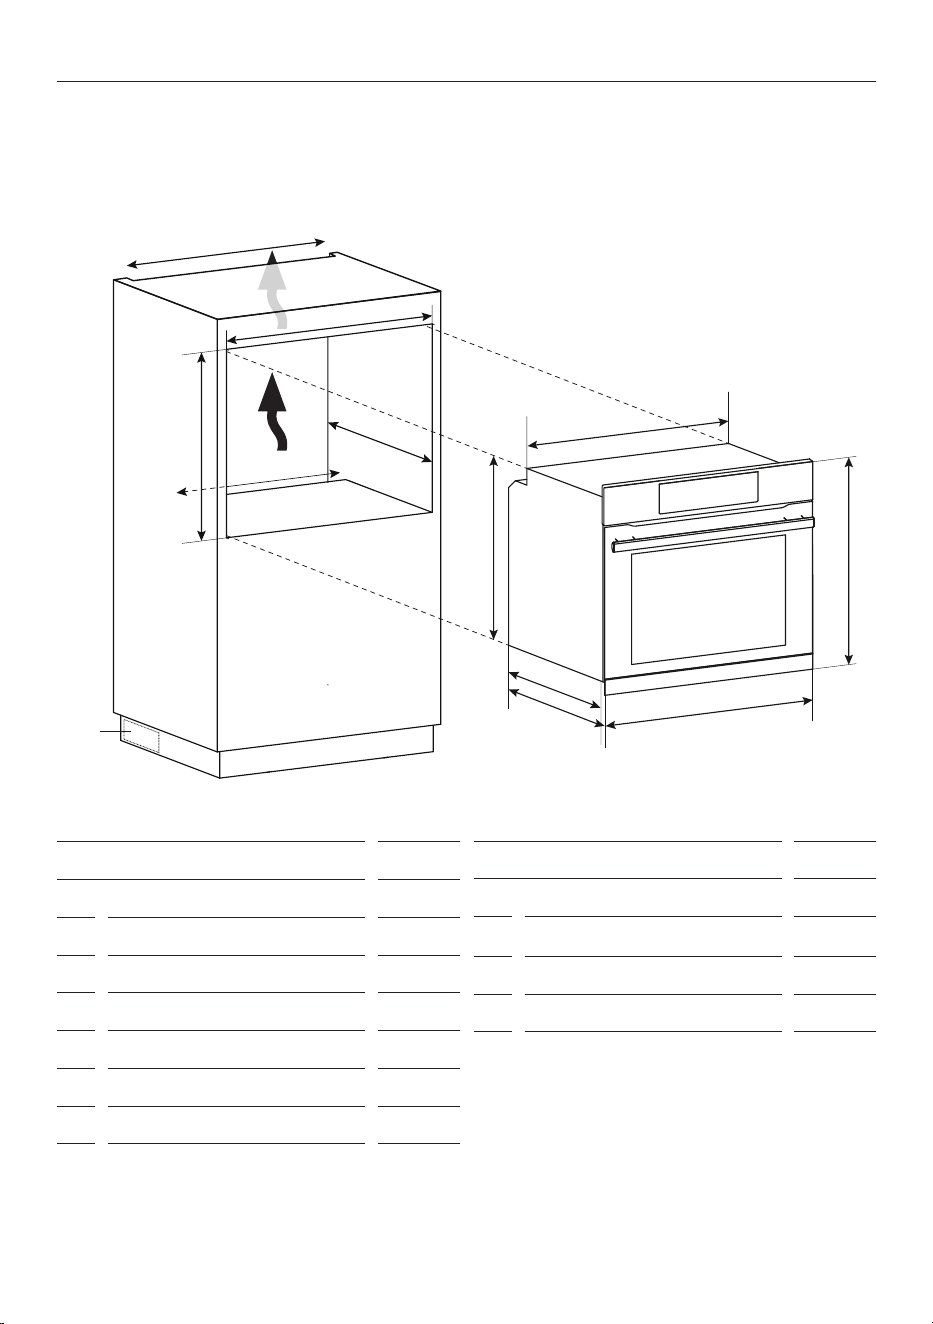
Standalone Installation
If the oven is mounted without a cooktop above, the cabinet depth and height can be reduced. An opening
should be provided at the top of the cabinetry to allow hot air to exit. If the bottom of the cabinetry is
sealed, an opening should be provided to allow cool air to enter.
Product Dimensions
mm
1
Overall height of oven
595
2
Overall width of oven
595
3
Overall depth of oven
568
4
Height of chassis
575
5
Width of chassis
550
6
Depth of chassis
548
7
Depth of door / control panel 20
Minimum Clearances
mm
8
Minimum inside height of cavity
580
9
Minimum inside width of cavity
560
10
Minimum inside depth of cavity
560
11
Air exit vent 560 x 45
Air
entry
1
23
4
5
6
8
9
!0
!1
!1
7
13
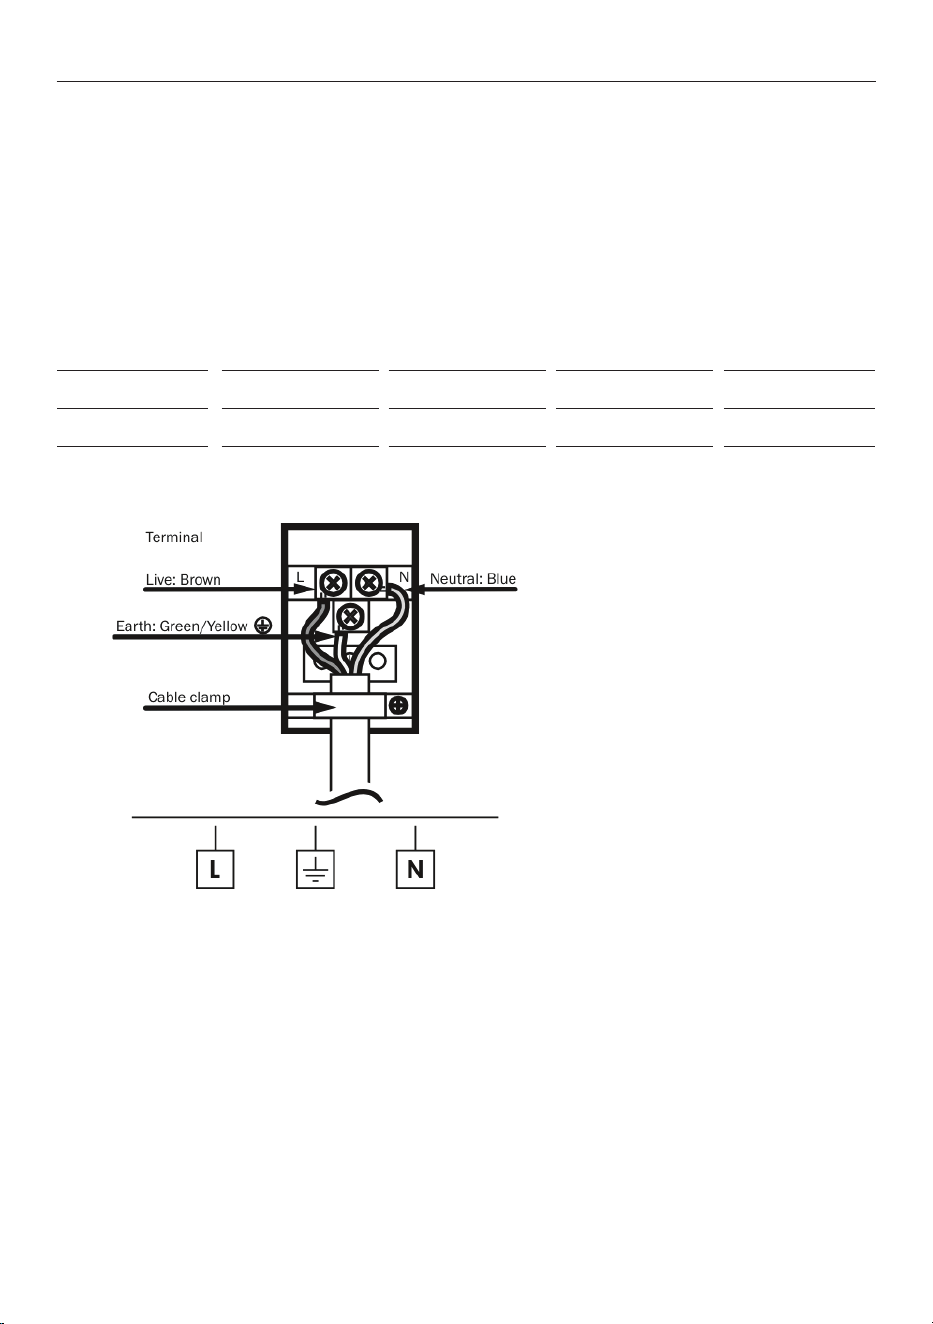
CONNECT POWER
z
This oven must be connected to the mains power supply only by a suitably qualied person.
z
The mains lead must not be clamped, bent, trapped, or come into contact with hot parts
of the appliance.
z
This oven must be earthed.
z
Before connecting the oven to the mains power supply, check that:
z
The domestic wiring system is suitable for the power drawn by the oven (as specified on
the rating plate)
z
The voltage corresponds to the value given on the rating plate.
MODEL CODE MAX POWER (W)
FREQUENCY (HZ) VOLTAGE (V) AMPS (A)
HWO60S 3300
50 220-240 16
Connect to the terminal block as
shown. Ensure oven is correctly
Earthed and cable clamp is
tightened.
14
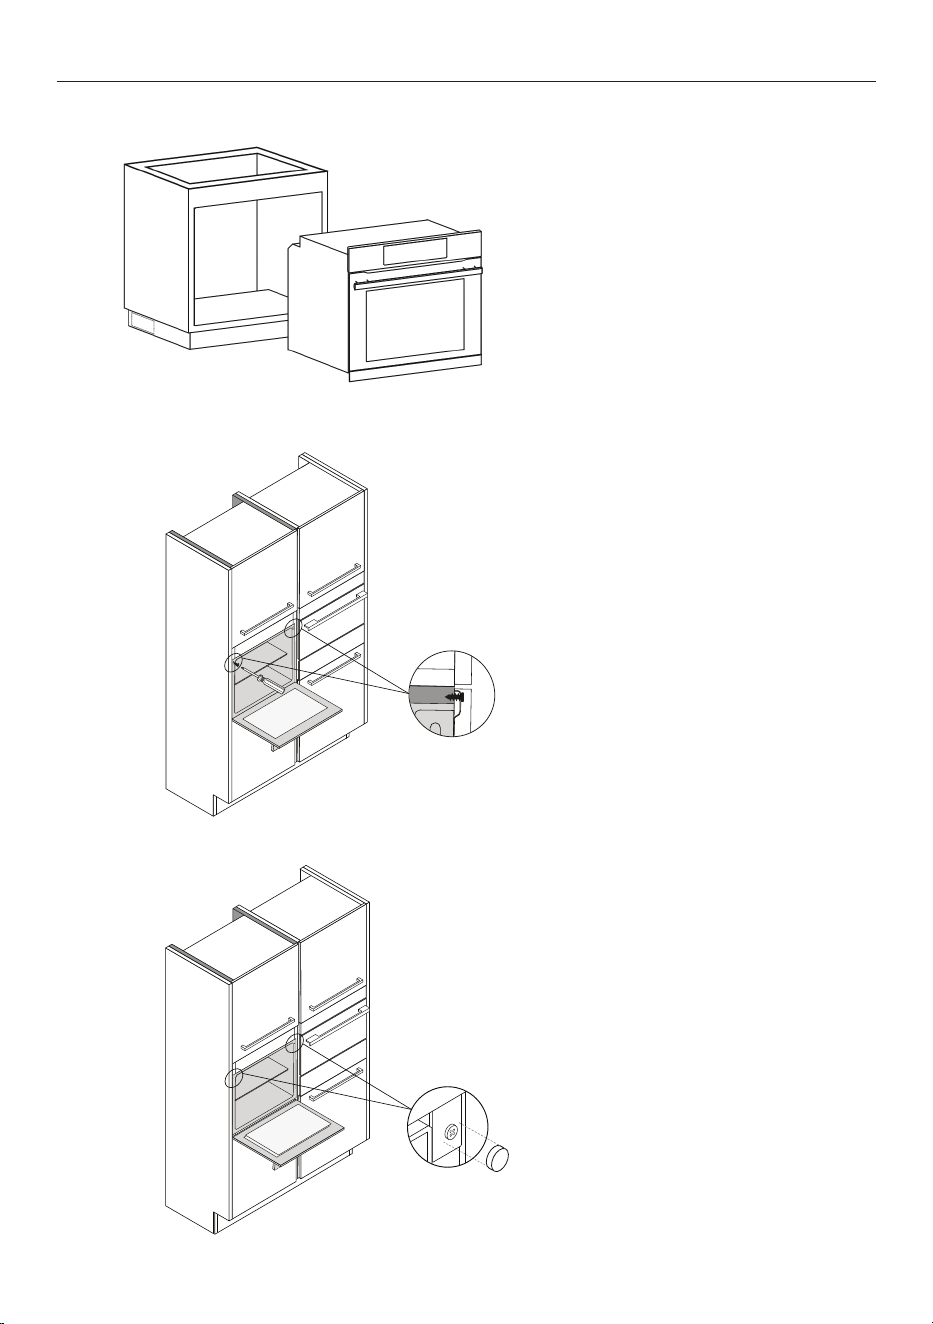
FIT THE PRODUCT
1. Lift the product into the cavity,
align the oven with surrounding
cabinetry and appliances.
2. Remove the covers from the
bumpers behind the door. Using the
bumper holes as a guide, pre-drill 2
x 3mm pilot holes, then fix the oven
to the cavity using the 2 x #4.2x25
screws provided.
3. Fix the provided bumper cover
into place over the screw.
FISSAGGIO IN COLONNA

15
Complete and keep for safe reference:
Model
Serial no.
Purchase date
Purchaser
Dealer address
Installer’s name
Installer’s signature
Installation company
Installation date
INSTALLER CHECKLIST
To be completed by the installer
F Ensure the oven is level and securely fitted to the cabinetry.
F Open the oven door slowly until it is fully open and check there is adequate clearance between the
bottom of the door and the lower trim. This is to ensure correct air circulation. Should the lower trim
become damaged, straighten the trim and ensure the oven door opens fully without obstruction.
F Ensure you remove all internal packaging before using your oven.
F Ensure all oven vents and openings are clear and free of any obstruction or damage. Failure to make
sure all oven vents and openings are clear may result in poor product performance.
F Ensure the isolating switch is accessible by the customer.