Instruction
Booklet
For your safety and continued enjoyment of this product,
always read the instruction book carefully before using.
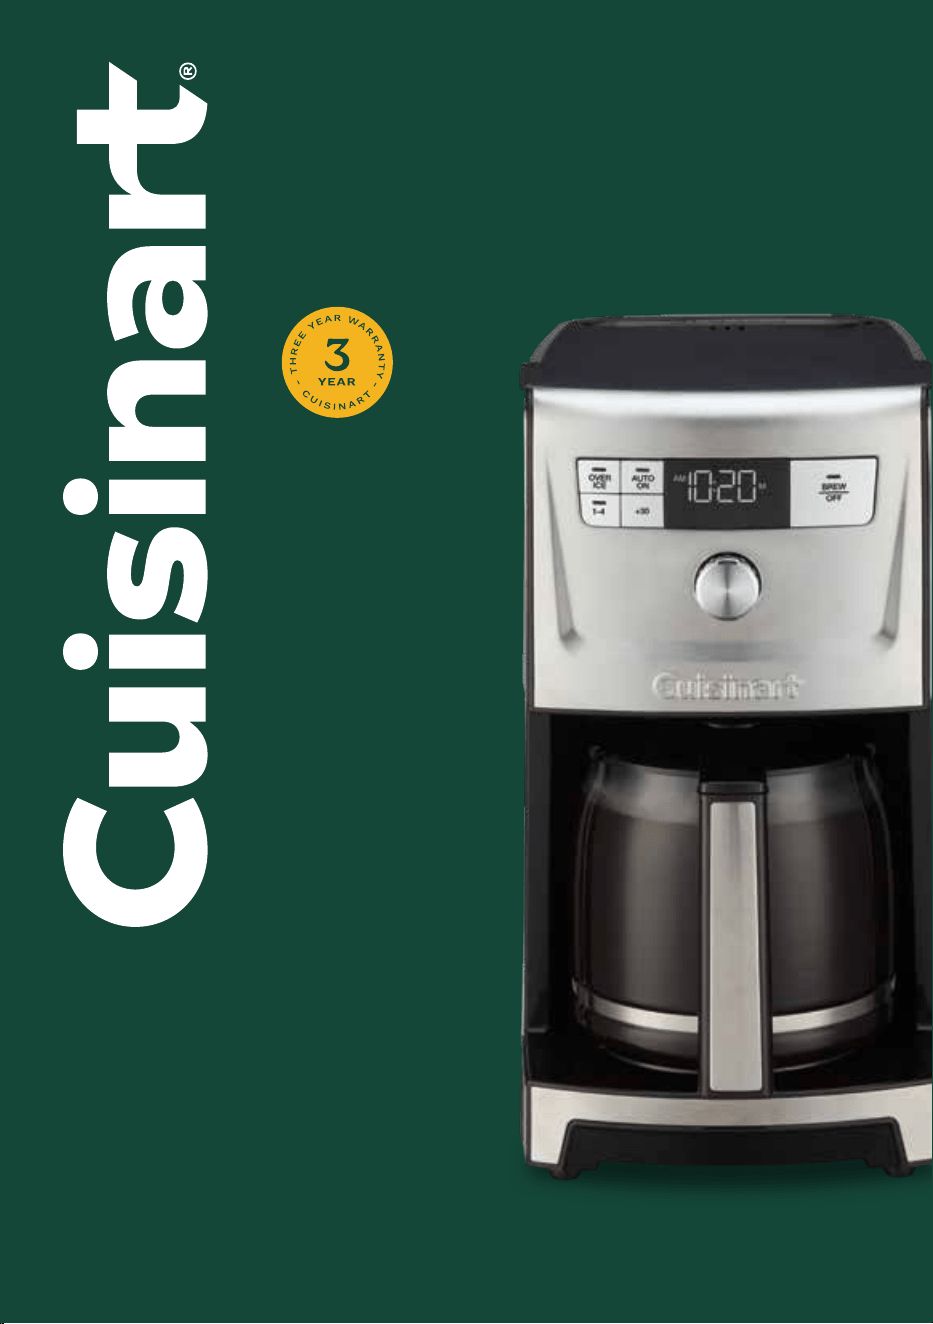
PerfecTemp
®
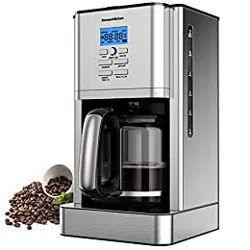
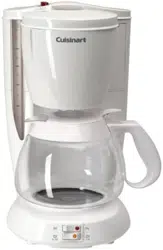
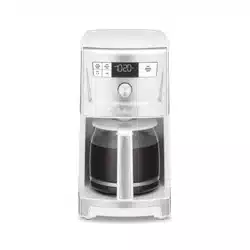
14-Cup Programmable
Coffeemaker
DCC-3500 SERIES

2
Important
Safeguards
When using electrical appliances, basic safety
precautions should always be taken, including
the following:
1. READ ALL INSTRUCTIONS.
2. Always unplug from outlet when either the
appliance or display clock is not in use and before
cleaning. Allow to cool before putting on or taking
o parts and before cleaning the appliance.
3. Do not touch hot surfaces. Use handles and knobs.
4. To protect against electric shock, do not place
cord, plug, or base unit in water or other liquids.
5. This appliance should not be used by or near
children or individuals with certain disabilities.
6. Do not operate any appliance with a damaged
cord or plug, or after the appliance malfunctions
or has been dropped or damaged in any manner.
Return appliance to the nearest Cuisinart Repair
Center for examination, repair, and electrical or
mechanical adjustment.
7. The use of accessory attachments not
recommended by Cuisinart may cause injuries.
8. Do not use outdoors.
9. Do not let cord hang over edge of table or counter,
or touch hot surfaces.
10. Do not place on or near a hot gas or electric
burner, or in a heated oven.
11. Alwaysllwaterreservoirrst,thenplug
cord into the wall outlet. To disconnect, push the
Brew/Obutton,thenremoveplugfromwalloutlet.
12. Do not use appliance for other than
intended use.
13. Snap lid securely onto carafe before serving
any beverages.
14. Scalding may occur if the lid is removed during
the brewing cycle.
15. The glass carafe is designed for use with this
coeemakeronly.Itmustneverbeusedonthe
range top.
16. Do not set a hot carafe on a wet or cold surface.
17. Do not use a cracked carafe or a carafe having a
loose or weakened handle.
18. Do not clean carafe or heating plate with cleansers,
steel wool pads, or other abrasive materials.
19. WARNING: TO REDUCE THE RISK OF FIRE OR
ELECTRIC SHOCK, DO NOT REMOVE THE BASE
PANEL. NO USER-SERVICEABLE PARTS ARE
INSIDE. REPAIRS SHOULD BE DONE ONLY BY
AUTHORIZED PERSONNEL.
20. Donotplaceclothbeneathcoeemakeror
otherwiserestrictairow.
21. Use only the Cuisinart
®
Gold-Tone Commercial
StyleFilterorstandardcone-shapedpaperlter
with this unit. OTHER GOLD-TONE PERMANENT
FILTERS MAY CAUSE THE COFFEEMAKER TO
OVERFLOW.
22. Do not operate your appliance in an appliance
garage or under a wall cabinet. When storing in an
appliance garage, always unplug the unit from the
electrical outlet. Not doing so could create a risk
ofre,especiallyiftheappliancetouchesthe
walls of the garage or the door touches the unit
as it closes.
23. This appliance is not intended for use by persons
(including children) with reduced physical, sensory,
or mental capabilities, or lack of experience and
knowledge, unless they have been given supervision
or instruction concerning use of the appliance by a
person responsible for their safety.
24. Close supervision is necessary when any
appliance is used by or near children.
25. The heating element is subject to residual heat
after use.
SAVE THESE
INSTRUCTIONS
FOR HOUSEHOLD
USE ONLY
3
Warning: Risk of Fire or
Electric Shock
Thelightningashwitharrowheadsymbol
within an equilateral triangle is intended to
alert the user to the presence of
uninsulated, dangerous voltage within the
product’s enclosure that may be of
sucientmagnitudetoconstituteariskof
reorelectricshocktopersons.
The exclamation point within an equilateral
triangle is intended to alert the user to the
presence of important operating and
maintenance (servicing) instructions in the
literature accompanying the appliance.
Special Cord Set
Instructions
A short power-supply cord is provided to
reduce the risks of injury resulting from becoming
entangled in or tripping over a longer cord. Longer
detachable power supply cords or extension cords
are available and may be used if care is exercised in
their use. If a longer extension cord is used:
1. The marked electrical rating of the cord set or
extension cord should be at least as great as the
electrical rating of the appliance.
2. The longer cord should be arranged so that it will
not drape over the countertop or tabletop where
it can be pulled on by children or tripped over
unintentionally.
Notice
This appliance has a polarized plug (one blade is
wider than the other). To reduce the risk of electric
shock,thisplugwilltintoapolarizedoutletonly
oneway.Iftheplugdoesnottfullyintotheoutlet,
reversetheplug.Ifitstilldoesnott,contacta
qualiedelectrician.Donotmodifytheplugin
any way.
Operating Notice
Cloggingandbackingupofwaterand/orcoeeinthe
lterbasketcanoccurunderanyoracombinationof
anyofthefollowingconditions:Theuseoftoonely
groundcoee,usingtwoormorepaperlters,using
thegold-tonelterinconjunctionwithapaperlter
ornotproperlycleaningcoeegroundsfromthe
gold-tonelter,orallowingcoeegroundstospill
overthelter.
Caution: Neveropenthelterbasketduringthe
brewing cycle, even if no water is draining from the
lterbasket,becauseextremelyhotwater/coee
canspilloutfromthelterbasketandcauseinjury.If
water/coeeisnotdrainingfromthelterbasket
during the brewing cycle, unplug the unit and wait 10
minutesbeforeopeningandcheckingthelter
basket.
WARNING
RISK OF FIRE OR ELECTRIC SHOCK
DO NOT OPEN
WARNING: TO REDUCE THE RISK OF FIRE OR ELECTRIC SHOCK,
DO NOT REMOVE COVER (OR BACK)
NO USER-SERVICEABLE PARTS INSIDE
REPAIR SHOULD BE DONE BY AUTHORIZED SERVICE PERSONNEL ONLY

4
Contents
Important Safeguards 2–3
Important Unpacking Instructions 4
The Quest for the Perfect Cup of Coffee 4
Features and Benefits 5
Control Panel 6
Charcoal Water Filter 7
Setting Up Your 14-Cup Coffeemaker 7
Programming Your 14-Cup Coffeemaker 7
Brewing Coffee 8
Brewing Over Ice 9
Brew Pause™ Feature 9
Cleaning and Maintenance 9
Decalcification 9
Warranty 10
Important
Unpacking
Instructions
1. Placetheboxonalarge,sturdy,atsurface.
2. Remove literature.
3. Turn the box so that the back side of the
coeemakerisdownandslidethecoeemaker
from the box.
4. Afterthecoeemakerhasbeenremoved,place
theboxoutofthewayandliftotheleftand
right inserts.
5. Grasp the carafe by its handle, remove it from the
heating plate, and remove the polybag.
6. Removethepolybagcoveringthecoeemaker.
Save all packing materials in case you have to ship
the machine in the future.
KEEP ALL PLASTIC BAGS AWAY FROM CHILDREN.
The Quest for the Perfect
Cup of Coffee
Element 1: Water
Coeeis98%water.Thequalityofthatwaterisas
importantasthequalityofyourcoee.Ifwater
doesn’t taste good from the tap, it won’t taste good in
yourcoee.Cuisinartincludesacharcoalwaterlter
to remove chlorine, bad tastes, and odors for the
purestcoeeavoreverytimeyoubrew.
Element 2: Coffee
Whilecoeeis98%water,alloftheavorcomes
from the beans. To achieve the same great taste you
enjoyatacoeebar,youneedtousethesame
qualityofcoee.Ifyouchoosetogrindyourown
beans, buy them fresh and whole. Buy only about a
two-week supply at a time, because once the bean is
broken,itsavordegradesquickly.
Element 3: Grind
Thegrindiscriticalforproperavorextraction.Ifthe
grindistoone,overextractionandbitternesswill
result.Tooneagrindmayalsoclogthelter.Ifthe
grind is too coarse, the water will pass through too
quicklyandthemaximumavorwillnotbeextracted.
When grinding your own beans, we recommend a
medium-negrind.
Element 4: Proportion
Coeethatistoostrongortooweakisalwaysa
disappointment. Follow the recommended portions
ofgroundcoeeintheinstructionsunderBREWING
COFFEE, and later adjust the amount to suit
your taste.

5
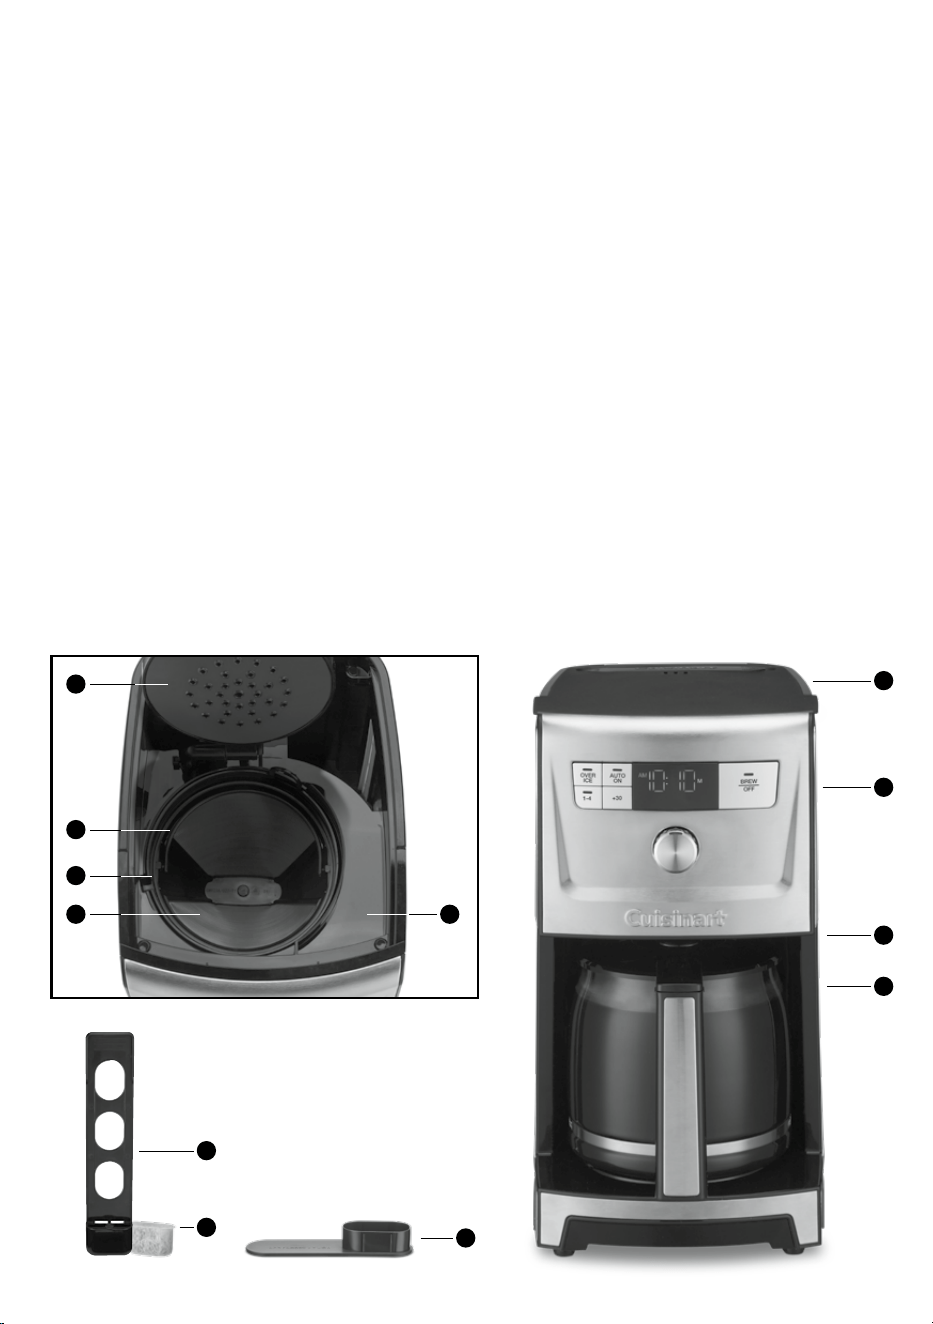
Features and Benefits
1. Coeemaker Lid
Openstoaccesslterbasket,waterlter,and
water reservoir.
2. Water Reservoir
Includesextra-largefrontllchannelthat
improvesaccessforeasierllingandsideview
water level window.
3. Integrated Coee Scoop
4. Shower head
Distributeswaterevenlyovercoee,
reducing temperature loss as water passes
through grounds.
5. Charcoal Water Filter Holder
Holdswaterlterrmlyinplace.
6. Charcoal Water Filter
Eliminates chlorine, bad tastes, and odors from
tap water.
7. Filter Basket
Holdsa#4paperlterORagold-tonelter.
8. Filter Basket Holder
9. Cuisinart
®
Permanent Gold-Tone
Commercial-Style Filter
Eliminatestheneedforpaperlters.
10. Control Panel
See detailed illustration, page 6.
11. Brew Pause™
Stopsowofcoeefrombasketwhencarafeis
removed (20 seconds max) from the heater plate,
so a cup can be poured mid-brew.
12. 14-Cup Glass Carafe
The easy-pour carafe has an ergonomic handle
andbrewedcoeemarkingsfor4to14cups.
13. Warming Plate
KeepscoeewarmuntiltheendoftheAUTOOFF
time. Adjustable temperature.
14. 60-Second Reset (not shown)
One-minute protection in case a breaker trips, the
unit is unplugged, or the power fails. It holds all
programmed information, including time of day,
AutoOntime,andAutoOtime.
10
1
11
12
2
3
6
5
7
8
9
4
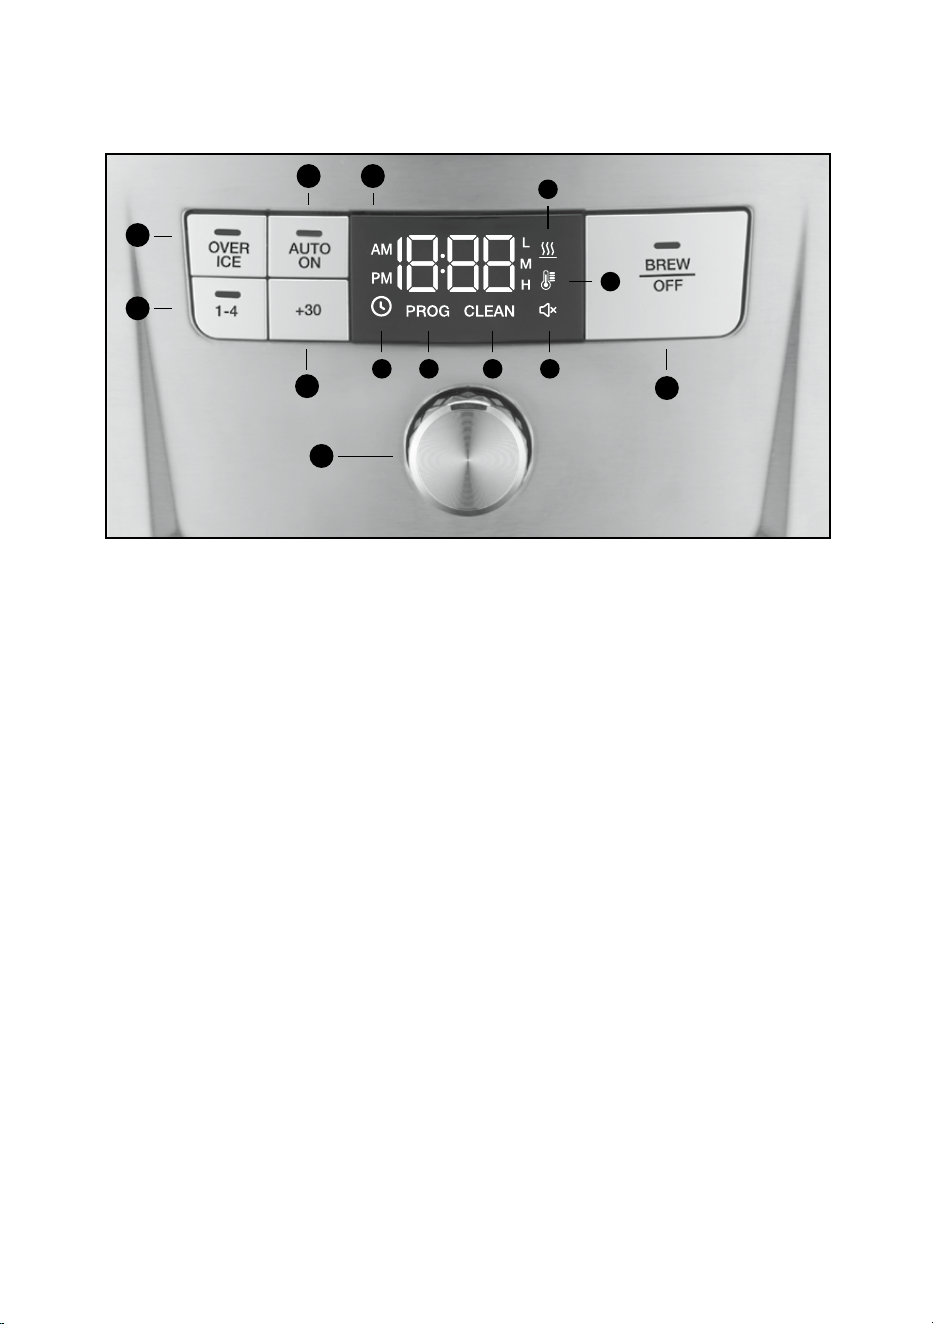
6
1. OVER ICE Button
Adjuststhebrewprocesstomaximizecoee
avoridealforicedcoee.
2. AUTO ON Button
Selecttoautomaticallystartbrewingcoeeatthe
time you’ve programmed.
3. 1-4 Cup Button
Adjustsbrewprocesstomaximizecoeeavor
when brewing fewer than 5 cups.
4. +30 Button
Press to extend Keep Warm time by 30 minutes.
5. Clock Display
Displaystimeofday,AutoOn,andAutoOtimes.
Indicators for Clock, Program, Keep Warm, Carafe
Temp,ToneO,andClean.
A. Clock Icon
Use to set hours and minutes for time.
B. PROG Icon
Select to program AUTO ON time.
Coeemakerbrewtimecanbeprogrammed
up to 24 hours in advance.
C. CLEAN Icon
Indicator appears in Clock Display when it is
timetodecalcifyyourcoeemaker.
D. Ready Tone Icon
Select to turn an audible “Brew Cycle Finished”
alertonoro.
E. Carafe Temp Icon
Thermometer icon Select to change warming
plate to Low, Medium, and High (L,M,H).
F. Keep Warm Icon
Appears in Clock Display when brew cycle
is complete.
6. BREW/OFF
Select to begin or stop brew cycle.
7. Function Knob
Turn to scroll through function selection and
activation in display. Press knob to activate and
deactivate choice selections.
Getting to Know Your Control Panel
Detailed programming and use instructions are on pages 7 and 8.
3
1
2
4
7
6
A B C D
E
5
F
7
Setting Up Your-Cup
Coffeemaker
Initial Cleaning
Perform an initial cleaning before making your
rstbeverage.Followtheseinstructions,without
addingcoee.
1. Insertcharcoalwaterlterasshownonleft(ifyou
haven’t already).
2. Fill water reservoir.
3. Make sure carafe is in place.
4. Plug the power cord into an independent outlet.
5. Press the BREW/OFF button and allow brew cycle
to run.
6. The one-time cleaning process is complete.
Discardhotwater.Yourcoeemakerisready
to use.
Programming Your 14-Cup
Coffeemaker
Setting the Clock
Whenthecoeemakerispluggedin,12:00willash
in the display for 10 seconds, indicating the unit is
inClockSetmode.If12:00stopsashing,simply
presstheFunctionKnobtoreturntoashingClock
Set mode.
Setting Hours and Minutes
Turn the Function Knob to scroll through hour times
and choose desired time. Be sure the PM indicator is
on if setting a PM time.
When hour time is selected, press the Function Knob to
switch to minutes. Turn knob to select desired minute
timeandpressthefunctionknobtoconrmselection
and exit clock setting.
Clock Setting Mode
To enter clock setting mode after initial plug in, turn
the Function Knob to
and press the Function Knob
toactivateclockmode.Thehourtimewillash.
Follow instructions in Setting Hours and Minutes
above to set time.
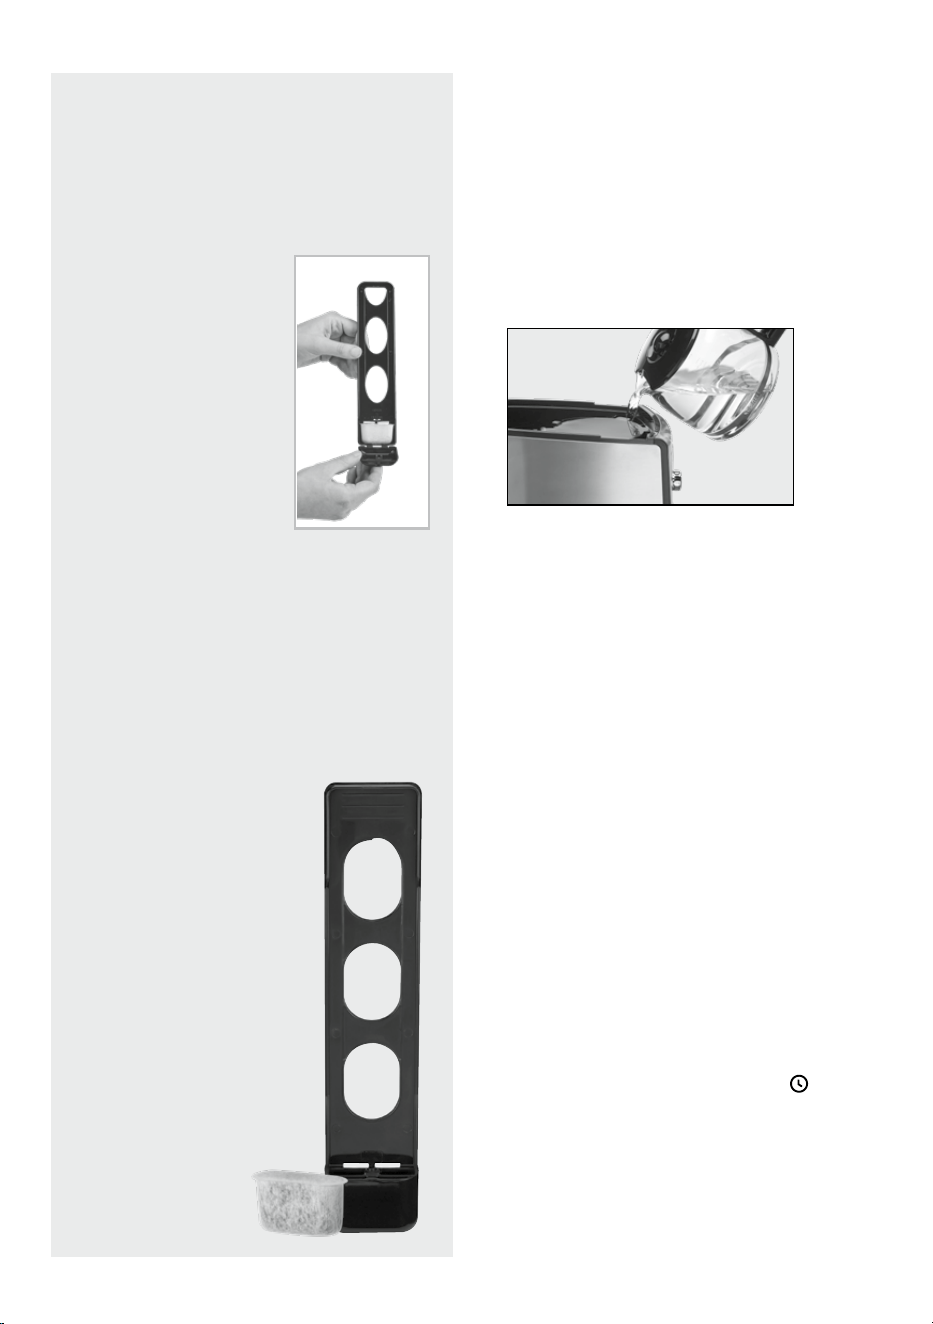
Charcoal Water Filter
Inserting the Water Filter
⚫ Removethelterfrompolybagandsoakit,fully
immersed, in cold tap water for 15 minutes.
⚫ Liftthewaterlterholderoutofthewater
reservoir.
⚫ Pressdownonthelter
compartment and pull
toward you to open.
⚫ Placelterintotheholder
and snap it closed. Be
careful – improper
placement can tear the
lterskin.
⚫ Flushlterbyrunningcold
tap water through holes in
bottom of compartment
for 10 seconds.
⚫ Allowtheltertodrain
completely.
⚫ Slidethewaterlterholderbackintothe
channel in the water reservoir, pushing it down
to the base of the unit.
NOTE:Werecommendchangingthewaterlter
every 60 days or after 60 uses, and more often if
you have hard water.
Replacementlterscanbepurchasedinstores,
by calling Cuisinart Customer Service, or at
www.cuisinart.com.
8
Setting the AUTO ON Time
Turn the function knob to the PROG icon in the clock
display and press the knob to activate AUTO ON. The
AUTOONindicatoranddigitaldisplaywillashthe
default (12:00) or previously selected time.
Follow directions under SETTING THE CLOCK on
page 7 to program your start-brew time. Five seconds
afternishing,theunitwillautomaticallyexitAUTO
ON setup mode.
1. To activate Auto On
Press the AUTO ON button. Previously set time will
appear and indicator will light up.
2. To deactivate Auto On: Press illuminated
AUTOONbutton;indicatorwillgoo,indicating
modeisturnedo.
Setting the Auto Off Time
1. Turn the Function Knob to the
icon in the clock
display and press the knob to enter Auto O.
ThedigitaldisplaywillashtheprogrammedAuto
Odefault(2:00)orpreviouslyselectedtime.
Follow directions under SETTING THE CLOCK to
programcoeemakertoshutofrom0to4
hoursafterbrewcycleisnished.
2. To exit/conrm Auto O time setting:
Do not touch any buttons or the Function Knob.
AutoOsetupmodewillbeexitedautomatically
after 5 seconds.
3. To extend Auto O by 30 minutes:
Press the +30 button while the unit is in the Keep
Warm mode.
Note: While in keep warm, countdown timer is in
display and not the time of day.
Turning Off Ready Tone
Your coeemaker features a Ready Tone that beeps
5 times when coee is nished brewing.
1. To disable this alert, turn the Function Knob to
the
icon in the clock display and press the
knob;“ON”willash.Pressthefunctionknob
again;“OFF”willash.Pressthefunctionknobto
disable tone. The icon will appear to indicate
tone is disabled.
2. To turn tone back ON, turn the function knob to
the
icon in the clock display and press the
knob;“OFF”willash.Pressthefunction
knobagain;“ON”willashandthe icon
will disappear.
Setting the Carafe Temperature
Use this feature to control the temperature of the
coeeinthepot.ChooseLow(L),Medium(M),orHigh
(H) carafe temperature by rotating the Function Knob
to icon in the clock display
. Press the knob to
activate carafe temp; the default temperature of (M)
willash.Rotateknobtodesiredcarafetempand
press knob to select temperature. Selection will
appear in display.
Brewing Coffee
Follow instructions in Setting Up Your 14-Cup
Coeemaker on page 7.
1. Insert the charcoal water lter
Follow directions for the preparation and insertion
ofthelteronpage7.
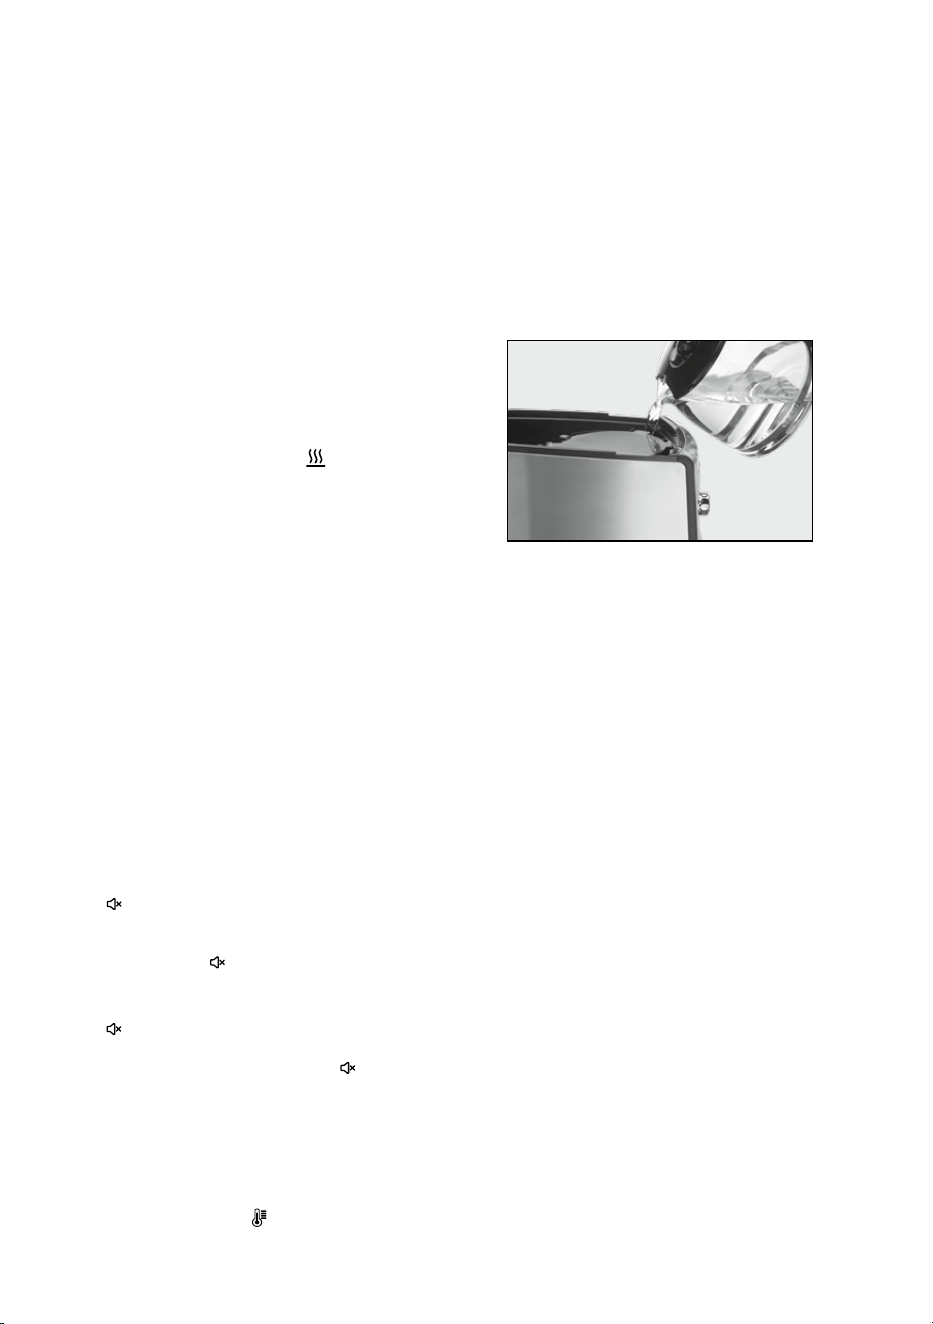
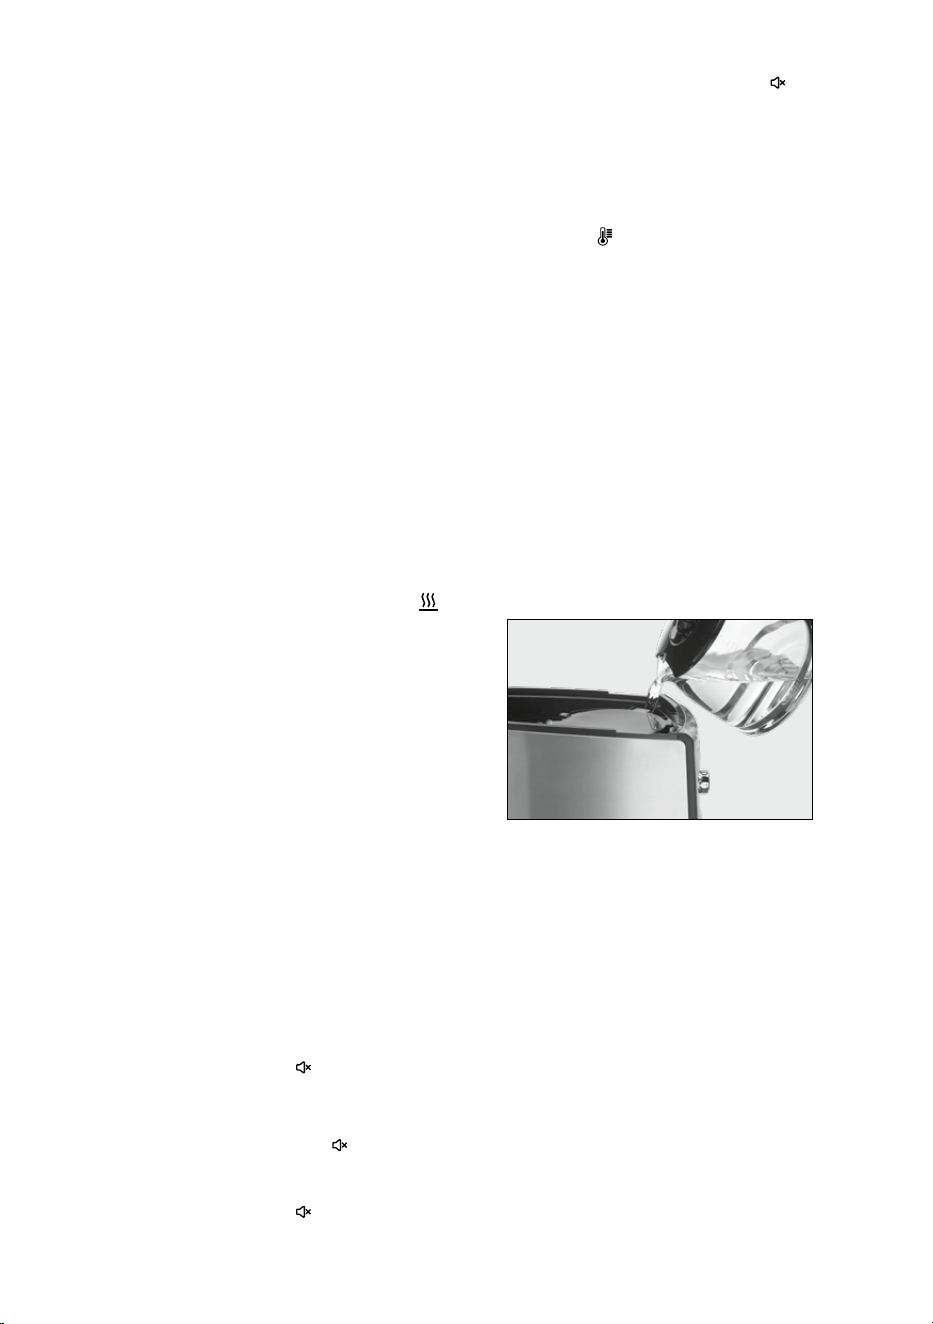
2. Fill the water reservoir
Openthecoeemakerreservoircoverbylifting
it up. Pour in the desired amount of water, using
the water level indicator located at the side of
thecoeemaker.
3. Before brewing
Make sure the glass carafe is in position on the
heater plate and the top cover is closed. Plug the
cord into an electrical outlet.
4. Set preferences
a. Press the 1–4 cup button if you are brewing fewer
than 5 cups. The indicator light will illuminate.
b. Choose Low (L), Medium (M), or High (H) carafe
temperature by following instructions listed on
this page under SETTING THE CARAFE
TEMPERATURE. If no option is selected, the
default temperature will be Medium (M).
c. Press the OVER ICE button to prepare iced
coee.Seepage9fordetailedinstructions.
NOTE: This will disable the warming plate.
5. Add ground coee
Inserta#4paperlterorpermanentlter.Be
surethatapaperlteriscompletelyopenand
fully inserted in the basket. It may help to fold
andattentheseamsofapaperlterbeforehand.
Add1levelscoopofgroundcoeepercup.Adjust
the amount according to taste.
9
NOTE:Themaximumcapacityforgroundcoeeis
15tablespoonsforthiscoeemaker.Exceeding
thisamountmaycauseoverowifthecoeeis
toonelyground.
6. Start brewing
PresstheBrew/Obuttontobeginbrewing.
7. After brewing
Whenthebrewingcycleisdone,coeewill
continuetostreamfromthelterforseveral
seconds.Whenstreamingcompletelystops,ve
beeps will sound, and you can now enjoy your
coee.
NOTE: Reservoir cover may be hot during and
directly after brewing. Wait at least 10 minutes
before opening.
Brewing Over Ice
The OVER ICE feature adjusts the brew process to
maximizecoeeavoridealformakingicedcoee.
Eitherbrewcoeedirectlyovericeoraddiceto
coeeafteritisbrewed.
1. Fill the water reservoir
Openthecoeemakerreservoircoverbylifting
it up. Pour in the desired amount of water, using
the water level indicator located at the side of
thecoeemaker.
2. Add ice
Fill the glass carafe with ice up to the 10 cups
marking. Make sure the glass carafe is in position
on the heater plate and the top cover is closed.
NOTE: Adjust amount of ice based on personal
preference. Adding too much ice could impact the
overallavorofthecoee.Donotllpast10cup
marking with ice.
3. Choose preferences
Press OVER ICE button. The LED indicator will
illuminate, indicating the function is active.
NOTE: Activating the OVER ICE function will
disable the warming plate.
4. Brewing
Followsteps5through7inBrewingCoeeon
page 8 to complete OVER ICE brewing.
5. After brewing
Thecoeemakerwillautomaticallyshutoafter
brewing is complete.
Brew Pause™ Feature
Thisfeatureinterruptstheowofcoee
fromthebaskettoletyoupourthatrstcup
mid-brew.Becausetheavorproleofcoee
brewedatthestartofacyclediersfromthat
brewed toward the end, be aware that using this
featurewillweakentheavorstrengthofthe
nishedpot.
NOTE: Removing carafe for more than
20 seconds during brew cycle may cause
lterbaskettooverow.

10
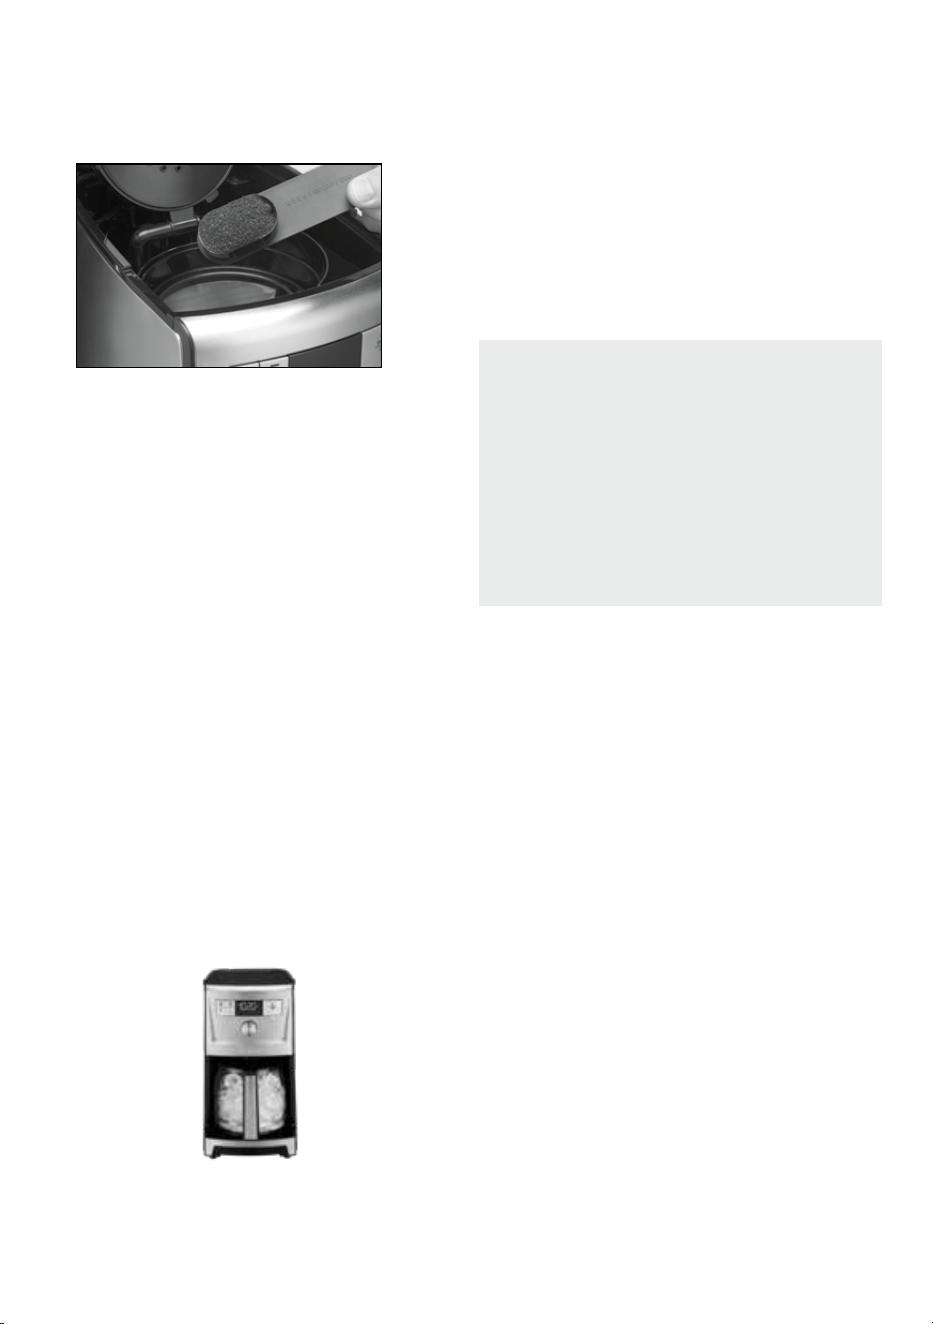
Cleaning and Maintenance
Alwaysturncoeemakeroandremove
the plug from the electrical outlet before cleaning.
Liftupthecoeemakerlid.Removeanddiscardthe
paperlterandgroundcoee.Thelterbasketcan
be washed in warm, soapy water and rinsed
thoroughly, or cleaned in the upper rack of the
dishwasher. Dry all parts after use.
Do not put any water in the unit once the lter basket
has been removed. Wipe the area under the lter
basket with a damp cloth.
Remove the carafe from the heating plate. Discard
anyremainingcoee.Thecarafeandlidcanbe
washed in warm, soapy water and rinsed thoroughly,
or placed in a dishwasher. The carafe and carafe lid
should be placed on the upper rack only.
Do not use any scouring agents or harsh cleansers on
anypartofthecoeemaker.
Never immerse base unit in water or other liquids. To
clean base, simply wipe with a clean, damp cloth and
dry before storing. Fingerprints and other blemishes
onthehousingcanbewashedowithsoapand
water or a nonabrasive cleaning solution. Wipe
heating plate with a clean, damp cloth. Never use
rough, abrasive materials or cleansers to clean the
heating plate. Do not dry the inside of the water
reservoir with a cloth, as lint may remain.
Maintenance
Any other servicing should be performed by an
authorized service representative.
Decalcification
Decalcicationreferstotheremovalofcalcium
deposits that form over time on the metal parts
ofyourcoeemaker.Themineralcontentofthetap
waterinyourareaandthefrequencyofuseaects
therateofthecalciumbuildup,whichcanaect
thefunctioningofyourcoeemakerandtheavor
ofyourcoee.
For best performance from your PerfecTemp
®
coeemaker,werecommendcleaningitwheneverthe
CLEAN icon lights up.
NOTE: Before decalcifying your unit, remove the
charcoalwaterlterfromthewaterreservoir.
To clean:
1. Fill the water reservoir to capacity with a mixture
of⅓whitevinegarand⅔water.
2. Rotate the Function Knob to CLEAN in the clock
display and press the knob. When the CLEAN icon
ashes,thecoeemakerisinCleanmode.
3. When the cycle is completed, 5 beeps will sound
andthecoeemakerwillshuto.
4. If the CLEAN icon appears once more, repeat the
cleaning procedure with a fresh solution of vinegar
and water.
NOTE:Onecleaningcycleisusuallysucient.
5. WhentheCLEANiconremainso,runonecycle
with a full reservoir of fresh, cold water to rinse
the unit.
6. Returnthecharcoalwaterltertotheholder
insidethewaterreservoirandyourcoeemakeris
ready to brew!

11
Warranty
Limited Three-Year Warranty
This warranty is available to U.S. consumers who
purchase products directly from Cuisinart or an
authorized Cuisinart
®
re seller. You are a consumer
if you own a Cuisinart
®
PerfecTemp
®
14-Cup
ProgrammableCoeemakerthatwaspurchasedat
retail for personal, family, or household use. Except as
otherwise required under applicable law, this warranty
is not available to retailers or other commercial
purchasers or owners or consumers who purchase
from unauthorized Cuisinart
®
re sellers. We warrant
that your Cuisinart
®
PerfecTemp
®
14-Cup
ProgrammableCoeemakerwillbefreeofdefectsin
materials and workmanship under normal home use
for 3 years from the date of original purchase.
We recommend that you visit our website,
https://cuisinart.registria.com,forafast,ecientway
to complete your product registration. However,
product registration does not eliminate the need for
the consumer to maintain the original proof of
purchaseinordertoobtainthewarrantybenets.In
the event that you do not have proof of purchase
date, the purchase date for purposes of this warranty
will be the date of manufacture.
California Residents Only
California law provides that for In-Warranty Service,
California residents have the option of returning a
nonconforming product (A) to the store where it was
purchased or (B) to another retail store that sells
Cuisinart products of the same type. The retail store
shall then, according to its preference, either repair
the product, refer the consumer to an independent
repair facility, replace the product, or refund the
purchase price less the amount directly attributable
to the consumer’s prior usage of the product. If
neither of the above two options results in the
appropriate relief to the consumer, the consumer may
then take the product to an independent repair
facility, if service or repair can be economically
accomplished. Cuisinart and not the consumer will be
responsible for the reasonable cost of such service,
repair, replacement, or refund for nonconforming
products under warranty. California residents may
also, according to their preference, return
nonconforming products directly to Cuisinart for
repair or, if necessary, replacement by calling our
Consumer Service Center toll-free at 1-800-726-0190.
Cuisinart will be responsible for the cost of the repair,
replacement, and shipping and handling for such
nonconforming products under warranty.
Hassle-Free Replacement Warranty
Your ultimate satisfaction in Cuisinart products
is our goal, so if your Cuisinart
®
PerfecTemp
®
14-Cup
ProgrammableCoeemakershouldfailwithinthe
generous warranty period, we will repair it or, if
necessary, replace it at no cost to you. To obtain a
return shipping label, email us at https://www.
cuisinart.com/customer-care/product-assistance/
product-inquiry/. Or call our toll-free customer
service department at 1-800-726-0190 to speak with
a representative.
Your Cuisinart
®
PerfecTemp
®
14-Cup Programmable
Coeemakerhasbeenmanufacturedtothestrictest
specicationsandhasbeendesignedforuseonlyin
120-volt outlets and only with authorized accessories
and replacement parts. This warranty expressly
excludes any defects or damages caused by
attempted use of this unit with a converter, as well as
use with accessories, replacement parts, or repair
service other than those authorized by Cuisinart. This
warranty does not cover any damage caused by
accident, misuse, or other than ordinary household
use. This warranty excludes all incidental or
consequential damages. Some states do not
allow the exclusion or limitation of these damages, so
these exclusions may not apply to you. You may also
have other rights, which vary from state to state.
Important: If the nonconforming product is
to be serviced by someone other than Cuisinart’s
Authorized Service Center, please remind the
servicer to call our Consumer Service Center at
1-800-726-0190 to ensure that the problem
is properly diagnosed, that the product is serviced
with the correct parts, and that the product
is still under warranty.

IB-18488-ESP
©2024 Cuisinart
Glendale, AZ 85307
Printed in China
24ce092499

Manual de
instrucciones
Para su seguridad y para disfrutar plenamente de este producto,
siempre lea atentamente las instrucciones antes del uso.
Cafetera programable
de 14 tazas (2L)
PerfecTemp
®
SERIE DCC-3500

2
Medidas de
seguridad
importantes
Al usar aparatos eléctricos, siempre se deben tomar
precauciones básicas de seguridad, entre ellas
las siguientes:
1. LEA TODAS LAS INSTRUCCIONES.
2. Siempre desenchufe el aparato cuando este o el
reloj no estén en uso, y antes de limpiarlo. Deje
que se enfríe antes de instalar/quitar piezas y
antes de limpiarlo.
3. Notoquelassuperciescalientes;uselosmangos/
asas/agarraderasolosbotones/perillas/diales.
4. Para reducir el riesgo de descarga eléctrica, no
sumerja el cable, el enchufe ni la base del
aparato en agua u otros líquidos.
5. Este aparato no debe ser usado por o cerca de
niños o personas con ciertas discapacidades.
6. No use este aparato si el cable o el enchufe
están dañados, después de un mal
funcionamiento, después de una caída, o si está
dañado;devuélvaloauncentrodeservicio
autorizadoparasurevisión,reparaciónoajuste
(eléctrico o mecánico).
7. El uso de accesorios no recomendados por
Cuisinart puede causar lesiones.
8. No lo use en exteriores.
9. No deje que el cable cuelgue de la encimera o
de la mesa, ni que tenga contacto con
superciescalientes.
10. No coloque el aparato sobre o cerca de un
quemador a gas o de un hornillo eléctrico
caliente, ni en un horno caliente.
11. Siemprelleneeldepósitodeaguaantesde
enchufar el aparato. Para desconectar, presione el
botónBREW/OFF,yluegodesenchufeelaparato.
12. Solouseesteaparatoparaelusoprevisto.
13. Compruebe que la tapa de la jarra esté bien
cerradaantesdeservircafé.
14. Paraevitarlasquemaduras,noquitelatapa
durante el funcionamiento.
15. Lajarraprovistaconestacafeterahasido
diseñadaparaserusadaconestaúnicamente;
no la coloque sobre un hornillo caliente.
16. Nocoloquelajarracalienteenunasupercie
húmeda o fría.
17. Nouselajarrasiestárajadaosielasaestáoja
o dañada.
18. No limpie la jarra ni la placa calentadora con
limpiadoresabrasivos,lanadeacerouotros
materialesabrasivos.
19. ADVERTENCIA: PARA REDUCIR EL RIESGO DE
INCENDIO O DESCARGA ELÉCTRICA, NO
DESARME LA BASE/CARCASA DEL APARATO.
ESTE APARATO NO CONTIENE NINGUNA PIEZA
QUE PUEDA SER REPARADA/REEMPLAZADA POR
EL USUARIO. LAS REPARACIONES DEBEN SER
REALIZADAS POR PERSONAL AUTORIZADO.
20. Nocoloquelacafeteraenunpaño/trapo,ni
obstruyaelujodeairedebajodelaparatode
ninguna manera.
21. Usesolamenteelltrodoradopermanente
Cuisinart
®
oltrosdepapelestándaresconeste
aparato.OTROSFILTROSPERMANENTESPUEDEN
CAUSAR UN DERRAME.
22. No haga funcionar el aparato debajo o dentro de
unarmario/gabinete.Siempre desenchufe el
aparato antes de almacenarlo en un armario/
gabinete. Dejar el aparato enchufado representa
un riesgo de incendio, especialmente si este
tocalasparedesolapuertadelarmario/gabinete
cuando se cierra.
23. Los niños o las personas que carezcan de la
experiencia o de los conocimientos necesarios
para manipular el aparato, o aquellas cuyas
capacidades físicas, sensoriales o mentales
estén limitadas, no deben usar el aparato sin la
supervisiónoladireccióndeunapersona
responsable por su seguridad.
24. Superviseelusodeesteaparatoconcuidado
cuando sea usado por o cerca de niños.
25. Labaseestarácalientedespuésdeluso;no
la toque.
GUARDE ESTAS
INSTRUCCIONES
PARA USO
DOMÉSTICO
SOLAMENTE
3
Advertencia: Riesgo de
incendio o descarga
eléctrica
El símbolo de relámpago con punta de
echadentrodeuntriánguloequilátero
tienecomonalertaralusuariodela
presenciadevoltajespeligrososno
aislados en el interior del aparato, los
cualespuedenserdesucientemagnitud
para constituir un riesgo de incendio o
descarga eléctrica.
Elsignodeexclamacióndentrodeun
triánguloequiláterotienecomonalertaral
usuario de la presencia de instrucciones
importantes de uso y mantenimiento
(servicio)enladocumentaciónqueacompaña
al equipo.
Instrucciones especiales
acerca del cable
Elcableprovistoconesteaparatoescorto,para
reducir el riesgo de que alguien se enganche o
tropiece con un cable más largo. Se puede usar un
cablealargador/deextensión,siemprequese
respeten las precauciones siguientes. Si usa un
cablealargador/deextensión:
1. Laclasicaciónnominaldelcableodelcable
alargador/deextensióndebeserporlomenos
igual a la del aparato.
2. El cable más largo debe ser acomodado de tal
maneraquenocuelguedelaencimera/mesa,
donde puede ser jalado por niños o causar
tropiezos.
AVISO
El cable de este aparato cuenta con un enchufe
polarizado (una pata es más ancha que la otra).
Como medida de seguridad, aquel enchufe se podrá
enchufar de una sola manera en las tomas de
corriente polarizadas. Si el enchufe no entra en la
tomadecorriente,inviértalo.Siaunasínoentra
completamente, comuníquese con un electricista.
Nointentemodicarlo.
IMPORTANTE
Algunascondicionespuedenprovocarun
atascamientodelaguaodelcaféenelportaltrosy
causarunderrame.Paraevitarqueestoocurra,no
muelaelcafédemasiadono,nousemásdeun
ltrodepapelalavez(ounltropermanenteal
mismotiempoqueunltrodepapel),limpie
cuidadosamenteelltrodorado,ynosobrelleneel
ltro.
Precaución: Nunca abra la tapa durante la
preparación,aunquelíquidonoestébajando;aguao
cafémuycalientepuedenrebosardelportaltrosy
causar quemaduras. Si el café no se escurre
debidamentedurantelapreparación,desenchufeel
aparato y espere 10 minutos antes de abrir la
cámaradepreparaciónyexaminarelportaltros.
ADVERTENCIA
RIESGO DE INCENDIO O DESCARGA ELÉCTRICA;
NO LO ABRA
ADVERTENCIA: PARA REDUCIR EL RIESGO DE DESCARGA ELÉCTRICA,
NO DESARME LA CARCASA DEL APARATO.
ESTE APARATO NO CONTIENE NINGUNA PIEZA QUE PUEDA SER REPARADA/
REEMPLAZADA POR EL USUARIO.
LAS REPARACIONES DEBEN SER REALIZADAS POR TÉCNICOS AUTORIZADOS
SOLAMENTE.

4
Índice
Medidas de seguridad importantes 2-3
Instrucciones de desembalaje 4
Sugerencias para la preparación de un buen café 4
Piezas y características 5
Panel de control 6
Filtro de agua de carbón 7
Instrucciones de uso 7
Programación 7
Preparación del café 8
Cómo preparar café helado 9
Función de pausa al servir Brew Pause
™
9
Limpieza y mantenimiento 10
Descalcificación 10
Garantía 11
Importantes
instrucciones de
desembalaje
1. Coloquelacajaenunasupercieespaciosa,
plana y resistente.
2. Retire el manual de instrucciones y otros folletos
de la caja.
3. Voltee la caja para que repose en su lado y retire
la cafetera.
4. Alejelacajaylevantelasdospiezasdecartón.
5. Agarre la jarra por el asa, y retírela de la placa y
de la bolsa protectora.
6. Quitelabolsaprotectoraqueenvuelvelacafetera.
Nota:Serecomiendaconservarlacajayelmaterial
deembalajeencasodequeseanecesarioenviarel
aparato en el futuro.
MANTENGALASBOLSASDEPLÁSTICOFUERADEL
ALCANCEDELOSNIÑOS.
Sugerencias para
la preparación de
un buen café
Elemento 1: El agua
Elcaféestáconstituidoporun98%deagua.Porlo
tanto, la calidad del agua es tan importante como la
del café. Si el agua tiene mal sabor, el café tendrá
malsabor.PoresoCuisinartequipósucafeteracon
unltrodeaguadecarbónqueeliminaelcloroyel
mal sabor y olor para preparar café puro taza tras
taza.
Elemento 2: El café
Aunque la mayor parte del brebaje es agua, el sabor
provienedelcafé.Paraprepararunbrebajede
calidad, debe usar ingredientes de calidad. Elija café
fresco, en granos enteros. Compre un suministro de
aprox.dossemanasalavez,nomás,porqueuna
vezmolidoslosgranos,susaborsedeteriora
rápidamente.
Elemento 3: El grado de molienda
Lamoliendaesprimordialparapreservarelsabor
delcafé.Cafémolidomuynoproduciráuncafé
amargo.Tambiénpuedeatascarelltro.Cafémolido
muy grueso dejará pasar el agua demasiado
rápidamente, lo que producirá un café aguado. Se
recomiendausarungradodemoliendamedio-no.
Elemento 4: Las proporciones
Para que el café sea perfecto, ni muy débil ni muy
fuerte,sedebeusarlaproporciónadecuadadecafé
yagua.Sigalaspautasenlasección“PREPARACIÓN
DELCAFɔyajustelasproporcionesalgusto.
5
Piezas y características
1. Tapa
Accesofácilalportaltros,alltrodeaguayal
depósitodeagua.
2. Depósito de agua
Conbocadellenadoextra-anchayventanilla
lateral para facilitar el llenado.
3. Cuchara medidora integrada
4. Rociador de agua
Distribuye el agua uniformemente por encima
del café, reduciendo la pérdida de temperatura
durantelainfusión.
5. Soportedelltrodeaguadecarbón
Sujetarmementeelltro.
6. Filtro de agua de carbón
Eliminaelcloro,elmalolor/sabordel
agua corriente.
7. Portaltros
Paraltrodepapeln.°4Oltropermanente.
8. Soportedelportaltros
9. Filtro dorado permanente Cuisinart
®
Eliminalanecesidaddeusarltrosdepapel.
10. Panel de control
Véase los detalles en la página 6.
11. Función de pausa al servir Brew Pause™
Detieneelujodecaféalretirarlajarradela
placa,loquepermiteservirunatazadecafé
antesdelnaldelapreparación.
12. Jarra de vidrio
Jarrade14tazas(2L)concómodaasa
ergonómica,bocaantigoteoymarcasqueindican
la cantidad de tazas, desde 4 hasta 14 tazas.
13. Placa calentadora
Mantieneelcafécalientealnaldeltiempode
apagadoautomático.Temperaturaajustable.
14. Sistema de protección contra falla eléctrica
(no ilustrado)
Proveeunaproteccióndeunminutoencasode
interrupcióndelsuministroeléctrico,guardandola
informaciónprogramada(incluyendolahora,la
hora de encendido automático y el tiempo de
apagado automático) en la memoria de la cafetera.
10
1
11
12
2
3
6
5
7
8
9
4

6
1. Botón OVER ICE (café helado)
Ajustaelprocesodepreparaciónparamaximizar
el sabor del café cuando prepare café helado.
2. Botón AUTO ON (encendido automático)
Seleccioneestaopciónparaactivarel
encendido automático.
3. Botón 1-4 (función 1-4 tazas)
Optimizaelsaborylatemperaturadelcafé
cuando se prepara menos de 5 tazas.
4. Botón +30
Seleccioneestaopciónparaprolongarelperíodo
de“mantenercaliente”en30minutos.
5. Pantalla retroiluminada
Indica la hora del día, la hora de encendido
automático y el tiempo de apagado automático.
Íconosdehora,programación,modomantener
caliente, temperatura de la jarra, señal de listo
desactivadaydescalcicación.
A. Ícono de reloj
Seleccióneloparajarlahoraylosminutos.
B. Ícono “PROG”
Seleccióneloparaprogramarlahorade
encendido automático,
conhasta24horasdeantelación.
C. Ícono “CLEAN”
Aparece en la pantalla cuando es necesario
descalcicarelaparato.
D. Ícono de señal sonora
Permiteactivar/desactivarlaseñalsonoraque
indicaelnaldelciclodepreparación.
E. Ícono de termómetro
Seleccióneloparaelegirlatemperaturadela
placa: baja (L), media (M) o alta (H).
F. Ícono de calor
Apareceenlapantallaalnaldelciclode
preparación,paraindicarqueelciclo
“mantenercaliente”sehaactivado.
6. Botón BREW/OFF
Presióneloparainiciarodetenerelciclo
depreparación.
7. Selector de función
Gíreloparaelegirlasopcionesenla
pantalla.Presióneloparaactivar/desactivar
sus selecciones.
PANEL DE CONTROL
Véaselasinstruccionesdetalladasdeprogramaciónenlaspáginassiguientes.
3
1
2
4
7
6
A B C D
E
5
F
7
Instrucciones de uso
Limpieza inicial
Limpie el sistema interno antes del primer uso,
comoseindicaacontinuación.Nota:Nousecafé
durante la limpieza inicial.
1. Siaúnnolohahecho,instaleelltrodeaguade
carbóncomoseindicaalaizquierda.
2. Lleneeldepósitodeaguaconagua.
3. Coloque la jarra en su sitio.
4. Enchufe el cable en una toma de corriente.
5. PresioneelbotónBREW/OFFparainiciarelciclo
depreparación.
6. Finalizadoelciclo,elsistemainternoestará
limpio.Tireelaguacaliente.Lacafeteraestá
lista para su uso.
Programación
Cómo fijar la hora
Alenchufarlacafetera,“12:00”(lahorapordefecto)
aparecerá en la pantalla, parpadeando, por 10
segundos. Si deja de parpadear, mantenga
presionadoelselectordefunciónparavolveral
mododejacióndelahora.
Cómo jar la hora y los minutos
Gireelselectordefunciónparajarlahora.NOTA:
Compruebequeelindicador“PM”estéenla
pantallacuandojeunahoradetarde/noche.
Presioneelselectordefunciónparaconrmarsu
selección.Gireelselectordefunciónparajarlos
minutos.Presioneelselectordefunciónpara
conrmarsuselecciónysalirdelmododejación
de la hora.
Paraingresaralmododejacióndelahora,gireel
selectordefunciónhastaqueelícono“
”se
encienda,ypresioneelselectordefunción;lahora
empezará a parpadear. Siga las instrucciones de la
sección“Cómojarlahora”.
Filtro de agua de carbón
(instalación)
⚫ Retireelltrodelabolsadeplásticoy
remójeloenaguafríapor15minutos.
⚫ Retireelsoportedelltrosituadoenel
depósitodeaguadelacafetera.
⚫ Abra el compartimiento
en la parte inferior
del soporte.
⚫ Instaleelltroenel
soporte y cierre este.
Importante: Haga esto con
muchoconcuidado;sino
instalaelltrodemanera
correcta, la membrana del
ltropuederomperse.
⚫ Enjuagueelltro,vertiendo
aguaeneloriciosituado
debajo del compartimento
por 10 segundos.
⚫ Dejequeelltrosesequecompletamente.
⚫ Vuelvaacolocarelsoportedelltroenel
depósito,empujándolohastaelfondo.
NOTA:Serecomiendacambiarelltrodeagua
cada 60 días o 60 usos, o más frecuentemente si
el agua es dura.
Puedecomprarltrosderepuestoenlastiendas,
en www.cuisinart.com, o llamando a nuestro
serviciodeatenciónalclienteal1-800-726-0190.
8
CÓMO PROGRAMAR EL ENCENDIDO
AUTOMÁTICO
Gireelselectordefunciónparaelegirelícono
“PROG”ypresióneloparaactivarelmodode
programacióndelencendidoautomático;el
indicadorluminosodelbotónAUTOONylahora
pordefecto(12:00),olahorapreviamente
jada,parpadearán.
Sigalasinstruccionesdelasección“Cómojarla
hora”paraprogramarlahoradeencendido
automático. El aparato saldrá automáticamente del
mododeprogramacióncincosegundosdespuésde
jarlahoradeencendidoautomático.
1. Para activar el encendido automático
PresioneelbotónAUTOON;lahorapreviamente
jadaapareceráenlapantallayelindicador
luminoso se encenderá.
2. Para desactivar el encendido automático:
PresioneelbotónAUTOONiluminado;el
indicador luminoso se apagará, lo que indica que
elmodohasidodesactivado.
CÓMO PROGRAMAR EL APAGADO
AUTOMÁTICO
1. Gire el selector de función para elegir el ícono
y
presiónelo para activar el modo de programación
del apagado automático;
el tiempo de apagado automático por defecto (2:00)
oeltiempopreviamentejadoapareceránenla
pantalla.Fijeeltiempodeapagadoautomático,
desde0hasta4horasdespuésdelnaldelciclode
preparación,delamismamaneraquejólahora
(véase“Cómojarlahora”).
2. Parasalirdelmododeprogramaciónyconrmar
el tiempo de apagado automático:
notoqueningúnbotón/perilla.Elaparatosaldrá
automáticamentedelmododeprogramación
después de 5 segundos.
3. Para extender el tiempo en 30 minutos:
Después de que el aparato ingrese el modo
“mantenercaliente”,presioneelbotón+30.
CÓMO DESACTIVAR LA SEÑAL DE LISTO
Este aparato cuenta con una señal sonora que emite
5pitidosalnaldelciclodepreparación.
1. Paradesactivarlaseñal,gireelselectorde
funciónparaelegirelícono“
”ypresiónelo
paraconrmarsuselección;elícono“ON”
parpadeará.Presioneelselectorotravez;el
ícono“OFF”parpadeará.Presioneelselector
paradesactivarlaseñal;elícono aparecerá
paraindicarquelaseñalhasidodesactivada.
2. Paravolveraactivarlaseñal,gireelselectorde
funciónparaelegirelícono“
”ypresiónelo
paraconrmarsuselección;elícono“OFF”
parpadeará.Presioneelselectorotravez;el
ícono“OFF”parpadearáyelícono
desaparecerá.
CÓMO FIJAR LA TEMPERATURA DE LA
PLACA CALENTADORA
Useestafunciónparacontrolarlatemperaturadel
caféenlajarra.Gireelselectordefunciónpara
elegirelícono“ ”ypresioneelselectorpara
conrmarsuselección;elíconodelatemperatura
pordefecto(“M”)parpadeará.Gireelselectorotra
vezparaelegirlatemperaturadeseada:baja(“L),
media(“M”)oalta(“H”).Presioneelselectorpara
conrmarsuselección;elíconoseencenderá.
PREPARACIÓN DEL CAFÉ
Siga las instrucciones de puesta en servicio en la
página 7.
1. Instaleelltrodeaguadecarbón
Sigalasinstruccionesdepreparacióne
instalacióndelltroenlapágina7.
2. Llene el depósito de agua
Abralatapadeldepósito.Agregueaguahastael
niveldeseado,jándoseenlasmarcasenel
costado del aparato.
3. Antes de preparar café
Coloque la jarra en la placa y compruebe que la
tapa esté cerrada. Enchufe el cable en una toma
de corriente.
4. Fije sus preferencias
a. Si desea preparar menos de 5 tazas de café,
presioneelbotón1-4;elindicadorluminoso
se encenderá.
b. Elija la temperatura de la placa calentadora
(véase“Cómojarlatemperaturadelaplaca
calentadora”).Nota:Latemperaturapor
defectoes“M”(medio).
c.Paraprepararcaféhelado,presioneelbotón
OVERICE(véaselasinstruccionesmásabajo).
NOTA:Estodesactivarálaplacacalentadora.
5. Agregue café molido
Instaleunltrodepapeln.°4oelltrodorado
enelportaltros.Compruebequeelltrode
papel esté completamente abierto y
correctamente instalado. Puede resultar útil
9
doblaryaplanarlascosturasdelltrodepapel
de antemano. Agregue 1 cucharada llena de café
molidoportaza(5oz/145ml)decafé,ajustando
la cantidad al gusto.
NOTA: La capacidad máxima es de 15 cucharadas
de café molido. Exceder esta cantidad puede
causar un derrame, especialmente si el café es
molidomuyno.
6. Empiece la preparación
PresioneelbotónBREW/OFFparaempezar
lapreparación.
7. Después del ciclo de preparación
Elcaféseguirásaliendodelpicoporvarios
segundos.Cuandoelujosedetenga,elaparato
emitirá 5 pitidos. ¡El café está listo!
NOTA: Puedequelatapadeldepósitodeagua
esté caliente durante e inmediatamente después
delciclodepreparación.Dejequeseenfríepor
un mínimo de 10 minutos antes de abrir el
depósitodeagua.
CÓMO PREPARAR
CAFÉ HELADO
Lafunción“OVERICE”ajustaelprocesode
preparaciónparamaximizarelsabordelcafé
cuando prepare café helado. Puede colocar hielo en
la jarra antes de preparar café, o añadir hielo al café
despuésdelapreparación.
1. Llene el depósito de agua
Abralatapadeldepósito.Agregueaguahastael
niveldeseado,jándoseenlasmarcasenel
costado del aparato.
2. Agregue hielo
Llene la jarra hasta la marca de 10 tazas con
cubitos de hielo. Compruebe que la jarra esté en
su puesto y que la tapa esté cerrada.
NOTA: Ajuste la cantidad de hielo dependiendo
de sus preferencias, teniendo presente que usar
demasiado hielo puede afectar el sabor del café.
Noexcedaelnivelmáximode10tazas.
3. Elija sus preferencias
PresioneelbotónOVERICE;elindicador
luminoso se encenderá, lo que indica que la
funciónhasidoactivada.
NOTA:Activarelmodo“OVERICE”desactivarála
placa calentadora.
4. Preparación
Sigalospasos5-7delasección“Preparacióndel
café”paraterminardeprepararcaféhelado.
5. Después de la preparación
Lacafeteraseapagaráautomáticamentealnal
delciclodepreparación.
Función de pausa al servir
Brew Pause
™
LafunciónBrewPause
™
(pausaalservir)
permiteretirarlajarradelaplacaparaservir
unatazadecaféantesdelnaldelciclode
preparación.Nota:Tengapresentequehacer
estocambiaráelsaborylaintensidadnaldel
café, ya que el sabor y la intensidad cambian
duranteelciclodepreparación.
NOTA:LafunciónBrewPause™detieneelujo
porsolo20segundos;nodejelajarrafuerade
la placa por más tiempo.

10
Limpieza y mantenimiento
Siempre apague y desenchufe el aparato antes
de limpiarlo.
Abralatapadelacafetera.Retireytireelltrode
papel.Elportaltrospuedelavarseamano,con
detergente y agua tibia, o en la bandeja superior del
lavavajillas.Dejequetodaslaspiezassesequen.
No vierta agua en el depósito después de haber
retiradoelportaltros.Limpieeláreabajoel
portaltrosconunpañohúmedo.
Retirelajarradelaplacacalentadora.Tireelcafé
restante.Lavelajarraysutapaamano,conagua
tibia y detergente, o en la bandeja superior
dellavavajillas.
Nouseproductosomaterialesabrasivospara
limpiar el aparato.
No sumerja el aparato en agua u otros líquidos. Limpie
la carcasa con un paño húmedo y séquela antes de
guardar el aparato. Las huellas dactilares y otras
manchas pueden quitarse con agua y detergente, o
conunasoluciónlimpiadoranoabrasiva.Limpiela
placa calentadora con un paño húmedo. Nunca use
materialesásperosolimpiadoresabrasivospara
limpiar la placa calentadora. No seque el interior del
depósitodeaguaconunpañoyaqueestopuededejar
pelusas en él.
Mantenimiento
Cualquierotroserviciodebeserrealizadoporun
técnicodeservicioautorizado.
Descalcificación
Coneltiempo,depósitosdecalcio/sarrose
acumulan en las partes metálicas de la cafetera, lo
que puede afectar el rendimiento de la cafetera y el
sabordelcafé.Nota:Elniveldeacumulación
depende del contenido de mineral del agua del grifo
y de la frecuencia de uso de la cafetera.
Paraunrendimientoóptimo,serecomienda
descalcicarelaparatocadavezqueelícono
“CLEAN”seencienda.
NOTA:Quiteelltrodeaguadecarbónantesde
descalcicarelaparato.
Paradescalcicar:
1. Lleneeldepósitodeaguahastalacapacidad
máximacon⅓devinagreblancoy⅔deagua.
2. Gireelselectordefunciónparaelegirelícono
“CLEAN”ypresióneloparaconrmar;elícono
parpadearáyelciclodedescalcicaciónempezará.
3. Finalizadoelciclo,elaparatoemitirá5pitidosy
se apagará.
4. Sielícono“CLEAN”sigueencendido,hagaun
segundociclodedescalcicación,usandouna
nuevasolucióndeaguaconvinagre.
NOTA:Porlogeneral,uncicloessuciente.
5. Cuando el ícono CLEAN se apague, repita estos
pasosconundepósitodeaguafrescapara
eliminareloloravinagre.
6. Vuelvaainstalarelltrodeaguadecarbón.
¡El aparato está listo para su uso!

11
Garantía
Garantía limitada de tres años
EstagarantíaesválidaenlosEstadosUnidos,para
los consumidores que hayan comprado este
producto directamente a Cuisinart o a un
revendedorautorizadodeCuisinart.Ustedesun
consumidor si posee una cafetera programable de
14tazas(2L)PerfecTemp
®
de Cuisinart
®
que haya
sido comprada en una tienda para uso personal,
familiar o casero. A menos que la ley aplicable exija
lo contrario, esta garantía no es para los minoristas
uotrosconsumidores/compradorescomerciales,ni
propietarios/consumidoresquehayancomprado
esteproductoarevendedoresnoautorizadospor
Cuisinart. Cuisinart garantiza este producto contra
tododefectodematerialesofabricacióndurante
3 años después de la fecha de compra original,
siempre que haya sido usado para uso doméstico y
de acuerdo con las instrucciones.
Se recomienda llenar el formulario de registro
disponible en https://cuisinart.registria.coman
defacilitarlavericacióndelafechadecompra
original de este producto. Sin embargo, no es
necesarioregistrarelproductopararecibirservicio
bajo esta garantía. En ausencia de prueba de la fecha
de compra, el período de garantía será calculado a
partirdelafechadefabricacióndelproducto.
Residentes de California solamente
La ley del estado de California ofrece dos opciones
bajo el período de garantía. Los residentes del
estadodeCaliforniapuedendevolverelproducto
defectuoso(A)alatiendadondelocomprarono(B)
aotratiendaquevendaproductosCuisinart
®
de
estetipo.Latiendapodrá,asuelección,repararel
producto, referir al consumidor a un centro de
servicioindependiente,sustituirelproducto,o
reembolsar al consumidor el precio de compra
menos la cantidad directamente atribuible al uso
anterior del producto por el consumidor. Si estas
dos opciones no satisfacen al consumidor, podrá
llevarelaparatoauncentrodeservicio
independiente, siempre que se pueda arreglar o
repararelaparatodemaneraeconómica.Cuisinart
(no el consumidor) será responsable por los gastos
deservicio,reparación,sustituciónoreembolsode
los productos defectuosos bajo garantía. Los
residentes de California también pueden, si lo
desean,enviarelproductodefectuosodirectamente
a Cuisinart para que sea reparado o sustituido. Para
esto,sedebellamaranuestroserviciodeatención
al cliente al 1-800-726-0190. Cuisinart será
responsableporlosgastosdereparación,
reemplazo,manejoyenvíodelosproductos
defectuosos durante el período de garantía.
Garantía de reemplazo sin dificultades
Sumáximasatisfacciónesnuestraprioridad,así
que, si este producto Cuisinart
®
falla dentro del
generoso período de garantía, lo repararemos o, de
ser necesario, lo reemplazaremos, sin costo alguno
para usted. Para obtener una etiqueta de
devolución,contáctenos,visitandohttps://www.
cuisinart.com/customer-care/product-assistance/
product-inquiry/.Ollamesincargoanuestro
serviciodeatenciónalcliente,al1-800-726-0190,
para hablar con un representante.
Este producto satisface las más altas exigencias de
fabricaciónyhasidodiseñadoparafuncionarcon
120V,usandoaccesoriosyrepuestosautorizados
solamente. Esta garantía excluye expresamente los
defectos o daños causados por accesorios, piezas o
reparaciones no autorizados por Cuisinart, así como
los defectos o daños causados por el uso de un
convertidordevoltaje.Estagarantíanocubreeluso
comercialoindustrialdelproducto,ynoesválida
en caso de daños causados por mal uso, negligencia
o accidente. Esta garantía excluye todos los daños
incidentales o consecuentes. Algunos Estados no
permitenlaexclusiónolimitacióndedaños
incidentales o consecuentes, de modo que las
limitaciones mencionadas pueden no regir para
usted.Ustedpuedetenerotrosderechosquevarían
de un Estado a otro.
Importante:Sidebellevarelproductodefectuosoa
uncentrodeservicionoautorizado,porfavor
informealpersonaldelcentrodeservicioquedeben
llamaralserviciodeatenciónalclienteCuisinart,al
1-800-726-0190,andediagnosticarelproblema
correctamente, usar las piezas correctas para
repararlo y comprobar que el producto aún esté
bajo garantía.

IB-18488-ESP
©2024 Cuisinart
Glendale,AZ85307
Impreso en China
24ce092499