SINGLE ZONE GRILL STAND
ASSEMBLY INSTRUCTIONS
Part # 145759
Created: September 28, 2022
Revised: August 8, 2023
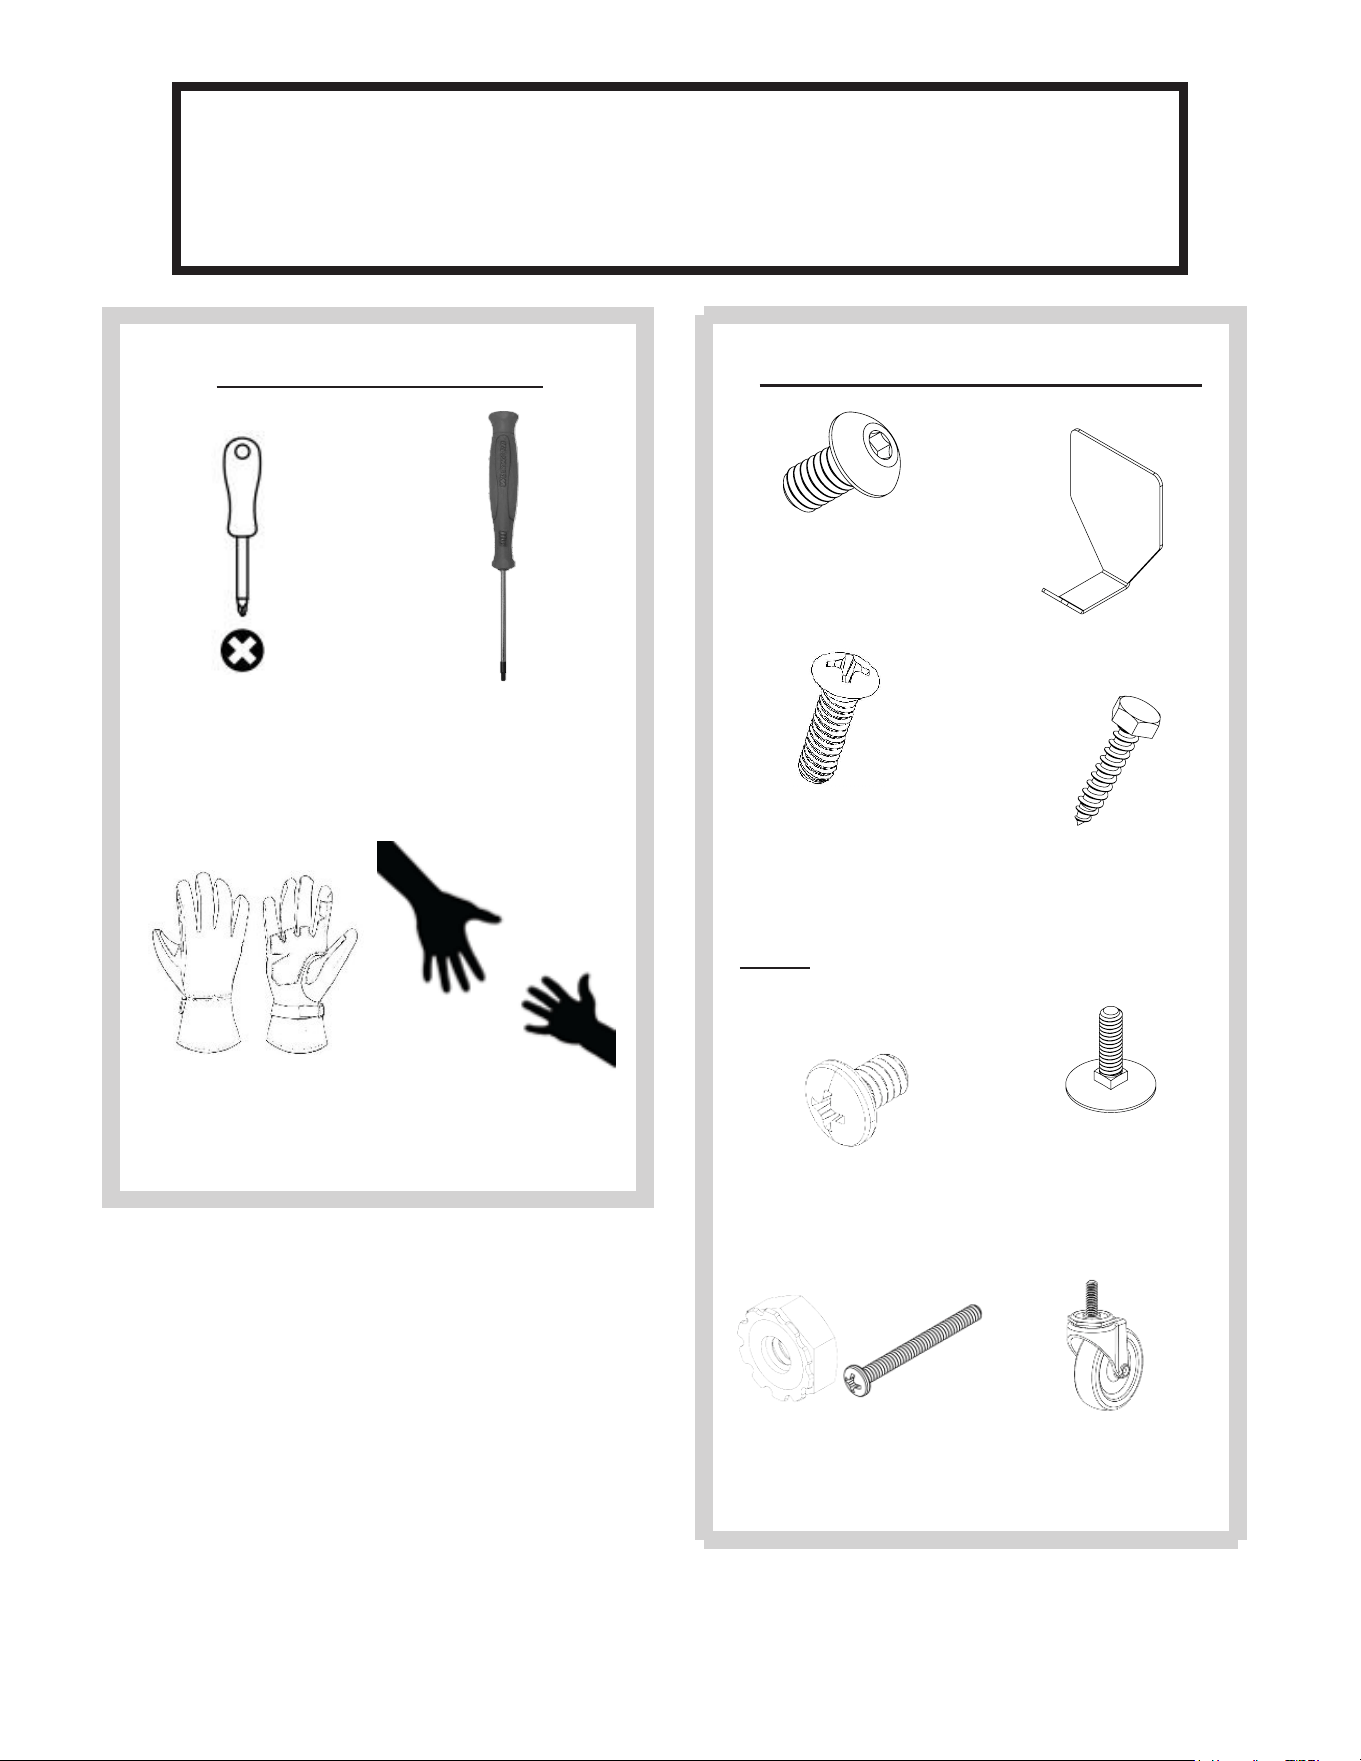
Gloves and a Helping Hand Strongly
Recommended
PLEASE READ THESE INSTRUCTIONS IN THEIR
ENTIRETY BEFORE USE. SAVE THESE
INSTRUCTIONS FOR FUTURE REFERENCE.
ITEMS REQUIRED
Phillips Head
Screwdriver
2
IMPORTANT: These
S2 (12x) screws replace
the hardware that comes in
the box of your Single Zone
Thank you for choosing Kenyon, the world’s
leading manufacturer of specialty cooking
appliances. By following the instructions in
this assembly manual, your grill stand will
provide you with many years of reliable
service.
Hex Screwdriver
(Included)
S4 (4X)
1/4” x 1-1/4”
Hex Head
*Optional*
E1 (4X)
Elevator Bolt
*Optional*
HARDWARE
S1 (18X)
#8-32 x 5/16”
Hex Drive
S3 (2x)
1/4”-20x 3/8”
Phillips Head
S2 (13X)
#6-32 x 1/2”
Phillips Head
Hooks (4X)
*Included in kit but not
need for assembly*
Casters (4X)
*Optional*
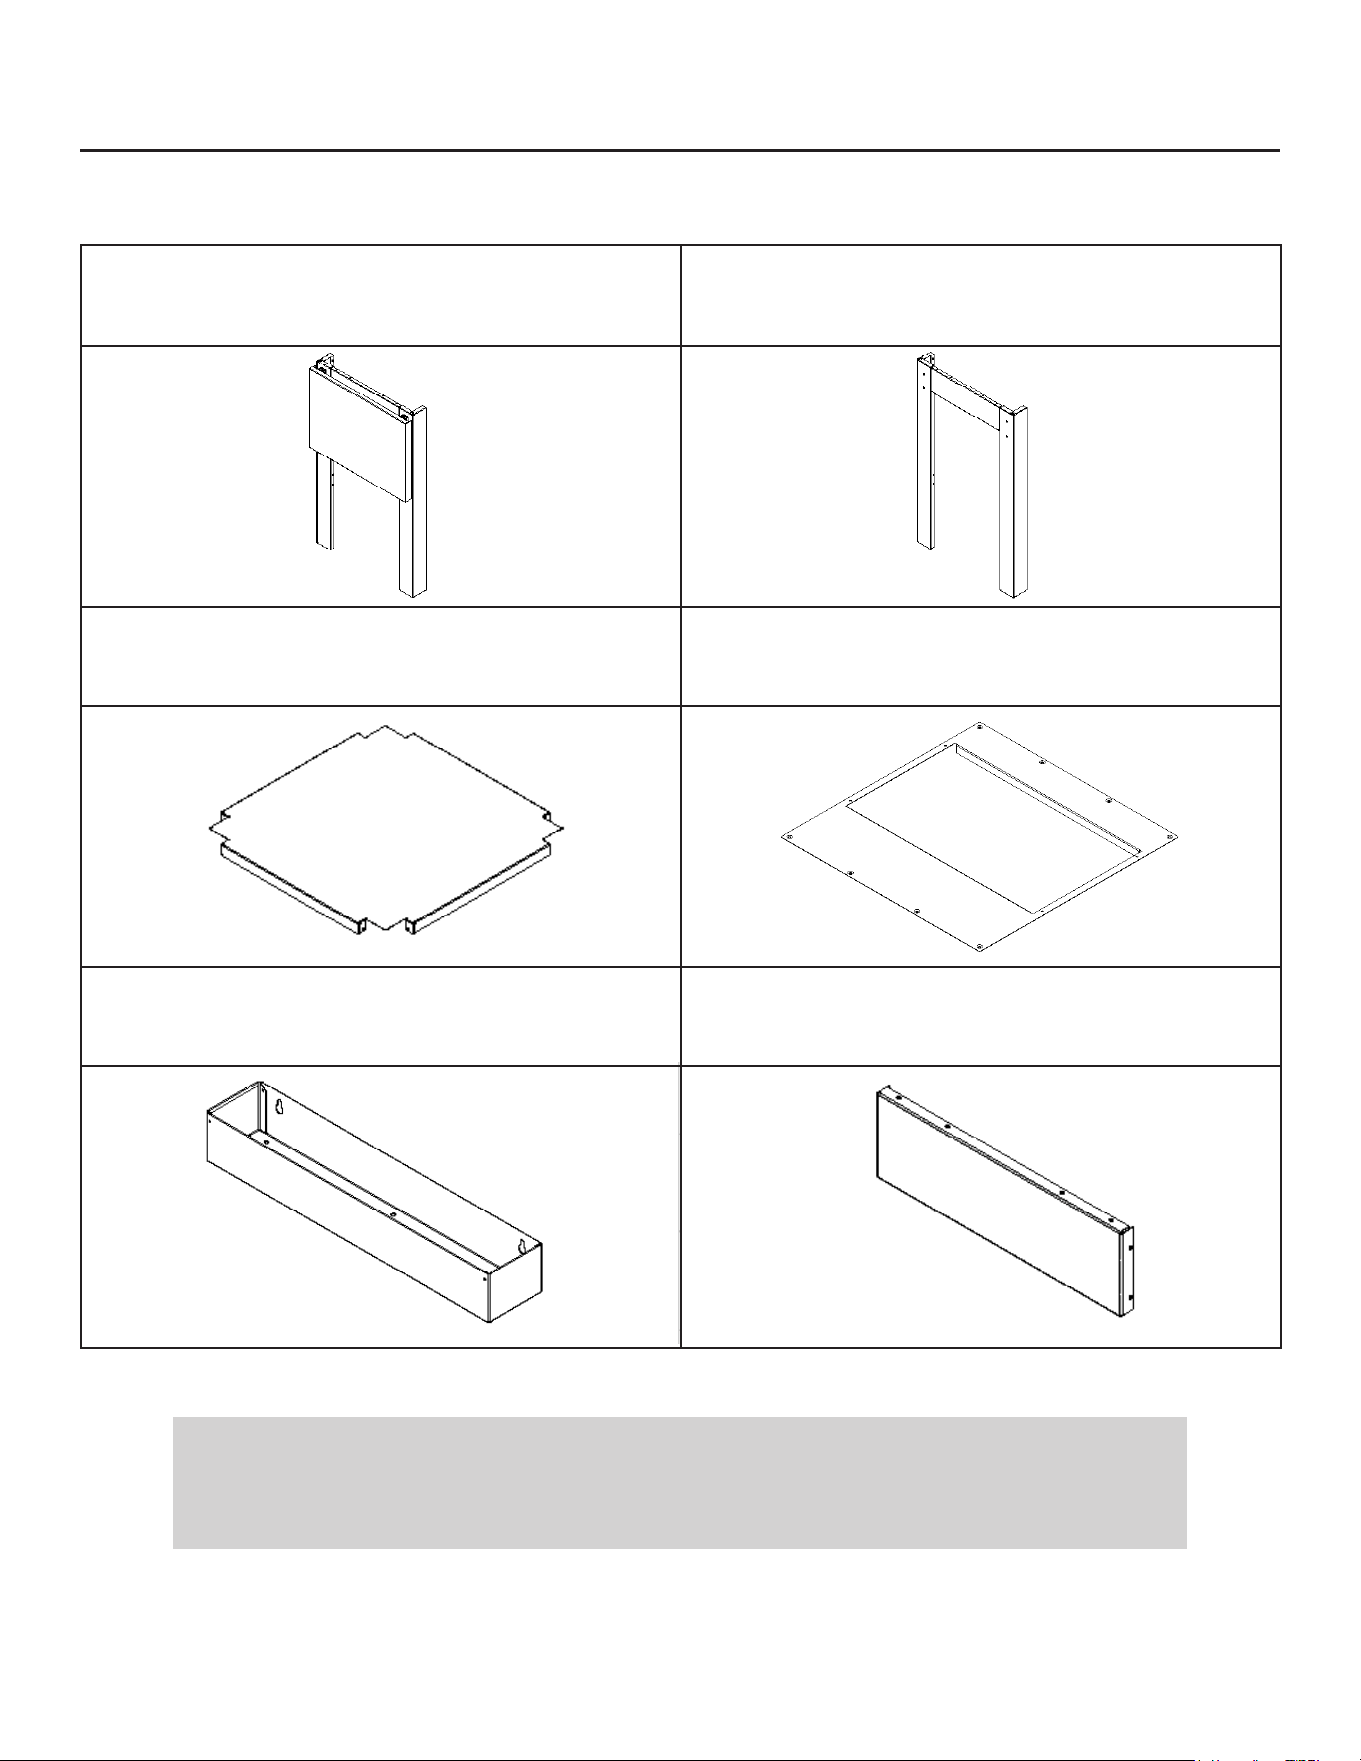
Part Lists
3
If any components are missing or damaged, please
call KENYON Customer Service at 860-664-4906.
SIDE SHELF ASSEMBLY
SIDE ASSEMBLY
STATIONARY SHELF TOP ADAPTER PLATE
SIDE TRAY TOP FRAME (2X)
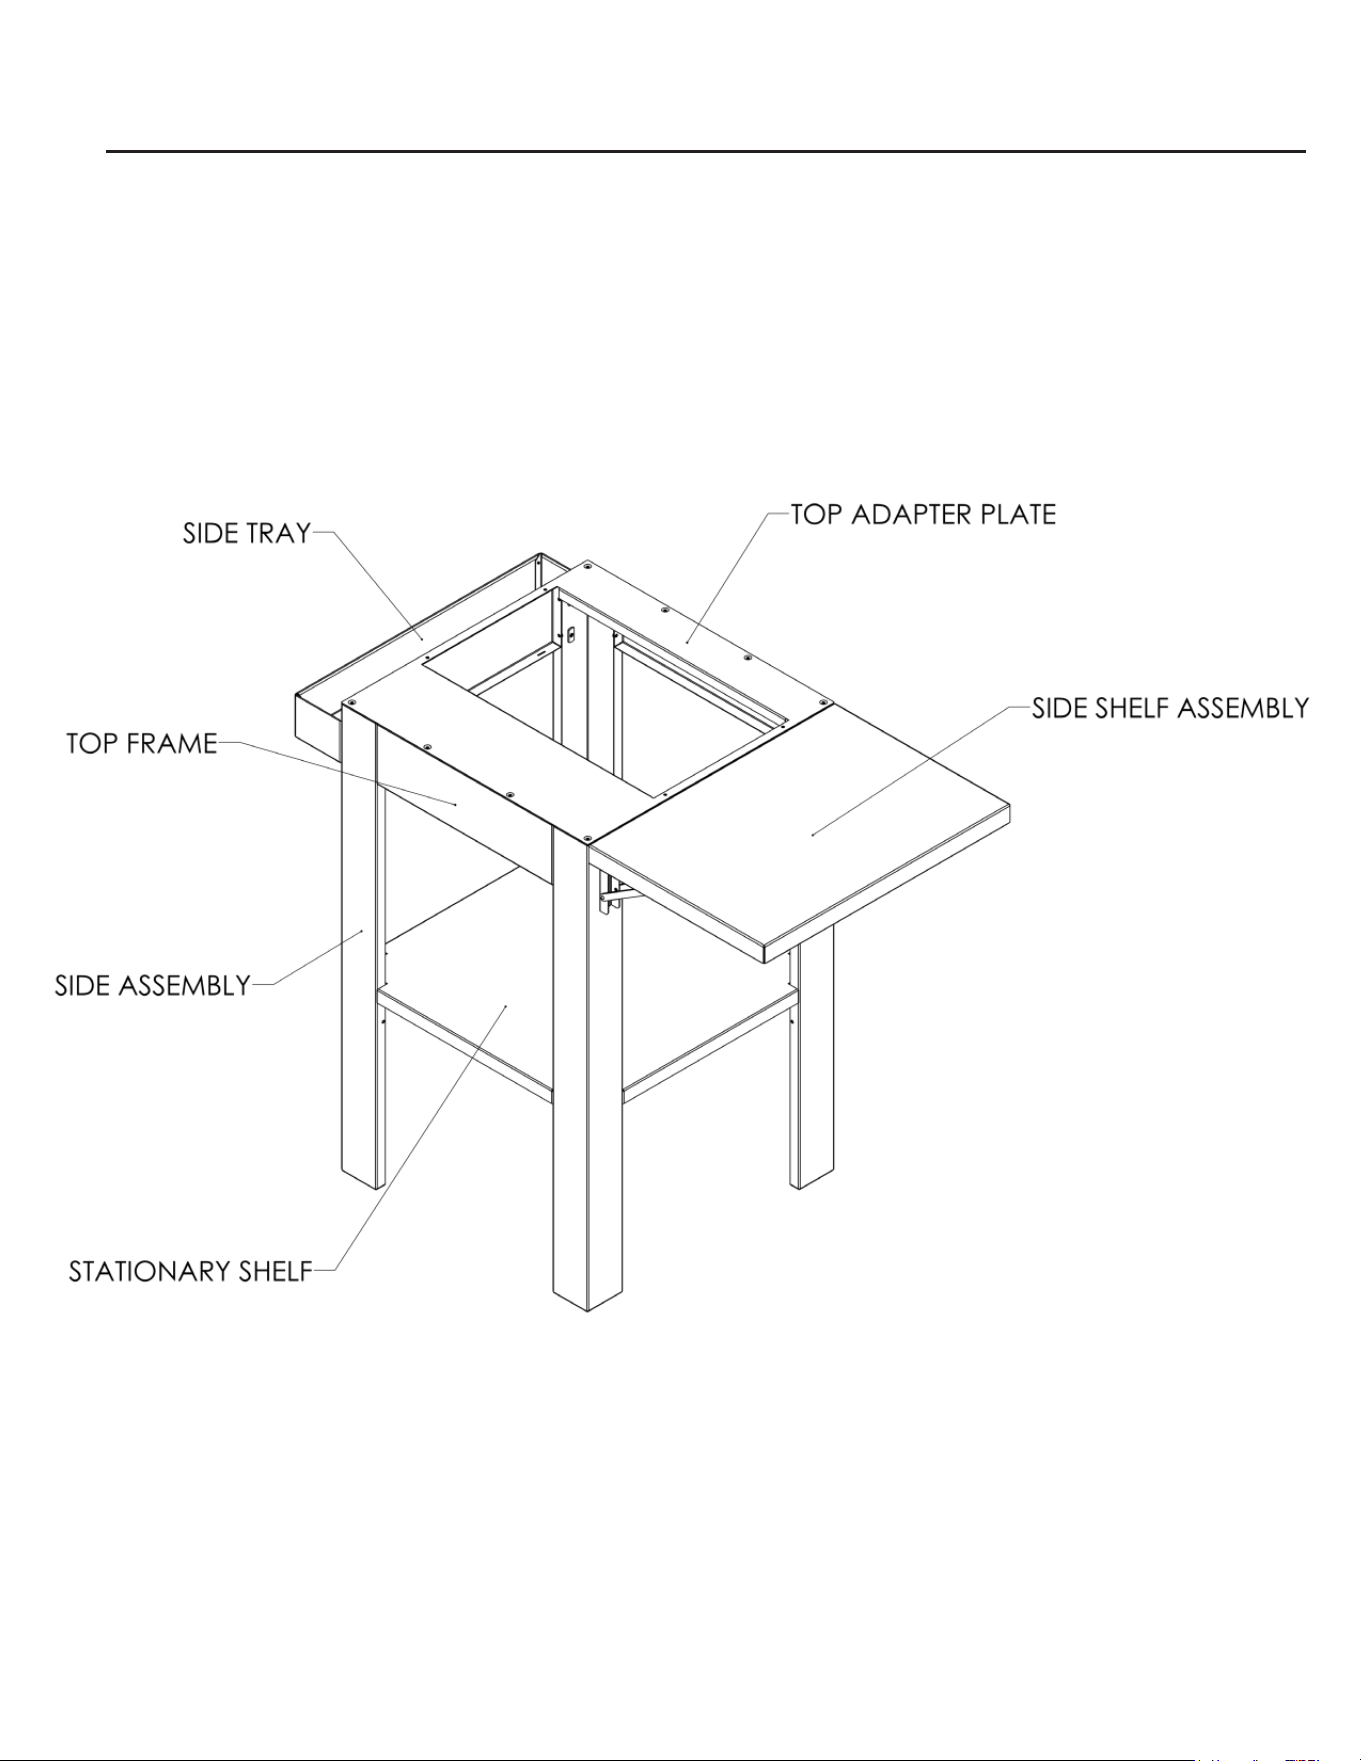
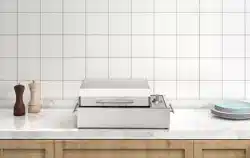
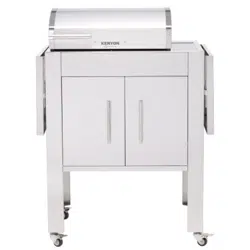
Assembled Stand
4
Instructions
5
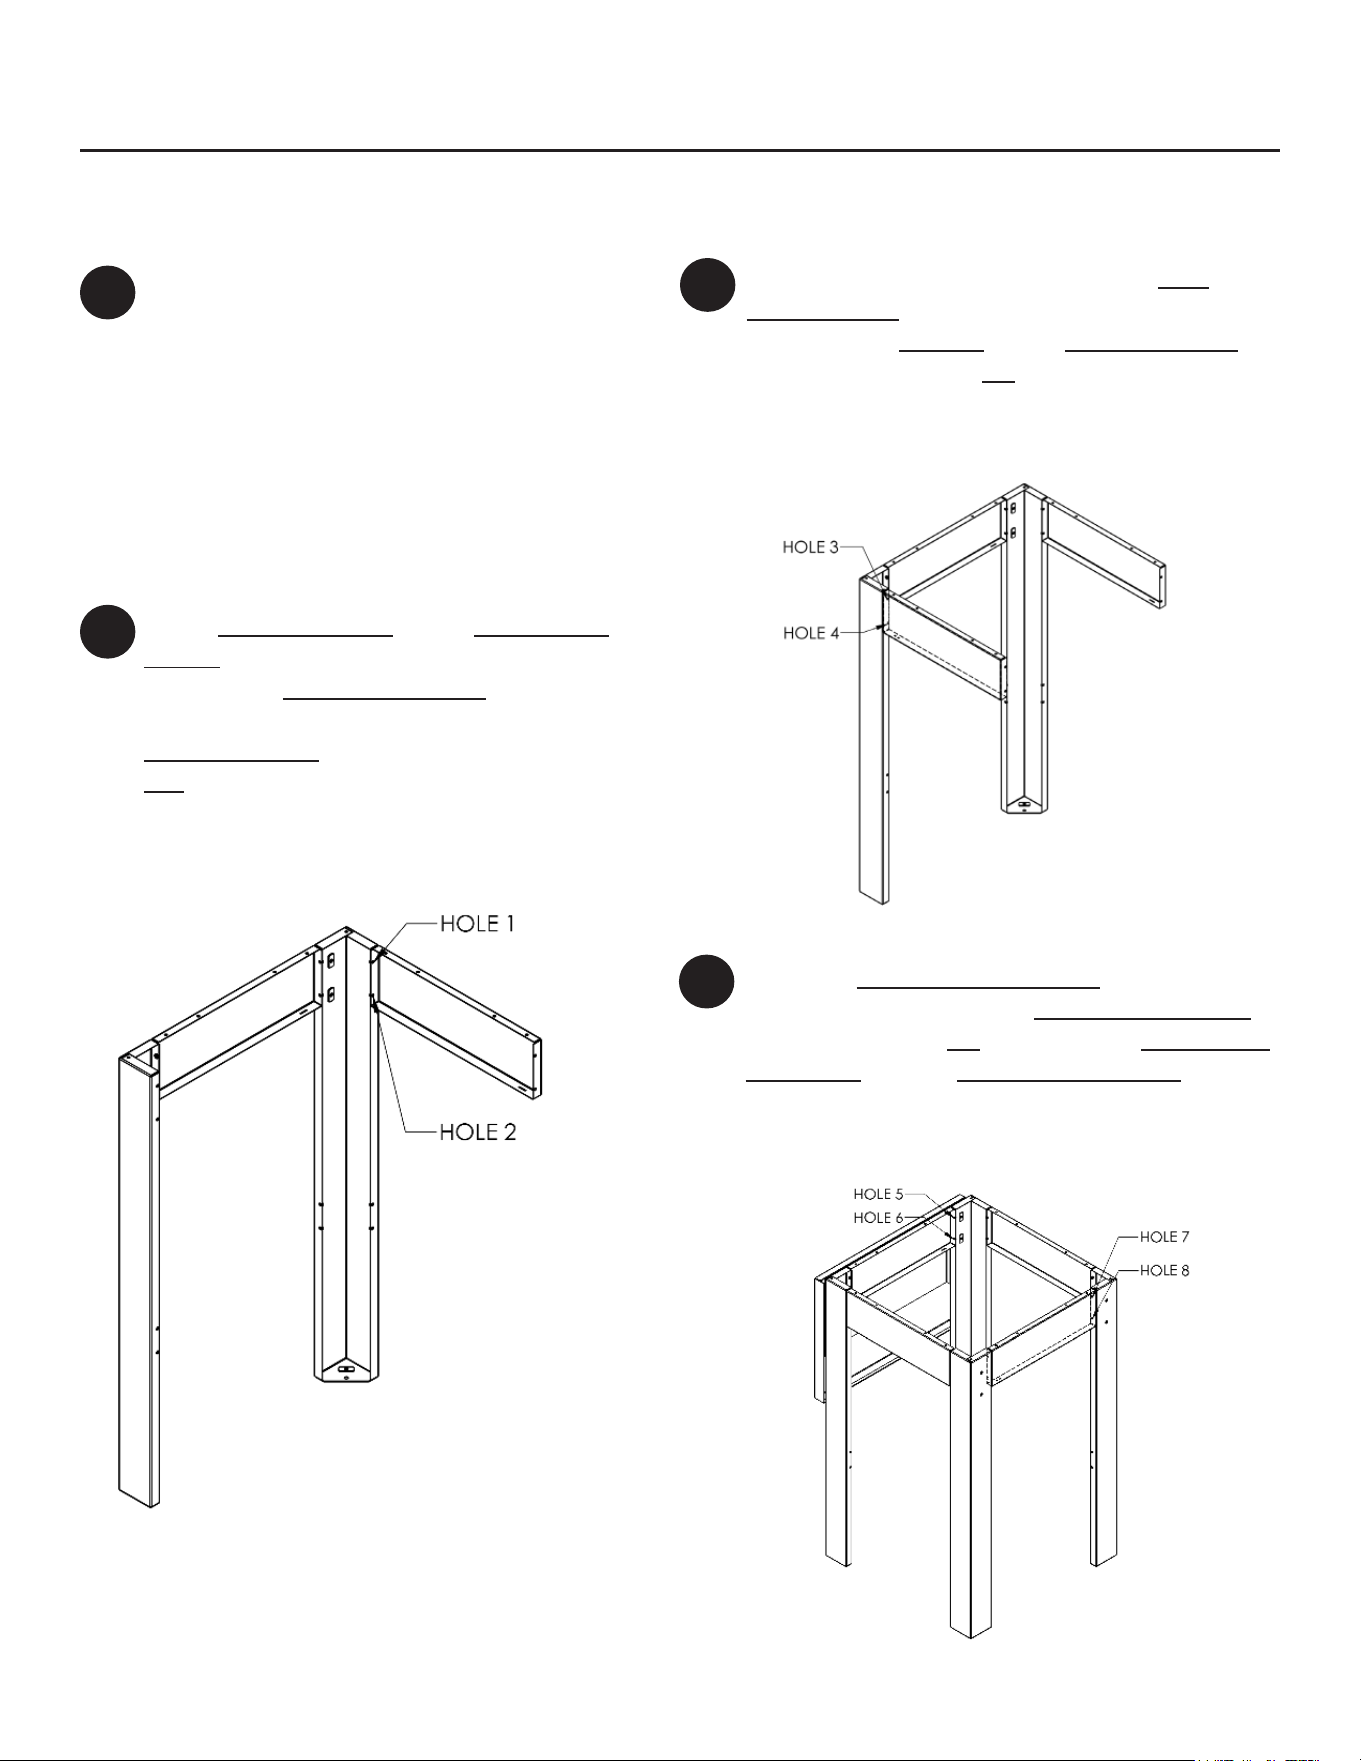
Assembling Grill Stand
1
2
3
Align the Side Shelf Assembly top holes
with the top holes of the Top Frame Panels.
Use 4X of screw S1 to fasten the Side Shelf
Assembly to both Top Frame Panels using
holes 5,6,7 & 8 as shown in the gures be-
low.
Use: 4x Screw S1
4
Assemble stand on a carpet or soft
surface to avoid any dents or scratches.
Kenyon recommends using gloves during
assembly.
Unpack stand parts carefully, lay the parts
out to check for shipping damage.
Place Side Assembly and a Top Frame
Panel on a at surface. Align the top
hole on the Top Frame Panel with the
top hole of the leg (contained within
Side Assembly). Fasten 2X of screw
S1 to the corresponding holes 1 & 2 as
shown in the gure below.
Use: 2X Screw S1
Align the top hole of the remaining Top
Frame Panel with the top hole of the oppo-
site leg from Step 2 on the Side Assembly.
Fasten 2X of screw S1 to the corresponding
holes 3 & 4 as shown in the gure below.
Use: 2X Screw S1
Instructions
6
5
6
7
8
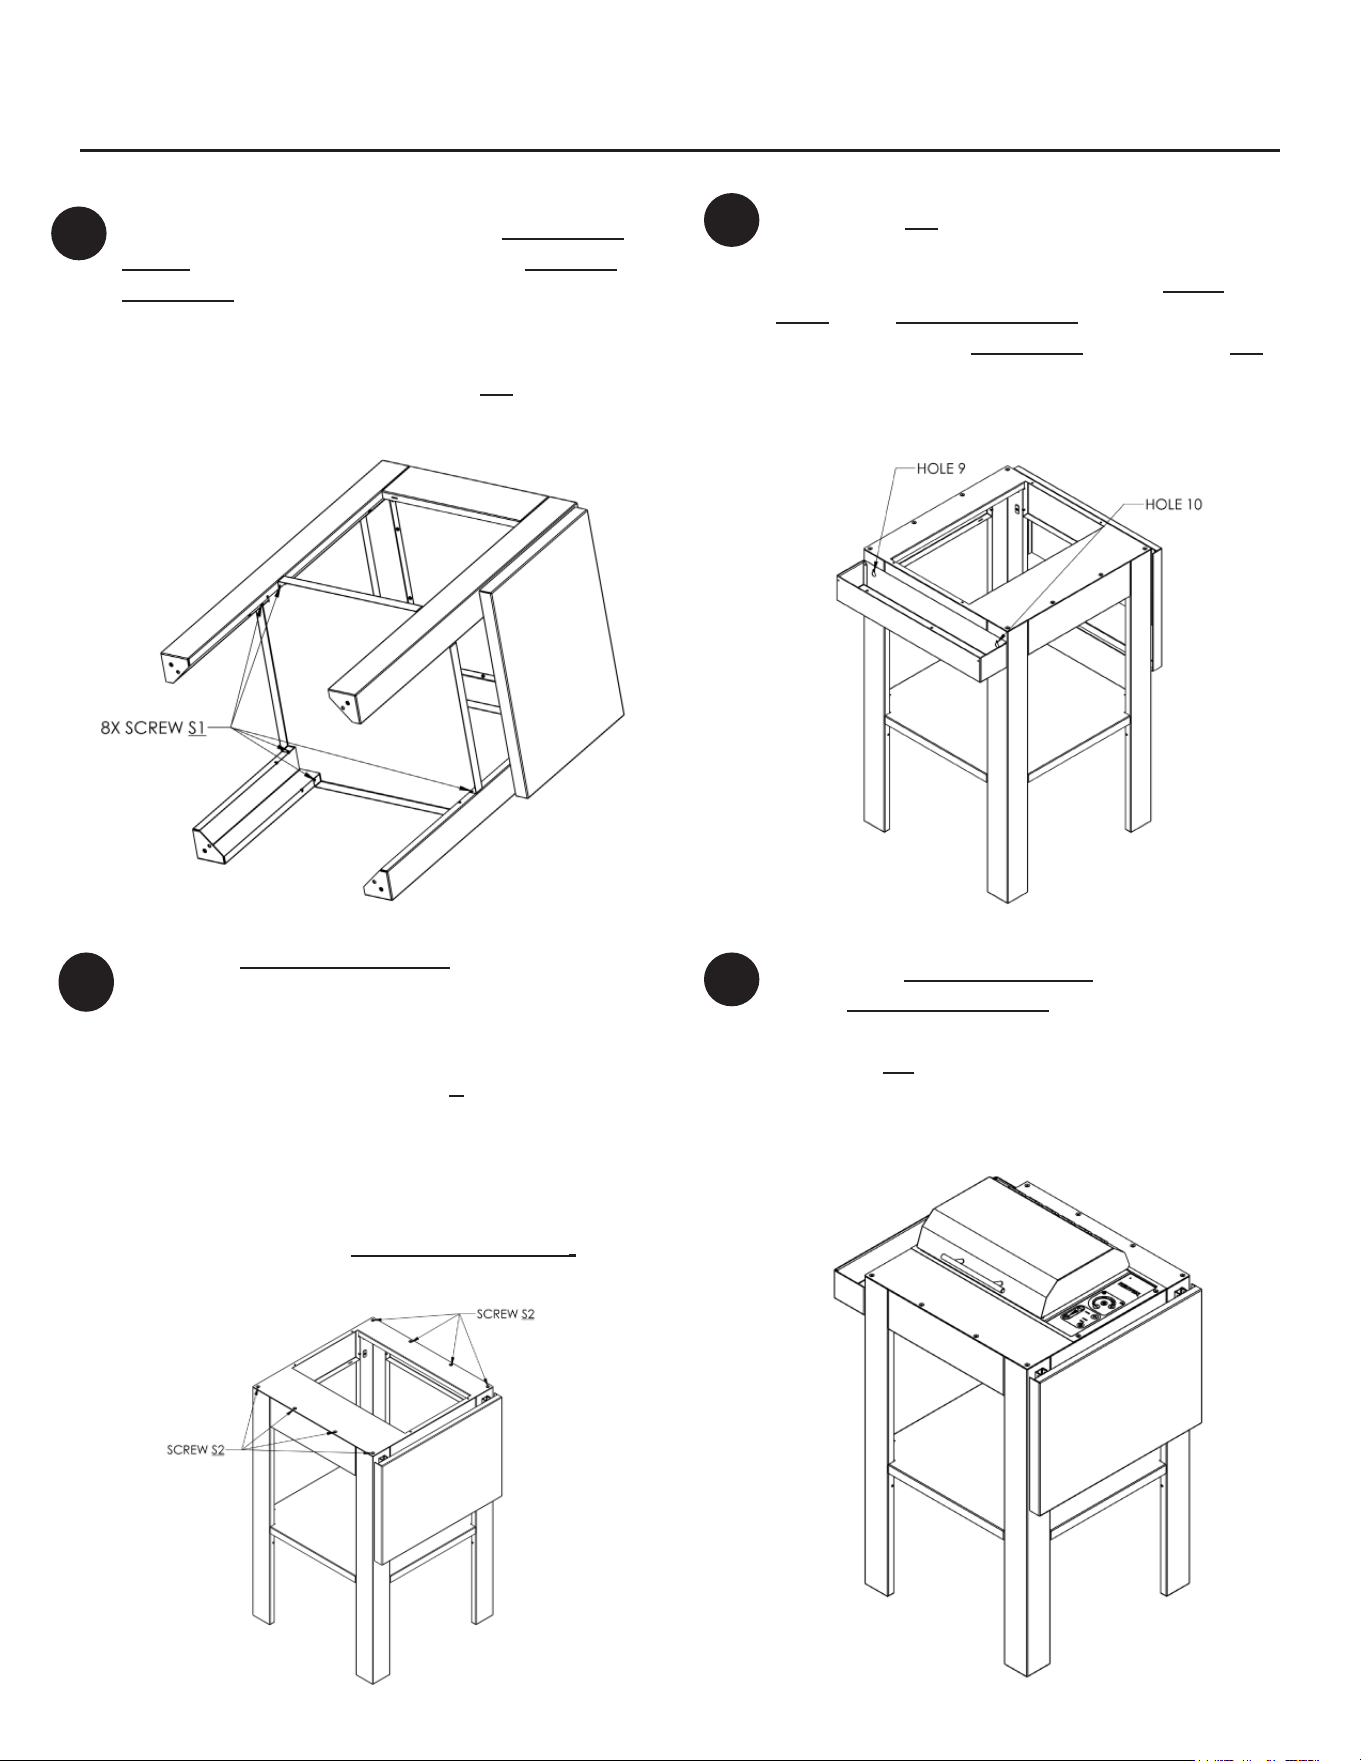
Place the Top Adapter Plate on top of the
stand assembly. Use the label on the part
to place the plate in the correct orienta-
tion. The larger at surface goes in the
front of the stand. Use 8X S2 screws to
fasten the plate to the stand using only
the front and back countersunk holes as
shown in the gure below. Do not fully
tighten the S2 screws until all 8 screws
are fastened to the Top Adapter Plate.
Use: 8X Screw S2
Remove vinyl covering from the Stationary
Shelf before installation. Slide the Station-
ary Shelf between the legs of the stand
as shown in the gure below. Fasten 8X
of screw S1 to the 2 holes in each of the
4 legs. Do not fully tighten the S1 screws
until all 8 screws are fastened to the legs.
Use: 8X Screw S1
Place your Single Zone Grill into the cutout
of the Top Adapter Plate as shown in the
gure below. Fasten the grill to the plate
using 4X S2 screws in the 4 corners of the
grill ange.
Use: 4X Screw S2
Fasten 2X S3 screws to the corresponding
holes 9&10 as shown in the gure below.
Do not tighten all the way. Place Side
Tray onto Side Assembly by aligning the
keyholes on the Side Tray with the 2X S3
screws.
Use: 2X Screw S3
Instructions
7
9
10
The Folding Shelf can be lifted and lowered
into position by lifting both levers on the
brackets underneath. Although there are rub-
ber caps on the levers to protect your stand,
do not let the Folding Shelf fall into the down
position.
12
Congratulations, your Single Zone Grill
Stand has been assembled! Take this time
to tighten all fasteners.
11
The Folding Shelf can be lifted and lowered
into position by lifting both levers on the
brackets underneath. Although there are
rubber caps on the levers to protect your
stand, do not let the Folding Shelf fall into
the down position.
There are 4 hooks included in this package.
The hooks can be used to hang your grilling
accessories wherever you would like. Be
aware that once the hooks are applied, they
cannot be adjusted without damaging the
surface they are attached to. The hooks are
applied using a very high bond tape. Thor-
oughly clean the area where you want the
hooks installed. Peel the protective layer off
the double-sided tape located on the back
of the hook and rmly apply the hook to the
desired location on the stand. Allow the ad-
hesive to set for 2 hours prior to putting any
load on the hook.
Take the remaining vinyl off and use this
time to clean and polish to put a beautiful
shine on the grill and stand. Remember
to wipe with the grain of the sheet metal.
Never wipe across or diagonally. We have
included a sample of stainless-steel polish
for your convenience.
14
13
14
Congratulations, go grill your favorite food!
If you have any questions or concerns while assembling, please
do not hesitate to call Kenyon customer service at 860-664-4906.
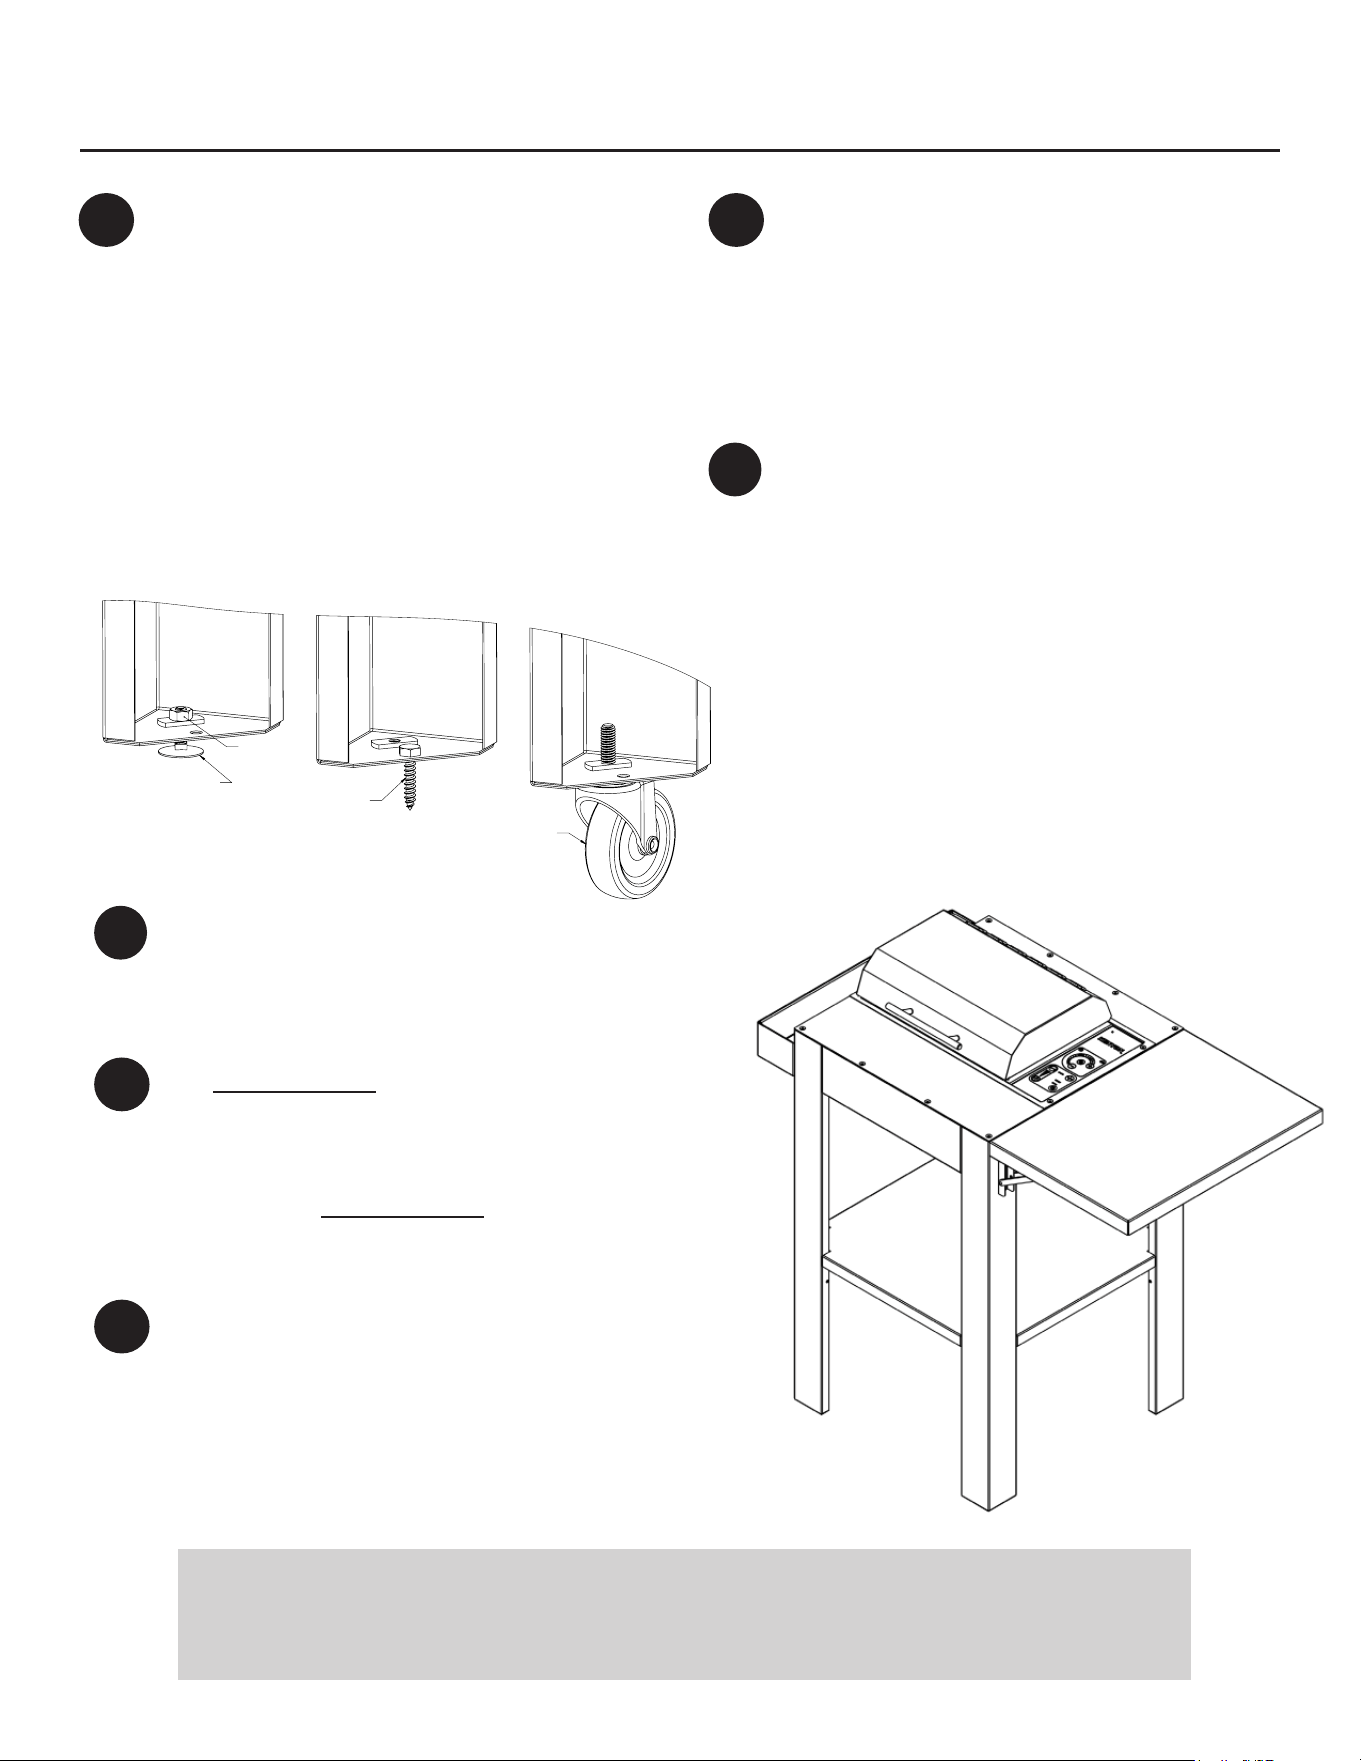
There are three options for this step:
1) If using the elevator bolts, screw E1 into
the bottom of each leg and adjust for level-
ing. Use the jam nut to secure the elevator
bolt in place.
2) If fastening the Stand to a deck or patio,
nd the install location to set the Stand. Use
screw S4 to fasten in place.
3) If using the casters, fasten into the bot-
tom of each leg. Each caster includes a
brake to secure the stand in place.
Use: 4X Screw S4, OR 4X Elevator Bolt
with Jam Nut E1, OR 4X Casters
ELEVATOR BOLT E1
SCREW S4
CASTER
JAM NUT