GTF7970 MEX
USER MANUAL
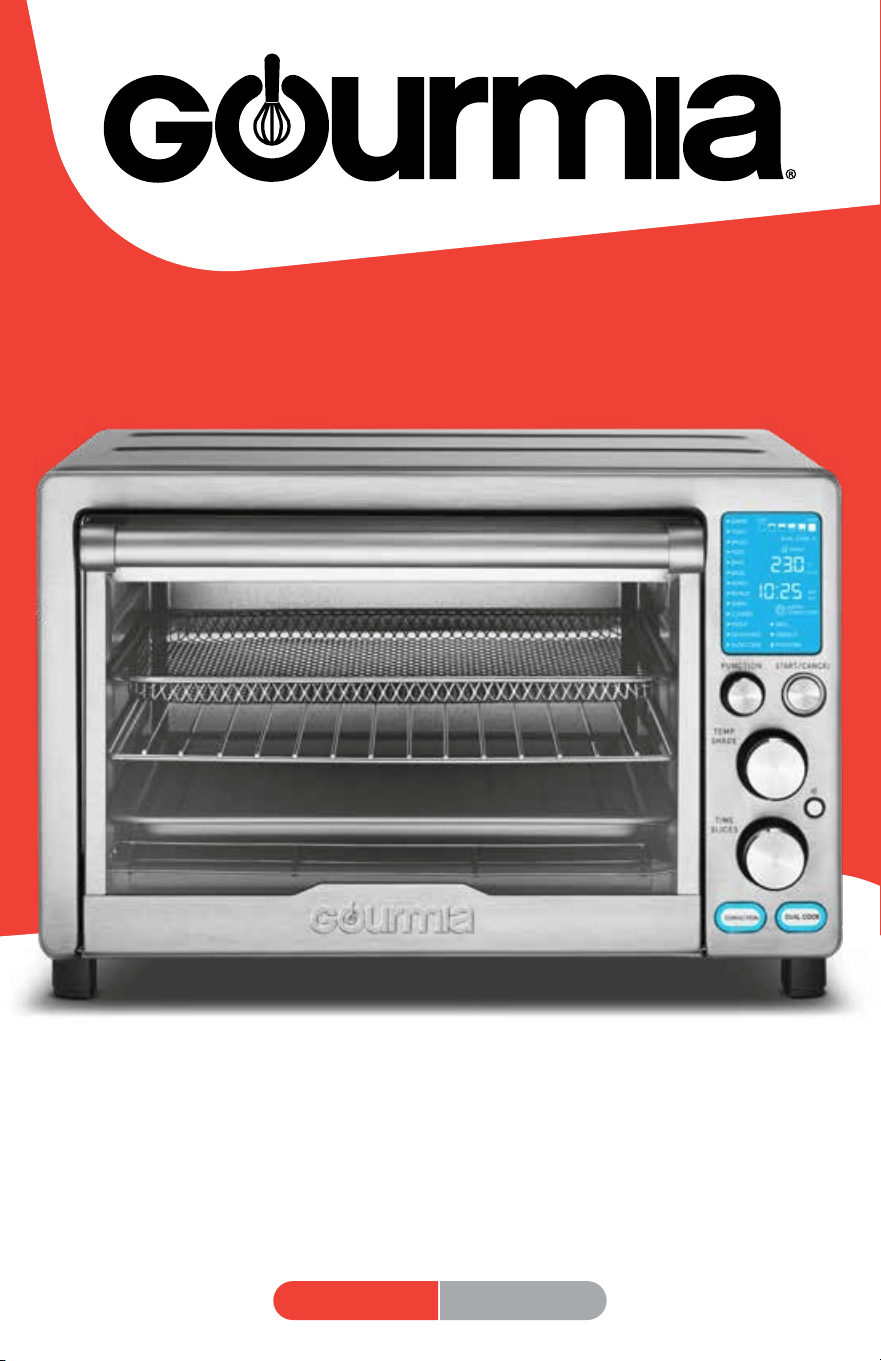
DIGITAL AIR FRYER OVEN
ENGLISH ESPAÑOL
ITM. / ART. 681900

2
TABLE OF CONTENTS
Congratulations
Important Safeguards
Know Your Air Fryer Oven
∙ Accessories
∙ Display & Control Panel
∙ Toggle Fahrenheit and Celsius
Using Your Air Fryer Oven
∙ Before First Use
∙ Set Up Your Air Fryer Oven
∙ Using Your Air Fryer Oven
∙ Stop / Cancel Cooking
∙ Using Dual Cook
∙ Using the Grill / Griddle Plate
∙ Using the Popcorn Function
Function Chart
Cooking Tips
∙ Convection Tips
Cleaning & Maintenance
Troubleshooting
Warranty & Service
3
5
8
8
9
9
10
10
10
11
12
13
14
15
16
20
20
21
22
23
TABLE OF CONTENTS
3
Congratulations on the purchase of your
Digital Air Fryer Oven + Grill from Gourmia!
Here at Gourmia, our one and only goal is to make sure nutritious and delicious meals
are always a practical possibility no matter how fast-paced your life is. Whether you’re
in need of a hearty breakfast, a mid-day snack, or a satisfying supper, our dependable,
easy-to-use appliances are designed to work for you while you work your way through
your busy day.
This manual provides an overview and instructions on all the air fryer oven’s functions
and features, along with directions for assembling, operating, cleaning, and maintaining
your appliance. Please read all safety instructions before getting started. Keep this
manual handy for future use and review.
Our team is available to help with any and every question you might have about your
new air fryer oven. We’re excited for you and want you to get the most out of your
purchase—so whether you need assistance with setup or guidance on which features
to enable for which foods, we’re happy to walk you through it, step by step.
Happy and easy cooking!
We’d love to hear about the mouthwatering meals you’re creating with your new
air fryer oven! Share your thoughts, recipes, and photos with us.
@gourmia

4
Model: GTF7970 MEX
© 2023 Gourmia
1.0
www.gourmia.com
The Steelstone Group
Brooklyn, NY
All rights reserved. No portion of this manual may be reproduced by any means
whatsoever without written permission from The Steelstone Group, except for the
inclusion of quotations in a media review.
Although every precaution has been taken in the preparation of this manual, The
Steelstone Group assumes no responsibility for errors or omissions. Nor is any
liability assumed for damages resulting from the use of the information contained
herein. Although every eort has been made to ensure that the information
contained in this manual is complete and accurate, The Steelstone Group is not
engaged in rendering professional advice or services to the individual consumer;
further, The Steelstone Group shall not be held responsible for any loss or damage
allegedly arising from any information or suggestions in this manual.
IMPORTANT
READ CAREFULLY
RETAIN FOR FUTURE REFERENCE
FOR CUSTOMER SERVICE
QUESTIONS OR COMMENTS
VISIT WWW.GOURMIA.COM
EMAIL [email protected]
5
Power:
120V~ 60Hz 1700W
CORD AND PLUG SAFETY
• A short power-supply cord is provided to reduce risk of becoming entangled in
or tripping over a longer cord.
• Extension cords may be used if care is exercised in their use.
• If an extension cord is used:
a. The marked electrical rating of the extension cord should be at least equal
to the electrical rating of the appliance; and
b. The extension cord should be arranged so that it will not drape over the
countertop or tabletop where it can be pulled on by children or tripped over.
IMPORTANT SAFEGUARDS
SAVE THESE INSTRUCTIONS
IMPORTANT SAFEGUARDS
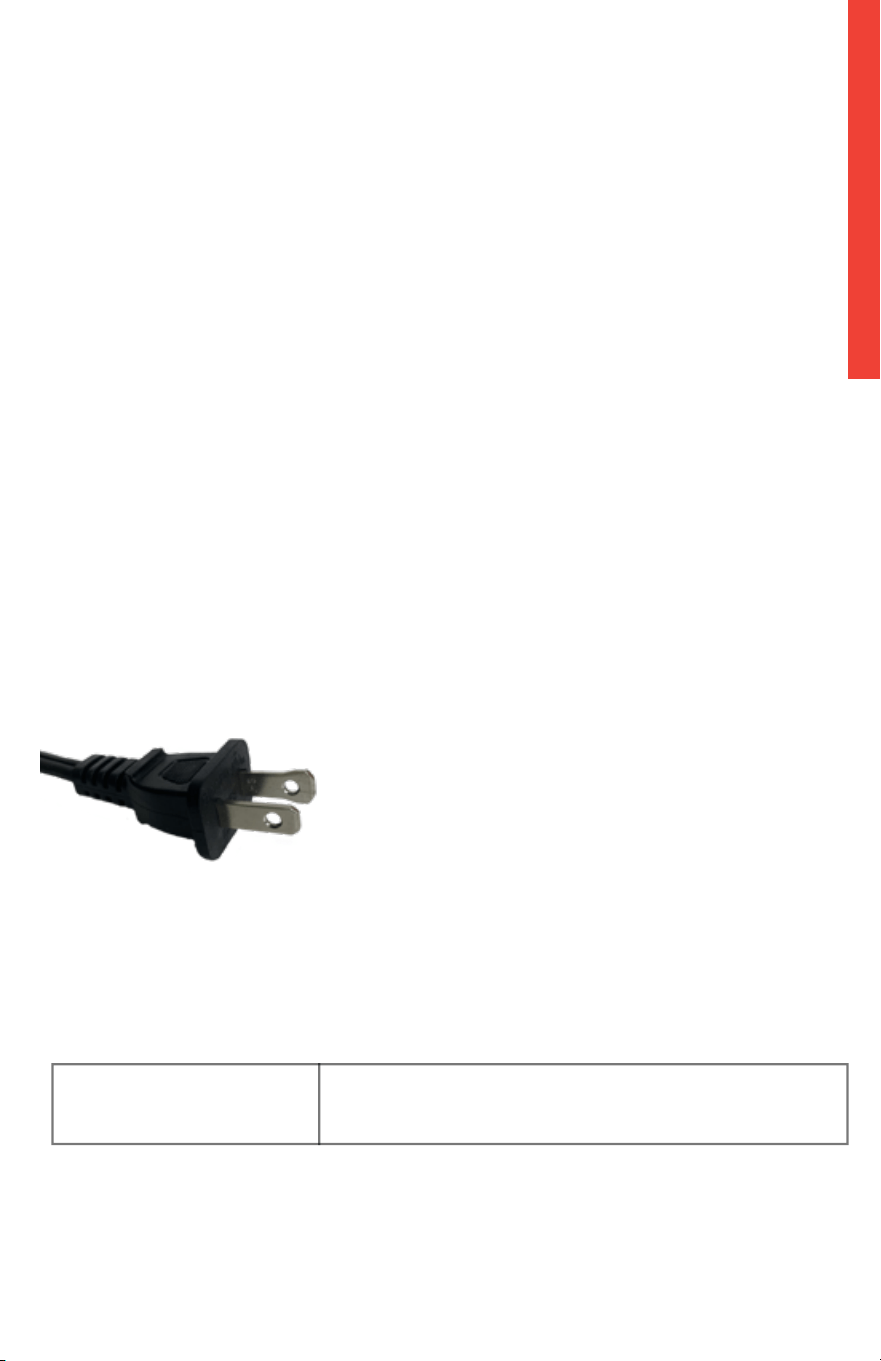
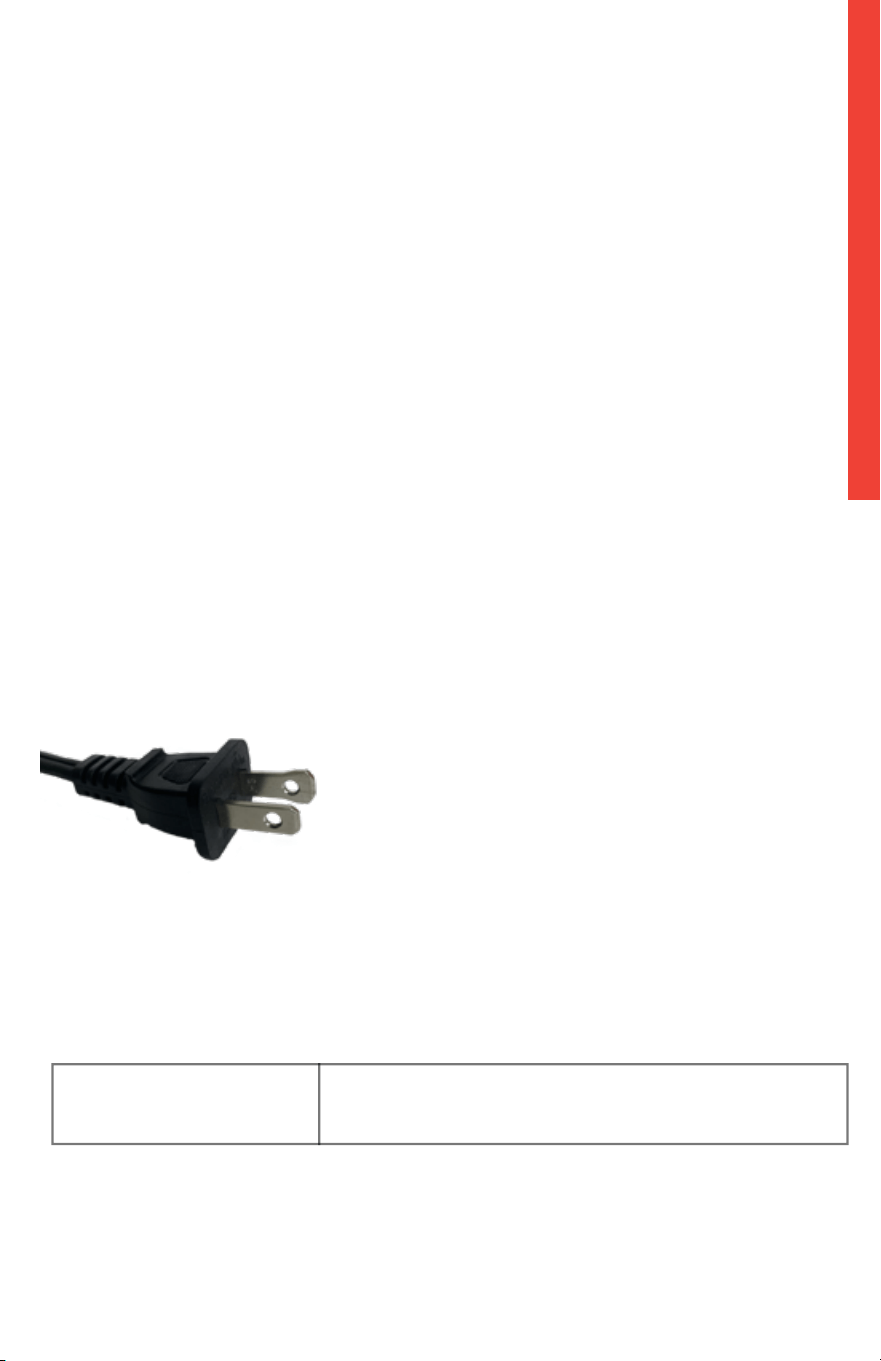
ELECTRICAL POLARIZED PLUG
This unit has a polarized plug (one blade is wider
than the other). To reduce the risk of electric
shock, the plug is intended to be used by inserting
it into the electrical outlet only one way. If the plug
does not fit securely into the outlet, reverse the
plug and re-insert. If it still does not fit, contact a
qualified electrician for assistance. Do not modify
the plug in any way.

6
6
FOR CUSTOMER SERVICE VISIT WWW.GOURMIA.COM
IMPORTANT SAFEGUARDS
IMPORTANT SAFEGUARDS
1. Read all instructions.
2. This appliance is not intended
for use by children or persons
with reduced physical, sensory
or mental capabilities, or lack
of experience and knowledge,
unless they have supervision.
3. Close supervision is necessary
when any appliance is used
near children. Children should
be supervised to ensure that
they do not play with the
appliance. Cleaning and user
maintenance shall not be done
by children unless they are
supervised.
4. Check if the voltage indicated
on the appliance corresponds
to the local main voltage before
you connect the appliance.
5. Do not use the appliance if
the plug, the main cord or the
appliance itself is damaged.
Always make sure that the plug
is inserted properly into a wall
outlet.
6. Do not operate any appliance
with a damaged cord or
plug, after the appliance
malfunctions, or has been
damaged in any manner.
Return appliance to the nearest
authorized service facility
for examination, repair, or
adjustment.
7. Do not let the cord hang over
the edge of the table or counter
or touch hot surfaces.
8. To protect against electric
shock, do not immerse cord,
plugs, or appliance in water or
other liquid. Do not plug in the
appliance or operate the control
panel with wet hands.
9. Never connect this appliance
to an external timer switch or
separate remote-control system
in order to avoid a hazardous
situation. To disconnect, turn o
the appliance, then remove plug
from wall outlet.
10. Do not place the appliance on
or near combustible materials
such as a tablecloth or curtain.
The accessible surfaces may
become hot during use. Do not
place on or near a hot gas or
electric burner, or in a heated
oven.
11. Do not place the appliance
against a wall or against other
appliances. Leave at least
10 cm / 4 inches of free space
on the back and sides and
10 cm / 4 inches of free space
above the appliance. Do not
place anything on top of the
appliance.
12. Do not use the appliance
for any other purpose than
described in this manual. The
use of accessory attachments
not recommended by the
appliance manufacturer may
cause injuries.
13. Do not let the appliance operate
unattended. Extreme caution
must be used when moving an
appliance containing hot oil or
other hot liquids.
14. Do not use outdoors.
15. Do not touch the hot surfaces;
When using electric appliances, basic safety precautions should always
be followed:

7
7
IMPORTANT SAFEGUARDS
SAVE THESE INSTRUCTIONS
use handle. During air frying,
hot steam is released through
the air outlet openings. Keep
your hands and face at a safe
distance from the steam and
from the air outlet openings.
Also be careful of hot steam
and air when you remove the
pan from the appliance.
16. After using the appliance, avoid
contact with the hot metal
inside. Unplug from outlet when
not in use and before cleaning.
Allow to cool before cleaning
the appliance.
17. Immediately unplug the
appliance if you see dark
smoke coming out of the
appliance. Wait for the smoke
emission to stop before you
remove the pan from the
appliance.
18. Do not use appliance for other
than intended use.
19. Use extreme caution when
removing tray or disposing of
hot grease.
20. Do not clean with metal
scouring pads. Pieces can
break o the pad and touch
electrical parts, creating a risk
of electric shock.
21. Oversize foods or metal
utensils must not be inserted
in a toaster-oven as they may
create a fire or risk of electric
shock.
22. A fire may occur if the toaster-
oven is covered or touching
flammable material, including
curtains, draperies, walls, and
the like, when in operation. Do
not store any item on top of the
appliance when in operation.
23. Extreme caution should
be exercised when using
containers constructed of
anything other than metal or
glass.
24. Do not store any materials,
other than manufacturers
recommended accessories, in
this oven when not in use.
25. Do not place any of the
following materials in the oven:
paper, cardboard, plastic, and
the like.
26. Do not cover crumb tray or any
part of the oven with metal foil.
This will cause overheating of
the oven.
27. Turn o the appliance by
pressing START / CANCEL.
28. For household use only.

8
8
KNOW YOUR AIR FRYER OVEN
KNOW YOUR AIR FRYER OVEN
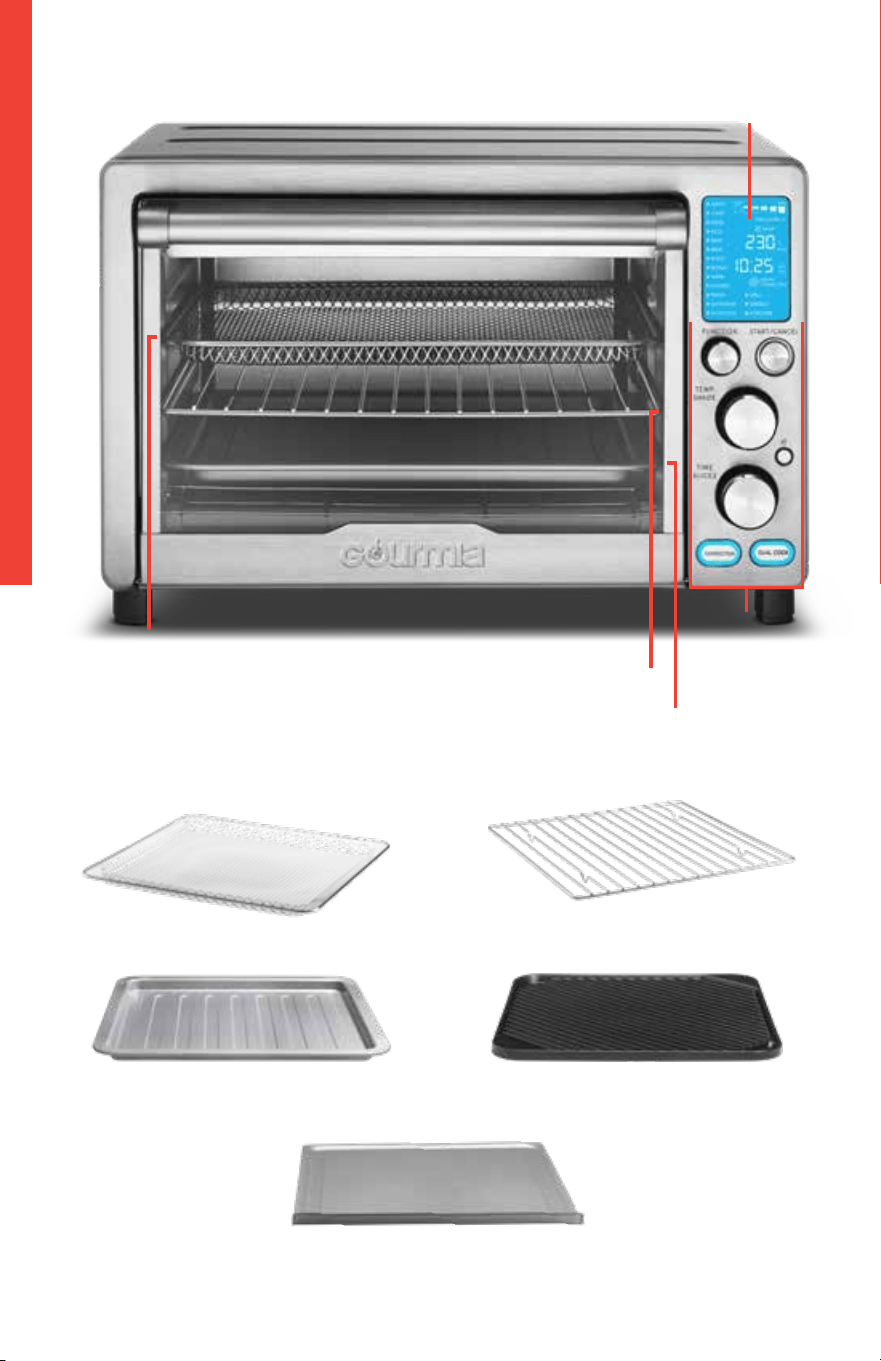
ACCESSORIES
NOTE: Always ensure the crumb tray is in the bottom of the air fryer oven during cooking.
Air Fry Basket Oven Rack
Baking Pan
Crumb Tray
Display
Control
Panel
Top Rack Position
Bottom Rack Position
Center Rack Position
Function Knob
Time / Slices
Knob
Convection
Grill / Griddle Plate
(Flip for Griddle)
FOR CUSTOMER SERVICE VISIT WWW.GOURMIA.COM
9
9
KNOW YOUR AIR FRYER OVEN
KNOW YOUR AIR FRYER OVEN
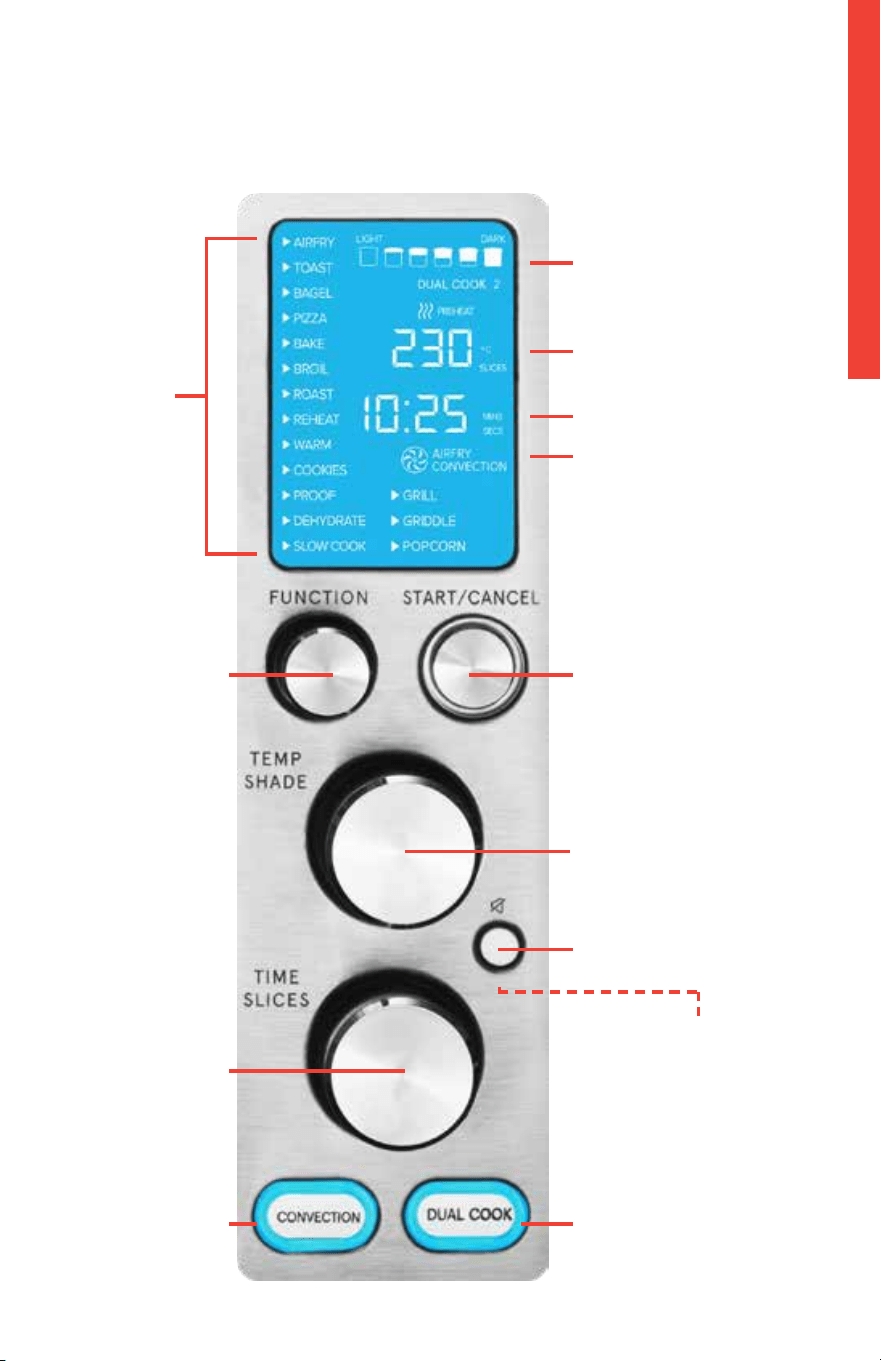
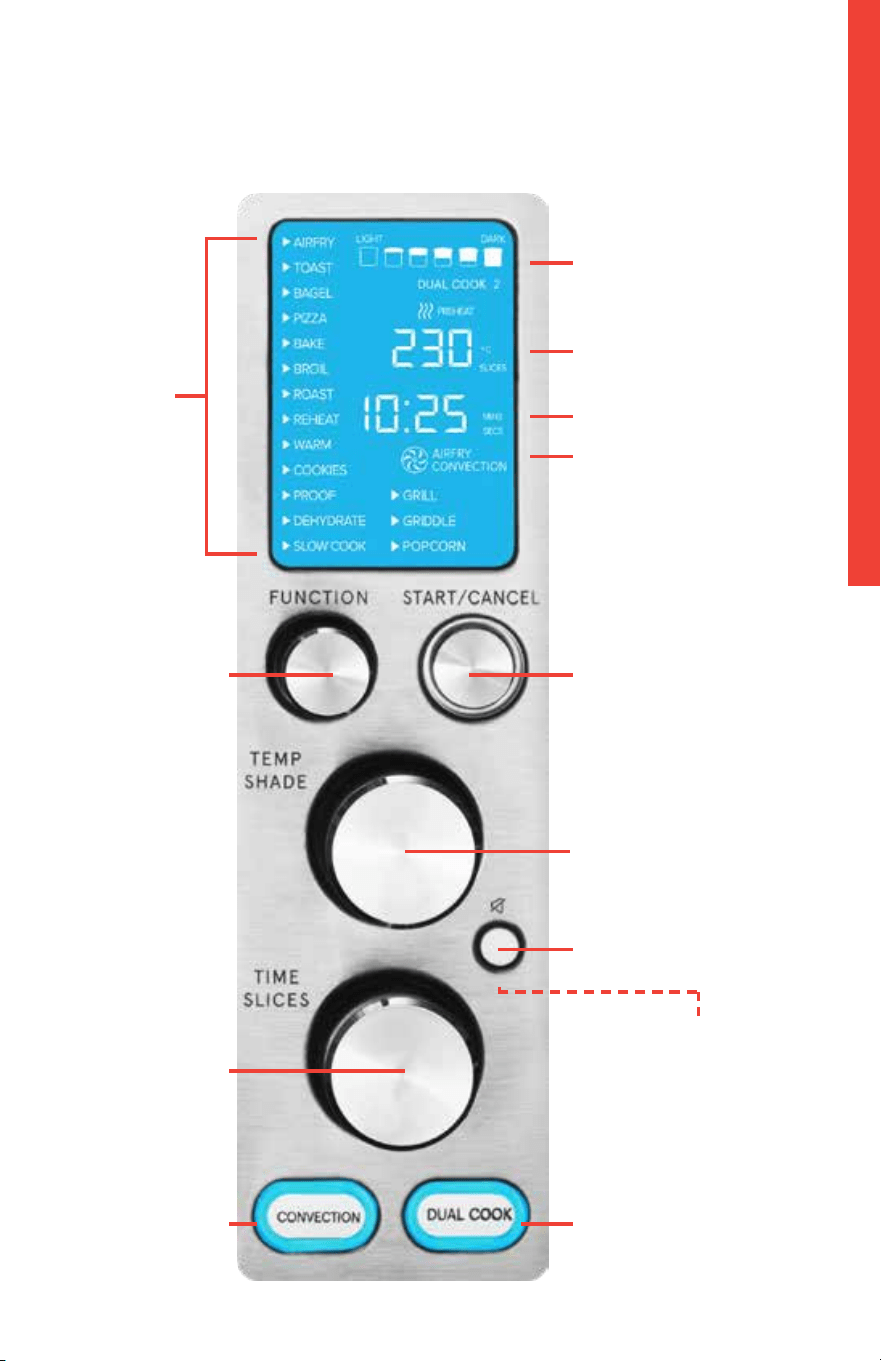
DISPLAY AND CONTROL PANEL
Start / Cancel
Functions
TOGGLE FAHRENHEIT
AND CELSIUS:
Press and hold the mute
button to toggle between
displaying temperature in
Fahrenheit or Celsius.
Time
Fan Icon
Temperature / Slices
Shade
Temp / Shade Knob
Mute Button
Function Knob
Time / Slices
Knob
Dual Cook
Convection

10
10
1. Remove and discard all packaging material, labels, and tape from the unit.
2. Thoroughly clean air fry basket, oven rack, grill / griddle, baking pan, and
crumb tray with hot water, dishwashing liquid, and a non-abrasive sponge.
Dry all parts before use.
3. Wipe the inside and outside of the unit with a moist cloth.
BEFORE FIRST USE
BEFORE FIRST USE
WARNING:
Do not place the appliance against a wall or against other appliances. Leave
at least 4 inches of free space on the back and sides, and 4 inches of free
space above the appliance.
Do not place anything on top of the appliance when in use.
Always use CAUTION when opening the door; hot steam may escape!
The oven, accessories and food will be hot! Do not touch hot surfaces. Use
oven mitts when inserting or removing food from the oven.
SET UP YOUR AIR FRYER OVEN
1. Place the air fryer oven on a stable, level, and heat-resistant surface.
2. Place the crumb tray in the bottom of the air fryer oven.
3. Plug the air fryer oven into an outlet.
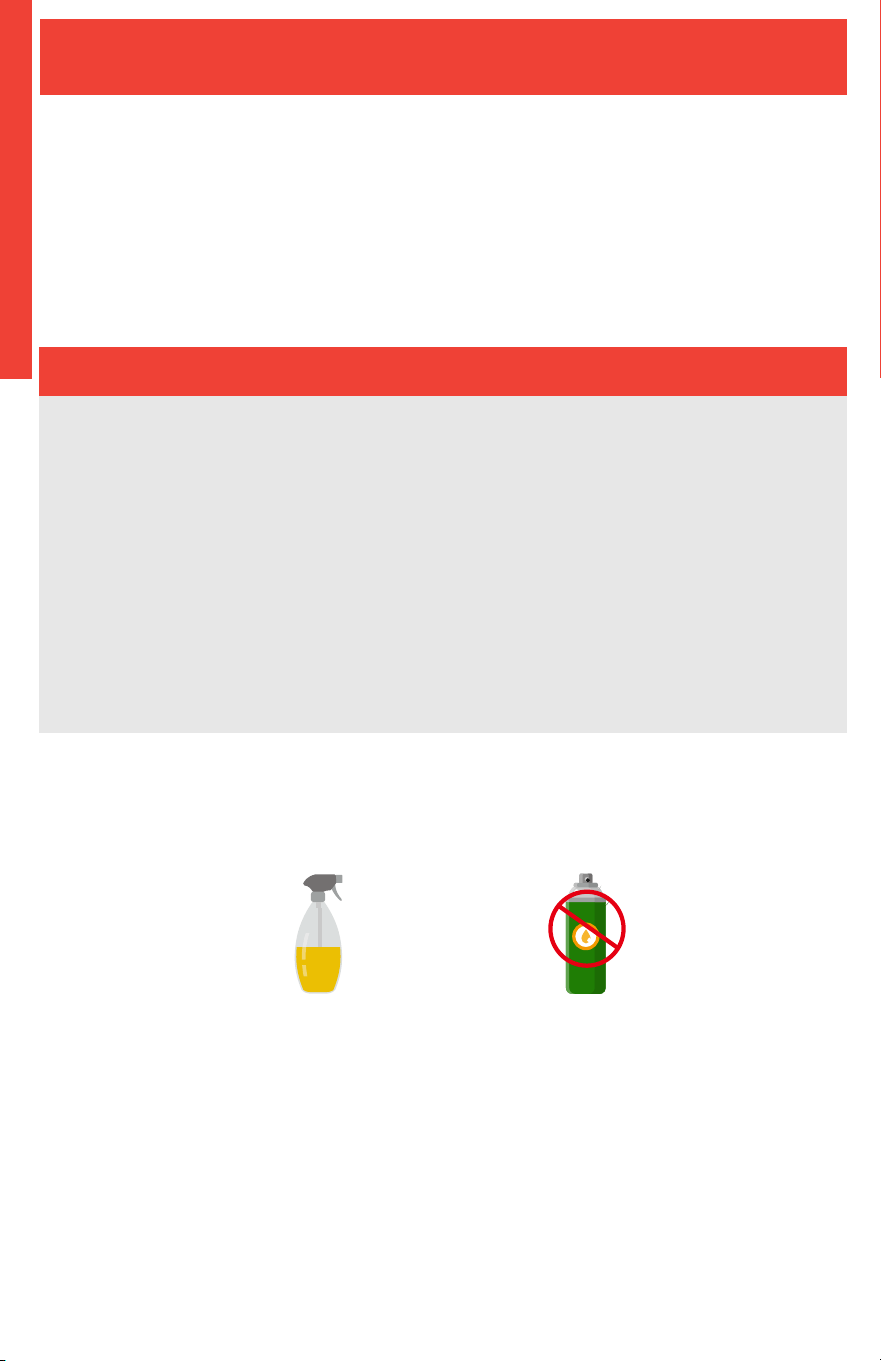
Not Recommended
Cooking Spray
Recommended
Oil Mister / Spray Bottle
NOTE: When spraying food for a crispier finish, we recommend using regular
cooking oil instead of cooking spray, as the latter may damage the accessories.
FOR CUSTOMER SERVICE VISIT WWW.GOURMIA.COM

11
11
USING YOUR AIR FRYER OVEN
USING YOUR AIR FRYER OVEN
1. To choose a function, rotate the function knob. A small arrow will move
along the function names as you turn the dial. Stop when the arrow reaches
your desired function. The function’s default time and temperature will be
displayed.
2. To adjust the temperature, rotate the TEMP / SHADE knob until desired
temperature is displayed.
For TOAST or BAGEL function: Rotate the TIME / SLICES knob until your
desired number of slices is displayed.
3. To adjust the time, rotate the TIME / SLICES knob until your desired
time is displayed.
See the FUNCTION CHART on pages 16-19 for each
function’s settings and which accessory to use.
For TOAST or BAGEL functions: Rotate the TEMP / SHADE knob until your
desired shade level is displayed.
For functions without preheat: Place food into the air fryer oven and tap
START / CANCEL to begin cooking.
4. Press START / CANCEL. The display will show PREHEAT and the air
fryer oven will begin preheating. Once preheated, the air fryer oven will
beep and the display will show Add Food.
Continued on next page.

12
12
USING YOUR AIR FRYER OVEN
USING YOUR AIR FRYER OVEN
5. Open the door, carefully place food into the air fryer oven, and close the
door. The cook time will begin automatically. When the cook time has
elapsed, the air fryer oven will beep and the display will show End.
6. Open the door. Carefully remove the food and place it on a heat-resistant
surface. WARNING: Wait for accessories to cool completely before
removing.
NOTE
• To adjust temperature and time while cooking, follow steps 2 & 3.
• To turn the Convection fan on / o, press CONVECTION. The fan icon will
be displayed when the fan is on. See CONVECTION TIPS on page 20 for
detailed information.
STOP / CANCEL COOKING
To stop cooking, press START / CANCEL. The unit will beep and display Stop.
Press START / CANCEL again within 3 seconds to resume cooking.
FOR CUSTOMER SERVICE VISIT WWW.GOURMIA.COM

13
13
For recipes that require two steps, Dual Cook will switch from one temperature or
function to another temperature or function automatically. Follow the steps below to
use Dual Cook.
1. Press Dual Cook. The display will show DUAL 1 as you choose your first
function.
NOTE: The Toast and Bagel functions will be disabled when using Dual Cook.
2. To choose a function, rotate the function knob. A small arrow will move along
the function names as you turn the knob. Stop when the arrow reaches your
desired function. The function’s default temperature and time will be displayed.
3. To adjust the temperature, rotate the TEMP / SHADE knob until desired
temperature is displayed.
4. To adjust the time, rotate the TIME / SLICES knob until your desired time is
displayed.
5. Press Dual Cook again.
6. Repeat steps 2-4. The display will show DUAL 2 as you choose your second
function.
For functions without preheat: Place food into the air fryer oven and tap START
/ CANCEL to begin cooking.
7. Press START / CANCEL. The display will show PREHEAT and the air fryer oven
will begin preheating. Once preheated, the air fryer oven will beep and the
display will show Add Food.
8. Open the door, carefully place food into the air fryer oven, and close the
door. The cook time will automatically begin. Dual Cook will automatically
switch between temperatures / functions when cook time is finished for the
first function. When the cook time is done, the air fryer oven will beep and
the display will show End.
9. Open the door. Carefully remove the food and place on a heat-resistant
surface.
USING DUAL COOK
USING YOUR AIR FRYER OVEN

14
14
USING YOUR AIR FRYER OVEN
Always brush the grill / griddle plate with vegetable oil. Ensure the grill / griddle
plate is in the oven prior to preheating.
Use the grill plate as you would use a traditional grill, to cook anything from meats
to vegetables.
Use the griddle plate to cook your favorite breakfast foods and sear dierent types
of seafood, like scallops and fish tacos. Also use the griddle plate for pizza (see the
FUNCTION CHART on page 16 for detailed information).
Allow the grill / griddle plate to cool completely before removing it from the oven to
clean.
USING THE GRILL / GRIDDLE PLATE
FOR CUSTOMER SERVICE VISIT WWW.GOURMIA.COM
15
15
USING YOUR AIR FRYER OVEN
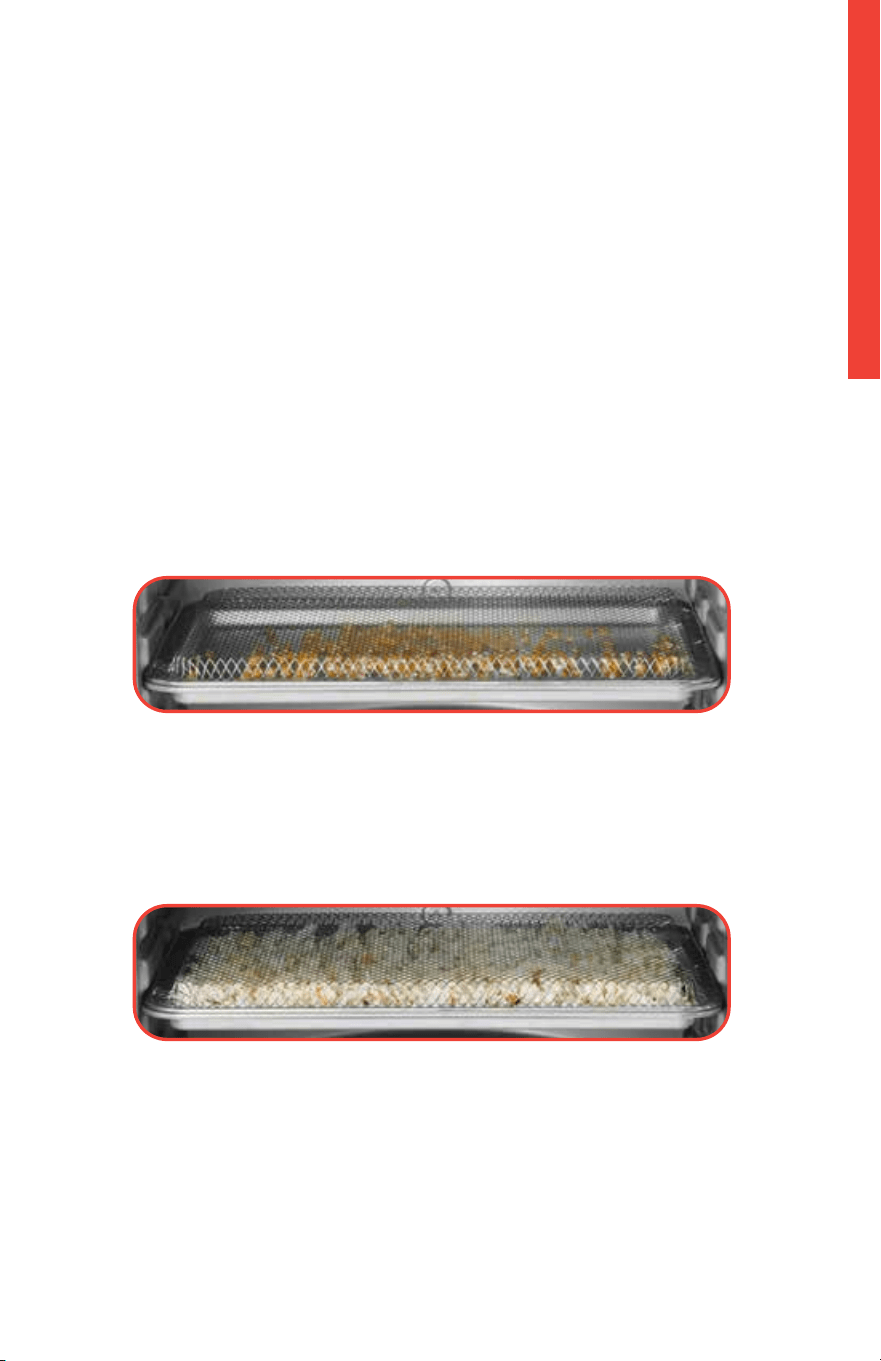
USING THE POPCORN FUNCTION
1. Select the POPCORN function with the function dial.
Optional: Rotate the TEMP / SHADE and TIME / SLICES knobs to adjust
temperature and time.
2. Press START / CANCEL.
The display will show PREHEAT and the air fryer oven will begin preheating.
3. Pour 1/2 a cup of unpopped popcorn kernels into the baking pan.
4. Turn the air fry basket upside down and place it on top of the baking pan.
Once preheated, the air fryer oven will beep and the display will show Add
Food.
5. Open the door, carefully insert the baking pan along with the upside down
air fry basket into the bottom rack position, and close the door.
The cook time will begin automatically. When the cook time has elapsed, the air
fryer oven will beep and the display will show End.
6. Let sit one to two minutes until popping has stopped before opening the
door. Carefully remove the popcorn and place it on a heat-resistant surface.

16
16
FUNCTION CHART
FUNCTION CHART
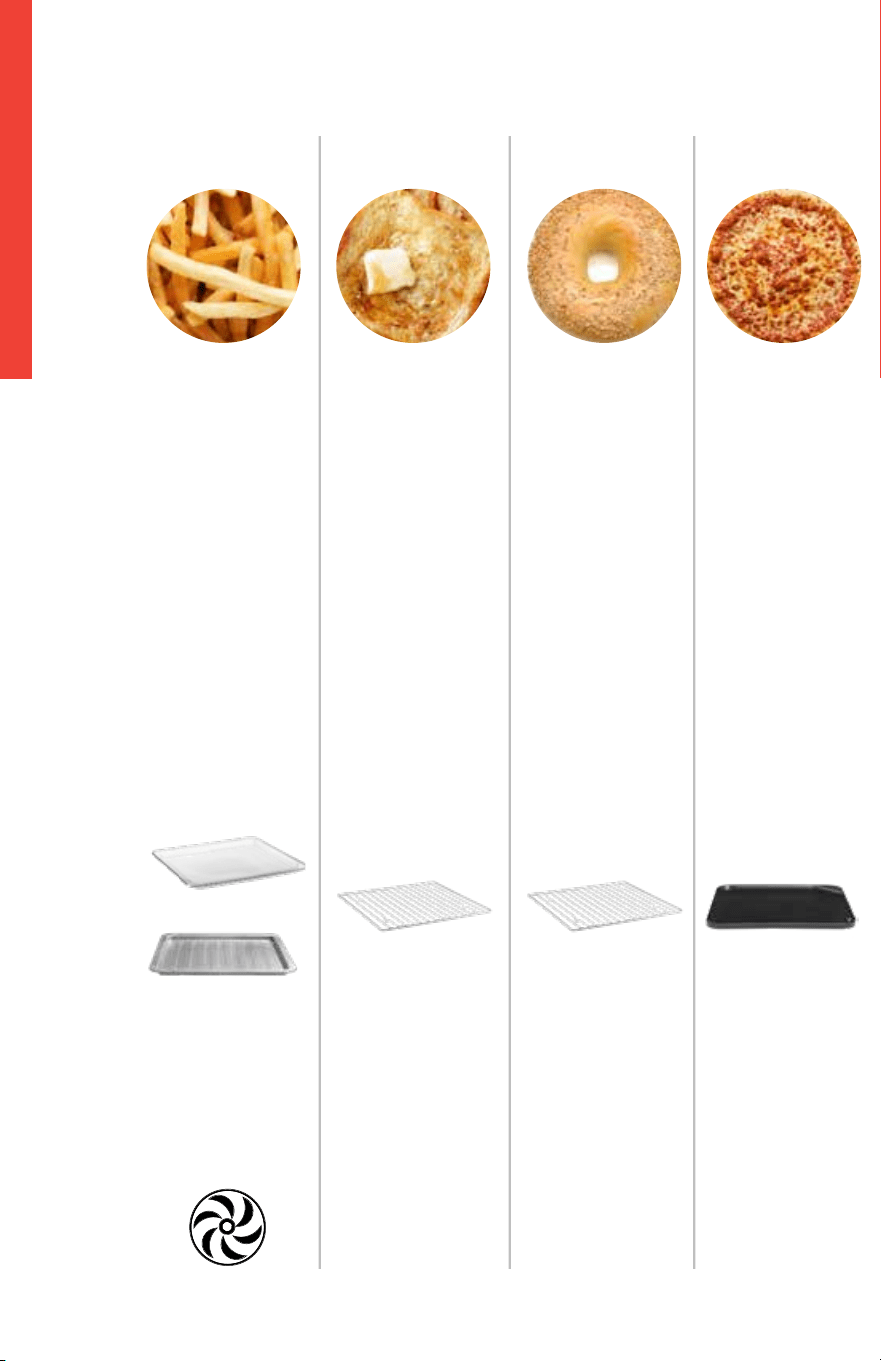
*When air frying foods with excess oil, use the baking pan instead of the air fry basket.
TOAST
No
1 - 6 slices
1 - 6 shades
Center
No Fan
Option
No Fan
Option
BAGEL
No
1 - 6 slices
1 - 6 shades
Center
AIR FRY
Yes
1 - 60 min
80 °C - 230 °C
Center
OR
See NOTE Below*
170 °F - 450 °F
PIZZA
Yes
1 - 60 min
80 °C - 230 °C
Optional
170 °F - 450 °F
Bottom
Griddle
Side Up
Function
Preheat
Time
Range
Temp
Range
Accessory
Rack
Position
Fan
FOR CUSTOMER SERVICE VISIT WWW.GOURMIA.COM
17
17
FUNCTION CHART
FUNCTION CHART
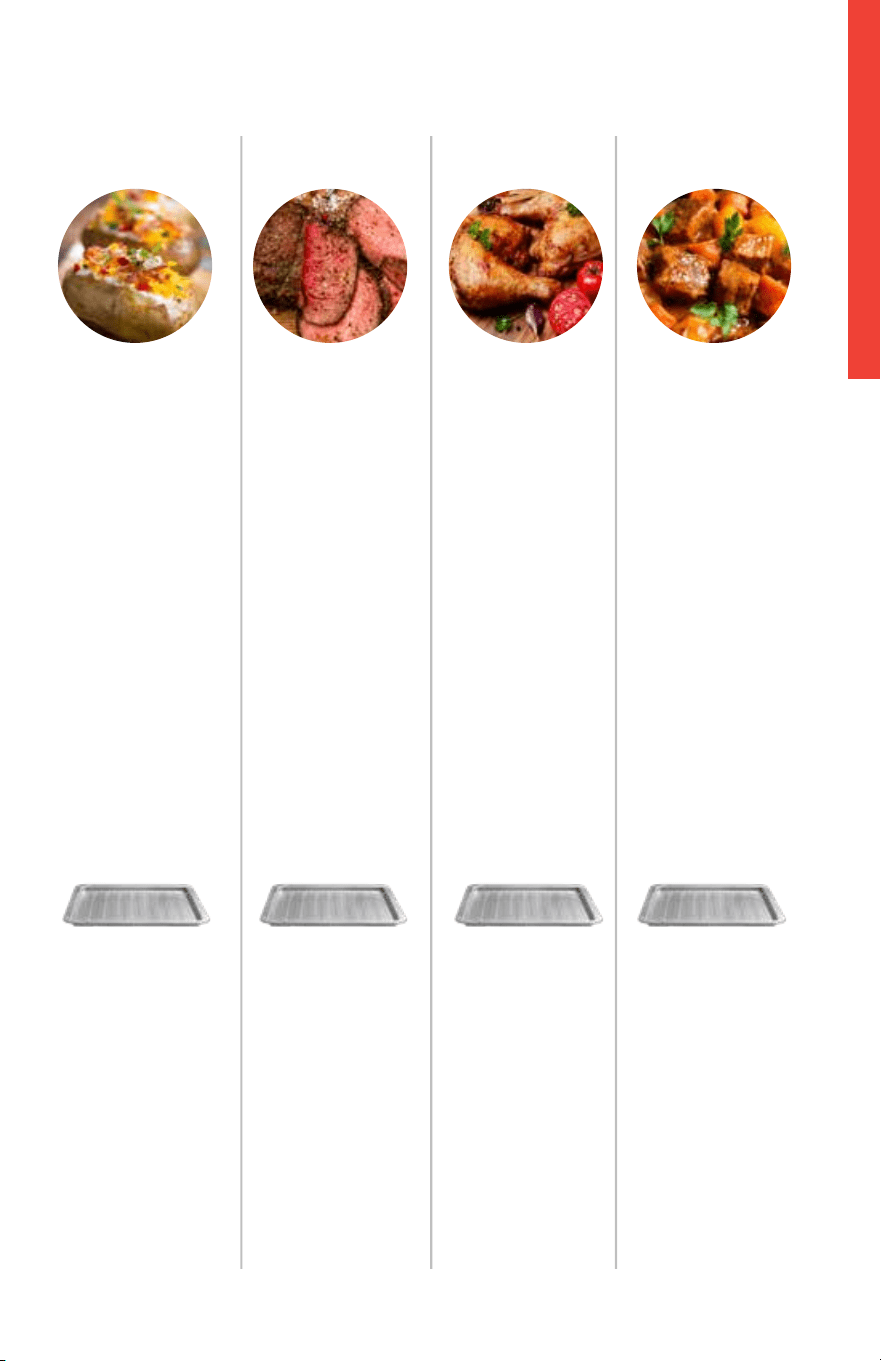
ROAST
Yes
1 - 90 min
80 °C - 230 °C
Center
Optional
170 °F - 450 °F
BAKE
Yes
1 - 90 min
80 °C - 230 °C
Center
Optional
170 °F - 450 °F
BROIL
Yes
1 - 60 min
230 °C
Top
Optional
450 °F
Bottom
REHEAT
No
1 - 60 min
80 °C - 230 °C
Center
Optional
170 °F - 450 °F

18
18
FUNCTION CHART
FUNCTION CHART
DEHYDRATE
No
30 min - 72 hrs
Center
30 °C - 80 °C
90 °F - 170 °F
PROOF
No
1 min - 4 hrs
30 °C - 40 °C
Center
Optional
90 °F - 100 °F
WARM
No
Up to 4 hrs
30 °C - 90 °C
Center
Optional
90 °F - 200 °F
COOKIES
Yes
1 - 60 min
80 °C - 230 °C
Center
Optional
170 °F - 450 °F
Function
Preheat
Time
Range
Temp
Range
Accessory
Rack
Position
Fan
FOR CUSTOMER SERVICE VISIT WWW.GOURMIA.COM

19
19
FUNCTION CHART
FUNCTION CHART
POPCORN
Yes
1 - 15 min
150 °C - 230 °C
300 °F - 450 °F
SLOW COOK
No
15 min - 12 hrs
Bottom
Low / High
Optional
+
Bottom
Upside Down
Air Fry Basket
Bottom
Baking Pan
See USE THE POPCORN
FUNCTION on page 18
GRILL
Yes
1 - 60 min
Bottom
Grill Side Up Griddle Side Up
Optional
GRIDDLE
Yes
1 - 60 min
Center
or Bottom
Optional Optional
60 °C - 230 °C
140 °F - 450 °F
60 °C - 230 °C
140 °F - 450 °F

20
20
COOKING TIPS
COOKING TIPS
CONVECTION TIPS
Foods that are covered benefit from the convection’s even heat and will cook
faster without any moisture loss.
The high temperature air circulation produces roasted foods that are golden
brown on the outside and juicy and tender on the inside.
Even cooking means that you can use more than one rack and you do not have to
turn foods or rotate baking trays.
Below are foods that benefit from the convection setting and when to use it:
Convection roast:
Meat, vegetables, whole fish
Convection Bake:
Pies, pastries, cookies, biscuits
Convection Broil:
Meat, fish, for melting cheese, for browning the top of casseroles
Pizza:
• Use the lower rack position and check often so the cheese does not burn.
• Start with no convection and then turn on convection for the last few
minutes to brown cheese.
Not recommended for:
Custards and flans, soues, cakes, quickbreads, breads
Additional tips:
• Make sure air can circulate around food and pans.
• Use trays, roasting pans, and baking pans with lower sides.
• Do not cover the oven shelves with foil.
• For an extensive list of foods and their ideal amounts, temperature and
time settings, along with preparation notes, see the cooking charts in the
Gourmia Air Fryer Oven Recipe Book.
• Check food for desired doneness and always ensure raw proteins reach
food-safe temperature.
• Spread food out in single layer in; do not overcrowd.
• When following instructions on item packaging or a standard recipe, reduce
the cooking temperature by 14 ºC / 25 °F. Check food for desired doneness
a few minutes before cook time elapses and cook a little longer if necessary.
FOR CUSTOMER SERVICE VISIT WWW.GOURMIA.COM

21
21
CLEANING & MAINTENANCE
CLEANING & MAINTENANCE
WARNING:
NEVER immerse cord, plug, or the unit in water or any other liquid.
Before cleaning, unplug the appliance and allow it to cool completely.
Do not use metal kitchen utensils or abrasive cleaning material to clean the
unit or the accessories.
• Clean and dry the appliance and accessories after each use.
• Clean the accessories with hot water, mild liquid soap, and a non-
abrasive sponge.
• Wipe the inside and outside of the unit with a damp cloth or non-
abrasive sponge.
• The air fry basket and oven rack are top rack dishwasher safe.
STORAGE
• Unplug the appliance and let it cool down.
• Make sure all parts are clean and dry.
• Store the appliance in a clean and dry place.
ENVIRONMENT
Do not discard the appliance with normal household waste at the end of its life;
instead, hand it in at an ocial collection point for recycling. Doing so will help to
preserve the environment.
GUARANTEE AND SERVICE
If you need service or information or if you have a problem, please visit www.
Gourmia.com or contact your distributor.

22
22
CLEANING & MAINTENANCE
TROUBLESHOOTING
Problem Solution
Food is not cooked
Use smaller batches for more even cooking
Raise temperature and continue cooking
Food is not browned
evenly
Turn over food halfway through cooking process
Cook similar sized foods together
White smoke is coming
out of the air fryer oven
Clean the air fryer oven and accessories after
each use to remove greasy residue

23
23
WARRANTY & SERVICE
WARRANTY & SERVICE
This Limited Warranty is for one full year from the date of
purchase and requires proof of purchase from an authorized
seller. It is applicable to the original purchaser only and is
not transferable to a third party user. Repair or replacement
of defective parts is solely at Gourmia’s discretion. In the
event that repair isn’t possible, Gourmia will replace the
product/part. If product repair/replacement won’t suce,
Gourmia has the option of refunding the cash value of the
product or component returned.
Product defects not covered under the Warranty provisions
include normal wear and damage incurred from use or
accidental negligence, misuse of instruction specifications,
or repair by unauthorized parties. Gourmia is not liable for
any incidental or consequential damages incurred by such
circumstances.
Only valid within the United States.
Register your product at www.Gourmia.com/warranty

We’d love to hear from you!
Get cooking with
MADE IN CHINA
Distributed by:
Costco Wholesale Corporation
P.O. Box 34535
Seattle, WA 98124-1535
USA
1-800-774-2678
www.costco.com
GTF7970 MEX
MANUAL DEL USUARIO
HORNO CON FREIDORA DE
AIRE DIGITAL + ASADOR
ENGLISH ESPAÑOL
ITM. / ART. 681900

26
ÍNDICE
Felicitaciones
Medidas de seguridad importantes
Conozca su horno con freidora de aire
∙ Accesorios
∙ Pantalla y panel de control
∙ Alternar entre grados Fahrenheit y Celsius
Uso del horno con freidora de aire
∙ Antes del primer uso
∙ Configuración del horno con freidora de aire
∙ Uso del horno con freidora de aire
∙ Detener / Cancelar la cocción
∙ Uso de la Cocción Dual
∙ Uso del Asador / Plancha
∙ Uso de la función para palomitas de maíz
Tabla de funciones
Consejos para cocinar
∙ Consejos para cocinar por convección
Limpieza y mantenimiento
Solución de problemas
Garantía y servicio
27
29
32
32
33
33
34
34
34
35
36
37
38
39
40
44
44
45
46
47
ÍNDICE

27
¡Felicitaciones por adquirir el Horno con Freidora
de Aire Digital + Asador de Gourmia!
En Gourmia, nuestro único objetivo es asegurarnos de hacer que las comidas nutritivas
y deliciosas sean siempre una opción práctica para usted, independientemente de su
ritmo de vida. Ya sea que necesite preparar un desayuno abundante, un refrigerio a
medio día o una cena sustanciosa, nuestros electrodomésticos confiables y fáciles de
usar, están diseñados para ayudarle a lo largo de su ajetreado día.
Este manual proporciona instrucciones para todas las funciones y características de su
horno con freidora de aire junto con las indicaciones de ensamblaje, funcionamiento,
limpieza y mantenimiento de su electrodoméstico. Por favor lea todas las instrucciones
de seguridad antes de comenzar. Conserve este manual a la mano para revisión y uso
futuro.
Nuestro equipo está disponible para ayudarle con cualquier pregunta que pueda tener
sobre su nuevo horno con freidora de aire. Nos entusiasma y queremos que saque
el máximo provecho a su compra, así que si necesita ayuda con la configuración u
orientación sobre qué funciones sirven para algún alimento en particular, estaremos
encantados de guiarle paso a paso.
¡Cocine feliz y de forma fácil!
Nos gustaría conocer los deliciosos platillos que está creando con su nuevo horno
con freidora de aire. Comparta con nosotros sus ideas, recetas y fotos.
@gourmia

28
Modelo: GTF7970 MEX
© 2023 Gourmia
1.0
www.gourmia.com
The Steelstone Group
Brooklyn, NY
Todos los derechos reservados. Ninguna parte de este manual podrá ser reproduci-
da por ningún medio sin la autorización por escrito de Steelstone Group, con excep-
ción del uso de las citas en las reseñas en los medios de comunicación.
Aunque se tomaron todas las precauciones necesarias durante la elaboración de
este manual, Steelstone Group no asume ninguna responsabilidad por cualquier
error u omisión en el mismo. Asimismo, no se asumirá ninguna responsabilidad
derivada de los daños causados por el uso de la información aquí contenida. Aunque
se han tomado todas las precauciones necesarias para asegurar que la información
contenida en este manual sea completa y precisa, Steelstone Group no se dedica a
la prestación de asesoramiento profesional a consumidores particulares; de ahí que
Steelstone Group no será responsable de ninguna pérdida o daño supuestamente
derivados de la información o de las sugerencias en este manual.
IMPORTANTE:
LEA CUIDADOSAMENTE
CONSERVE PARA FUTURA REFERENCIA.
PARA SERVICIO AL CLIENTE,
PREGUNTAS O COMENTARIOS,
VISITE WWW.GOURMIA.COM
MANDE UN CORREO ELECTRÓNICO A [email protected]
(Servicio no válido en México)
29
Potencia:
120 V
~
60 Hz 1 700 W
SEGURIDAD DEL CABLE Y DEL ENCHUFE
• El cable provisto con este aparato es corto para reducir el peligro de que
alguien se enganche o tropiece con un cable más largo.
• Se podrán utilizar extensiones eléctricas, siempre y cuando se tomen
precauciones al usarlas.
• Si utiliza un cable de extensión:
a. La clasificación eléctrica marcada en el cable de extensión debe ser al
menos igual a la clasificación eléctrica del aparato; y
b. El cable más largo debe disponerse de manera que no cuelgue de la
encimera o la mesa donde pueda ser jalado por niños o tropezarse con él.
MEDIDAS DE SEGURIDAD IMPORTANTES
CONSERVE ESTAS INSTRUCCIONES
MEDIDAS DE SEGURIDAD IMPORTANTES
ENCHUFE ELÉCTRICO POLARIZADO
Este aparato cuenta con un enchufe polarizado
(una clavija es más ancha que la otra). Para reducir
el riesgo de descarga eléctrica, este enchufe solo
se podrá enchufar en la toma de corriente de una
sola forma. Si el enchufe no entra completamente
en el tomacorriente, inviértalo y vuélvalo a
enchufar. Si aun así no entrara completamente,
contacte a un electricista. No modifique el
enchufe de ninguna forma.

30
30
PARA SERVICIO AL CLIENTE VISITE WWW.GOURMIA.COM
MEDIDAS DE SEGURIDAD IMPORTANTES
MEDIDAS DE SEGURIDAD IMPORTANTES
1. Lea todas las instrucciones.
2. Este aparato no debe ser
utilizado por personas
(incluyendo niños) cuyas
capacidades físicas, sensoriales
o mentales estén reducidas,
o carezcan de experiencia
o conocimiento, a menos
que dichas personas sean
supervisadas.
3. Se requiere supervisión
constante cuando cualquier
electrodoméstico sea usado
cerca de los niños. Es necesario
supervisar que los niños no
jueguen con el aparato. La
limpieza y el mantenimiento del
aparato no deben ser realizados
por niños.
4. Antes de conectar el aparato,
compruebe que el voltaje
indicado en el mismo
corresponda al voltaje de
suministro local.
5. No utilice el aparato si el
enchufe, el cable principal o el
propio aparato están dañados.
Asegúrese siempre de que el
enchufe esté correctamente
insertado en un tomacorriente
de pared.
6. No utilice un aparato con un
cable o enchufe dañado, si el
aparato ha funcionado mal o si
este se ha dañado de alguna
forma. Devuelva el aparato
al centro de servicio técnico
autorizado más cercano para su
revisión, reparación o ajuste.
7. No permita que el cable de
alimentación cuelgue sobre
el borde la mesa o entre en
contacto con superficies
calientes.
8. Para evitar una descarga
eléctrica, no sumerja el
cable, los enchufes o el
electrodoméstico en agua u
otros líquidos. No enchufe el
electrodoméstico ni toque el
panel de control con las manos
mojadas.
9. Para evitar situaciones
peligrosas, nunca conecte
este electrodoméstico a
un temporizador externo
o a un sistema de control
remoto. Para desconectarlo,
apague el electrodoméstico y
después retire el enchufe del
tomacorriente de pared.
10. No coloque el aparato sobre o
cerca de materiales inflamables
como manteles o cortinas. Las
superficies cercanas podrían
calentarse durante el uso. No
coloque el aparato sobre o
cerca de un quemador a gas,
una hornilla eléctrica o en un
horno caliente.
11. No coloque el electrodoméstico
contra la pared o contra otros
aparatos. Deje al menos 10
cm de espacio libre en la
parte posterior y los laterales
y 10 cm de espacio libre
sobre el electrodoméstico.
No coloque nada encima del
electrodoméstico.
12. No utilice el aparato para
ningún otro propósito que
no sea el descrito en este
manual. El uso de accesorios no
recomendados por el fabricante
Siempre que utilice aparatos eléctricos debe seguir precauciones de
seguridad básicas:

31
31
MEDIDAS DE SEGURIDAD IMPORTANTES
CONSERVE ESTAS INSTRUCCIONES
podría provocar lesiones.
13. No deje el electrodoméstico
funcionando sin supervisión. Se
debe tener extrema precaución
al mover un electrodoméstico
que contenga aceite caliente u
otros líquidos calientes.
14. No utilice el aparato en
exteriores.
15. No toque las superficies
calientes: use el asa. Durante
el proceso de freír saldrá vapor
caliente a través de las salidas
de aire. Mantenga las manos y
la cara a una distancia segura
del vapor y de las salidas de
aire. Asimismo, tenga cuidado
con el vapor y el aire caliente a
la hora de retirar la canasta del
aparato.
16. Evite el contacto con la parte
metálica interior después de
usar el electrodoméstico.
Desenchufe el aparto del
tomacorriente cuando no esté
en uso y antes de limpiarlo.
Deje que se enfríe antes de
limpiarlo.
17. Desenchufe el
electrodoméstico de inmediato
si ve que está saliendo humo
negro de su interior. Espere
a que el humo deje de salir
antes de retirar la cesta del
electrodoméstico.
18. No utilice este producto con
un propósito distinto al que fue
diseñado.
19. Tenga mucho cuidado al retirar
la bandeja o al desechar la
grasa caliente.
20. No utilice estropajos metálicos
para limpiar el aparato.
Se pueden desprender
fragmentos del estropajo que
al entrar en contacto con las
piezas eléctricas crean un
riesgo de descarga eléctrica
21. No introduzca alimentos
muy grandes o utensilios de
metal en el horno; esto podría
provocar un incendio o una
descarga eléctrica.
22. Podría ocurrir un incendio si
cubre el aparato o si este está
en contacto con materiales
inflamables como cortinas,
colgantes o paredes durante
su operación. No coloque
ningún objeto encima del
aparato cuando esté en
funcionamiento.
23. Se debe tener mucho cuidado
cuando se utilicen recipientes
que no sean de metal o de
vidrio.
24. No almacene ningún
material, salvo los accesorios
recomendados por el
fabricante, en este horno
cuando no esté en uso.
25. No introduzca en el horno
ninguno de los siguientes
materiales: papel, cartón,
plástico y similares.
26. No cubra la bandeja para
migajas ni ninguna parte
del horno con papel de
aluminio ya que provocará un
sobrecalentamiento del horno.
27. Apague el aparato pulsando el
botón START/CANCEL (Iniciar /
Cancelar).
28. Para uso doméstico solamente.
32
32
CONOZCA SU HORNO CON FREIDORA DE AIRE
CONOZCA SU HORNO CON FREIDORA DE AIRE
ACCESORIOS
NOTA: Asegúrese siempre de que la bandeja para migajas esté en el fondo del horno
con freidora de aire cuando cocine.
Cesta para freír con aire Rejilla para el horno
Bandeja para hornear
Bandeja para migajas
Pantalla
Panel de
control
Posición superior
de la rejilla
Posición inferior de la rejilla
Posición central
de la rejilla
Dial de función
Dial de
Tiempo /
Rebanadas
Convección
Asador / Plancha
(Voltear para plancha)
PARA SERVICIO AL CLIENTE VISITE WWW.GOURMIA.COM
33
33
CONOZCA SU HORNO CON FREIDORA DE AIRE
CONOZCA SU HORNO CON FREIDORA DE AIRE
PANTALLA Y PANEL DE CONTROL
Iniciar / Cancelar
Funciones
ALTERNAR ENTRE GRADOS
FAHRENHEIT Y CELSIUS:
Mantenga pulsado el botón
de silenciar para alternar
entre la visualización de
la temperatura en grados
Fahrenheit o Celsius.
Tiempo
Ícono del
ventilador
Temperatura /
Rebanadas
Nivel de tostado
Dial de Temperatura /
Nivel de Tostado
Botón de Silenciar
Dial de función
Dial de
Tiempo /
Rebanadas
Cocción dual
Convección
34
34
1. Retire y deseche todo el material de embalaje, las etiquetas y la cinta
adhesiva de la unidad.
2. Lave bien la cesta para freír, la rejilla del horno, el asador / plancha, la
bandeja para hornear y la bandeja para migajas con agua caliente, jabón
líquido y una esponja no abrasiva. Seque todas las piezas antes de usarlas.
3. Limpie el interior y exterior del horno con un paño húmedo.
ANTES DEL PRIMER USO
ANTES DEL PRIMER USO
ADVERTENCIA:
No coloque el electrodoméstico contra la pared o contra otros aparatos. Deje
al menos 10 cm de espacio libre en la parte posterior y los laterales y 10 cm de
espacio libre sobre el electrodoméstico.
No coloque nada encima de su electrodoméstico cuando esté en uso.
Siempre tenga CUIDADO al abrir las puertas; ¡puede salir vapor caliente!
¡El horno, los accesorios y los alimentos estarán calientes! No toque las
superficies calientes. Utilice guantes de cocina para introducir o sacar los
alimentos del horno.
CONFIGURACIÓN DEL HORNO CON FREIDORA DE AIRE
1. Coloque el horno sobre una superficie estable, nivelada y resistente al
calor.
2. Coloque la bandeja para migajas en el fondo del horno con freidora de
aire.
3. Enchufe el horno con freidora de aire en un tomacorriente.
No recomendado
Aceite de cocina en
aerosol
Recomendado
Botella de aceite / rociador
NOTA: Si rocía aceite en los alimentos para obtener un acabado más crujiente, le
recomendamos utilizar aceite de cocina normal en lugar de aceite de cocina en
aerosol, ya que este último podría dañar los accesorios.
PARA SERVICIO AL CLIENTE VISITE WWW.GOURMIA.COM

35
35
USO DEL HORNO CON FREIDORA DE AIRE
USO DEL HORNO CON FREIDORA DE AIRE
1. Para elegir un modo de cocción preestablecido, gire el dial de selección.
Una pequeña flecha se moverá a lo largo de los nombres de los
preajustes a medida que gire el dial. Detenga el dial cuando la flecha
llegue al preajuste deseado. Se mostrará el tiempo y la temperatura
predeterminados del preajuste.
2. Para ajustar la temperatura, gire el dial de TEMP / SHADE (Temperatura /
Nivel de tostado) hasta que aparezca la temperatura deseada.
Para las funciones TOAST o BAGEL (Tostar / Bagels): Gire el dial TIME / SLICES
(Tiempo / Rebanadas) hasta que aparezca el número de rebanadas que desee.
3. Para ajustar el tiempo, gire el dial TIME / SLICES (Tiempo / Rebanadas)
hasta que aparezca el tiempo que desee.
Consulte la TABLA DE FUNCIONES en las páginas
40-43 para conocer los ajustes de cada una de las
funciones y qué accesorio utilizar.
Para las funciones TOAST o BAGEL (Tostar / Bagels): Gire el dial TEMP /
SHADE (Temperatura / Nivel de tostado) hasta que aparezca el nivel de
tostado que desee.
Para funciones sin precalentamiento: Coloque los alimentos en el horno y
oprima START / CANCEL (Iniciar / Cancelar) para comenzar a cocinar.
4. Oprima START / CANCEL. La pantalla mostrará PREHEAT
(Precalentamiento) y el horno comenzará a precalentarse. Una vez
precalentado, el horno emitirá un pitido y la pantalla mostrará “Add
Food” (Añadir alimentos).
Continúa en la página siguiente.

36
36
USO DEL HORNO CON FREIDORA DE AIRE
USO DEL HORNO CON FREIDORA DE AIRE
5. Abra la puerta, coloque cuidadosamente los alimentos en el horno con
freidora de aire y cierre la puerta. El tiempo de cocción comenzará
automáticamente. Cuando haya transcurrido el tiempo de cocción, el horno
emitirá un pitido y la pantalla mostrará “End” (Fin).
6. Abra la puerta. Retire los alimentos con cuidado y colóquelos sobre una
superficie resistente al calor. ADVERTENCIA: Espere a que los accesorios
se enfríen completamente antes de retirarlos.
NOTA
• Para ajustar la temperatura y el tiempo durante la cocción, siga los pasos 2
y 3.
• Para encender/apagar el ventilador de convección, oprima el botón
CONVECTION (Convección). El icono del ventilador se mostrará cuando
el ventilador esté encendido. Consulte los CONSEJOS PARA EL AJUSTE
DE CONVECCIÓN en la página 44 para obtener información detallada.
CONVECTION.
DETENER / CANCELAR LA COCCIÓN
Para detener la cocción, oprima START / CANCEL (Iniciar/Detener). El aparato
emitirá un pitido y mostrará la palabra “Stop” (Detener). Oprima de nuevo antes
de 3 segundos para reanudar la cocción.
PARA SERVICIO AL CLIENTE VISITE WWW.GOURMIA.COM

37
37
Para recetas que requieren dos pasos, la función DUAL COOK (Cocción
Dual) cambiará de una temperatura o función a otra temperatura o función
automáticamente. Siga los pasos que se indican a continuación para utilizar la
cocción dual.
1. Oprima Dual Cook (Cocción Dual). La pantalla mostrará “DUAL 1” mientras
elige la primera función.
NOTA: Las funciones Toast y Bagel (Tostar/ Bagels) se desactivarán al utilizar la
cocción dual.
2. Para elegir una función, gire el dial de función. Una pequeña flecha se moverá
a lo largo de los nombres de las funciones a medida que gire el dial. Deténgase
cuando la flecha llegue a la función deseada. Se mostrarán la temperatura y el
tiempo predeterminados de la función.
3. Para ajustar la temperatura, gire el dial TEMP / SHADE (Temperatura/Nivel de
tostado) hasta aparezca la temperatura deseada.
4. Para ajustar el tiempo, gire el dial TIME / SLICES (Tiempo/ Rebanadas) hasta
que aparezca el tiempo deseado.
5. Oprima Dual Cook (Cocción Dual) de nuevo.
6. Repita los pasos 2-4. La pantalla mostrará “DUAL 2” mientras elige su segunda
función.
Para funciones sin precalentamiento Coloque los alimentos en el horno y
oprima START / CANCEL (Iniciar/ Cancelar) para comenzar a cocinar.
7. Pulse START / CANCEL (Iniciar/Cancelar). La pantalla mostrará “PREHEAT”
(Precalentamiento) y el horno comenzará a precalentarse. Una vez
precalentado, el horno emitirá un pitido y la pantalla mostrará “Add Food”
(Añadir alimentos).
8. Abra la puerta, coloque cuidadosamente los alimentos en el horno y cierre
la puerta. El tiempo de cocción comenzará automáticamente. La función de
Cocción Dual cambiará automáticamente entre temperaturas / funciones
cuando el tiempo de cocción haya terminado para la primera función.
Cuando el tiempo de cocción haya finalizado, el horno emitirá un pitido y la
pantalla mostrará “End” (Fin).
9. Abra la puerta. Retire los alimentos con cuidado y colóquelos sobre una
superficie resistente al calor.
USO DE LA COCCIÓN DUAL
USO DEL HORNO CON FREIDORA DE AIRE

38
38
Unte siempre la placa del asador / plancha con aceite vegetal. Asegúrese de que
la placa del asador / plancha esté en el horno antes del precalentamiento.
Utilice la placa del asador como lo haría con un asador tradicional, para cocinar
cualquier cosa, desde carnes hasta verduras.
Utilice la placa del asador / plancha para cocinar sus desayunos favoritos y sellar
diferentes tipos de pescados y mariscos, como callos de hacha y tacos de pescado.
Utilice también la plancha para hacer pizza (consulte la TABLA DE FUNCIONES en
la página 40 para obtener información detallada).
Deje que la placa del asador / plancha se enfríe completamente antes de sacarla
del horno para limpiarla.
USO DEL ASADOR / PLANCHA
USO DEL HORNO CON FREIDORA DE AIRE
PARA SERVICIO AL CLIENTE VISITE WWW.GOURMIA.COM

39
39
USO DE LA FUNCIÓN PARA PALOMITAS DE MAÍZ
1. Seleccione la función POPCORN (Palomitas de maíz) con el dial de
funciones.
Opcional: Gire los diales TEMP / SHADE (Temperatura/ Nivel de Tostado) y TIME
/ SLICES (Tiempo/ Rebanadas) para ajustar la temperatura y el tiempo.
2. Oprima START / CANCEL (Iniciar / Cancelar).
La pantalla mostrará PREHEAT (Precalentamiento) y el horno con freidora de
aire comenzará a precalentar
3. Vierta 115 g de granos de maíz sin cocer en la bandeja para hornear.
4. Voltee la cesta para freír con aire y colóquela sobre la bandeja para
hornear.
Una vez precalentado, el horno con freidora de aire sonará y la pantalla
mostrará “Add Food” (Añadir alimentos).
5. Abra la puerta, introduzca con cuidado la bandeja para hornear junto con
la cesta para freír invertida en la posición inferior de la rejilla y cierre la
puerta.
El tiempo de cocción comenzará automáticamente. Cuando haya transcurrido el
tiempo de cocción, el horno emitirá un pitido y la pantalla mostrará “End” (Fin).
6. Deje reposar 1 minuto o 2 minutos hasta los granos dejen de explotar antes
de abrir la puerta. Retire las palomitas con cuidado y coloque sobre una
superficie resistente al calor.
USO DEL HORNO CON FREIDORA DE AIRE
40
40
TABLA DE FUNCIONES
TABLA DE FUNCIONES
*Cuando fría al aire alimentos con exceso de aceite, utilice la bandeja para hornear en
lugar de la cesta para freír con aire.
TOSTAR
No
1 - 6
rebanadas
1 - 6 niveles
de tostado
Centro
Opción sin
ventilador
Opción sin
ventilador
BAGELS
No
1 - 6
rebanadas
1 - 6 niveles
de tostado
Centro
FREÍR CON
AIRE
Sí
1 min - 60 min
80 °C - 230 °C
Centro
O
Vea la NOTA
de abajo*
170 °F - 450 °F
PIZZA
Sí
1 min - 60 min
80 °C - 230 °C
Opcional
170 °F - 450 °F
Inferior
Función
Precalenta-
miento
Rango de
Tiempo
Rango de
Temperatura
Accesorio
Posición
de la Rejilla
Ventilador
PARA SERVICIO AL CLIENTE VISITE WWW.GOURMIA.COM
Plancha
hacia arriba

41
41
TABLA DE FUNCIONES
TABLA DE FUNCIONES
ROSTIZAR
Sí
1 min - 90 min
80 °C - 230 °C
Centro
Opcional
170 °F - 450 °F
HORNEAR
Sí
1 min - 90 min
80 °C - 230 °C
Centro
Opcional
170 °F - 450 °F
ASAR
Sí
1 min - 60 min
230 °C
Superior
Opcional
450 °F
Inferior
RECALENTAR
No
1 min - 60 min
80 °C - 230 °C
Centro
Opcional
170 °F - 450 °F
42
42
TABLA DE FUNCIONES
TABLA DE FUNCIONES
DESHIDRATAR
No
30 min - 72 h
Centro
30 °C - 80 °C
90 °F - 170 °F
LEUDAR
No
1 min - 4 h
30 °C - 40 °C
Centro
Opcional
90 °F - 100 °F
CALENTAR
No
Hasta 4 h
30 °C - 90 °C
Centro
Opcional
90 °F - 200 °F
GALLETAS
Sí
1 min - 60 min
80 °C - 230 °C
Centro
Opcional
170 °F - 450 °F
Función
Precalenta-
miento
Rango de
Tiempo
Rango de
Temperatura
Accesorio
Posición
de la Rejilla
Ventilador
PARA SERVICIO AL CLIENTE VISITE WWW.GOURMIA.COM
43
43
TABLA DE FUNCIONES
TABLA DE FUNCIONES
PALOMITAS
Sí
1 min - 15 min
150 °C - 230 °C
300 °F - 450 °F
No
15 min - 12 h
Inferior
Bajo / Alto
Opcional
+
Parte inferior
Cesta para
freír al revés
Parte inferior
Bandeja para
hornear
Sí
1 min - 60 min
Inferior
Asador hacia
arriba
Plancha hacia
arriba
Opcional
Sí
1 min - 60 min
Centro
o Inferior
Opcional Opcional
60 °C - 230 °C
140 °F - 450 °F
60 °C - 230 °C
140 °F - 450 °F
COCCIÓN
LENTA
ASAR A
LA PARRILLA
ASAR A
LA PLANCHA
Vea USO DE LA FUNCIÓN
PARA PALOMITAS en la
página 39

44
44
CONSEJOS PARA COCINAR
CONSEJOS PARA COCINAR
CONSEJOS PARA COCINAR POR CONVECCIÓN
Los alimentos cubiertos se benefician del calor uniforme de la convección y se
cocinan más rápido sin perder humedad.
La circulación de aire a alta temperatura produce alimentos asados por fuera y
jugosos y tiernos por dentro.
Una cocción uniforme significa que puede utilizar más de una rejilla y que no
tiene que girar los alimentos ni rotar las bandejas para hornear.
A continuación se indican los alimentos que se benefician del ajuste de
convección y cuándo utilizarlo:
Rostizar por convección:
Carne, verduras, pescado entero.
Hornear por convección:
Tartas, repostería, galletas, bizcochos.
Asar por convección:
Carne, pescado, para derretir queso, para dorar la parte superior de los guisos.
Pizza:
• Utilice la posición inferior de la rejilla y vigile continuamente para que el
queso no se queme.
• Comience sin convección y luego enciéndala durante los últimos minutos
para dorar el queso.
No recomendado para:
Natillas y flanes, suflés, pasteles, panes rápidos, panes.
Consejos adicionales:
• Asegúrese de que el aire pueda circular alrededor de los alimentos y las
bandejas.
• Utilice bandejas, bandejas para asar y para hornear con los laterales más
bajos.
• No cubra los estantes del horno con papel de aluminio.
• Para una lista extensa de alimentos, sus cantidades, temperaturas y tiempos
ideales, junto con notas sobre su preparación, consulte las tablas para
cocinar del Recetario para Horno con Freidora de Aire de Gourmia.
• Compruebe el nivel de cocción deseado unos minutos antes de que
transcurra el tiempo de cocción y cocine un poco más si es necesario.
• Extienda los alimentos en una sola capa; no llene demasiado.
• Cuando siga las instrucciones del envase de un producto o de una receta
estándar, reduzca la temperatura de cocción en 14 ºC / 25 °F, compruebe el
nivel de cocción deseado unos minutos antes de que transcurra el tiempo de
cocción y cocine un poco más si es necesario.
PARA SERVICIO AL CLIENTE VISITE WWW.GOURMIA.COM

45
45
LIMPIEZA Y MANTENIMIENTO
LIMPIEZA Y MANTENIMIENTO
WARNING:
NUNCA sumerja el cable, el enchufe o el aparato en agua o cualquier otro
líquido.
Antes de limpiar, pulse el icono de encendido para apagar el aparato,
desenchúfelo y deje que se enfríe por completo.
No utilice utensilios de cocina metálicos o material de limpieza abrasivo para
limpiar el aparato o los accesorios.
• Limpie y seque el aparato y los accesorios después de cada uso.
• Limpie los accesorios con agua caliente, jabón líquido suave y una
esponja no abrasiva.
• Limpie el interior y exterior del horno con un paño húmedo o una
esponja no abrasiva.
• La cesta para freír con aire y la rejilla del horno se pueden lavar en el
lavavajillas.
ALMACENAMIENTO
• Desconecte el aparato y deje que se enfríe.
• Asegúrese de que todas las piezas estén limpias y secas.
• Almacene el aparato en un lugar limpio y seco.
MEDIO AMBIENTE
Al finalizar la vida útil del producto, no lo deseche con la basura doméstica
normal; en su lugar, entréguelo en un punto de recolección oficial para su
reciclaje. Al hacer esto, usted ayudará a preservar el medio ambiente.
GARANTÍA Y SERVICIO
Si necesita servicio o información o tiene algún problema, por favor, visite nuestro
sitio web o contacte a su distribuidor.

46
46
LIMPIEZA Y MANTENIMIENTO
SOLUCIÓN DE PROBLEMAS
Problema Solución
Los alimentos no se
cocinaron
Coloque en tandas más pequeñas para una
cocción más uniforme
Aumente la temperatura y continúe la cocción
Los alimentos no se
doran uniformemente
Dé vuelta a los alimentos a mitad del proceso
de cocción
Cocine juntos los alimentos de tamaño similar
El horno con freidora
de aire expide humo
blanco
Limpie el horno con freidora con aire y los
accesorios después de cada uso para eliminar
los residuos de grasa
PARA SERVICIO AL CLIENTE VISITE WWW.GOURMIA.COM

47
47
GARANTÍA Y SERVICIO
GARANTÍA Y SERVICIO
Esta garantía limitada tiene una validez de un año completo
a partir de la fecha de compra y requiere del comprobante
de compra de un distribuidor autorizado. Aplica únicamente
al comprador original y no es transferible terceros. La
reparación o sustitución de las piezas defectuosas queda a
discreción única de Gourmia. En caso de que la reparación
no sea posible, Gourmia reemplazará el producto o la pieza
defectuosa. Si la reparación o sustitución del producto no es
satisfactoria, Gourmia tiene la opción de reembolsar el valor
en efectivo del producto o componente devuelto.
Los defectos del producto que no están cubiertos por las
disposiciones de la garantía incluyen el desgaste normal
y los daños ocasionados por el uso o la negligencia
accidental, el seguimiento indebido de las especificaciones
de las instrucciones o la reparación por parte de terceros
no autorizados. Gourmia no es responsable de ningún daño
accidental o derivado de tales circunstancias.
La garantía únicamente es válida dentro de los Estados
Unidos. Para México, vea garantía ofrecida por el
importador.
Registre su producto en www.Gourmia.com/warranty
¡Nos encantaría escucharlo!
HORNO TOSTADOR Y FREIDORA DE AIRE
Especificaciones eléctricas: 120 V~ 60 Hz 1 700 W
Consumo de energía en modo de espera: N/A
Consumo de energía en modo de operación: 379.54 Wh
Este aparato se destina a usarse para aplicaciones de uso doméstico y similar como las
siguientes: USO DOMÉSTICO SOLAMENTE. Este aparato no debe sumergirse en agua
durante su limpieza. Este aparato no se destina para ponerse en funcionamiento por medio
de un temporizador externo o sistema de control remoto separado. Objetos metálicos
tales como cuchillos, tenedores, cucharas y tapas, no deben colocarse sobre la superficie
caliente debido a que pueden calentarse. Este manual se refiere al producto como Horno
con Freidora de Aire Digital + Asador como Horno con Freidora de Aire de forma indistinta.
Si el cordón de alimentación es dañado, éste debe sustituirse por el fabricante, por su
agente de servicio autorizado o por el personal calificado con el fin de evitar un peligro.
CUIDADO. SUPERFICIE CALIENTE.
HECHO EN CHINA
Importado Por:
Importadora Primex S.A. de C.V.
Blvd. Magnocentro No. 4
San Fernando La Herradura
Huixquilucan, Estado de México
C.P. 52765
RFC: IPR-930907-S70
(55)-5246-5500
www.costco.com.mx
Cocine con Gourmia