
1
MADE IN CHINA
ASSEMBLY INSTRUCTIONS
Adult assembly required
Small parts may present choking hazard prior to assembly.
Enclosed please find simple step-by-step instructions to help you
quickly assemble your products. Before you begin we recommend
that you following the steps below:
1. Please read the instructions thoroughly.
2. Identify all parts and hardware.
3. You will need the following tools:
Philips head screw drive
Flat head screw driveo protect your parts during assemb
Hammer
DO NOT use power drills or drivers
To protect your parts during assembly please place them on a soft surface.
To clean surface use only water ona damp cloth. DO NOT use
window cleaners or cleaning abrasives as it will scratch the surface
and could damage the protective coating.
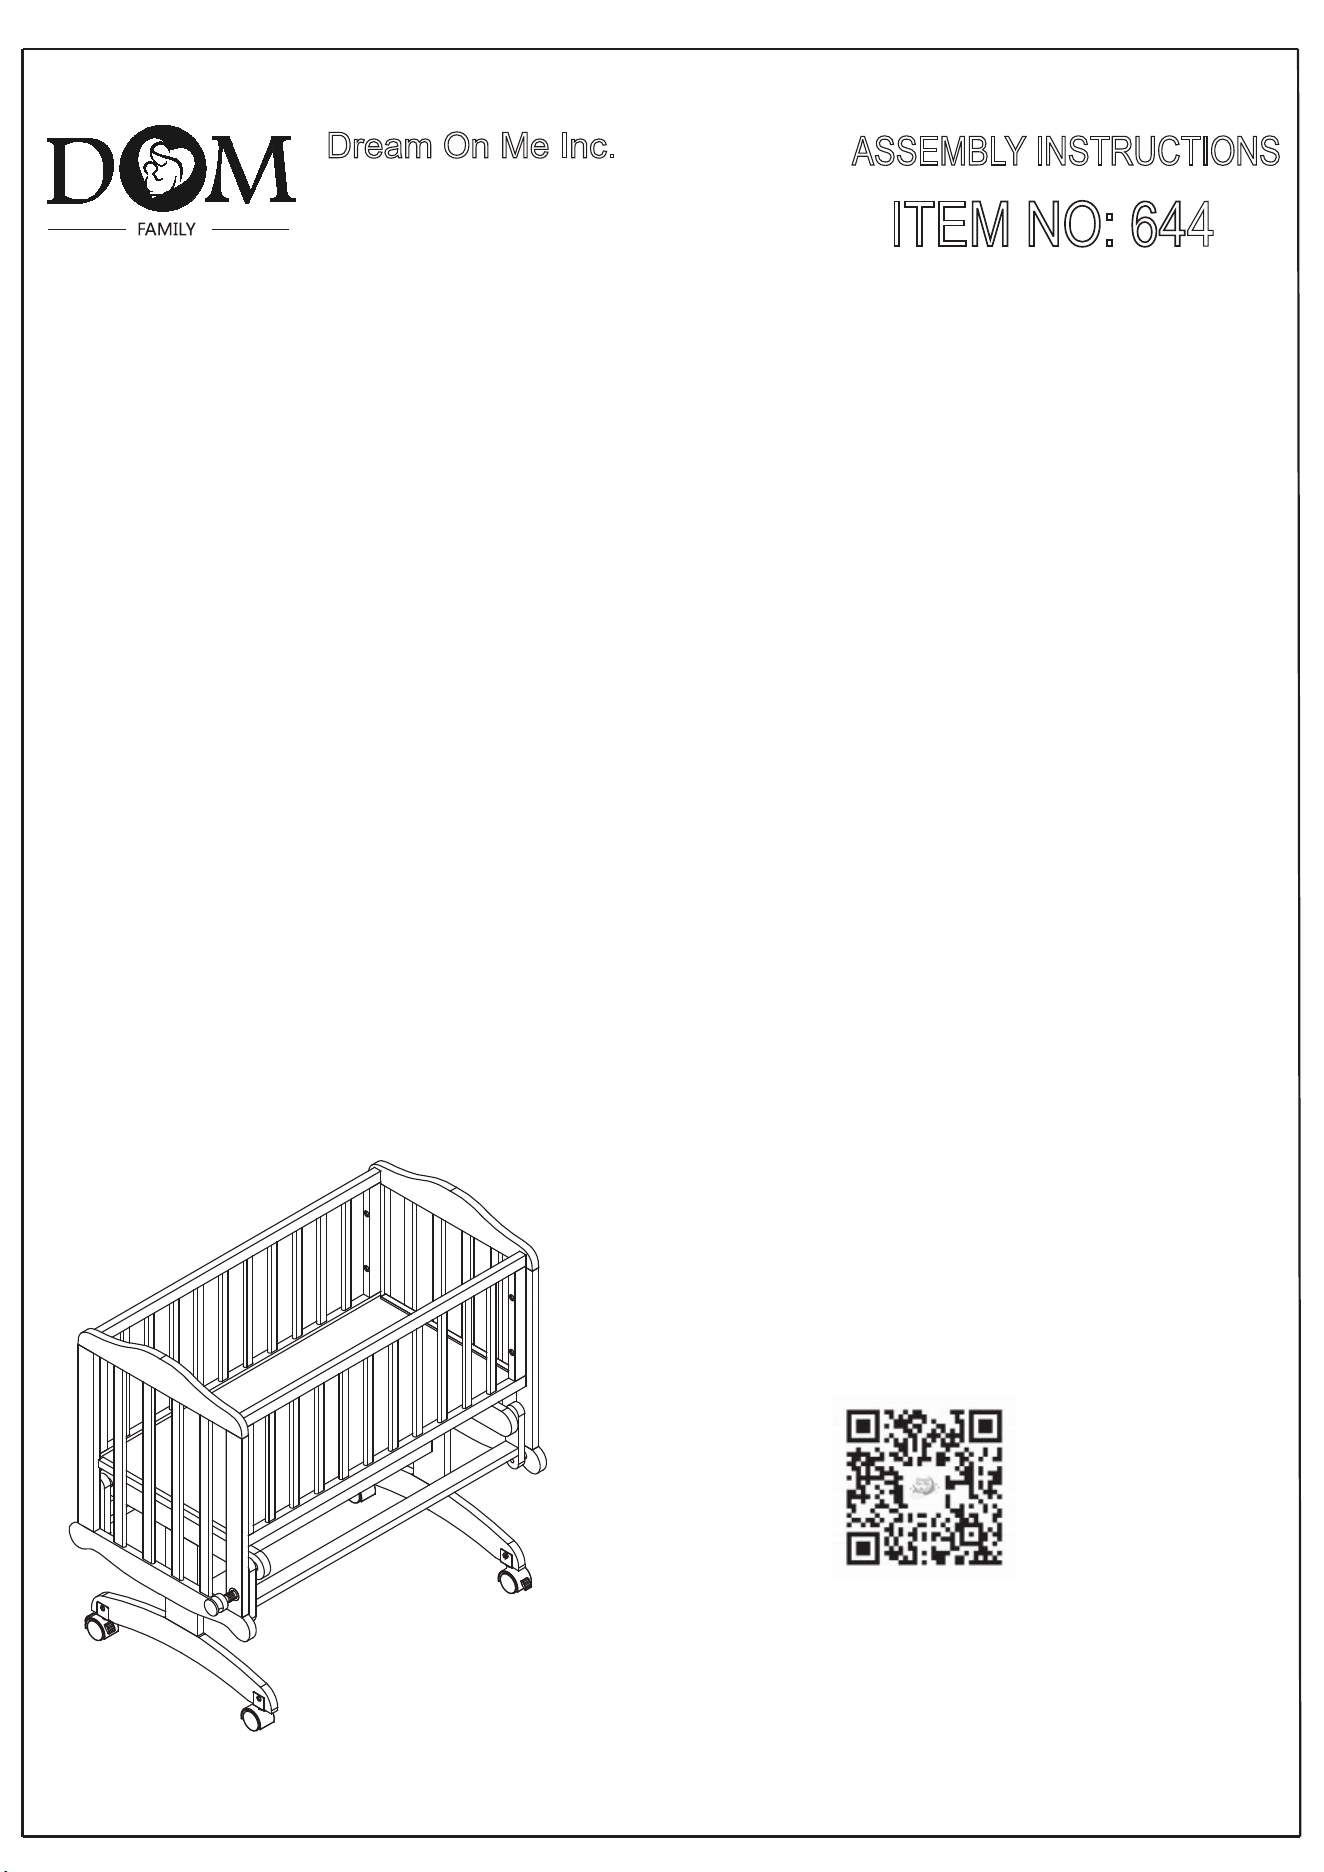
ITEM NO: 644
Dream On Me Inc.
1532 S WASHINGTON AVE
PISCATAWAY TWP NJ 08854
Email: [email protected]
www.dreamonme.com
Scan the QR code to register your product
https://dreamonme.com/customercare/registration/

2
.
Read all instructions before assembling cradle.KEEP INSTRUCTIONS FOR FUTURE
USE.
Periodically check the safety of your cradle, by making certain all scerws,nuts and bolts
are tightened securely and insepect cradle for damaged hardware, loose joints,missing
parts or sharp edges. DO NOT use the cradle if any parts are missing or broken. Ask your
local dealer for replacement part and instruction literature if needed. DO NOT substitute
parts.
When child is able to climb out unaided, the cradle should no longer be used.
DO NOT suspend items with long strings into cradle. DO NOT place cradle near a window
where cords from blinds or drapes may strangle a child. DO NOT tie pacifiers, necklaces,
or any other item around a chlid’s neck or on the cradle parts. This could cause
strangulation.
DO NOT use a water mattress with this cradle.
DO NOT use shipping or other bags as mattress covers since they can cause suffocation.
Never aim or point a vaporizer or humidifier directly at the cradle as the water vapour
could
ruin the finish of it.
Wash with mild soap and a damp cloth. Do not use abrasives. Avoid furniture polish as it
could be hazardous to your child. If refinishing, use a non-toxic finish specific for children’s
products.
.
Failure to follow these warnings and the assembly instructions could result in serious injury
or death.
WARNING
.
.
.
.
.
.
.
FALL HAZARD--To help prevent falls,do not use this product when the infant begins to
push up on hands or has reached 30lbs,whichever comes first.
SUFFOCATION HAZARD--Infants have suffocated in gaps between extra padding and
side of the cradle.On soft bedding Never add a pillow or comforter.Use only the pad
provided by Dream On Me.Never place addtional padding under an infant.
Strings can cause strangulation! Do not place items with a string around a child’s neck,
such as hood strings or pacifier cords. Do not suspend strings over a bassinet or cradle
or attach strings to toys
To reduce the risk of SIDS,pediatricians recommend healthy infants be placed on their
backs to sleep,unless otherwise advised by your physician.
If a sheet is used with the pad, use only the one provided by the bassinet or cradle
manufacturer or one specifically designed to fit the dimension of the bassinet or cradle
mattress.
3
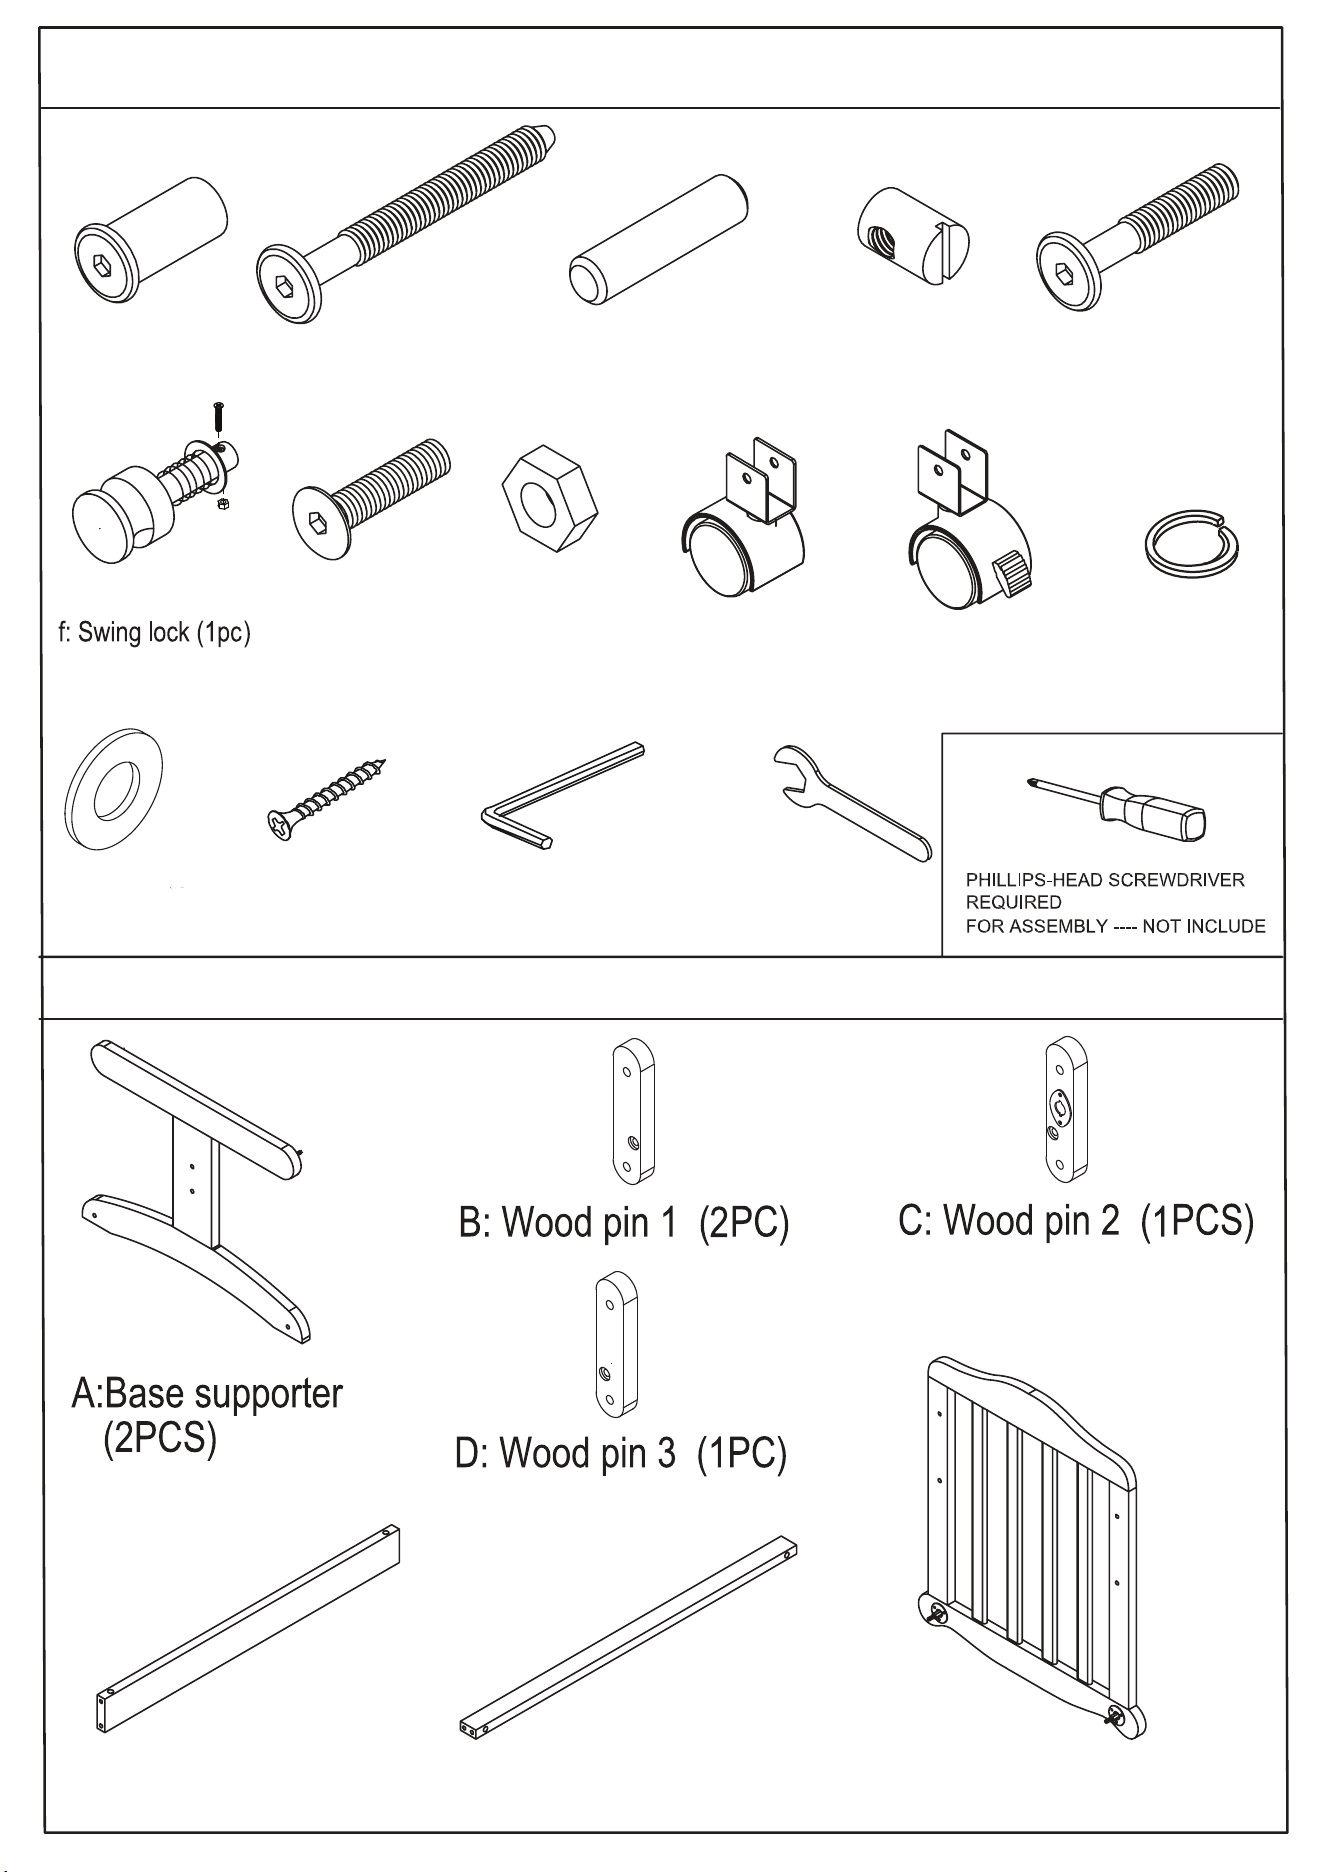
a:Bearing (8pcs) b: Allen head bolts
2-3/8”(8pcs)
c:Wood dowels (4pcs)
m:Flat washer
(16pcs)
n:Screw
(2pcs)
q: Allen key
(1pc)
r:Wrench (1pc)
E: Middle bar (1PC)
d:Barrel nuts (8pcs)
e: Allen head bolts
1-3/5”(8pcs)
g:Screws (4pcs)
h:Nuts (4pcs)
i: Casters (2pcs)
j: Casters with lock
(2pcs)
k: Spring washer
(8pcs)
HARDWARE AND TOOLS DIAGRAM
PARTS LIST
F: Side bar (2PCS)
G: Right Headboard (1PC)
with the wood pin(B) and (C).
with the wood pin(B) and (C).
with the wood pin(B) and (C).
with the wood pin(B) and (C).
with the wood pin(B) and (C).
with the wood pin(B) and (C).
with the wood pin(B) and (C).
STEP 1
4
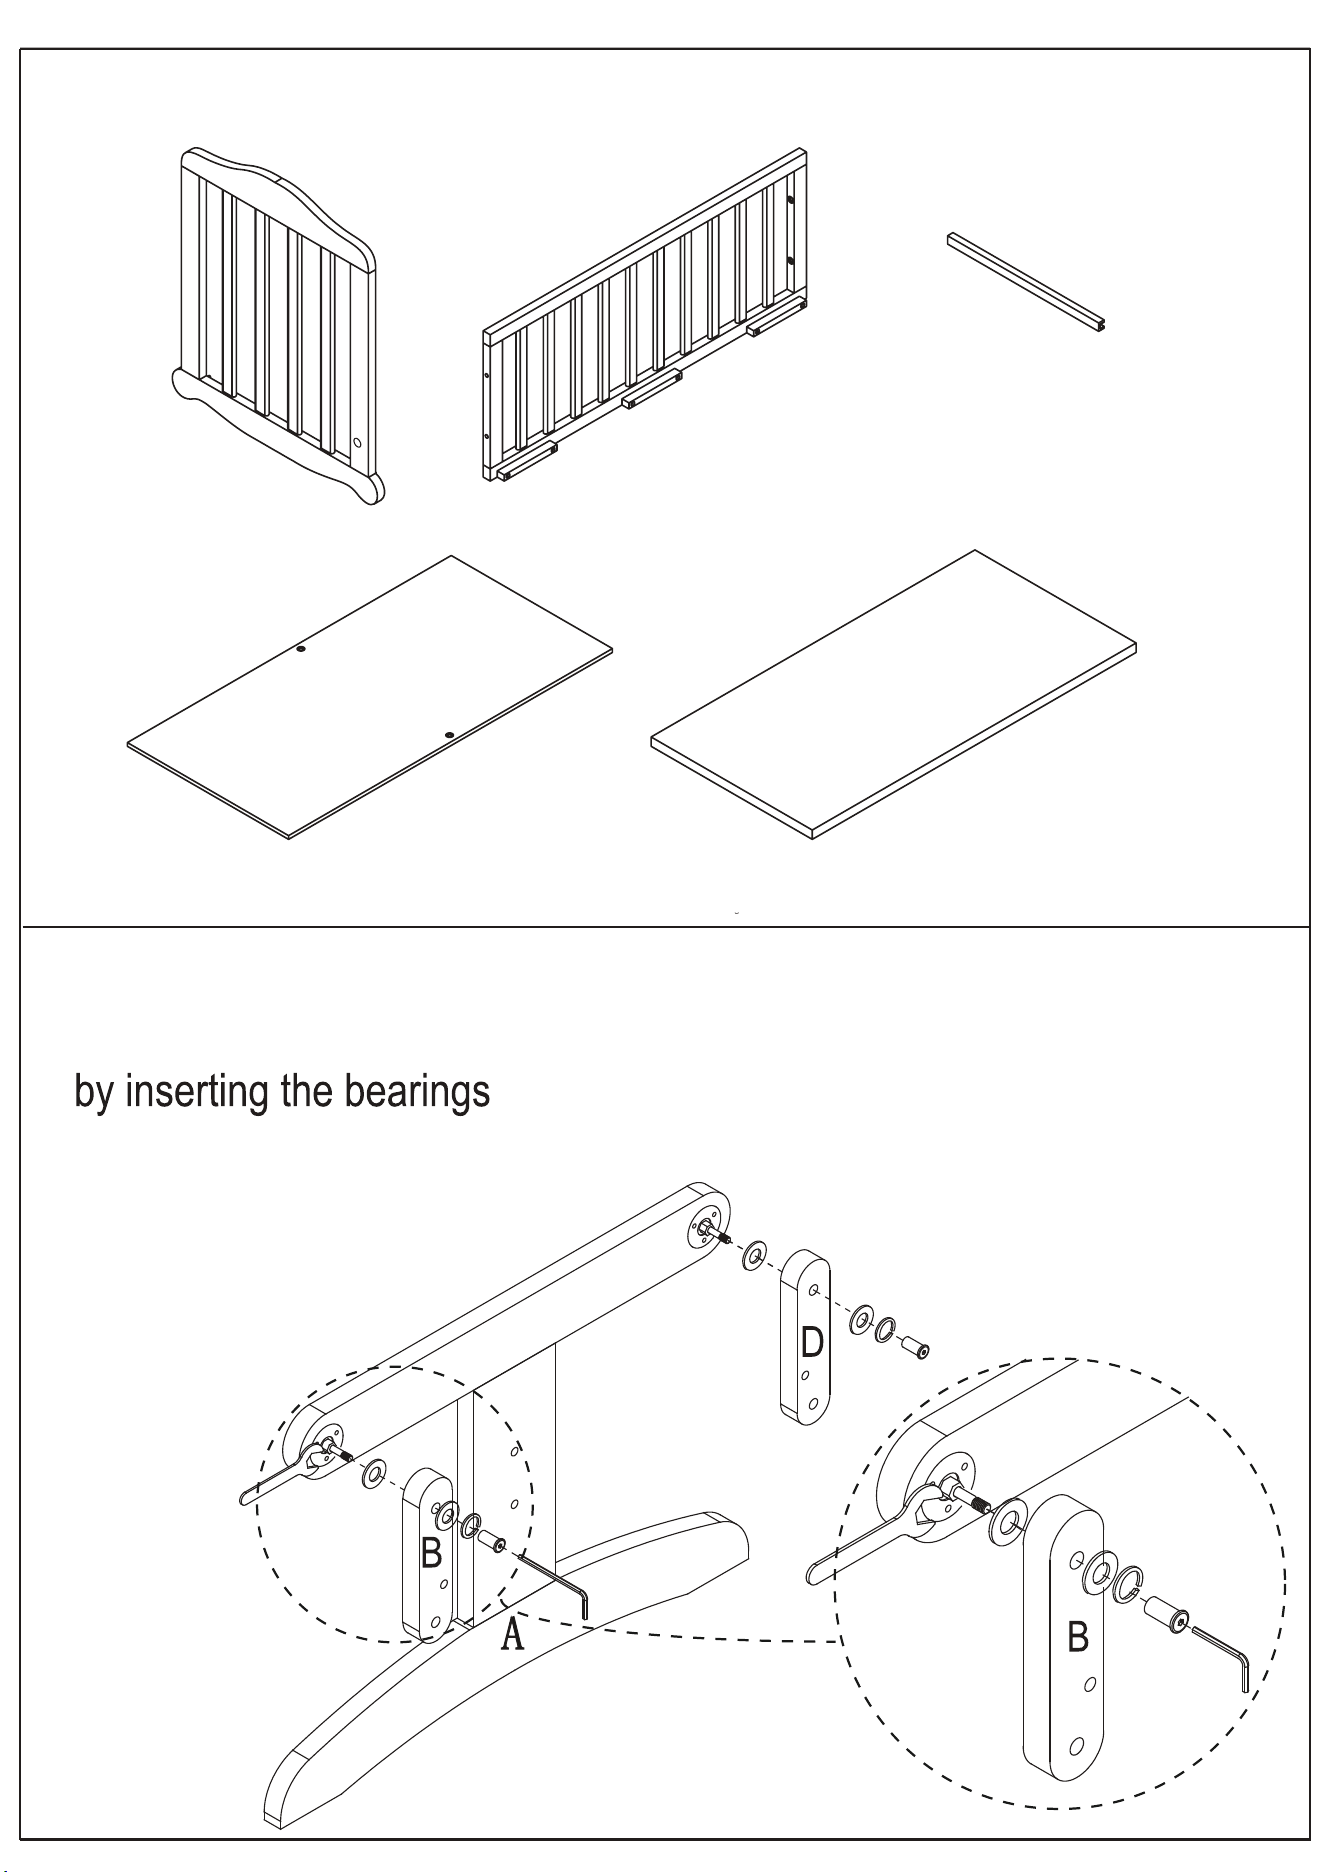
H:Left Headboard (1PC)
L: Pad (1PC)
I: Rails (2PCS)
J: Cradle base supports (2PCS)
K:Mattress support(1PC)
Connect the base supporter (A) and the wood pins (B) and (D)
(a) using the allen key (q) and wrench(r).
The same way to assemble another piece of the base support
q
a
a
m
r
with the wood pin(B) and (C).
q
a
m
r
m
m
m
k
k
m
k
J: Cradle base supports (2PCS) J: Cradle base supports (2PCS) J: Cradle base supports (2PCS)
J: Cradle base supports (2PCS) J: Cradle base supports (2PCS) J: Cradle base supports (2PCS) J: Cradle base supports (2PCS)
5
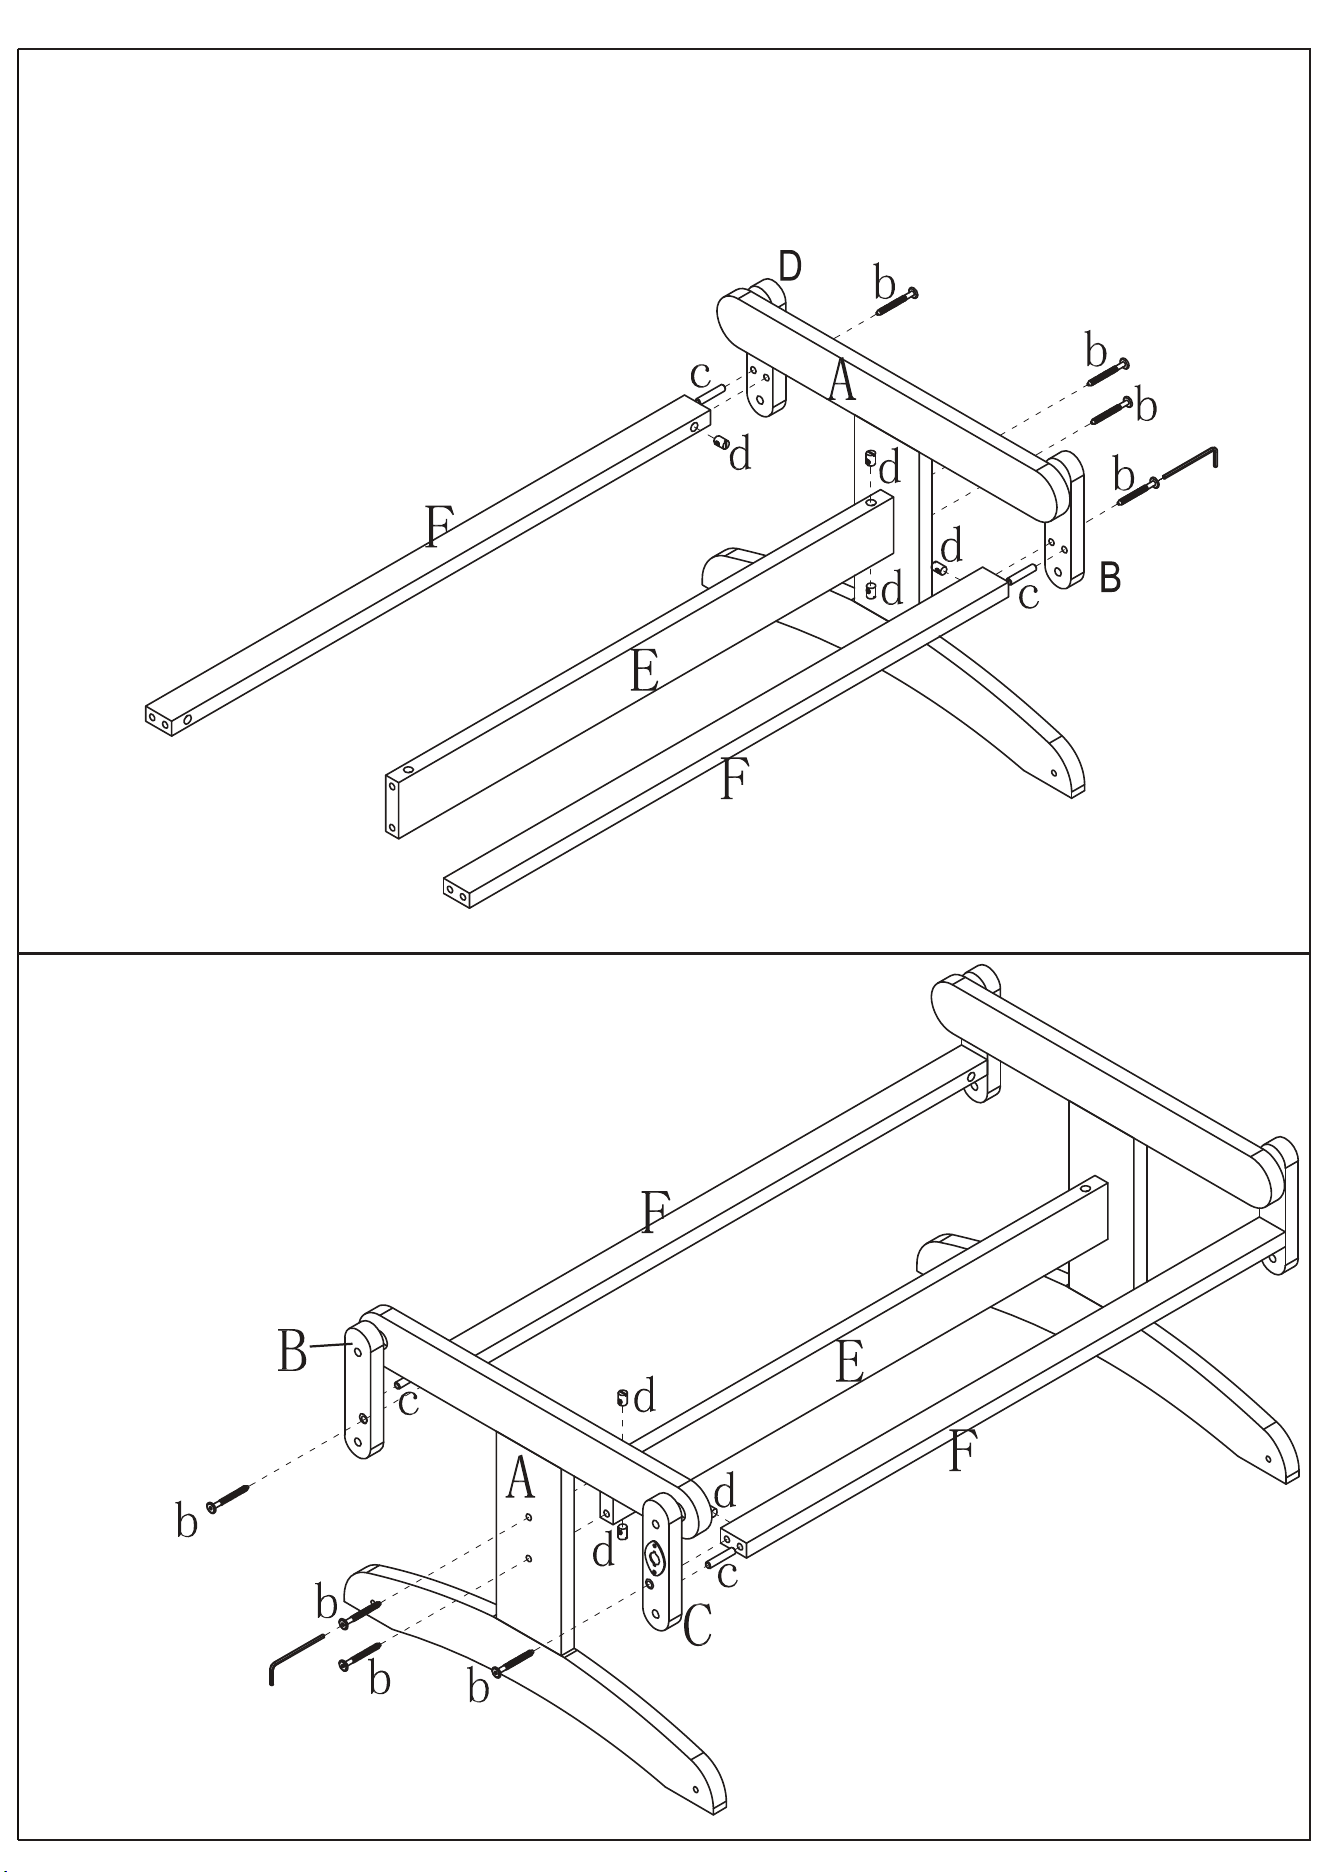
STEP 2
Connect the midlle bar (E),side
bars (F) by inserting the allen
head bolts (b), barrel nuts (d),
and wood dowels (c) with the
allen key (q ).
Connect middle bar(E) and
side bars (F) to the wood pin
(B) and (C) by using the allen
head bolts (b),barrel nuts(d),
and wood dowels (c).
STEP 3
q
q
6
Release the Swing lock (f),and insert (f) through the holes
on the headboard (H), and tighten the bolt.
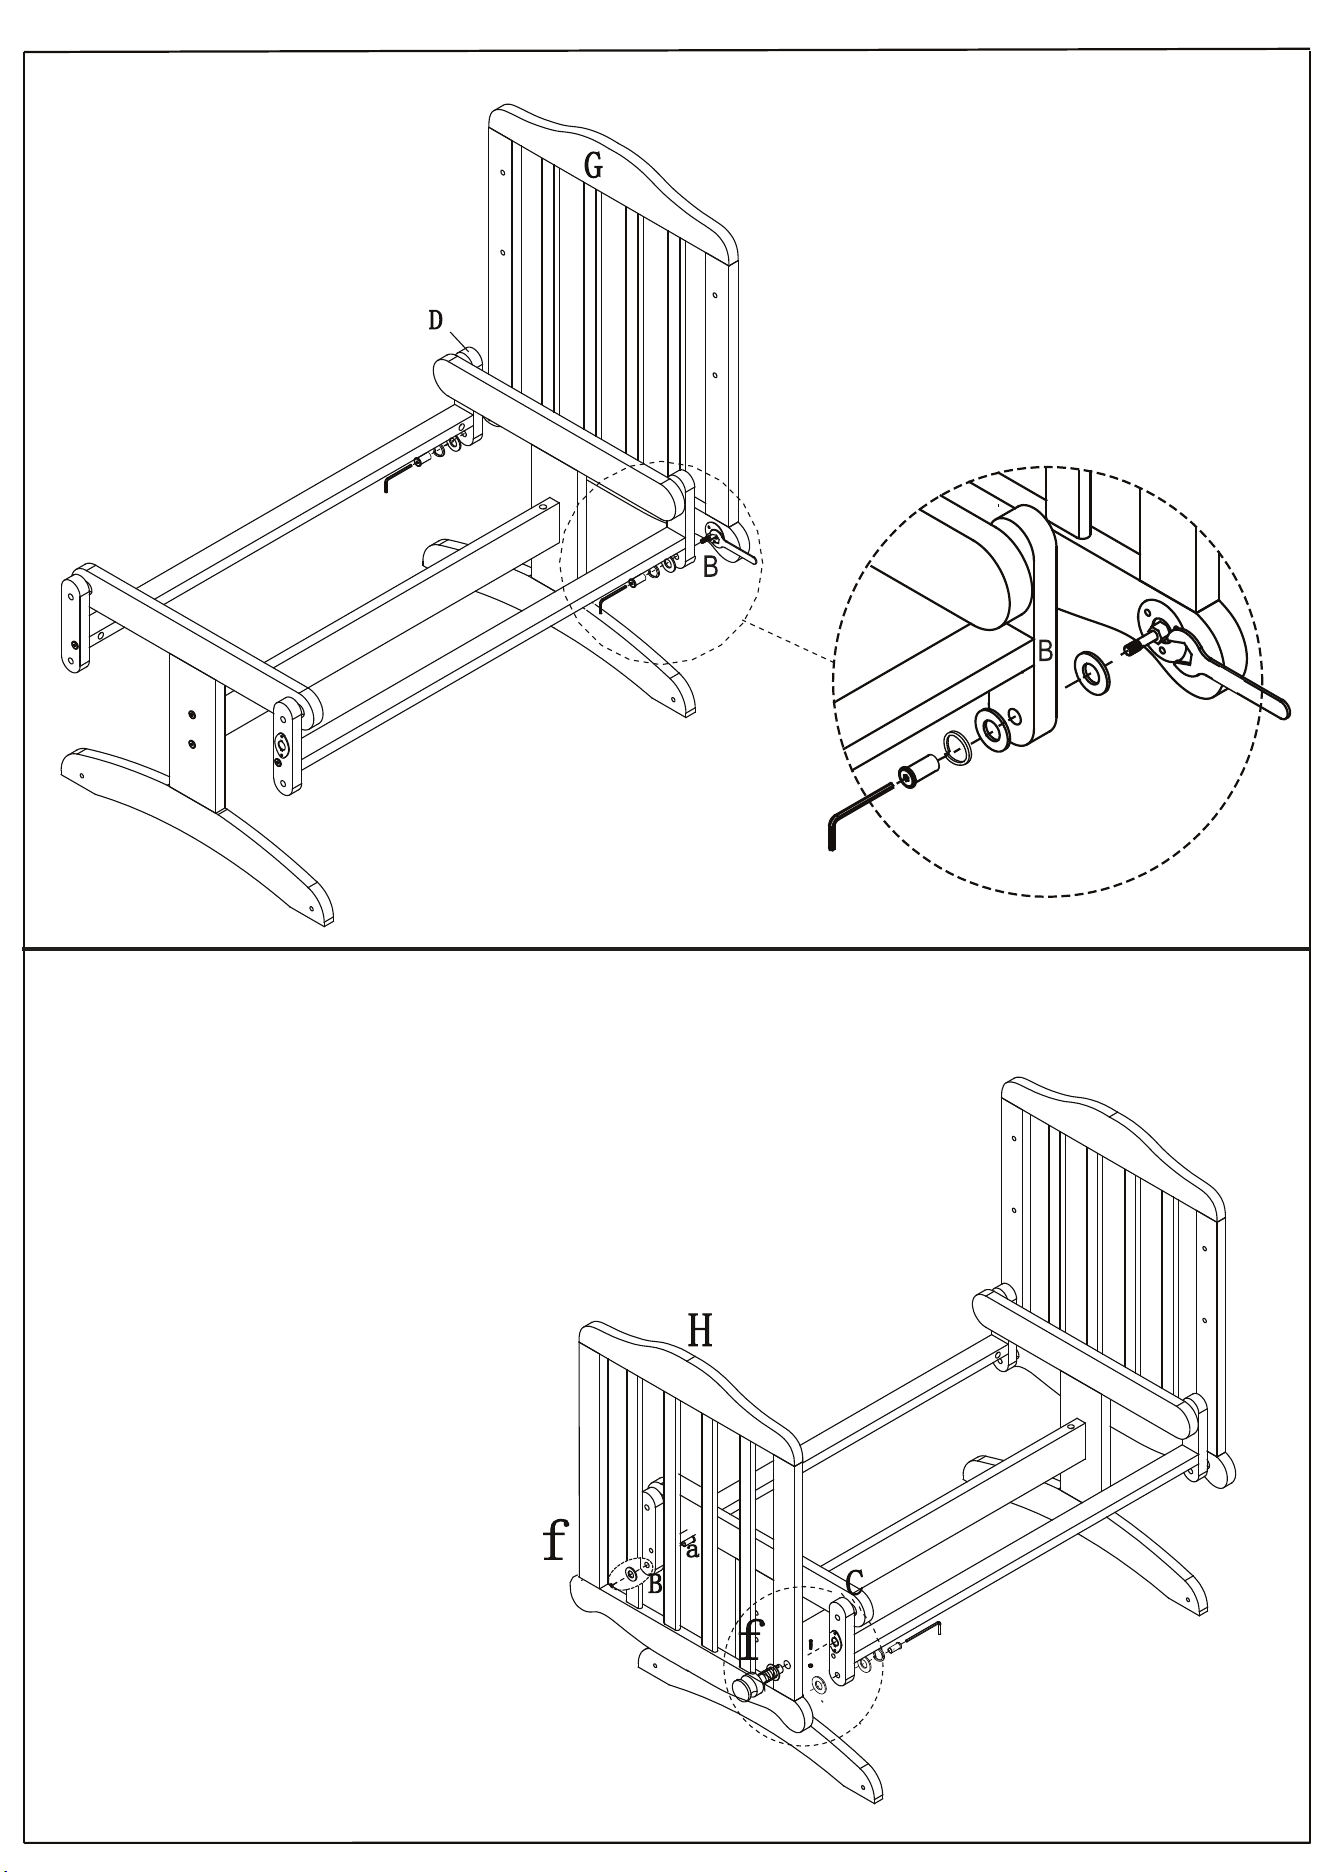
Connect the headboard (H) to the wood pins (C) and (B)
with the bearings (a) by using the allen key(q) and wrench(r).
Connect the headboard (G) to
the wood pins (B) and (D)
with the bearings (a) by using
allen key (q) and the wrench(r)
A
F
G
Step 4
Step 5
m
r
m
m
k
a
q
m
k
a
q
k
a
q
m
m
k
q
a
7
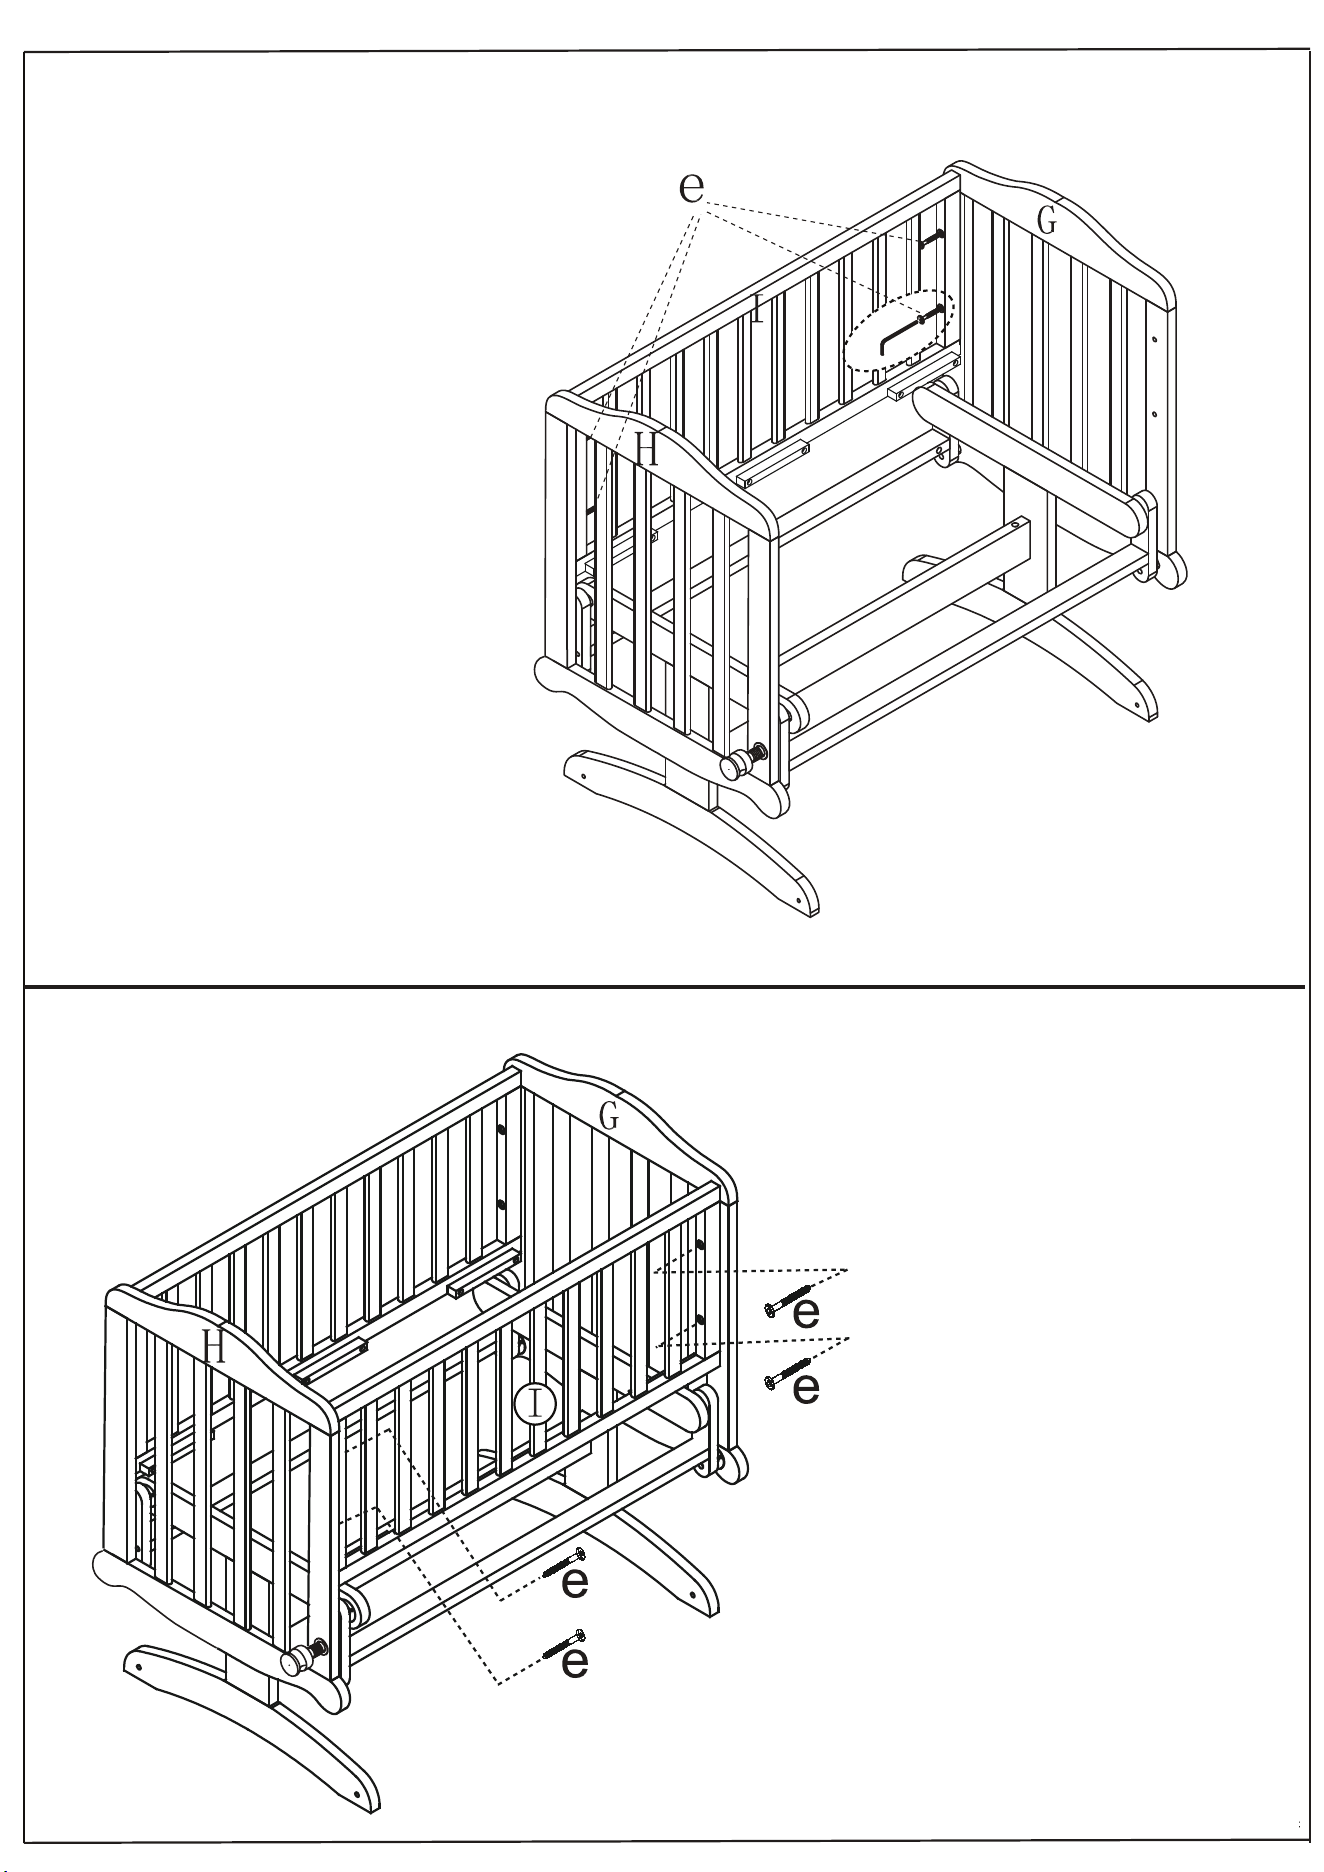
Step 6
Step 7
Connect the side rail (I) to
the headboard (G) and (H)
with the allen head bolts(e)
by using the allen key (q ).
Connect the side rail (I) to
the headboard (G) and (H)
with the allen head bolts(e)
by using the allen key (q ).
q
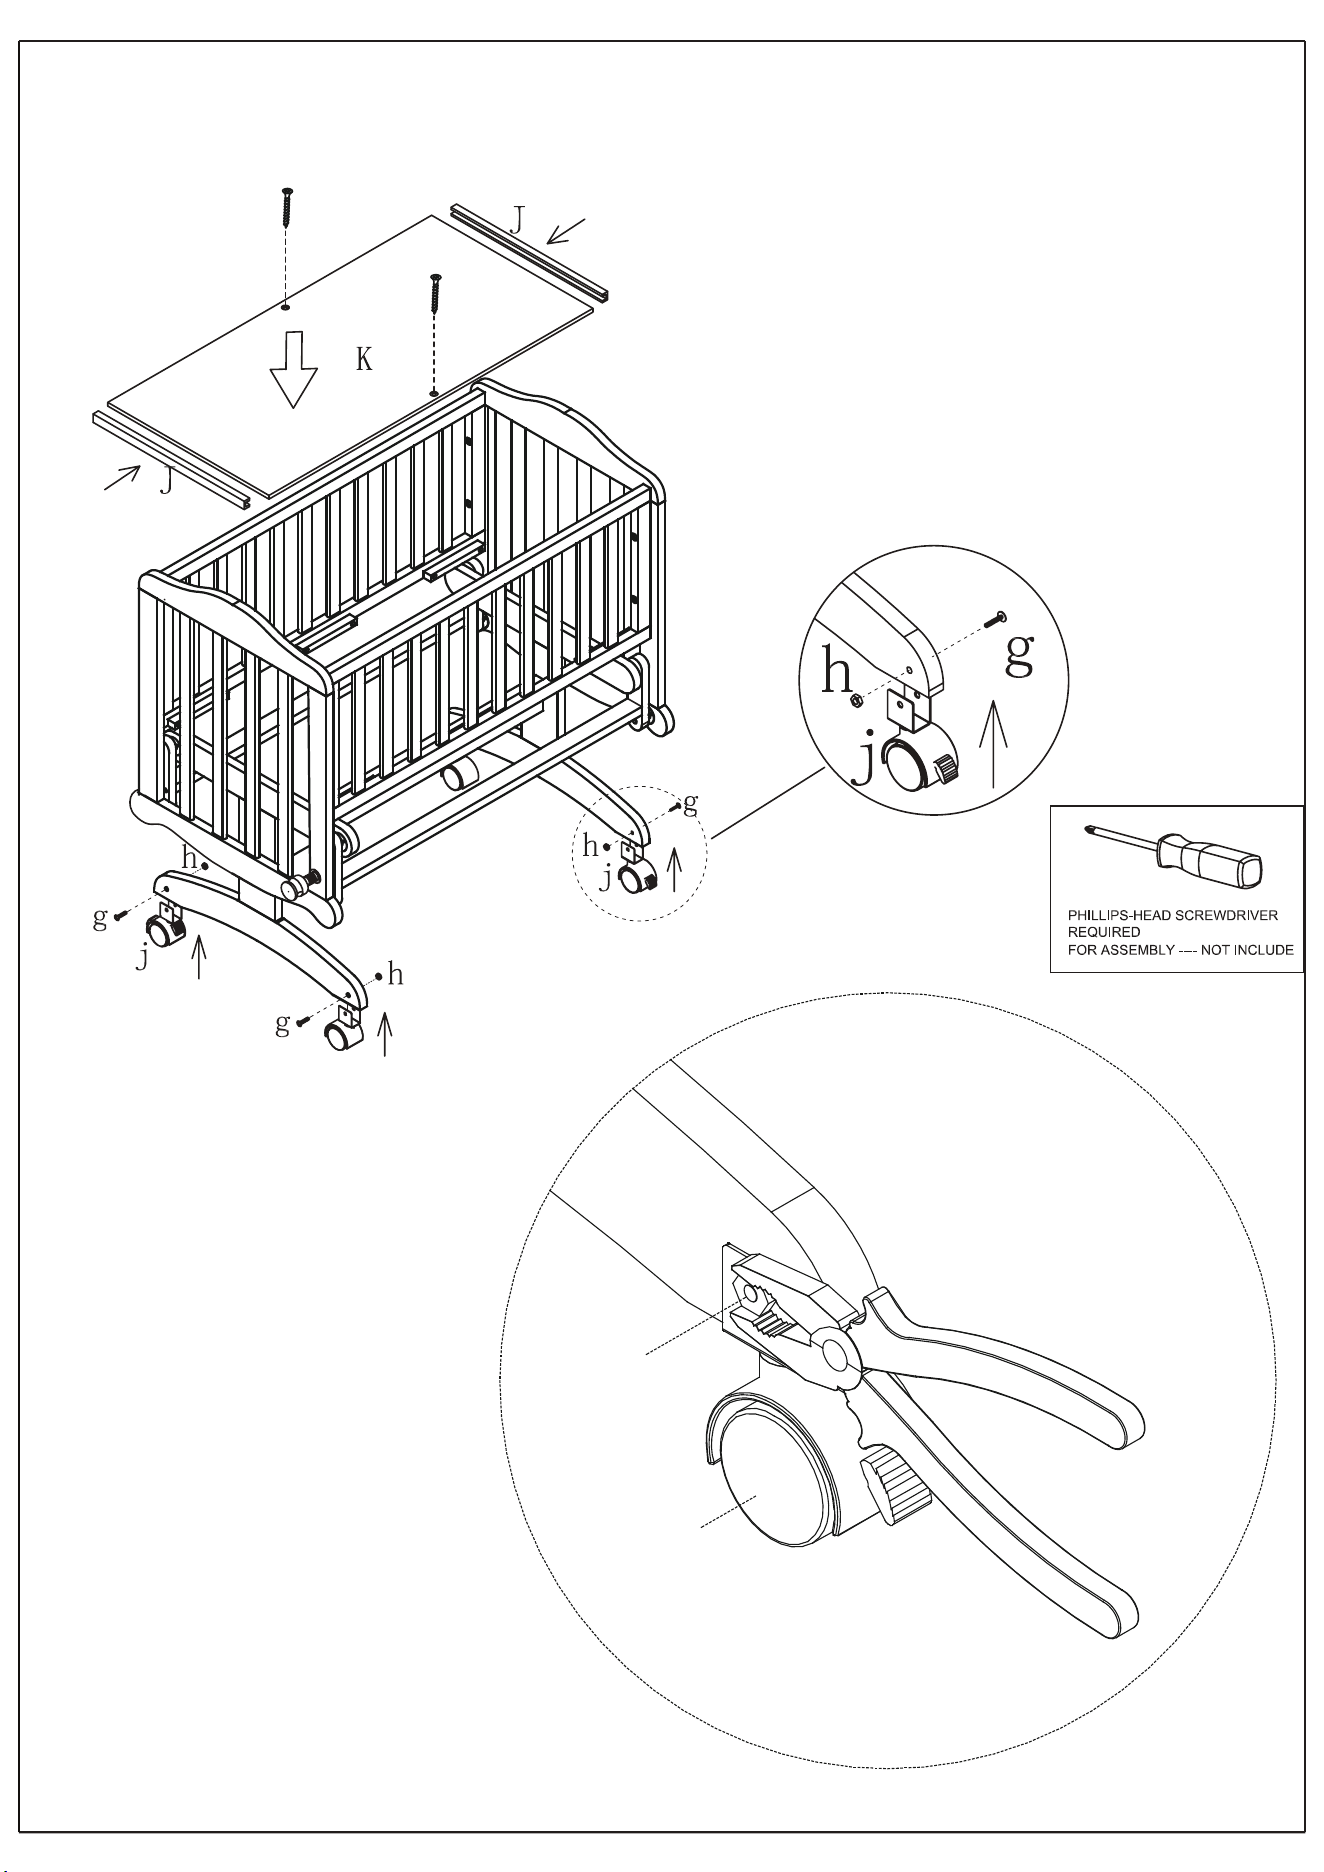
Step 8
1.Insert the four casters (j&i) with screw (g)
and nuts(h) as shown,and tighten the bolts.
i
A
A
i
n
n
8
2.Assembled the cradle base supporters (J)
to the mattress support (K).
3.Assembled the mattress support (K) to the
to the assembled parts of STEP 7 by using
screw (n).Tighten all by phillips-head
screwdriver.
Note for Step 8:
When you tighten the nut to the bolt
for the casters, please use a wrench
or plyers to strengthen the nut and
bolt securel
between the bolt and the base leg
of the cradle. By doing this it will
ensure the bolt does not come loose
during usage.
h
j
9
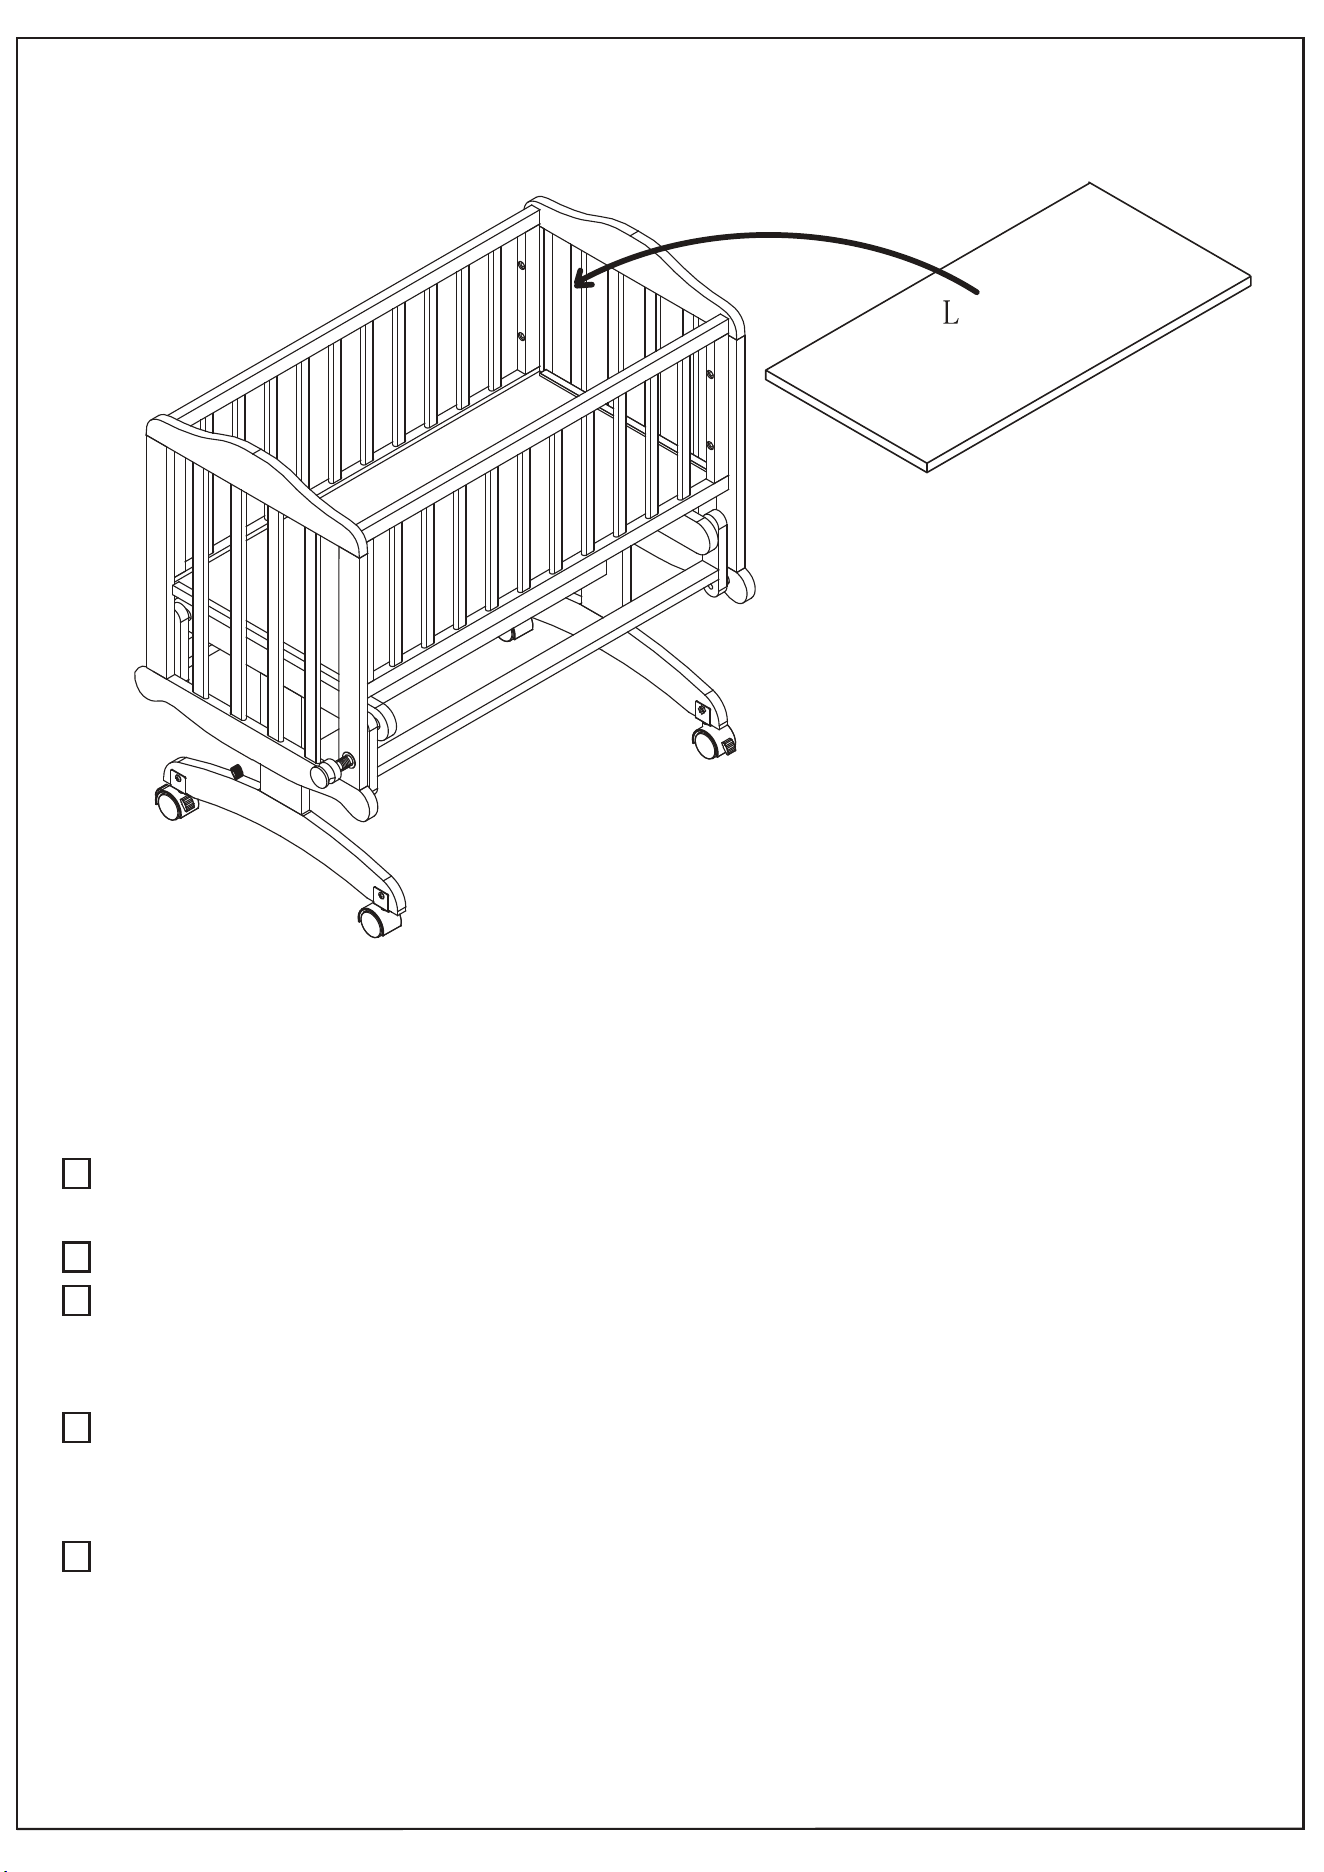
Step 9
Put the mattress (L) on the
mattress support.
LIMITED WARRANTY
Dream on Me warrants its product to be free from defects in material and
workmanship and agrees to remedy any such defect.
This warranty covers 30 days from the date of original purchase.
This warranty is valid only upon presentation of proof of purchase.
This is solely limited to the repair or replacement of defective furniture
components and no assembly labor is included.
This warranty does not apply to any product which has been improperly
assembled, subjected to misuse or abuse or which has been altered or
repaired in any way.
This warranty gives you specific legal rights and you may also have other
rights which vary from State to State.
WARNING: Should this product become damaged, and/or components
are broken or missing, DO NOT USE

Enter our monthly giveaway!
Simply scan the QRcode to register.
Chat with us!
For any questions or concerns or feedback.
1532, S. Washington Avenue
Piscataway, NJ 08854
E-mail: [email protected]
www.dreamonme.com
Follow us on
to get your nursery featured on our social media.
@dreamonmeinc
@dreamonmeinc