‘
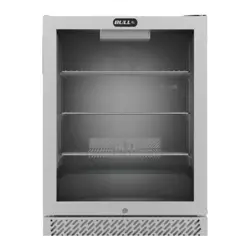
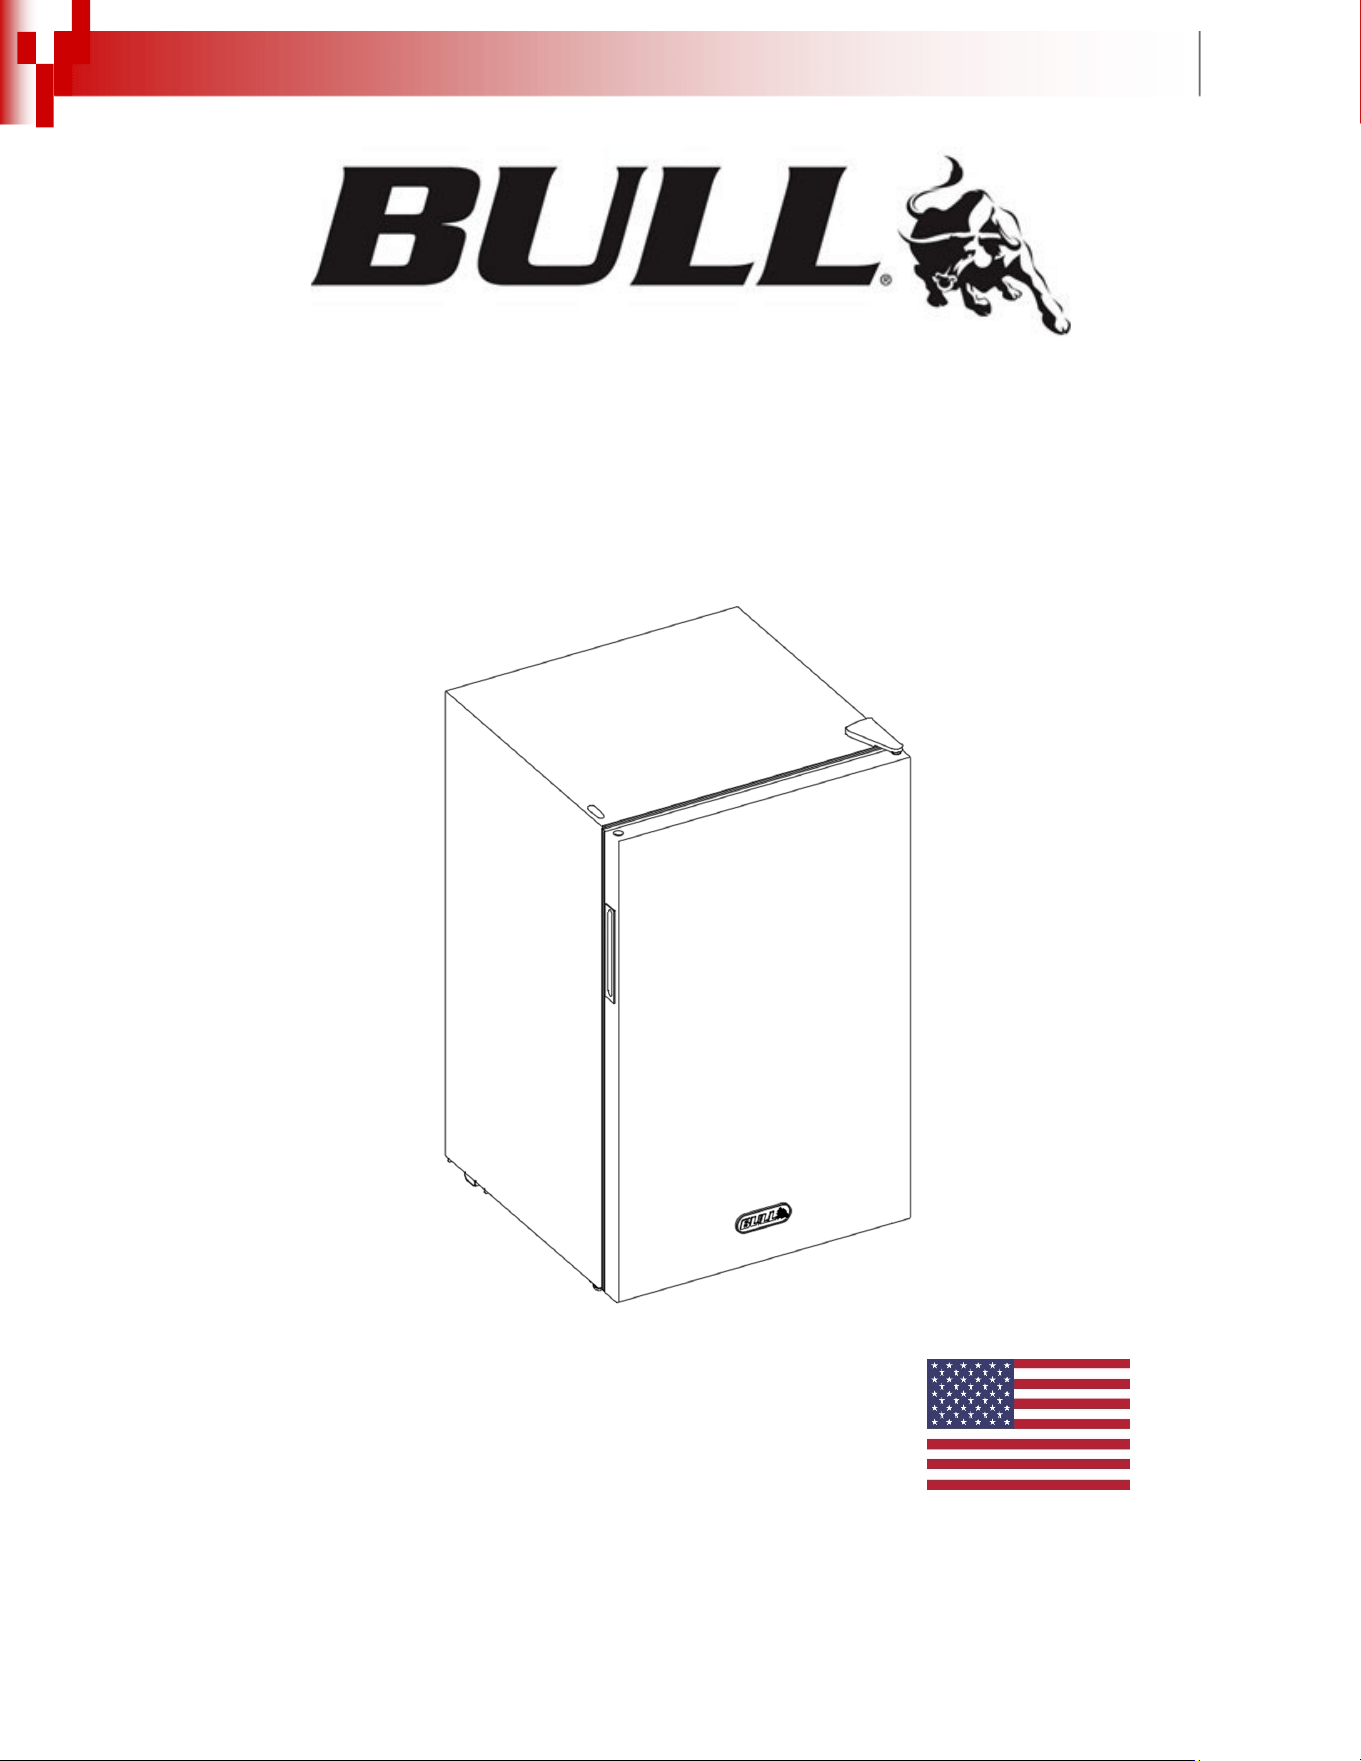
SELECT CONTEMPORARY REFRIGERATOR
OWNER MANUAL
MODEL #11520
USA EDITION
1
TABLE OF CONTENTS PAGE#
APPLIANCE SAFETY AND IMPORTANT SAFEGUARDS………………………………………………………………………………………………………2
ELECTRICAL REQUIREMENTS / EXTENSION CORD REQUIREMENTS……………………………………………………………………………………3
INSTALLATION INSTRUCTIONS
LOCATION GUIDELINES…………………………………………………………………………………………………………………………4
VENTILATION……………………………………………………………………………………… ……………………………………4
LEVELING.………………………………………………………………………………………………………………………………………….4
CHANGING THE DOOR SWING DIRECTION………………………………………………………………………………………………………………… 5-6
OPERATION GUIDELINES
SETTING THE TEMPERATURE CONTROL ......................................................................................................................................... 6
ELECTRICAL .......................................................................................................................................................................................... 6
STORING FOODS .................................................................................................................................................................................. 6
ROUTINE MAINTENANCE
AUTOMATIC DEFROSTING OF THE REFRIGERATOR ...................................................................................................................... 7
CLEANING THE UNIT ............................................................................................................................................................................ 7
POWER FAILURE .................................................................................................................................................................................. 7
VACATION TIME .................................................................................................................................................................................... 7
MOVING YOUR UNIT ............................................................................................................................................................................. 7
ENERGY SAVING TIPS ......................................................................................................................................................................... 7
TROUBLESHOOTING ..................................................................................................................................................................................................... 8
PRODUCT REGISTRATION, REPLACEMENT PARTS ORDERING INSTRUCTIONS ................................................................................................. 9
REPLACEMENT PARTS LIST WIT EXPLODED ILLUSTRATION ............................................................................................................................... 10
WARRANTY POLICY .................................................................................................................................................................................................... .11-13
- READ THE FOLLOWING INSTRUCTIONS CAREFULLY AND BE SURE YOUR REFRIGERATOR IS PROPERLY INSTALLED, ASSEMBLED
AND CARED FOR. FAILURE TO FOLLOW THESE INSTRUCTIONS MAY RESULT IN SERIOUS BODILY INJURY AND/OR PROPERTY
DAMAGE. IF YOU HAVE QUESTIONS CONCERNING ASSEMBLY OR OPERATION, CONSULT YOUR DEALER OR APPLIANCE SERVICE
REPRESENTATIVE.
- NOTE TO INSTALLER:
LEAVE THESE INSTRUCTIONS WITH THE CONSUMER AFTER INSTALLATION.
- NOTE TO THE CONSUMER:
RETAIN THESE INSTRUCTIONS FOR FUTURE REFERENCE.
- THIS REFRIGERATOR IS INTENDED FOR STORING BEVERAGES AND FRESH FOODS AT TEMPERATURES HIGHER THAN 0°C/32°F.
*FOR WARRANTY PURPOSES, PLEASE RECORD YOUR SERIAL NUMBER, DATE OF PURCHASE & A COPY OF YOUR RECEIPT OR
INVOICE IN YOUR MANUAL ON PAGE 9.
BEFORE INSTALLATION OR USE, PLEASE READ AND
FOLLOW ALL SAFETY RULES AND OPERATING INSTRUCTIONS
V2023.11.02
2
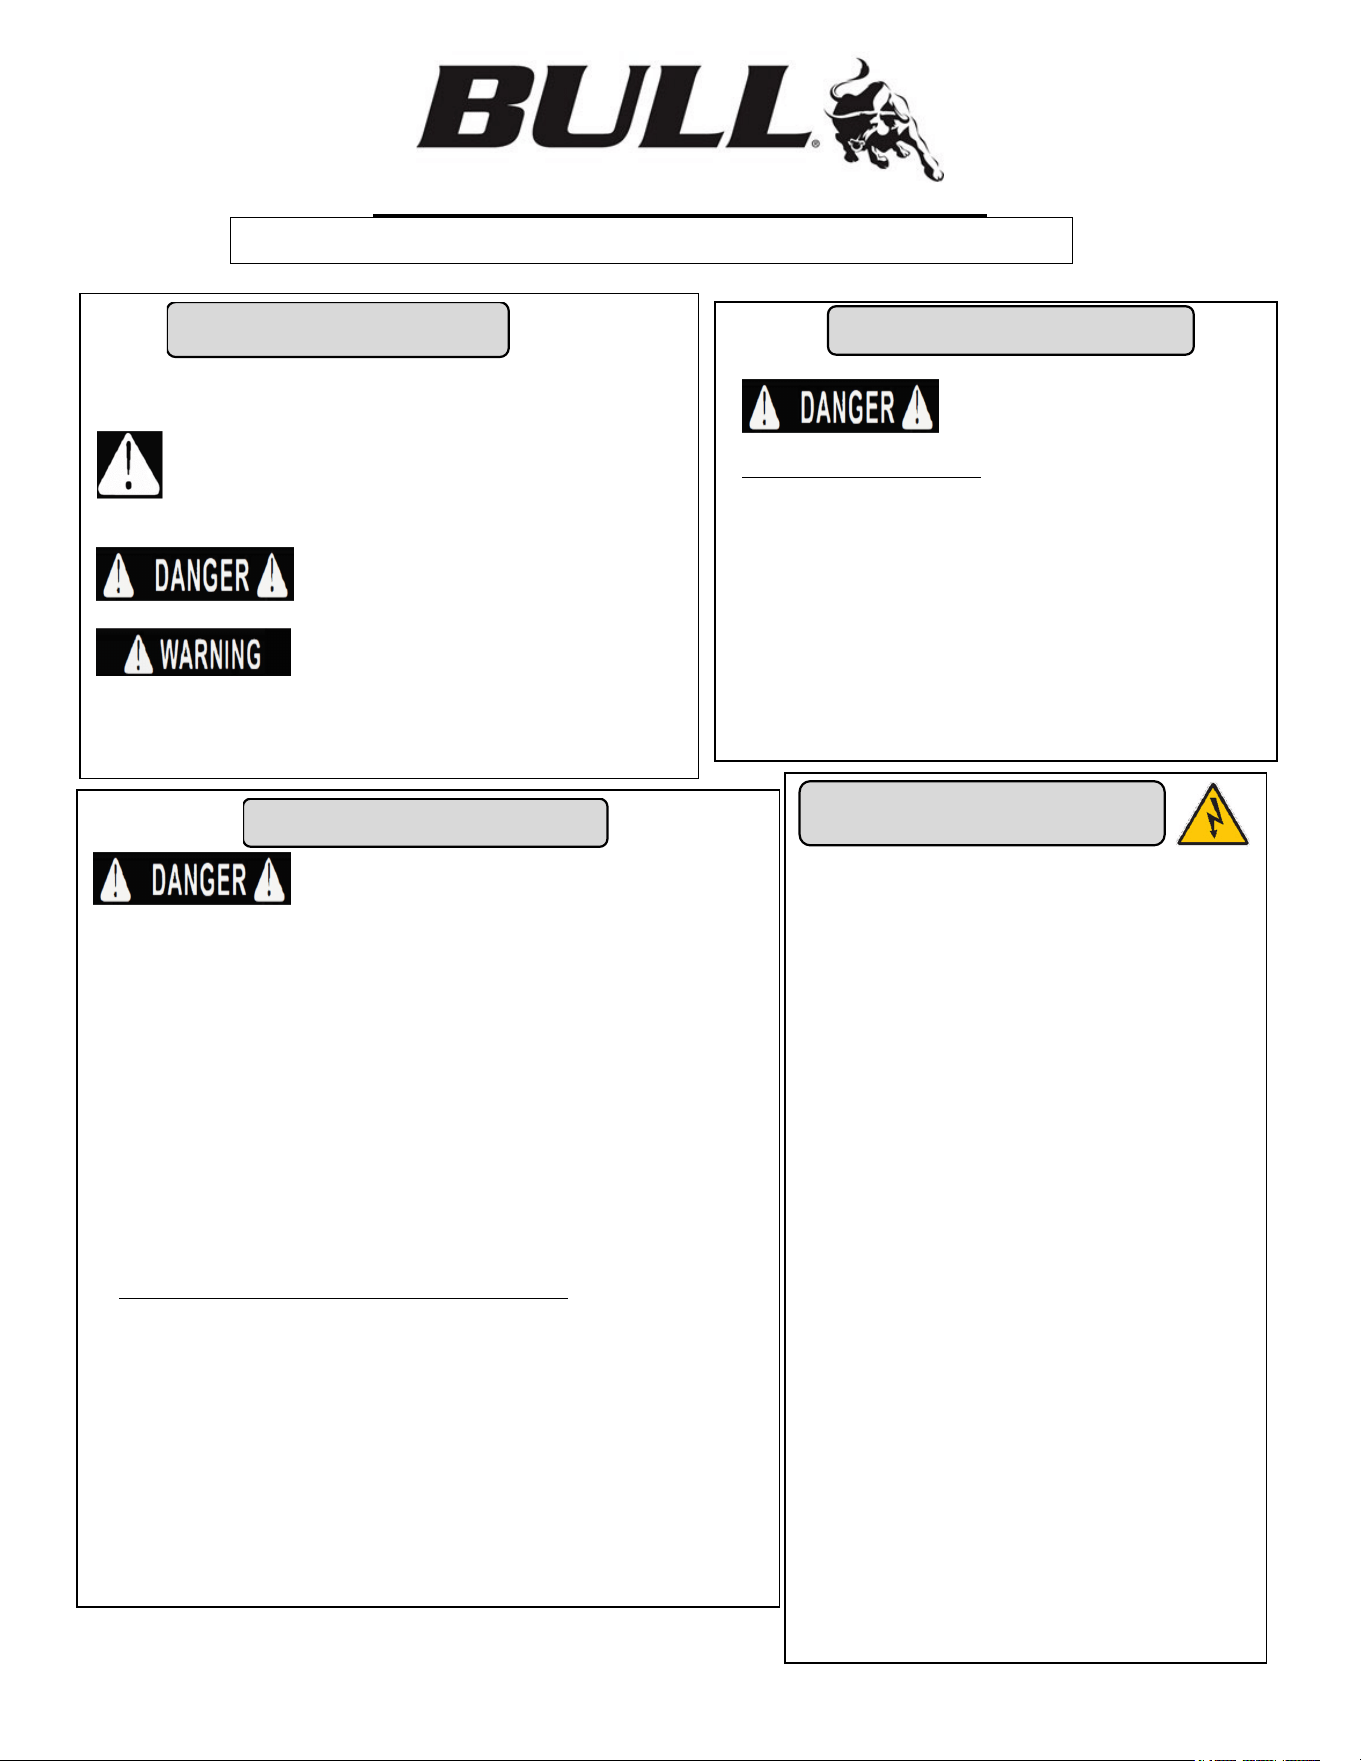
APPLIANCE SAFETY AND IMPORTANT SAFEGUARDS
READ CAREFULLY BEFORE OPERATION OF YOUR REFRIGERATOR
Your safety and the safety of others is very important.
We have provided many safety messages in this manual and on your
refrigerator. Always read and obey all safety messages.
This is the Safety Alert Symbol. This symbol alerts you to potential
hazards that can injure or kill you and others. All safety messages will follow the
Safety Alert Symbol with the word ‘DANGER’ or ‘WARNING’
‘DANGER’ means that failure to heed this safety
statement may result in severe personal injury or death.
‘WARNING’ means that failure to heed this safety
statement may result in extensive product damage, severe personal injury, or
death. All safety messages will alert you about the potential hazard, tell you how
to reduce the chance for injury and let you know what can happen if the
instructions are not followed.
APPLIANCE SAFETY
RISK OF CHILD ENTRAPMENT
Child entrapment and suffocation are not problems of the past.
Junked or abandoned appliances are still dangerous, so please do
the following before discarding your old refrigerator:
1) Take off the doors or drawers.
2) Leave shelves in place so children may not easily climb inside.
3) Never allow children to operate, play with, or climb inside the
refrigerator.
PROPER DISPOSAL:
Before you throw away your refrigerator:
Please take off the door so that children cannot easily climb in
and be trapped.
CHILD SAFETY
Before the refrigerator is used, it m\ust be properly positioned and insatalled as described in
this manual, so read the manual carefully to reduce the risk of fire, electrical shock or injury
when using the appliance by folllowing the basic precautions below:
Do not put your hands under the unit when the unit is required to be moved.
•
Do not store or use gasoline or other liquids with flammable vapors in the vicinty of
the or any other appliance that can create a fire or explosion hazard.
•
Do not attempt to repair or replace any part of your refrigerator unless it is specifically
recommended in this manual. All other servicing should be referred to a qualified
technician.
•
When the unit is not in use for a long period of time, please unplug the unit from the
outlet.
•
After unplugging the unit, wait at least 10 minutes before re-plugging it. Failure to do
so could cause damage to the compressor.
•
Do not defrost the appliance with other electric appliances (for example a hair dryer)
and never attempt to scrape/remove ice/frost with sharp objects.
•
During maintenance and cleaning, please unplug the unit.
Never clean refrigerator parts with flammable fluids. The fumes can create a fire hazard
or explosion.
The refrigerator must be installed with all electrical connections in accordance with state
and local codes. A standard electrical supply (115V AC only, 60Hz), properly grounded in
accordance with the National Electrical Code and ordinances is required.
Do not use solvent-based cleaning agents of abrasives on the interior. These cleaners
may damage or discolor the interior.
Do not attempt to remove or repair any component unless instructed by factory.
Make sure that the unit is not resting on or against the electrical cord and plug.
To minimize personal injury, do not hang on the door.
Do not store any flammable and explosive gas or liquids inside the unit.
Do not attempt to alter or tamper with the electrical cord.
IMPORTANT SAFEGUARDS
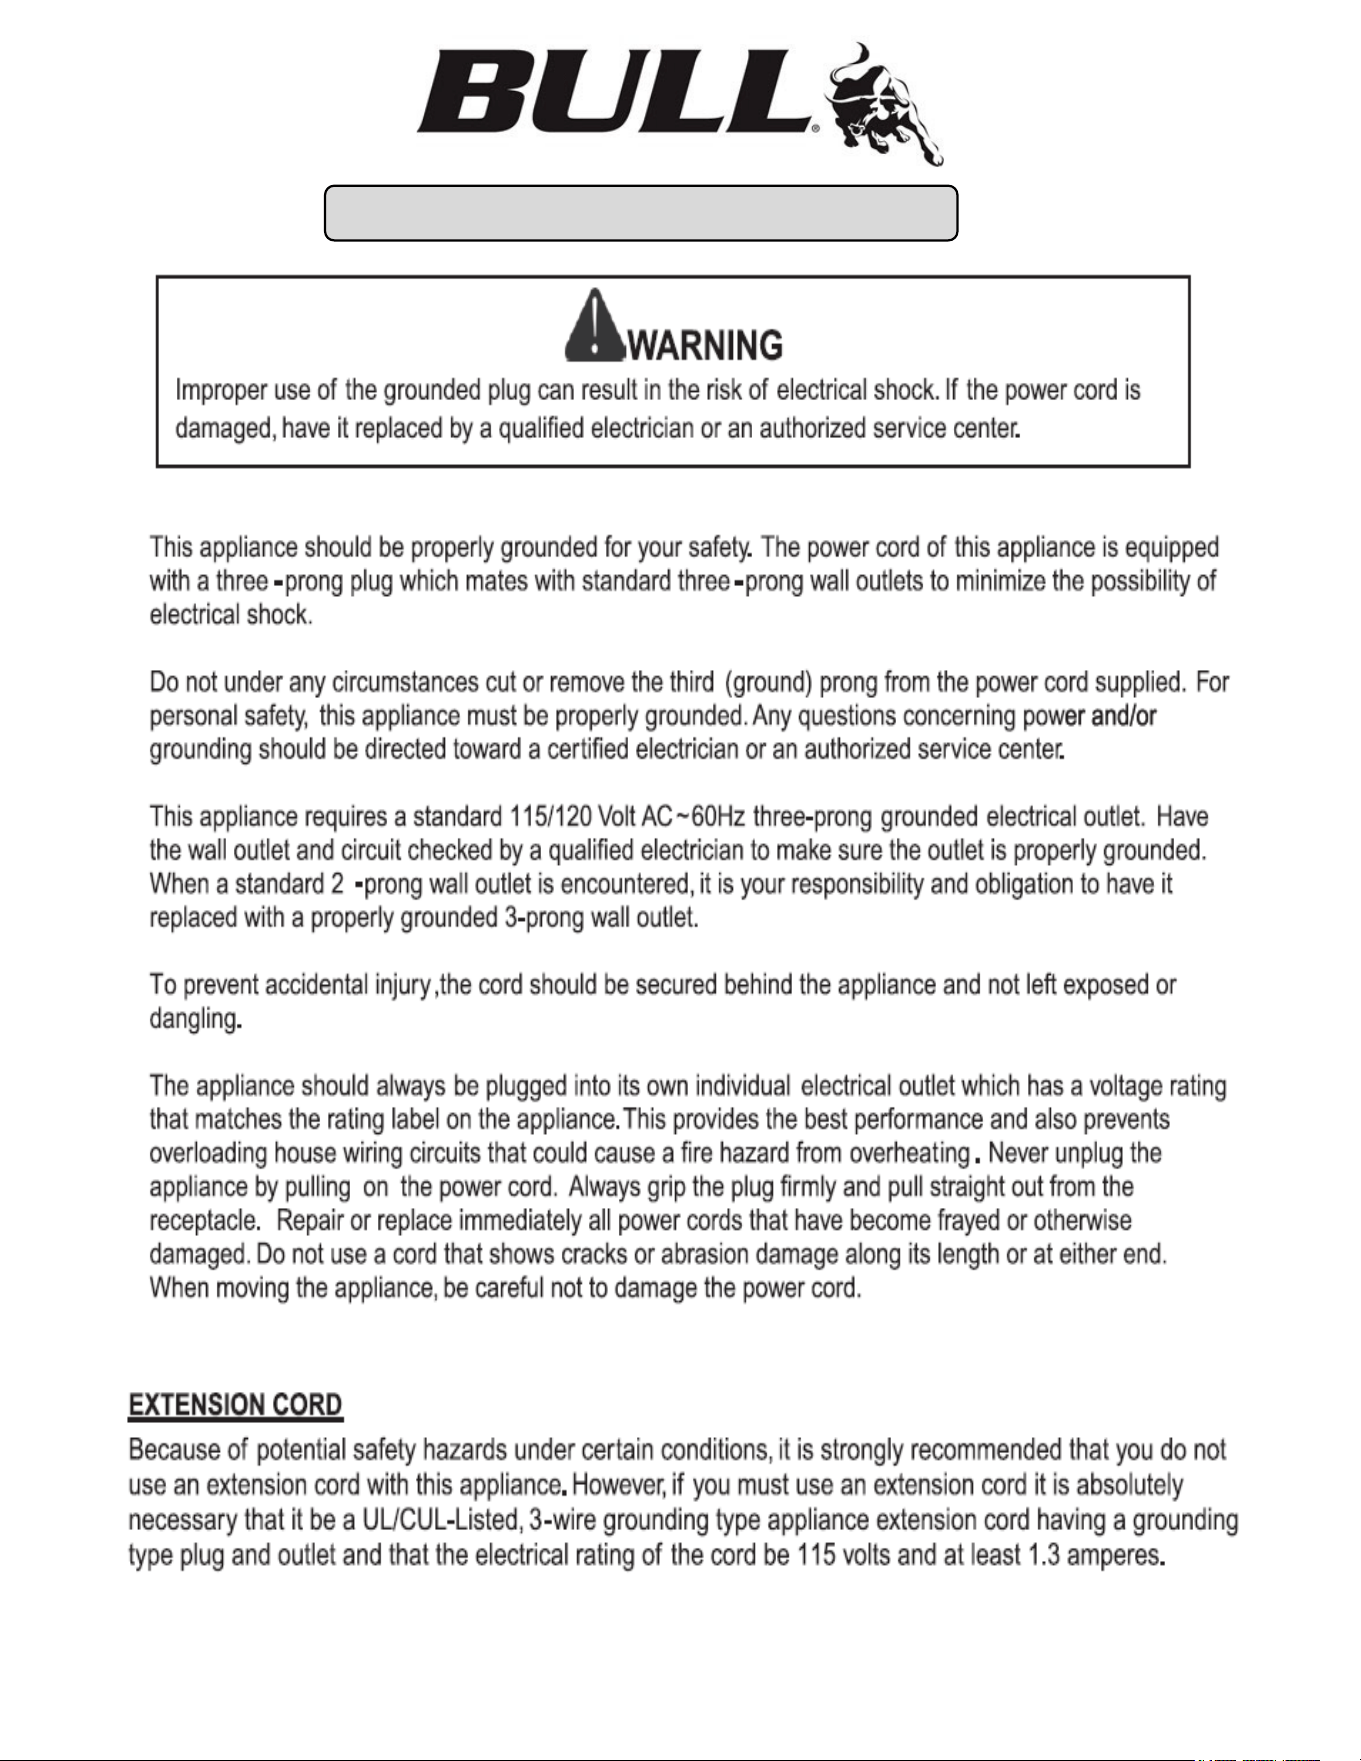
Electrical Grounding Required
1) To minimize shock and fire hazards, make sure that the
unit is properly grounded.
•
It is recommended your Refrigerator be powered by a
separate circuit dedicated only to your appliace to
minimize shock and fire hazards, be sure not to
overload outlet. Please designate one outlet for your
unit and that cannot be turned off by a switch or pull
chain. The fuse or circuit breaker size should be 15
amps.
This appliance is equipped with a 3 prong (grounding)
polarized plug and must be plugged into a 3 prong outlet.
for your protection against possible shock hazards.
Where a 2 prong wall receptacle is encountered or a
longer power cord is required, contact a qualified
electrician to have it replaced in accordance with
applicable electrical codes.
•
NEVER remove the grounding prong from the plug.
•
NEVER use a 2 prong grounding adapter.
•
NEVER use an extension cord connect power to the
unit
•
Use a receptacle that cannot be turned off by a switch
or pull-chain.
•
Do not connect or disconnect the electric plug when
your hands are wet
•
Unplug the refrigerator or disconnect power before
cleaning or servicing. Failure to do so can result in
electrical shock or death.
•
.Never clean Electrical cord for Refrigerator s with
flammable liquids. These liquids have fumes that can
create a fire or explosion hazard.
ELECTROCUTION HAZARD
3
ELECTRICAL REQUIREMENTS
4
INSTALLATION INSTRUCTIONS
READ CAREFULLY BEFORE INSTALLATION OF YOUR REFRIGERATOR
GUIDELINES FOR SETTING UP YOUR REFRIGERATOR
THE REFRIGERATOR MUST BE INSTALLED ACCORDING YOUR LOCAL CODES AND ORDINANCES.
BEFORE INSTALLING YOUR APPLIANCE
1) Remove the exterior and interior packing.
2) Before connecting the refrigerator to the power source, let it stand for approximately 24 hours.This will reduce the possibility of a
malfunction in the cooling system from handling during transportation.
3) Clean the interior surface with lukewarm water using a soft cloth.
LOCATION SELECTION
1) Your refrigerator has been designed for built-in or free standing use.
2) The location should be on a flat, level surface, preferably a dedicated floor. DO NOT
set up on bare ground.
3) Do not install in a location where the temperature will be below 50
degrees Fahrenheit, or in a moist area
REASONS WHY THESE LOCATION GUIDELINES ARE IMPORTANT
1) Install the unit on a strong and level surface, otherwise:
• Unit may make unpleasant noises.
• Unit may malfunction.
2) Install the unit in a dry, well-ventilated area.
3) Avoid locations that will expose unit to:
•
Direct sunlight
•
Prolonged temperatures below (32°F- 0°C) may also cause the unit not to perform properly.
• Prolonged temperatures above (90°F- 32°C) will cause the compressor to overwork, leading to higher energy
bills and gradual breakdown of the unit.
•
Avoid installation in a high humidity and/or dusty area.
• Humidity which could cause unit to rust and decrease efficiency of the unit.
• Excessive Dust that if allowed to collect on condenser coil will cause unit to malfunction. Clean the condenser at
least once a month with a brush or clean cloth.
• Heat emitting devices (for example cooking appliances, radiators, water heaters, or similar devices) and
moisture- generating equipment.
VENTILATION
1) The unit must have more than 4 inches of clearance from the back of the unit to any walls for ventilation purposes.
Also make sure there is nothing stuck underneath the unit.
2) No air space is required for the bottom, side or top
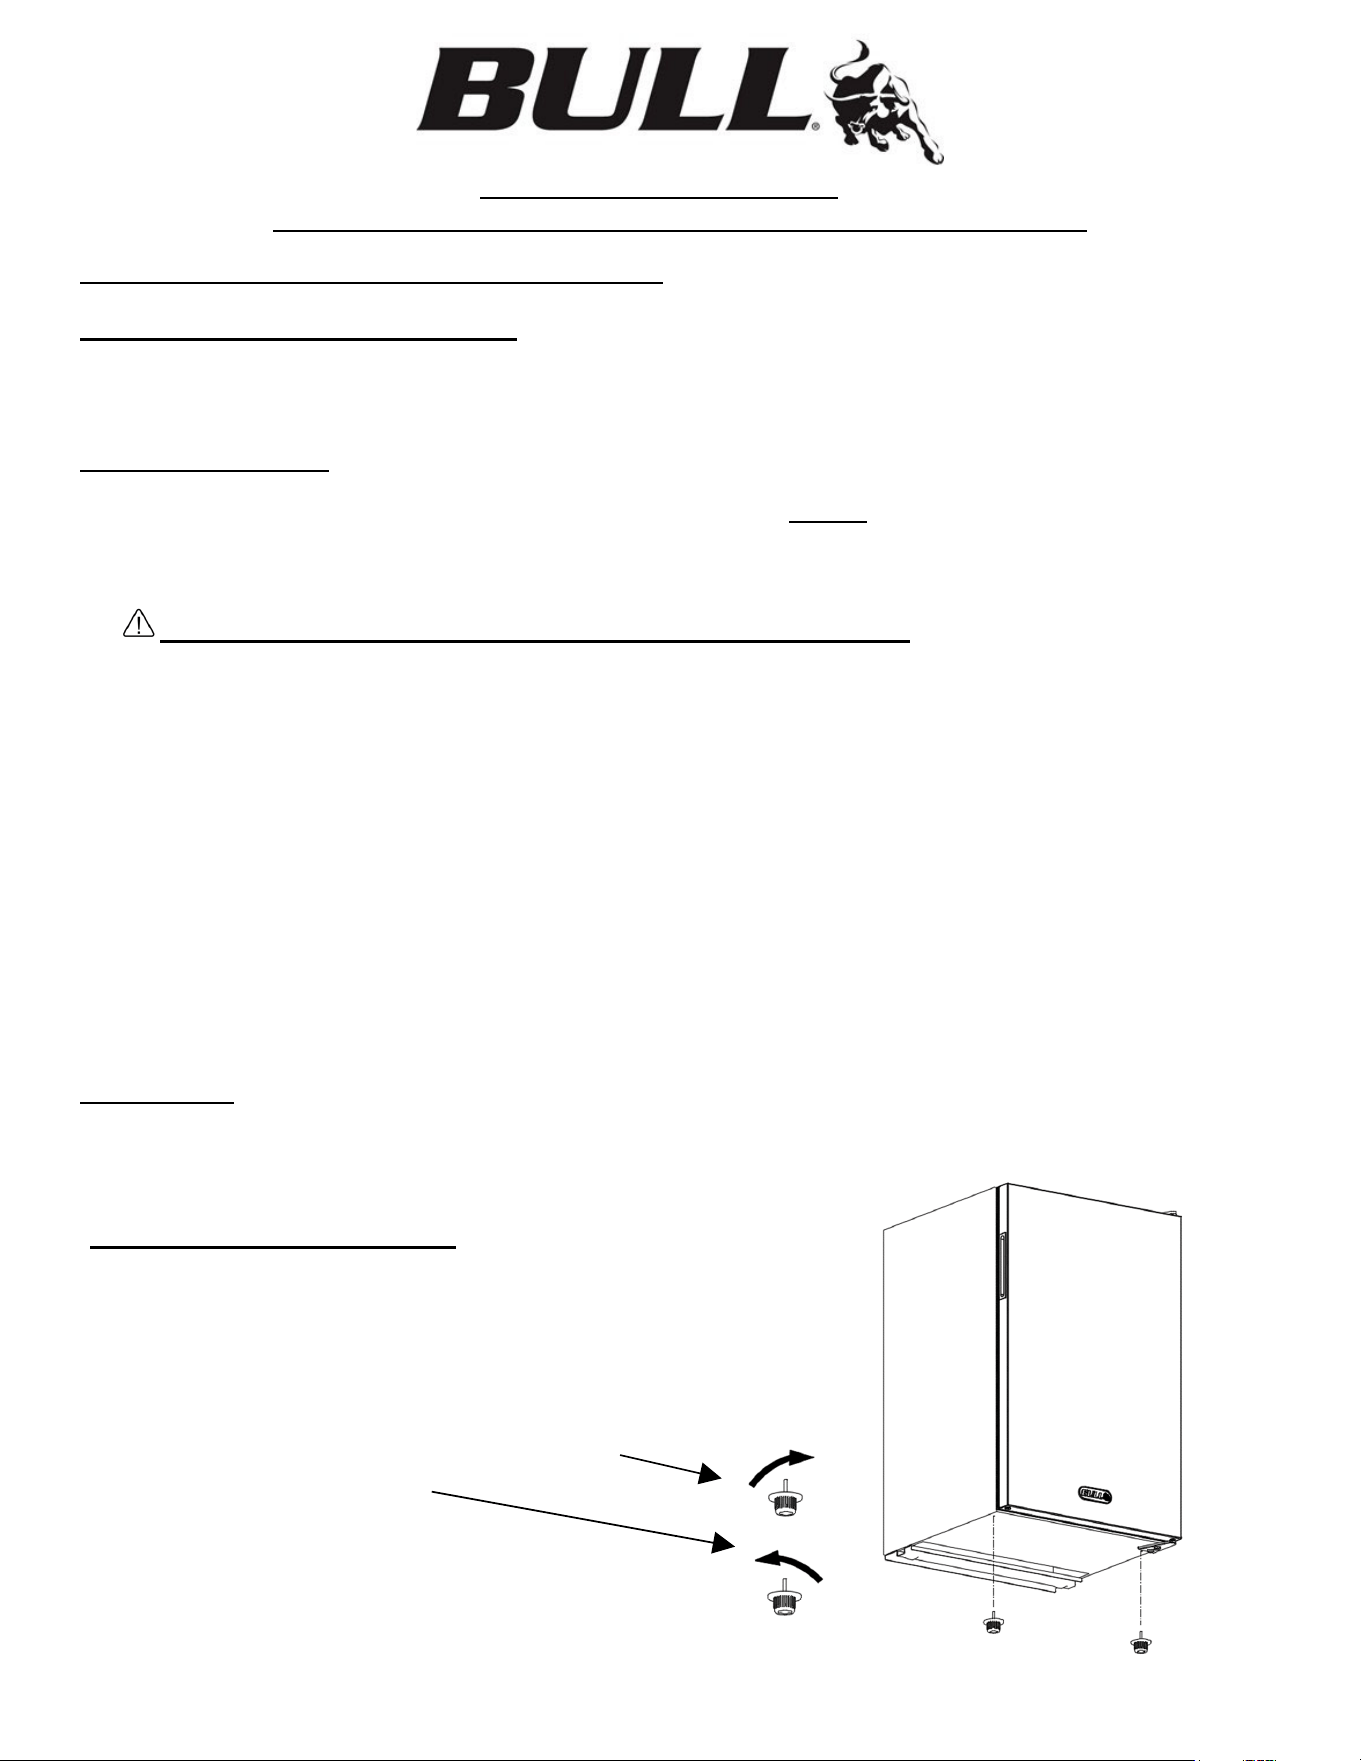
LEVELING YOUR REFRIGERATOR
Your Refrigerator has 2 adjustable feet on the bottom.
Do not operate your Refrigerator without them.
They serve two important roles:
a. They are used to level your refrigerator.
b. They provide a gap below the refrigerator allowing air
flow.
Rotate the adjusting feet clockwise to decrease height, or
counter clockwise to increase height.
5
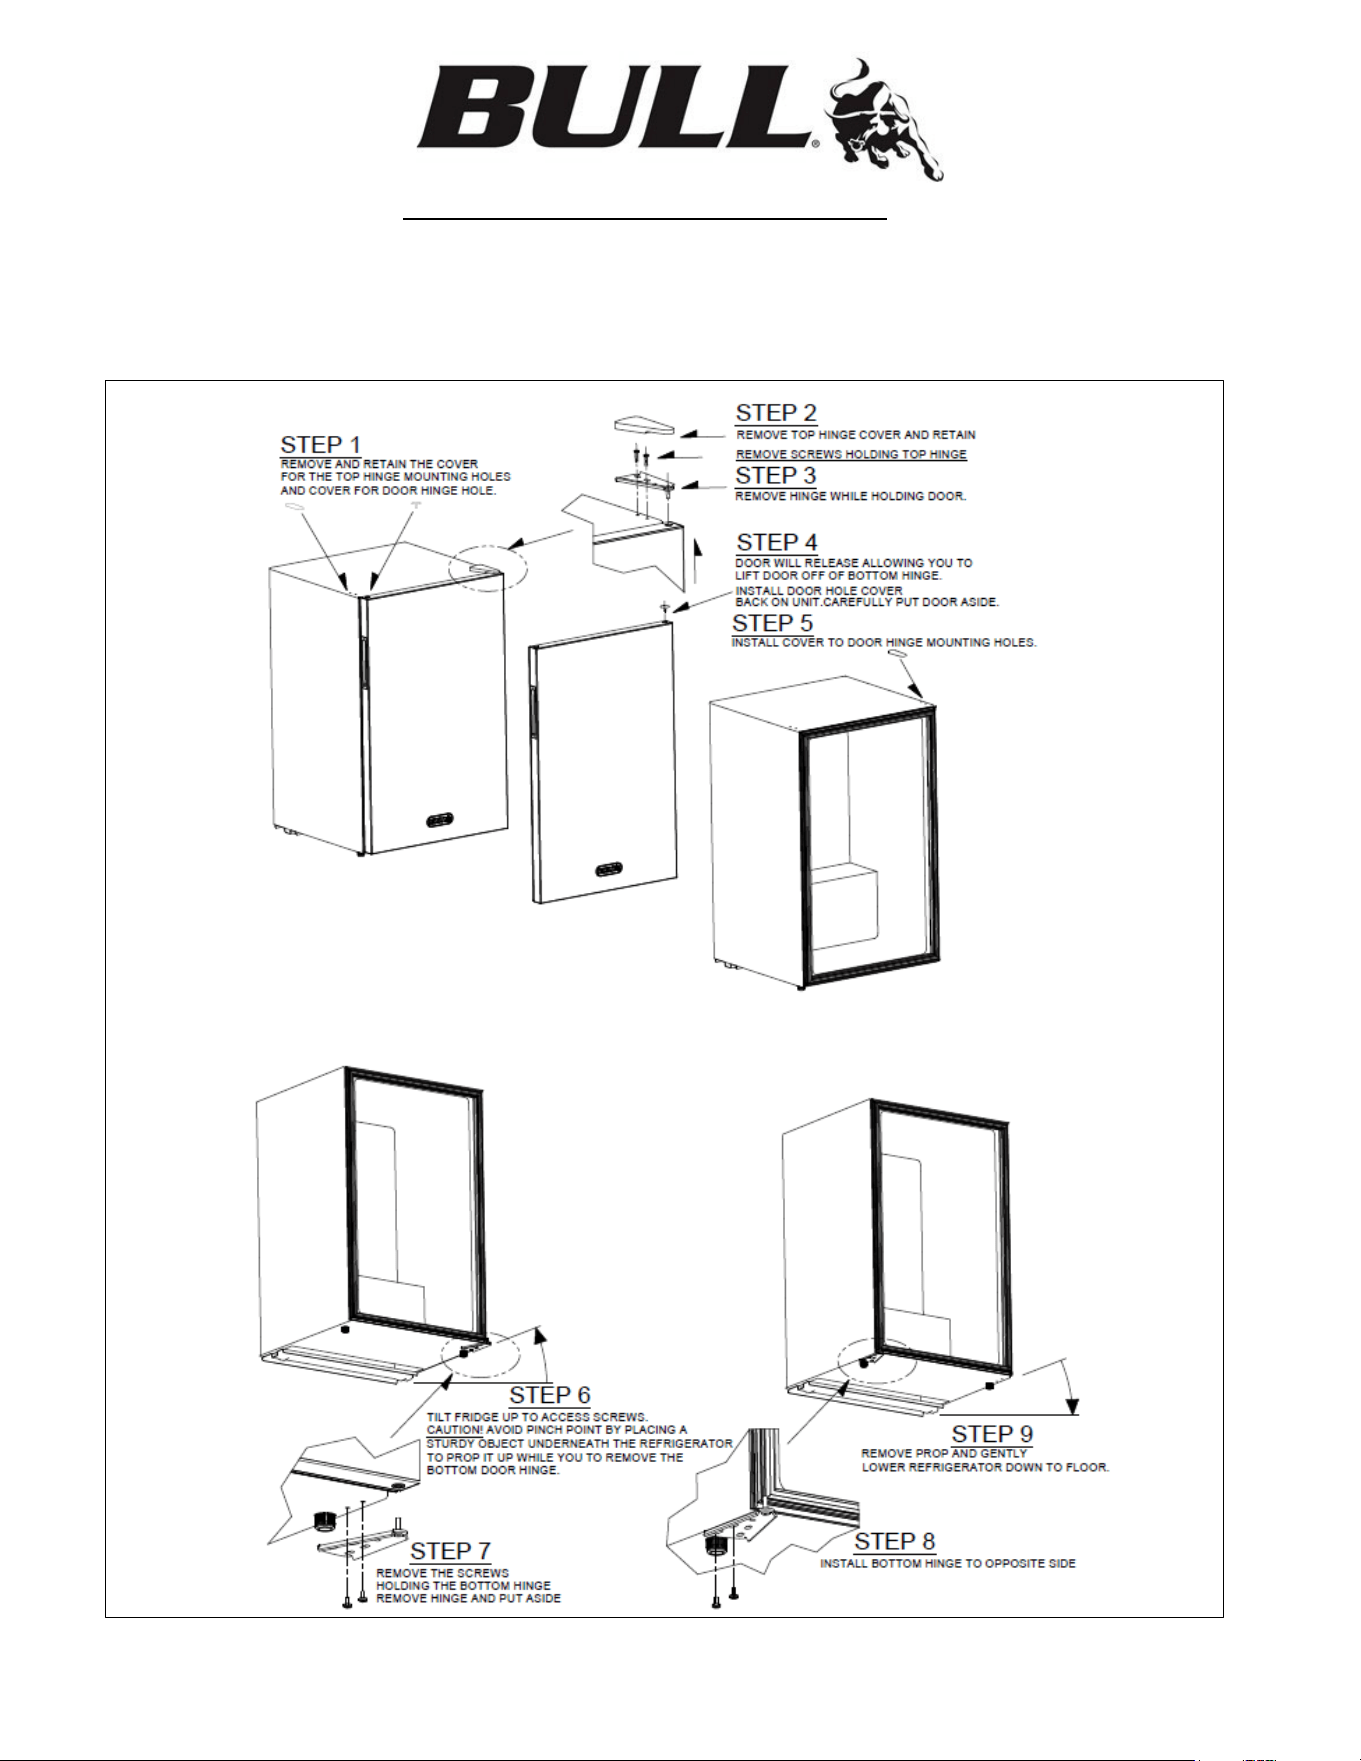
CHANGING THE DOOR SWING DIRECTION
Please follow the directions below to switch your door’s swing direction.
First. Remove the contents from the unit, and the door. This will help prevent unintended messes from something
falling over or out of the door during the switch. Now you’re ready to begin.
Follow the steps below to switching the hinges.
6
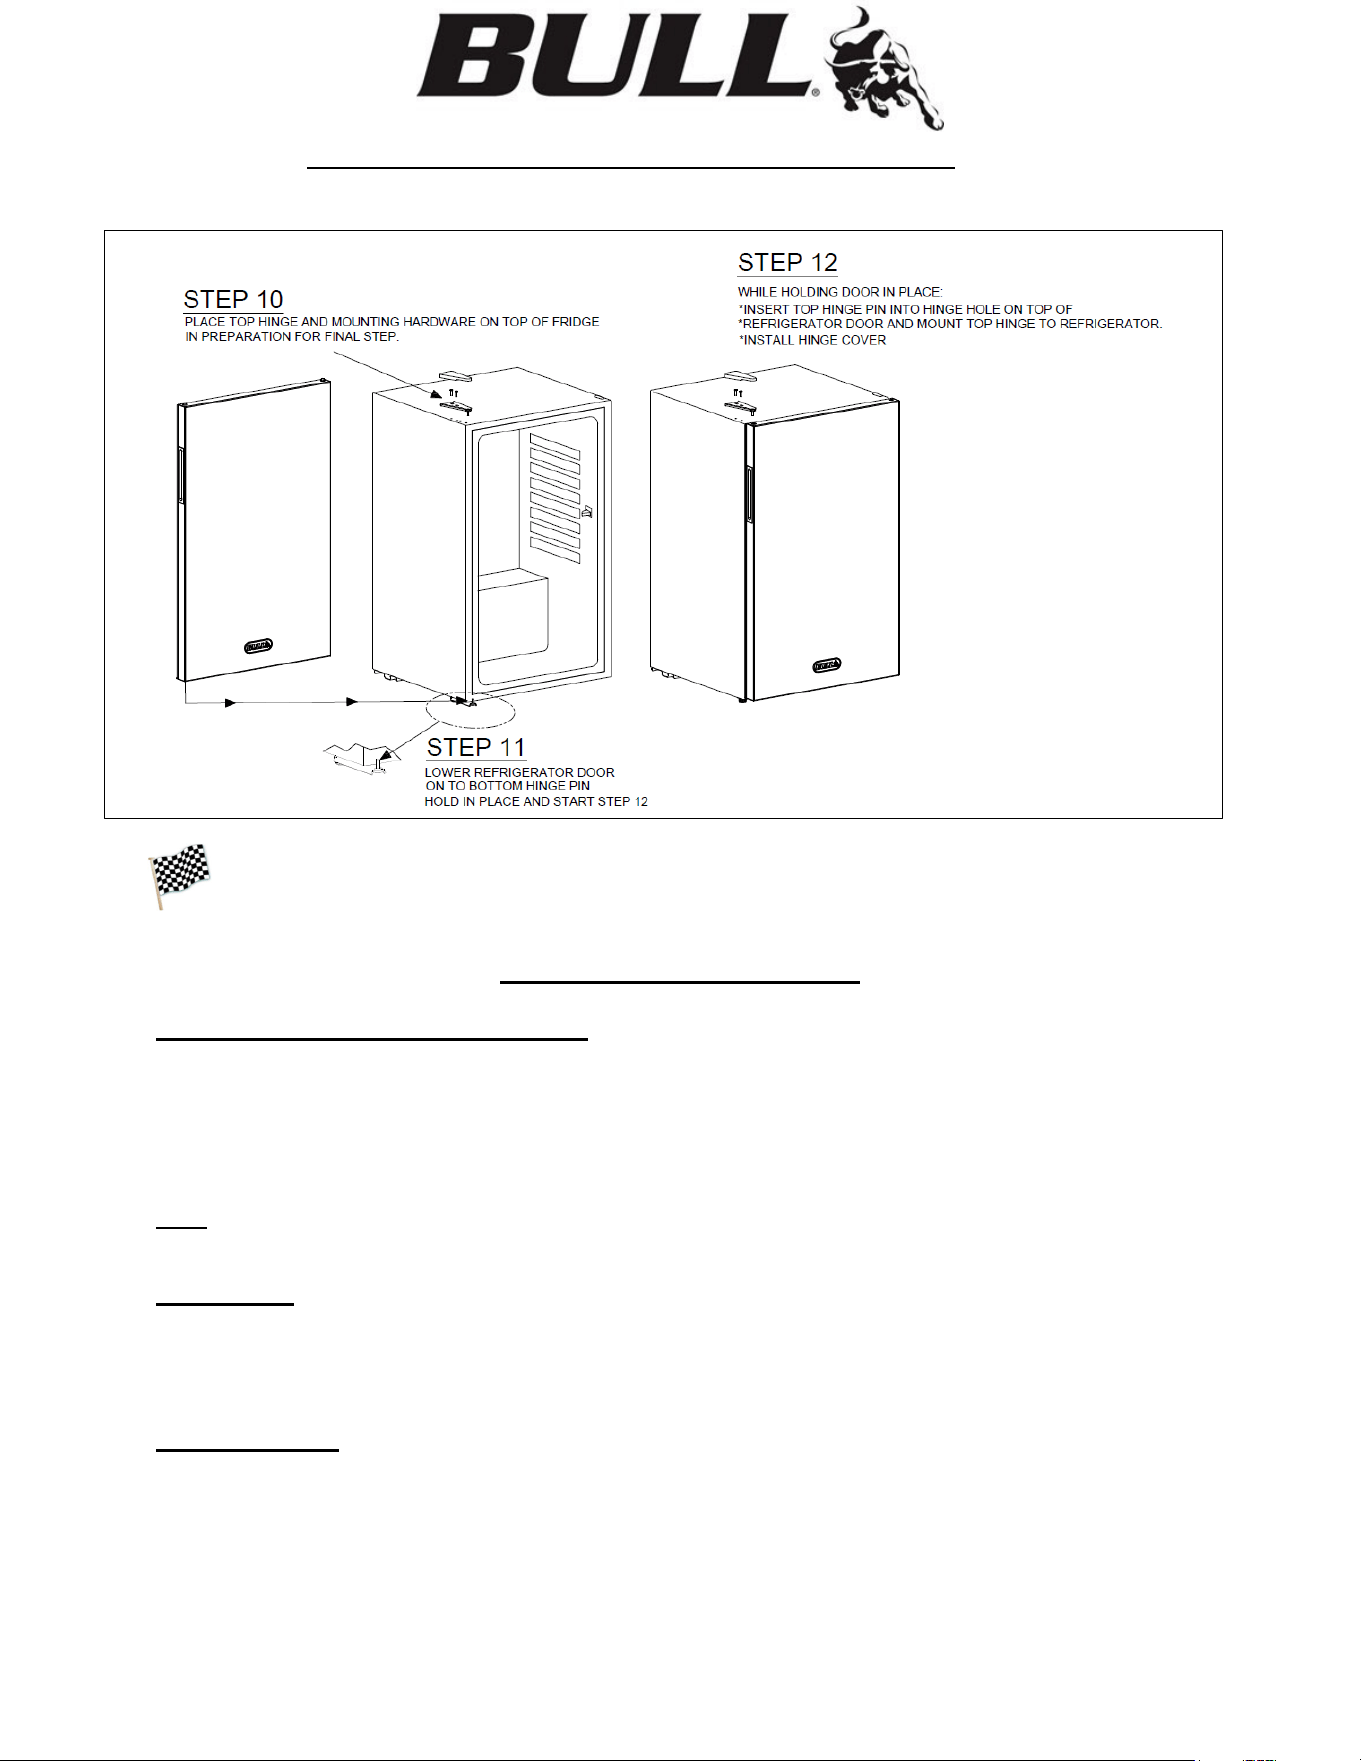
CHANGING THE DOOR SWING DIRECTION (CONTINUED)
Complete these remaining steps and you’ll be ready to reload your refrigerator.
OPERATION GUIDELINES
SETTING THE TEMPERATURE CONTROL
1) Your unit has only one control for regulating the temperature in the compartment. The temperature control is located on
the upper right-hand side of the compartment.
2) The first time you turn the unit on, set the temperature control to “6”.
3) The range of the temperature control is from position “OFF” to “6”. After 24 to 48 hours, adjust the temperature
control to the setting that best suits your needs. The setting of “3” should be appropriate for home or office use.
4) To turn the appliance off, turn the temperature control to “OFF”.
NOTE: Turning the temperature control to “OFF” position stops the cooling cycle but does not shut off the power to the
unit. If the unit is unplugged, has lost power, or is turned off, you must wait 3 to 5 minutes before restarting the unit. If
you attempt to restart before this time delay, the unit will not start.
ELECTRICAL
Please ensure that the required voltage of the compressor is always being supplied. Low or high voltage can
detrimentally affect the refrigeration unit. All units should be plugged into a grounded and properly-sized electrical outlet
with appropriate overcurrent protection. Please refer to the electrical requirements on the nameplate. Please make sure
that your unit has its own dedicated outlet. Do not use an extension cord.
STORING FOODS
1) Foods to be stored in the refrigerator should be properly packed to prevent mixing various moisture degrees and odors.
2) Make sure that foods do not touch each other. Assure adequate air circulation around packages.
3) Never store flammable, volatile, or explosive substances.
4) Beverages with a high alcohol percentage shall be stored in tightly sealed bottles in a vertical position.
5) Food should not touch the rear wall of the refrigerator.
6) Try not to open the door too often.
7) Make sure to remove perishable articles of food out of the appliance before you leave for a long time.
Great job! Door Swing change is now complete, and you can return the items you removed from the
Refrigerator. Before using, please keep reading to understand all safety instructions in this manual and the
manual included with your Refrigerator before use.

7
ROUTINE MAINTENANCE
AUTOMATIC DEFROSTING OF THE REFRIGERATOR
1) There is no need to defrost the refrigerator; ice depositing on the inner back wall is defrosted automatically.
2) Ice build-up on the inner back wall during the compressor operation will (when the compressor has cycled off) defrost
automatically. Defrosted water collects inside the drain by passing through the drain outlet in the inner back wall into a drain
pan situated above the compressor. From there, the water should evaporate over time.
CLEANING THE UNIT
CAUTION: Do not use boiling water because it may damage the plastic parts. In addition, never use a sharp or
metallic instrument to remove frost as it may damage the cooling system and will void the warranty. We
recommend using a plastic scraper.
1) Turn the temperature control to “OFF”, unplug the unit and remove the food, shelves, and tray.
2) Wash the inside surfaces with warm water and baking soda solution. The solution should be about 2 tablespoons of
baking soda to a quart of water.
3) Wash the shelf and tray with a mild detergent solution.
4) The outside of the unit should be cleaned with mild detergent and warm water. Rinse well and wipe dry with a clean, soft cloth.
5) Wring excess water out of the sponge or cloth before cleaning the area of the controls or any electrical parts.
POWER FAILURE
Most power failures are corrected within a few hours and should not affect the temperature of your unit if you minimize
the number of times the door is opened. If the power is going to be off for a longer period, you need to take the proper
steps to protect your food.
VACATION TIME
1) Short vacations: Leave the unit operating during vacations of less than three weeks.
2) Long vacations: If the appliance will not be used for several months, remove all food, and unplug the power cord.
Clean and dry the interior thoroughly. To prevent odor and mold growth, leave the door open slightly, blocking it
open if necessary.
MOVING YOUR UNIT
1) Remove all the food.
2) Securely tape down all loose items inside your unit.
3) Tape the door shut.
4) Be sure the unit stays secure in the upright position during transportation. Also protect the outside of the unit with a blanket or
similar item.
ENERGY SAVING TIPS
1) Let hot foods cool to room temperature before placing in the unit. Overloading the unit forces the compressor to run longer.
2) Be sure to wrap food properly and wipe containers dry before placing them in the unit. This cuts down on frost build-up inside
the unit.
3) Unit storage bin should not be lined with aluminum foil, wax paper, or paper towels. Liners interfere with cold air
circulation, making the unit less efficient.
4) Organize and label food to reduce door openings and extended searches. Remove as many items as needed at one
time and close the door as soon as possible.
DISCONNECT POWER CORD BEFORE CLEANING ANY PARTS OF THE UNIT
8
SYMPTOM POSSIBLE CAUSE
Unit does not operate.
Not plugged in.
The circuit breaker tripped or a blown
fuse.
The unit temperature control is set at
“OFF” position.
Turns on and off frequently.
The room temperature is hotter than
normal.
A large amount of food has been
added to the unit.
The door is open too often.
The door is not closed completely.
The temperature control is not set
correctly.
The door gasket does not seal
properly.
The unit does not have the correct
clearances.
Vibrations. Check to assure that the unit is level.
The unit seems to make too
much noise.
The rattling noise may come from the
flow of the refrigerant, which is
normal.
As each cycle ends, you may hear
gurgling sounds caused by the flow of
refrigerant in your unit.
Contraction and expansion of the
inside walls may cause popping and
crackling noises.
The unit is not level.
The door will not close
properly.
The unit is not level.
The door was reversed and not
properly installed.
The gasket is dirty or bent.
The shelves, bins or baskets are out
of position.
TROUBLESHOOTING
9
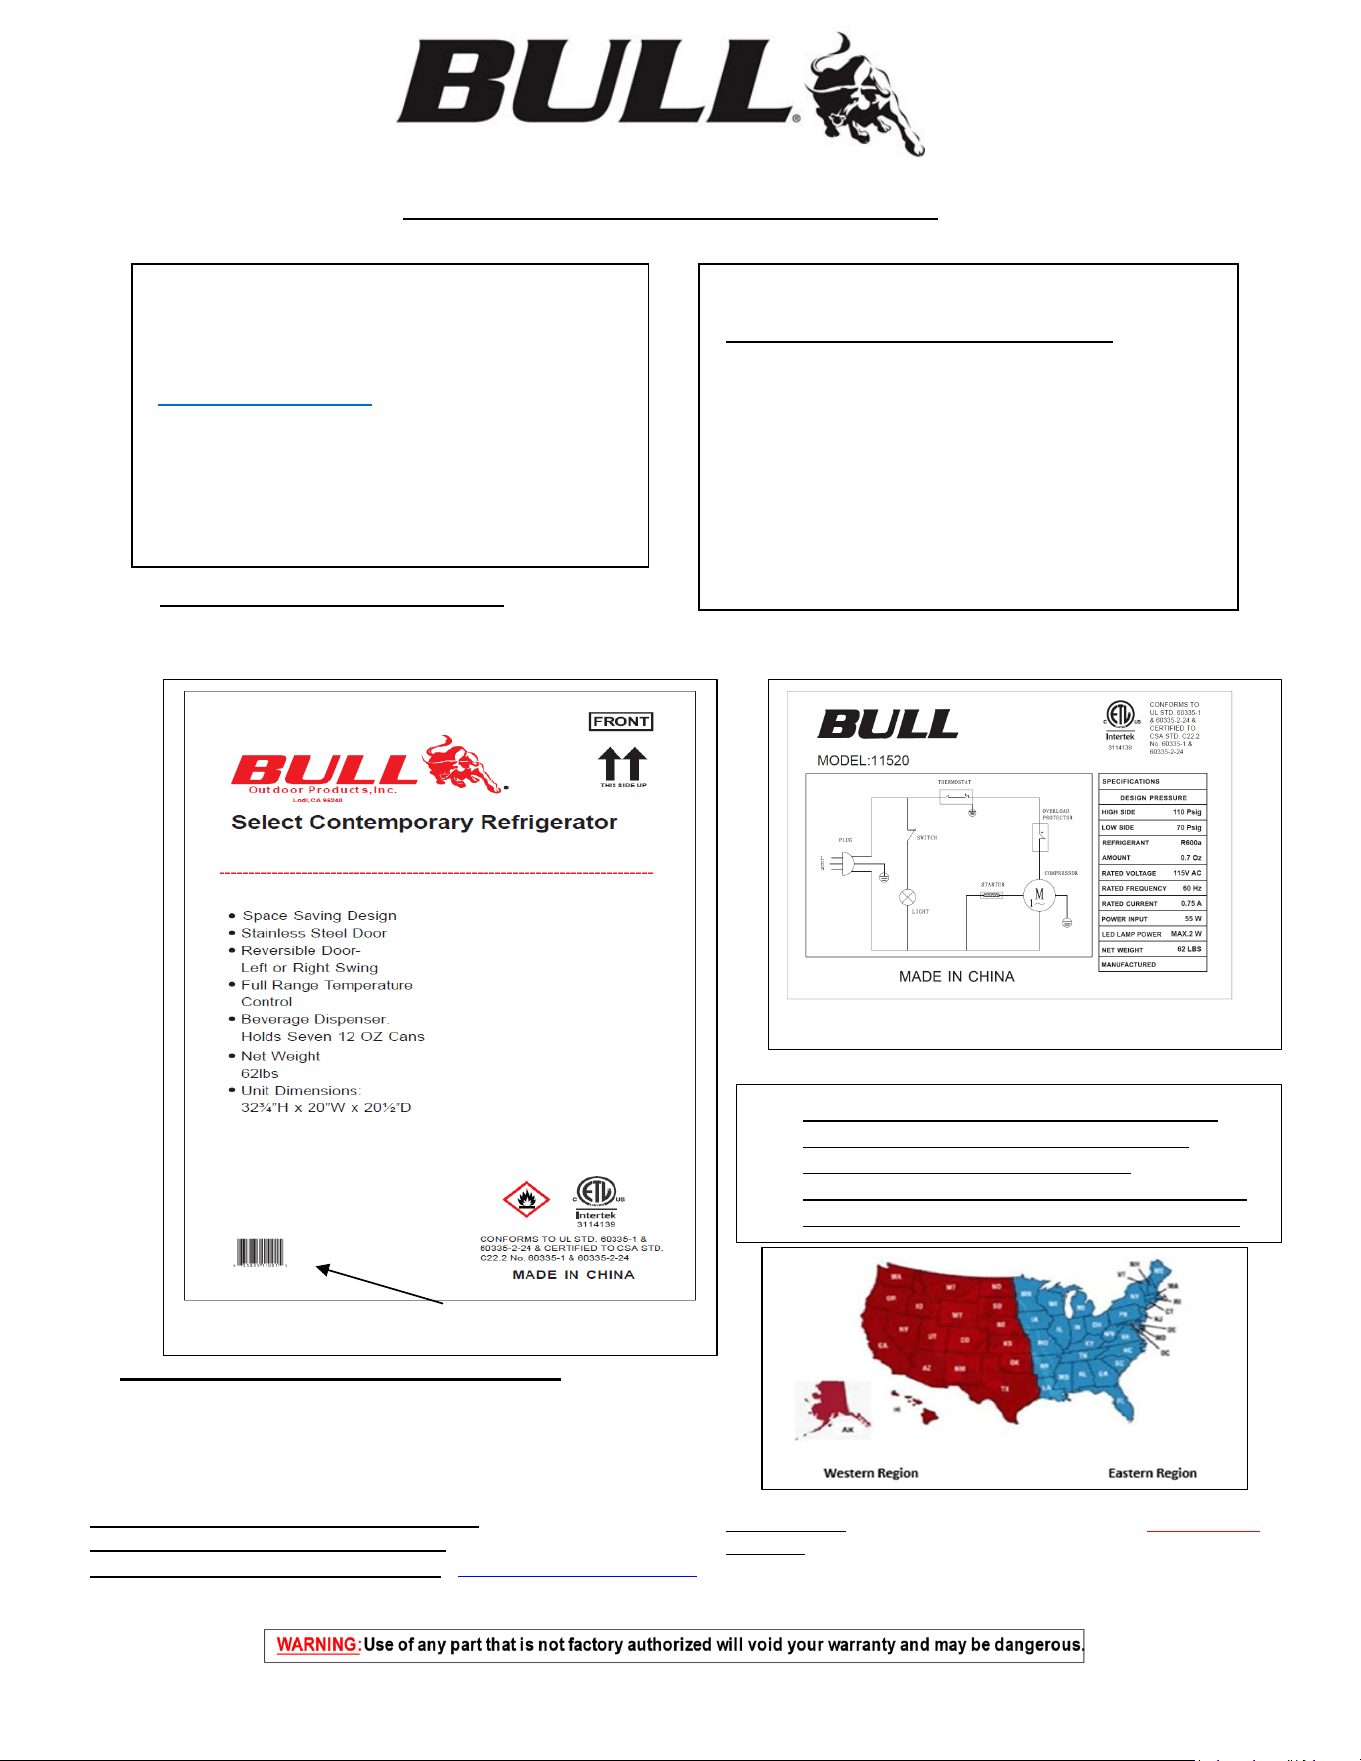
LOCATION OF SERIAL NUMBER
Essential information about your product is encoded in the serial
number. This information will be required for all warranty claims, ordering replacement parts and will identify any variations of your unit. It is
extremely important that you record your serial number and register your grill from the Proof of Purchase.
HOW TO ORDER REPLACEMENT PARTS
This is where your Product Information Reference Card will come in handy for
supplying the Model # and Serial #. needed by your Bull Authorized Dealer to
assure you get the correct part(s) or additional accessories to keep your
Refrigerator in top working condition. If you don’t have the card you can still get
the model number and type of gas hook up used as stated on your Refrigerator
data sticker as shown in the caption above.
Please refer to your owner’s manual parts list
and illustration to identify what you need.
To Order Replacement Parts on-line go to
:
https://bullbbq.com/partsearch
Ordering Parts Western Region Customers, please call (800) 258-6810
by phone: Eastern Region Customers, please call (760) 291-8469
Bull is ready to help with 2 regional suppliers
open 8:00 am to 5:00 pm Monday through Friday
.
REGISTERING YOUR REFRIGERATOR
INSPECT YOUR REFRIGERATOR FOR ANY
DAMAGE AND CONTACT OUR SERVICE
CENTER OR LOCAL DEALER FOR
REPLACEMENT OF ANY DAMAGED PARTS. IF
DAMAGED DO NOT ATTEMPT INSTALLATION.
The shipping box has the serial number printed on
the Front and Back of shipping box as shown.
Data plate on the back of the unit shows the serial number.
For Warranty Claims or Replacement Parts ordering,
please fill out the area provided below:
PRODUCT INFORMATION REFERENCE CARD
1) Model Number
____________________________
2) Serial Number
_____________________________
(The Serial Number is encoded with essential information
for ordering replacement parts or submitting Warranty
claims. Location of Serial Numbers is shown below)
3) Date of Purchase______________________
4) Copy of your Purchase Receipt or Invoice.
For Warranty Questions call Customer Service at (800)
521-2855
Thank you for purchasing your Bull Outdoor Products
Refrigerator. To validate your Limited Warranty, you must
submit the completed the Warranty Registration Form
within 90 days from the date of purchase. Registration can
be completed on-line at
https://bullbbq.com/register
or by sending the completed Warranty Registration Form
and copy of your Purchase Receipt or Invoice as proof of
purchase to:
BULL OUTDOOR PRODUCTS, INC.
1011 East Pine St.
Lodi, CA 95240
Attn: Warranty Service Center
10
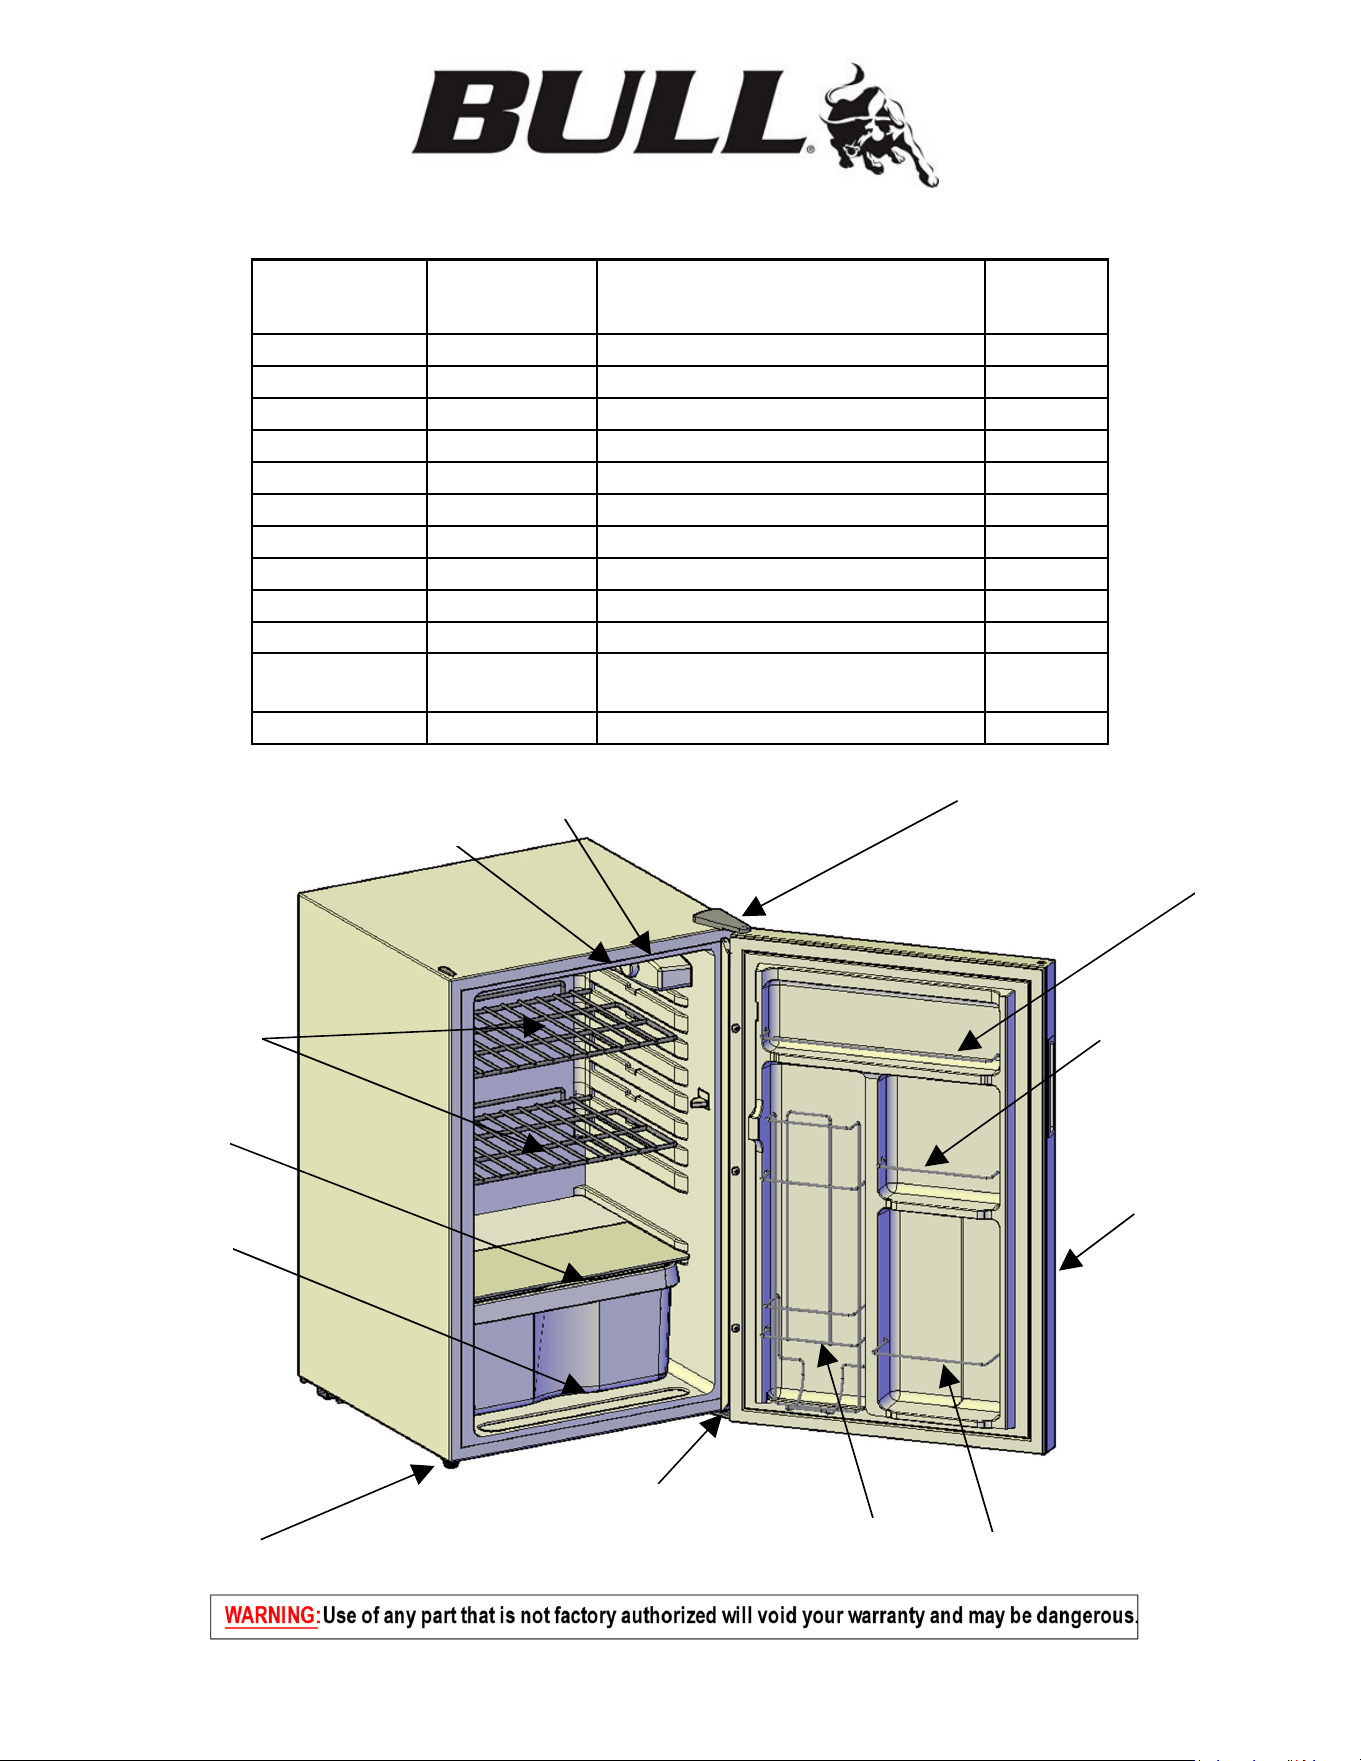
11520 REPLACEMENT PARTS LIST AND REFERENCE DRAWING
(WARRANTY PERIOD FOR ALL PARTS IS 1 YEAR)
# NO. USED IN
PARTS LIST
ILLUSTRATION
BULL PART
NO.
PART DESCRIPTION
QTY
1
11504 INTERIOR LIGHT COVER
1
2
11500 TEMPERATURE CONTROL KNOB
1
3 11503 SHELF (WIRE)
2
4 11506 SHELF (GLASS)
1
5 11505 DRAWER
1
6 11508 LEVELING LEG 2
7 11507 CAN DISPENSER 1
8 11511 CONDIMENT BAR 1
9
11519 DOOR 1
10 11510 DOOR BAR
1
11 11517
TOP AND BOTTOM HINGE
(1 SET INCLUDES BOTH HINGES)
1
12 11518 DOOR HINGE COVER
1
1
2
3
4
5
12
8
10
9
10
7
11
6
11
Warranty Policy
LIMITEDWARRANTYONBULLOUTDOORPRODUCTS,INC.,PRODUCTS
THISLIMITEDWARRANTYGIVESYOUSPECIFICLEGALRIGHTS.YOUMAYALSOHAVEOTHERRIGHTS,
WHICHVARYFROMSTATETOSTATE.
THISLIMITEDWARRANTYCANALSOBEFOUND ONOUR WEBSITEAT:
https://www.bullbbq.com/support-warranty(UnitedStatesCustomers);
https://www.bullbbq.eu/en/warrantyform.htm(InternationalCustomers)
ANDINTHEOWNER’S/INSTALLATIONMANUALTHATWEPROVIDEWITHOUR
PRODUCT.
THISLIMITEDWARRANTYISSUBJECTTOTHEEXCLUSIONS,CONDITIONS ANDLIMITATIONSSETFORTH
BELOW.
ANYIMPLIEDWARRANTIESIMPOSEDBYLAW,INCLUDINGWITHOUTLIMITATIONTHEIMPLIED
WARRANTIESOFMRECHANTABILITYANDFITNESSFORAPARTICULARPURPOSE,ARELIMITEDIN
DURATIONTOTHE
DURATIONOFTHISEXPRESSLIMITEDWARRANTY.SOMESTATESDONOTALLOW
LIMITATIONSONHOWLONGANIMPLIEDWARRANTYLASTS,SOTHEABOVELIMITATIONMAYNOTAPPLY
TOYOU.
WHOMAYUSETHISWARR ANTY?
BULL OUTDOOR PRODUCTS, INC. located at address 1011 East Pine St. Lodi, CA. 95240
("we") extend this limited warranty only to the consumer who originally purchased the product ("you") at the
original site of delivery or installation. It does not extend to any subsequent owner or other transferee of the
product. It does not apply to products installed in any rental, commercial or non-residential application. Examples
of excluded applications include, but are not limited to day care centers, schools, bed and breakfast centers,
churches, private clubs, fire stations, club houses, common areas in multi-family dwellings, restaurants, hotels,
nursing homes, food service locations and institutional food service locations.
WHATDOESTHISWARRANTYCOVER?
This limited warranty covers defects in materials and workmanship of the product and product components
identified below for the Warranty Periods defined below.
WHAT
ISTHEPERIODOFCOVERAGE?
This limited warranty starts on the date of your purchase and lasts for the time period or time periods specified
above (the "WarrantyPeriod"). The Warranty Period is not extended if we repair or replace the product. We may
change the availability of this limited warranty at our discretion, but any changes will not be retroactive.
12
Warranty Policy (Continued)
GrillWarrantyPeriods
The following parts are covered for oneyear on all our current gas grill models:
The lid, control panel, grease tray, bezels, knobs, temperature gauge, valves, regulator, flex tubes, rotisserie burner,
transformer, and all components of the lighting system.
The following parts are covered for threeyears on all our current gas grill models:
The manifold, handle end caps, flame tamers, heat shields, and warming rack.
The following parts are covered for lifetime on all our current gas grill models:
Insert assembly and the grates.
The warranty period for the grill burners vary by type:
Cast stainless steel burners - lifetime,
Welded burners – 5years, and
Porcelain coated burners – 3years.
The warranty period for the charcoal grill is oneyear on all parts, except for the insert assembly, which is covered
for 5years.
The Bel Air grill included a one‐year warranty on all parts.
ComponentWarrantyPeriods
All of the parts for our components/grill carts/refrigerators/kegerators/drawers/doors are covered for oneyear
with these exceptions:
Power Burner
The insert/grates are lifetime covered parts.
The manifold/burner are covered for 3years.
Searing Station/Slide in Double Sideburner
The grates are covered for lifetim e,
the insert for 5years
, and
the manifold for 3years.
Single Sideburner
The grates are covered for 5years and
the burner for 3years.
Sidekick
The burner is covered for 3years.
PizzaOvens/Islands/FireFeaturesWarrantyPeriods
All of the parts and construction materials are covered for oneyear.
Grill Accessories and Grill Covers do not include a warranty period.
13
Warranty Policy (Continued)
WHATDOESTHISWARRANTYNOTCOVER?
This limited warranty does not cover any damage due to: (a) transportation; (b) storage; (c) improper installation
or use; (d) use on improper fuel/gas supply; (e) failure to follow the product instructions or to perform any
preventive maintenance; (f) modifications; (g) unauthorized repair; (h) normal wear and tear; or (i) external
causes such as accidents, abuse, or other actions or events beyond our reasonable control.
WHATAREYOURREMEDIESUNDE RTHISWARRANTY?
With respect to any defective product claim made during the Warranty Period, we will, in our sole discretion,
either: repair or replace such product (or the defective part) free of charge or (b) refund the purchase price of such
product. We will not pay for shipping charges for repaired or replacement parts, or for any labor or labor related
charges. We will not pay for any accessory products or ancillary products purchased by you for use in connection
with the product.
HOWDOYOUOBTAINWARRANTYSERVICE?
To obtain warranty service, you must submit a warranty claim online through the Bullbq.com website during the
Warranty Period. Warranty claims will not be accepted via email, fax or phone.
LIMITATIONOFLIABILITY
THEREMEDIESDESCRIBEDABOVEAREYOURSOLEANDEXCLUSIVEREMEDIESANDOURENTIRE
LIABILITYFORANYBREACHOFTHIS
LIMITEDWARRANTY.OURLIABILITYSHALLUNDERNO
CIRCUMSTANCESEXCEEDTHEACTUALAMOUNTPAIDBYYOUFORTHEDEFECTIVEPRODUCT,NORSHALL
WEUNDERANYCIRCUM STANCES BELIABLEFORANYCONSEQUENTIAL,INCIDENTAL,SPECIALOR
PUNITIVEDAMAGESORLOSSES,WHETHERDIRECTORINDIRECT.
SOMESTATESDONOTALLOWTHEEXCLUSIONORLIMITATION
OFINCIDENTALOR CONSEQUENTIAL
DAMAGES,SOTHEABOVELIMITATIONOREXCLUSIONMAYNOTAPPLYTOYOU.
Revised 10-15-2020 APR