Ewbank LLC
6801-D Northpark Boulevard, Charlotte, NC 28216 USA
Email: [email protected] Telephone: +1 704 827 9385
Website: www.Carolina-Pets.com
Care and Use Instructions
Please retain these
FOR USE ON DOGS AND CATS ONLY
Model CP300
Pet Grooming kit
Read the instruction manual before using the Grooming Kit and make sure that:
• The battery charger cable is in perfect condition.
• All packaging materials are removed from the product.
Safety Instructions - CAUTION
• Never use the machine on WET fur or WET hair.
• Keep the plastic packing bags away from children (danger of suocation).
• Do not expose the Grooming kit, battery or charger to extreme temperatures or moisture.
• Do not use in humid conditions – such as a steam lled bathroom.
• Store in a cool dry place.
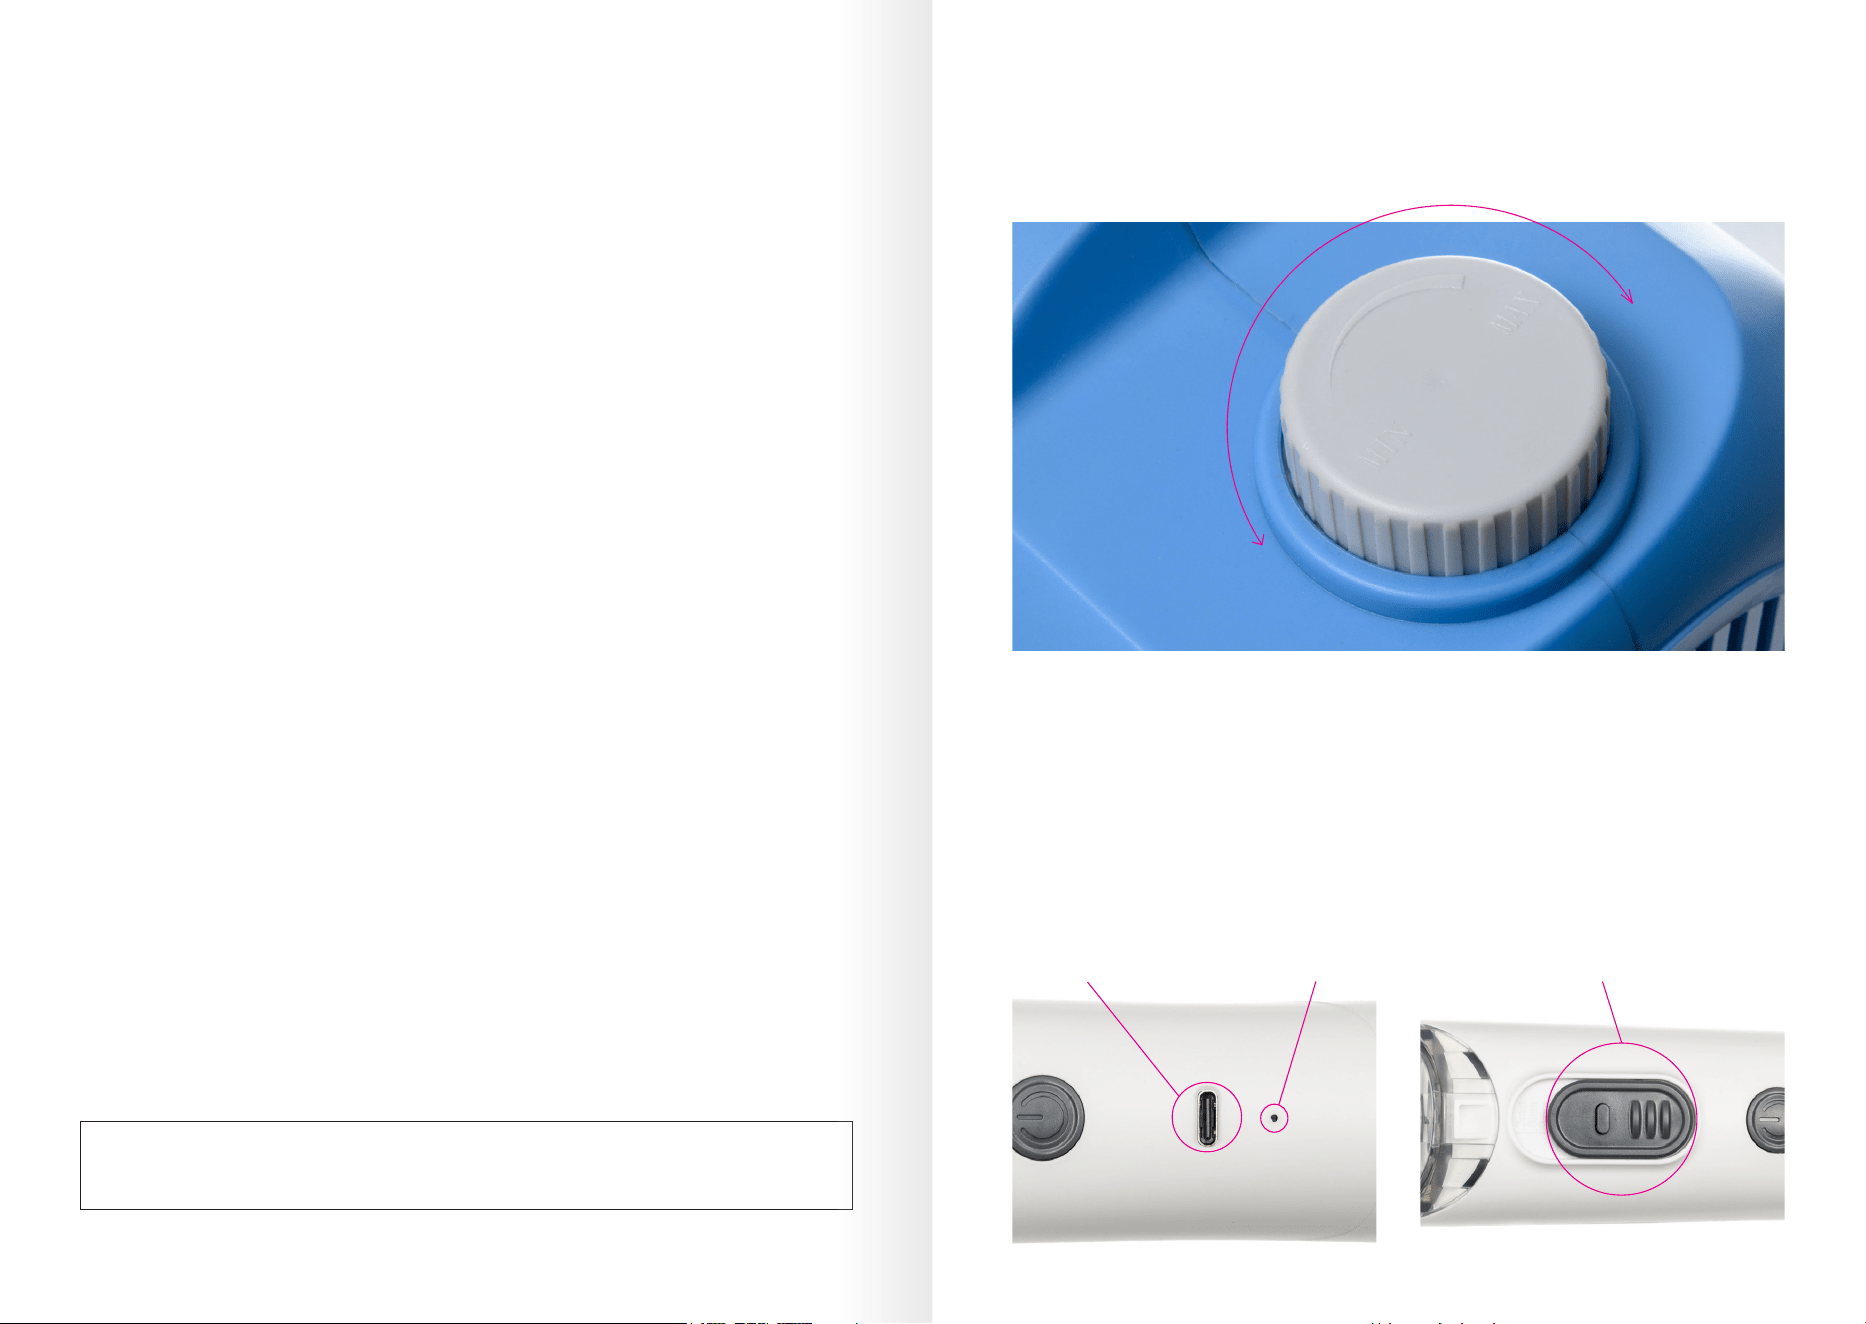
• Only charge the Grooming Kit cutters with the correct USB-C cable.
• Do not attempt to remove the rechargeable battery from the Grooming kit cutters when
charging.
• Disconnect the battery charger once the battery is completely charged (indicated by a green
light on the battery charging unit).
• Never throw the rechargeable battery into open ames or burn it, always dispose of
batteries in the correct manner.
• Ensure the Grooming kit is switched o at the on/o push button switch before emptying
the container.
• Keep away from ammable and explosive environments.
• In order to protect the motor, ensure that the lter is correctly installed and that it is
regularly emptied and cleaned before turning on the power.
• This Grooming kit is for domestic use only and should not be used outside if raining.
• Do not use the product on uneven surfaces.
• DO NOT use the machine for vacuuming liquids.
• This appliance should not be used, cleaned, or maintained by children under the age of
14 years. Persons with reduced physical, sensory, or mental capabilities or lack of
experience and knowledge should only use, clean or maintain the product if they are
adequately supervised and given instruction for the safe use and understanding of the
hazards involved. Children must not play with the appliance.
• Ensure ngers, hair, jewellery, loose clothing etc. are kept away from any moving parts.
• To protect the Grooming Kit from overheating do not block the lter, Dust Container or
Hose of the unit. The Grooming Kit has a built-in thermal protection unit which will shut
down if over-heating occurs. If this happens you will need to unplug the unit and wait
several minutes for the unit to cool.
• Do not use on burning or smoking objects such as cigarettes, matches or hot ash.
• Please only use the Grooming kit for indicated purposes.
• Unplug the machine after use.
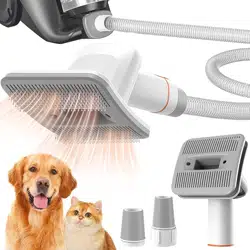
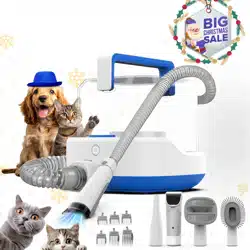
GROOMING KIT Product Overview
The CP300 GROOMING KIT is is designed to enable you to replicate the same type of
equipment that is used in a professional grooming salon, although not intended for
professional use. The tools supplied are all precision instruments to ensure that you can
safely keep your pet in top condition as and when you want to. Take your time to read the
instructions or follow the videos on our website to ensure you get the best results. The more
you use the kit, the better your results sill become. Whether this is in between professional
grooms, or as your grooming solution, the CP300 is the product for you.
Thank you for buying the Carolina Pet’s GROOMING KIT, we hope you enjoy using it. Please
read these instructions carefully before using your Grooming kit. Please retain these safety
instructions for future reference.
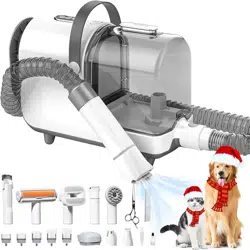
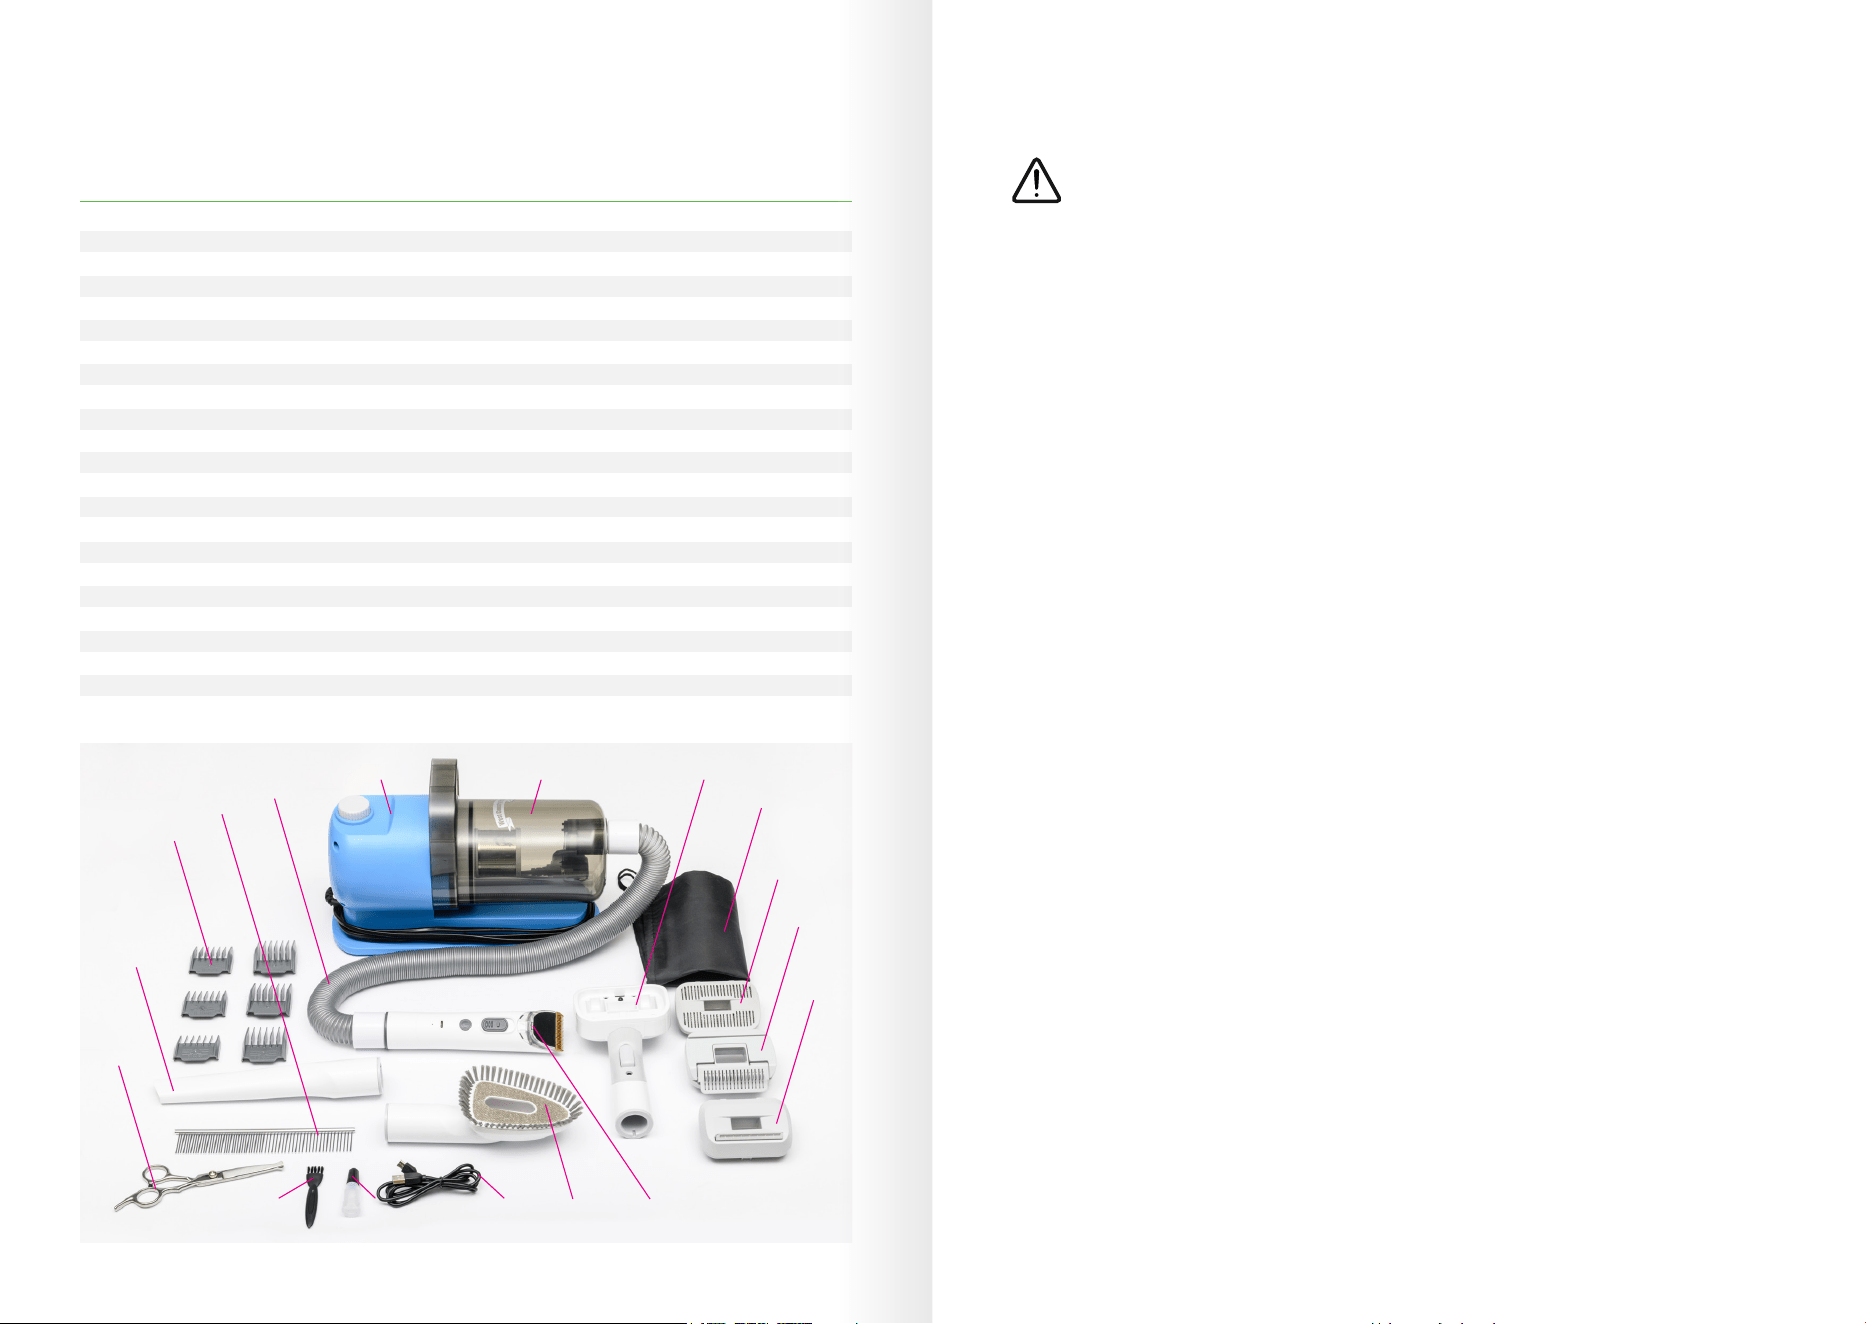
1. GROOMING KIT MOTOR UNIT EB1359
2. Hose EB1360
3. Clipper with Stainless Steel blade EB1361
Comb – 3mm EB1362
Comb – 6mm EB1363
Comb – 9mm EB1364
Comb – 12mmm EB1365
Comb – 15mm EB1366
Comb – 18mm EB1367
4. Brush head EB1368
a) Slicker brush EB1369
b) Knot Buster EB1370
c) Molting Comb EB1371
5. Hair Removal Brush EB1372
6. Long crevice tool EB1373
7. Charging Cable – Type C – 5v EB1374
8. Bottle of oil EB1375
9. Small brush to clean Clippers EB1376
10. Straight safety scissors EB1380
11. Stainless steel comb EB1381
12. Storage bag for accessories EB1378
13. Dust Container EB1393
Pack contents: Part No.
2 3
x6
combs
4b
4
12
6
11
10
4c
13
5
789
3
2
4a
1
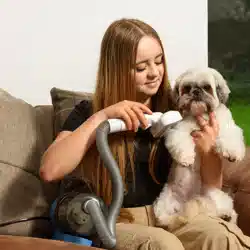
Using your CP300
CAUTION – DO NOT USE THIS PRODUCT ON WET HAIR OR WET FUR
WE STRONGLY RECOMMEND THAT YOU DO NOT USE THIS PRODUCT ON YOUR PET
UNTIL YOU HAVE READ THE RECOMMENDED STEPS FOR CLIPPING YOUR PET’S HAIR / FUR
1) Place the main unit on the oor and unravel the power cord.
2) Remove the fur collector cannister to ensure that the lter has been correctly tted and
not moved in transit. To remove the cannister, grasp the handle and simply twist
anti-clockwise with container towards you and this will release the cannister. You will
be able to check the lter inside.
3) The lter should be tight in the aperture with the black foam inside the cannister and the
white washable lter visible from the outside.
4) Ret the collector cannister by sliding the cannister onto the main body and then twisting
it clockwise.
5) To t the hose, nd the smooth end, without any locating slots and push this in the hole
at the front of the dust cannister as far as possible, with a slight twist clockwise to
complete a snug t. If the end of the hose is too small, then you need to turn the hose
around and use the other end.
6) Select whichever tool you wish to use and slide it into place at the end of the hose by
locating it onto the location tabs. There is no need to twist this.
7) To change tools simply pull the current tool out. Some may need a gentle tug to release.
8) Once you have connected the required tool then connect the power cord to a suitable
power socket and make sure this is switched on.
9) The on/o button for the main unit is also a Variable Speed Control. Switch on by
pressing this button down. The motor will start to operate. Select the level of suction that
you require and then begin to use your new Grooming kit.
10) The variable speed can be changed at any time during operation, and it is advisable to
select the lowest setting to start with, so that your furry friends get used to the noise.
With the longer stretch hose, you do not need to groom very close to the power unit
which will help your pet to get accustomed to the experience.
11) The 13 ft power cord enables you to move freely around your pet. The hose extends to
at least 8 ft when fully pulled out.
Caution: As protection against overheating the unit, please do not block the Dust
Collection Cannister, Filter or Hose.
Variable Speed Control
One of the benets of the CP300 is a variable speed control. Most other grooming kits
available only have 2 or 3 speeds. With this product, you can choose exactly the speed
you want, and your pet is comfortable with.
1. Electric Clipper
Before using the clipper, you will need to charge the battery with the USB-C cable that is
supplied with the Grooming Kit. You need to insert the USB end into a converter plug or
USB point and the other end into the clipper – just below the on/o switch.
The light just below the power input will show red and then turn green when fully charged.
Charging aperture Light indicator
Blade adjuster
4 5
The combs determine the overall length
required, whilst the adjustment on the
clipper is only for minor adjustments. It is
suggested that you start with the clipper
set at 1.9mm.
Once you have selected the cutting depth
and the comb size and decided whether
or not to connect the clipper to the main
grooming unit, then you are ready to
switch on and start your grooming. Simply
press the on/o button, select the speed
and o you go. There is a 1 ½ second delay
on the clipper starting. This is a safety
feature.
As you cut the hair, you will need to check
regularly that the collection container has
not become full, and need emptying. If this
requires emptying, remove the fur collector
cannister. To remove the cannister, rst
remove the hose then grasp the handle
and simply twist anti-clockwise, and this
will release the cannister.
Remove the lter by simply pulling it out, then remove the grey internal main lter holder,
then brush o the outside of the stainless lter. This will also enable you to empty all
contents. Then simply ret the items in reverse order, making sure each is centrally
positioned to get a good t. If the container does not easily t back onto the main body,
then you will need to check you have retted the lters correctly.
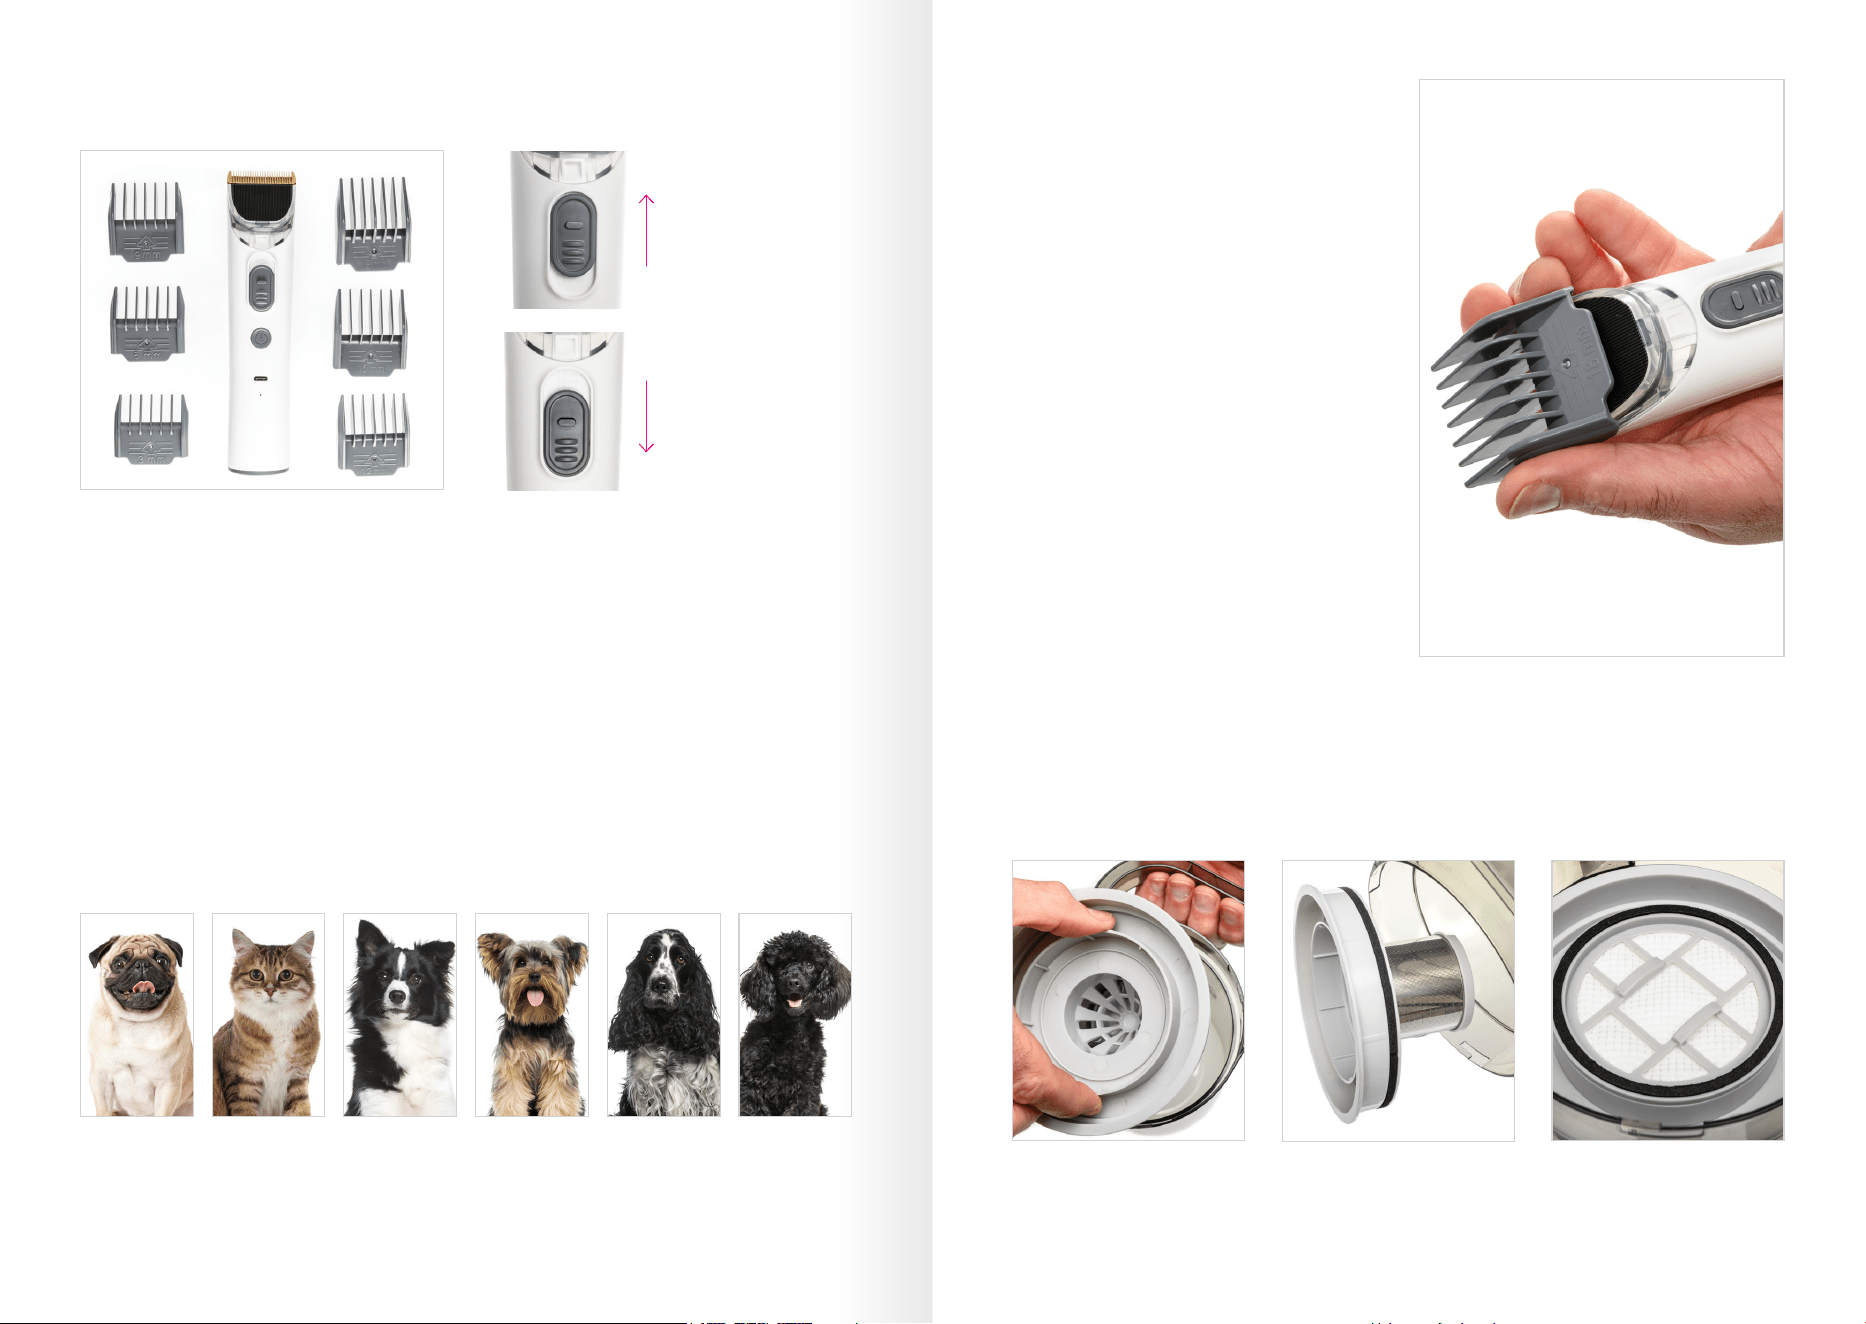
Select the comb, that is the correct size for the length of hair and style required. Slide this
onto the top of the clipper, with the on/o button facing you and the blades of the comb
facing away from you. Slide this down into place until it is locked in place. To remove simply
push up on the base of the comb.
If you would like to practice before trying out on your furry friend, use faux fur fabric, to
replicate a similar experience in cutting the hair/fur..
The electric clipper can be used either on its own or in connection with the main unit, which
should ensure that most hair and fur is collected in the main grooming unit.
Pictures are for general guidance purposes only and not specic to the breed.
3mm 1/8”
Limit comb
size
6mm 1/4”
Limit comb
size
9mm 3/8”
Limit comb
size
12mm 1/2”
Limit comb
size
15mm 5/8”
Limit comb
size
18mm 3/4”
Limit comb
size
Internal lter holder being
removed
Filter removed
Filter back in place
USE THE SHORT COMB TO PROTECT THE
CLIPPER BLADE WHEN STORED AFTER USE.
YOU NEED TO PRESS THE “ON”
BUTTON OF THE CLIPPERS FOR 1.5 SECS
IN ORDER TO OPERATE.
Choose a guard comb according to the hair
length required (optional use)
Micro hair length adjustment
Slide Up to
decrease the hair
length from
1.9mm - 1.6mm
1.3mm - 1.0mm
Slide Down to
increase the hair
length from
1.0mm - 1.3mm
1.6mm - 1.9mm
6 7
CLEANING THE CLIPPER – SHOULD ONLY BE UNDERTAKEN WHEN DETACHED FROM THE
HOSE AND ALWAYS ENSURE THE CLIPPER IS TURNED OFF
1) Make sure the height adjuster slides correctly. Move adjuster to 1.9mm before removing
or retting blades. Remove any debris from the clippers by using the brush supplied or
using the hose to blow the clipper.
2) To remove the blade, place a nger behind the blades and your thumb on the base of
the blade and snap forwards. The blade simply pulls out – see photo.
3) Drop some lubricant (supplied) onto the blades from time to time – see photo.
4) To replace the blade simply locate the lug at the bottom of the blade, into the aperture
in the clear plastic and simply snap back into place.
5) You can clean the body of the clipper by using a damp cloth. Do not submerge the
clipper in water.
6) We recommend that when you store the clippers, you t one of the combs as a guard
so as to protect the blade from any damage. Replacement blades are available to
purchase, these are regarded as consumables and not covered by warranty.
7) Replacement blades are available from Carolina Pets Product Code EB1388.
8 9
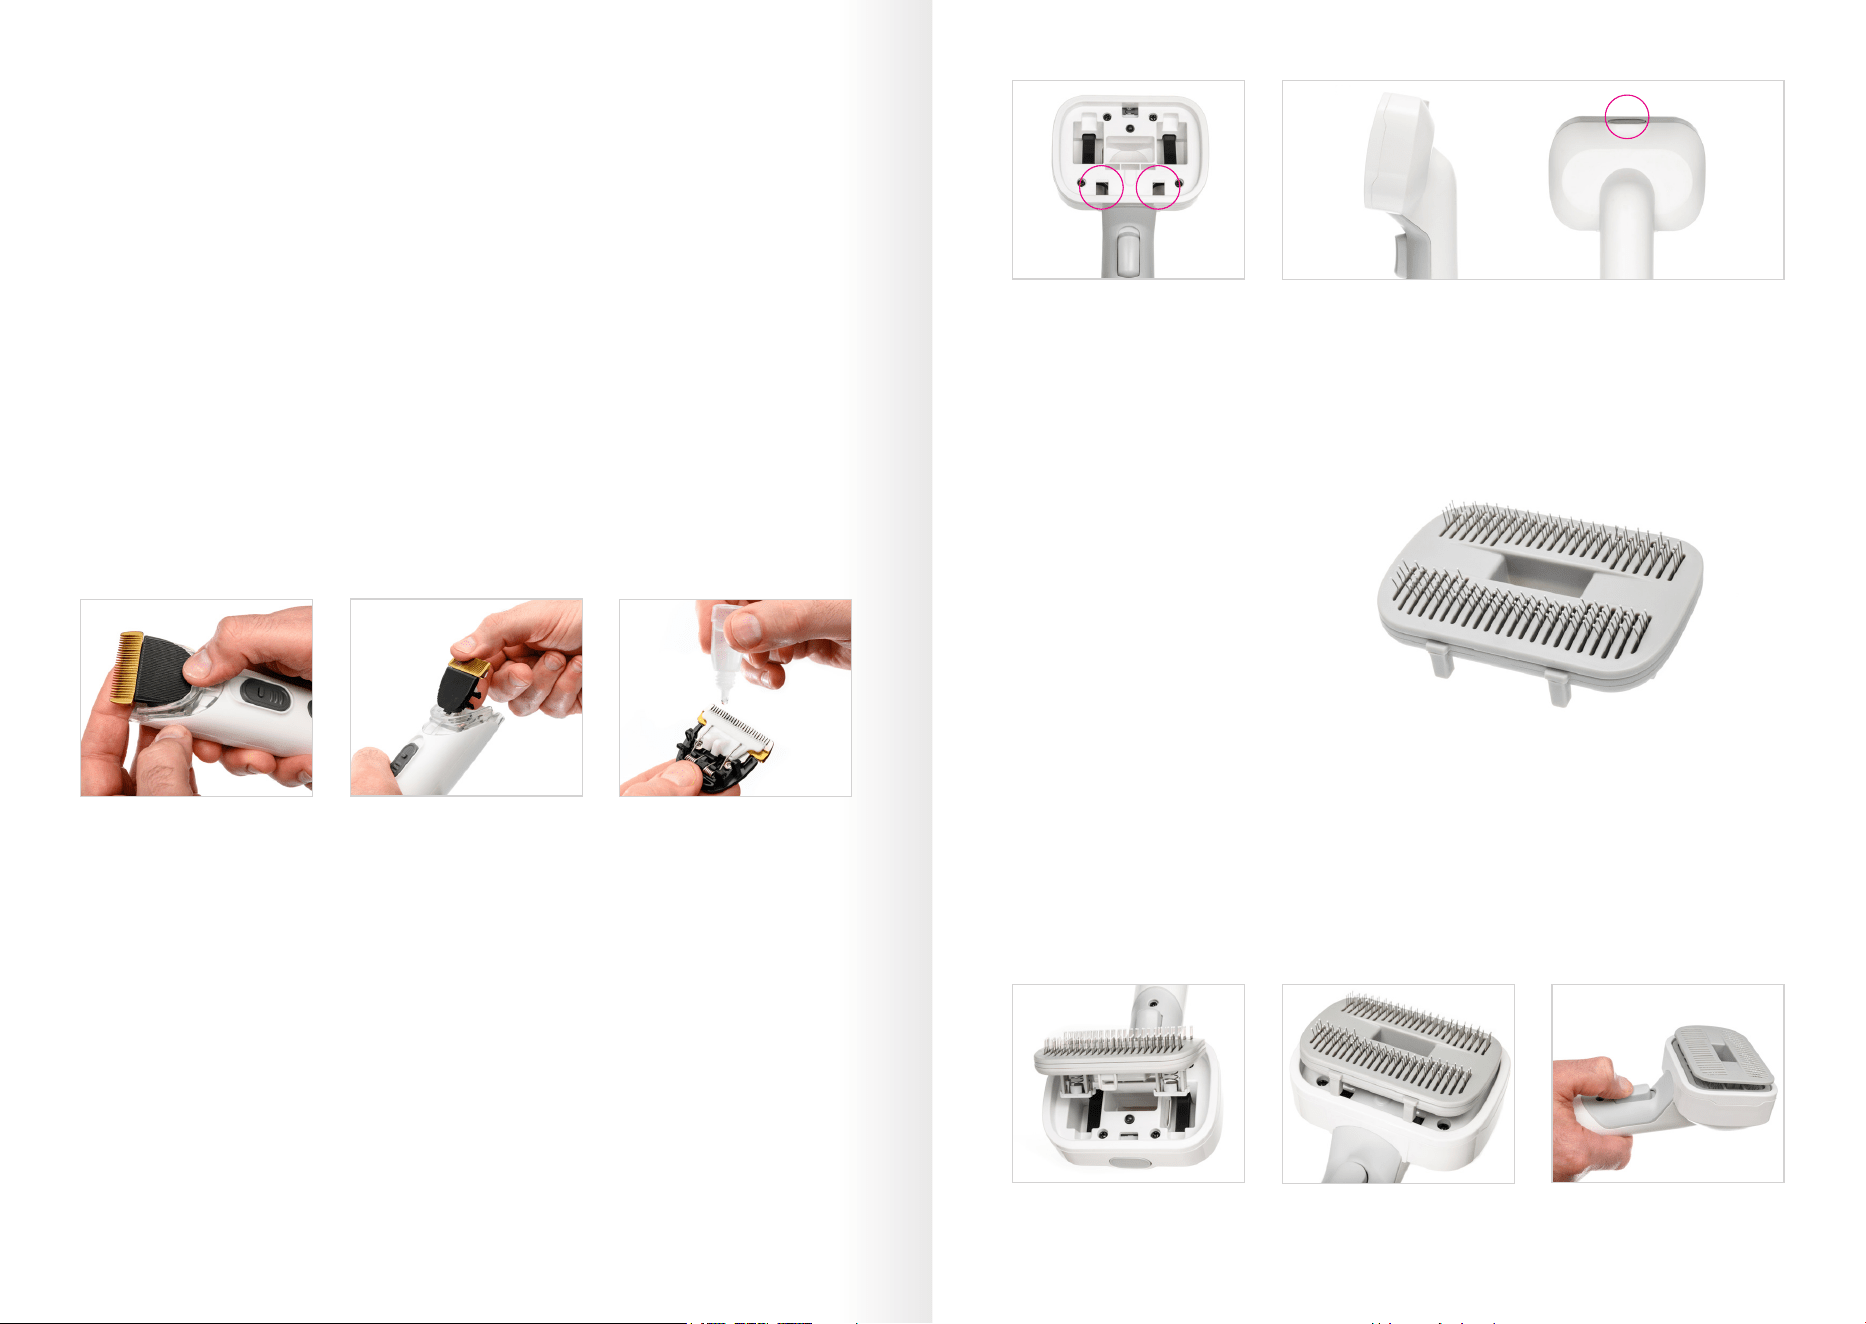
2. Brush Holder
The brush holder is designed to use with 3 dierent heads. To change heads, simply push the
button on the top of the brush holder, and the head pops out.
When replacing with a dierent head, make sure you insert the two lugs on the head pointing
downwards to t into the location in the brush holder, then clip into place.
The button on the front of the handle enables you to simply remove any hair that has
blocked the brush. Press this button and the central head lifts, to enable you to easily remove
the trapped hair, even when in use.
Removing blade for
cleaning
Lift and pull out the blade Adding lubricant onto
the blades
Locating lugs Press here to change heads
Inserting brush head
Locating
Lifting brush head
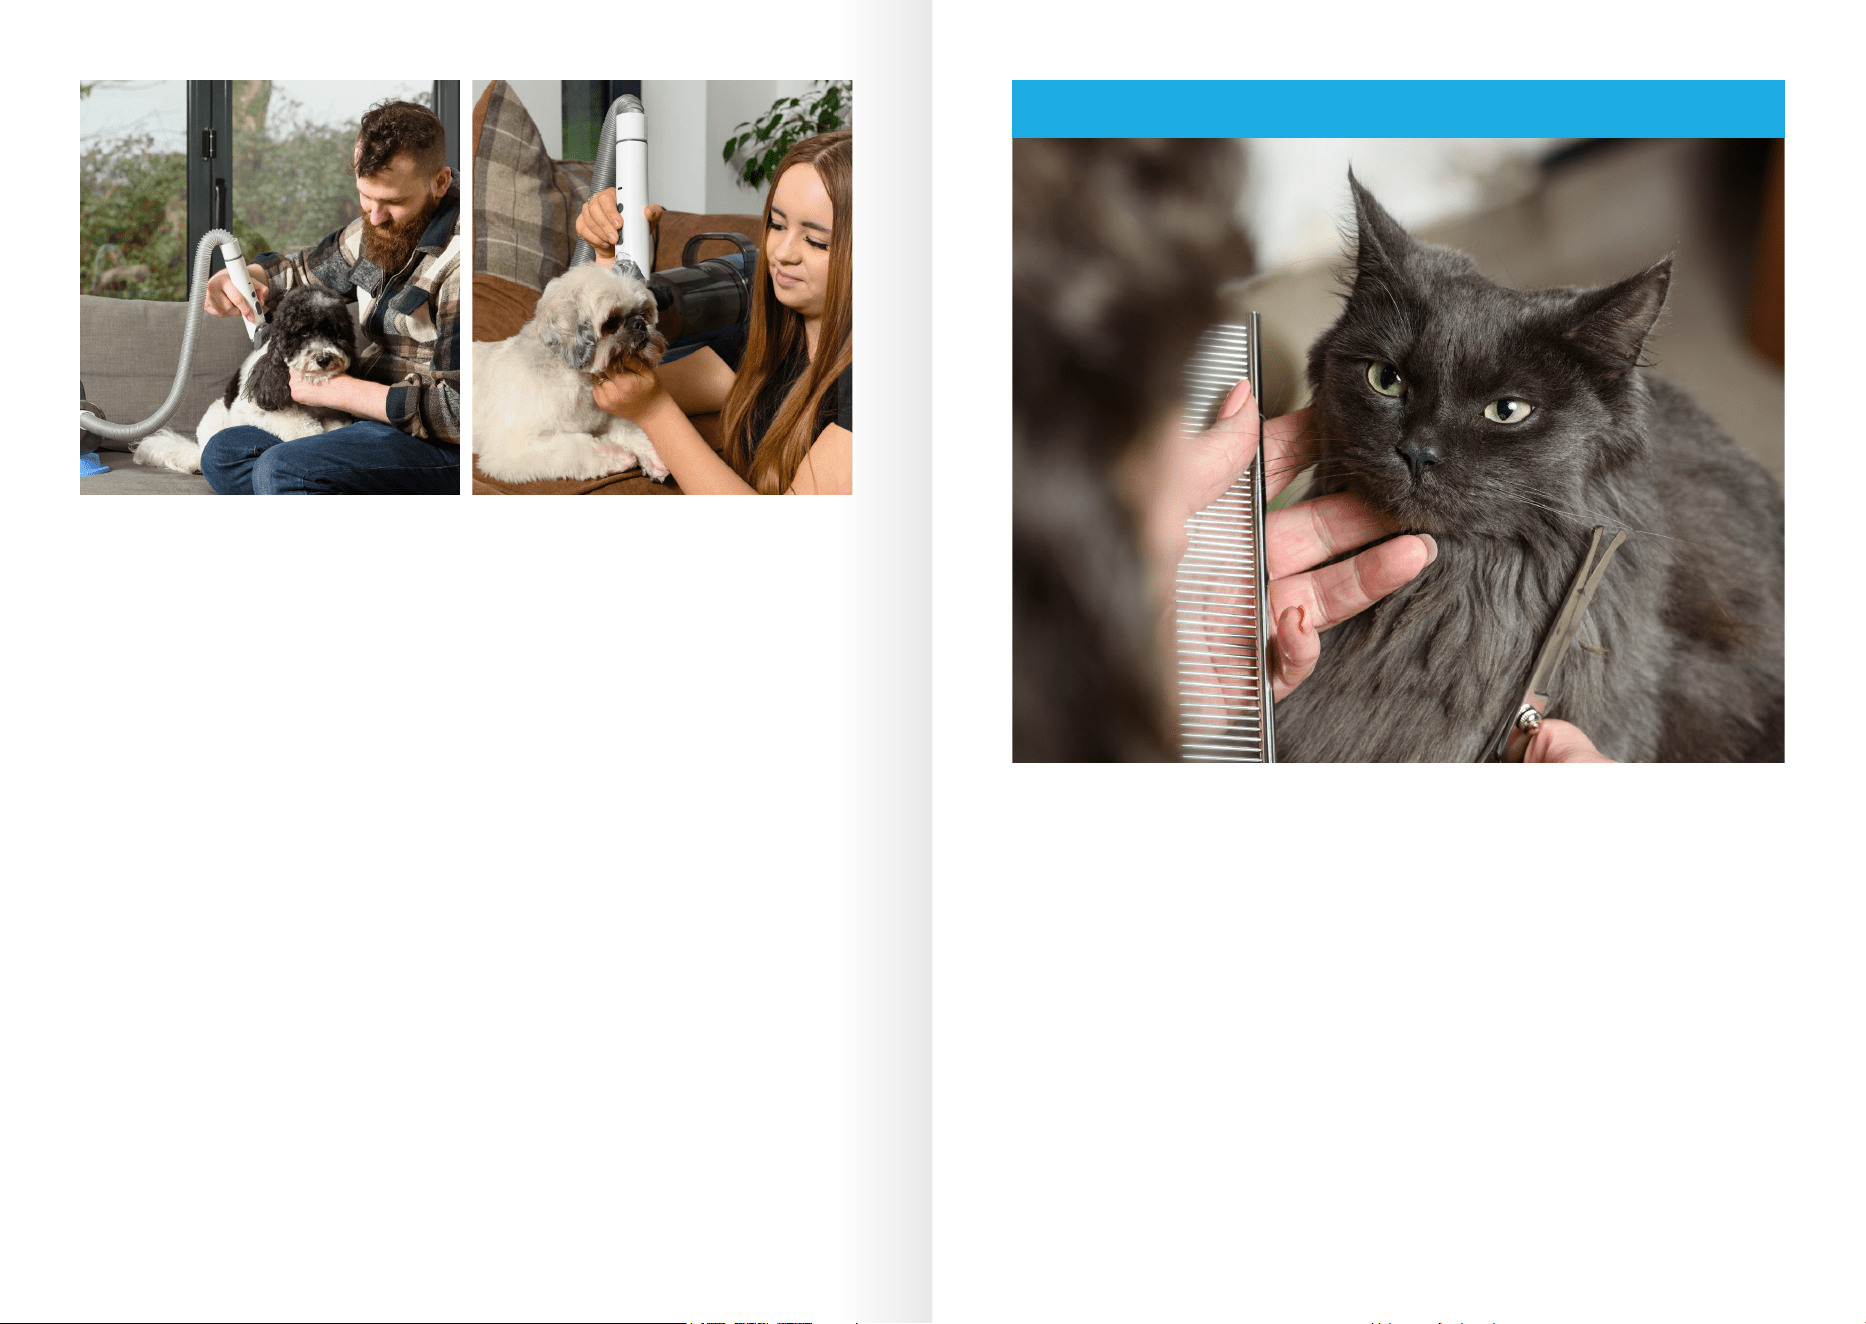
3. Slicker Brush
Connect the Slicker brush to the hose.
The brush has a series of specially designed tightly packed angled wire pins with nylon ball
ends to go through the pet’s coat and are designed to make it gentler on the skin. Use this
on medium coated, long-coated, wire-coated and curly coated dogs to remove mats (and to
prevent mats from forming) by removing loose hair.
To keep your pet’s coat in perfect condition it is recommended you use this brush once a
week. If your pet’s hair reacts to static electricity, then use an anti-static spray mist to help
prevent this.
Each of these heads are used in conjunction with the vacuum, which means you should have
much less to clean up, as virtually all of this is collected in the fur container.
4. Knot Buster
The Knot Buster is perfect for removing knots from long, silky and curly coats. The blades cut
through mats and with a rounded edge on the blades it is gentle on the skin.
The Knot Buster should be pulled slowly upwards through the coat and moved back and
forth to gently detangle stubborn knots. The blades will have a cutting action on knotted hair.
This is designed to ensure your pet stays comfortable while being groomed.
5. Molting Comb
• Removes loose hair from both the topcoat and undercoat
• Fine teeth whisk away fur
• Ideal molting tool
To use the Molting Comb, ensure the fur is free of knots and mats. Gently brush the hair in
the direction of the fur growth. The teeth of this comb will slide into the undercoat, pulling
away loose hairs.
To ensure your pet has an enjoyable grooming session, start gently. Pause or end the
grooming session if your dog becomes agitated.
Begin grooming sessions when your dog is relaxed, if possible, after they have exercised.
Use tools gently and avoid tugging on the skin or on knots or mats. Give your dog plenty
of reassurance throughout the grooming session.
Pause or end the grooming session if your dog becomes agitated or shows signs of stress.
Keep grooming sessions brief to begin with and increase the length of the sessions as your
dog becomes used to grooming.
7. Hair Removal Brush
This brush is designed to collect any pet hair or fur that has fallen onto furniture, bed or onto
clothes.
Simply t this to the hose and you can then start to clean. The bristles and hook and loop pad
make sure that you collect the maximum hair possible.
8. Long Crevice Tool
This tool is ideal for cleaning dirt or pet hair from sofa, carpets, keyboards and dicult to
reach areas.
Simply t to hose to use.
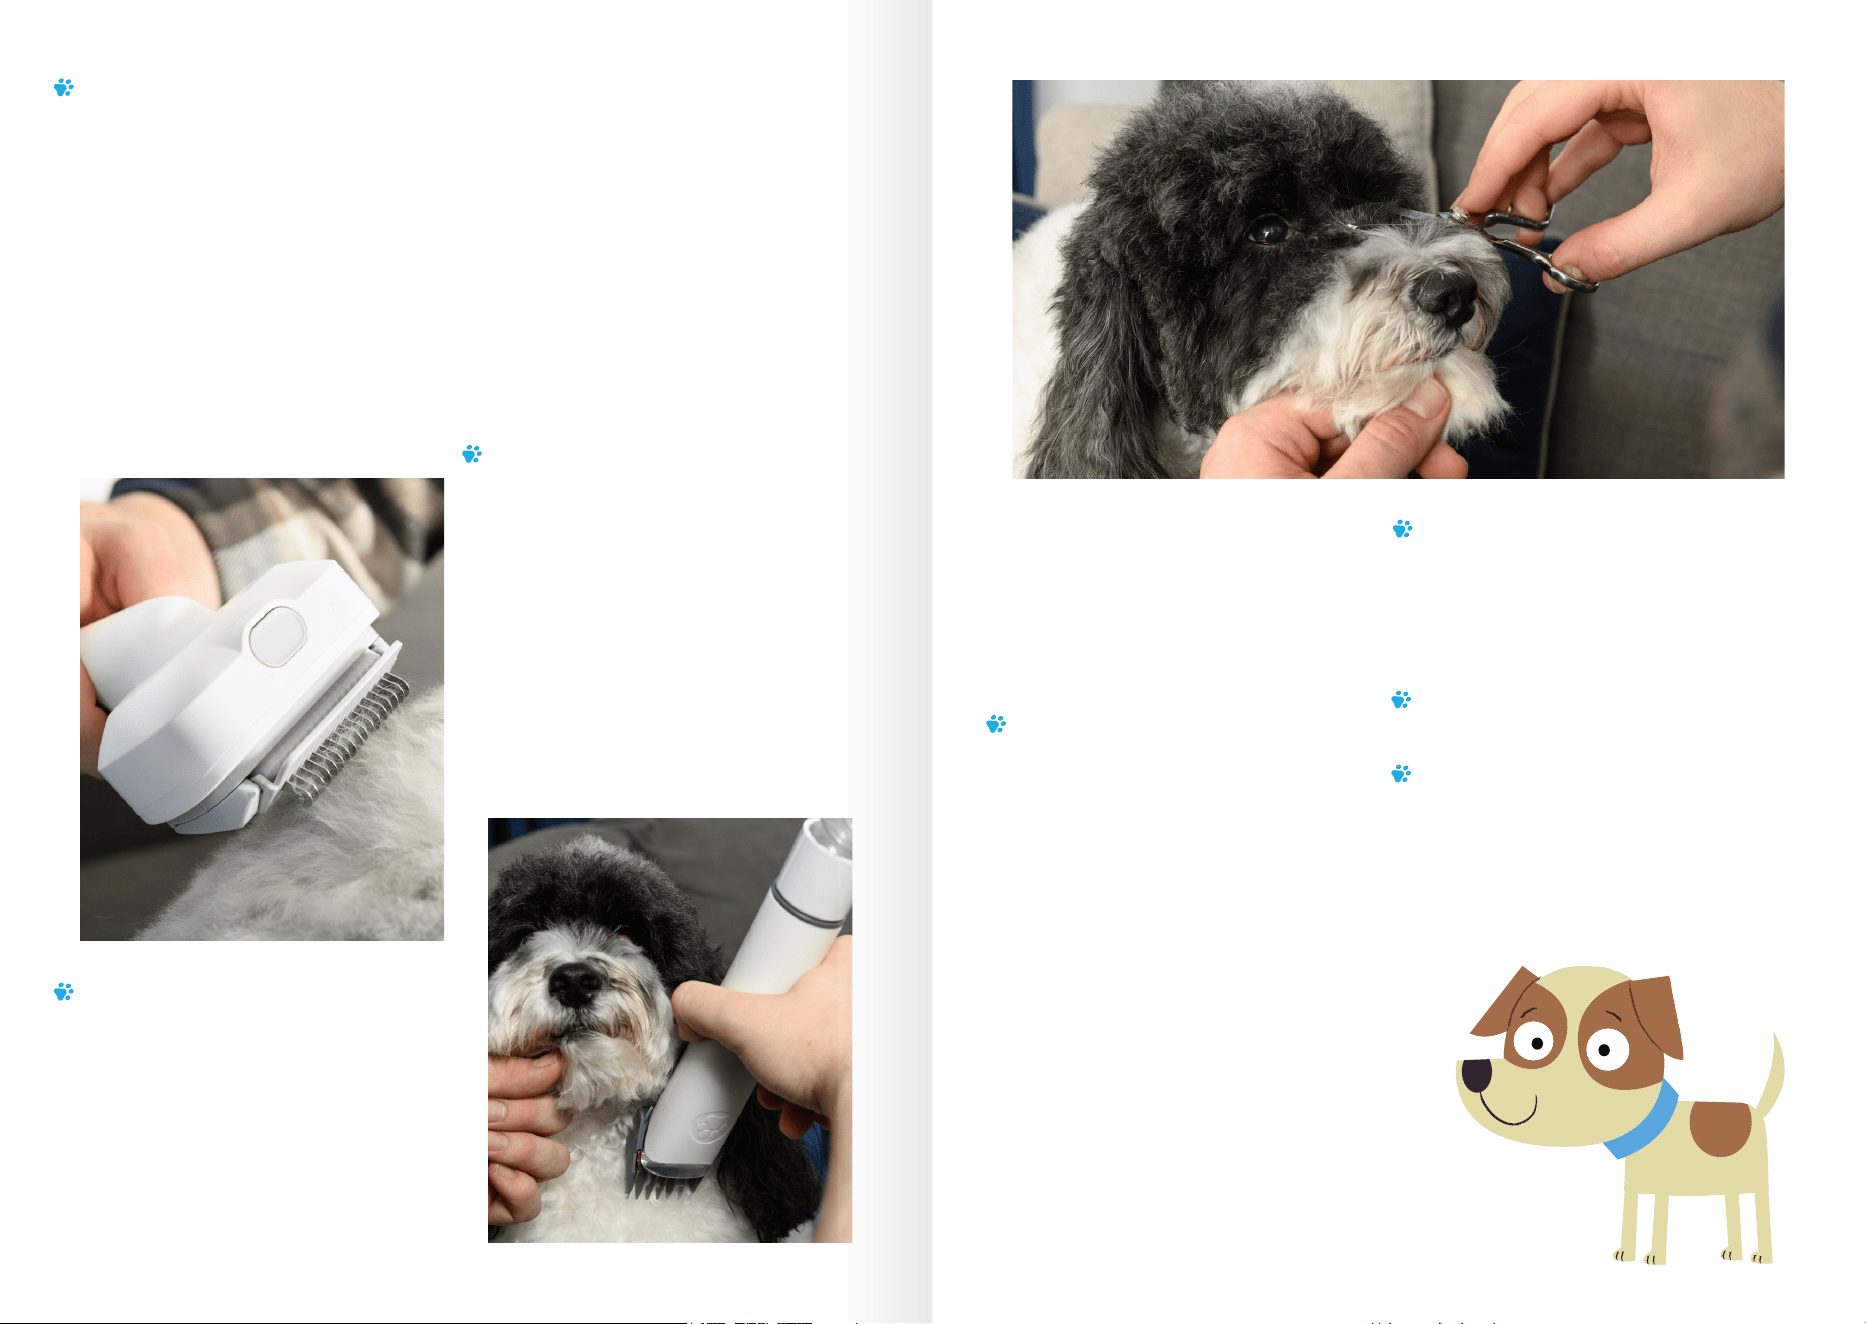
6. Straight Scissors
Use your ring nger and your thumb and place them in the eye holes. Only the top of your
ngers should be in the holes, don’t press them too deeply into the nger holes because your
hand will cramp up and you won’t be able to scissor smoothly.
Just hold it at the tip of your ngers and move your thumb. Don’t open the scissors too wide,
just move evenly and slowly by moving your thumb. Try not to push the shears too much just
gently work with them.
10 11
There are 2 pre-lters which will need to be checked regularly. These are located in the fur
collector cannister. Having removed the hose, remove the cannister by grasping the handle
and simply twisting anti-clockwise, and this will release the cannister rst.
Remove the HEPA lter by simply pulling it out, the black foam lter is on the reverse. Then,
remove the grey internal main lter holder. Empty all contents from the cannister.
The white HEPA lter and black foam lters are washable in warm soapy water and will need
drying for at least 24 hours before re-tting. Then, simply ret the items in reverse order,
making sure each is centrally positioned to get a good t. If the cannister does not easily t
back onto the main body, then you will need to check you have retted the lters correctly.
If the main lter requires attention, then once the pre-lters have been removed you will
need to pull out the grey moulding containing the main lter. Grasp the centre of the grey
moulding and pull it out, you may need to tug this a little.
Once cleaned simply re-assemble in reverse order, making sure all parts are tted correctly.
Spare lters are available from Carolina Pets. Foam lter is part EB1385. HEPA Filter is part
EB1386. Main Stainless Steel Filter is part EB1387.
HEPA and foam
Main lter unit
9. Cleaning Filters
10. Storage
Power Cord – this can be wound around the base of the unit for easy storage.
Included in the kit is a bag to hold all the accessories so these can be kept together.
We recommend that you keep all items stored in the original box received in order
to keep all these together.
Recommended Steps for Clipping Your Pet’s Fur
Not all dogs need regular trimming. But for
those who do, it is recommended that their
hair is cut every four to eight weeks.
The dogs that need regular haircuts include
breeds that have long hair, such as Poodles,
Shih Tzus, Lhasa Apsos, as well as sporting
breeds, such as Spaniels. Using a clipper to
give the dog a haircut keeps them tidy and
reduces the chances of long hair becoming
tangled.
It is not recommended that dogs with thick,
double coats, such as Pomeranians, Huskies,
Chows and similar types, have their hair
clipped. It is not unusual for normal hair
growth patterns in these dogs to be disrupted
if they are clipped, especially if the hair is
clipped short. This phenomenon is called
“post clipping alopecia.” If you decide that
learning how to trim your dog’s hair is
something, you want to try, then this kit is
for you. If you look after your clippers, they
should last a long time. Using guide combs
is safer than using just a clipper blade
because the comb keeps the blade away
from the dog’s skin. These can be used
over the blade that comes with the clipper,
allowing you to leave a longer coat where
desired. We supply 6 dierent combs
between 3mm and 18mm.
Step 1: Give your dog a bath and dry them
o completely. Clipping a clean, dry coat
will give you the best results and be kinder
to your grooming equipment.
How Often Should I Trim My Dog’s Hair?
DOGS
12 13
Step 2: Brush your dog completely by using
one of the hair removal brushes, and make
sure you can get a dog comb through every
bit of hair. Once that is done, you are ready
to use your clippers and guide comb.
If you cannot brush the tangles out and
your pet is very matted, even after using
the Knot Buster de-matting head, we
suggest you have your pet professionally
groomed to remove the tangles this time,
then have a regular, frequent schedule of
home grooming. Clipping a matted coat is
a skill best left to someone with experience,
because the possibility of injuring your dog
increases dramatically.
Step 3: Find a place to work where your
pet can be secured, and you are both
comfortable. Keep in mind that dogs are
moving targets and grooming tools are
sharp, so it’s important to nd a way to
keep your pet as still as possible while you
work. Something like an enrichment toy
with spreadable food or treats on is ideal,
some of which come with handy suction
cups on the back to attach to tiles on the
side of the bath.
If you are working with your dog on an
elevated surface, make sure they cannot
jump o and hurt themselves, and never
leave them unattended. Something like
a bathing tether might work if you have
a smooth surface to secure it to. Some
people may nd clipping their dog in a dry
bathtub works, because it keeps the dog
conned to a small space and cleaning
up the cut hair is a breeze. But if you
decide that grooming your pet at home is
something you want to do regularly,
investing in a grooming table will make
your work much easier, and safer, too.
Step 4: Start with the 9mm comb and clip
the pet’s sanitary area. This means clipping
long hair away from the rectum and away
from the vulva or penis to prevent urine
from gathering in long fur.
When clipping the hair, make sure to keep
the blade at against the body. If the blade
is tilted so that the cutting edge meets
skin, you may accidentally cause a cut or
irritation. Use the shortest of the guide
combs over your blade if it makes you
nervous to use the clipper blade on these
delicate areas.
The 9mm comb can also be used to trim
the hair from the bottom of the paw pads.
Painful mats can form between the large
pad and the toes, so clipping this hair is a
good idea. It also decreases the amount
of dirt and moisture your dog will bring in
after a trip outside.
Step 5: Next, for the rest of your pet decide
how long you want your pet’s hair to be and
choose a corresponding comb guide. They
are clearly marked to show how much hair
will remain after clipping but this can vary
with coat texture and thickness of the dog’s
hair. Do a test clip on your dog’s underbelly
to see if you like the length before moving
on to work on the back or sides. You can
always choose a shorter guide, so start a
little longer than you think to see how it
looks on your dog’s coat.
Most groomers clip with the lay of the coat.
In other words, from the head toward the
tail and from shoulders and hips toward the
toes. Some pet owners nd they get good
results clipping against the lay of the coat.
This will make the hair a little shorter than
the length marked on the guide combs, but
you may nd you get more even results
clipping this way.
Step 6: Once you have clipped your dog’s
hair to the desired length, brush and comb
again to nd any uneven spots, then re-clip
those areas. You will need a set of scissors
to trim up around your dog’s head, feet
and tail.
Step 7: Store your Grooming kit in a dry
place, out of reach of your dog.
Step 8: To maintain your pets coat at home,
keeping the hair thoroughly brushed and
combed at least once a week is crucially
important. A tangle-free coat will keep your
dog comfortable and will be easier and
safer to groom with clippers every four to
eight weeks or as needed.
14 15
Pro Tips for Grooming Your Dog with Clippers
• If your dog is not accustomed to the sound and feel of the Grooming Kit, you can
desensitize them by stroking them all over with just the clipper turned on. Once that is
accepted, turn on the vacuum unit. Repeat the stroking all over while not actually clipping
any hair. Most pets soon accept the strange new sensation and motor noise and then you
can begin to cut the hair.
• Positive reinforcement training can be used here. Giving your pet their favourite treat whilst
stroking them with the clippers turned on will encourage them that it is a positive thing and
will help speed up the process. If the pet is fearful though, it is not advisable to give treats
as it encourages this behaviour, instead it is advisable to switch o the unit, calm the pet
down, reward, then try again.
• When working around sanitary areas and the “tuck up” area (the skin where the hind leg
joins the body) be especially careful to avoid nicking the skin.
• When clipping your pet’s ears, hold the ear at and always work from the centre, toward the
edges. Canine ears have some little folds and aps of skin that can easily become injured by
the clipper blade.
• If you struggle with static when grooming then it is possible to purchase an antistatic
conditioning spray for pets which will prevent static while you work, a light coat spray is all
that is needed. Lightly spritz the coat while you use the brushes supplied.
• After clipping your dog, use the soft brush supplied to remove any hair residue from the
blade. Then follow the above instructions to oil the blade before storing it. This is a crucial
step in maintaining your clipper blade so it will be ready for action the next time you need
to use it.
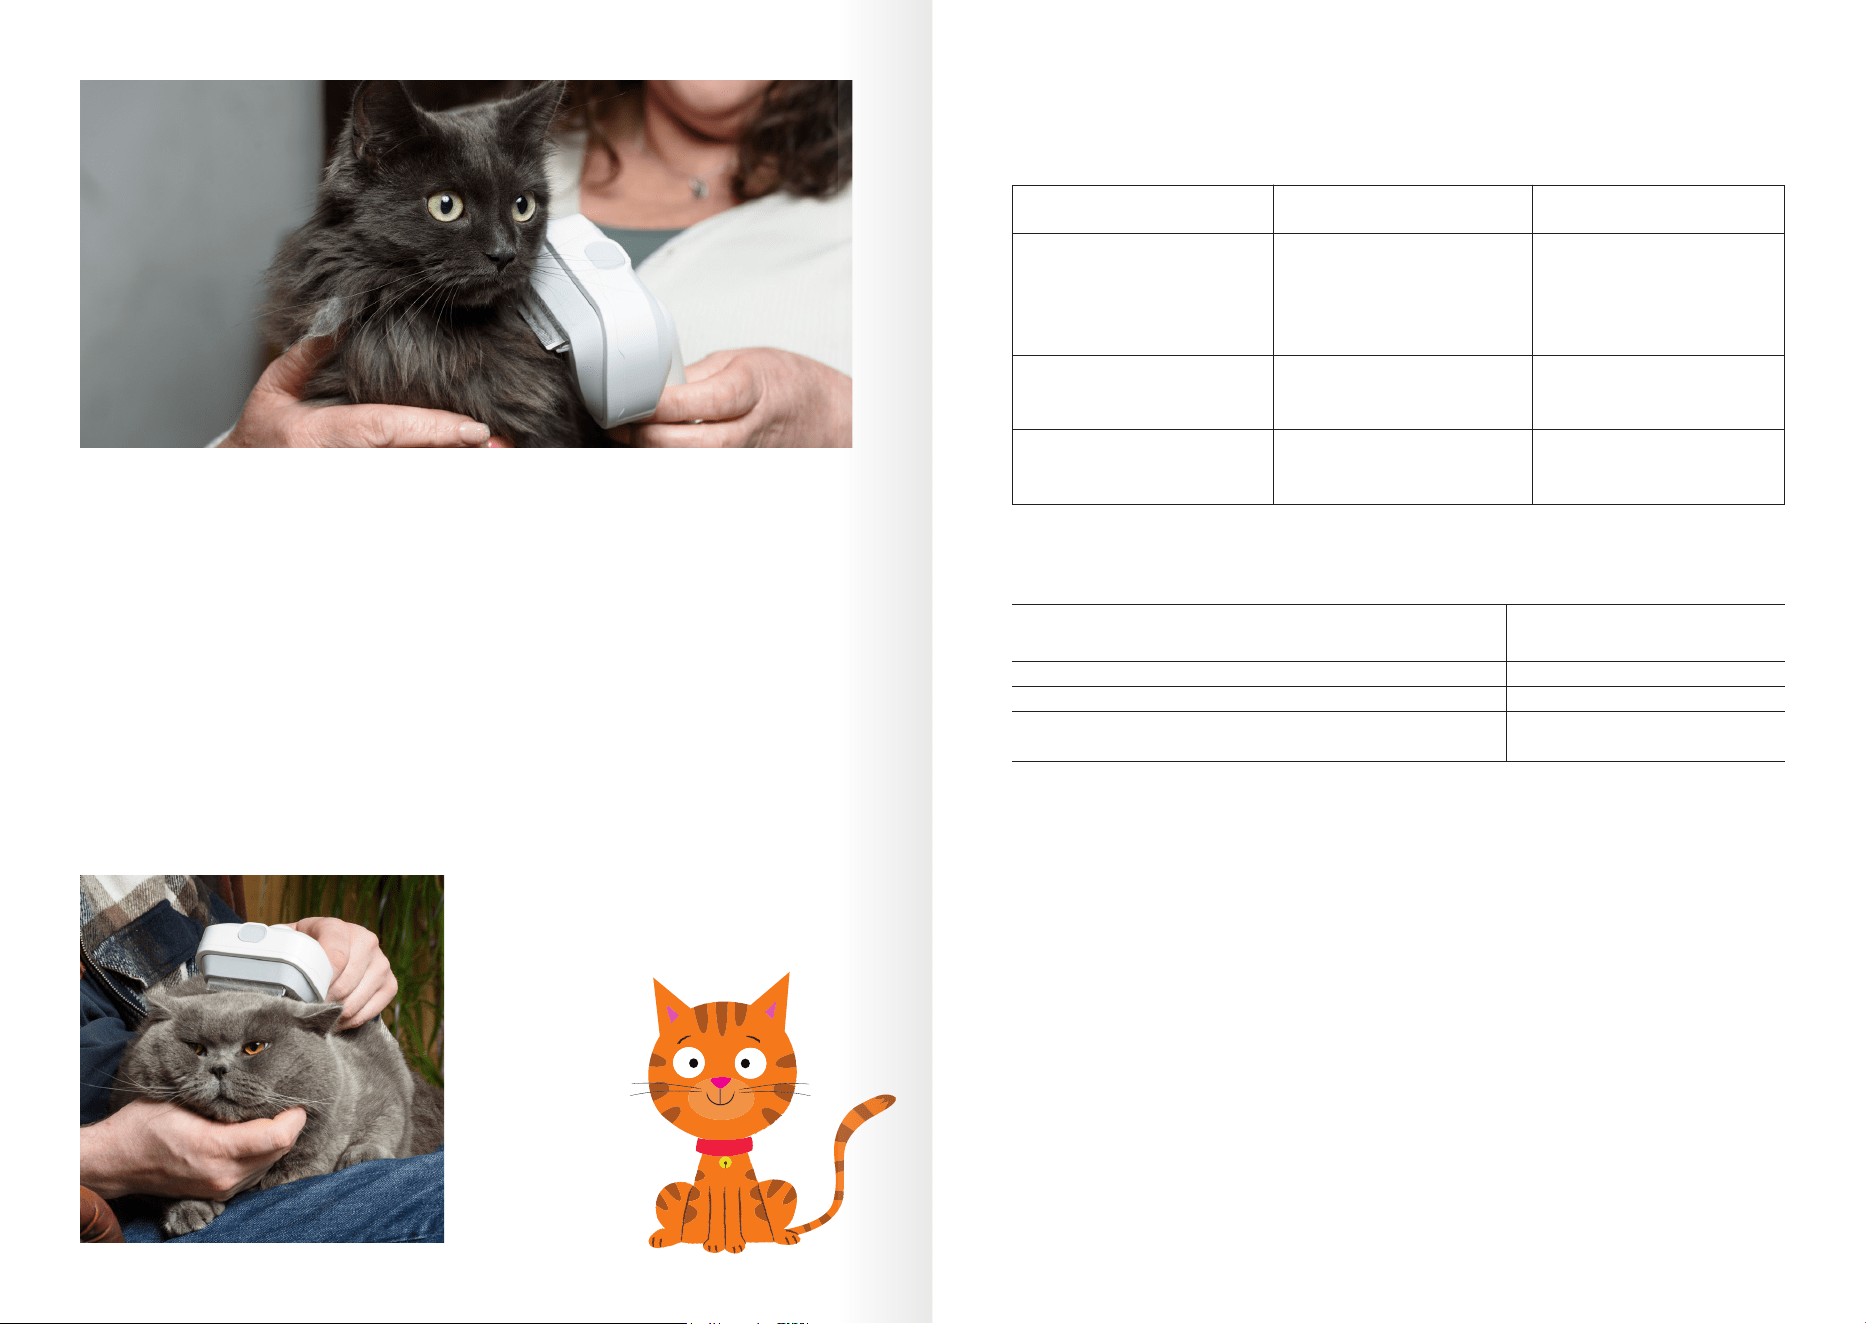
Should you groom your cat?
In a word, yes! Regular grooming allows you
to spend quality time with your cat, as well
as providing the opportunity to monitor
their health. Grooming also removes dust,
dead skin and loose hairs, prevents serious
tangling and matting and can improve
circulation.
Looking at the condition of your cat’s coat
can be a good way of checking on their
overall health and nutrition. Look for issues
such as sore patches, wounds or matted
fur, and if the condition of your cat’s coat
changes, visit your vet for a check-up.
How much time to spend
grooming your cat?
This depends on your cat, but short, regular
sessions are best. Use praise and treats
to help your cat associate grooming with
nice things. Some cats nd grooming
uncomfortable, so if you notice your cat
twitching, swishing their tail, growling or
hissing, end the session.
Many long-haired cats need grooming every
day to prevent knots from forming, while
short-haired cats generally do a good job
of grooming themselves. However,
grooming sessions at least once a week
are still important to help keep their coat
in a good condition.
CATS
16 17
Grooming a long-haired cat
Use the Slicker brush, also in conjunction
with a wide-toothed metal comb if required
and follow the direction the hair grows
in naturally. Include your cat’s chest and
abdomen, behind their ears, the backs of
their legs and armpit area, where tangles
tend to form.
Tease any knots gently with the Knot Buster
or comb to avoid damaging the skin. Keep
grooming sessions short, especially while
your cat gets used to them, and nish with
praise and a reward.
Choosing the best grooming
brush for your cat
• Knot Buster, which should be used
instead of attempting to cut matted fur
with scissors, as there is the risk of cutting
your cat’s skin.
• Fine Comb, which can help distribute
natural oils which can help the condition
of your cat’s fur for shorter haired cats.
• Slicker Brush, which is good for pulling
out dead hair and breaking down mats
in long-haired cats.
You can also buy grooming mitts and
rubber brushes, which are useful for
removing the dead hair from shorter-
coated breeds.
Troubleshooting
Recharge – during operation, if the clippers stop operating, it indicates that the battery is
exhausted and needs recharging. Follow charging instructions as above.
Problem
Clippers do not start
Remember to hold down
switch for 1.5 seconds to
start
Motor running but no
vacuum
Unable to recharge
normally
Cause
1. Switch is o
2. Battery is low
Filters are blocked
Incompatible power
adaptor
Solutions
1. Turn switch on
2. Recharge immediately
Clean all lters
Use a 5v power adaptor
Electrical Connection - Clippers
This unit is a Class III battery-powered appliance which means it operates at SELV (Safety
Extra Low Voltage).
This unit is supplied with a USB-C charging cable. If this lead is damaged DO NOT USE for
charging your HS265. Instead, replace immediately, CP300 Part No; EB1374.
Technical Data
Clippers
Lithium battery capacity
Charging time for Clipper
Max No load speed
Power adaptor required
(not supplied)
2000mAh 4v
3 – 4 hours
160rpm
General 5v adaptor
Motor Unit
Power 300w
Voltage 230v AC
18 19
Please ensure that you dispose of any electrical waste and batteries
in the most environmentally friendly way and ensure these are
recycled wherever possible.

For spares, service and further information please visit the shop page
on our website www.Carolina-Pets.com alternatively
email: [email protected]
Ewbank LLC
6801-D Northpark Boulevard, Charlotte, NC 28216 USA
Email: [email protected]
Telephone: +1 704 827 9385
Your Warranty
This product is covered by a 2-year warranty for domestic use only. This warranty does not
extend to use in professional grooming salons.
This does not cover normal wear and tear or abuse. For guarantee purposes, please
retain your original receipt as proof of purchase.
This warranty does not aect your statutory rights.
Made in China EB01377 12/23
© December 2024