

List
------------------------------
------------------------------
------------------------------
------------------------------
------------------------------
----------------------------
---------------------------------------
04
06
07
11
12
14
15
Safety Attentions
Product introdution
Using instructions
After-sales service
Daily maintenance
Product specification
Warranty

04
Safety Attentions
This machine is designed for home use only. It is not suitable for commercial or industrial conditions, nor should it be used
outdoors or in wet places;
Never allow children or individuals with limited physical or mental abilities to use this product alone;
Please use it safely and under the supervision of someone who understands how to use the product properly and is aware
of the potential dangers;
Be cautious when using near children or pets, and do not let them play with the product;
Do not touch the plug or machine with wet hands, and do not vacuum up wet hair or liquid;
If the power cord or plug is damaged, do not use the product;
If the product is not functioning correctly, broken, left outside for an extended period, or has been exposed to liquids,
contact our company immediately;
Do not disassemble the product. Improper assembly may result in electric shock or fire,Contact our company for repairs;
Do not vacuum flammable or combustible liquids, such as gasoline, and avoid using the product in areas with flammable or
combustible gases;
Do not pull on the power cord, place heavy objects on top of the machine, or let the door trap the cord. Also, do not vacuum
cigarettes, matches, hot soot, or other burning, smoking, or hot items;
Do not insert anything into the air inlet or block it. After use, maintenance, or replacement of parts, ensure that the plug is
disconnected before handling the machine;
Do not store the product outdoors, in the bathroom, or other damp locations;
Avoid using aromatic or scented substances as filters, as they may cause fire;
If the power cord is damaged, have it replaced by a professional from the manufacturer's maintenance department or a
relevant service provider to avoid any risks.

This can cause failure and electric shock, which must be strictly prohibited.
Please do not operate or pull out the plug with wet hands
But it is not harmful to the body and will disappear after a while. However, if there is a persistent burning smell,
stop using the product immediately.
There may be an initial smell during the first time use
Make sure to turn off and unplug the machine before doing any maintenance.
To prevent failure and accidents, please clean the dust cup and sponge filter regularly
As this can result in accidents or dangers. If the temperature of the product rises abnormally during use, stop operation
immediately and let it cool down before continuing.
Do not attempt to maintain the product while it is turned on
remove the dust cup, and clean the sponge filter. Allow the product to cool down for at least 30 minutes before turning
it back on.
If the motor overheats or the air inlet is blocked, stop operation immediately
As failure to do so can cause malfunctions.
Make sure all filters are properly installed before using the product
such as slicker combos and trimmers, as they can cause cuts or injuries.
Pay attention to sharp blades and right angles when using accessories
Please note that the hose has a conductive function and should not be used to suck up or immerse in water for
cleaning purposes.
Regularly check the hose for damage, and do not use it if it is damaged.
Before cleaning or performing maintenance on the product, be sure to remove the plug from the socket to
prevent accidents.
Note:
*
Do not vacuum flammable or highly flammable substances such as cigarettes, and avoid using the
product in areas with flammable liquids, as it can lead to fire or explosion.
05
Safety Attentions
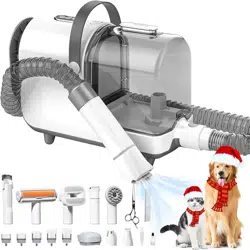
Host
host vacuum cleaner*1 User manual*1
Product introduction
06
Pet hair trimmer
Product Operation Manual
PC-S1
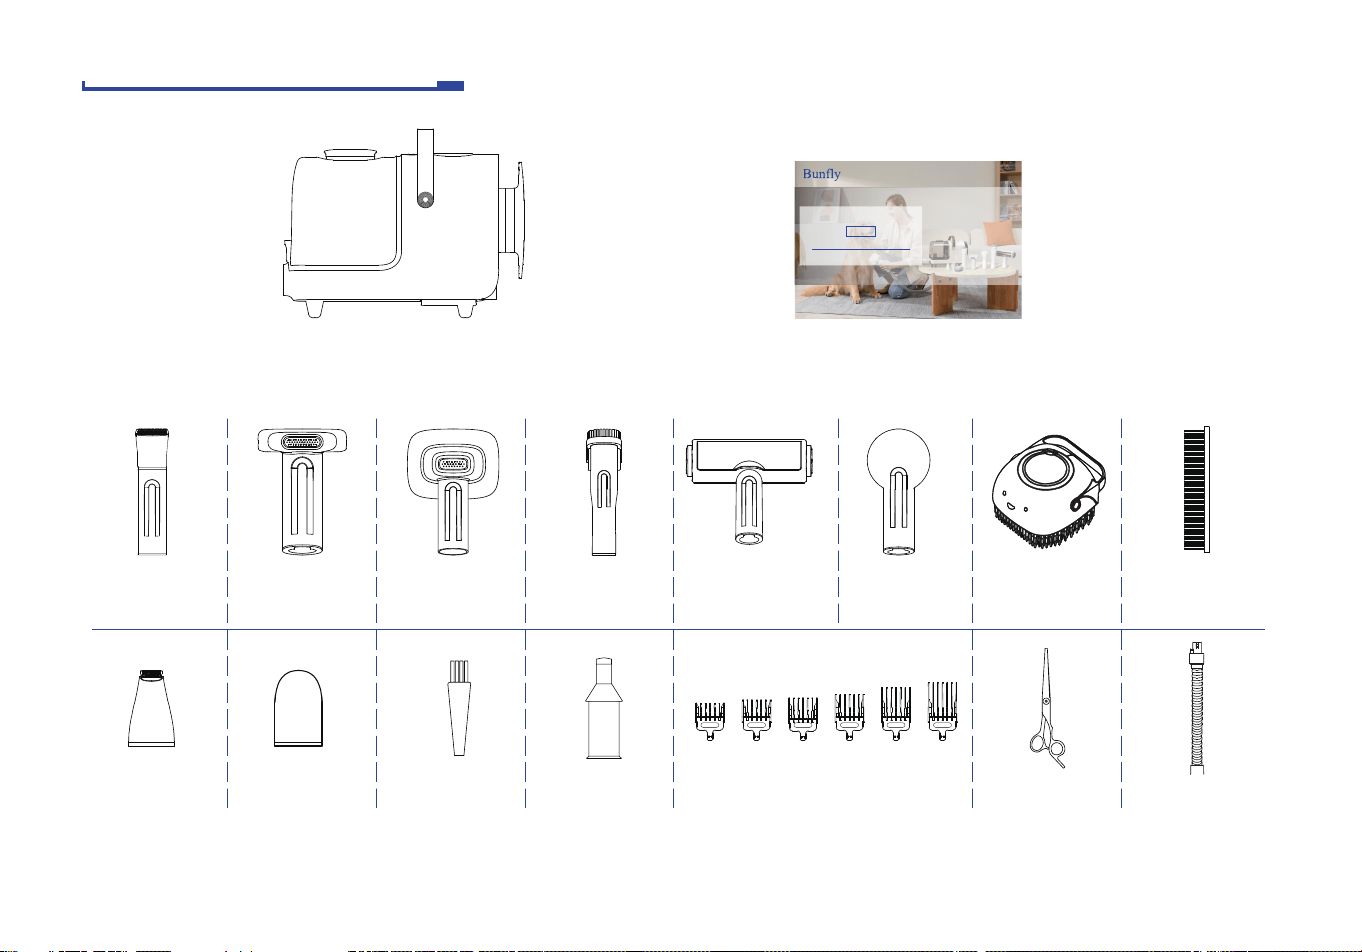
Accessories
*
Guide combs*6
(3-6-9-12-18-24mm)
Grooming
combo*1
Trimmer*1
Slicker
combo*1
2 in 1
flat brush*1
Pet hair
roller
brush*1
Massage
brush*1
Hose*1
PUSH
3mm,(1/8’’)
PUSH
6mm,(1/4’’)
PUSH
12mm,(1/2’’)
PUSH
9mm,(3/8’’)
PUSH
18mm,(3/4’’)
PUSH
24mm,(4/4’’)
Scissor*1Paw trimmer*1 Nail grinder*1
lubricating
oil*1
Trimmer
brush*1
Bath brush*1 Hair comb*1
Note: If you find any accessories lacked, please contact our after-sales svervice in time.

Before Using
Please install the dust cup gently according to the direction of the arrow and remove it in the opposite direction.
The hose should be connected to the host and accessories
Hose
Due to the functions required, please pay attention to the blades and sharp right angles of accessories to prevent
cuts and injuries.
Press this button
Using instructions
07
Accessories
How to use
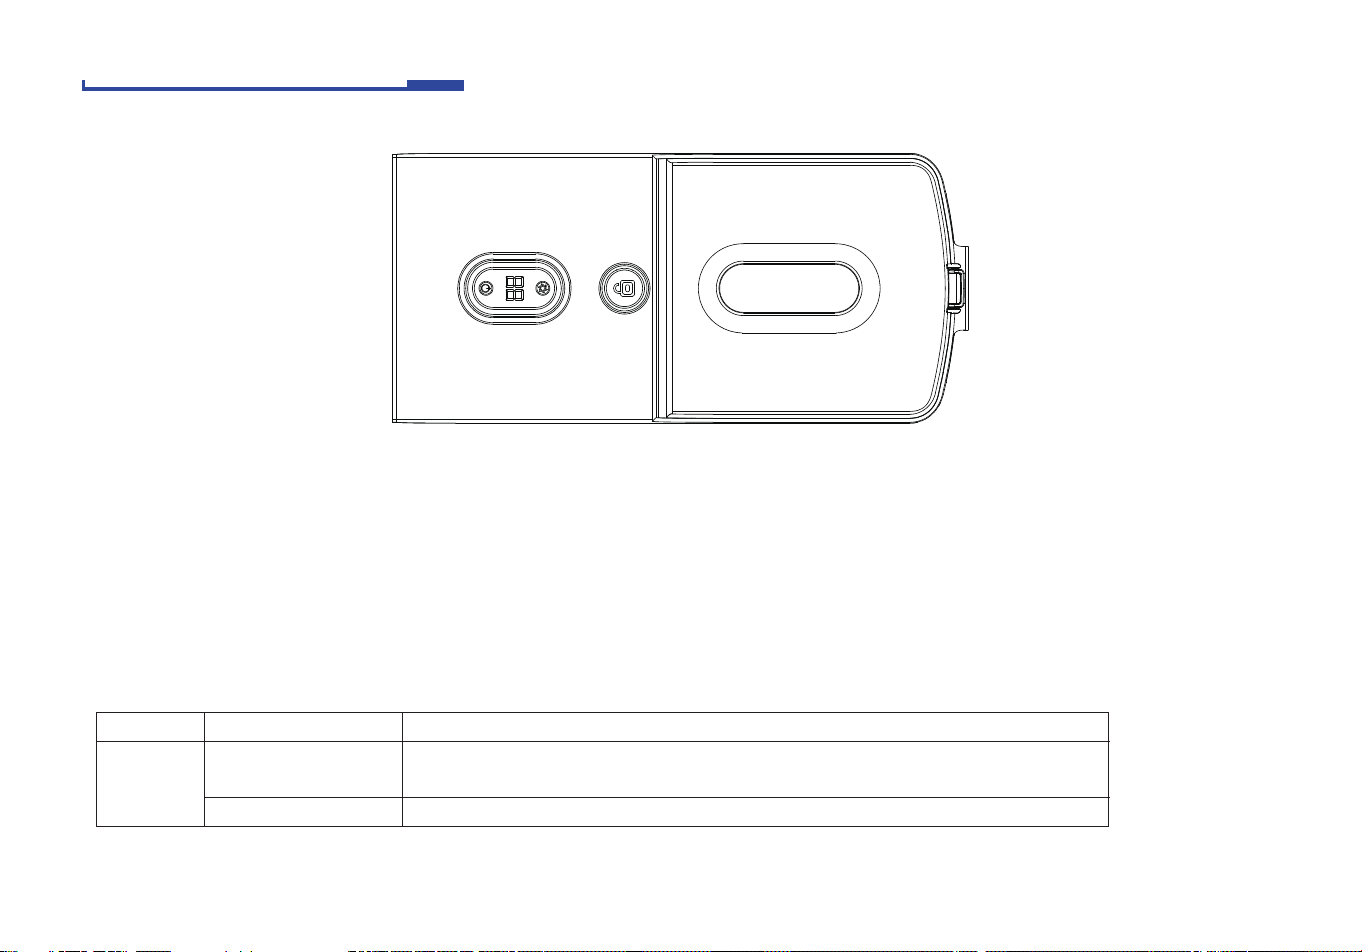
Functional Description
1. When the device is plugged in, the blue "--" display will be on, and other lights will not be illuminated.
2. To start the product in low gear, touch the power button. The wind speed key will light up.
3. Touch the wind speed button to display "02" in blue,For shy or fearful cats, it is recommended to use 1-2 gears.
4. Touch the wind speed button again to display "03" in blue. After touching the button three times, it will cycle through
01-02-03 and repeat.
5. To turn off the system, touch the power button. The system will display "--" to indicate standby mode.
08
Error code
ER
Fault reason
Trimmer hair blocking
Trimmer loose contact
Repair Measure
To reattach the trimmer, turn off the machine first. Ensure that the power switch on the
trimmer is turned off (ON/OFF) before reattaching it. Once the trimmer is reattached,
restart the machine.
Pls clean the hair according to the video guidance.
Using instructions
09
How to use accessories
Note: When using the product, avoid aiming the suction head directly at your pet's face.
*
Using instructions
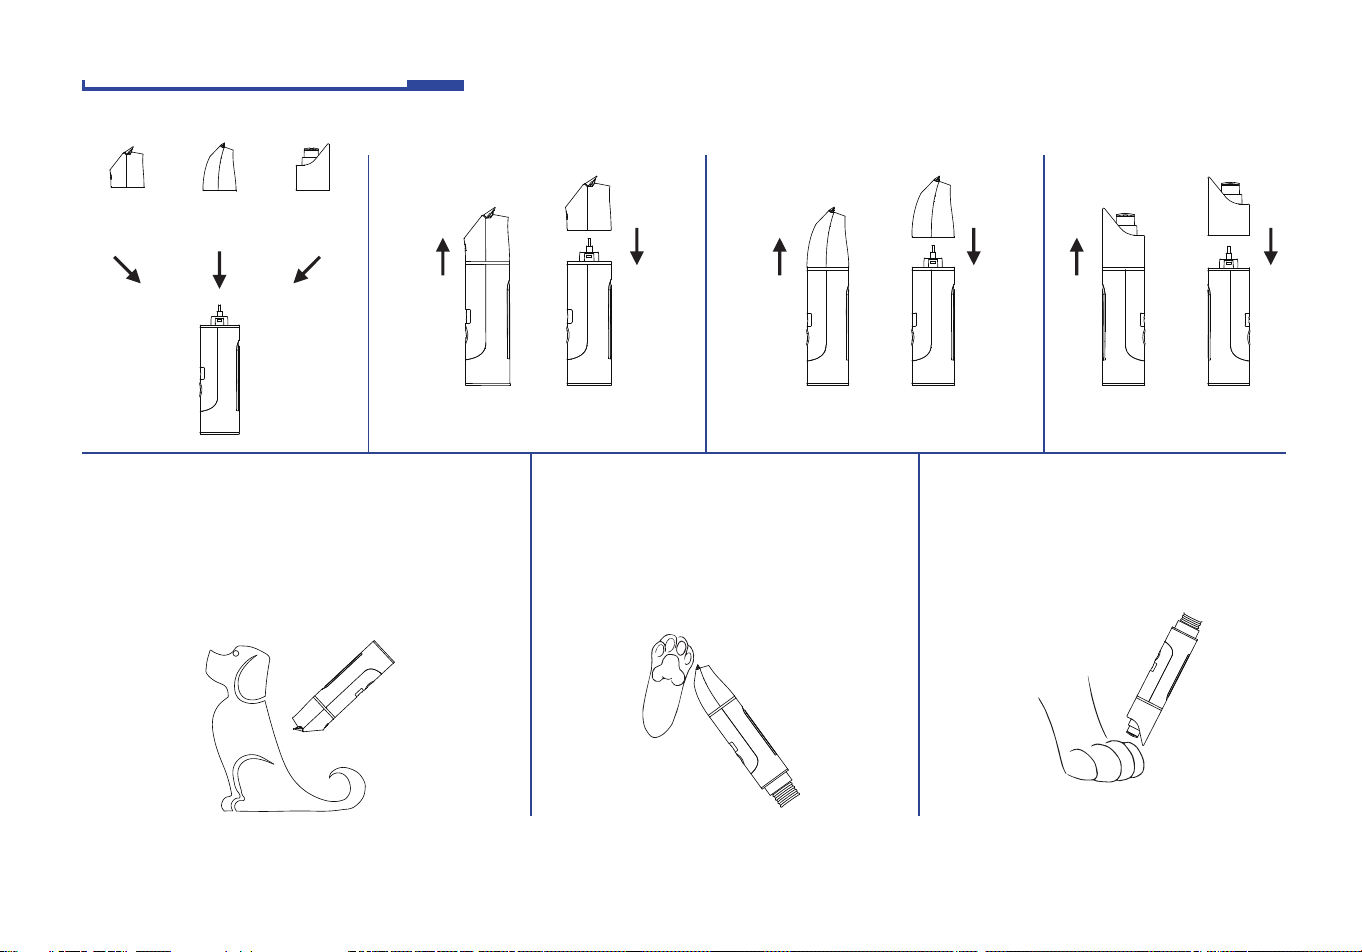
Trimmer
head
Paw trimmer
head
Nail
grinding
head
Three kinds
of tool heads
Interchange-
ability
Trimmer
Pet paw trimmer
Shaved and inhaled the pet hair on the sole of the
pet, no residue, foot hair will not fly around.
Note:
Please be careful with soft parts of pet skin. Don't
overexert ,cause the cut to the skin.
Pet paw trimmer
Shaved and inhaled the pet hair on the sole
of the pet, no residue, foot hair will not fly
around.
Note:
Please be careful with soft parts of pet skin.
Don't overexert ,cause the cut to the skin.
Pet nail grinder
Polish your pet's nails to achieve
cosmetic results.
Attention:
Do not sand too much to avoid damaging
pets.
InstallDisassemble InstallDisassemble InstallDisassemble
10
How to use accessories
Using instructions
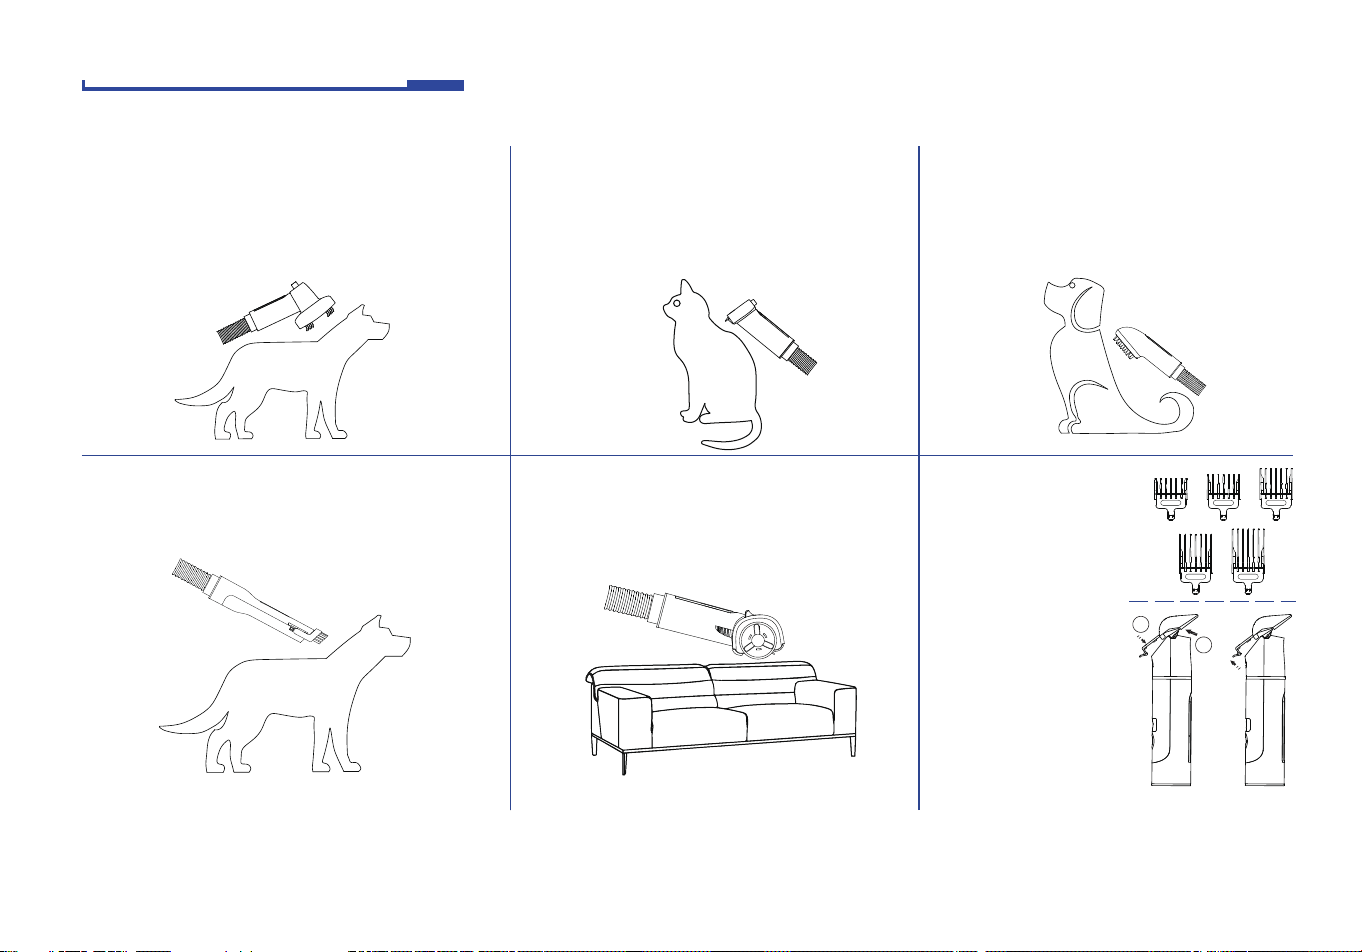
Slicker combo
This product effectively removes your pet's
shedding hair, old hair, and other debris while
also utilizing rational hair function to make the
hair more neat and fluffy.
2 in 1 flat brush
Clean your pet's body and shed hair to achieve a
clean effect.
Grooming combo
You can trim your pet's excessively long hair to
achieve a desirable grooming effect with this product.
Note:
Please be mindful of the edge and sharpness when
using the product and avoid applying excessive force
to your pet's skin.
Pet hair roller brush
Remove pet hair from furniture and clothing.
Massage brush
It can remove the residual floating hair
and miscellaneous hair on the pet.
Grooming is good for blood circulation
and skin metabolism.
Guide combs
For pet hair styling,
according to
different hair type
needs, change the
hair comb of
different lengths
(optional use).
Attention:
Hair comb is
scattered and
small, please keep
it properly when
not in use, beware
of loss.
InstallDisassemble
PUSH
3mm,(1/8’’)
PUSH
6mm,(1/4’’)
PUSH
12mm,(1/2’’)
PUSH
18mm,(3/4’’)
PUSH
24mm,(4/4’’)
1
2
Note: When using the product, avoid aiming the suction head directly at your pet's face.

11
If you have any questions or comments about the product, please contact [email protected].
After-sales service
12
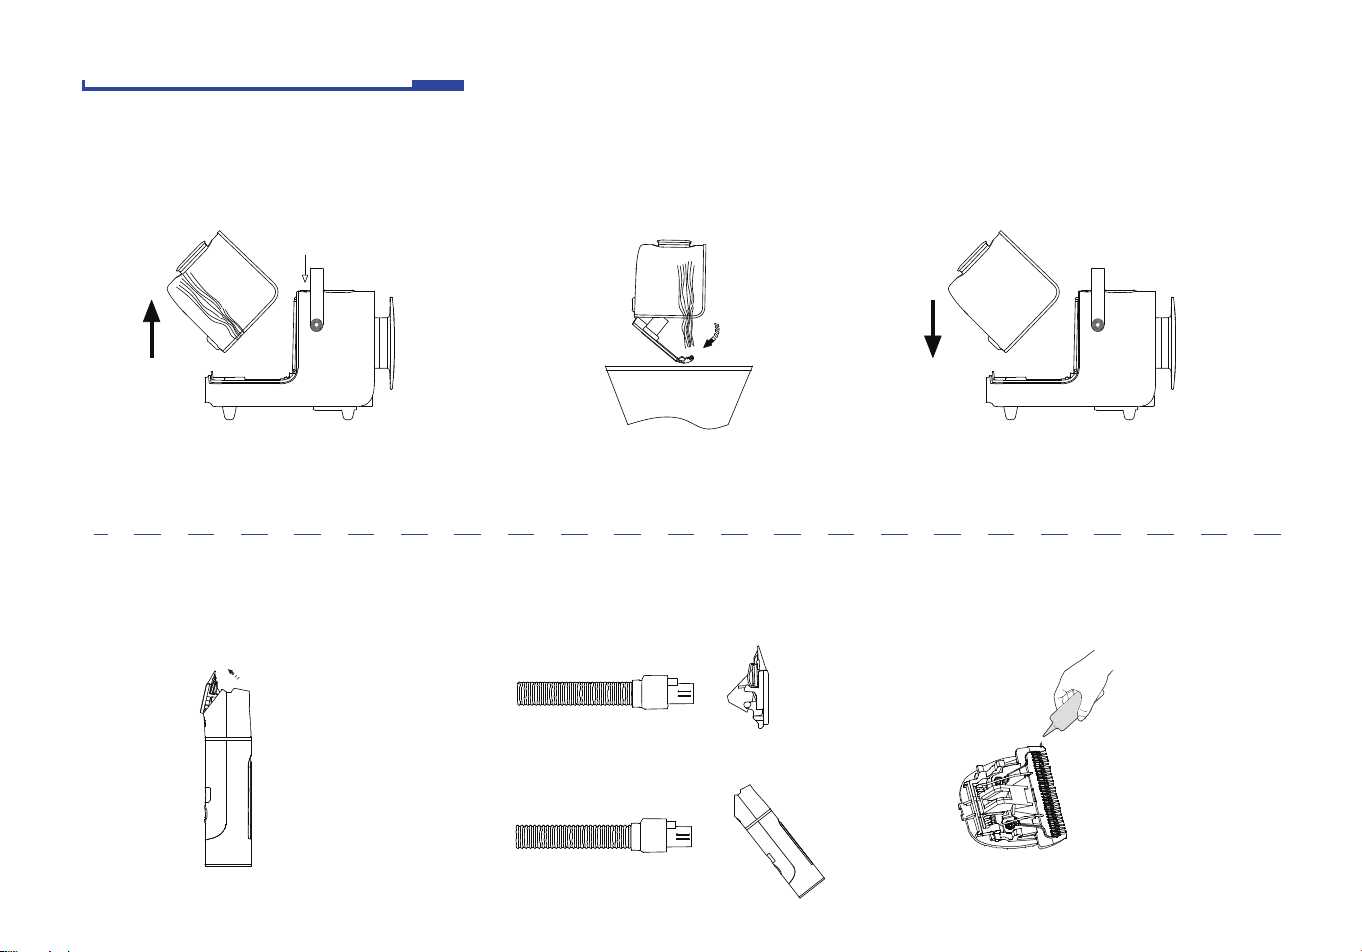
Clean the dust cup
Trimmer Cleaning
1. Remove the dust cup
Remove the dust cup by lifting it
slightly in the direction of the arrow.
1. Pls turn off the trimmer before
installing the knife.
2. Remove residual impurities from
the suction port.
3. Add lubricant to the tool head.
2. Open the cover and pour out
Push the clasp to open the dust cup
and pour out the dander.
3. Place the dust cup
Install the dust cup in the direction of
the arrow.
Daily maintenance
Note: When removing the dust cup, handle it with care and do so gently. After emptying
the dust cup, allow it to fully dry before reinstalling to prevent any water from
entering the motor and causing electric shock or damage to the machine.
Press this button
*
Tool head
Tool rest
13
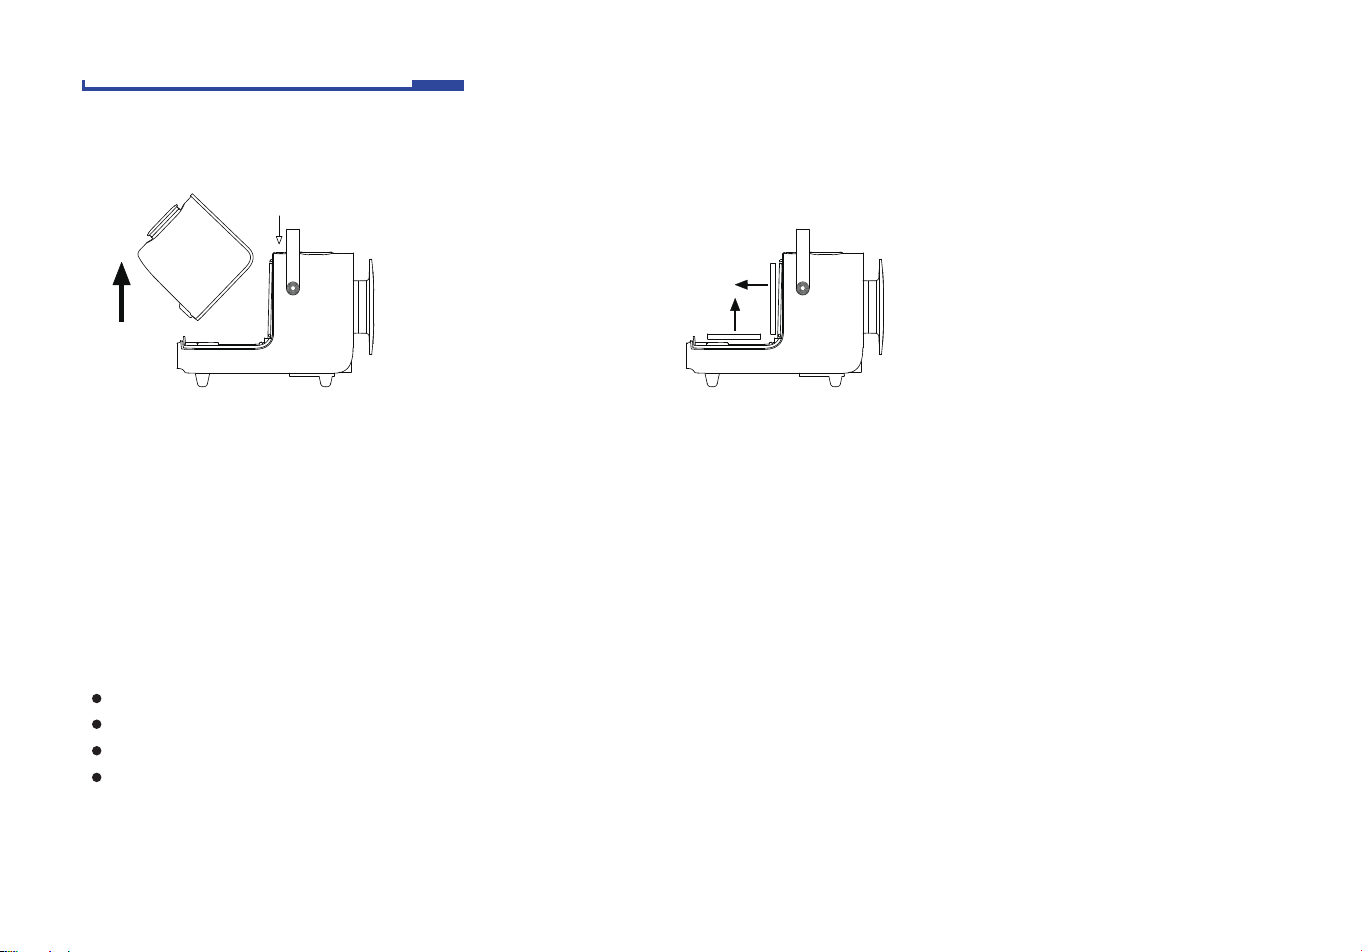
Filter sponge and HEPA cleaning
1.Remove the dust cup.
3. Rinse the filter with running water and allow it to drain.
4. Place the filter in a well-ventilated area to dry for at least 24 hours.
5. Once the filter is completely dry, install both the filter sponge and HEPA properly in their designated place.
2. Remove filter sponge and HEPA.
Press this button
Rinse the filter sponge with cold water at least every other month.
Regularly check the condition of the filter sponge and clean it if it appears dirty.
When cleaning, always ensure that the power is cut off and the plug is removed from the socket.
After cleaning the filter sponge, make sure to let it dry completely before re-installing it. Failure to do so may result
in electric shock or equipment failure.
Note:
Daily maintenance
*

14
Power
350 W
5.2 Ft
3.5 L
13.4*5.5*9.5 IN
8.2 Ft
The dust cup volume
The fuselage size
The power cord length
length of the hose
Product specification

Warranty
1. The warranty period for this product shall be 12 months from the date of receipt.
2. In case of damage or malfunction during normal use, repairs will be provided free of charge within the warranty period.
If repair is not possible, a replacement product will be issued after the damaged product has been returned.
3. The replacement product will have the same warranty period as the original product from the purchase date.
4. For questions or repair needs, please contact [email protected] for assistance.
5. The provisions of this product are subject to change without prior notice. The company reserves the right to update the
warranty terms as necessary. All repair requests will be handled according to the latest warranty terms.