23779, 23782
EN
Original Instructions
Version 1
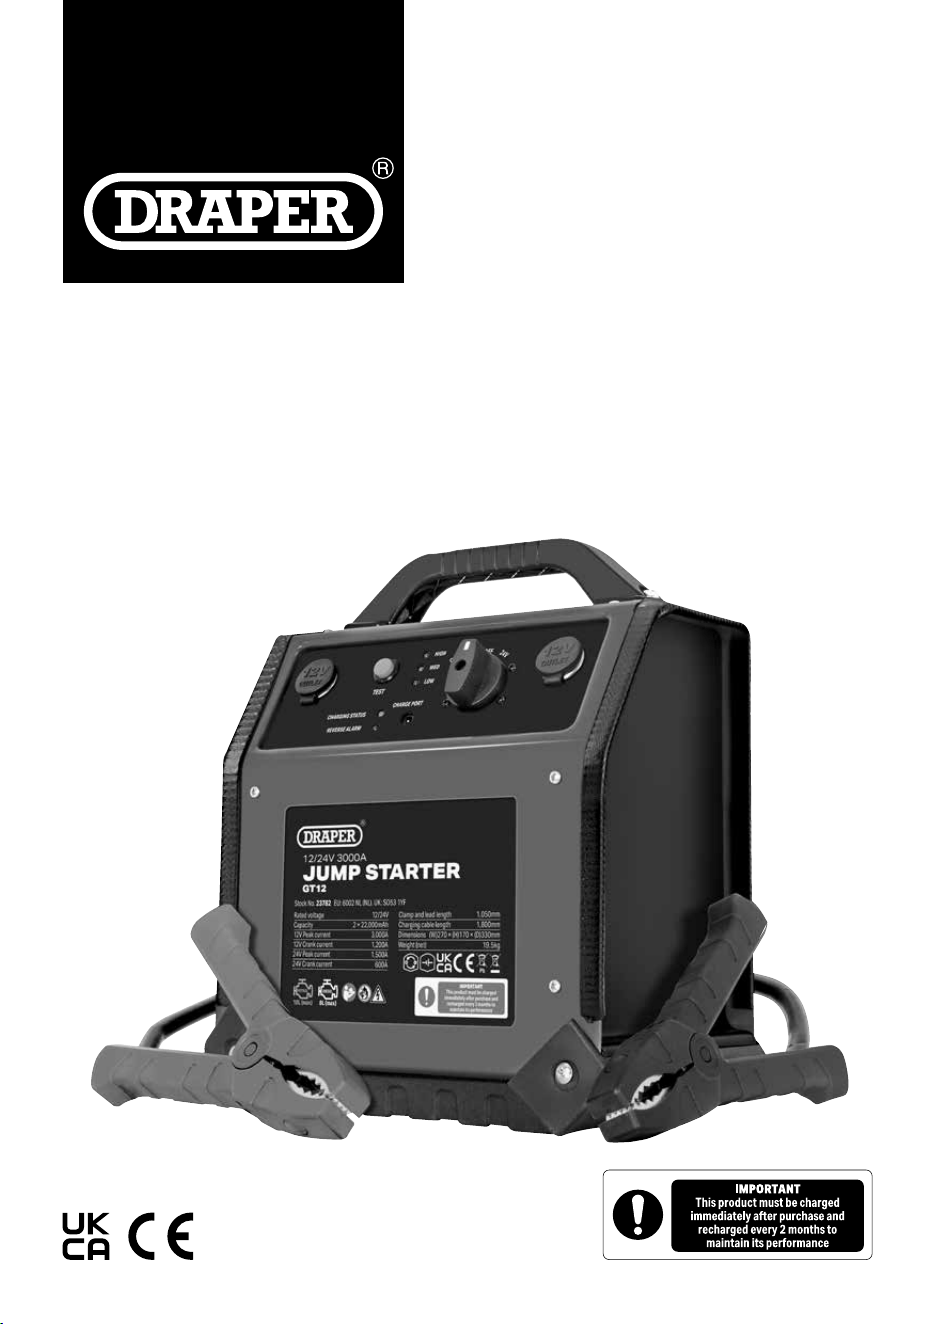
12/24V 3000A
JUMP
STARTER
1.1 Product Reference
User Manual for: 12V/24V Jump Starter
Stock No: 23779, 23782
Part No: GT12, GT24
1.2 Revisions
Version 1: April 2024
First release
As our manuals are continually updated, always ensure
that the latest version is used.
Download the latest version from:
drapertools.com/manuals
1.3 Understanding the Safety Content of
This Manual
WARNING!
– Situations or actions that may result
in personal injury or death.
CAUTION! – Situations or actions that may result
in damage to the product or surroundings.
Important: – Information or instructions of particular
importance.
1.4 Copyright © Notice
Copyright © Draper Tools Limited.
Permission is granted to reproduce this manual for
personal and educational use ONLY. Commercial
copying, redistribution, hiring or lending is strictly
prohibited.
No part of this manual may be stored in a retrieval system
or transmitted in any other form or means without written
permission from Draper Tools Limited.
In all cases, this copyright notice must remain intact.
1. Preface
These are the original product instructions. This
document is part of the product; retain it for the life
of the product, passing it on to subsequent holders.
Read this manual in full before attempting to
assemble, operate, or maintain this product.
This Draper Tools manual describes the purpose
of the product and contains all the necessary
information to ensure its correct and safe use.
Following all the instructions and guidance in
this manual will ensure the safety of both the
product and the operator and increase the
lifespan of the product.
All photographs and drawings within this manual are
supplied by Draper Tools to help illustrate correct
operation of the product.
Every eort has been made to ensure the
information contained in this manual is accurate.
However, Draper Tools reserves the right to amend
this document without prior warning. Always use the
latest version of the product manual.
– 2 –

2. Contents
– 3 –
EN
1. Preface 2
1.1 Product Reference 2
1.2 Revisions 2
1.3 Understanding the Safety Content of This
Manual 2
1.4 Copyright © Notice 2
2. Contents 3
3. Product Introduction 4
3.1 Intended Use 4
3.2 Specication 4
4. Explanation of Symbols 5
5. Health and Safety Information 6
5.1 General Health and Safety Precautions 6
5.2 Additional Safety Instructions for Jump
Starters 6
5.3 Working With Lead-Acid and
Other Vehicle Batteries 7
5.4 Safety Information for This Product’s
Rechargeable Battery 7
5.6 Residual Risk 8
6. Identication and Unpacking 9
6.1 Product Overview 9
6.2 Packaging 10
7. Charging Instructions 11
7.1 Charging the Jump Starter 11
7.2 Checking Jump Starter Battery Status 11
7.3 12V Output Sockets 11
8. Operating Instructions 12
8.1 Jump Starting 12
9. Maintenance and Troubleshooting 13
9.1 General Maintenance and Storage 13
9.2 Troubleshooting 13
10. Spares, Returns and Disposal 14
11. Warranty 15

– 4 –
3. Product Introduction
3.1 Intended Use
This product has been designed as a heavy-duty vehicle
battery jump starter, suitable for use with cars, vans, light
commercials & boats. It can also be used as a portable
power source for devices powered by a 12V DC supply.
Part of our core range, this product is suitable for regular
use by enthusiasts and tradespersons alike.
CAUTION! NEVER use this product to jump start
lithium-ion (Li-ion) batteries.
Read this manual in full before attempting to assemble,
operate or maintain the product, and retain it for later
use.
3.2 Specication
Stock No.: 23779 23782
Part No.: GT12 GT24
Rated voltage: 12V 12V/24V
Peak current: 3000A 12V 3000A/24V 1500A
Crank current: 1200A 12V 1200A/24V 600A
Capacity: 2 × 22Ah 2 × 22Ah
Petrol Engine: 10L 10L
Diesel Engine: 8L 8L
Integral battery: lead-acid sealed lead-acid sealed
DC Output: 2 × 12V (10A) 2 × 12V(10A)
Charging Adaptor:
Input voltage: 230V AC 230V AC
Input frequency: 50Hz 50Hz
Output voltage: 12V/3A 12V/3A
Product Class: Class II Class II
Dimensions (L×W×H): 270 × 170 × 330mm 270 × 170 × 330mm
Weight: 17.3kg 19.5kg
Important: To maintain the health of the integral battery, this product must be fully charged IMMEDIATELY after
purchase; see 7.1 Charging the Jump Starter.

4. Explanation of Symbols
Read the instruction manual
Mandatory action required
Warning!
Warning Electrical hazard –
risk of electrocution!
Do not incinerate or throw onto re
Rated voltage (23782 only)
Alternating Current
Direct Current
Capacity
Lead-acid battery
10L (max)
PETROL
Max. Petrol engine capacity
DIESEL
8L (max)
Max. Diesel engine capacity
Reverse polarity protection
Short-circuit protection
Net product weight (23782 only)
Pb
Lead-acid content
WEEE –
Waste Electrical & Electronic Equipment
Do not dispose of Waste Electrical & Electronic Equipment
in with domestic rubbish
European conformity
UK Conformity Assessed
– 5 –
EN

– 6 –
5. Health and Safety Information
Important: Read all the Health and Safety instructions
before attempting to operate, maintain or repair this
product. Failure to follow these instructions may result in
injury or damage to the user or the product or any
connected devices.
5.1 General Health and Safety
Precautions
• Observe all standard safety precautions and good
practices when working with electrical equipment and
batteries.
• Ensure that your working environment is well lit, with
any bystanders a safe distance away.
• Use the product only as instructed by this manual; DO
NOT disassemble or modify it in any way.
• ONLY use spare parts supplied by Draper Tools.
• DO NOT use this product if you are tired or under the
inuence of alcohol, drugs or other medication.
• DO NOT use this device in wet environments or
expose it to water or other liquids.
• DO NOT use or store this product in temperatures
exceeding 50°C.
• DO NOT obstruct or insert foreign objects into the air
vents.
• Before every use, inspect the product for broken,
cracked, loose or corroded parts and leakages.
• Important: DO NOT use this product if it is leaking or
damaged in any way. DO NOT attempt to disassemble
a damaged product; contact Draper Tools to discuss
repair and replacement options.
• ALWAYS wear protective gloves and eye protection
while using this product.
• Damaged external cords must be replaced by the
manufacturer, its service agent or similarly qualied
persons in order to avoid a hazard.
• NEVER carry the product by the plug or external
cords.
• Keep this product out of reach of children.
WARNING! DO NOT leave this product
unattended or unobserved while in use under
any circumstances.
5.2 Additional Safety Instructions for
Jump Starters
CAUTION! This product MUST be charged for at
least 48 hours immediately after purchase.
Charge the product fully at least once every two
months to maintain the health of the on-board
battery.
CAUTION! The jump start function of this
product is suitable for use on 12V and 24V DC
circuits ONLY.
• Use this product in well-ventilated areas.
• NEVER use this product near ammable substances
or substances that produce ammable vapours.
• DO NOT use this product near devices that may cause
sparks.
• This product may become warm during extended
periods of use.
− ALWAYS position this device on a non-ammable
surface during use.
− NEVER cover the product or battery during use or
charging.
• ALWAYS ensure that the jump starter is switched o
before connecting the leads to a battery.
− When jump starting, the jump start leads should
remain o until you are instructed otherwise as
part of the jump starting process.
• NEVER jump start a frozen battery.
• NEVER allow the clamps to touch one another or
contact the same piece of metal as this may result in
current arcing.
• NEVER touch both the positive and negative
terminals of the connection leads.
• If the terminals are connected incorrectly, switch o
the product IMMEDIATELY and reconnect the correct
way round.
• DO NOT use or store this product in warm
environments, in direct sunlight or near sources of
heat or ignition.
• Ensure that the product is in its upright position while
the on-board battery is being charged.
• DO NOT use the product while it is charging or
connected to a mains power supply.
• If the battery has not charged after the period
specied, disconnect it from the power source and
contact Draper Tools for support.
– 7 –
5. Health and Safety Information
EN
5.3 Working With Lead-Acid and Other
Vehicle Batteries
WARNING! Risk of explosive gases. Working in
close proximity to lead-acid batteries is
dangerous as they produce potentially explosive
gases during normal operation. ALWAYS read
this manual in full before EVERY use and keep
your work area well-ventilated. Contact Draper
Tools for assistance if you are not condent in
the use of this product.
• Use this manual in conjunction with the battery
manufacturer manual and that of any other
equipment to be used in the vicinity. Review all safety
markings and rating plates present on the battery,
charger and any other nearby equipment before using
this product to jump start a vehicle battery.
• DO NOT work with vehicle batteries on your own;
ALWAYS ensure that someone is nearby to come to
your aid if necessary.
• Wear complete eye and hand protection and wear
suitable clothing that covers your skin appropriately.
− Avoid touching your eyes while working with
lead-acid batteries.
• Keep plenty of fresh water and soap nearby in case
battery acid comes into contact with your skin, eyes or
clothing.
− If battery acid comes into contact with your skin
or clothing, wash the aected area immediately
with soap and water.
− If battery acid enters your eyes, ush the eye
immediately with cool, clean running water for at
least 15 minutes and seek medical attention
immediately.
• NEVER smoke or allow sparks or ames in the vicinity
of the battery or engine.
• Take extra care to prevent metal objects or tools from
falling onto the battery as this may cause a spark,
short-circuit the battery or cause an explosion.
• ALWAYS remove personal metallic objects before use.
− Lead-acid batteries can produce a short-circuit
current high enough to weld metal and cause
severe burns.
WARNING! DO NOT top up the electrolyte
beyond the manufacturer’s recommended level.
Overlling the battery may cause the acid
content to leak.
WARNING! DO NOT use this product to jump
start high ampere-hour batteries.
WARNING! NEVER use this product to jump
start lithium-ion batteries.
5.4 Safety Information for This Product’s
Rechargeable Battery
Important: This product contains a sealed lead-acid
battery. These instructions apply in addition to those
listed in 5.3 Working With Lead-Acid and Other Vehicle
Batteries.
WARNING! Risk of shock.
DO NOT open.
• DO NOT allow the on-board battery to entirely
discharge as this may lead to warping of the battery or
build-up of internal condensation when it is
recharged.
• ONLY charge this product battery using the charger
supplied.
• Monitor the product frequently while it is being
charged to reduce the risk of incidents while it is
unobserved.
• DO NOT charge this device in the vicinity of objects
that may cause sparks or sources of heat or ignition.
• Ensure that all switches are in the o position before
connecting a charger to this product.
• DO NOT attempt to damage, dismantle, modify or
burn the on-board battery.
• DO NOT use this product if there is evidence of
battery leakage.
− Battery acid is highly corrosive; if the product
battery begins to leak, stop all operations
immediately and contact Draper Tools for support.
− If battery acid comes into contact with your skin,
wash it o immediately with plenty of clean water.
− If battery acid comes into contact with your eyes,
ush them with plenty of clean water and seek
medical attention immediately.
• NEVER burn or mutilate batteries or products
containing batteries as they may explode or release
toxic substances.
• DO NOT attempt to remove the battery from the
product.

5. Health and Safety Information
– 8 –
5.5 Connection to the Power Supply
This appliance is supplied with an approved plug and
cord for your safety.
If the power supply cord is damaged, it must be replaced
by Draper Tools, an authorised service agent or similarly
qualied personnel in order to avoid a hazard.
The damaged or incomplete plug, when cut from the
cord, shall be disabled to prevent connection to a live
electrical outlet.
This product and its charger are Class II* appliances and
are designed for connection to a power supply matching
that detailed on the rating label and compatible with the
plug tted.
The fuse in the power supply for this product cannot be
replaced. Contact Draper Tools for replacement options
if the fuse in the supplied plug has blown.
If an extension lead is required, use an approved and
compatible lead rated for this appliance.
Follow all the instructions supplied with the extension
lead.
*Double Insulated: This product is double insulated and
does not require an earth connection to protect against
electric shock from accessible conductive parts in the
event of failure of the basic insulation.
Important: Always follow the extension lead instructions
regarding maximum load while the cable is wound. If in
doubt, unwind the entire cable. A coiled extension lead
generates heat which could melt the lead and cause a
re.
5.6 Residual Risk
The safety instructions in this manual cannot account for
all possible conditions and situations that may occur.
Exercise common sense and caution when using this
product and protect against any additional conceivable
risks.
– 9 –– 9 –
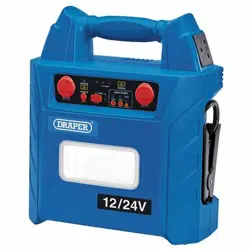
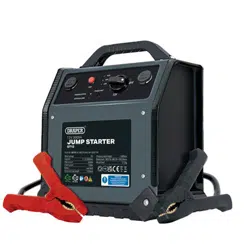
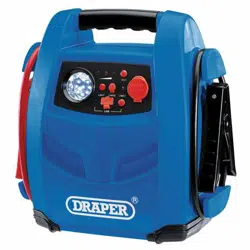
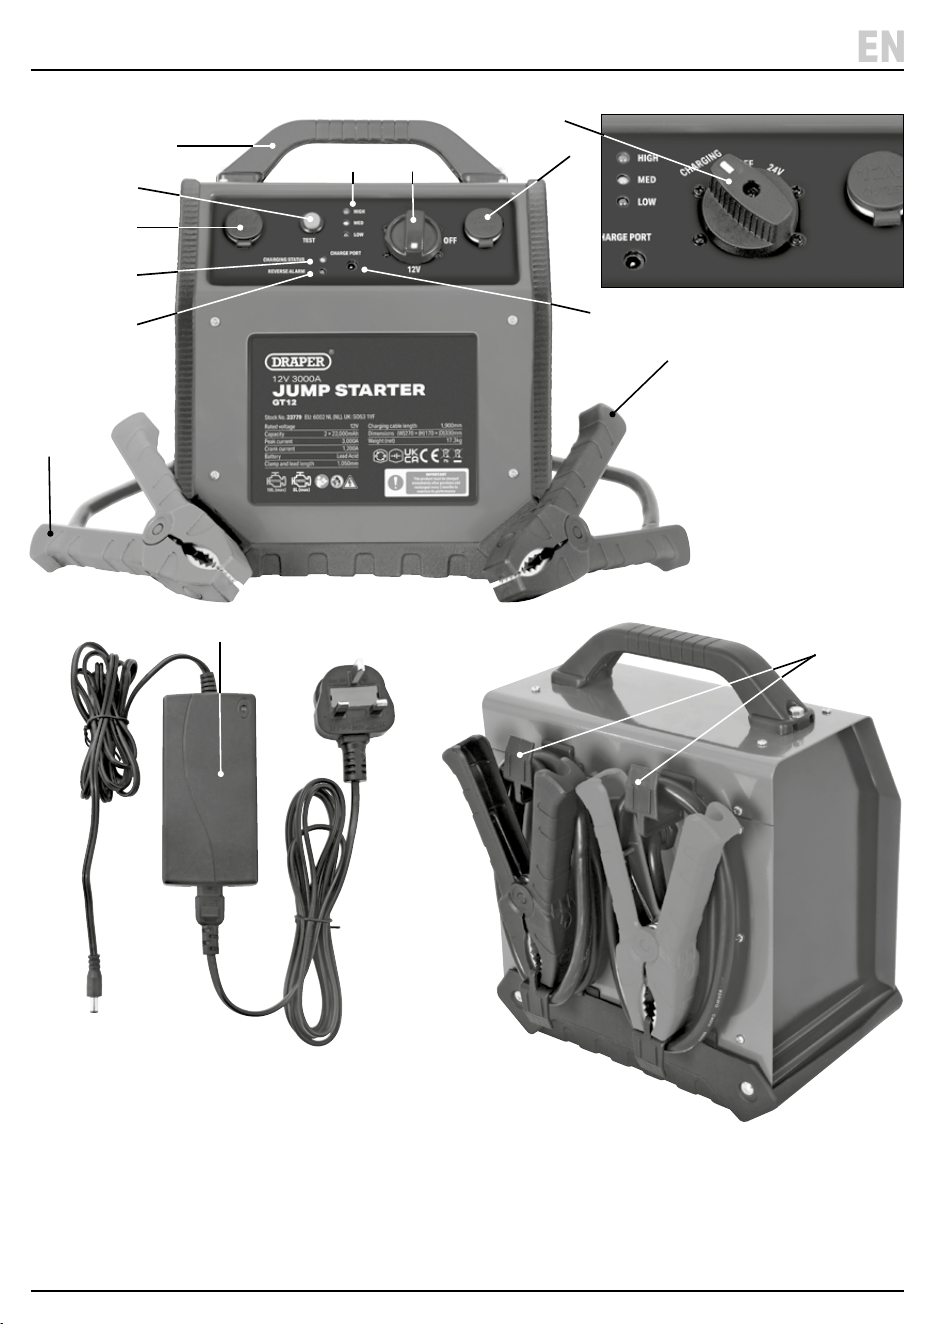
(1) 2 × 12V DC output socket
(2) Test button
(3) Carry handle
(4) Battery charge indicators
(5) 12V/24V jump start selector
(6) Charging socket
(7) Charging status light
(8) Reverse alarm light
(9) (+) Positive jump start lead and clamp (red)
(10) (-) Negative jump start lead and clamp (black)
(11) Clamp storage holders
(12) 230V mains charger
6. Identication and Unpacking
6.1 Product Overview
EN
(1)
(11)
(4)
(12)
(9)
(10)
(5)
(6)
(8)
(7)
(1)
(3)
(2)
(5)
Stock No.23782

– 10 –
6.2 Packaging
Keep the product packaging for the duration of the
warranty period for reference should the product need to
be returned for repair.
WARNING! Keep packaging materials out of
reach of children. Dispose of packaging
correctly and responsibly and in accordance
with local regulations.
6. Identication and Unpacking
Please visit drapertools.com for our full range of accessories and consumables.
– 11 –
7. Charging Instructions
EN
Important: Read and understand all the safety
information in this manual before attempting to charge
or operate this product.
CAUTION! This product MUST be charged for at
least 48 hours immediately after purchase and
at least once every two months thereafter.
Monitor the product frequently during charging
to reduce the risk of incidents while it is
unobserved.
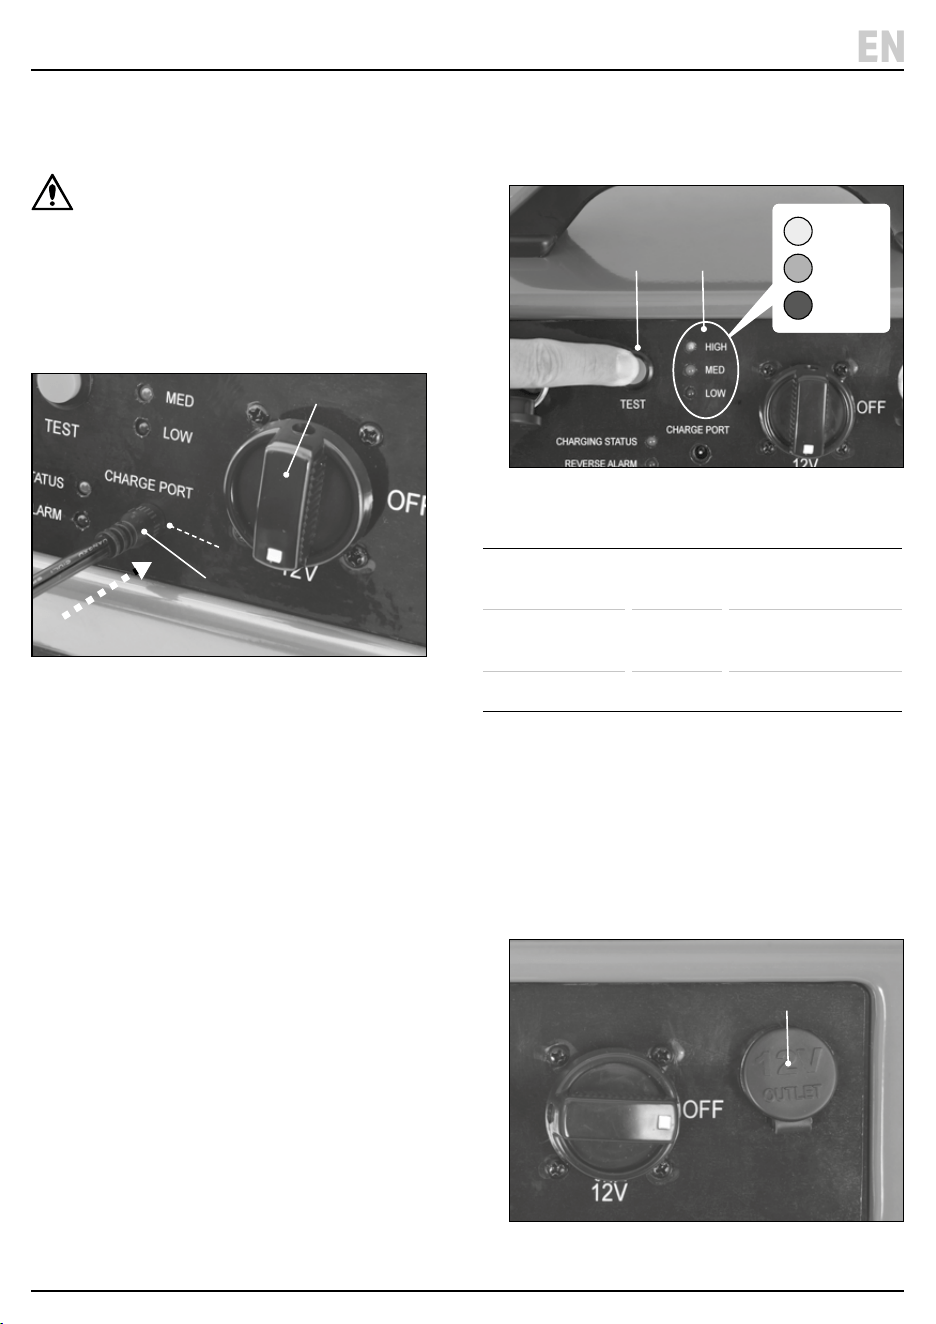
7.1 Charging the Jump Starter
1 Fig.
(5)
(12)
(6)
1. Turn the voltage selector (5) to the 12V position.
2. Connect the charger (12) to the charging socket (6)
and a mains power supply.
3. Continue charging until the charging status light (7)
turns from red to green.
4. After charging turn the voltage selector to the 'OFF'
position and unplug the charger.
− The jump starter will naturally lose charge
while it is disconnected from a power supply.
7.2 Checking Jump Starter Battery Status
1. Press the TEST button (2) to check the voltage status
of the Jump Starter battery.
2 Fig.
(2) (4)
HIGH
MED
LOW
Status Lights Action Required
HIGH Green Fully Charged and
ready to use.
MED Yellow Charge as soon as
possible.
LOW Red Charge immediately
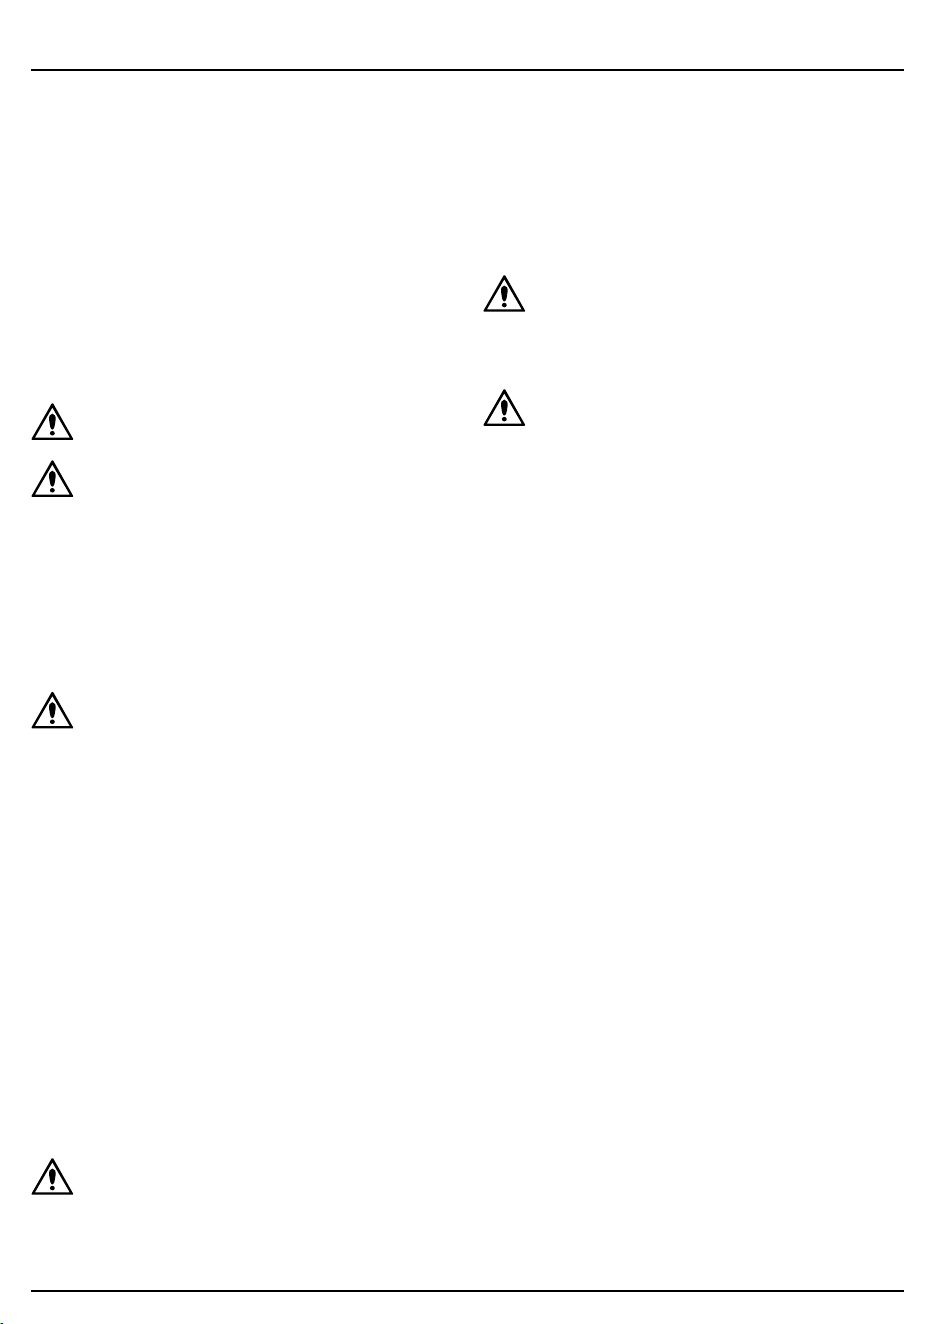
7.3 12V Output Sockets
The two 12V /10A output sockets (1) can be used as a
power source for products tted with a 12V DC supply
such as tyre inators and car vacuum cleaners.
• Use the TEST button (2) to check that the Jump
Starter is fully charged before using the 12V output
sockets. Always recharge the jump starter after using
the output sockets.
3 Fig.
(1)
– 12 –
8. Operating Instructions
Important: Read and understand the safety information
and instructions in this manual in full before attempting
to operate this product.
8.1 Jump Starting
Important: These instructions are intended as a guide
ONLY. ALWAYS refer to the vehicle and battery
manufacturer manuals for specic instructions relating
to the vehicle to be jump started as the procedure varies
between vehicles. Any manufacturer instructions relating
to other equipment to be used in the immediate area
should also be consulted. Read all instructions in full
BEFORE using this product.
WARNING! NEVER jump start a lithium-ion
battery.
CAUTION! NEVER attempt to jump start an
engine while other devices are connected to the
product.
1. Clean the battery terminals with a dry cloth to
optimise conduction with the terminal clamps.
Important: ALWAYS wear protective gloves when
handling battery terminals.
2. Turn the vehicle’s ignition o and check that the
Jump Start selector (5) is in the 'OFF' position.
WARNING! The jump start leads should NOT be
activated until you are instructed to do so as
part of the jump start process. To turn o the
jump start leads, turn the voltage selector (5) to
the OFF position.
3. Connect the positive clamp (9) to the (+) terminal of
the vehicle’s battery and then connect the negative
clamp (10) to the vehicle’s chassis or engine block
away from the battery (-) terminal.
− ALWAYS refer to the vehicle and battery
manufacturer’s instructions for guidance on
connecting the terminal clamps to the battery
terminals and performing a jump start.
4. Turn the voltage selector (5) to 12V or 24V (23782
only) to start the jump start process:
− If the Reverse Alarm (8) begin to ash and an
audible tone is heard, the clamps have been
connected to the wrong terminals. Remove and
reconnect the correct way round.
WARNING! If the terminals are connected using
the incorrect polarity, disconnect them
IMMEDIATELY to avoid damaging the battery.
5. Start the engine for 3 – 5 seconds. If the engine does
not start within 10 seconds, stop, and wait 4 minutes
before retrying.
6. Once the vehicle has started turn the voltage selector
to the 'OFF' position. Then disconnect the clamps in
the correct order - negative terminal clamp (10) rst
then the positive clamp (9) .
WARNING! Failure to disconnect the clamps
correctly may cause damage to the jump starter.
7. Once the jump start leads are disabled return the
clamps to the storage area (11) on the jump starter.
WARNING! Ensure that the jump start leads are
isolated and that the voltage selector (5) is in
the 'OFF' position before performing any
maintenance.

9. Maintenance and Troubleshooting
– 13 –
EN
9.1 General Maintenance and Storage
This product contains no parts that are serviceable by
the user. However, the product should be kept in good
condition to ensure a long working life. Maintenance
should be carried out ONLY by suitably qualied
personnel authorised by Draper Tools.
• Charge the product for at least 48 hours immediately
after purchase and at least once every two months.
When stored for extended periods, charge the battery
periodically to maintain battery health.
• DO NOT allow the on-board battery to become
completely exhausted before recharging.
• Clean the product regularly using a dry cloth.
CAUTION! NEVER use aggressive chemicals
to clean the product as these may damage
the product casing.
• Store the product in a clean and dry location, out of
direct sunlight and out of reach of children.
− Ensure that all port covers are closed and sealed
when storing the product.
− Ensure that there are no metallic objects nearby
that may fall onto the battery and connect the
terminals.
• Store the product in its upright position with the
clamps attached to their holders (11).
Important: Poor storage conditions may signicantly
reduce the performance capabilities and lifespan of
the product.
Problem Possible Cause Remedy
The jump-start leads are not
operating.
The battery terminals or terminal
clamps are dirty and cannot
conduct the current.
Clean the battery terminals and
clamps. Then retry.
The jump leads are damaged or
faulty.
Disconnect the jump leads
IMMEDIATELY and contact Draper
Tools for support.
The jump starter has low or no
charge.
Disconnect the jump leads and
charge the jump starter.
Reverse Alarm LED red light and
beeping.
Reverse polarity alarm activated
due to clamps connected
incorrectly.
Ensure the clamps are tted to the
correct terminals.
Socket overloaded and automatic
circuit overload protection
activated.
Check that output current for the
product is below 15A.
Leave for a few minutes before
retrying.
12V outlet sockets are not working. Socket overloaded and automatic
circuit overload protection
activated.
Check that output current for the
product is below 15A.
Leave for a few minutes before
retrying.
The port is damaged or faulty. Contact Draper Tools for support.
The Jump starter has low or no
charge
Charge the jump starter.
9.2 Troubleshooting

– 14 –
10. Spares, Returns and Disposal
For spare parts, servicing, and repair and replacement
options, please contact the Draper Tools Product
Helpline for details of your nearest authorised agent.
Draper Tools will endeavour to hold any spare parts, if
applicable, for seven years from the date that it sells the
nal matching stock item.
Any servicing or repairs carried out by unauthorised
personnel or installation of spare parts not supplied by
Draper Tools will invalidate your warranty.
At the end of its working life, dispose of the product
responsibly and in line with local regulations. Recycle
where possible.
• DO NOT dispose of this product with domestic waste;
most local authorities provide appropriate recycling
facilities.
• DO NOT burn or mutilate batteries; this may release
toxic or corrosive substances.
• DO NOT abandon this product in the environment.

– 15 –
11. Warranty
Important: This product MUST be charged until full
immediately after purchase. Failure to do so will
invalidate your warranty.
Draper Tools products are carefully tested and inspected
before shipment and are guaranteed to be free from
defective materials and workmanship.
Should the tool develop a fault, return the complete tool
to your nearest distributor or contact Draper Tools
directly. Contact information can be found at the back of
this manual.
Proof of purchase must be provided.
If, upon inspection, it is found that the fault occurring is
due to defective materials or workmanship, repairs will
be carried out free of charge.
This warranty period covers
parts and labour for 12 months from the date of purchase.
Where tools have been hired out, the warranty period
covers 90 days from the date of purchase.
This warranty does not apply to any consumable parts,
batteries or normal wear and tear, nor does it cover any
damage caused by misuse, careless or unsafe handling,
alterations, accidents, or repairs attempted or made by
any personnel other than the authorised Draper Tools
repair agent.
In all cases, to make a claim for faulty workmanship or
materials within the standard warranty period, please
contact or return the product to the place of purchase.
Proof of purchase may be required.
If the place of purchase is no longer trading or if you
experience any diculties with your warranty, please
contact Customer Services with the product details and
your proof of purchase. Contact details can be found at
the back of this manual.
If the tool is not covered by the terms of this warranty,
repairs and carriage charges will be quoted and charged
accordingly.
This warranty supersedes any other guarantees
expressed or implied and variations of its terms are not
authorised.
Your Draper Tools guarantee is not eective until you can
produce, upon request, a dated receipt or invoice to
verify your purchase within the guarantee period.
Please note that this warranty is an additional benet
and does not aect your statutory rights.
Draper Tools Limited
EN

© Published by Draper Tools Limited© Published by Draper Tools Limited
Delta International
Delta International BV
Oude Graaf 8
6002 NL
Weert
Netherlands
Contact Details
Draper Tools
Draper Tools Limited
Hursley Road
Chandler’s Ford
Eastleigh
Hampshire
SO53 1YF
UK
Website: drapertools.com
Email: [email protected]
Product Helpline: +44 (0) 23 8049 4344
Telephone Sales Desk: +44 (0) 23 8049 4333
General Enquiries: +44 (0) 23 8026 6355
General Fax: +44 (0) 23 8026 0784
Please contact the Draper Tools Product Helpline for repair and servicing enquiries.