23724
EN
Original Instructions
Version 1
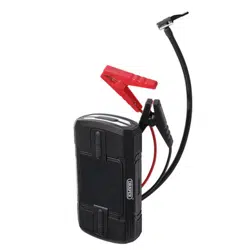
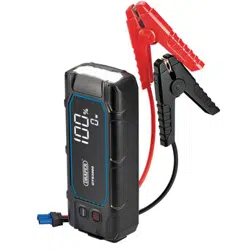
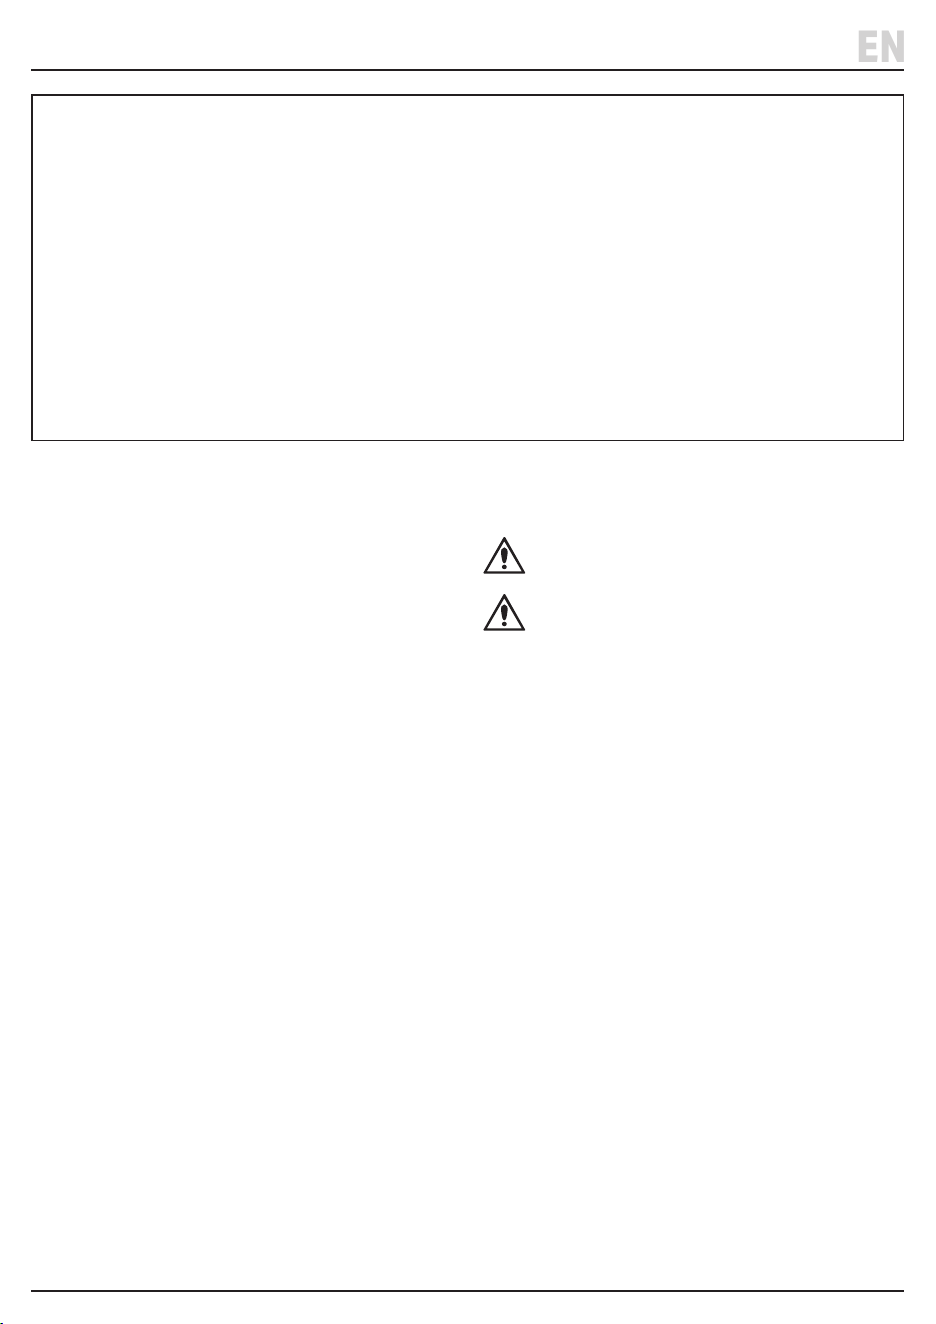
12V 1200A LITHIUM
JUMP
STARTER
IMPORTANT: This product must be charged immediately after purchase and recharged every
3 months to maintain its performance.
1.1 Product Reference
User Manual for: Lithium Jump Starter
Stock No: 23724
Part No: GT1200
1.2 Revisions
Version 1: April 2024
First release
For the latest version of this manual and the associated
parts list, if applicable, please visit drapertools.com/
manuals.
1.3 Understanding the Safety Content of
This Manual
WARNING!
– Situations or actions that may result
in personal injury or death.
CAUTION! – Situations or actions that may result
in damage to the product or surroundings.
Important: – Information or instructions of particular
importance.
1.4 Copyright © Notice
Copyright © Draper Tools Limited.
Permission is granted to reproduce this manual for
personal and educational use ONLY. Commercial copying,
redistribution, hiring or lending is strictly prohibited.
No part of this manual may be stored in a retrieval system
or transmitted in any other form or means without written
permission from Draper Tools Limited.
In all cases, this copyright notice must remain intact.
1. Preface
– 2 –
These are the original product instructions. This
document is part of the product; retain it for the life
of the product, passing it on to subsequent holders.
Read this manual in full before attempting to
assemble, operate or maintain this product.
This Draper Tools manual describes the purpose
of the product and contains all the necessary
information to ensure its correct and safe use.
Following all the instructions and guidance in
this manual will ensure the safety of both the
product and the operator and increase the
lifespan of the product.
All photographs and drawings within this manual are
supplied by Draper Tools to help illustrate correct
operation of the product.
Every eort has been made to ensure the
information contained in this manual is accurate.
However, Draper Tools reserves the right to amend
this document without prior warning. Always use the
latest version of the product manual.
EN

2. Contents
– 3 –
EN
1. Preface 2
1.1 Product Reference 2
1.2 Revisions 2
1.3 Understanding the Safety Content of This
Manual 2
1.4 Copyright © Notice 2
2. Contents 3
3. Product Introduction 4
3.1 Intended Use 4
3.2 Specication 4
4. Health and Safety Information 5-6
4.1 Vehicle Battery Health and Safety Precautions 5
4.2 Jump Starter Health & Safety Precautions 5
4.3 Rechargeable Battery Health & Safety
Precautions 5
4.4 Flashlight Health & Safety Precautions 6
4.5 Residual Risk 6
4.6 Explanation of symbols 6
5. Identication and Unpacking 7-8
5.1 Product Overview 7
5.2 What’s in the Box? 8
5.3 Packaging 8
6. Charging the Product 9
6.1 Charging the Jump Starter 9
6.2 Using as a Power Bank 9
7. Operating Instructions 10-11
7.1 Jump Starting the Vehicle 10
7.2 Using the built in Flashlight 11
8. Maintenance and Troubleshooting 12
8.1 General Maintenance 12
8.2 Troubleshooting 12
9. Disposal 13
10. Warranty 13

3. Product Introduction
Stock No. 23724
Part No. GT1200
Net Weight: 489g
Dimensions (LXWXH): 176 X 83 X32mm
Voltage: 12V DC
Capacity: 12,000mAh
Peak Current: 1200A
Crank Current: 600A
Petrol Engine: 6L
Diesel Engine: 4L
Flashlight Power: 1W
USB-C Input: 5V/2A
USB Output 1: 5V/3A, 9V/2A, 12V/1.5A
USB Output 2: 5V/2.1A
DC Output: 15V/5A
Battery Type: Lithium-ion
Charging Time: Approx. 7½ hours
Storage Temperature: -20°C to 60°C
EN
3.2 Specication
3.1 Intended Use
This product has been designed as a compact and
portable vehicle jump starter with a built-in ashlight. It
can also be used as a powerful USB power bank supplying
several full charges to most smart phones.
Any other application beyond the conditions established
for use will be considered misuse. Draper Tools accepts no
responsibility for improper use of this product.
Read this manual in full before assembling, operating or
maintaining the product, and retain it for later use.
– 4 –

– 5 –
4. Health and Safety Information
4.1 Vehicle Battery Health and Safety
Precautions
WARNING! Risk of explosive gases
– Working in the vicinity of lead-acid batteries is
dangerous as they generate explosive gases
during normal operation. Follow these
instructions and those published by the battery
manufacturer and the manufacturer of any other
equipment to be used in the vicinity of the battery.
– Review warning marks on all these products and
on the engine.
– When working near a lead-acid battery, ensure
someone is within range of your voice or close
enough to come to your aid.
– Never smoke or allow a spark or ame near the
battery or engine.
– Take extra care not to drop a metal tool onto the
battery. It could spark or short circuit the battery.
• Wear suitable eye and face protection.
• Have plenty of fresh water and soap nearby in case
battery acid contacts eyes, skin or clothing. If acid
enter eyes, wash eye under cold clean ruining water
for at least 15 minutes and get medical attention
immediately.
• Remove any metallic items such as rings, bracelets,
necklaces and watches. A lead-acid battery can
produce a short circuit current high enough to weld a
metallic item, which may cause a severe burn.
4.2 Jump Starter Health & Safety
Precautions
• Before using the jump starter refer to the vehicle’s
manufacturer instruction manual for specic advice
on jump starting.
• Only trained and competent personnel may operate
this device.
• Fully charge the jump starter before using for the
rst time.
• The jump starter is for use on 12V batteries only.
• ONLY use the clamps supplied with the starter unit.
• DO NOT use this unit if the clamp leads are damaged
or worn.
• NEVER allow the clamps to touch one another or to
connect to the same piece of metal, otherwise the
jump starter will be damaged.
• DO NOT use the jump starter to start a damaged,
bulging, or frozen car battery.
• DO NOT disassemble or modify the unit.
• DO NOT place or store the unit in a high temperature
environment that exceeds 60°C. The storage
temperature is -20 to 60°C.
• Handle the unit with care and if dropped or showing
signs of damaged get it checked by a qualied
service person.
WARNING! DO NOT use this product if damage or
defects are present; take it out of service until it
has been repaired or replaced. Contact Draper
Tools for repair and replacement options.
• Children should be supervised to ensure they do not
play with the jump starter.
• Keep the product away from children and pets.
• Observe and adhere to all standard safety
precautions and good practices when working in a
workshop environment.
• Keep the work environment clear and well-lit, with
bystanders at a safe distance.
• DO NOT use this product in wet conditions or expose
it to rain.
• DO NOT use this product near ammable or
combustible materials or in dangerous or explosive
environments.
• Keep away from heat sources and do not leave for
long periods of time in a hot car.
4.3 Rechargeable Battery Health & Safety
Precautions
• DO NOT leave battery in a discharged state.
• To maintain the battery health and performance
charge the battery every 3 months.
WARNING! To reduce the risk of burns or re:
– DO NOT attempt to open, disassemble, modify or
service the jump starter.
– DO NOT crush, puncture, short external contacts or
dispose of in re or water.
– DO NOT expose to temperatures above 60°C.
– DO NOT use this product if the casing is open,
missing or damaged in any way.
• DO NOT attempt to remove the built in battery as it is
not replaceable.
• DO NOT charge non-rechargeable batteries.
EN

Read the instruction manual
Warning!
Wear face mask and safety glasses
Keep out of the reach of children
WEEE –
Waste Electrical & Electronic Equipment
Do not dispose of Waste Electrical & Electronic Equipment
in with domestic rubbish
UK Conformity Assessed
European conformity
– 6 –
4. Health and Safety Information
4.4 Flashlight Health & Safety Precautions
• DO NOT turn the light on when the jump starter is
being charged.
• DO NOT shine the light directly into eyes.
• DO NOT allow children to use the light.
4.5 Residual Risk
The safety instructions in this manual cannot account for all
possible conditions and situations that may occur. Exercise
common sense and caution when using this product and
protect against any additional conceivable risks.
4.6 Explanation of symbols
EN
5. Identication and Unpacking
EN
– 7 –
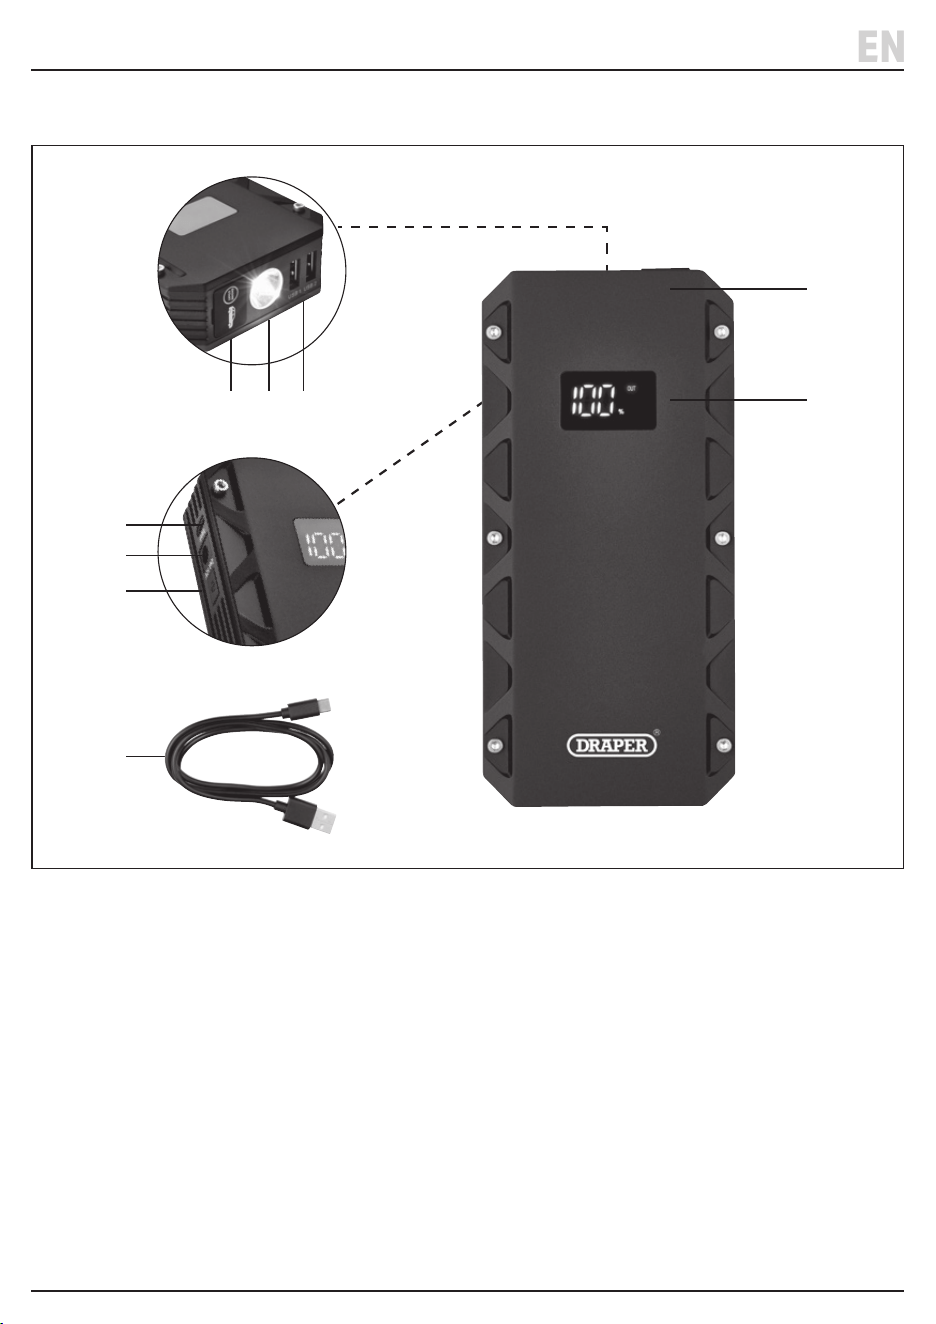
(1) Jump starter lead port
(2) Flashlight
(3) 2 X USB output port
(4) Jump starter
(5) Display screen
(6) ON/OFF button
(7) DC output
(8) USB- C Input
(9) USB type-C charging cable
5.1 Product Overview
(2)(1) (3)
(7)
(6)
(9)
(8)
(4)
(5)
5. Identication and Unpacking
EN
– 8 –
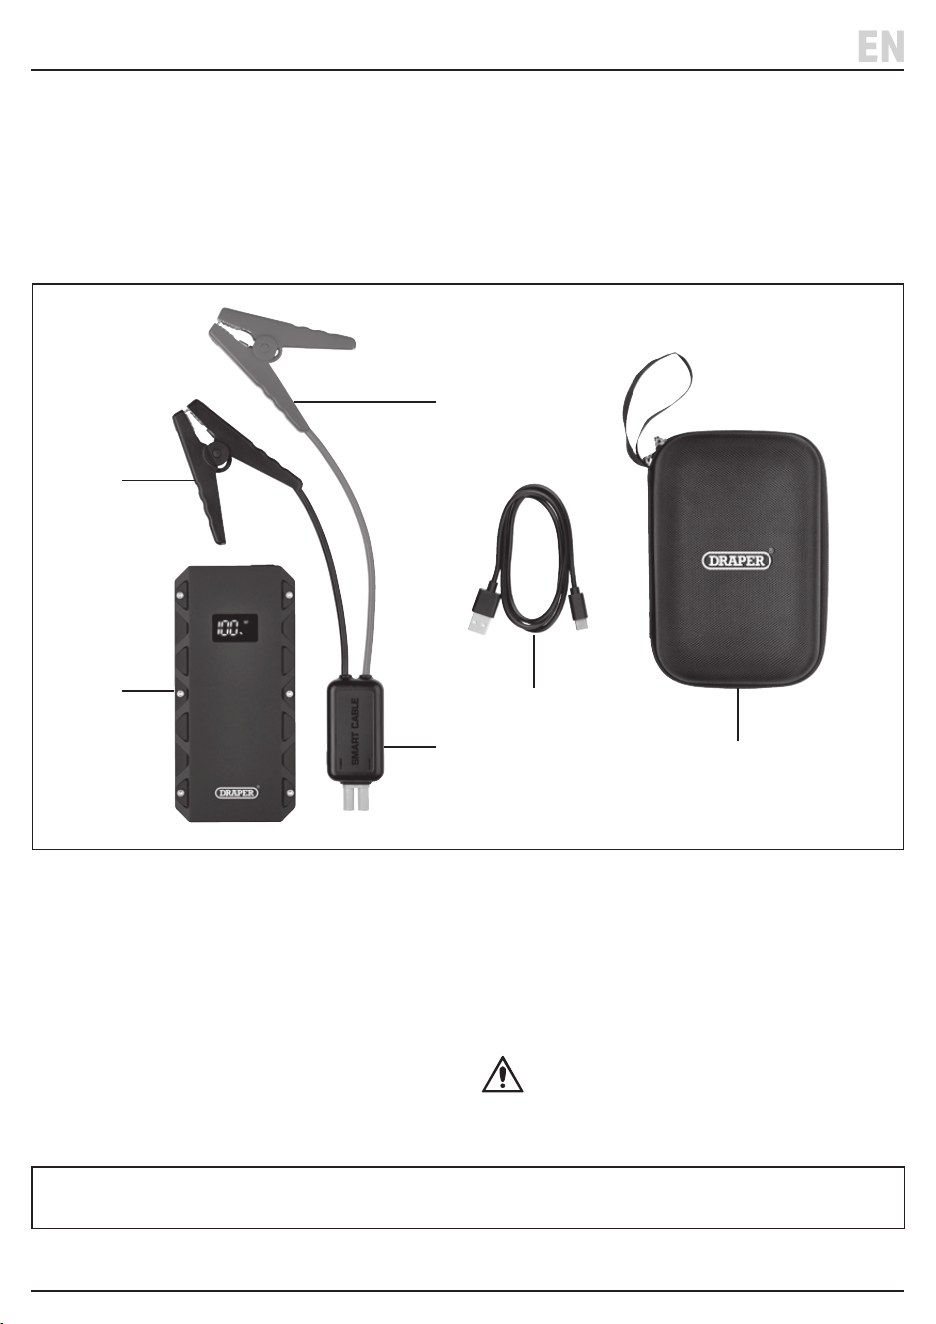
5.2 What’s in the Box?
Carefully remove the product from the packaging and
examine it for any signs of damage that may have
occurred during shipment.
Before assembling the product, lay the contents out and
check them against the parts shown below. If any part is
damaged or missing, do not attempt to use the product.
Please contact the Draper Helpline; contact details can
be found at the back of this manual.
A. 1 x Jump starter
B. 1 x Intelligent jump leads
B1. 1 x Red clamp (+)
B2. 1 x Black clamp (-)
C. 1 x USB-C cable
D. 1 X Storage case
Please visit drapertools.com for our full range of accessories and consumables.
5.3 Packaging
Keep the product packaging for the duration of the
warranty period in case the product needs to be returned
for repair.
WARNING! Keep packaging materials out of
reach of children. Dispose of packaging
correctly and responsibly and in accordance
with local regulations.
(B)
(B1)
(A)
(B2)
(C)
(D)
6. Charging the Product
EN
6.1 Charging the Jump Starter
Note: Before using for the rst time, ensure that the
jump starter is fully charged.
• DO NOT use the device while charging.
1. To begin charging, connect one end of the USB-C
cable to the USB-C input port (8) and the other to a
suitable power supply.
2. Press the ‘ON/OFF’ button (6) to turn on.
3. During charging, ‘IN’ will be displayed and the screen
will turn o automatically once fully charged.
• Charging time will take approximately 7½ hours.
4. Unplug the cable when fully charged (100%).
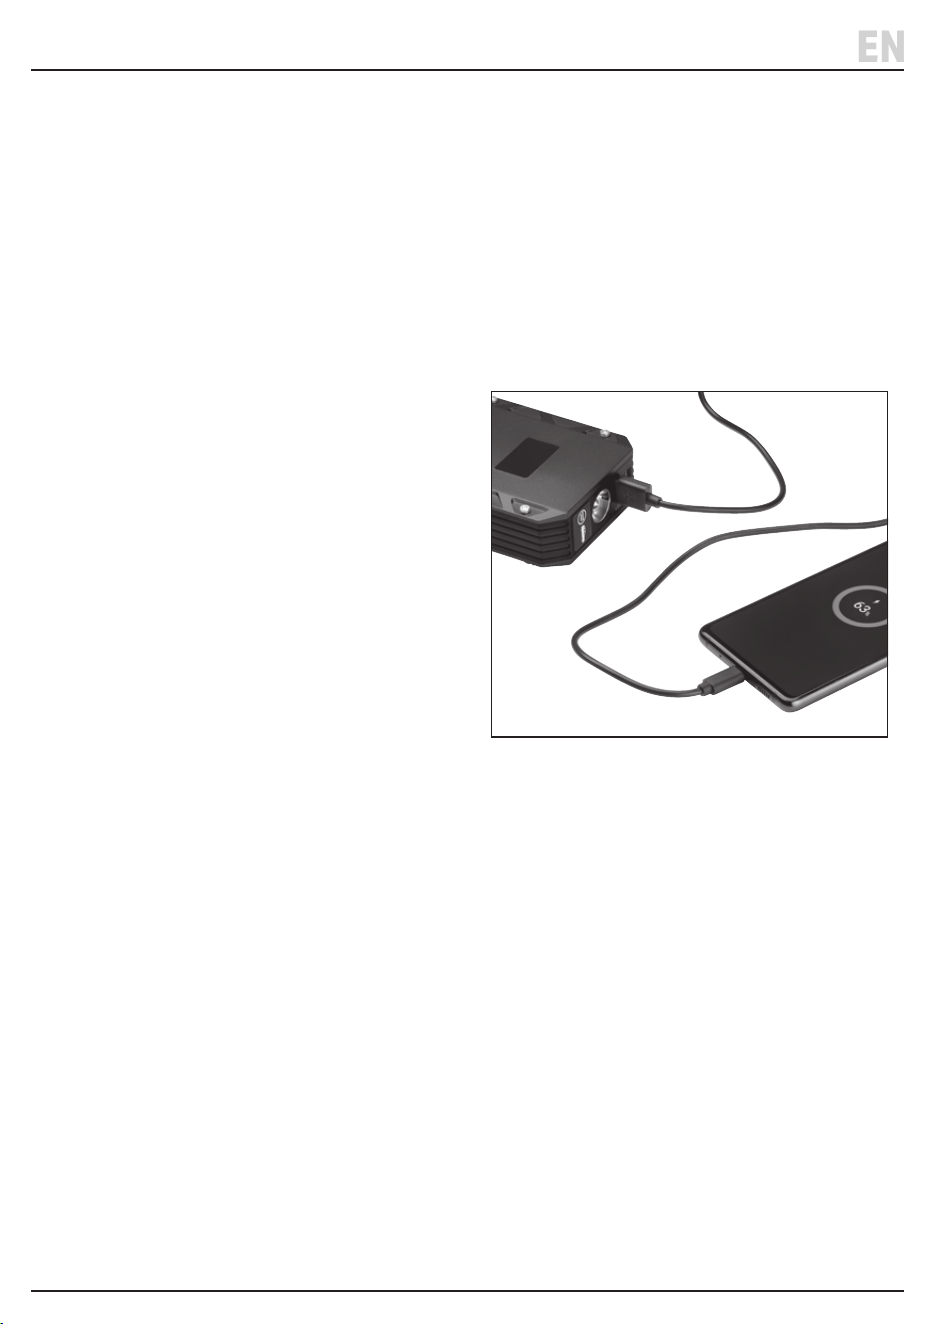
6.2 Using as a Power Bank - Fig. 1.
1. Connect your smart phones, tablets, laptops or other
electronic devices using the USB cable to either of the
USB output ports (3) on the Jump starter.
2. Press the ‘ON/OFF’ button once to start charging.
3. Unplug the cable when fully charged.
Fig. 1
– 9 –
7.1 Jump Starting the Vehicle - Fig. 2.
Note:
• This product is for 12V petrol 6 litre engine and diesel
4 litre engine cars only.
• Before using the Jump Starter:
- Check that the battery power is above 80%.
- Refer to the vehicle’s manufacturer instruction
manual for specic advice on jump starting and
follow their recommended process.
1. Lift up the port cover (1) and insert the connector end
(B) of the clamps fully into the jump starter Port (1).
2. With the engine turned o, connect the red clamp to
the positive (+) terminal (or the vehicle’s manufacturer’s
recommended jump point) and the black clamp to the
negative (-) terminal of the car battery (or the vehicle’s
manufacturer’s recommended jump point).
3. Press the ‘ON/OFF’ (6) button to turn on the jump
starter.
7. Operating Instructions
Important: Before preparing or using this product, read
and understand all the safety instructions listed in this
manual.
EN
4. Start the car engine and allow 30 seconds between
each attempt.
• If unsuccessful after 3 attempts, to avoid damaging
the jump starter stop and inspect the vehicle/
battery for potential issues.
5. Once the engine has been started, turn o the
engine and remove the lead connector from the
jump starter. Disconnect the jump starter clamps
within 30 seconds removing the negative clamp
rst then the positive clamp.
6. Restart your car.
Note: The jump starter will turn o automatically when
no load is detected.
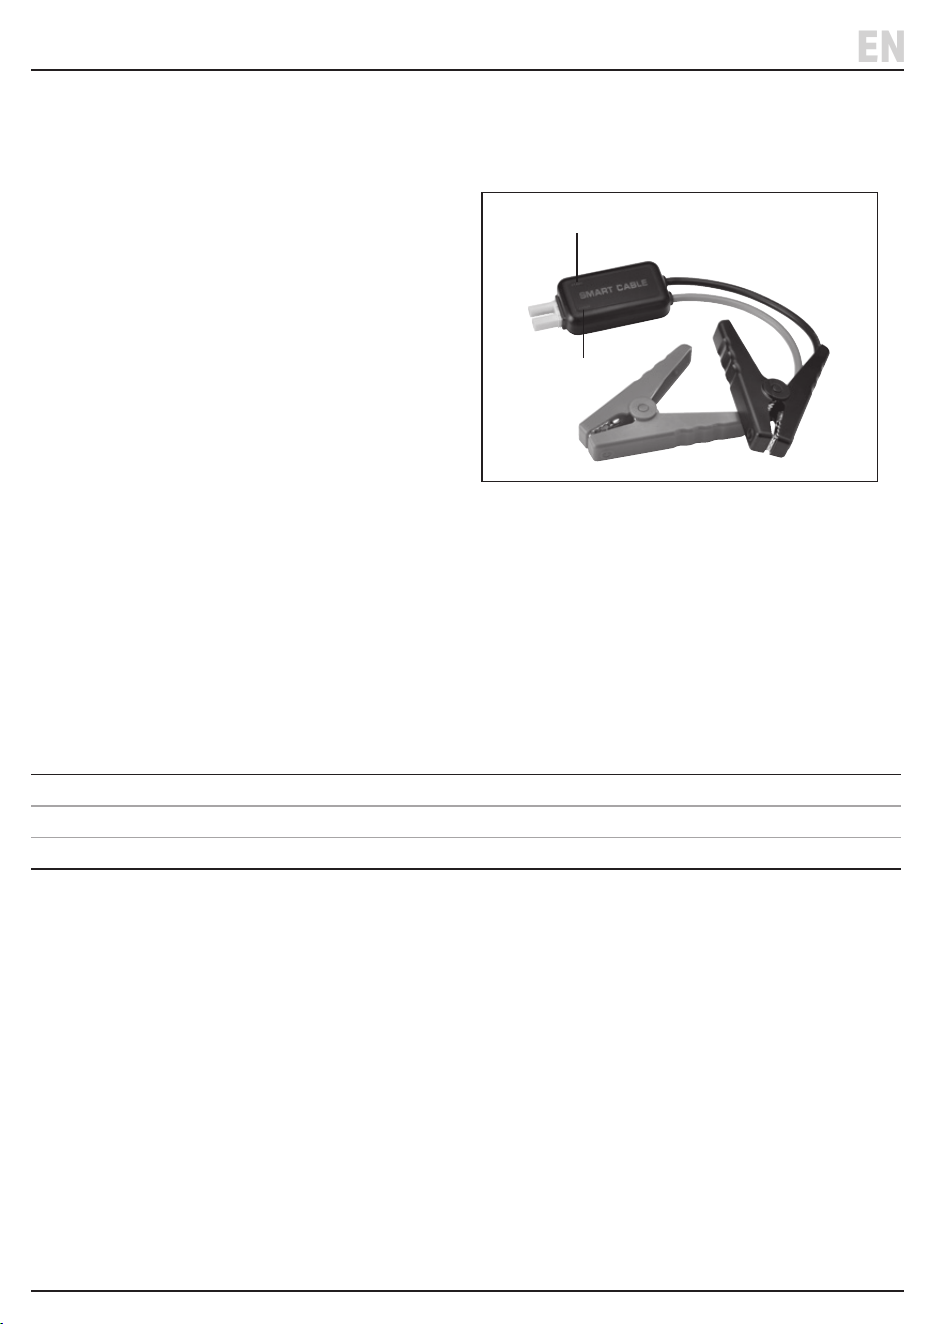
Jump leads (B) indicators Meaning
Green and red ashing Clamps are connected correctly to the vehicle’s battery.
Green only Ready to start.
‘Red Error’ only Voltage too low to start vehicle.
Fig. 2
Green - Start
Error - Red
– 10 –

7.2 Using the built in Flashlight
1. To operate the ashlight, press and hold the ‘ON/OFF’
button (6) for 3 seconds or until the light comes on.
2. The light has 3 settings as follows:
3. To turn o the ashlight press the ‘ON/OFF’ button
until the light goes out.
Note: the jump starter display will remain o and will
turn o automatically once no load is detected.
7. Operating Instructions
EN
Press Beam Setting
Once On/High
X2 Strobe/Fast ashing
X3 S.O.S/Slow ashing
– 11 –

8.1 General Maintenance
• Check the battery level and recharge at least once
every 3 months.
• Keep the product clean and free from dust, debris and
grease.
• Use a dry clean cloth to clean the housing of the device.
• Do not use detergents to clean the product.
• When not in use store in a dry well-ventilated area,
out of direct sunlight and out of the reach of children.
The storage temperature should not exceed 60°C.
8. Maintenance and Troubleshooting
EN
8.2 Troubleshooting
Problem Possible cause Remedy
Jump Starter Clamp Indicators
Flashing red and green
indicator.
Jumper cable connected. /
Solid green indicator. Ready to start. /
Solid red indicator. Low voltage protection. Recharge the product.
Solid red indicator with
continuous beeping and two
short beeps
Short circuit protection.
Do not connect the clamps to each other or to the
same metal surface, and let it cool down.
Solid red indicator with beeping. Reverse polarity protection.
Swap the clamps and ensure the correct
connection.
Solid red indicator with fast
beeping.
Over-heating protection. Disconnect the clamps and let it cool down.
Solid red and green indicator. Timeout protection.
If the leads are connected but no starting action
carried out, the intelligent lead will automatically
switch o after 90seconds. Reconnect the leads to
the jump starter.
Jump Starter Problems
Jump start failed.
Battery power level too low. Keep battery level above 80%.
Poor connection due to rusty
or dirty car battery terminals.
Clean the terminals and retry.
Battery overheating. Allow to cool down for 1 minute before retrying.
The clamps are incorrectly
connected.
Ensure the clamps are connected to the correct
(+) and (-) terminals.
Wrong battery voltage used. Only suitable for vehicles with 12V batteries.
Problem unrelating to vehicle’s
battery.
Inspect the vehicle for other issues.
– 12 –

9. Disposal
• At the end of its working life, dispose of the product
responsibly and in line with local regulations. Recycle
where possible.
• DO NOT dispose of this product with domestic waste;
most local authorities provide appropriate recycling
facilities.
• DO NOT burn or mutilate batteries; this may release
toxic or corrosive substances.
– 13 –
10. Warranty
Draper Tools products are guaranteed for 12 months to
be free from defective materials and workmanship. Full
details of the warranty period can be found on the Draper
Tools Website.
Should the tool develop a fault within the warranty
period, return the complete tool to the place of purchase
or contact Draper Tools directly. Proof of purchase must
be provided.
This warranty does not apply to any consumable parts or
normal wear and tear.
It also does not cover any damage caused by misuse,
careless or unsafe handling, modications, or repairs
carried out by any personnel other than an authorised
Draper Tools repair agent.
Please note that this guarantee is in addition to and does
not aect your statutory rights.
Draper Tools Limited
EN
EN

Notes
– 14 –
EN

Notes
– 15 –
EN

© Published by Draper Tools Limited© Published by Draper Tools Limited
Delta International
Delta International BV
Oude Graaf 8
6002 NL
Weert
Netherlands
Contact Details
Draper Tools
Draper Tools Limited
Hursley Road
Chandler’s Ford
Eastleigh
Hampshire
SO53 1YF
UK
Website: drapertools.com
Email: [email protected]
Product Helpline: +44 (0) 23 8049 4344
Telephone Sales Desk: +44 (0) 23 8049 4333
General Enquiries: +44 (0) 23 8026 6355
Please contact the Draper Tools Product Helpline for repair and servicing enquiries.