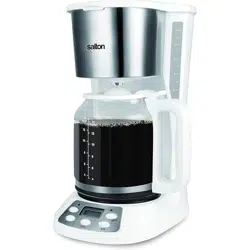
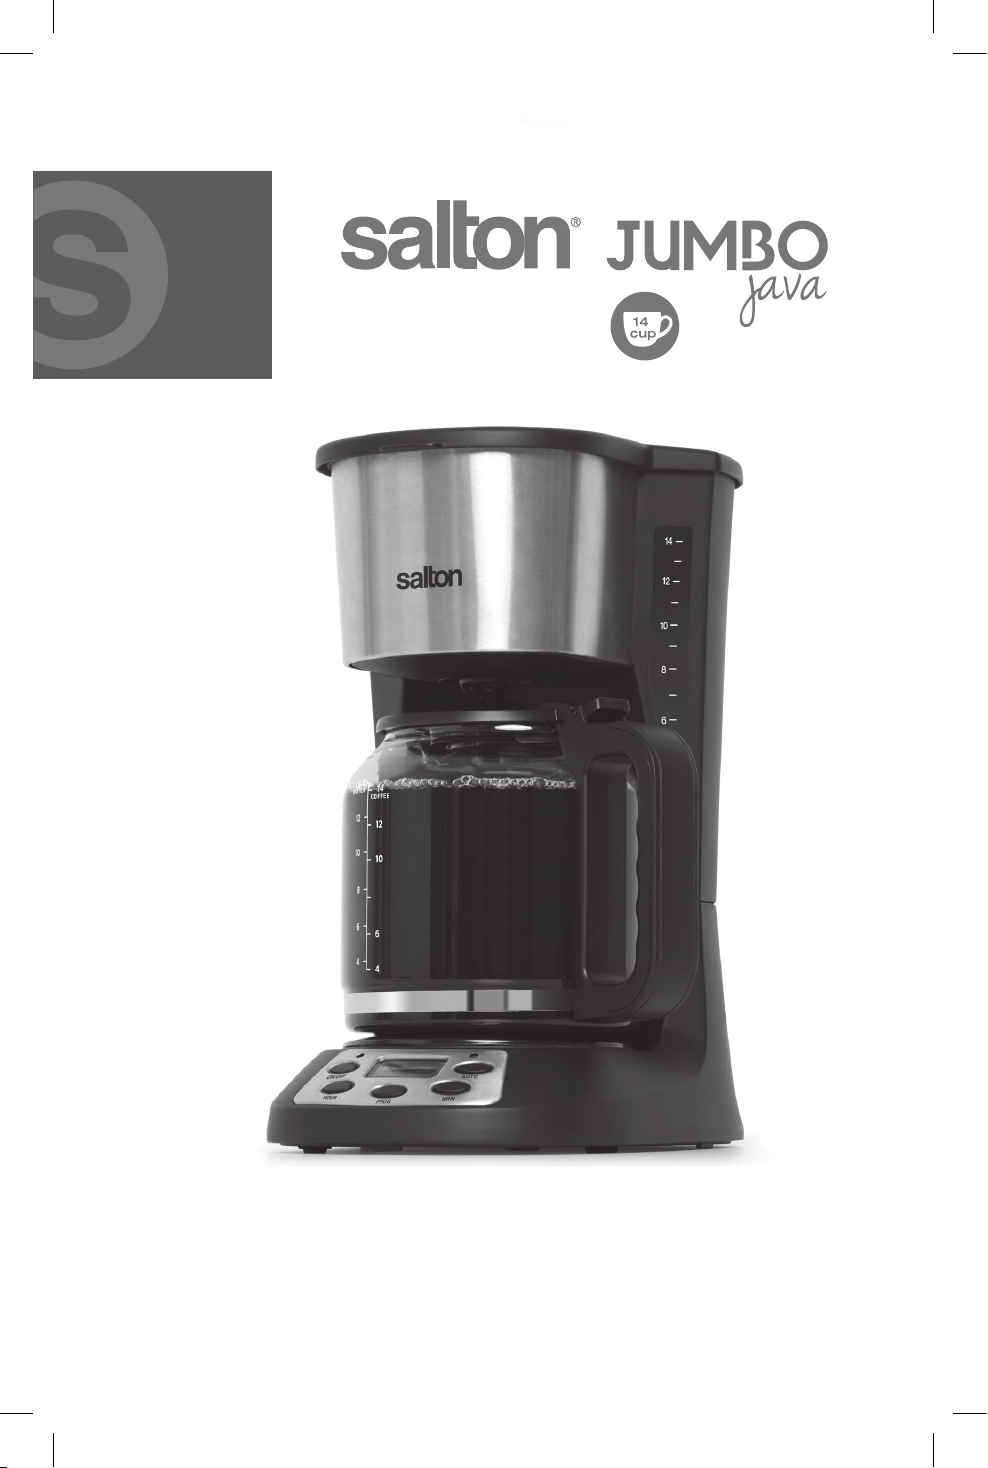
Instruction Booklet
Model: FC1667
coffee maker

IMPORTANT SAFEGUARDS
When using electrical appliances, basic safety precautions should always
be followed including the following:
1. Read all instructions.
2. Do not touch hot surfaces. Use handles or knobs.
3. To protect against electrical hazards, do not immerse cord, plugs, or
the appliance in water or other liquid.
4. Close supervision is necessary when any appliance is used by or near
children. Children should be supervised to ensure that they do not
play with the appliance.
5. This appliance is not intended for use by persons (including children)
with reduced physical, sensory or mental capabilities or lack of
experience and knowledge, unless they have been given supervision
or instruction concerning the use of the appliance by a person
responsible for their safety.
6. Unplug from outlet when either the appliance or display clock is not
in use and before cleaning. Allow to cool before putting on or taking
off parts, and before cleaning the appliance.
7. DO NOT operate any appliance with a damaged cord or plug or after
the appliance malfunctions, or is dropped or damaged in any manner.
Return appliance to the manufacturer for examination, repair or
electrical or mechanical adjustment. All servicing, other than cleaning,
should be performed by an authorized service representative.
See Warranty section.
8. To disconnect, ensure that the Coffee Maker is off then remove the
plug from the wall outlet. Always hold the plug, never pull the cord.
9. The use of accessories or attachments not recommended by Salton
mayresultinre,electricshockorinjury.
10.DO NOT use outdoors.
11.PlacetheCoffeeMakeronaatlevelsurface.DONOTletcordhang
over edge of table or counter, or touch hot surfaces.
12.DO NOT place on or near a hot gas or electric burner, or in a heated
oven.
13.DO NOT use appliance for other than intended use.
14.DO NOT leave unit unattended while in use.
15.DO NOT turn on the coffee maker without water in the reservoir.
16.DO NOT place the carafe on a wet or cold surface or in a microwave
oven.
17.DO NOT use the carafe if it is cracked or has a loose or weakened
handle.
2

18.DO NOT clean the carafe with cleansers, steel wool pads or other
abrasive material.
19.DO NOTopenthewaterreservoircoverorthelterbasketholder
when coffee is brewing. Scalding may occur if these parts are opened
during the brew cycle.
20.Extreme caution must be used when moving an appliance containing
hot liquids.
21.The carafe is designed for use with this appliance. It must never be
used on a range top.
22.Neverleavetheemptycarafeonthe‘KeepWarmPlate’asthecarafe
is likely to crack.
23.Any maintenance other than cleaning should be performed by an
authorized service facility.
SAVE THESE INSTRUCTIONS
HOUSEHOLDUSEONLY
POLARIZED PLUG
This appliance has a polarized plug (one blade is wider than the other).
Toreducetheriskofelectricshock,thisplugwilltinapolarizedoutlet
onlyoneway.Iftheplugdoesnottfullyintheoutlet,reversetheplug.
Ifitstilldoesnott,contactaqualiedelectrician.Donotmodifythe
plug in any way.
WARNING:Toreducetheriskofreorelectricshockdonotremovethe
bottomcover.Nouserserviceablepartsinside.Repairshouldbedone
by authorized personnel only.
3
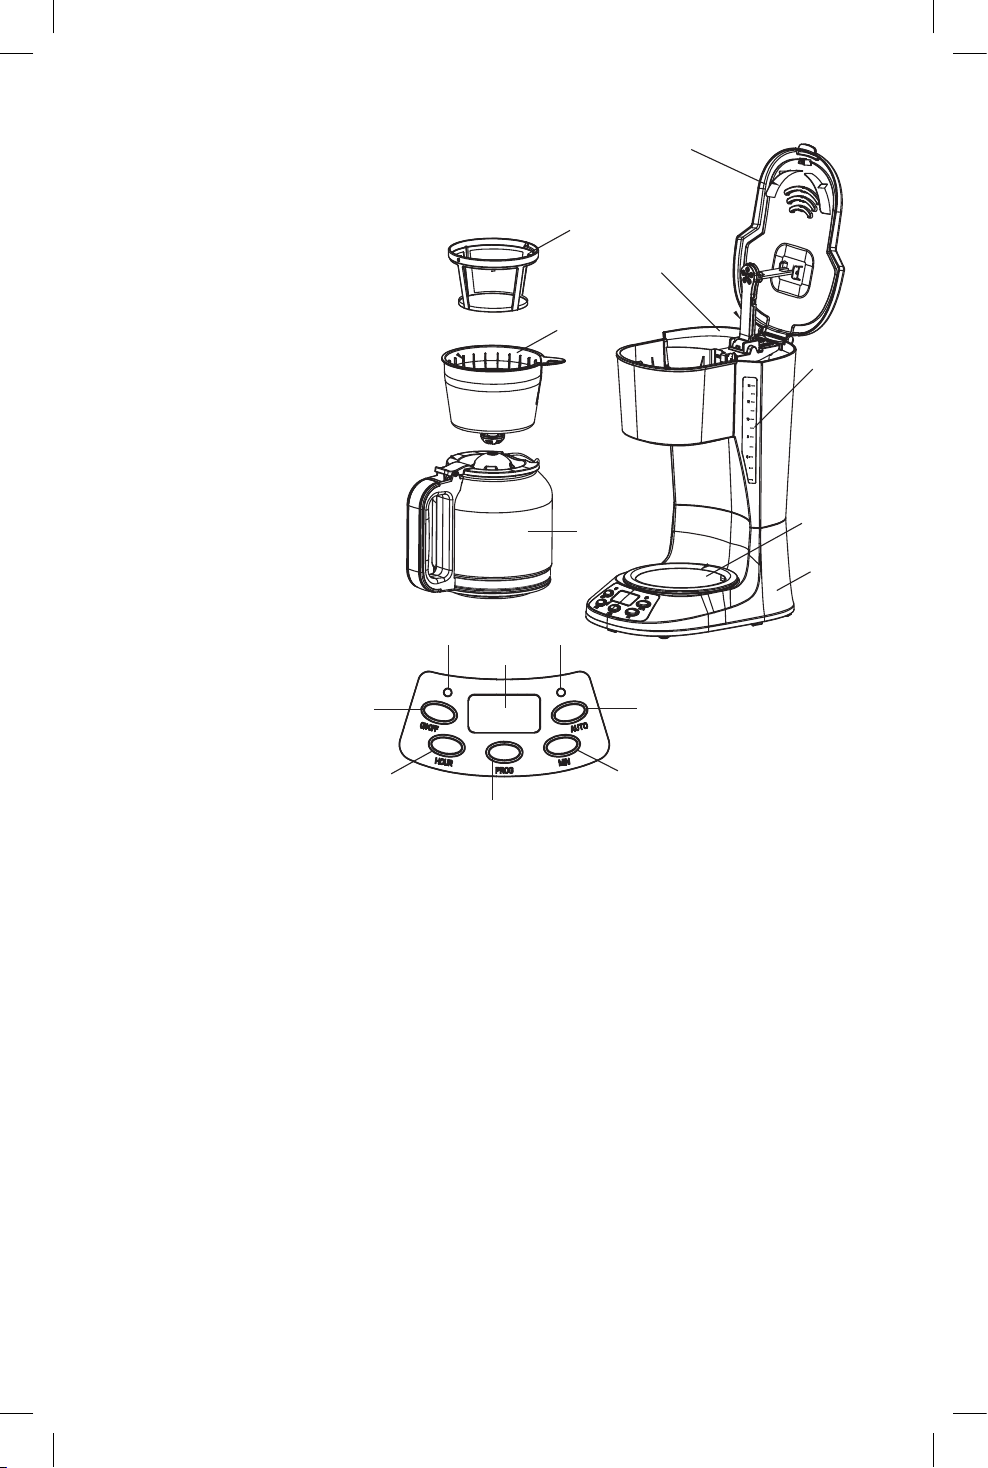
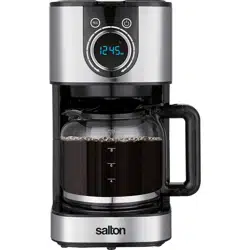
DESCRIPTION OF PARTS
1) Lid
2) Main Housing
3) Filter Holder (removable)
4) Reusable Filter
5) Water Reservoir
6) WaterLevelWindow
7) Control Panel
a) Digital Display
b)ON/OFFButton
c)HOURButton
d)PROGButton
e)Minute(MIN)button
f)AUTOButton
g)OnIndicatorLight
h)AutoIndicatorLight
8) Carafe
9) KeepWarmPlate
BEFORE FIRST USE
Wash the Carafe, Filter Holder and Permanent Filter in warm soapy
water. Rinse thoroughly and dry. Wipe the Main Housing with a soft
dampcloth.DONOTimmersetheMainHousinginwateroranyother
liquid.
Priortobrewingcoffeeforthersttimerunthemachinewithwateronly.
FollowthedirectionsintheHOWTOUSEsectionomittingthecoffeeand
Permanent Filter.
HOW TO USE
To Set the Clock
1. Plug into a 120 Volt AC wall outlet.
2. PressthePROGButtononceandthewordCLOCKwillappearinthe
upper right corner of the display.
4
1
6
7a
3
5
6
9
2
8
4
7b
7c
7d
7e
7f
7g 7h

3. PresstheHOURandMINUTE(MIN)Buttonstosetthetime.
a) The clock will show a 12 hour cycle and the AM and PM will
change.
b)Toscrollthroughthenumbersfaster,pressandholdtheHOURand
MINUTEButtons.
Immediate Brewing
1. LifttheLidandlltheWaterReservoirwithfreshcoldwaterforthe
desirednumberofcups.FilltheWaterReservoirbyllingtheCarafe
and pouring water into the Water Reservoir.
NOTE:DonotllabovethemaximumWaterLine(14)orless
thantheminimumWaterLine(4)indicatedontheCarafeandWater
Reservoir.
2. RemovetheReusableFilterandllwiththedesiredamountofground
coffee.
NOTE:Usecoffeethatisgroundspecicallyforautomaticdripcoffee
makers. Usually one Coffee Measuring Scoop or a level tablespoon
of ground coffee is used for each cup of coffee. Adjust the amount to
your personal taste.
3. RepositiontheReusableFilterandclosetheLid.
NOTE:IftheLiddoesnotclosecompletely,ensurethattheFilter
Holder and Reusable Filter are properly seated in position.
4. PlacetheCarafewithLidontheKeepWarmPlate.
5. PresstheON/OFFButtonandtheOnIndicatorLightwillilluminate
and the brew cycle will start. (To use the delay start function follow the
directionsinthe“DelayedBrewingsection”below)
NOTE:ThebrewcyclecanbeinterruptedbypressingtheON/OFF
Buttonatanytime.HotwaterwhichhasalreadyenteredtheFilterwill
continue to drip until the Filter is empty so long as the Carafe
remainsinposition.IfyoupresstheON/OFFbuttonagainthebrew
cycle will continue.
6. In a few minutes the coffee will be brewed and the Coffee Maker will
automaticallyswitchoverto‘KeepWarm’modeforthenexttwo
hours.The‘KeepWarmCycle’willshutoffautomaticallyandthe‘On’
IndicatorLightwillgooutattheendofthe2hours.Ifyouwishto
turn off the Coffee Maker before 2 hours has elapsed, press the
ON/OFFButtononce.
7. Seethe‘Pause&Serve’sectiontopouracupofcoffeebeforethe
brew cycle ends.
8. Always turn off the Coffee Maker and unplug from the wall outlet
when not in use.
Delayed Brewing
1. Fill the Water Reservoir with fresh cold water for the desired number
5

ofcups.FilltheWaterReservoirbyrstllingtheCarafeandthen
pouring water into the Water Reservoir.
NOTE:DonotllabovethemaximumWaterLine(14)orless
thantheminimumWaterLine(4)indicatedontheCarafeandWater
Reservoir.
2. RemovetheReusableFilterandllwiththedesiredamountofground
coffee.
NOTE:Usecoffeethatisgroundspecicallyforautomaticdripcoffee
makers. Usually one Coffee Measuring Scoop or a level tablespoon
of ground coffee is used for each cup of coffee. Adjust the amount to
your personal taste.
3. RepositiontheReusableFilterandclosetheLid.
NOTE:IftheLiddoesnotclosecompletely,ensurethattheFilter
Holder and Reusable Filter are properly seated in position.
4. PlacetheCarafewithLidontheKeepWarmPlate.
5. PressthePROGButtontwicetosetthetimefortheDelayedBrew
Cycle.(NOTE:ThewordTIMERwillappearinthetopleftcornerof
the display)
6. PresstheHOURandMINUTE(MIN)buttonsuntilthedesiredbrew
start time displays. Ensure that the AM or PM display is correct.
7. PresstheAUTOButtonandthegreenAUTOIndicatorLightwill
illuminate.
8. After about 10 seconds the Digital Display will switch back to the
currenttime.ToseetheDelayedBrewstarttimepressthePROG
Buttononce.NOTE:Youcancancelthedelaystarttimebypressing
theON/OFFbutton.
9. OncetheclockreachesthepresettimetostarttheBrewCycle,the
greenAUTOIndicatorLightwillgooutandtheredONIndicatorLight
will illuminate and the brew cycle will start.
10.Afterthebrewcycleisnished,theCoffeeMakerwillautomatically
switchoverto‘KeepWarm’modeforthenexttwohours.The‘Keep
WarmCycle’willshutoffautomaticallyandthe‘On’IndicatorLightwill
go out at the end of the 2 hours. If you wish to turn off the Coffee
Makerbefore2hourshaselapsed,presstheON/OFFButtononce
and unplug the coffee maker from the wall outlet.
‘PAUSE & SERVE’ FEATURE
The‘Pause&Serve’featureallowsyoutopouracupofcoffeebeforethe
brewcyclehasnished.RemovetheCarafeslowlytotemporarilystop
theowofcoffee.QuicklypouracupofcoffeeandrepositiontheCarafe
securelyontheKeepWarmPlate.
NOTE:DonotremovetheCarafeforlongerthan30seconds.
6

CARE AND CLEANING
1) Unplug the Coffee Maker and allow it cool before cleaning.
2) Remove the Reusable Filter and the Filter Holder from the Coffee
Maker.
3) The Filter Holder, Permanent Filter and Carafe can be washed in
warm soapy water. NEVER use abrasive cleansers on any part of
the Coffee Maker.
4) Wipe the Main Housing and Warming Plate with a soft damp cloth.
NEVER IMMERSE THE MAIN HOUSING IN WATER OR ANY
OTHER LIQUID.
5) All servicing, other than cleaning, should be performed by an
authorized service representative. See Warranty section.
Descaling
Overaperiodoftime,mineralsandcalciumfoundinwaterwill
accumulate in your Coffee Maker and may affect its operation. The
appliance should be cleaned approximately every six months, depending
on water conditions. Use distilled vinegar in the following manner to
remove the mineral deposits.
1. FilltheWaterReservoirtothemaximumWaterLine(14)withequal
partsofwhitevinegarandcoldwater.ClosetheLid.
2. Place the Filter Holder into position.
3. PlacetheCarafewithLidontheWarmingPlate.
4. PresstheON/OFFButtononceandtheCoffeeMakerwillstart.
5. Letthewholequantityofthevinegar/watersolutionrunthroughthe
machine,thenturntheCoffeeMakeroffbypressingtheON/OFF
Button.(TheredOnIndicatorLightwillturnoff.)
6. Repeat the above steps using cold water to rinse away any residual
vinegar. Repeat twice.
HELPFUL HINTS
1. Regularly clean the Coffee Maker to ensure great tasting coffee.
FollowthedirectionsintheCare&CleaningSection.
2. Store unused ground coffee in a cool dry place. After opening a
package of ground coffee reseal it tightly and store in the refrigerator
to maintain its freshness.
3. For optimum coffee taste buy whole coffee beans and grind them just
before brewing.
4. Reheatingcoffeeisnotrecommended.Coffeeisatitspeakavor
immediately after brewing.
7
8
A short supply cord is provided to reduce the hazards of becoming
entangled in or tripping over a long cord. Extension cords may be used
if care is exercised in their use. If an extension cord is used, the marked
electrical rating of the detachable power-supply cord or extension cord
should be at least as great as the electrical rating of the appliance. If
the appliance is of the grounded type, the extension cord should be a
grounded 3-wire cord. The extension cord should be arranged so that
it will not drape over the counter top or table top, where it can be pulled
on by children or tripped over.
This warranty does not include the cost of shipping, which is to be borne by the
customer.
LIMITED WARRANTY
**The original sales receipt is the only acceptable proof of purchase**
Salton Canada warrants that this appliance shall be free from defects in material
and workmanship for a period of two (2) years from the date of original purchase.
Salton Canada, at its sole discretion during this warranty period, will repair or
replace a defective product or issue a refund. Any refund to the purchaser will
be at a pro-rated value based on the remaining period of the warranty. All liability
is limited to the amount of the purchase price. This warranty covers normal
domestic usage and does not cover damage which occurs in shipment or failure
which results from alteration, accident, misuse, abuse, glass breakage, neglect,
improper maintenance, use contrary to the operating instructions or commercial
use. This warranty is not available to retailers or other commercial purchasers or
owners.
Salton_2yrWarranty_E.indd 1 13-02-12 4:08 PM
TO OBTAIN PROMPT WARRANTY SERVICE:
Contact one of our many Service Centers found on our website
www.salton.com/customer-care
or
Securely package and return the appliance to us. Please enclose:
• Original proof of purchase
• The completed form below with a $12.50 Return Shipping & Handling fee –
either a cheque, money order or credit card (A personal cheque will delay return
shipping by 2-3 weeks)
For added protection, we suggest that you use an insured delivery service with
tracking information when returning your product. Salton Canada will not be held
responsible for in-transit damage or for packages that are not received.
This warranty does not include the cost of shipping, which is to be borne by the
customer.
Name
Address
City Prov/State Postal/Zip Code
Daytime Phone No. Email
Product defect:
Type of payment Cheque/Money Order □ Visa □ MasterCard □
Name on card Expiry Date CSV No
Card No.
To contact our Customer Service Department:
SALTON CANADA Telephone: 514-685-3660 (Ext. 226)
81A Brunswick, E-mail: [email protected]
Dollard-des-Ormeaux, Quebec H9B 2J5 Fax: 514-685-8300
Canada www.salton.com
Salton_2yrWarranty_E.indd 2 13-02-12 4:08 PM