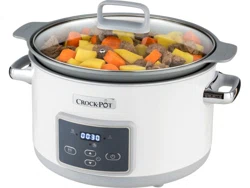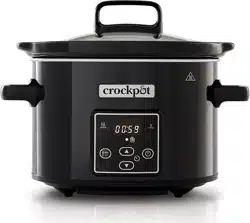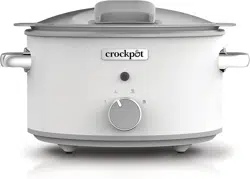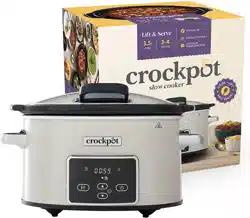

7-COOK & CARRY™
Slow Cooker
Printed in China P.N. 2162737 / NWL0001307474
CPSCVTS70LL-S_21EM1 GCDS-CRP1836643-LD
SERVICE INSTRUCTIONS
1. Do NOT attempt to repair or adjust any electrical or mechanical functions on this unit. Doing so will void the Warranty.
2. If you need to exchange the unit, please return it in its original carton, with a sales receipt, to the store where you
purchased it. If you are returning the unit more than 30 days after the date of purchase, please see the enclosed Warranty.
3. If you have any questions or comments regarding this unit’s operation or believe any repair is necessary, please call our
Consumer Service Department at 1-800-323-9519 or visit our website at www.crockpot.com.
1 YEAR LIMITED WARRANTY
Sunbeam Products, Inc. or if in Canada, Newell Brands Canada ULC (collectively "Sunbeam") warrants that for a period
of one year from the date of purchase, this product will be free from defects in material and workmanship. Sunbeam, at
its option, will repair or replace this product or any component of the product found to be defective during the
warranty period. Replacement will be made with a new or remanufactured product or component. If the product is no
longer available, replacement may be made with a similar product of equal or greater value. This is your exclusive
warranty. Do NOT attempt to repair or adjust any electrical or mechanical functions on this product. Doing so will void
this warranty.
This warranty is valid for the original retail purchaser from the date of initial retail purchase and is not transferable. Keep
the original sales receipt. Proof of purchase is required to obtain warranty performance. Sunbeam dealers, service
centers, or retail stores selling Sunbeam products do not have the right to alter, modify or any way change the terms
and conditions of this warranty.
This warranty does not cover normal wear of parts or damage resulting from any of the following: negligent use or
misuse of the product, use on improper voltage or current, use contrary to the operating instructions, disassembly,
repair or alteration by anyone other than Sunbeam or an authorized Sunbeam service center. Further, the warranty does
not cover: Acts of God, such as fire, flood, hurricanes and tornadoes.
What are the limits on Sunbeam’s Liability?
Sunbeam shall not be liable for any incidental or consequential damages caused by the breach of any express,
implied or statutory warranty or condition.
Except to the extent prohibited by applicable law, any implied warranty or condition of merchantability or fitness for
a particular purpose is limited in duration to the duration of the above warranty.
Sunbeam disclaims all other warranties, conditions or representations, express, implied, statutory or otherwise.
Sunbeam shall not be liable for any damages of any kind resulting from the purchase, use or misuse of, or inability to
use the product including incidental, special, consequential or similar damages or loss of profits, or for any breach of
contract, fundamental or otherwise, or for any claim brought against purchaser by any other party.
Some provinces, states or jurisdictions do not allow the exclusion or limitation of incidental or consequential damages
or limitations on how long an implied warranty lasts, so the above limitations or exclusion may not apply to you.
This warranty gives you specific legal rights, and you may also have other rights that vary from province to province,
state to state or jurisdiction to jurisdiction.
How To Obtain Warranty Service
In the U.S.A.
If you have any question regarding this warranty or would like to obtain warranty service, please call 1-800-323-9519
and a convenient service center address will be provided to you.
In Canada
If you have any question regarding this warranty or would like to obtain warranty service, please call 1-800-323-9519
and a convenient service center address will be provided to you.
In the U.S.A., this warranty is offered by Sunbeam Products, Inc. Boca Raton, Florida 33431. In Canada, this warranty is
offered by Newell Brands Canada ULC located at 20B Hereford Street, Brampton, Ontario L6Y 0M1. If you have any other
problem or claim in connection with this product, please write to Consumer Service Department. PLEASE DO NOT
RETURN THIS PRODUCT TO ANY OF THESE ADDRESSES OR TO THE PLACE OF PURCHASE.
To register your product, please visit us online at www.crockpot.com.
© 2021 Sunbeam Products, Inc. All rights reserved. Distributed by Sunbeam Products, Inc. Boca Raton, Florida 33431.
Owner’s Guide
Read and Keep These Instructions
P.N. 2162737 / NWL0001307474
www.crockpot.com
TM
TM
CPSCVTS70LL-S_21EM1.indd 20-1CPSCVTS70LL-S_21EM1.indd 20-1 7/5/21 4:34 PM7/5/21 4:34 PM

-2- -3-
IMPORTANT SAFEGUARDS
When using electrical appliances, basic safety
precautions should always be followed to reduce the
risk of fire, electric shock, and/or injury to persons
including the following:
1. Read all instructions before using this product.
2. This appliance generates heat during use. Do not
touch hot surfaces. Use handles or knobs.
3. To protect against electric shock, do not place or
immerse cord, plugs, or appliance in water or other
liquid.
4. This appliance is not intended for use by children
or by persons with reduced physical, sensory,
or mental capabilities, or lack of experience and
knowledge. Close supervision is necessary when
any appliance is used near children. Children
should be supervised to ensure that they do not
play with the appliance. Keep the appliance and its
cord out of reach of children.
5. Unplug from outlet when not in use, before putting
on or taking off parts and before cleaning. Allow
to cool before putting on or taking off parts, and
before cleaning. To disconnect, turn any control to
OFF, then unplug power cord from outlet. Do not
disconnect by pulling on cord.
6. Do not operate any appliance with a damaged cord
or plug or after the appliance malfunctions, or has
been damaged in any manner. Do not attempt
to replace or splice a damaged cord. Return
appliance to the manufacturer (see warranty) for
examination, repair or adjustment.
7. The use of accessory attachments not
recommended by the appliance manufacturer may
cause injuries.
8. Do not use outdoors or for commercial purposes.
9. Do not let cord hang over edge of table or counter,
or touch hot surfaces.
10. Do not place on or near wet surfaces, or heat
sources such as a hot gas or electric burner, or in a
heated oven.
11. Extreme caution must be used when moving an
appliance containing hot oil or other hot liquids.
12. The heating base is subject to residual heat
from cooking cycle. Do not touch heating base
immediately after removing stoneware. Allow to
cool before handling.
13. Use caution when opening the lid during or after a
cooking cycle. Escaping steam can cause burns.
14. Do not use appliance for other than intended use.
Misuse can cause injuries.
15. Intended for household countertop use only. Keep
6 inches (152 mm) clear from the wall and on all
sides. Always use appliance on a dry, stable, level
surface.
16. Avoid sudden temperature changes, such as adding
refrigerated foods or cold liquids into a heated pot.
CPSCVTS70LL-S_21EM1.indd 2-3CPSCVTS70LL-S_21EM1.indd 2-3 7/5/21 4:34 PM7/5/21 4:34 PM

-4- -5-
17. The slow cooker lid is made of tempered glass. The
lid is fragile and may crack or break if dropped.
Handle with care. Always inspect the lid for chips,
cracks or any other damage. Do not use the glass
lid if it is damaged, as it may shatter during use.
18. The ceramic stoneware is fragile and may crack or
break if dropped. Handle with care and inspect for
damage before using. Do not use your slow cooker
with a damaged stoneware.
19. CAUTION: To protect against electrical shock
and product damage, do not cook directly in the
heating base. Cook only in the stoneware provided.
20. WARNING: Spilled food can cause serious burns.
Keep appliance and cord away from children.
Never drape cord over edge of counter, never
use outlet below counter, and never use with an
extension cord.
For appliances with locking lids (does not apply to
Cook and Carry models):
21. Never attempt to lift or carry this appliance by the
lid handle. Always use the handles located at each
side on the base of the appliance.
22. Do not lock the lid while cooking. Locking the
glass lid while cooking may lead to glass breakage,
which can cause injuries.
Instructions for appliances incorporating
replaceable Coin Cell batteries:
1. WARNING: Chemical Burn Hazard. Keep
batteries away from children.
2. This product contains a lithium button/coin cell
battery. If a new or used lithium button/coin cell
battery is swallowed or enters the body, it can
cause severe internal burns and can lead to death
in as little as 2 hours. Always completely secure the
battery compartment. If the battery compartment
does not close securely, stop using the product,
remove the batteries, and keep it away from
children. If you think batteries might have been
swallowed or placed inside any part of the body,
seek immediate medical attention.
3. The cells shall be disposed of properly, including
keeping them away from children.
4. Even used cells may cause injury.
SAVE THESE INSTRUCTIONS
HOUSEHOLD USE ONLY
CPSCVTS70LL-S_21EM1.indd 4-5CPSCVTS70LL-S_21EM1.indd 4-5 7/5/21 4:34 PM7/5/21 4:34 PM
-6- -7-
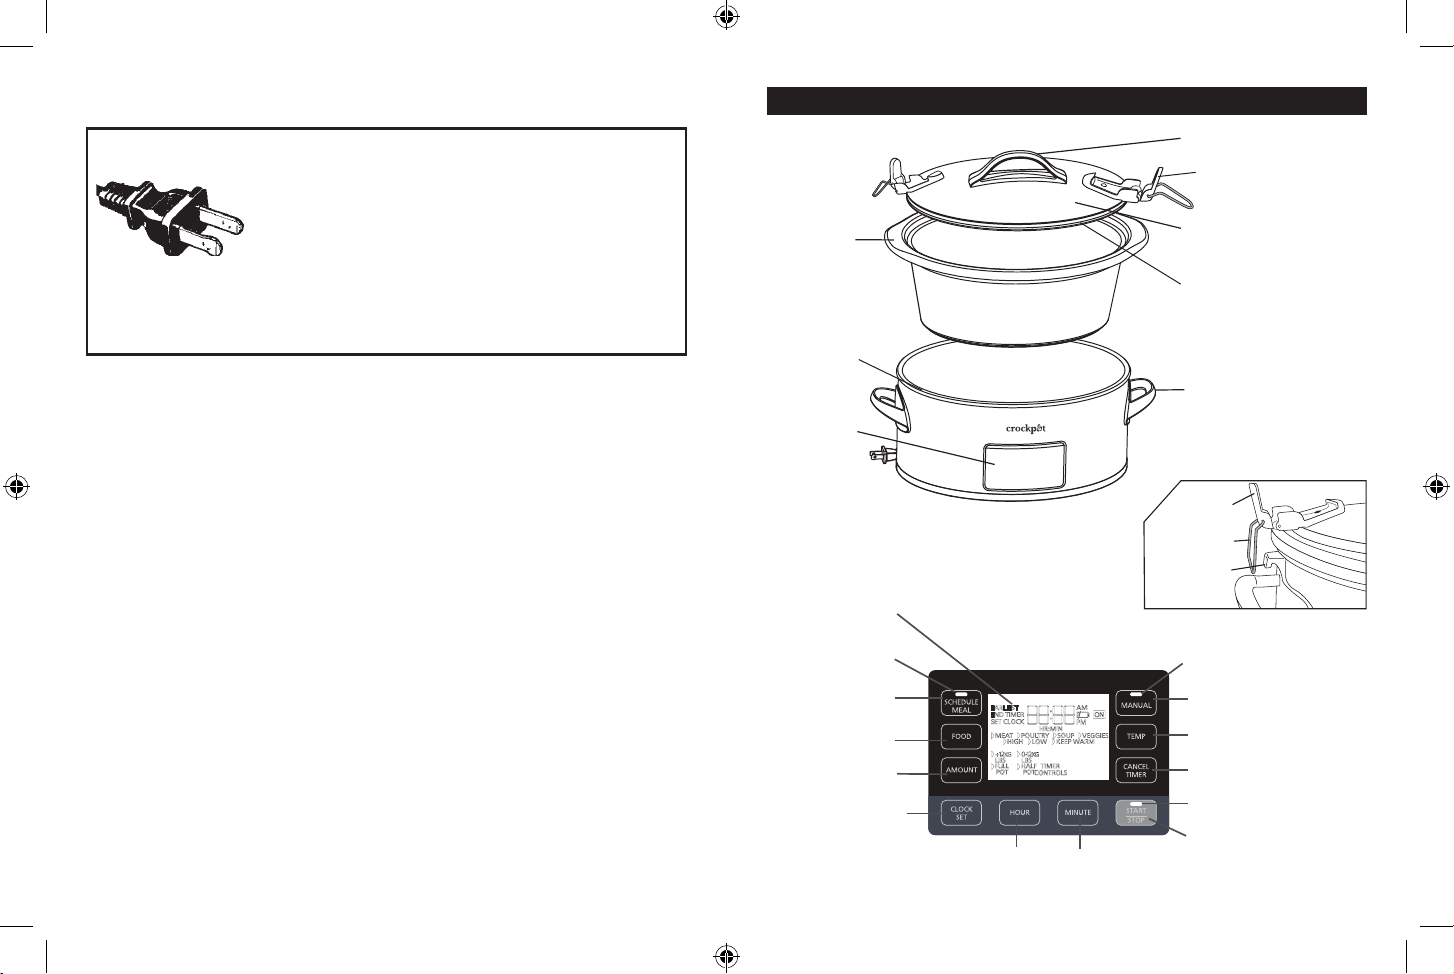
Start/Stop Indicator Light
Start/Stop Button
CONTROL PANEL
Time Setting
Display Screen
Schedule Meal
Button
Schedule Meal
Indicator Light
Food Button
Amount Button
Clock Set Button
Manual Indicator
Light
Manual Button
Temp Button
Cancel Timer Button
YOUR CROCKPOT™ SLOW COOKER COMPONENTS
Hour Button
Minute Button
NORTH AMERICAN MODELS WITH POLARIZED PLUGS:
POLARIZED PLUG
This appliance has a polarized plug (one blade is
wider than the other). To reduce the risk of electric
shock, this plug is intended to fit into a polarized
outlet only one way. If the plug does not fit fully
into the outlet, reverse the plug. If it still does
not fit, contact a qualified electrician. Do not attempt to modify the
plug in any way. If the plug fits loosely into the AC outlet or if the AC
outlet feels warm do not use that outlet.
POWER CORD INSTRUCTIONS:
A short power-supply cord is used to reduce the risk resulting from it
being grabbed by children, becoming entangled in, or tripping over a
longer cord.
NOTICES:
1. Some countertop and table surfaces are not designed to withstand the
prolonged heat generated by certain appliances. Do not set the heated
unit on a finished wood table. We recommend placing a hot pad or trivet
under your slow cooker to prevent possible damage to the surface.
2. During initial use of this appliance, some slight smoke and/or odor may
be detected. This is normal with many heating appliances and will not
recur after a few uses.
3. Please use caution when placing your stoneware on a ceramic or smooth
glass cook top stove, countertop, table or other surface. Due to the
nature of the stoneware, its rough bottom may scratch some surfaces if
caution is not used. Always place heat resistant protective padding under
the stoneware before setting on a table, countertop or other surface.
Removable
Secure Fit Lid
Stoneware
Lid Handle
Handles
Control Panel
Heating Base
Locking Latches
Gasket
Latch
Wire Clip
Clip Hook
CPSCVTS70LL-S_21EM1.indd 6-7CPSCVTS70LL-S_21EM1.indd 6-7 7/5/21 4:34 PM7/5/21 4:34 PM

-8- -9-
HOW TO USE MYTIME™ TECHNOLOGY
1. Place the stoneware into the heating base, add ingredients into the
stoneware and cover with the lid.
2. Plug Crockpot™ 7 QT Cook & Carry Slow Cooker into an electrical outlet.
3. Choose “SCHEDULE MEAL” on the left side of the control panel.
4. Select “FOOD” to choose from a list of 4 preset functions: MEAT, POULTRY,
SOUP, and VEGGIES.
NOTE: Make “FOOD” selection based on the recipe type being
cooked. If the recipe that you are cooking is not on the preset list,
please choose the main ingredient that most closely relates, or cook
using the “MANUAL” function.
NOTE: Stews should be cooked using the “soup” food selection. To
achieve the best results when cooking large pieces of meat or poultry,
please add additional time to the meal’s earliest end time.
5. Use the “AMOUNT” button to select weight or capacity of food being
cooked. If “MEAT” or “POULTRY” is selected, the slow cooker will give a
weight option of “+2 LBS” or “0-2 LBS”. If “SOUP” or “VEGGIES” is chosen,
the slow cooker will give a capacity option of “FULL POT” or “HALF POT”.
NOTE: “FULL POT” is referencing a cooking pot that is filled ¾ of the
way full.
6. Next, use the “HOUR” and “MINUTE” buttons to select the time that you
would like your meal to be complete (e.g. 8:00pm), then press “START”.
Initial time displayed on the screen is the meal’s earliest end time, based on
food and amount being cooked.
NOTE: “SCHEDULE MEAL” function will not cook food longer than 12
hours from the meal cook-start time. Once the clock is past the scheduled
meal time, the slow cooker will automatically turn to “KEEP WARM”.
NOTE: MyTime™ technology automatically determines the correct
heat setting based on the above inputs. Food will always be kept at a
food safe temperature, unless there is a power outage. See page 10 for
more details, in the event of a power outage.
PREPARING YOUR CROCKPOT™ SLOW COOKER FOR USE
1. Before using the slow cooker, remove all packaging components and
wash the lid and stoneware in warm, soapy water and dry thoroughly.
2. Remove orange pull tab on the bottom of the slow cooker to activate
battery (the battery is used to keep clock time). The low battery icon will
be illuminated until the pull tab is removed. Use the “HOUR” and
“MINUTE” buttons to set local time, then select “CLOCK SET”.
HOW TO USE YOUR LOCKING LID
LOCKING THE LID
1. Place Lid on Stoneware. Hook Wire Clip onto Clip Hook (Figure 1). Flip
Latch around to top (Figure 2) and push Latch down to securely lock
(Figure 3). Repeat steps on other side of the lid.
UNLOCKING THE LID
1. Flip the latch up and around to loosen the Wire Clip.
Clear the Wire Clip from the Clip Hook. Repeat steps
on other side of the lid.
2. Remove the Lid.
3. Wire should remain in Latch base when unit is
unlocked (Figure 4)
CAUTION:
NEVER attempt to lift or carry your slow cooker by the lid handle.
Always use the handles located at each side on the base of the unit.
Fig. 1
Fig. 4
Fig. 2 Fig. 3
HOW TO USE MANUAL FUNCTION ON SLOW COOKER
1. Place the stoneware into the heating base, add ingredients into the
stoneware and cover with the lid.
2. Plug Crockpot™ 7 Quart Cook & Carry Slow Cooker into an electrical
CPSCVTS70LL-S_21EM1.indd 8-9CPSCVTS70LL-S_21EM1.indd 8-9 7/5/21 4:34 PM7/5/21 4:34 PM

-10- -11-
HOW TO CLEAN YOUR SLOW COOKER
• ALWAYS turn your slow cooker off, unplug it from the electrical outlet,
and allow it to cool before cleaning.
• The lid and stoneware can be washed in the dishwasher or with hot,
soapy water. Do not use abrasive cleaning compounds or scouring pads.
A cloth, sponge, or rubber spatula will usually remove residue. To remove
water spots and other stains, use a non-abrasive cleaner or vinegar.
• As with any fine ceramic, the stoneware and lid will not withstand
sudden temperature changes. Do not wash the stoneware or lid with
cold water when they are hot.
• The outside of the heating base may be cleaned with a soft cloth and
warm, soapy water. Wipe dry. Do not use abrasive cleaners.
CAUTION: Never immerse the heating base in water or other liquid.
• No other servicing should be performed.
• This appliance has no user serviceable parts. Any servicing beyond
that described in the Cleaning Section should be performed by an
Authorized Service Representative only. See warranty available online.
outlet, and select "MANUAL" on the right side of the controller.
3. Select "TEMP" to choose the temperature setting from HIGH, LOW, or
KEEP WARM.
NOTE: "KEEP WARM" is ONLY for keeping already cooked food warm.
DO NOT cook on the "KEEP WARM" setting. We do not recommend
using the "KEEP WARM" setting for more than 4 hours.
4. Use the "HOUR" and "MINUTE" buttons to select cook time in increments
of 15 minutes, up to 20 hours. Select the time based on the length of time
indicated in the recipe. The time will begin to count down in one minute
increments. Use "CANCEL TIMER" to clear the countdown timer. This will
allow your slow cooker to remain on its current setting until turned off.
5. For recipes that require a range of times, select the time closest to the
setting on your slow cooker. For example, to cook a recipe calling for a
cooking time of 7 to 9 hours on LOW, cook for 8 hours.
6. When the cooking time has completed, the Crockpot™ slow cooker
automatically shifts to the "KEEP WARM" setting and the "KEEP WARM"
light illuminates.
7. To turn the Crockpot™ slow cooker off, press the "START/STOP" button
and unplug the unit from the outlet.
8. When cooking is done, unplug your slow cooker and allow it to cool
before cleaning.
USAGE NOTES:
• To change between LBS and KGS, hold "AMOUNT" button for 3 seconds.
• To change the current time, hold "CLOCK SET" for 3 seconds. Adjust
the time using "HOUR" and "MINUTE", then press "CLOCK SET" to
confirm the selection.
• To change the battery, first unplug the unit, then remove battery
cover on the bottom of the unit. Press in on silver tab to dislodge
battery. Then remove and properly dispose of the old battery and
replace with a new CR2025 coin cell battery.
• If there is a Power outage, the display and lights blink when the Power
is restored. All slow cooker settings have been cleared and must be
reset. As a result, the food may be unsafe to eat. If you are unaware of
how long the power was out, we suggest you discard the food inside.
• To avoid over or under-cooking, always fill the stoneware ½ to ¾ full
and conform to recommended cook times.
Part Dishwasher
Safe
Oven Safe Microwave
Safe
Stovetop
Safe
Lid Yes No No No
Stoneware Yes Yes, but not
in the broiler
Yes No
• Do not overfill stoneware. To prevent spillover, do not fill stoneware
higher than ¾ full.
• Always cook with the lid on for the recommended time. Do not
remove the lid during the first two hours of cooking to allow the heat
to build up efficiently.
• Always wear oven mitts when handling the lid or stoneware.
• Unplug when cooking is done and before cleaning.
• Removable stoneware is ovenproof and microwave safe. Do not use
removable stoneware on gas or electric burner or under broiler. Refer
to chart below.
CPSCVTS70LL-S_21EM1.indd 10-11CPSCVTS70LL-S_21EM1.indd 10-11 7/5/21 4:34 PM7/5/21 4:34 PM

-12- -13-
HINTS AND TIPS
(CONT.)
HERBS AND SPICES
• Fresh herbs add flavor and color, but should be added at the end of the
cooking cycle as the flavor will dissipate over long cook times.
• Ground and/or dried herbs and spices work well in slow cooking
and may be added at the beginning.
• The flavor power of all herbs and spices can vary greatly depending
on their particular strength and shelf life. Use herbs sparingly, taste
at end of cook cycle and adjust seasonings just before serving.
MILK
• Milk, cream, and sour cream break down during extended cooking.
When possible, add during the last 15 to 30 minutes of cooking.
• Condensed soups may be substituted for milk and can cook for
extended times.
SOUPS
• Some soup recipes call for large amounts of water. Add other soup
ingredients to the slow cooker first then add water only to cover. If
thinner soup is desired, add more liquid at serving time.
MEATS
• Trim fat, rinse well, and pat meat dry with paper towels.
• Browning meat in a separate skillet or broiler allows fat to be drained
off before slow cooking and also adds greater depth of flavor.
• Meat should be positioned so that it rests in the stoneware without
touching the lid.
• For smaller or larger cuts of meat, alter the amount of vegetables or
potatoes so that the stoneware is always
1
⁄
2
to
3
⁄
4
full.
• The size of the meat and the recommended cook times are just
estimates and can vary depending upon the specific cut, type, and
HINTS AND TIPS
PASTA AND RICE
• For best rice results, use long grain converted rice or a specialty rice
as the recipe suggests. If the rice is not cooked completely after the
suggested time, add an extra 1 to 1
1
⁄
2
cups of liquid per cup of
cooked rice and continue cooking for 20 to 30 minutes.
• For best pasta results, first partially cook the pasta in a pot of boiling
water until just tender. Add the pasta to the Crockpot™ slow cooker
during the last 30 minutes of cook time.
BEANS
• Beans must be softened completely before combining with sugar
and/or acidic foods. Sugar and acid have a hardening effect on
beans and will prevent softening.
• Dried beans, especially red kidney beans, should be boiled before
adding to a recipe.
• Fully cooked canned beans may be used as a substitute for dried beans.
VEGETABLES
• Many vegetables benefit from slow cooking and are able to develop
their full flavor. They tend not to overcook in your slow cooker as
they might in your oven or on your stovetop.
• When cooking recipes with rooted vegetables and meat, place
vegetables in slow cooker before meat. Vegetables usually cook
slower than meat in the slow cooker.
• Place rooted vegetables near the sides or bottom of the stoneware to
facilitate cooking.
CPSCVTS70LL-S_21EM1.indd 12-13CPSCVTS70LL-S_21EM1.indd 12-13 7/5/21 4:34 PM7/5/21 4:34 PM

-14- -15-
RECIPES
BABY BACK RIBS
Serves 6-10
1. Place ribs in Crockpot™ slow cooker. Top with onion and barbecue
sauce.
2. Cover and cook on Low for 7–9 hours or on High for 4–5 hours, or
until meat is tender.
3. To serve, cut ribs between bones and coat with extra sauce as
desired.
BBQ PULLED PORK
Serves 6–8
1. Place pork loin in Crockpot™ slow cooker. Top with onion and
barbecue sauce.
2. Cover and cook on Low for 7–9 hours or on High for 4–5 hours, or
until meat is tender.
3. Remove pork from Crockpot™ slow cooker and shred with a fork.
Add pork back into Crockpot™ slow cooker and coat with sauce.
4. Serve BBQ pulled pork on hamburger buns or hard rolls.
2–4 racks of baby back ribs,
cut into 3–4 pieces each
2–4 cups barbecue sauce
2–3 onions, chopped
2½–5 pound pork loin,
trimmed of fat
2–4 cups barbecue sauce
2–3 onions, chopped
6–8 hamburger buns or hard
rolls
NOTE: The following recipes are referencing the use of the "MANUAL"
function. When using MyTime™ technology, please disregard recipe
time and temperature given. Simply input desired meal time, and
Crockpot™ will take care of the rest.
HINTS AND TIPS
(CONT.)
bone structure. Lean meats such as chicken or pork tenderloin tend
to cook faster than meats with more connective tissue and fat such
as beef chuck or pork shoulder. Cooking meat on the bone versus
boneless will increase required cook times.
• Cut meat into smaller pieces when cooking with precooked foods
such as beans or fruit, or light vegetables such as mushrooms, diced
onion, eggplant, or finely minced vegetables. This enables all food
to cook at the same rate.
• When cooking frozen meats, at least 1 cup of warm liquid must first
be added. The liquid will act as a “cushion” to prevent sudden
temperature changes. An additional 4 hours on LOW or 2 hours on
HIGH is typically required. For larger cuts of frozen meat, it may take
much longer to defrost and tenderize.
FISH
• Fish cooks quickly and should be added at the end of the cooking
cycle during last fifteen minutes to hour of cooking.
LIQUID
• For best results and to prevent food from drying or burning, always
ensure an adequate amount of liquid is used in the recipe.
• Ensure the stoneware is always filled a minimum of
1
⁄
2
full and a
maximum of
3
⁄
4
full, and conform to recommended cook times.
Visit the Crockpot™ slow cooker website at
www.crockpot.com for additional hints, tips and
recipes or call 1-800-323-9519.
CPSCVTS70LL-S_21EM1.indd 14-15CPSCVTS70LL-S_21EM1.indd 14-15 7/5/21 4:34 PM7/5/21 4:34 PM

-16- -17-
RECIPES
CHICKEN CACCIATORE
Serves 4-8
1. Place sliced onion in Crockpot™ slow cooker and cover with chicken.
2. In a bowl, stir tomatoes, salt, pepper, garlic and white wine together.
Pour over chicken.
3. Cover and cook on Low for 5–6 hours or on High for 3–4 hours, or
until chicken is tender.
4. Stir in capers, olives and herbs just before serving.
5. Serve over cooked pasta.
NOTE: Cooking chicken on the bone versus boneless will increase
cook time about 30 minutes to 1 hour.
CHILI
Serves 6–8
1. Add all ingredients to Crockpot™ slow cooker.
2. Cover and cook on Low for 8–9 hours or on High for 4–5 hours.
2–3 onions, thinly sliced
2–4 pounds chicken (breasts or
thighs), skinned
1 28 -ounce can plum
tomatoes, chopped
5 cloves garlic, minced
½ cup dry white wine or broth
2 tablespoons capers
20 pitted Kalamata olives,
chopped coarsely
1 bunch fresh parsley or basil,
stemmed and coarsely chopped
Kosher salt and pepper
Cooked pasta
2 large onions, chopped
5–6 cloves garlic, minced
2 green peppers, chopped
2–3 pounds ground beef,
cooked and drained
2 14 -ounce cans red, black or
white beans, rinsed and
drained
1 14-ounce can diced tomatoes
2 jalapeños, seeded and minced
1 tablespoon cumin
1 teaspoon cayenne pepper
½ cup beef broth
RECIPES
BEEF BOURGUIGNON
Serves 6-8
1. Coat beef in flour seasoned with salt and pepper. Sear beef in a
skillet on stovetop (optional).
2. Place meat in Crockpot™ slow cooker and add remaining
ingredients.
3. Cover and cook on Low for 8–10 hours or on High for 5–7 hours, or
until meat is tender.
LEMON HERB ROASTED CHICKEN
Serves 4–6
1. Place the onion in the cavity of the chicken and rub the skin with
butter. Place chicken in Crockpot™ slow cooker.
2. Squeeze lemon juice over chicken and sprinkle with remaining
seasonings. Cover and cook on Low 8–10 hours or on High 4–5
hours.
3 tablespoons flour
Kosher salt and pepper
3 pounds beef chuck, cut
into 1-inch cubes
3 large carrots, peeled and sliced
1 medium onion, sliced
6 strips cooked bacon, cut
into 1–2 inch pieces
1 10-ounce can beef broth
2 cups red or Burgundy wine
1 tablespoon tomato paste
2 cloves garlic, minced
3 sprigs fresh thyme, stemmed
1 bay leaf
1 pound fresh mushrooms, sliced
2 large potatoes,cut
into 1-inch pieces
4–6 pound roasting chicken
½ cup onion, chopped
1–2 tablespoons butter
Juice of one lemon
½ teaspoon Kosher salt
2 tablespoons fresh parsley
½ teaspoon dried thyme
teaspoon paprika
CPSCVTS70LL-S_21EM1.indd 16-17CPSCVTS70LL-S_21EM1.indd 16-17 7/5/21 4:34 PM7/5/21 4:34 PM

-18- -19-
RECIPES
BEEF STEW
Serves 6-8
1. Sprinkle flour, salt and pepper over meat. Place meat in Crockpot™
slow cooker.
2. Add remaining ingredients and stir well.
3. Cover and cook on Low for 8–10 hours or on High for 5–6 hours, or
until meat is tender. Stir thoroughly before serving.
EASY, HEALTHY FISH FILLET
Serves 4–6
1. Salt and pepper both sides of the fish and place in Crockpot™ slow
cooker. Cover top of fish with herbs and lemon slices, and tuck some
under fish.
2. Cover and cook on High for approximately 30–40 minutes, or until
no longer translucent. Cook times vary depending on thickness of
fish.
3. Remove lemon slices and top with salsa or tapenade.
2–4 pounds beef chuck stew
meat, cut into 1-inch cubes
½ cup flour
Kosher salt and pepper
3 cups beef broth
1 tablespoon Worcestershire sauce
3 cloves garlic, minced
2 bay leaves
6 small potatoes, quartered
2–3 onions, chopped
3 celery stalks, sliced
Kosher salt and pepper
2–3 pounds white fish (cod, sea
bass, tilapia or catfish), skinned
Fresh herbs (flat-leaf parsley,
basil, tarragon, savory or a
combination of all)
2–3 lemons, thinly sliced
Prepared salsa or olive
tapenade to garnish
RECIPES
POT ROAST
Serves 6-10
1. Coat roast with ½ cup flour, salt, and pepper. Sear roast in a skillet
on stovetop (optional).
2. Place all vegetables in Crockpot™ slow cooker, except mushrooms.
Add roast and spread mushrooms on top. Pour in liquid.
3. Cover and cook on Low for 10–12 hours or on High for 6–8 hours,
or until tender.
SAUSAGE AND MEATBALLS
Serves 8–10
1. Brown sausage and meatballs in a skillet on stovetop (optional).
2. Add all ingredients to Crockpot™ slow cooker except pasta and
grated cheese.
3. Cover and cook on Low for 7–8 hours or on High for 4–5 hours.
4. Serve with cooked pasta and grated cheese.
2–4 pound beef chuck pot roast
½ cup flour
Kosher salt and pepper
3 carrots, sliced
3 potatoes, quartered
3 onions, sliced
2 stalks celery, sliced
1 cup mushrooms, sliced
1 cup beef broth or wine
3–5 pounds sausage and
meatballs, uncooked
6 cloves garlic, peeled and
chopped
1 28 -ounce can crushed
tomatoes
1–2 28 -ounce cans plum
tomatoes in juice,
chopped coarsely
1 bunch fresh basil
Cooked pasta
Grated cheese
CPSCVTS70LL-S_21EM1.indd 18-19CPSCVTS70LL-S_21EM1.indd 18-19 7/5/21 4:34 PM7/5/21 4:34 PM