1
Questions, problems, missing parts? Before returning to your retailer
,
call our customer service department at 1-877-447-4768,
8:00 a.m. – 4:30 p.m., CST, Monday-Friday or email us at
AS-283 09-13-21
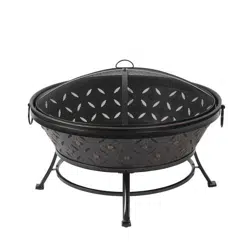
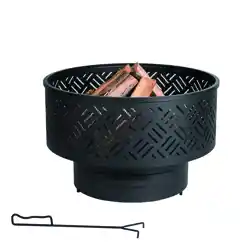
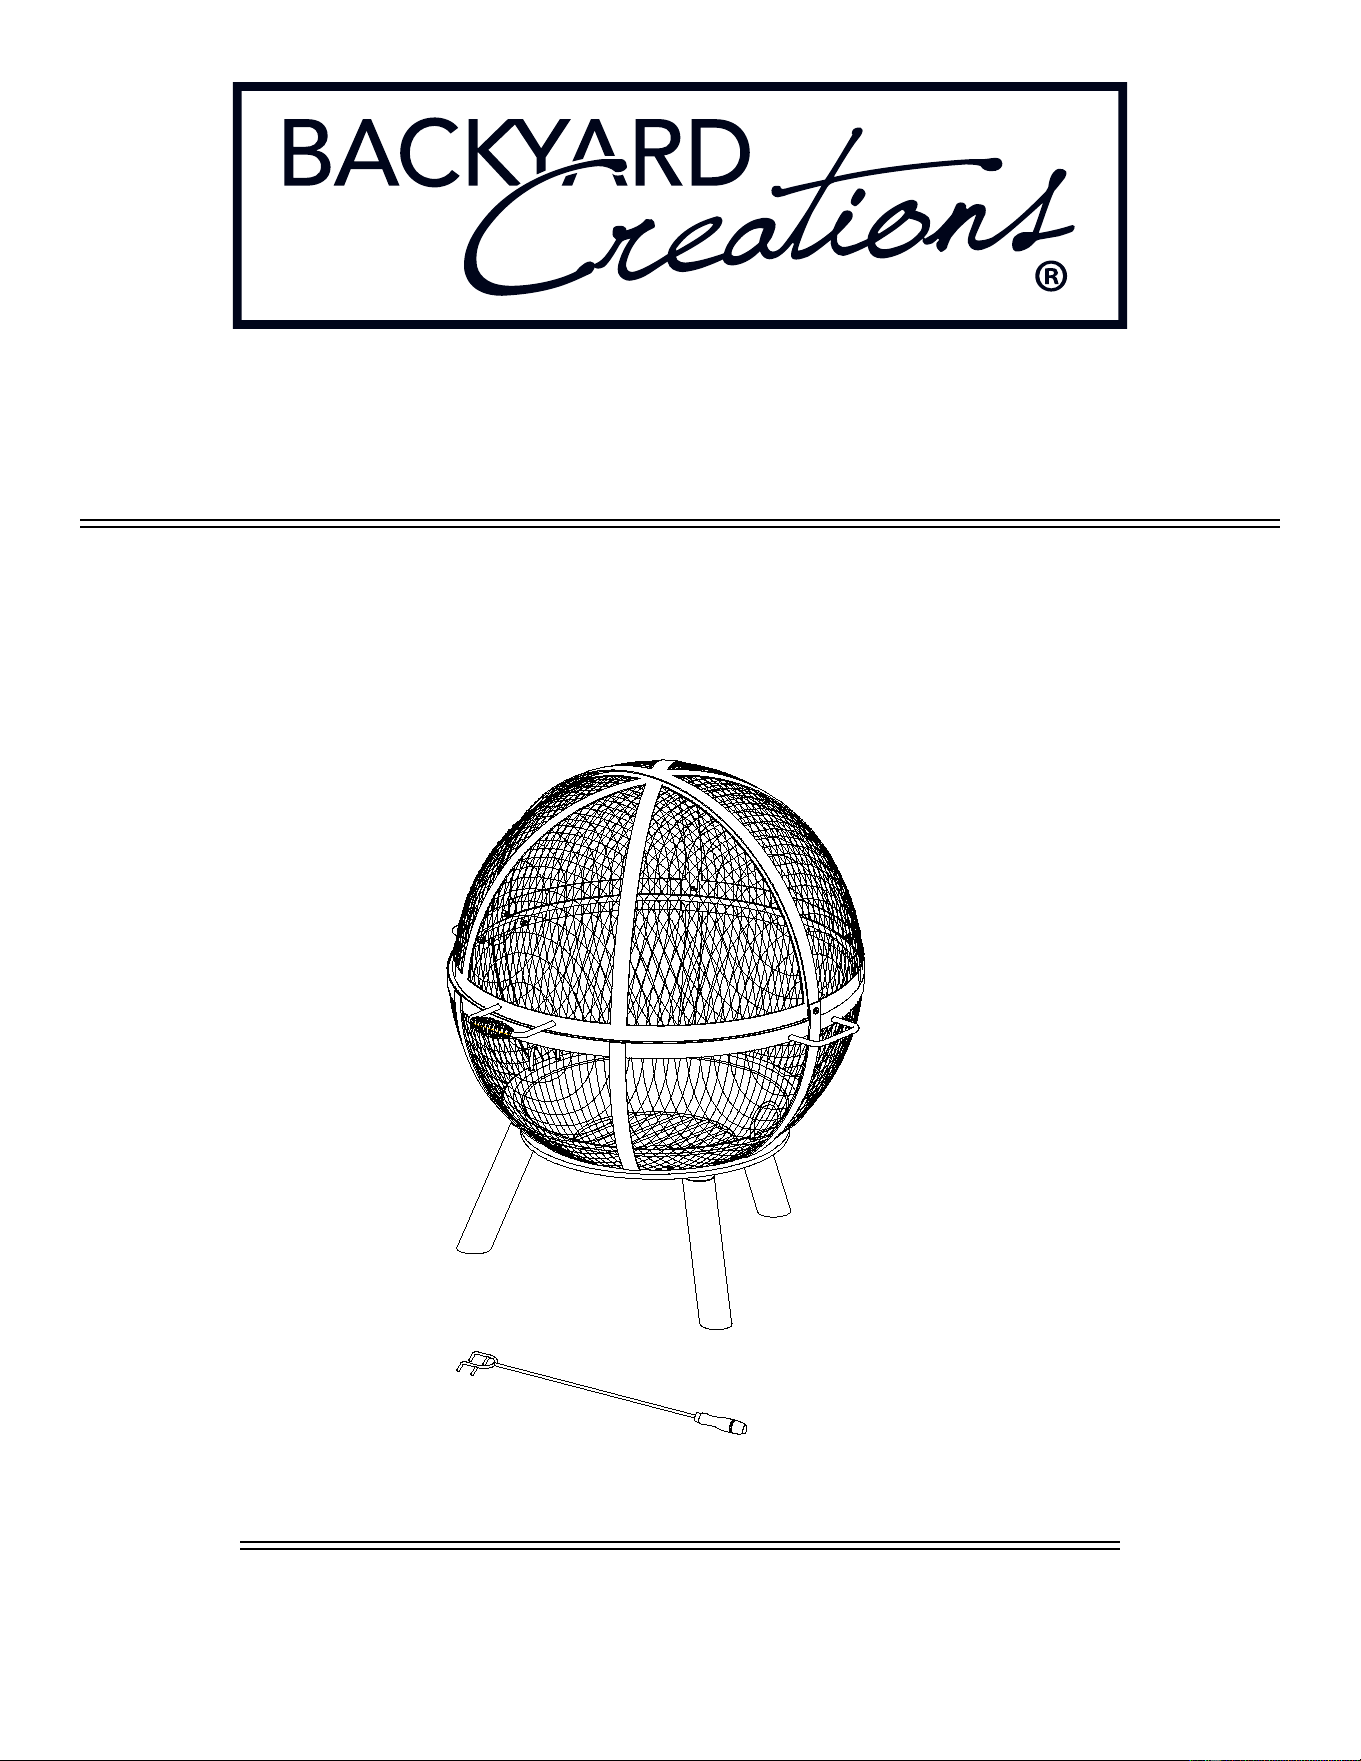
COMPASS 35" SPHERE FIRE PIT
MENARDS SKU #259-5266
MODEL #OFW283R
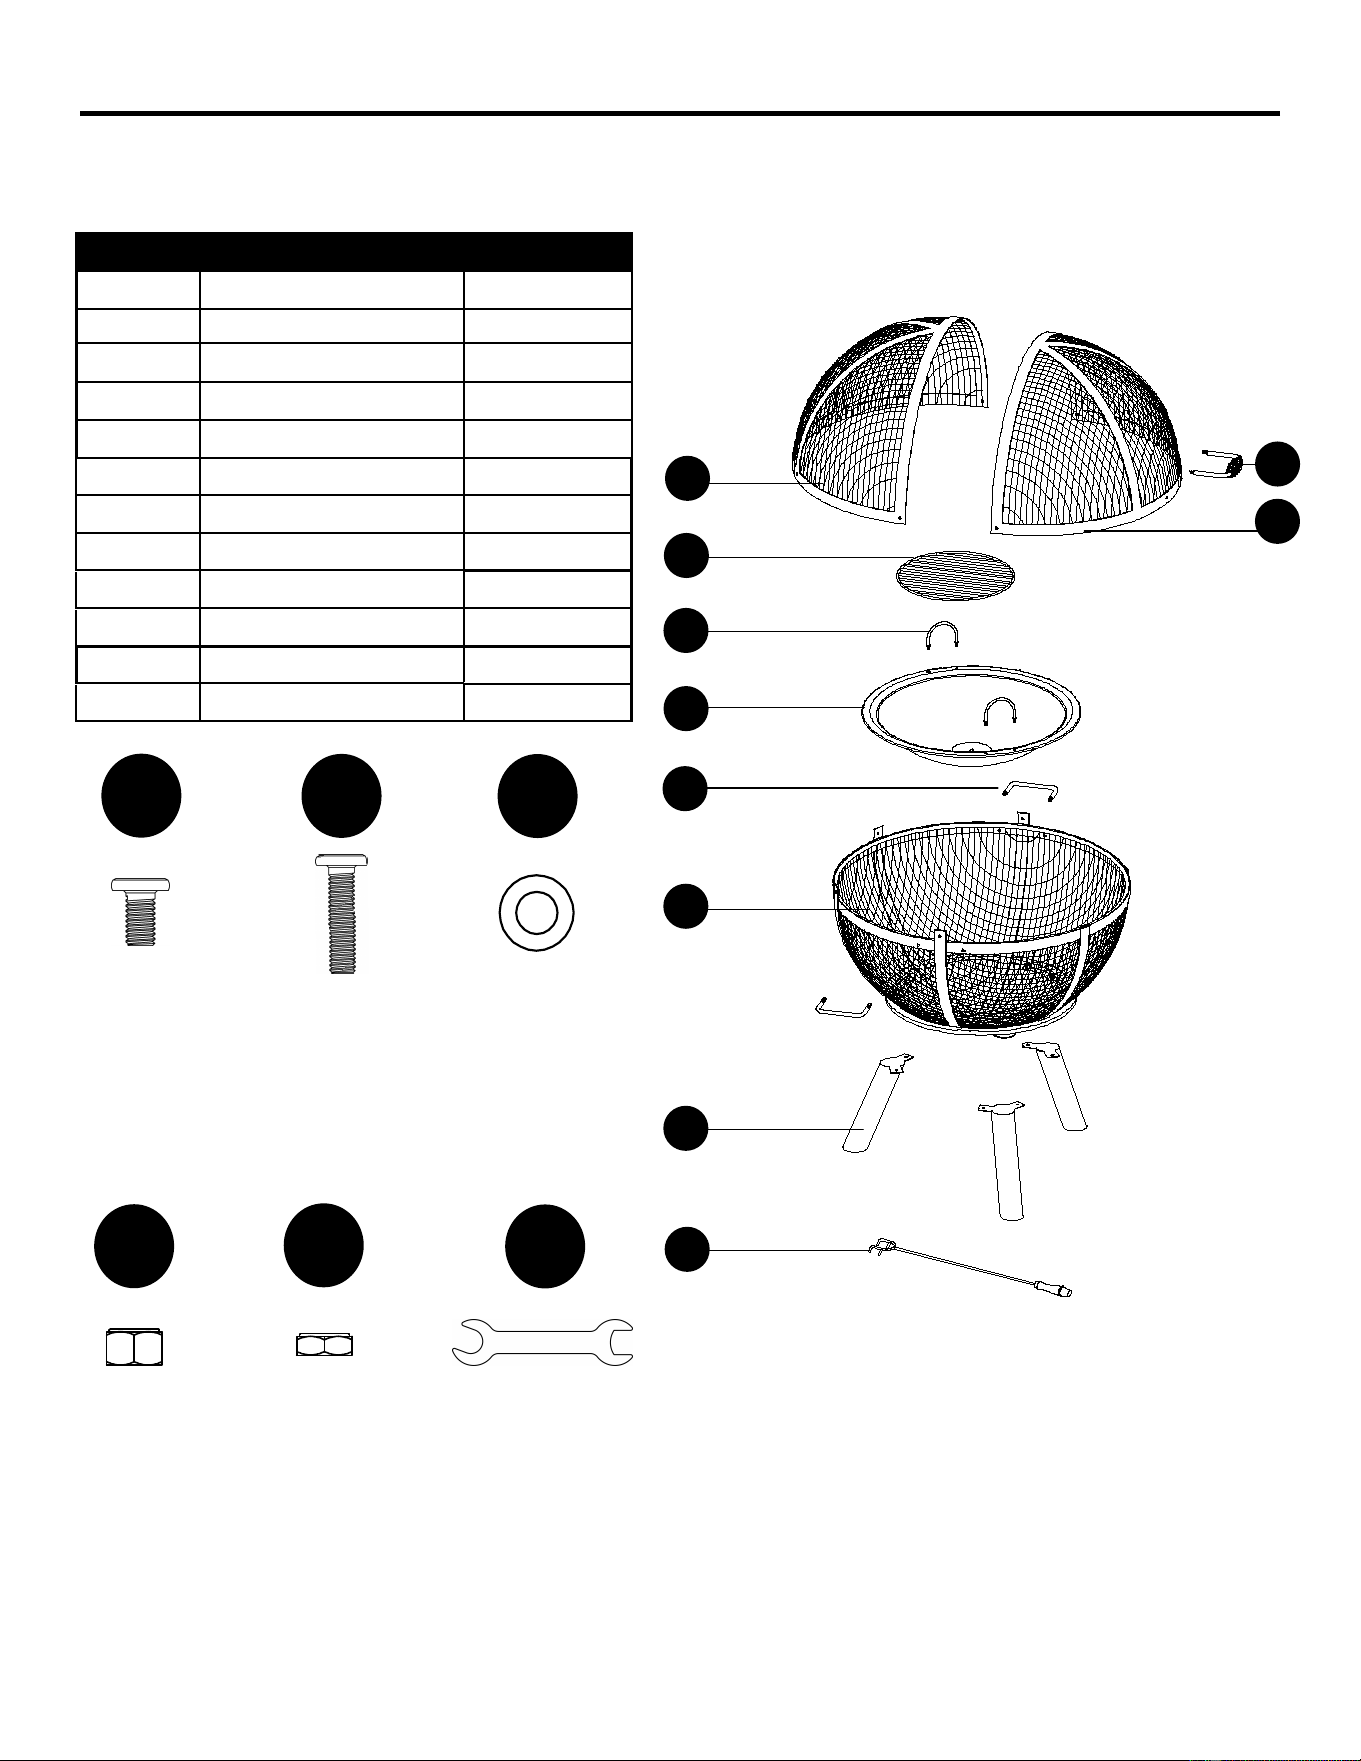
2
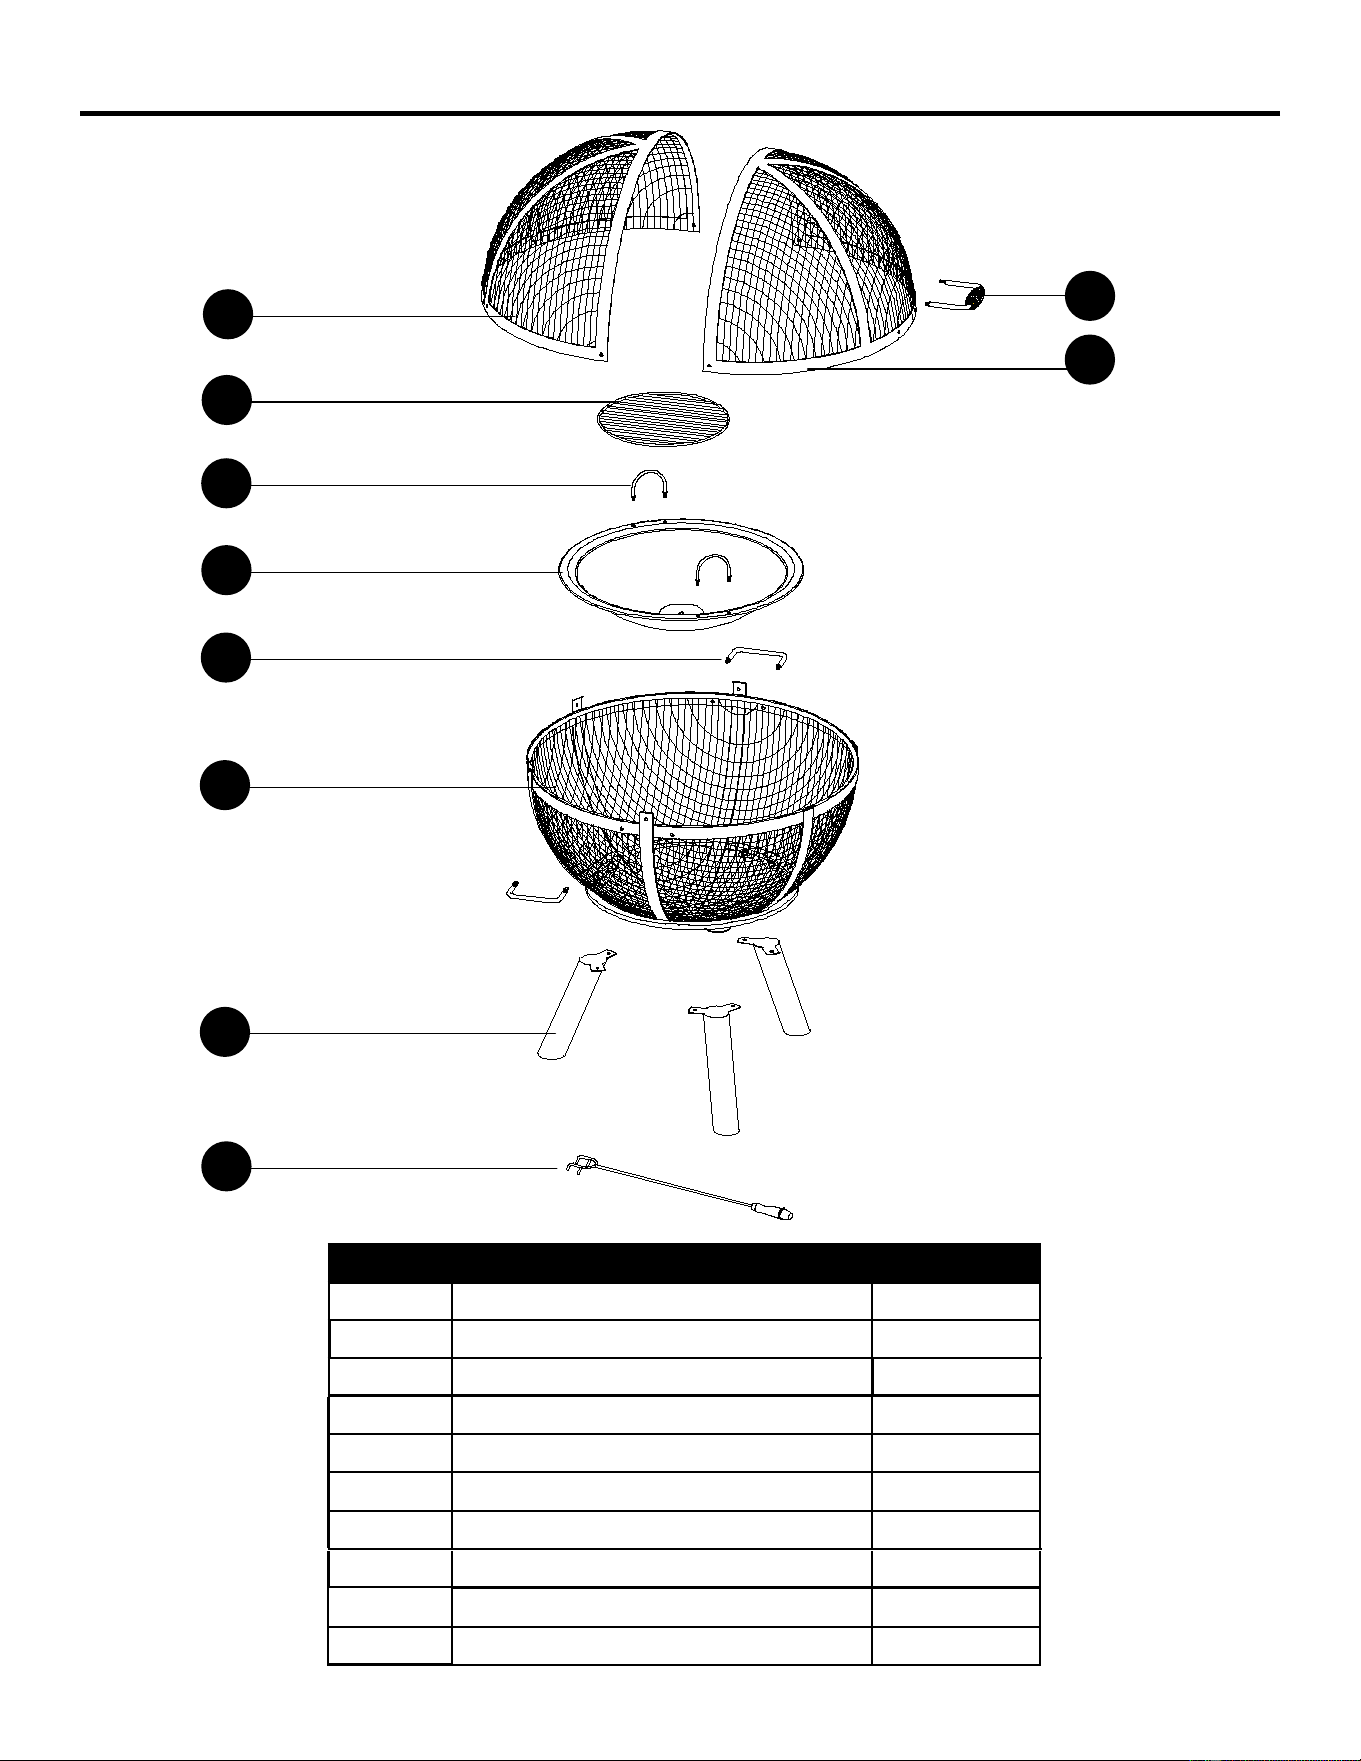
PACKAGE CONTENTS
PART DESCRIPTION QUANTITY
A
B 1
1
Top front screen
Front handle
D
E 2
1
Handle
Log grate
C
Top rear screen
1
F
G
2
1
Side Handle
Fire bowl
H 1
Bottom hemisphere
I
J
1
3
Leg
Poker
C
D
E
F
G
H
I
J
A
B
3
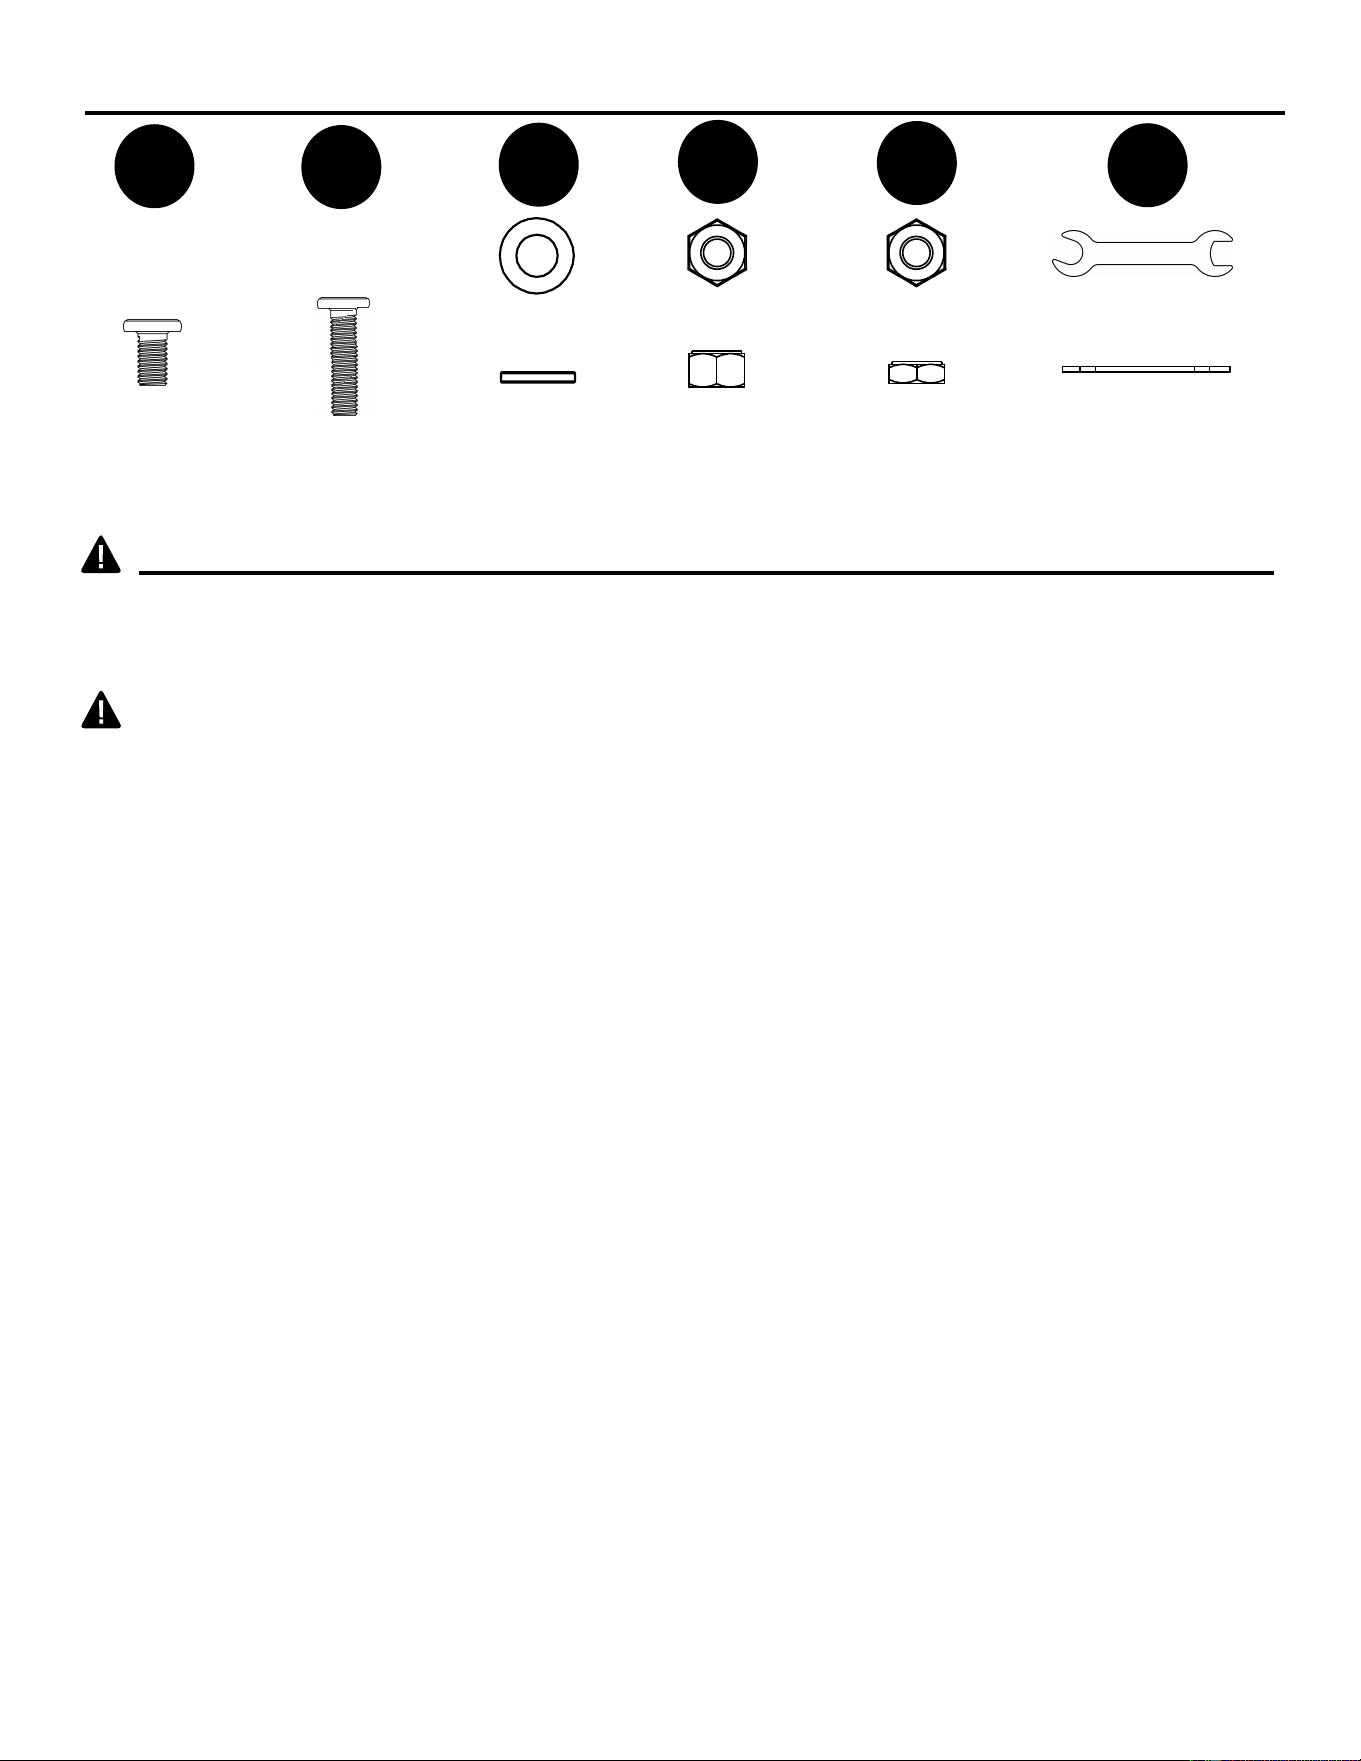
HARDWARE LIST
M6x16
Qty. 8
AA
BB
DD
EE
FF
M6x25
Qty. 2
M6
Qty. 12
M6
Qty. 4
Wrench
Qty. 1
CC
Qty. 6
Please read and understand this entire manual before attempting to assemble, operate or install
the product. If you have any questions regarding the product, please call customer service at
1-877-447-4768, 8:00 a.m. – 4:30 p.m. CST, Monday – Friday.
WARNINGS:
• DO NOT
allow children or pets near the re pit without supervision.
• DO NOT
touch surface of re pit while in use.
• FOR OUTDOOR USE ONLY! Burning wood or charcoal indoors can kill you. It gives off carbon
monoxide, which has no odor.
• NEVER burn in vehicles, tents, garages, other enclosed areas or indoors. CARBON MONOXIDE
HAZARD.
• NEVER LEAVE FIRE UNATTENDED!
• NEVER
place a storage cover on pit when in use. Ensure the fire pit has cooled off before
placing a storage cover over the fire pit.
•
When the fire pit is in use, the handle on the mesh sphere can reach extreme temperatures
that can cause serious injury to an unprotected hand. Use a poker when handling.
• DO NOT use under overhead cables or power lines.
SAFETY INFORMATION
Screw
Screw
Washer
Flange nut
Nut
`
`
4
CAUTIONS:
• Adequate re extinguishing material should be readily available.
•
Always ensure that the mesh sphere is secured over fire bowl while in use.
• Burn only seasoned hard wood or re logs in the re pit.
• DO NOT attempt to move the re pit while it is hot or in use.
• DO NOT use gasoline or kerosene to start the re in your re pit.
• DO NOT use this outdoor re pit under any overhead or near any unprotected combustible
constructions. Avoid using near or under overhanging trees and shrubs. DO NOT use this unit on
long or dry grass and/or leaves.
• Always use this outdoor fire pit on a hard, level, non-combustible surface such as concrete, rock or
stone.
An asphalt or blacktop surface may not be acceptable for this purpose. DO NOT use on wooden decks.
• Place the re pit no closer than 10 feet / 3.05 meters from walls or combustibles during use.
• Handles may become hot during and after use.
• Use heat-resistant gloves to handle hot tools.
• Burn only 10lbs/4.5kg of charcoal, wood or re logs in the re pit.
PREPARATION
Before beginning assembly of product, make sure all parts are present. Compare parts with package
contents list and hardware contents above. If any part is missing or damaged, do not attempt to
assemble the product. Contact customer service for replacement parts.
Estimated Assembly Time: 20 minutes
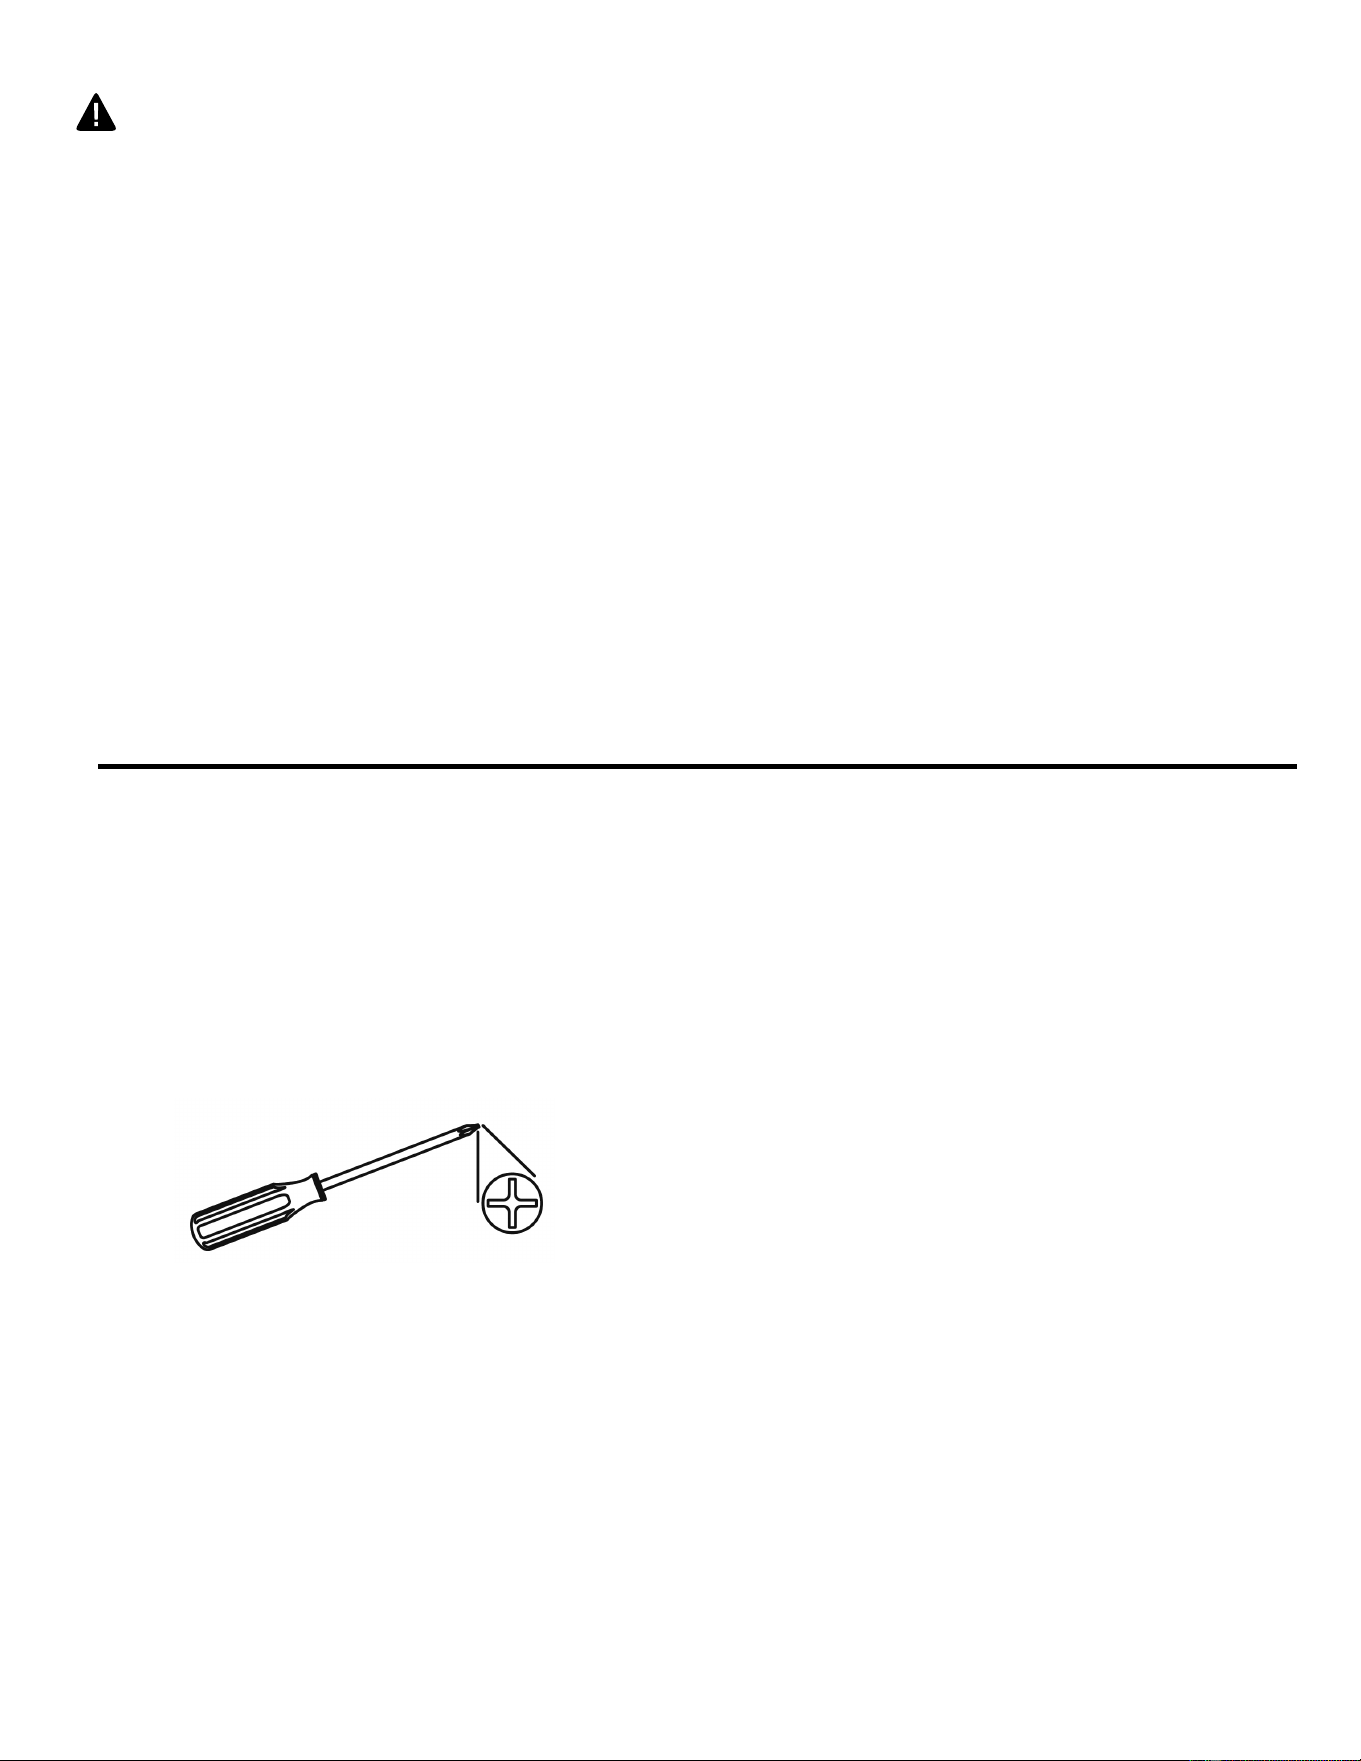
Tools Required for Assembly: Phillips Screwdriver, Wrench (included).
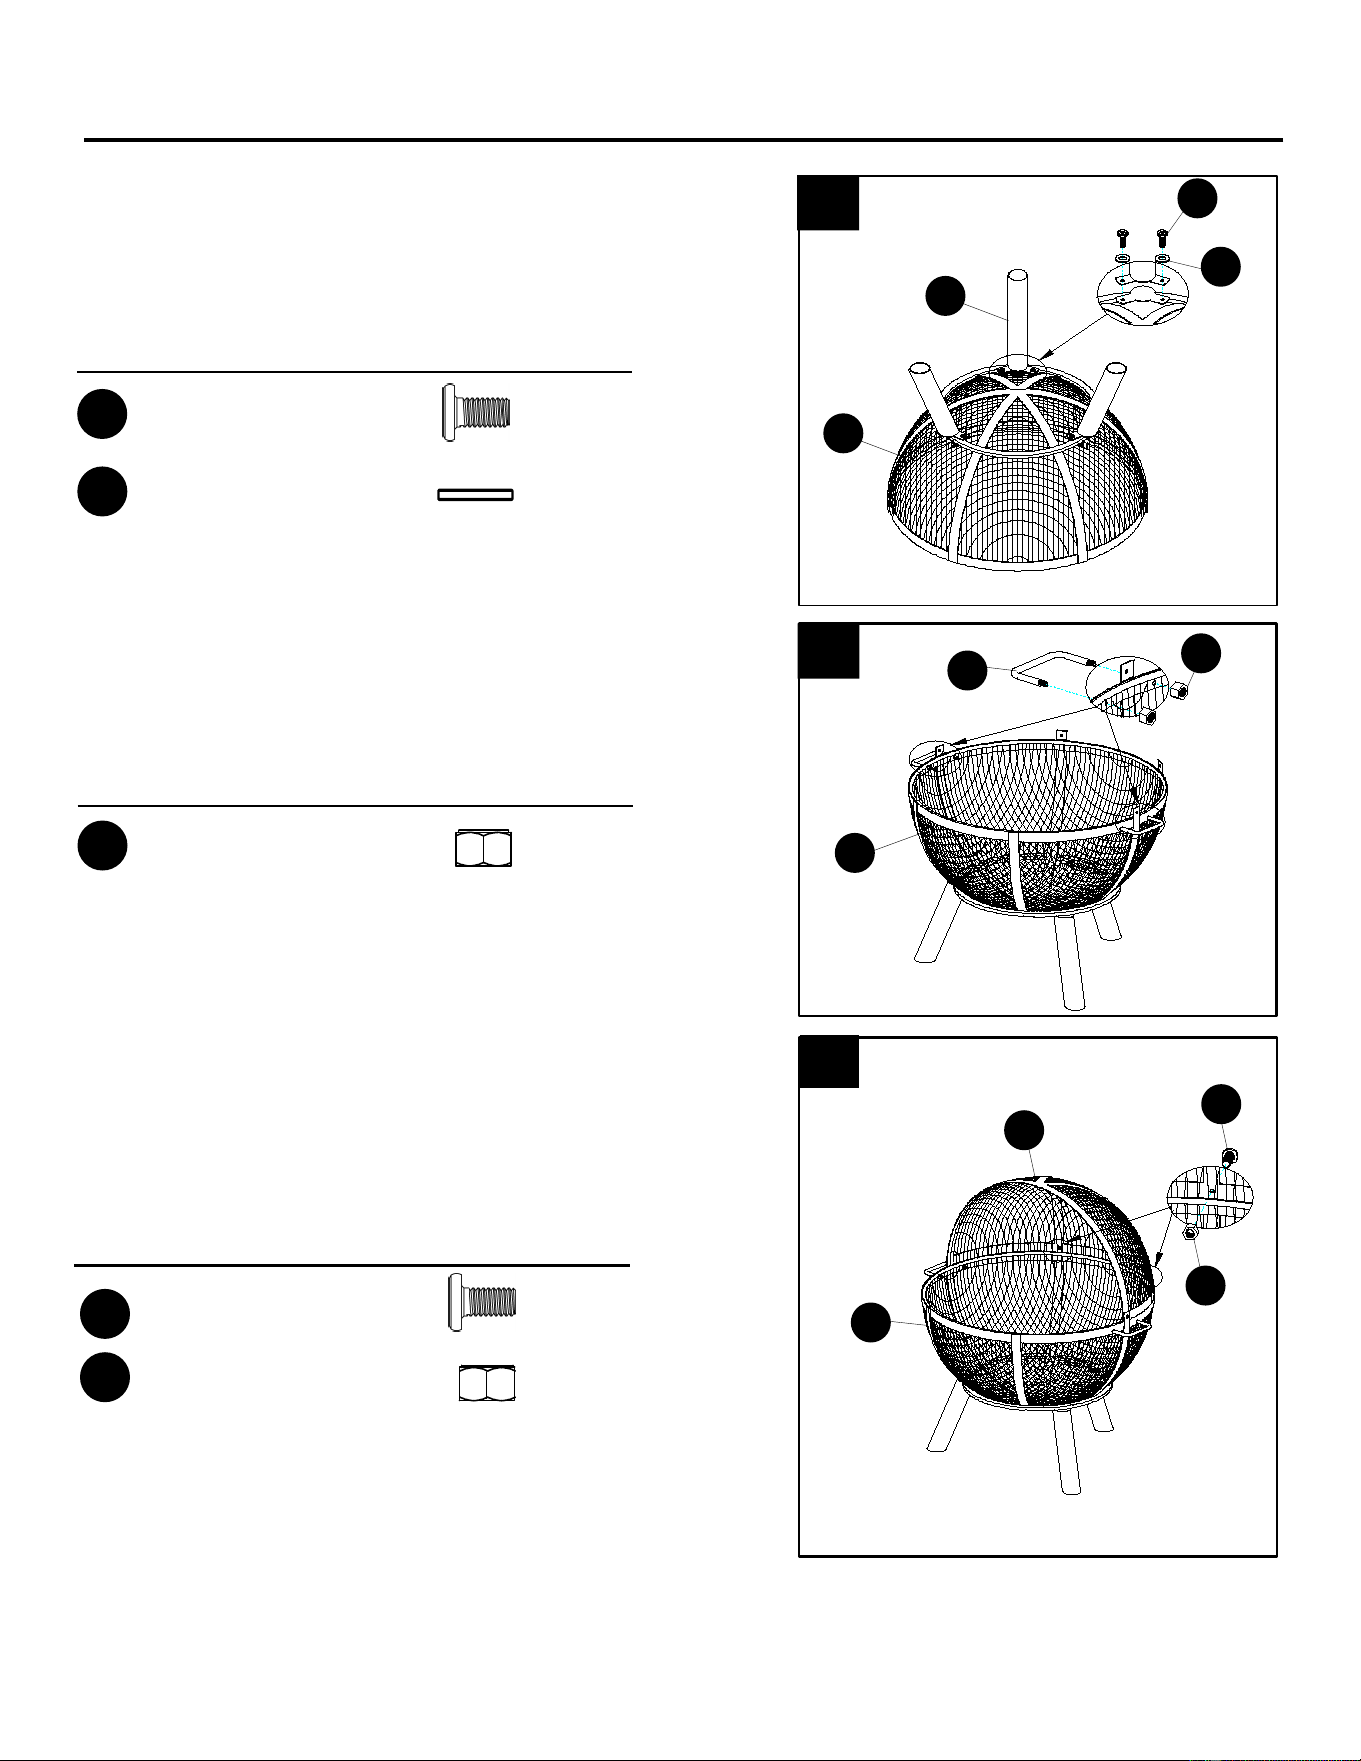
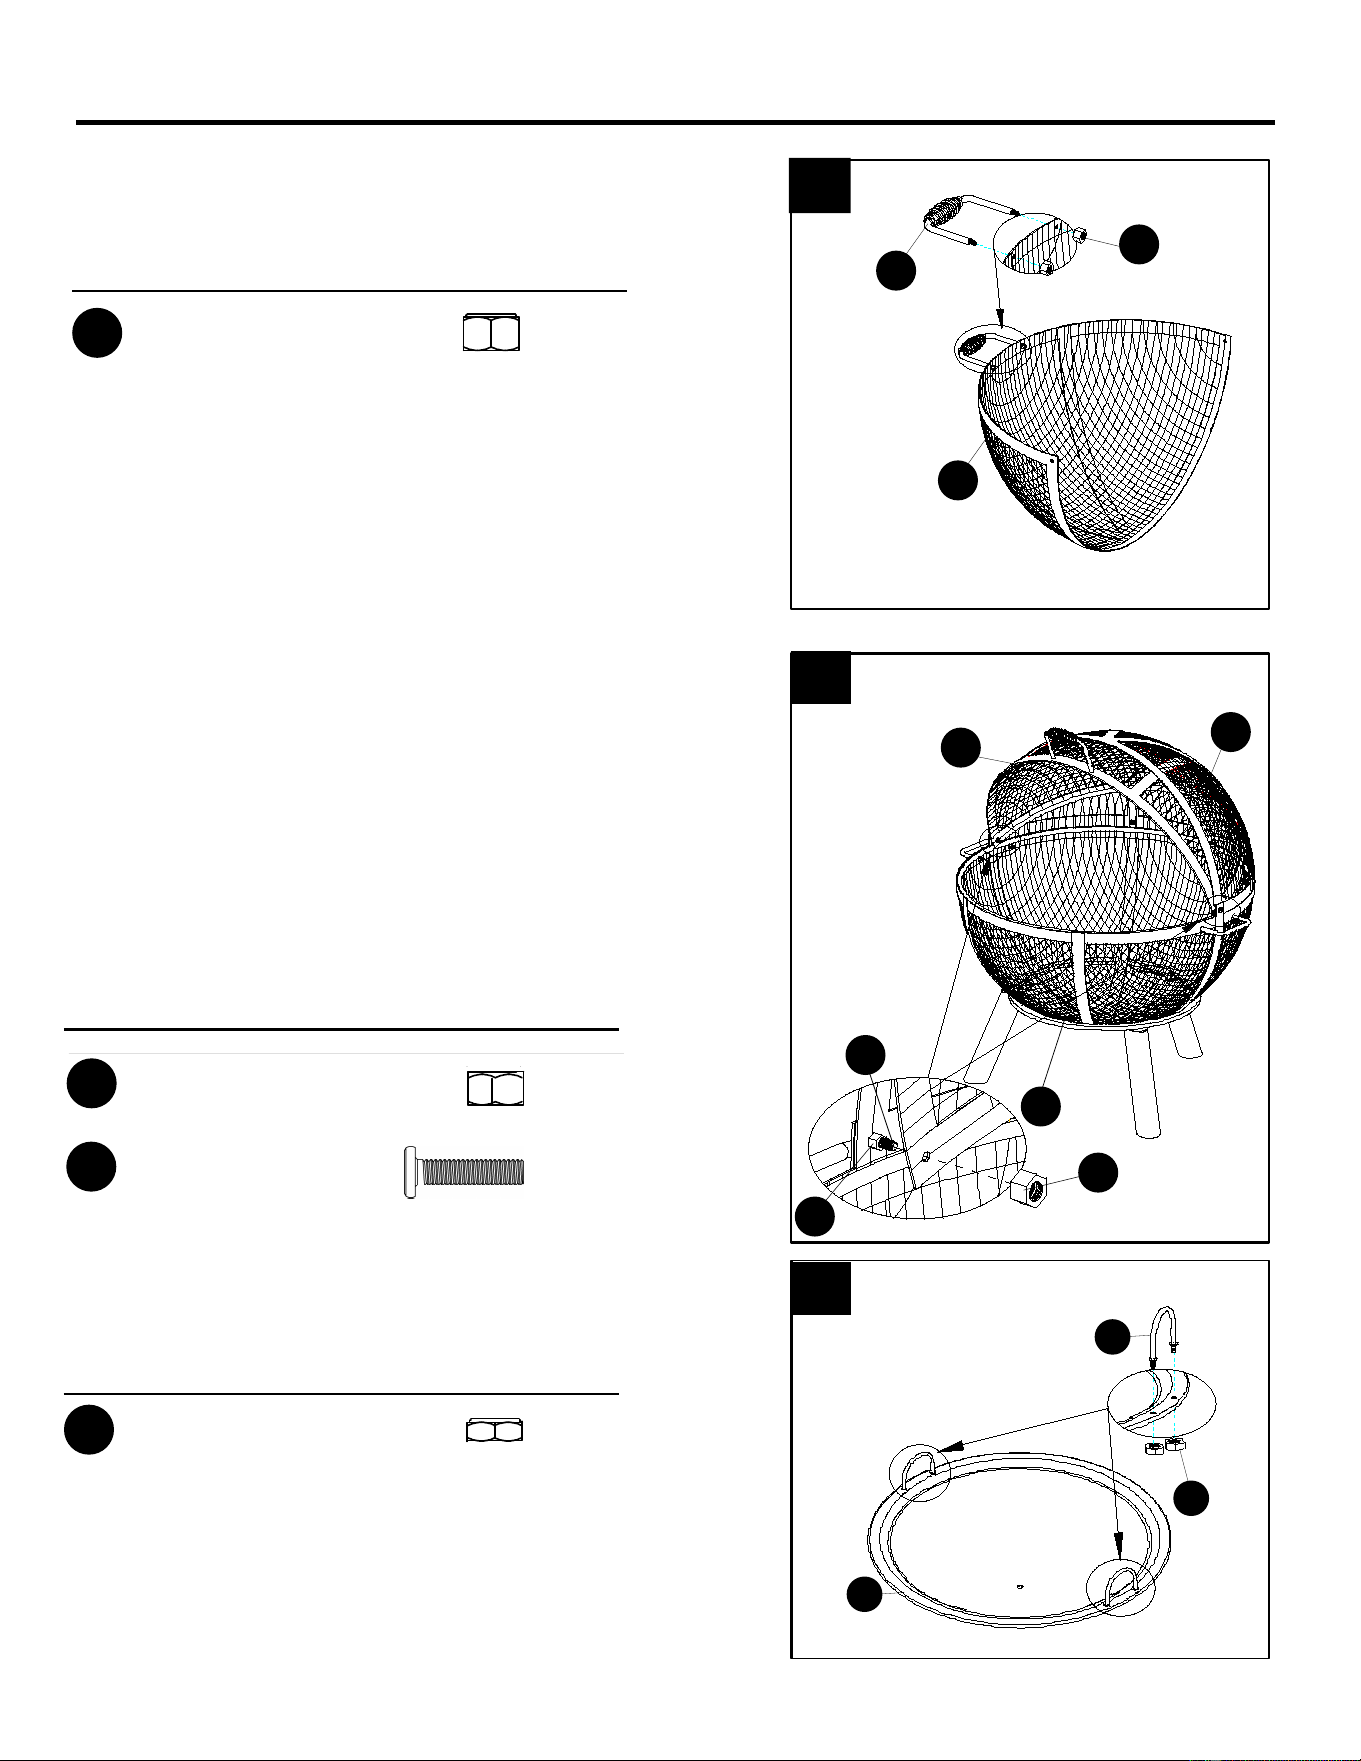
5
2. Attach the 2 side handles (G) to the bottom
hemisphere (H) using 4 M6 nuts (DD).
2
G
H
Hardware Used
DD M6 Nut
x 4
ASSEMBLY INSTRUCTIONS
1.
Flip the bottom hemisphere (H) upside down.
Attach 3 legs (I) to the bottom hemisphere (H)
1
Hardware Used
AA
M6x16 Screw
x 6
CC
Washer
x 6
CC
AA
I
H
3
Hardware Used
M6x16 Screw
x 2
AA
DD
M6 Nut
C
H
x 2
DD
AA
DD
Tighten nuts with included wrench (FF).
(CC). Secure with a phillips screwdriver.
using 6 M6x16 screws (AA) and 6 washers
.
3.
Tighten with a phillips screwdriver and a wrench
(FF).
Attach the top rear screen (C) to the bottom
2 M6 nuts (DD).
hemisphere (H) using 2 M6x16 screws (AA) and
6
ASSEMBLY INSTRUCTIONS
4.
Attach the front handle (A) to the top front screen
(B) using 2 M6 nuts (DD). Tighten the nuts with the
4
Hardware Used
DD
M6 Nut
x 2
DD
A
B
DD
E
EE
F
Attach 2 handles (E) to the fire bowl (F) using
4 M6 flange nuts (EE).
EE
M6 Flange Nut
x 4
6.
6
M6 Nut
x 4
Tighten nuts with included
Hardware Used
included wrench (FF).
wrench (FF).
5.
Install 2 M6x25 screws (BB) through the holes
on
the
side of the bottom hemisphere (H) and top
rear
screen (C). Use the wrench (FF) and a phillips
screwdriver to tighten with 2 M6 nuts (DD). On the
same 2 M6x25 screws (BB). Attach the top front
screen (B) assembly from step 4 to the top rear
screen (C) and bottom hemisphere (H) using 2
M6 nuts (DD).
Do not tighten the inner nuts fully, since the top
front screen (B) will need to slide open and shut.
BB
M6x25 Screw
x 2
5
C
DD
BB
BB
DD
B
H
Hardware Used
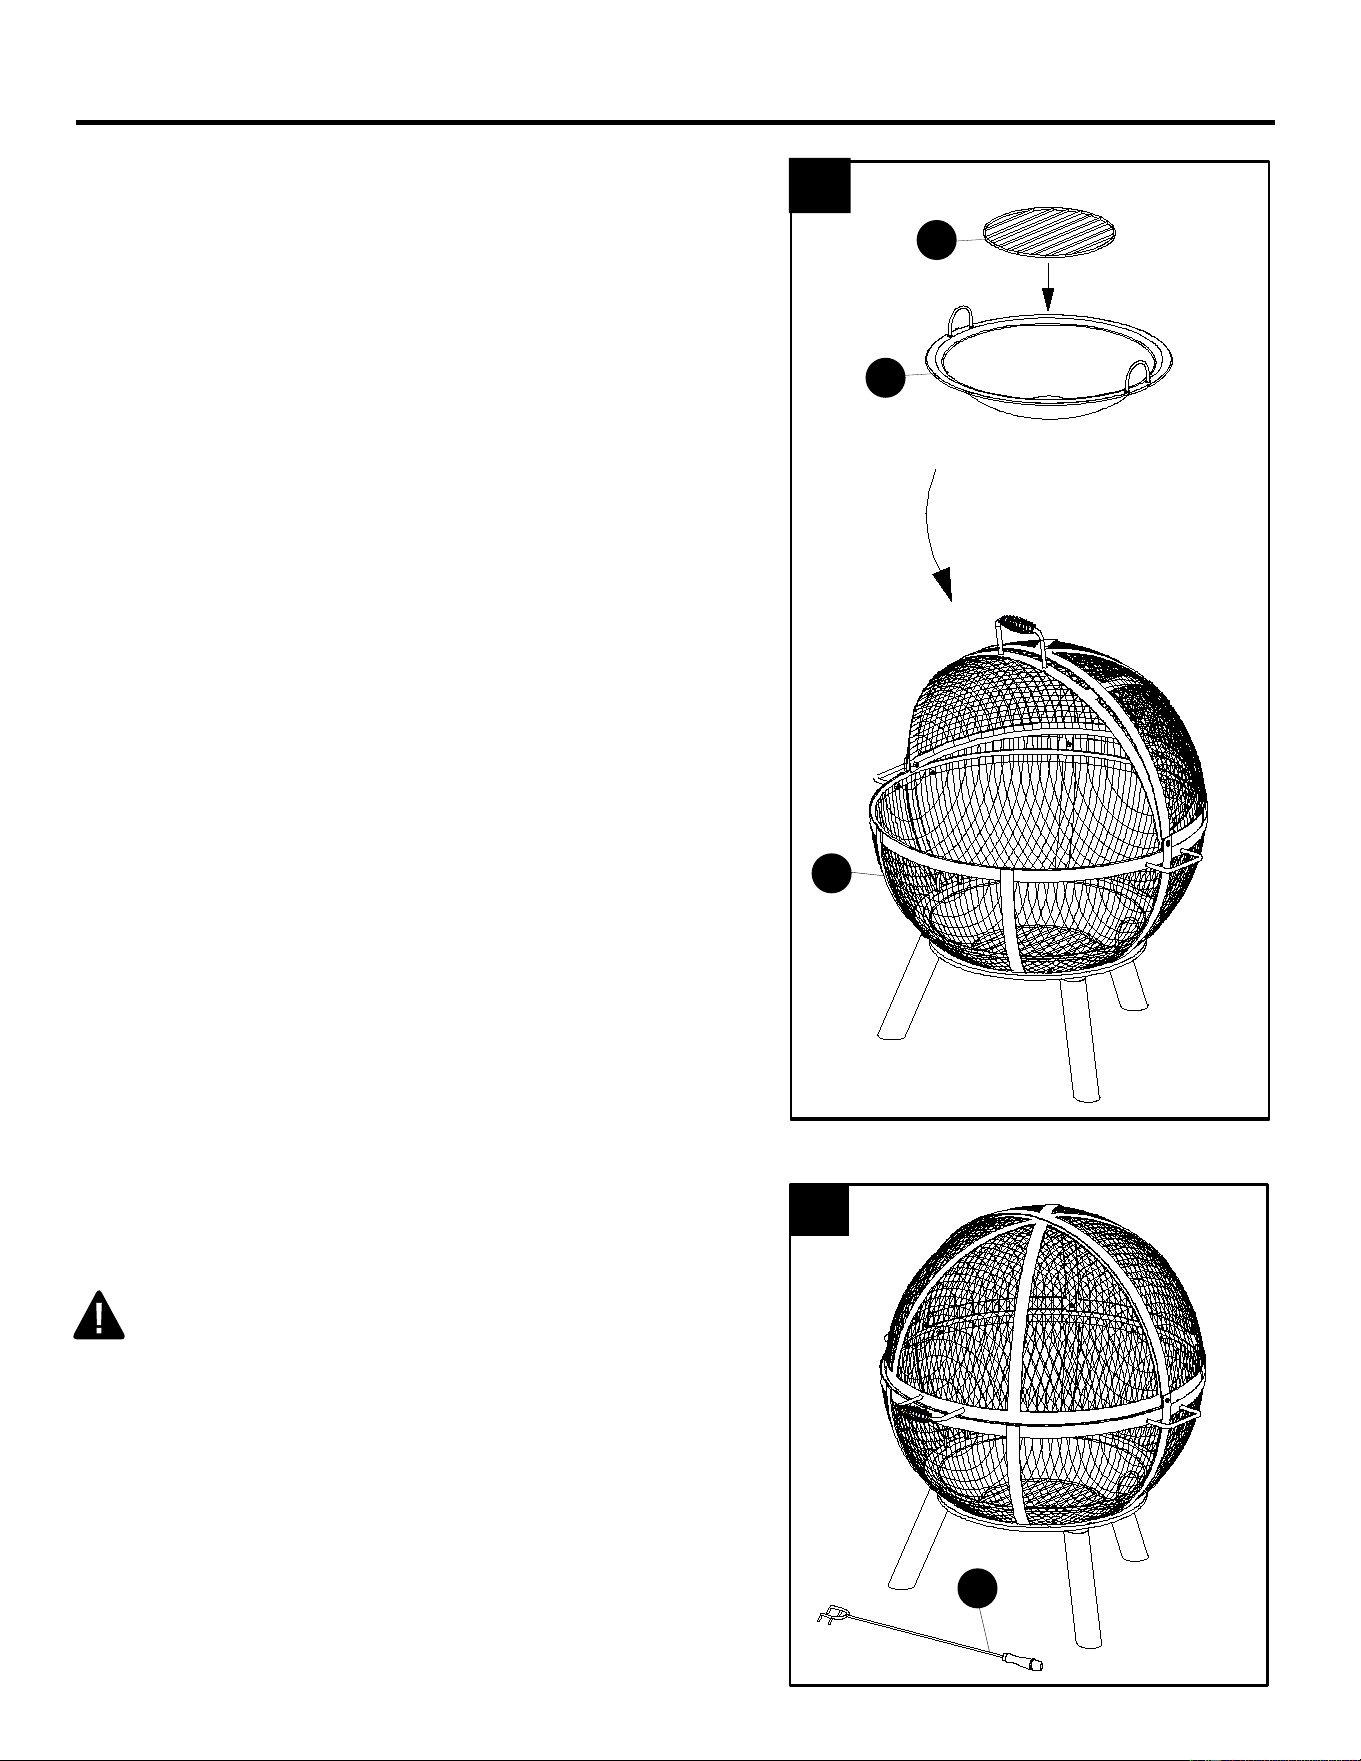
7
ASSEMBLY INSTRUCTIONS
7
7. Place the log grate (D) into the fire bowl (F),
then place the fire bowl (F) into the bottom
8
8. Your re pit is now ready for use. Keep the
poker (J) near the re pit for use.
screen during use.
Always use poker (JJJjjJJJjjjJJJJ)jJJJJJJJJJJJJJJJJJJJJJJJJJJJJJJJJJJJJJJJJJJJJJJJJJJJJJJJJJJJJJJJJJJJJJJJJJJJJJJJJJJJJJjjjjJjjjjjjjjjjjjjjjj toJJJ open and close top front
WARNING
H
D
F
hemisphere (H).
J

8
CARE AND MAINTENANCE
1-YEAR LIMITED FRAME WARRANTY
If within one year from the date of original purchase, this item fails due to a defect in material or
workmanship, we will replace or repair at our option, free of charge. To order parts or to obtain
warranty service, call 1-877-447-4768, Monday - Friday, 8:00 a.m. - 4:30 p.m. CST. This warranty
does not cover defects resulting from improper or abnormal use, misuse, accident, or alteration.
Failure to follow all instructions in the owner's manual will also void this warranty. The manufactur-
er will not be liable for incidental or consequential damages, or common erosion of outdoor prod-
ucts. Some states do not allow the exclusion or limitation of incidental or consequential damages,
so the above limitation may not apply to you. This warranty gives you specic legal rights, and
you may also have other rights which vary from state to state.
GHP Group Inc., 6440 W. Howard St., Niles, IL, USA 60714-3302, USA
• Allow the re pit to cool completely before moving it.
• To extend the life of your re pit , clean it after each use.
• To protect the re pit
nish, use a soft cloth to wipe the re
pit
and poker.
• Do not attempt to clean while hot.
• Store in a cool, clean, dry place.
• Use gloves in lieu of bare hands while handling.
• Place a storage cover over the re pit once it has cooled.
• Do not douse the ame with water to extinguish. Use sand or dirt to snuff out the re if it cannot
burn out naturally.
• Rust can appear on the inside of your re bowl. Surfaces of the re bowl may need occasional
touch up. We recommend the use of commercially available black high temperature spray paint.
9
REPLACEMENT PARTS LIST
For replacement parts, call our customer service department at 1-877-447-4768, 8:00 a.m. – 4:30 p.m.,
CST, Monday – Friday.
Printed in China
PART DESCRIPTION PART #
A
Front handle
Top front screen
Top rear screen
log grate
Handle
Fire bowl
Side Handle
Bottom hemisphere
Leg
Poker
B
C
D
E
F
G
H
I
J
AA-FF
Hardware Pack
N/A Instruction Manual
M6x16
Screw
Qty. 8
AA
BB
DD
EE
FF
M6x25
Screw
Qty. 2
M6
Nut
Qty. 12
M6
Flange nut
Qty. 4
Wrench
Qty. 1
CC
Qty. 6
A
B
C
D
E
F
G
H
I
J
AS-283-01
AS-283
AS-283-02
AS-283-03
AS-283-04
AS-283-05
AS-283-06
AS-283-07
AS-283-08
AS-283-09
AS-283-10
AS-283-11
Washer