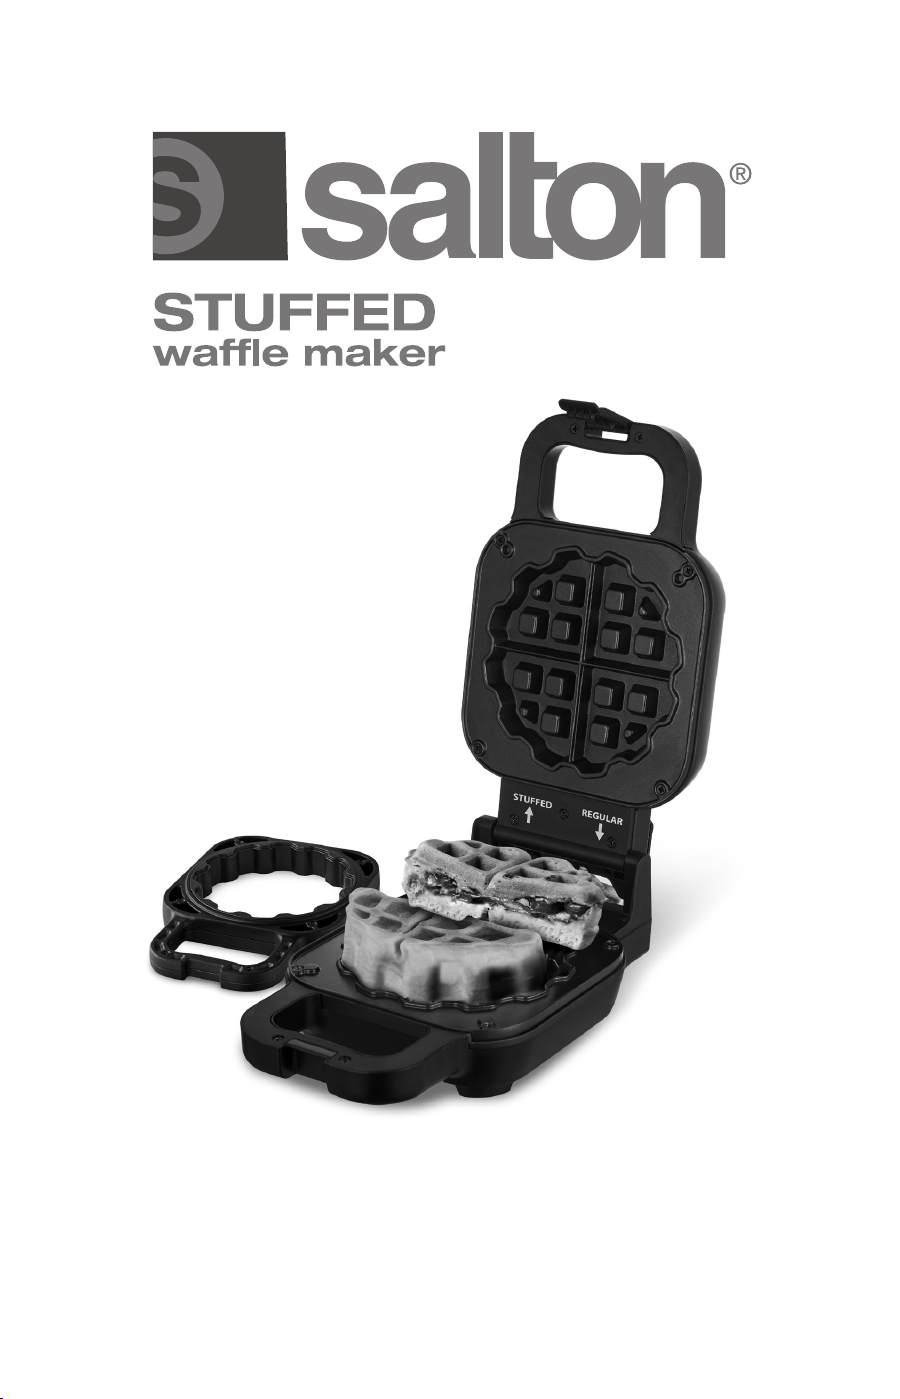
Instruction Booklet
Model: WM2105

IMPORTANT SAFEGUARDS
When using electrical appliances, basic safety precautions should
always be followed, including the following:
1. Read all instructions.
2. DO NOT touch hot surfaces. Use handles or knobs.
3. To protect against electrical hazards, DO NOT immerse cord, plugs,
or the appliance in water or other liquid.
4. Close supervision is necessary when any appliance is used by or
near children. Children should be supervised to ensure that they do
not play with the appliance.
5. This appliance is not intended for use by persons (including children)
with reduced physical, sensory or mental capabilities or lack of
experience and knowledge, unless they have been given supervision
or instruction concerning the use of the appliance by a person
responsible for their safety.
6. Unplug from outlet when not in use and before cleaning. Allow to
cool before putting on or taking o parts, and before cleaning the
appliance.
7. DO NOT operate any appliance with a damaged cord or plug or
after the appliance malfunctions or has been damaged in any
manner. Return appliance to manufacturer for examination, repair or
adjustment. See Warranty.
8. The use of accessories or attachments not recommended by Salton
may cause hazards.
9. DO NOT use outdoors.
10. DO NOT let cord hang over edge of table or counter, or touch hot
surfaces.
11. DO NOT place on or near a hot gas or electric burner, or in a heated
oven.
12. Extreme caution must be used when moving an appliance
containing hot oil or other hot liquids.
13. DO NOT move the unit when it is still hot.
14. Wear oven mitts when handling hot components or touching hot
surfaces.
15. Prior to connecting or disconnecting plug from wall outlet, turn any
control to “O”.
16. Always unplug the unit after use. The appliance will remain on
unless it is unplugged.
17. Always place appliance on a heat resistant surface.
18. CAUTION: This appliance generates heat during use. Proper
precautions must be taken to prevent the risk of burns, re or other
damage to persons or property.
2
19. DO NOT use appliance for other than intended use.
20. DO NOT leave appliance unattended while in use.
SAVE THESE INSTRUCTIONS
HOUSEHOLD USE ONLY
POLARIZED PLUG
This appliance has a polarized plug (one blade is wider than the other).
To reduce the risk of electric shock, as a safety feature, this plus will
t in a polarized outlet only one way. If the plug does not insert fully
in the outlet, reverse the plug. If it still fails to t, contact a qualied
electrician. Do not attempt to defeat this safety feature.
A short supply cord is provided to reduce the hazards of becoming
entangled in or tripping over a long cord. Extension cords may be used
if care is exercised in their use. If an extension cord is used, the marked
electrical rating of the detachable power-supply cord or extension cord
should be at least as great as the electrical rating of the appliance. If
the appliance is of the grounded type, the extension cord should be a
grounded 3-wire cord. The extension cord should be arranged so that it
will not drape over the counter top or table top, where it can be pulled
on by children or tripped over.
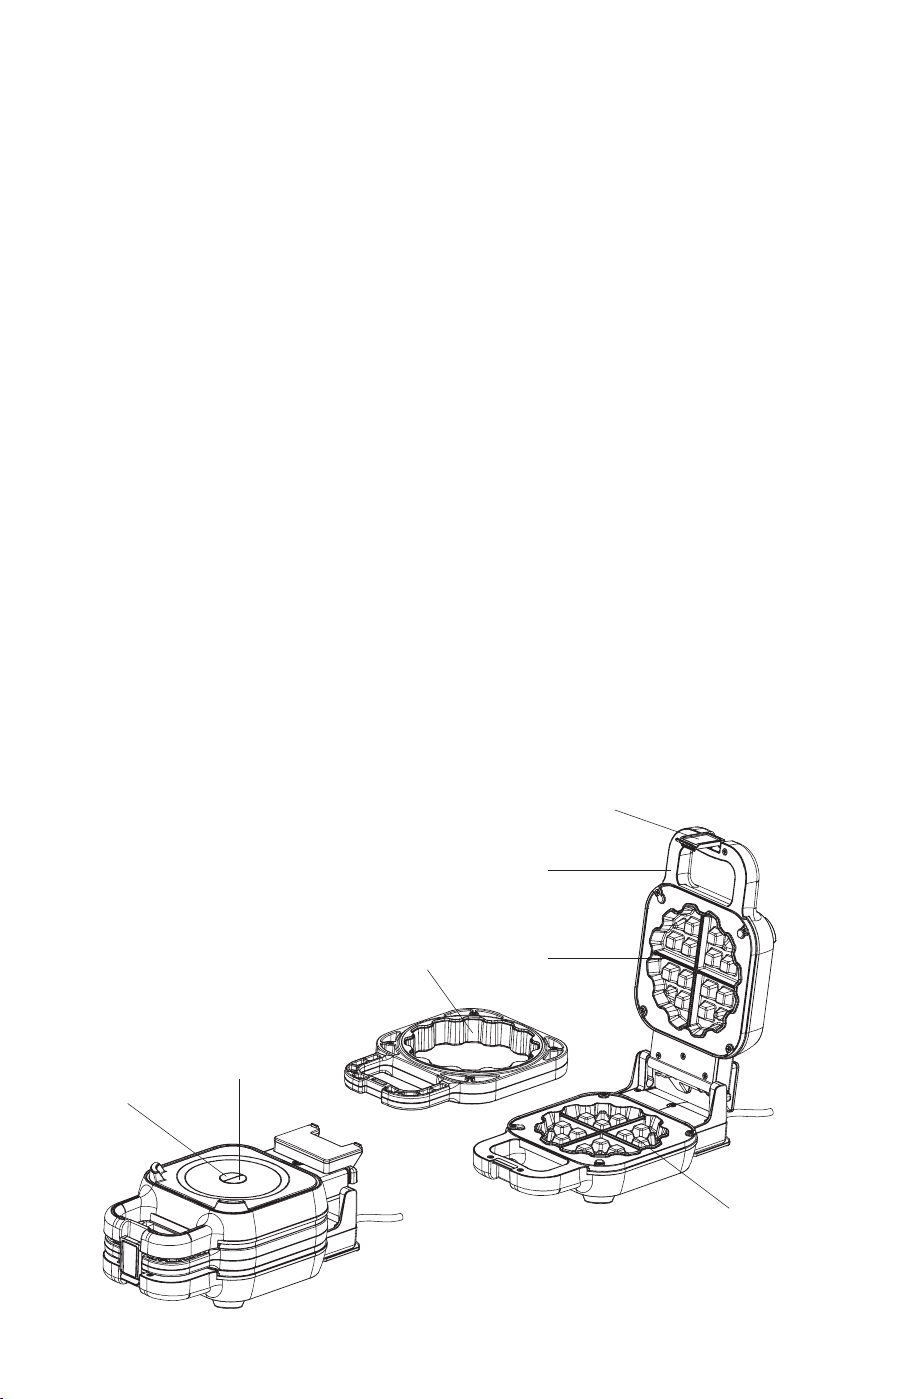
DESCRIPTION OF PARTS
1. Handles
2. Locking Clip
3. Red Power Light
4. Green Ready Light
5. Removable Wae Ring
6. Top Heating Plate
7. Bottom Heating Plate
3
1
6
3
7
4
5
2
BEFORE FIRST USE
1. Read all instructions carefully and keep them for future reference.
2. Remove all packaging.
3. Clean the cooking plates by wiping with a non-abrasive sponge or
cloth dampened in warm water. DO NOT IMMERSE THE UNIT AND
DO NOT RUN WATER DIRECTLY ONTO THE COOKING SURFACE.
4. Wash the Removable Wae Ring in warm soapy water with a non-
abrasive sponge.
5. DO NOT use steel wool pads or other abrasive cleansers on the
cooking plates or the Wae Ring as they may damage the non-stick
coating.
6. Dry the cooking plates and Removable Wae Ring with a cloth or
paper towel.
7. Place the unit onto a smooth, dry, at surface and plug into a 120V
AC outlet WITHOUT food and without the Removable Wae Ring.
8. Allow the unit to heat with the lid closed. The unit may emit some
smoke or odor as it burns o any manufacturing oils. This is normal
and does not aect the safety of the appliance.
9. When the smoke has stopped, unplug the unit from the wall outlet.
10. Allow the appliance to cool down and wipe the cooking plates
with a sponge or cloth dampened in warm water to remove any
residue. DO NOT IMMERSE THE UNIT AND DO NOT RUN WATER
DIRECTLY ONTO THE COOKING SURFACE.
11. Your unit is now ready for use.
HOW TO USE
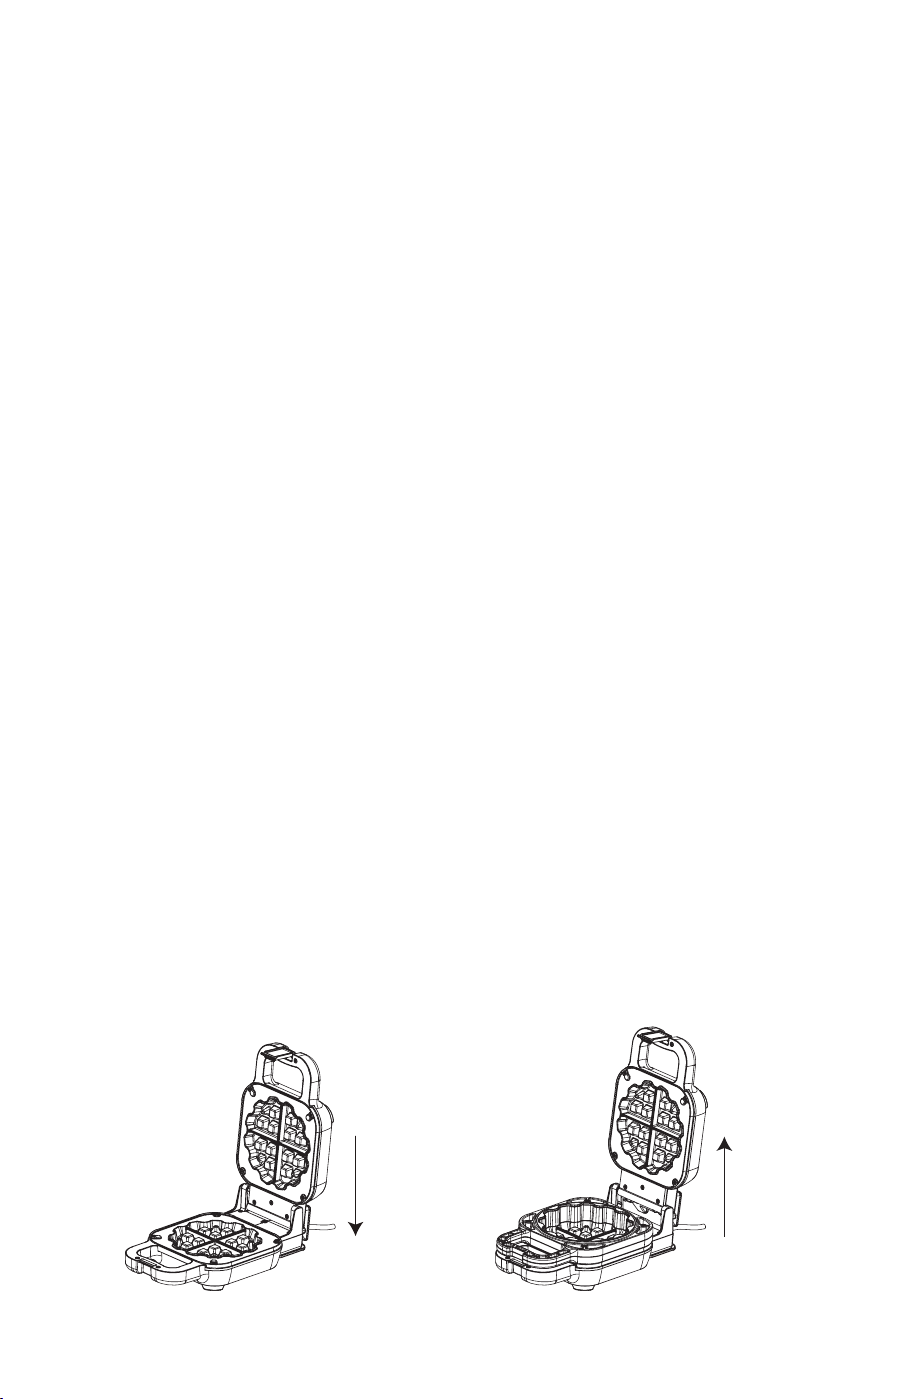
Adjusting the wae plate
Make sure the unit is o and cool to the touch. Open the appliance
and place one hand on the bottom plate. Using your other hand, grab
the handle on the Top Heating Plate and pull up gently for stued wae.
For regular wae, push down gently.
LOW POSITION HIGH POSITION
Makes 1” thick regular waes Makes 2” thick stued waes
Push down Pull up
4

How to make a regular wae
1. Make sure the unit is in the LOW position for regular waes.
2. Plug unit into a 120V AC outlet. The red power light will come on.
3. Close the lid until it is preheated and the green ready light comes on.
4. Open the lid and pour batter to ll the lower cooking plate. If
necessary, use a spatula to spread the batter to the edges of the
cooking plate.
NOTE: It is recommended to lightly coat the cooking plates with
cooking oil or a cooking spray prior to adding batter to ensure
the wae doesn’t stick.
NOTE: Do not overll the cooking plate. The batter will expand
during the cooking process.
5. Close the lid, secure the Locking Clip and ip the unit 180°. The
green ready light will go o and steam will escape from the wae
maker as the wae is cooking.
6. When the green ready green light goes on again, ip the wae
maker back 180° to its original position. Unlatch the Locking Clip
and open the lid. The wae should be done. For a darker wae,
close the lid and continue baking until the desired color is achieved.
7. Once the wae is cooked, carefully remove from the Wae Maker
with a wooden or plastic spatula. Never touch the cooking surface
with sharp, pointy or metal objects. This could damage the non-
stick surface.
8. To cook more waes, close the unit to retain heat and make sure the
green light goes on before pouring batter onto the cooking plate.
9. Once you are nished cooking, disconnect the plug from the wall
outlet and leave unit open to cool.
How to make a stued wae
1. Make sure the unit is the HIGH position for stued waes and make
sure to add the Removable Wae Ring.
2. Plug unit into a 120V AC outlet. The red power light will come on.
3. Close the lid until it is preheated, and the green ready light comes on.
4. Open the lid and pour rst layer of batter to ll the lower cooking
plate. Fill just enough to cover the wae grid. If necessary, use a
spatula to spread the batter to the edges of the cooking plate.
NOTE: It is recommended to lightly coat the cooking plates with
cooking oil or a cooking spray prior to adding batter to ensure
the wae doesn’t stick.
5. Add your desired lling over the rst layer of batter.
6. Pour second layer of batter over your lling. The second layer of
batter should be even with the top of the Removable Wae Ring.
NOTE: Do not overll the cooking plate. The batter will expand
5

during the cooking process.
7. Close the lid, secure the Locking Clip and ip the unit 180°. The
green ready light goes o and will cycle on and o to maintain the
temperature. Steam will escape from the wae maker as the wae
is cooking.
8. Cook the wae for approximately 5-10 minutes then ip the wae
maker back 180° to its original position. Unlatch the Locking Clip
and open the lid. The waes should be done. Cooking times may
vary depending on batter/lling used. For a darker wae, close the
lid and continue baking until the desired color is achieved.
NOTE: Do not open the wae maker for at least 5 minutes.
Opening too soon will cause under baked wae to split, making
it dicult to remove.
9. Once the wae is cooked, remove the Wae Ring carefully and set
aside on a heat resistant surface. Carefully remove the stued wae
from the Wae Maker with a wooden or plastic spatula. Never
touch the cooking surface with sharp, pointy or metal objects. This
could damage the non-stick surface.
10. To cook more waes, re-insert the Removable Wae Ring, close
the unit to retain heat and make sure the green light goes on before
pouring batter onto the cooking plate.
11. Once you are nished cooking, disconnect the plug from the wall
outlet and leave unit open to cool.
HELPFUL HINTS
1. DO NOT over mix batter or waes will be tough. Stir batter only
until large lumps of dry ingredients disappear.
2. Fillings such as meats, sh, eggs & poultry should be cooked,
and frozen foods should be thawed prior to adding them to make
waes. The cooking temperature is not hot enough and cooking
time is not long enough to adequately cook uncooked foods or heat
frozen foods.
3. When using frozen fruit or canned fruit/vegetables, make sure to
drain as much liquid as possible before using as a lling or you risk
making soggy waes.
4. To retain crispness, let the baked wae cool on a wire rack to
prevent steam from accumulating underneath.
5. Cooled waes can be re-warmed by returning them to the hot wae
maker. Place the wae on the grid, close the lid and heat for 1 to 2
minutes, watching carefully to prevent burning.
6. The Belgian Wae Maker has a non-stick surface for even baking
and easy cleaning.
7. Waes can be baked ahead of time. Prepare according to the
6

recipes and cool on a rack for approximately 10 minutes. Store in
your freezer for up to 2 weeks. Waes can be heated by toasting in
a toaster or toaster oven.
8. Unused batter can be stored in the refrigerator for up to 3 days.
CARE AND CLEANING
1. Unplug the Wae Maker and allow it to cool.
2. Clean the cooking plates with non-abrasive sponge or cloth
dampened in warm soapy water. DO NOT IMMERSE THE UNIT
AND DO NOT RUN WATER DIRECTLY ONTO THE COOKING
PLATES.
3. The Removable Wae Ring can be washed with warm soapy water.
4. Dry the cooking plates and Wae Ring with a cloth or paper towel.
5. DO NOT use steel wool pads or other abrasive cleansers on the
cooking plates or the Wae Ring as they may damage the non-stick
coating.
6. If a small amount of batter has adhered to the Cooking Plates, pour
a small amount of cooking oil onto the baked-on food and allow to
stand for 5 – 10 minutes. Wipe with paper towels.
7. Wipe the outside of the Wae Maker with a soft cloth dampened in
warm soapy water. Do not use scouring pads or steel wool.
8. Rinse with a dampened clean cloth. Dry.
7

RECIPES
Basic Wae Batter
Makes 3-4 stued waes
Ingredients
2 cups (500 ml) our
3 tbsp (45 ml) sugar
3 tsp (15 ml) baking powder
1/2 tsp (2.5 ml) salt
2 eggs
1 3/4 cup (430 ml) milk
5 tbsp (75 ml) oil
1 tsp (5 ml) vanilla
Directions
1. Whisk dry ingredients in a large mixing bowl.
2. In a separate bowl, mix together the eggs, milk, oil and vanilla.
3. Pour the wet mixture into the dry ingredients and combine until
smooth
4. Let stand for about 10 minutes before using in wae maker.
Cornbread Wae Batter
Makes 3-4 stued waes
Ingredients
1 cup (250 ml) our
1 cup (250 ml) cornmeal
2 tbsp (30 ml) sugar
3 tsp (15 ml) baking powder
1 tsp (5 ml) salt
2 eggs
1 3/4 cup (430 ml) milk
4 tbsp (60 ml) oil
Directions
1. Whisk dry ingredients in a large mixing bowl.
2. In a separate bowl, mix together the eggs, milk, oil and vanilla.
3. Pour the wet mixture into the dry ingredients and combine until
smooth
4. Let stand for about 10 minutes before using in wae maker.
8

Waes reimagined with the Salton STUFFED Wae Maker.
Create delicious, sweet or savory thick Belgian waes with
your favorite toppings stued inside.
Wae meals for breakfast, lunch, or dinner.
Get creative, the possibilities are endless!
For more recipes, scan the QR code below with your
smartphone or tablet
Your wae, your way! Share your delicious stued Belgian
wae creations using #SaltonKitchen or by visiting us at
Salton.com
Follow us @saltongroup

A short supply cord is provided to reduce the hazards of becoming
entangled in or tripping over a long cord. Extension cords may be used
if care is exercised in their use. If an extension cord is used, the marked
electrical rating of the detachable power-supply cord or extension cord
should be at least as great as the electrical rating of the appliance. If
the appliance is of the grounded type, the extension cord should be a
grounded 3-wire cord. The extension cord should be arranged so that
it will not drape over the counter top or table top, where it can be pulled
on by children or tripped over.
This warranty does not include the cost of shipping, which is to be borne by the
customer.
LIMITED WARRANTY
**The original sales receipt is the only acceptable proof of purchase**
Salton Appliances (1985) Corp. warrants that this appliance shall be free from
defects in material and workmanship for a period of two (2) years from the date
of original purchase. Salton Appliances (1985) Corp. at its sole discretion during
this warranty period, will repair or replace a defective product or issue a refund.
Any refund to the purchaser will be at a pro-rated value based on the remaining
period of the warranty. All liability is limited to the amount of the purchase price.
This warranty covers normal domestic usage and does not cover damage which
occurs in shipment or failure which results from alteration, accident, misuse,
abuse, glass breakage, neglect, improper maintenance, use contrary to the
operating instructions or commercial use. This warranty is not available to
retailers or other commercial purchasers or owners.

Contact one of our many Service Centers found on our website
www.salton.com/customer-care
For added protection, we suggest that you use an insured delivery service with
tracking information when returning your product. Salton Canada will not be held
responsible for in-transit damage or for packages that are not received.
This warranty does not include the cost of shipping, which is to be borne by the
customer.
To contact our Customer Service Department:
Salton Appliances (1985) Corp.
81A Brunswick,
Dollard-des-Ormeaux, Quebec H9B 2J5
Canada
Telephone: 514-685-3660 (Ext. 226)
E-mail: [email protected]
Fax: 514-685-8300
www.salton.com
Securely package and return the appliance to us. Please enclose:
• Original proof of purchase
• The completed form below with a $12.50 Return Shipping & Handling fee –
either a cheque, money order or credit card (A personal cheque will delay return
shipping by 2-3 weeks)
TO OBTAIN PROMPT WARRANTY SERVICE:
or
Name
Address
City Prov/State Postal/Zip Code
Daytime Phone No. Email
Product defect:
Type of payment Cheque/Money Order Visa MasterCard
Name on card Expiry Date CSV No
Card No.
□ □ □