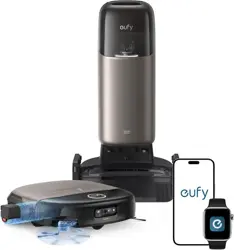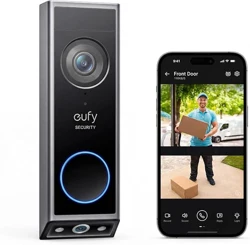
At A Glance
③
⑤
①
④
②
⑥
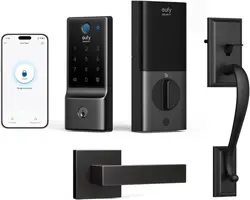
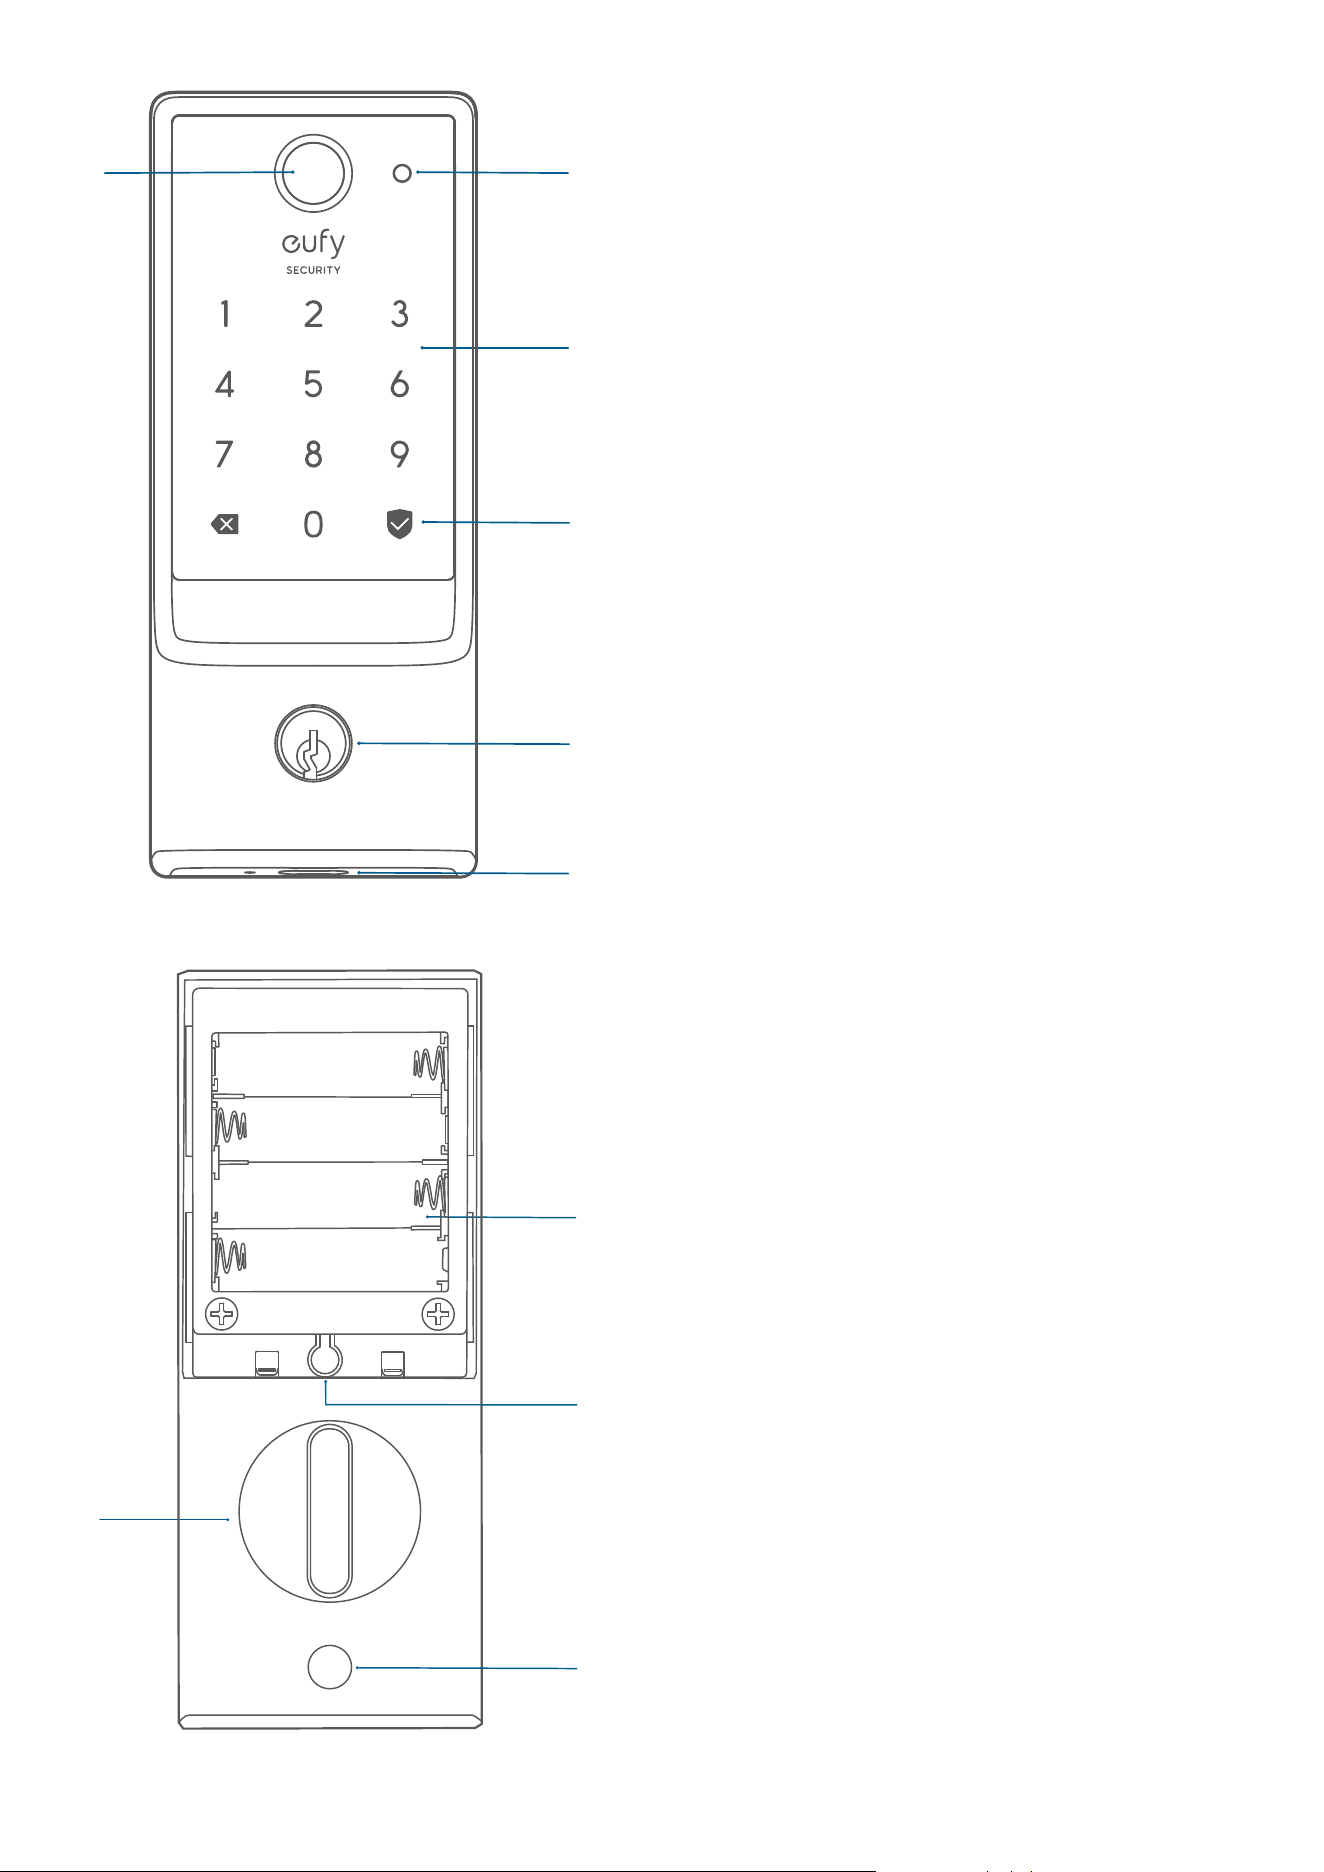
1. Fingerprint Button
2. Battery Indicator
3. Keypad
4. Status Light and Lock / Unlock Button
Blue: Door unlocked
Orange: Door locked
Red: Abnormal state
5. Keyway: Can be copied, can't be
rekeyed.
6. USB-C Port: Charges the lock in
emergency situations.
③
①
④
②
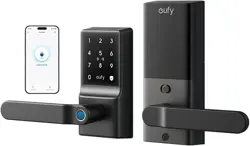
Set
1. Battery Compartment
2. Setup Button
3. Thumbturn
4. Screw Hole
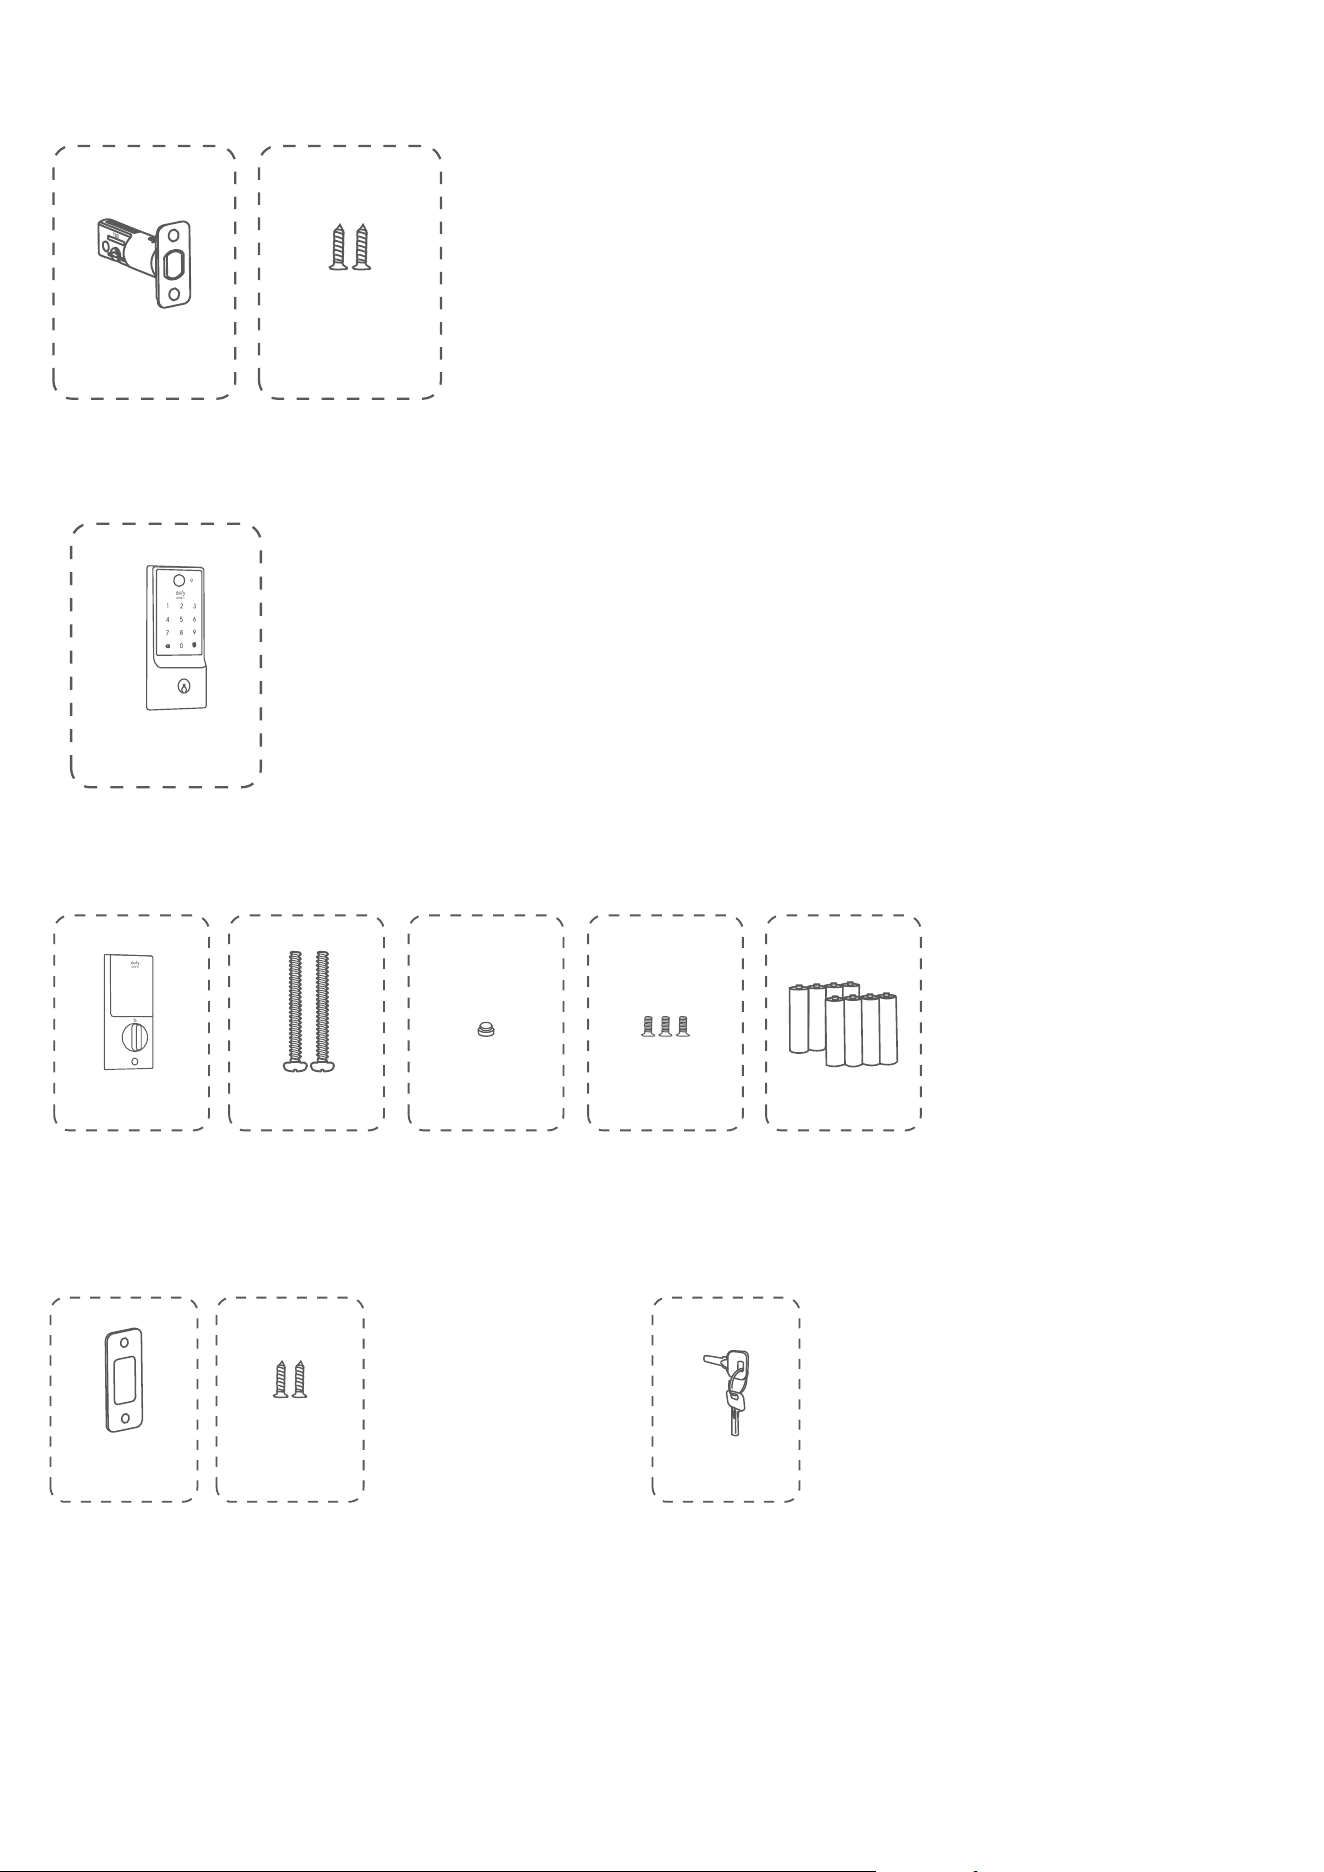
What's In The Box
(Step 2) Deadbolt Installation Set
B
A
Deadbolt
Deadbolt Screws × 2
(Step 3)
Exterior Assembly
C
Exterior Assembly
(Step 4)
Interior Assembly Installation Set
F
G H
E
D
Interior
Assembly
Silicone Plugs
Interior Assembly
Screws
Batteries
Screws
(Step 5)
Strike Plate Installation Set
K
J
I
Strike Plate
Keys
Strike Screws

Step 1. Prepare the Door
1. Remove the existing lock and check your door.
2. Check if your door has holes like the one below. Standard US doors are already compatible.
If not, follow the template to drill holes on your door.
Door Hole
Diameter
1’’ (25.4 mm)
Minimum
Distance
1¾’’ (45 mm)
Backset
2⅜’’ (60 mm)
or 2¾ (70 mm)
Cross Bore
Diameter
1½’’ (38 mm)
or 2⅛’’ (54 mm)
Door Thickness
1⅜’’ (35 mm)
or 2⅙’’ (55 mm)
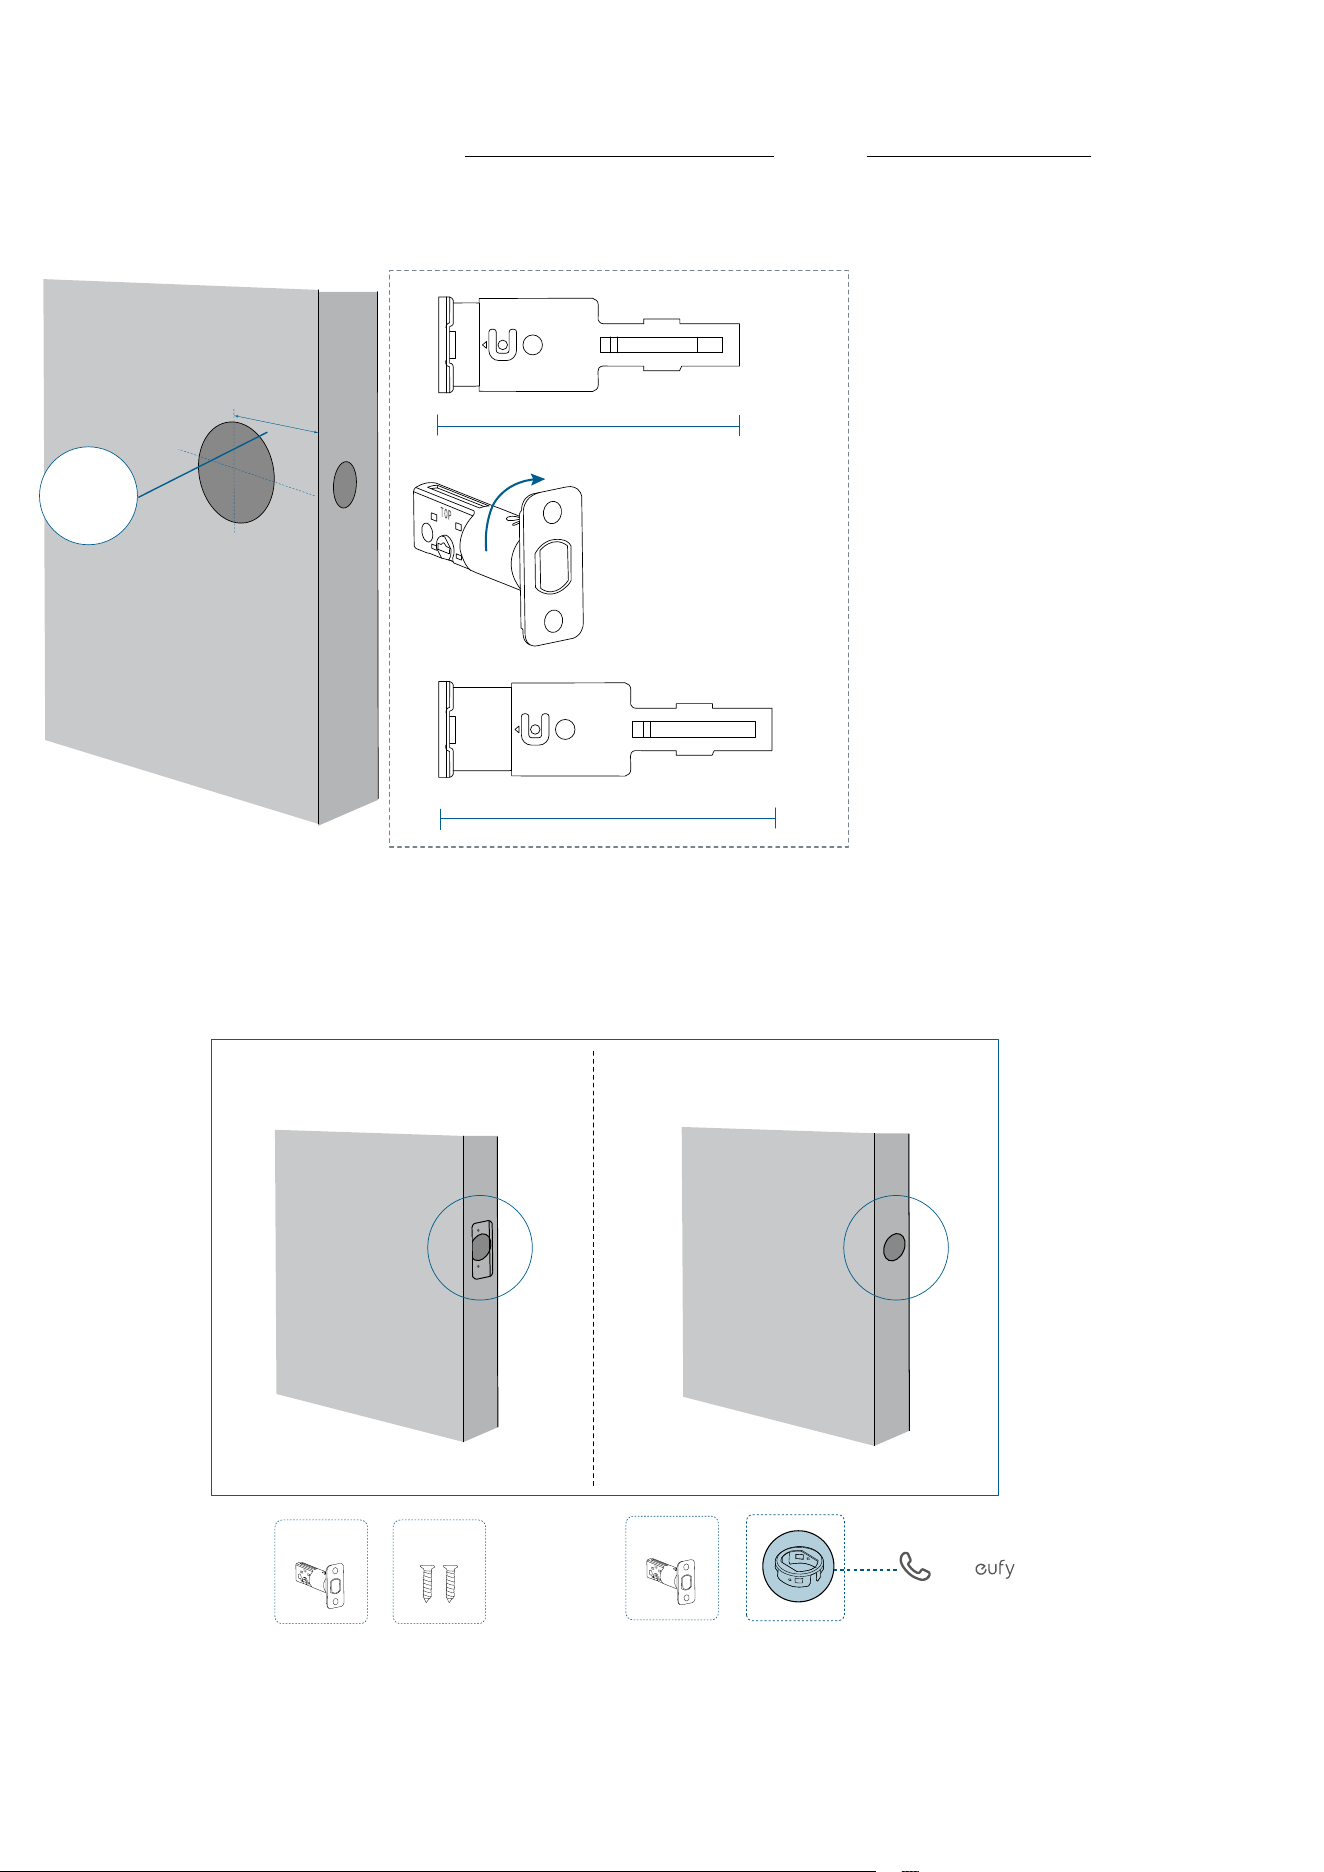
Step 2. Install the Deadbolt
1. Adjust the Deadbolt
Measure the distance between center of the door hole to the edge of the door.
If the backset is 2⅜ in (60 mm), insert the deadbolt directly.
If the backset is 2¾ in (70 mm), rotate the faceplate of the deadbolt 180° to adjust the
deadbolt to 70 mm.
2-3/8
2-3/4
180°
Backset
2⅜’’ (60 mm)
2¾’’ (70 mm)
2. Check the Latch Recess
If your latch recess is round, contact eufy Support to get a round drive-in faceplate, and
replace the existing one.
Call Support
A
B
A
Rectangular Latch Recess
Round Latch Recess
3. Install the Deadbolt
»
If your latch recess is rectangular, insert and screw the provided deadbolt directly.
Ensure the word "TOP" on the deadbolt faces up and the T-shaped hub is centered.
»
If your latch recess is round, swap the faceplate first:
1) Take apart the current faceplate with a flathead screwdriver.
2) Take o the other part of the faceplate.
3) Slide the round drive-in faceplate onto the deadbolt.
And then install the deadbolt into the door frame.
❷❶
❸❹
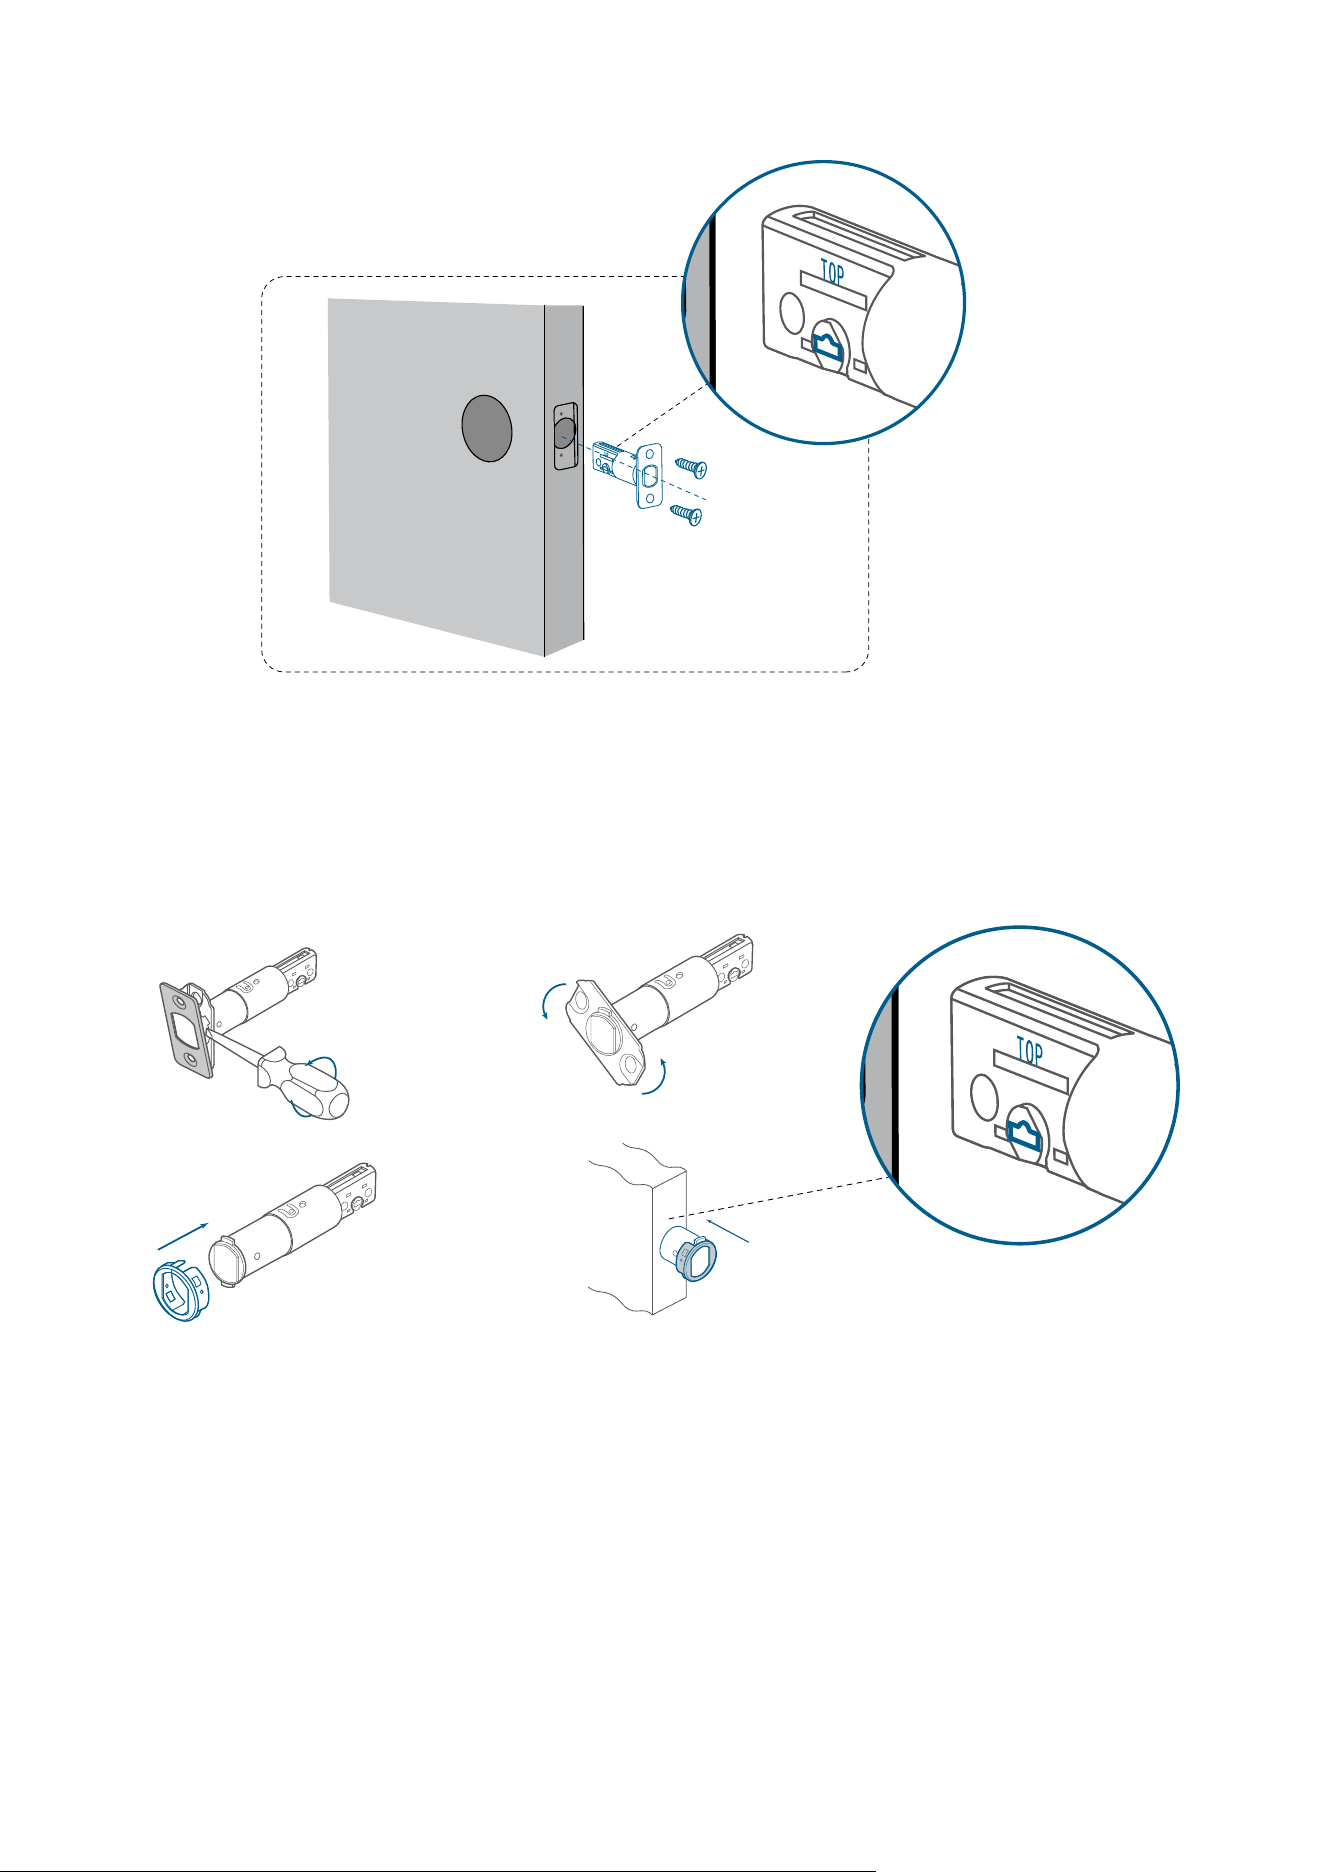
Step 3. Install the Exterior Assembly
1. Measure Cross Bore Diameter
• If 2 ⅛ in (54 mm), install the exterior assembly.
• If 1 ½ in (38 mm), remove the spacer first, and install the exterior assembly.
Cross Bore
Diameter
1 ½ in (38 mm)
2. Attach Exterior Assembly to the Door
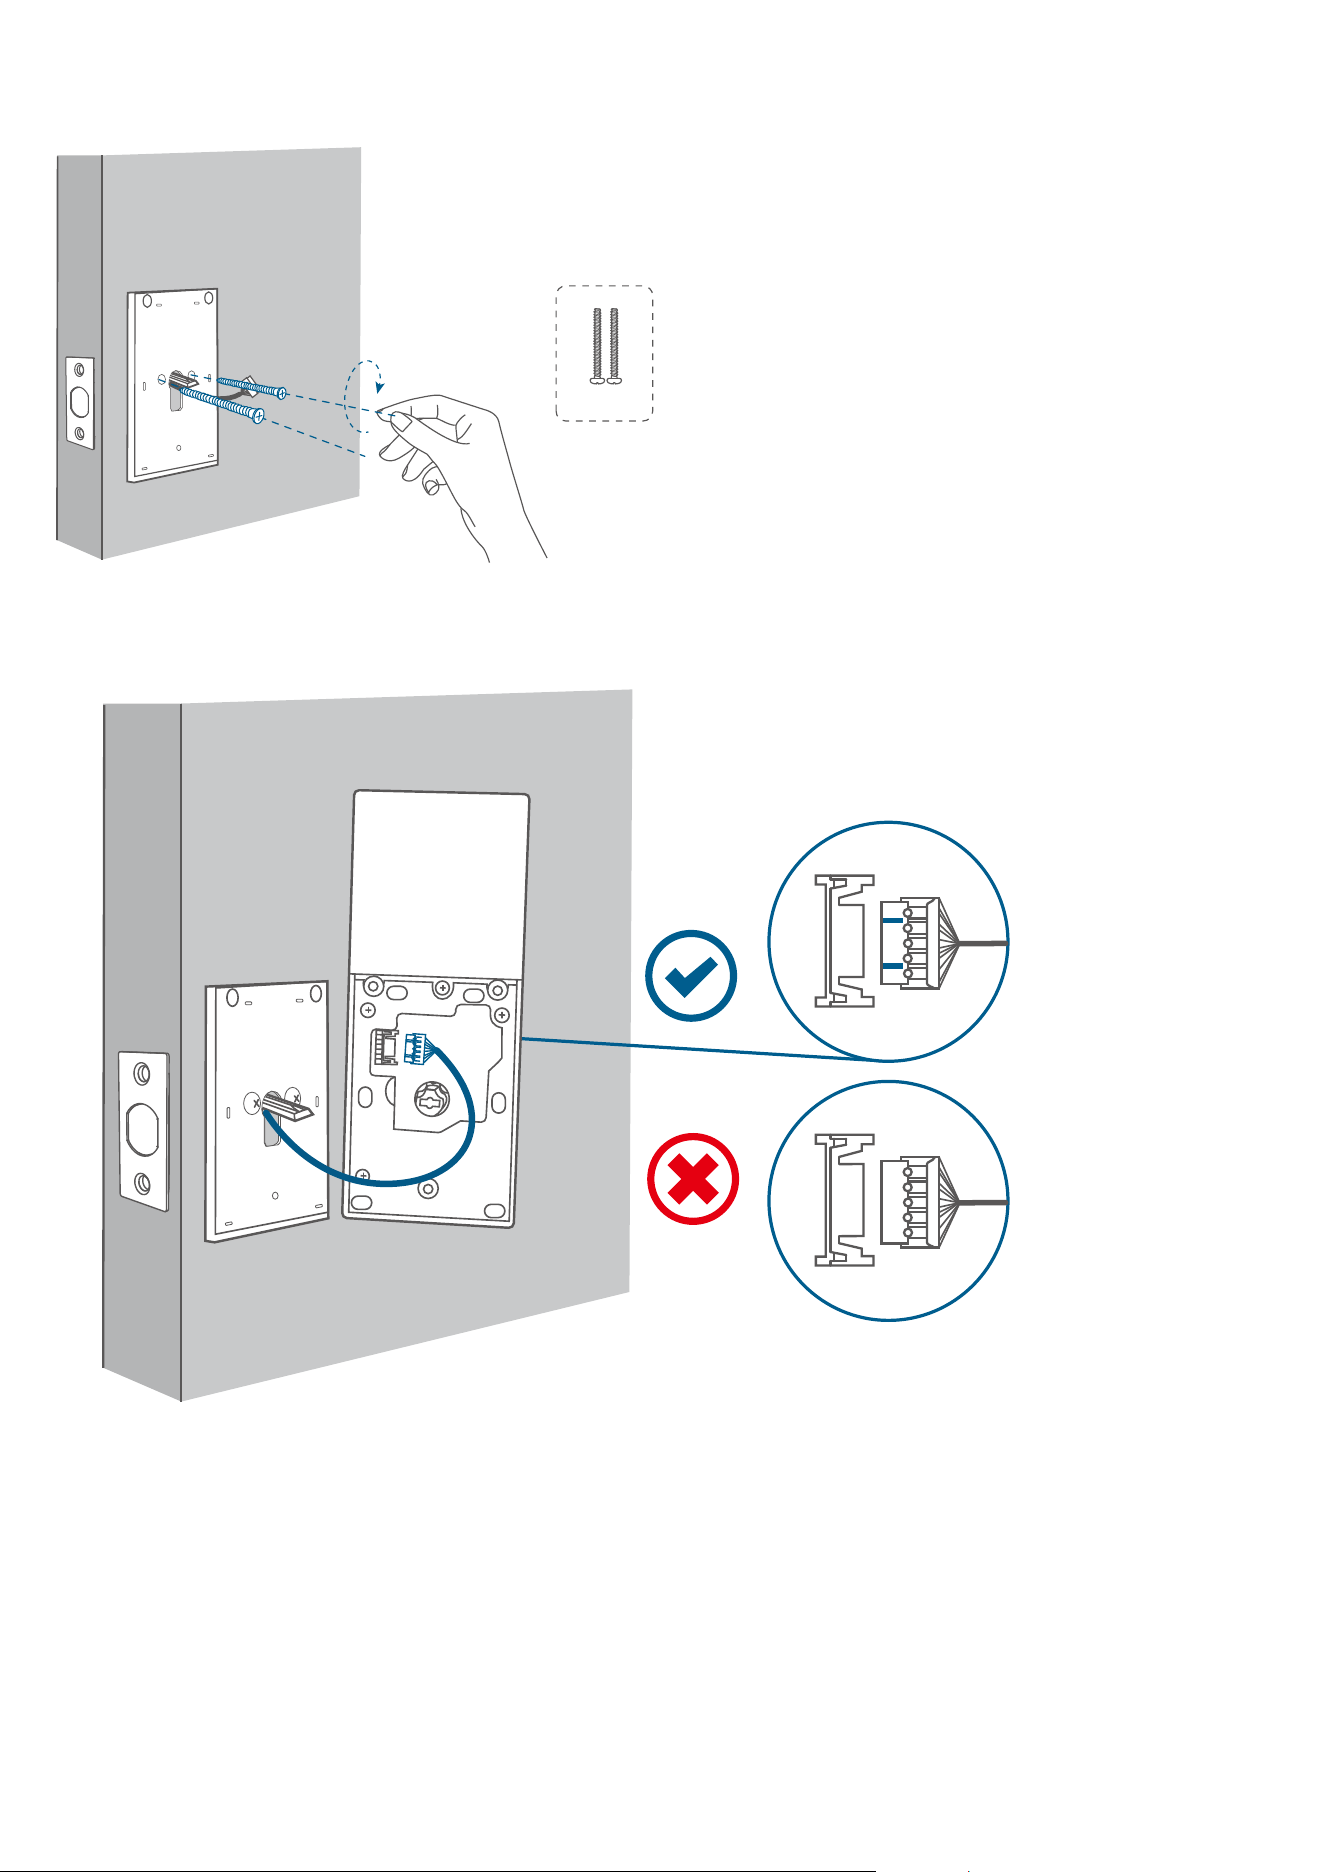
1. Feed the T-shaped tailpiece of the exterior assembly through the T-shaped tailpiece slot
on the deadbolt.
2. Make sure the cables go underneath the deadbolt.
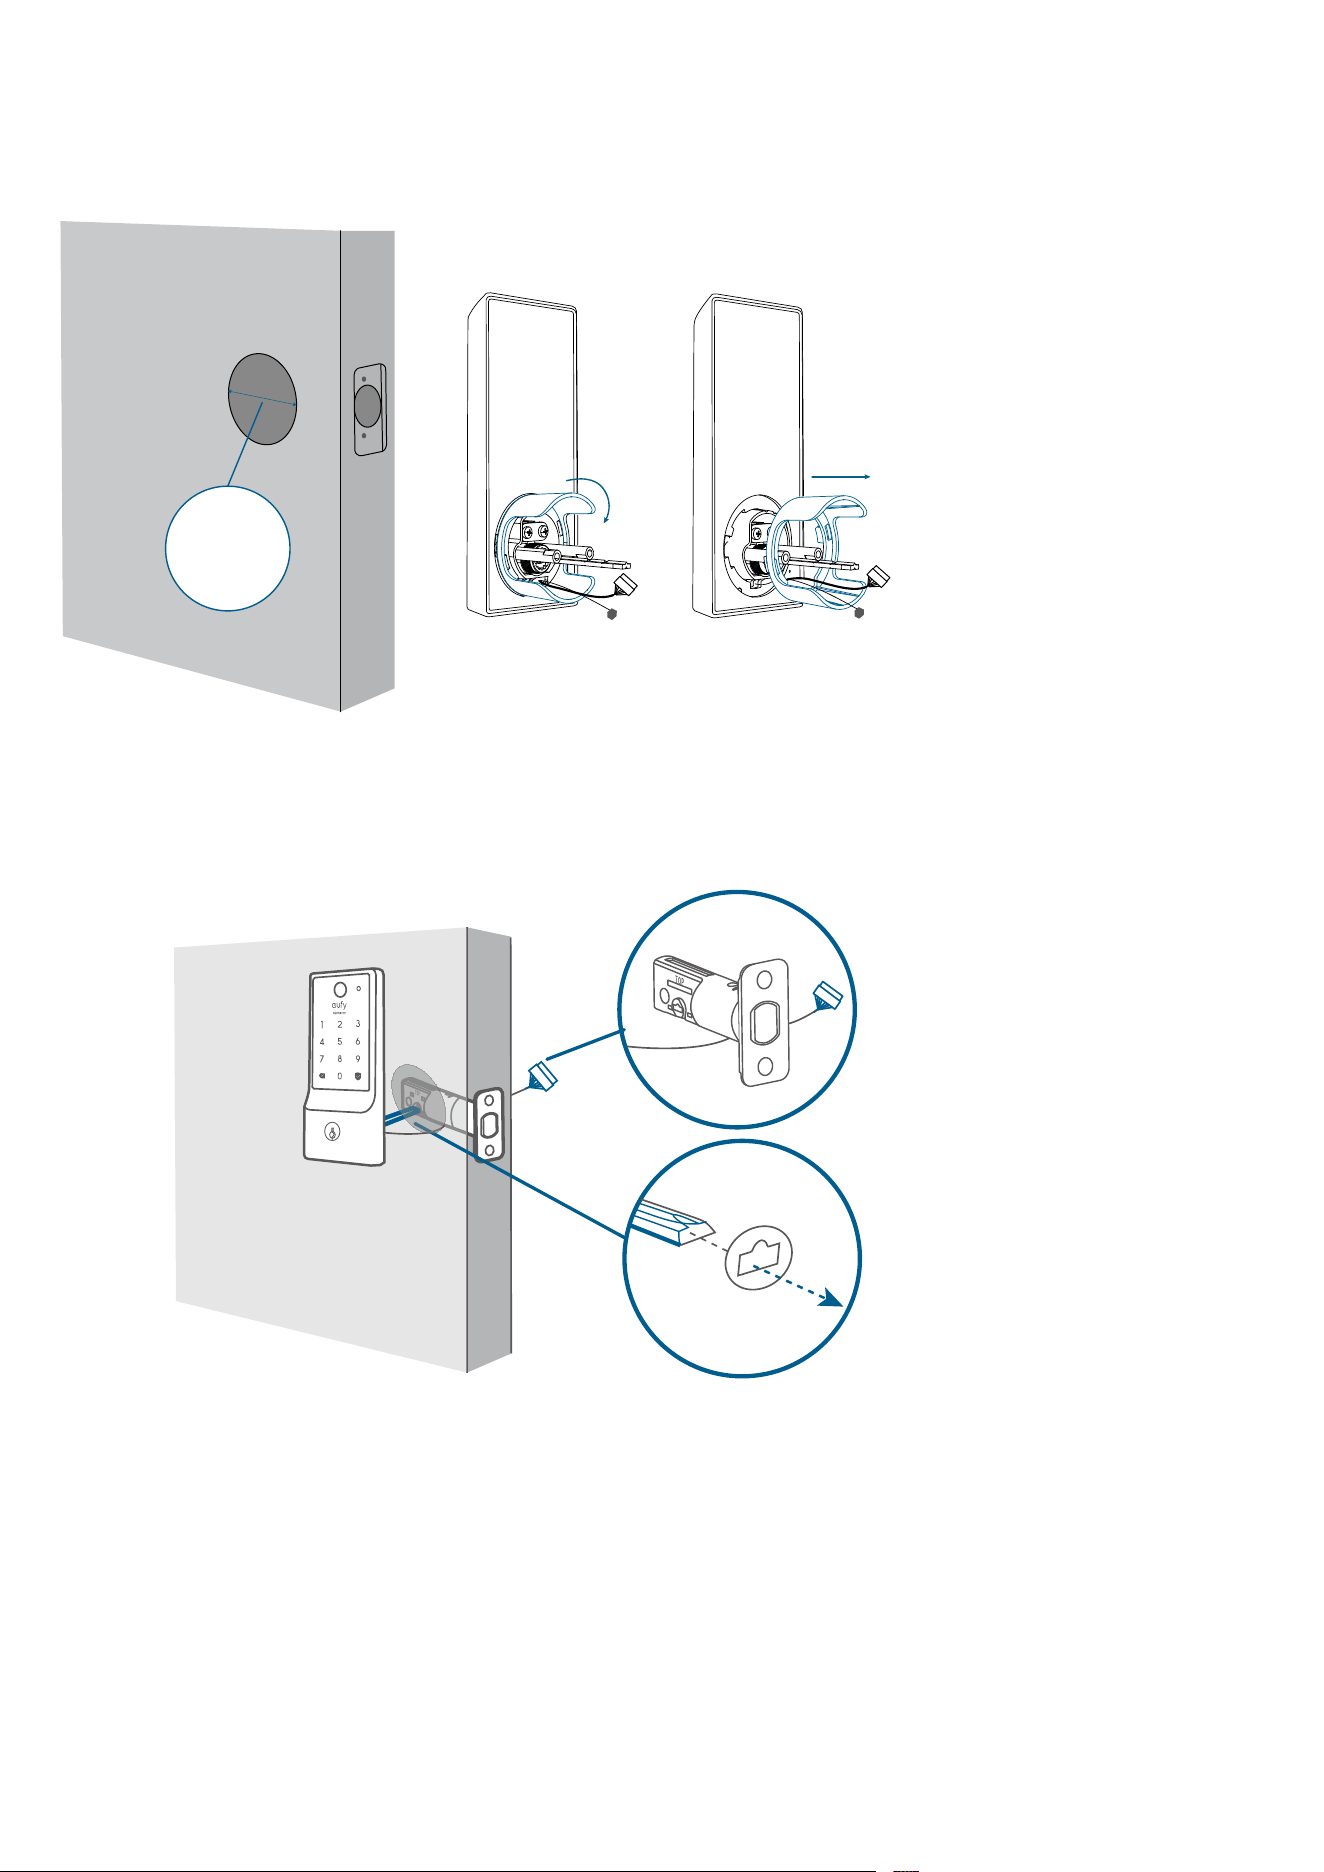
Step 4. Install the Interior Assembly
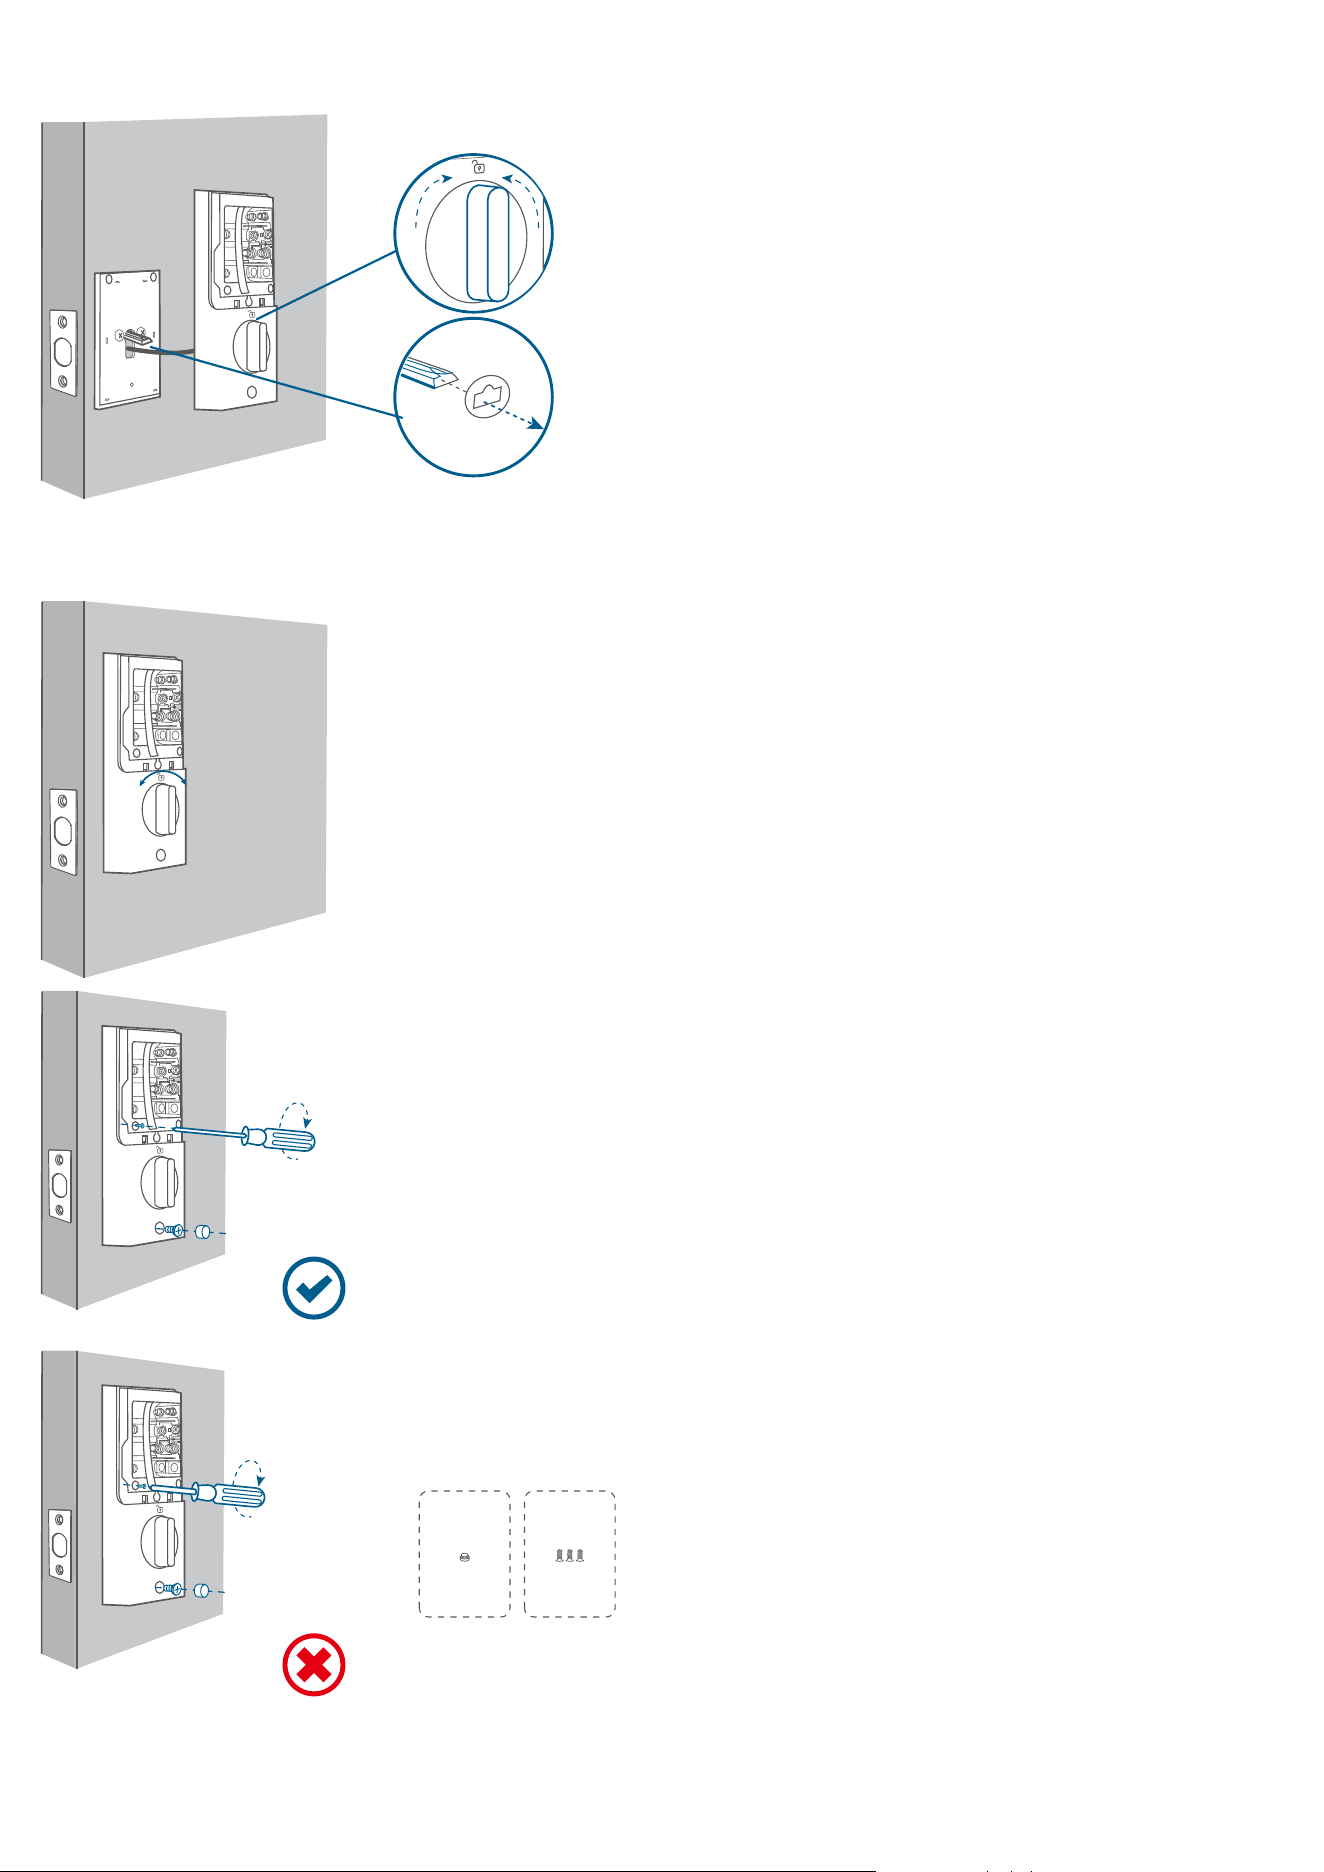
1. Detach the back cover from the interior assembly.
2. Run the wires through the back cover.
3. Secure the back cover with screws.
Tightly fasten the screws in place. Set the screws with your hands, then use a screwdriver
to secure them.
E
4. Wire to the interior assembly.
5. Mount the interior assembly. Make sure both wires are tucked into the cabin on the back
of the interior assembly.
Set
Make sure the deadbolt is retracted and the thumb turn knob is on the 'unlock' position,
check if the deadbolt moves properly by turning the thumbturn.
Set
F
G
Set
Set
*Use a long screwdriver to fasten the interior assembly screws.
6. Install the 8 AA batteries provided with the correct polarity. Don't put on the cover until
the system setup is done in the app.
*For your convenience, please first install the bottom layer of 4 AA batteries.
Set
H
Friendly Reminder: When removing the batteries, first remove the upper layer, then gently
pull the ribbon to li the remaining batteries out of the compartment.
Set
Set
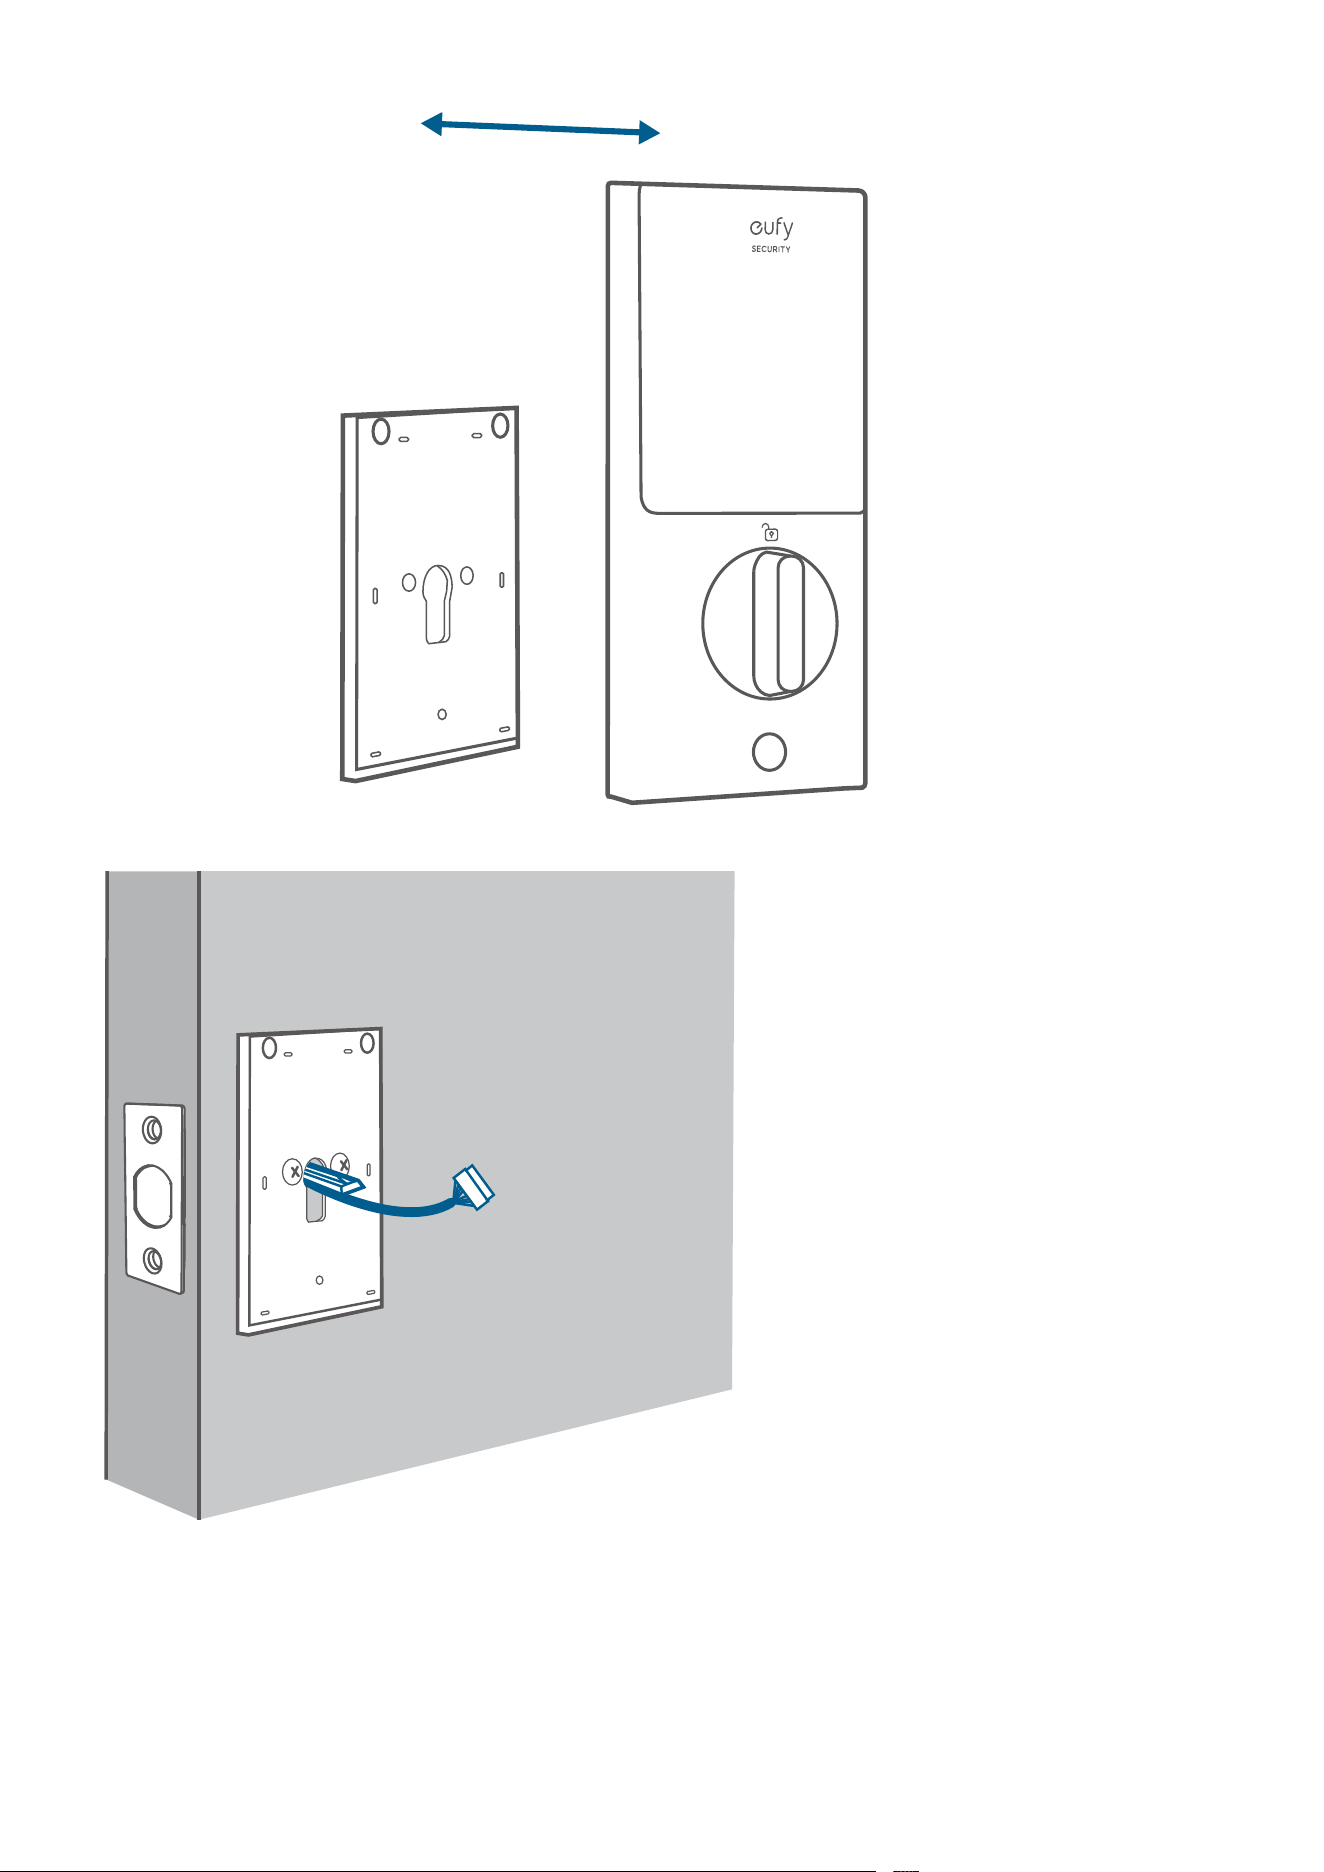
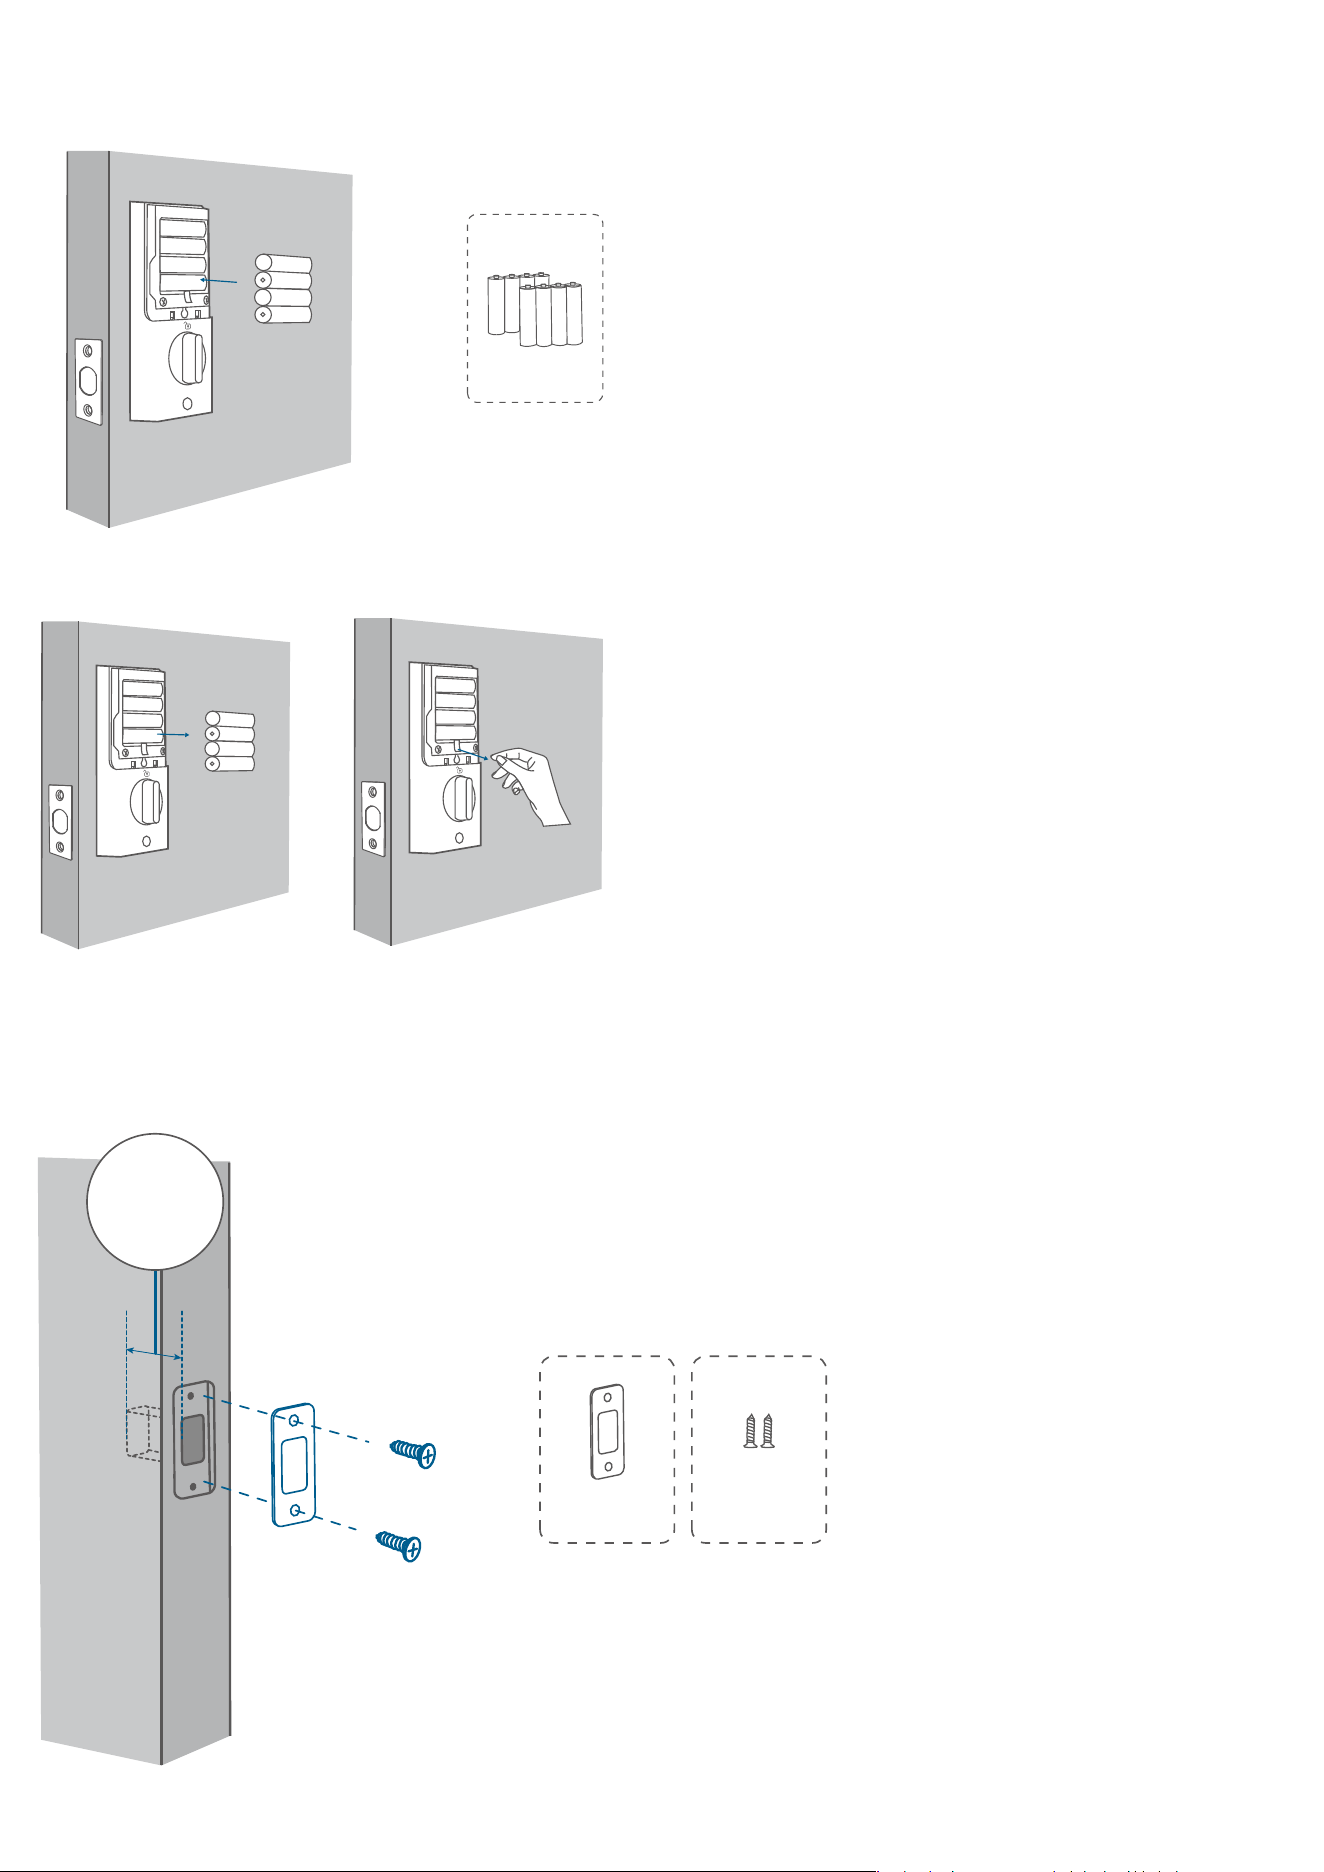
Step 5. Install the Strike Plate
Make sure the depth of the latch hole on door frame is deep enough (1" / 25.4 mm), otherwise
the calibration might fail during the setup.
JI
Latch Hole Depth
25.4mm/1''

Step 6. Set up the System
1. Download and install the eufy Security app, then sign up for an account.
2. Follow the in-app instructions to add the C220 Smart Lock to your device list.
Please visit https://support.eufylife.com/s/ or scan the QR code for more information.