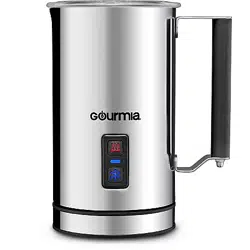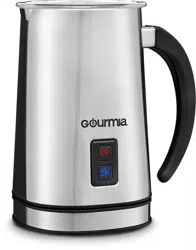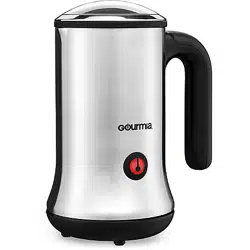

PHOTO OF PRODUCT
MODEL# GMF245
MILK FROTHER
CAPPUCCINOS & LATTES
www.gourmia.com

© 2016 Gourmia
www.Gourmia.com
The Steelstone Group
Brooklyn, NY
All rights reserved. No portion of this manual may be reproduced by any means whatsoever
without written permission from The Steelstone Group, except for the inclusion of quotations in a
media review.
Although every precaution has been taken in the preparation of this manual, The Steelstone
Group assumes no responsibility for errors or omissions. Nor is any liability assumed for damages
resulting from the use of the information contained herein. Although every eort has been made
to ensure that the information contained in this manual is complete and accurate, The Steelstone
Group is not engaged in rendering professional advice or services to the individual consumer;
further, The Steelstone Group shall not be held responsible for any loss or damage allegedly
arising from any information or suggestion in this manual.
10 9 8 7 6 5 4 3 2 1
Printed in China
Welcome to Del
icious and Aromatic
World of
Milk Frothers from Gourmia!
With the purchase of your Milk Frother, you’ll be able to make all your favorite
coffee-house beverages right in your own kitchen!. Your new milk frother makes
cappuccino with thick, rich frothed milk, latte, latte macchiato, café mocha and hot
chocolate. So whether you’re in the mood for a cappuccino, latte, café mocha, hot
chocolate or any other favorite milk-based drink, this Milk Frother is your easy and
money saving answer.
The following pages of this manual offer full and complete instructions for all of the
functions and features of your Milk Frother. Inside these pages, you’ll
nd information
on and instructions for assembly, operating, cleaning and maintenance of your Milk
Frother. Please read all safety instructions and complete directions carefully for safe
usage at all times.
Thank you for your purchase! We hope you will enjoy all the innovative products
brought to you by our family at Gourmia.

TABLE OF CONTENTS
SAFETY FIRST p. 6
FEATURES & CARE p. 8
WARRANTY & SERVICE
p. 12
CLEANING & MAINTENANCE
p. 10
OPERATING INSTRUCTIONS
p. 14

SAFETY FIRST
SAFETY FIRST
IMPORTANT SAFEGUARDS
When operating this electric appliance, basic safety instructions should always
be followed. Refer to the following for these instructions
1. READ ALL SAFETY & USAGE INSTRUCTIONS BEFORE USING.
2. Do not use appliance on wet or hot surfaces, or near a heat source.
3. To protect against electric shock, do not immerse any part of appliance, power
cord
, or plug in water or other liquid. Unplug from outlet when not in use and
before cleaning.
4. To disconnect, unplug power cord from electrical outlet. Do not disconnect by
pulling on cord.
5. Do not operate appliance with a damaged power cord or plug. Do not
operate appliance if it malfunctions or is in any way damaged. For details,
contact Consumer Services.
6. Use appliance only for its intended use.
7. Closely supervise children when using any electrical appliance. Do not allow
appliance to be used as a toy.
8. This appliance has a polarized plug (one blade is wider than the other). To
reduce risk of electrical shock, this plug is intended to fit in a polarized outlet
only one way. If plug does not fit fully in the outlet, reverse plug. If it still does
not fit, contact a qualified electrician. Do not modify plug in any way.
9. Caution: A short power cord is provided to reduce risks from entanglement or
tripping over a longer cord. An extension cord may be used when marked
electrical rating is no less than electrical rating of this appliance. All cords
should not drape over counter or tabletop where cords can be tripped over or
pulled on unintentionally, especially by children.
10. Do not place on or near a hot gas or electric burner, or heated oven.
Extreme caution must be used when moving products containing hot liquids.
11. For Household Use Only.
SAVE THESE INSTRUCTIONS
6 7
FOR HOUSEHOLD USE ONLY
Electrical 3-conductor Cord Set:
Appliance equipped with a
3-conductor cord set that has a 3 prong
grounding-type plug. It should be
properly connected to a grounding-type
a 3-grounding outlet unit, and as such,
the grounding prong should never be
removed. If needed, purchase a 2-prong
adapter and ground it to the outlet.
Do not use an adapter unless you are
for assistance.

FEATURES AND CARE
Before Using for the First Time
1. Remove all packaging from the Milk Frother and its power base.
2. Position the power base on a flat, heat-resistant surface, as close to an
electrical outlet as possible. Make sure the power base is unplugged.
3. Remove the Milk Frother from its power base and take off the lid.
4. Read the rating in the base of the unit to make sure the power of the unit
complies with your local civil electricity.
5. Use a cup to fill the non-stick pot with water up to the lower MAX line.
6. Gently position the pot over the electrical connector on the power base.
7. To avoid spillage, make sure the lid is on before turning the Milk Frother ON.
8. Plug the power cord into the electrical outlet, it will beep once.
9. Press the ON/OFF button quickly. The indicator will illuminate in red and the
Milk Frother starts to work in heating and frothing mode.
10. When the water has warmed up, the Milk Frother will turn OFF automatically
and the power light will turn off. It will beep twice.
11. Empty the water and the unit is ready to work with milk.
CAUTION: Always remove the Milk Frother’s pot from its base when pouring.
8 9
11
22
33
44
55
1. Lid
2. Whisk set for foam
3. Pot
4. Indicator/switch button
5. Power Base
10
OPERATING INSTRUCTIONS
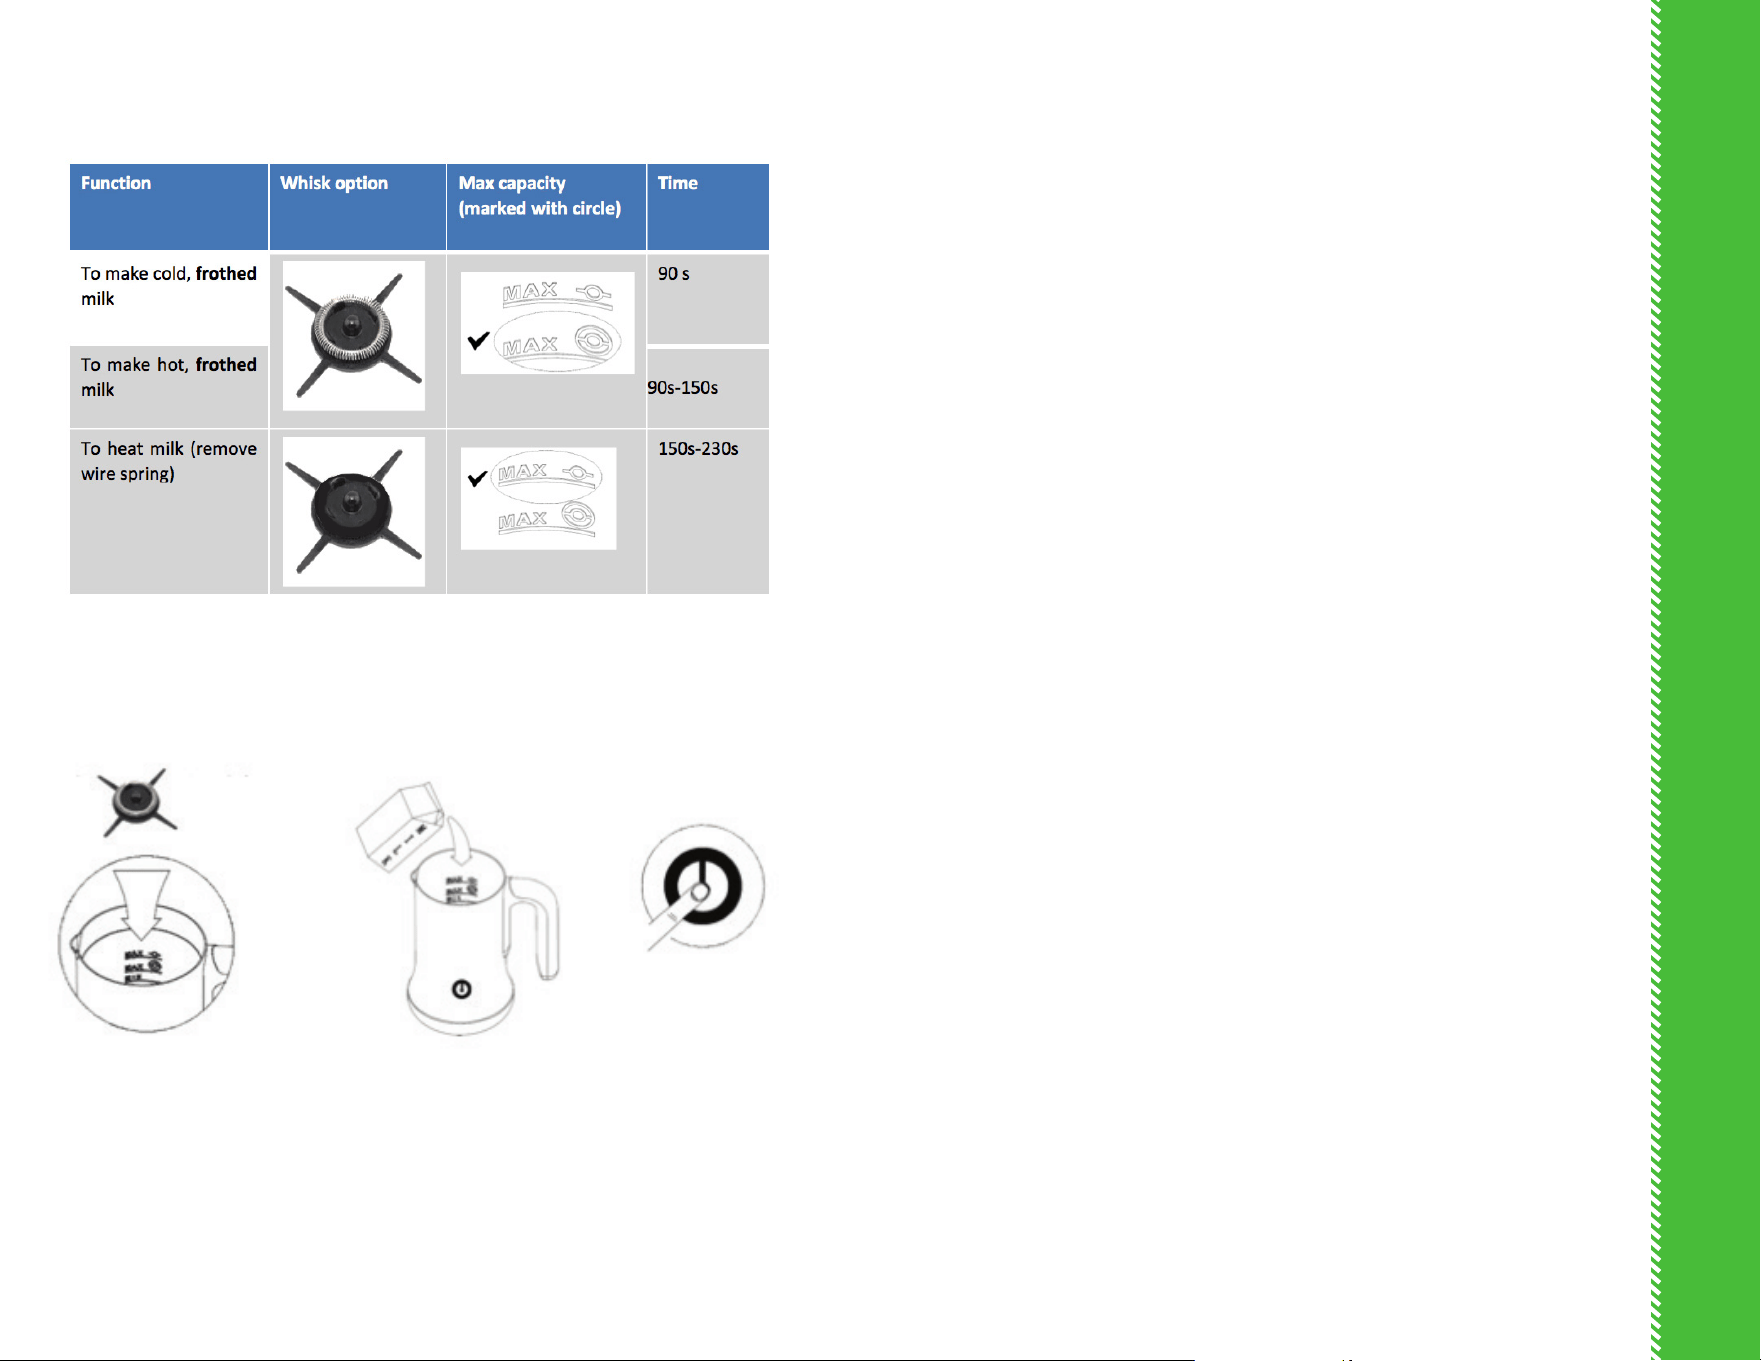
STEP 3
1. Choose the appropriate whisk and insert it on the whisk head inside the pot. (see the table
left for reference).
2. Pour milk into the pot according to the maximum & minimum markings. (See the max
capacity for each whisk type left for reference), place the pot on power base. Place the lid
securely on the pot.
3. Choose the mode you want to make with the milk.
A. To make Cold, Frothed Milk:
Make sure you have inserted the whisk (with wire spring) and ensure the pot is lled with
milk up to the Lower MAX level (150ml) or at least lled to MIN mark. Check that the lid is
securely in place then press and hold the ON/OFF button for 3 seconds until the blue light
turns on to start frothing. Once the frothing process is complete, the blue light will turn o
automatically and the frothed milk is ready.
B. To make hot, Frothed Milk:
Make sure you have inserted the whisk (without the wire spring) and ensure the pot is lled
with milk up to the Lower MAX level (150 ml) or at least lled to MIN mark. Check that the lid is
securely in place and press the ON/OFF button briey. The red light turns on to start
frothing. Once the frothing process is complete the red light will turn o automatically and
the hot frothed milk is ready.
C. To make Hot Milk:
Make sure you have inserted the whisk (without the wire spring) and ensure the pot is lled
with milk up to the upper MAX Level (300ml Max) or at least lled to MIN mark. Check that
the lid is securely in place and press the ON/OFF button twice briey and you will hear 2
beep sound. The red light turns on to start heating milk. Once the heating process is
complete the red light will turn o automatically and the hot milk is ready.
Using the milk frother
STEP 1 STEP 2
11

CLEANING AND MAINTENANCE
Remove the plug from the power before cleaning. Take out the silicon ring.
Never immerse the Milk Frother or power base into water.
1. THE POT: Clean immediately after each use. Flush and clean the inner walls
with warm soapy water and a non-abrasive cloth. Then wipe dry with a soft
cloth.
2. THE LID: Separate the lid and the silicon ring. Wash with warm soapy water.
3. THE BODY: Clean with a soft cloth. Never use sharp cleaning agents, hard
nylon brush or metal brush to avoid scratches on the stainless steel
surface! Never clean with metal objects and never use abrasives.
4. THE WHISKS: Remove and wash with warm soapy water. Dry and store in a
safe place. Do not put in the dishwasher.
5. Take out the spiral whisk or paddle. Use a small brush to clean areas
around the motor, wipe clean and dry thoroughly.
7. Use sponge or non metal soft brush to clean the inside and outside of the
Frother, then wipe dry with a soft cloth.
8. When cleaning the Frother, never immerse it in water. There are electronic
components in the body that will be damaged.
9. NOT dishwasher safe.
CLEANING THE MILK FROTHER
Here is a selection of quick and easy drinks you can make using the frother.
SERVING SUGGESTIONS
Here are some handy hints to help you get the most out of your frother.
• Always use your frother first to froth or heat your milk. While it is working prepare
your
coffee or hot chocolate and serve immediately.
• Use whole milk (fat content >3.0%) for best results.
• Cold milk can be frothed with this frother.
• Milk heats to approximately 65+/-5°C. This is the ideal temperature to ensure the best
flavor of your coffee and it will not be too hot to drink.
• Keep the whisks in a safe place. They are small and can easily be lost.
• After frothing or heating allow 2 minutes for the thermostat to reset and the frother
to be ready for use again. To shorten this time, rinse with cool water and wipe dry after
each use.
• The frother is designed to heat and froth milk only. Do not put coffee grounds, or
chocolate powder or other similar consistencies into the frother. Clean and dry
after using.
HINTS & TIPS
WITH FROTHED MILK
CCappuccino
1/3 Espresso
Add 2/3 frothed milk
Top with cocoa powder.
LLatte Macchiato
Pour frothed milk in a tall glass
Add espresso carefully
along rim of the glass.
IInstant Frothy Coee
Make instant coee
Add frothed milk.
WITH HOT MILK
CCae Latte
1/3 Espresso shot
Add 2/3 heated milk and stir.
HHot Chocolate
Pour heated milk in to a large mug
Add chocolate powder and stir to mix.
IInstant Milky Coee
Place instant coee granules in a cup
Add hot milk and stir to mix.
12 13
WARRANTY AND SERVICE
WARRANTY & SERVICE
This Limited Warranty is for one full year from the date of purchase. It is
applicable to the original purchaser only and is not transferable to a third party
user. Repair or replacement of defective parts is solely at the seller’s discretion.
In the event that repair isn’t possible, the seller will replace the product/part. If
the cash value of the product or component returned.
Product defects not covered under the Warranty provisions include normal wear
and damage incurred from use or accidental negligence, misuse of instruction
is not liable for any incidental or consequential damages incurred by such
circumstances.
For Customer Service or Questions, Please call: 888-552-0033
www.gourmia.com
DISPOSAL OF THE DEVICE
PROTECTION OF THE ENVIRONMENT
At the end of the life of your product, it should go to a specially adapted
waste-recycling center.
ENVIRONMENT PROTECTION FIRST
1. The symbol on the product or on its packaging indicates that this
product may not be treated as household waste. Instead it should be handed
over to the applicable. Collection point for the recycling of electrical and
electronic equipment.
2. By ensuring this product is disposed of correctly, you will help prevent
potential negative consequences for the environment and human health, which
could otherwise be caused by inappropriate waste handling of this product .For
more detailed information about the recycling of this product, Please contact
your local council oce or your household waste disposal service.
1514