
APP will automatically fill in the WIFI name, please fill in the
corresponding WiFi password. Adjust the volume to a
reasonable level, and then click "Next". If it is the second time
to connect to the same WIFI, the APP will automatically fill in
the password and there is no need to re-enter the password.
User Manual
Wireless Video Doorbell Camera
说明书尺寸:75x120mm
材质:80g铜版纸
印刷:单黑
装订方式:骑马钉装订
*封面背面不印刷
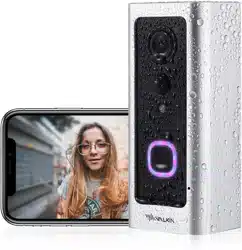
Thank you for purchasing the VALKIA SD-A01 Wireless Video
Doorbell Camera. Please read this user manual carefully and
keep it for future reference. If you need any assistance, please
contact our support team(support@valkiahome.com) with
your product model number and Amazon order number.
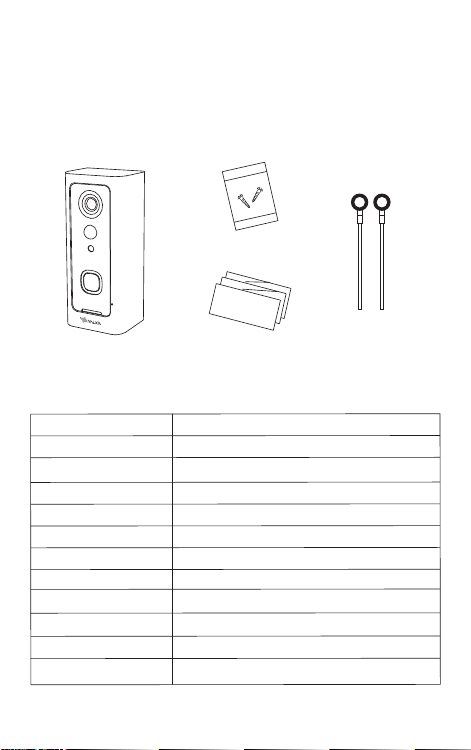
Package Contents
Quick Start Guideline
Video Doorbell
Screws
User Manual
- 01 -
- 12 - - 13 - - 14 - - 15 - - 16 - - 17 - - 18 -
- 02 -
The doorbell has been connected to the network, please fill
in the doorbell camera name and password, the password
must be more than 8 characters and contain uppercase
letters, lowercase letters, and numbers.
7)
The installation is complete! APP will automatically enter the
device list interface. Congratulations!
The doorbell is ready for use.
8)
3.Doorbell instructions
On the device list interface, click the settings icon in the upper
right corner to enter the device settings interface.
Reminder
When it is turned on, if someone rings the doorbell or calls loudly,
you will receive a notification.
Share QR Code
If you have already installed the doorbell camera and want to
share it with friends and relatives, you can send the QR code to
them.
Delete Doorbell Device
The mobile device will not receive the notifications after you
delete the camera. But the camera still works and the other
connected mobile devices still able to receive the notifications.
Set up
Call reminding
QR code
删除设备
Deleting equipment
Call reminding
QR code
删除设备
Deleting equipment
4.PIR Detection Instructions
The device supports PIR infrared detection function, select
"infrared detection" in the setting menu.
5.Cloud Storage
In the XSHcam APP setting menu, choose storage managment,
and open Cloud Storage
Cloud Storage Description:
When the device is in sleep mode, PIR is triggered or the
doorbell button is pressed, the device will automatically upload
10 seconds of video to the cloud. Each device can record 20
event videos every day and provide a week of free loop
recording space for users.
Close: In this state, the device will not perform PIR detection.
Low: If a person is sensed for 7 seconds, the device will record
and call the mobile phone.
Medium: If a person is sensed for 5 seconds, the device will
record and call the mobile phone.
High: If a person is sensed for 1 seconds, the device will record
and call the mobile phone.
Note: In a crowded environment, it is recommended to turn off
or set the device to low sensitivity to extend the battery life.
Click the calendar icon in the
upper right corner
Select a date to see all cloud
videos of the current date.
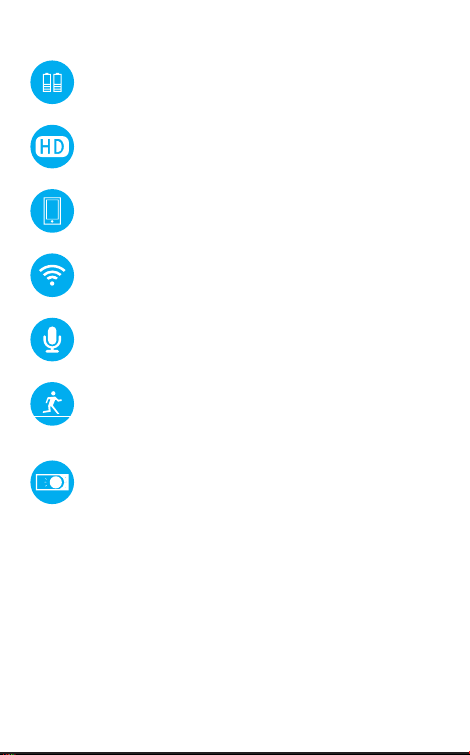
Features
Technical Specification
Model
Resolution
Viewing angle
IR LED
Wi-Fi
Audio
Recording
Storage
Battery
Power consumption
Dimensions
Weight
SD-A01
1920*1080
1.7mm@F2.4/166°
4pcs*850mm
IEEE 802 11 b/ g/ n
Two-way talk with noise cancellation
Device TF Card recording
Cloud storage or 8G/16G/32G TF Card
2pcs 18650 batteries (not included)
Standby 200uA, Working 170mA
115 x 50 x 36mm/ 4.53” x 1.97” x 1.42”
150g / 5.29oz
- 19 -
6. Note for using
This device is powered by 2 pieces of 18650 batteries and is
expected to wake up 2000 times when fully charged (10 times
per day, about 6 months). Frequent wake-up will reduce usage
time. When the battery voltage is low, the APP will give a
prompt. Please charge the device in time after receiving the
prompt.
During the installation process, please make sure that the
network is normal in the installation environment, especially
when installing outdoors/outside the door. You need to check
whether the WiFi is covered. If the WiFi signal is weak, you need
to add a WiFi signal amplifier.
This device is a low-power smart product that can support APP
remote wakeup, PIR detection wakeup, and press the doorbell
to wake up. After each wakeup, it will automatically enter the
sleep state after working for 30 seconds.
1)
2)
3)
Two 18650 batteries
Mega HD pixels with ultra-thin 1.7MM wide-angle lens
Support phone wake up
Support to wake up the phone remotely within 1
second
2.4G Wi-Fi connection
High-quality two-way talk with noise cancellation
Support PIR infrared detection, when someone is
hovering at the door, immediately push the alarm
information to the mobile APP
Day and night mode is automatically switched,
whether it is day or night, the image is clearly visible,
protecting the safety of you and your family
Model: SD-A01
Aukey Technology Co.,Ltd
Room 102, Building P09, Huanan City Elec-trading Center,
Longgang District, Shenzhen, China
©Aukey Technology Co.,Ltd All right reserved.
Valkia and the Valkia logo are trademarks of
Aukey Technology Co.,Ltd, registered in the United States.
FCC ID: 2ATIH-SDA01
Infrared Light:When the environment is not bright enough,
infrared light can increase the brightness of the environment
Light Sensor: It can sense the environmental brightness value,
when the environmental brightness value is lower than 2Lux, the
doorbell will activate the infrared light
MIC:Record environmental sound and voice intercom
Doorbell Button:Notify users that someone is visiting
PIR Induction:When someone moves in front of the doorbell, it
can trigger a signal to the phone
Lens:Record video
Indicator Light:
Flash Blue: In configuration status;
Solid Red: The doorbell failed to connect to WiFi;
Solid Blue: The doorbell has successfully connected to WiFi;
Red and blue lights on together: The doorbell is connecting to
WiFi;
Speaker: Make system prompts and voice intercom
AC Input:Power the doorbell by connecting external power
supply with 2 AC input cables, no need to install batteries and
no need to remove the doorbell for charging
Reset Button:Long press for 5 seconds to restore factory settings
Battery Compartment:No need to connect to external power
supply when installing 2 pieces of 18650 batteries
Fixing Holes: Install the bracket on the wall with 4 screws
Anti-theft Screw Hole: Install anti-theft screws to prevent the
doorbell from being disassembled
Micro USB Port: After installing 2 pieces of 18650 batteries, you
can charge the doorbell via a 5V micro USB Port, the first
charging time is preferably more than 12 hours
TF Card Slot: TF card supports up to 32G
- 03 - - 04 - - 05 - - 06 - - 07 - - 08 - - 09 -
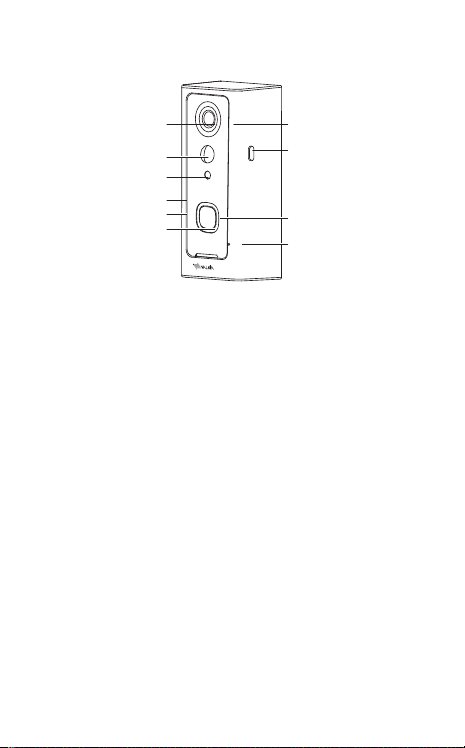
Product Diagram
Lens Infrared Light
Reset Button
Doorbell Button
MIC
PIR Induction
Light Sensor
Micro USB Port
TF Card Slot
Indicator Light
AC Input Holes
Fixing Holes
Battery Compartment
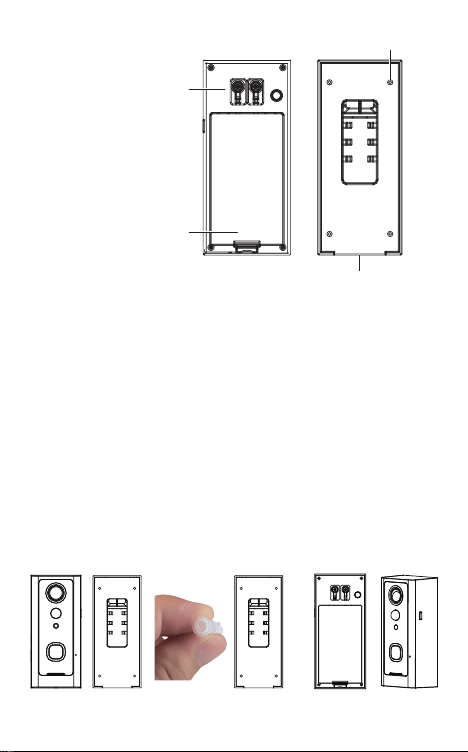
Installation Guide
Install the bracket on the wall with screws.
Connect the AC (16-24V) power cables to the
AC input holes ( If there is no AC power supply,
this step can be omitted).
If there is no AC power supply, please put two
18650 batteries into the battery compartment
and install the battery cover.
Long press the reset button for 5 seconds, wait
for the red indicator light to flash slowly.
Buckle the doorbell and bracket together,
tighten the anti-theft screw to complete the
installation.
1)
2)
3)
4)
5)
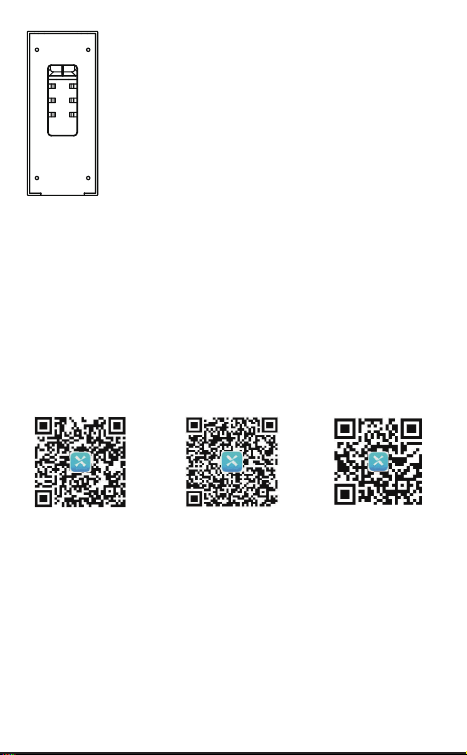
Downloading and Installing the App
Open the App Store (for iOS) or the Google Play Store (for
Android) on your mobile devices. Search for"XSH Cam" or
scan the following QR Code to download and install it to your
device.
1.
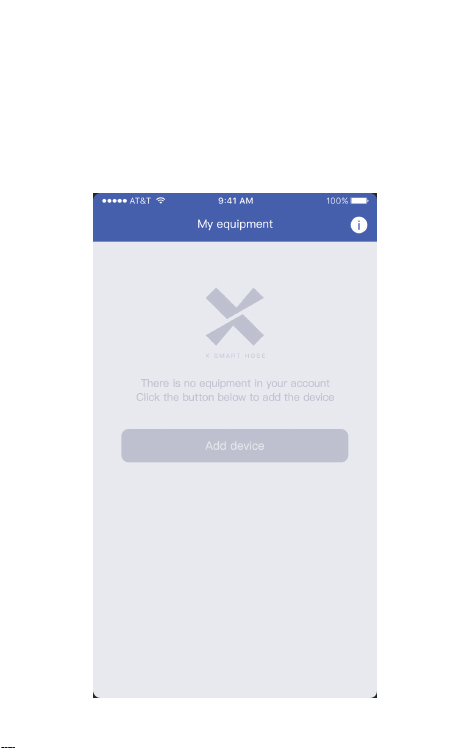
Setting up the App
Please make sure your doorbell is connected to a 2.4GHz
Wi-Fi network, not a 5GHz network.
Please make sure that the XSH Cam application has been
installed on your device.
Add Device: Please launch the XSH Cam application on your
mobile device and click "Add device".
2.
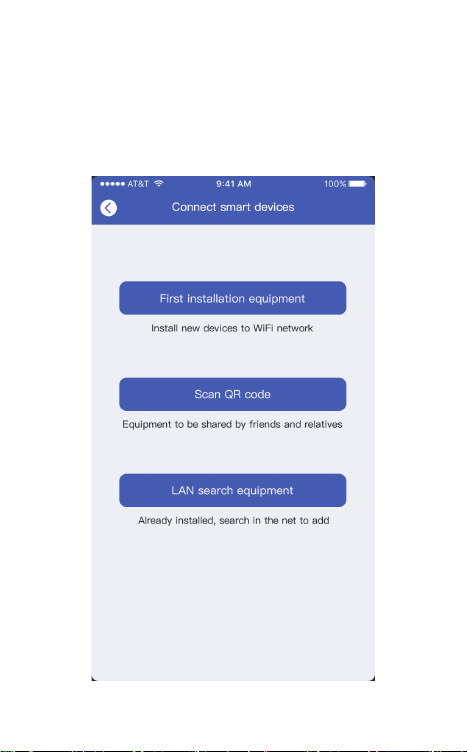
1)
Click “First installation equipment” to install the doorbell
camera.
2) Please wait for the system voice prompt "The camera is now
ready to begin pairing".
3) If you do not hear the voice prompt, please press the reset
button for 5 seconds, wait for the blue LED to light up, the
doorbell will restart and enter the configuration state.
4)
Device connection instructions
APP-AndroidApp Google playApp iOS
Anti-theft Screw Hole
POWER RESET
- 10 -
5)
AC Power
Cables
- 11 -
The phone will emit sound waves, please keep quiet at this
time, put the phone about 30cm from the doorbell, and wait
for the doorbell to configure the network. If the doorbell
cannot connect to the WIFI, please reset the doorbell and
repeat all steps (see the previous step, reset the doorbell).
6)
APP will automatically fill in the WIFI name, please fill in the
corresponding WiFi password. Adjust the volume to a
reasonable level, and then click "Next". If it is the second time
to connect to the same WIFI, the APP will automatically fill in
the password and there is no need to re-enter the password.
User Manual
Wireless Video Doorbell Camera
说明书尺寸:75x120mm
材质:80g铜版纸
印刷:单黑
装订方式:骑马钉装订
*封面背面不印刷
Thank you for purchasing the VALKIA SD-A01 Wireless Video
Doorbell Camera. Please read this user manual carefully and
keep it for future reference. If you need any assistance, please
contact our support team([email protected]) with
your product model number and Amazon order number.
Package Contents
Quick Start Guideline
Video Doorbell
Screws
User Manual
- 01 -
- 12 - - 13 - - 14 - - 15 - - 16 - - 17 - - 18 -
- 02 -
The doorbell has been connected to the network, please fill
in the doorbell camera name and password, the password
must be more than 8 characters and contain uppercase
letters, lowercase letters, and numbers.
7)
The installation is complete! APP will automatically enter the
device list interface. Congratulations!
The doorbell is ready for use.
8)
3.Doorbell instructions
On the device list interface, click the settings icon in the upper
right corner to enter the device settings interface.
Reminder
When it is turned on, if someone rings the doorbell or calls loudly,
you will receive a notification.
Share QR Code
If you have already installed the doorbell camera and want to
share it with friends and relatives, you can send the QR code to
them.
Delete Doorbell Device
The mobile device will not receive the notifications after you
delete the camera. But the camera still works and the other
connected mobile devices still able to receive the notifications.
Set up
Call reminding
QR code
删除设备
Deleting equipment
Call reminding
QR code
删除设备
Deleting equipment
4.PIR Detection Instructions
The device supports PIR infrared detection function, select
"infrared detection" in the setting menu.
5.Cloud Storage
In the XSHcam APP setting menu, choose storage managment,
and open Cloud Storage
Cloud Storage Description:
When the device is in sleep mode, PIR is triggered or the
doorbell button is pressed, the device will automatically upload
10 seconds of video to the cloud. Each device can record 20
event videos every day and provide a week of free loop
recording space for users.
Close: In this state, the device will not perform PIR detection.
Low: If a person is sensed for 7 seconds, the device will record
and call the mobile phone.
Medium: If a person is sensed for 5 seconds, the device will
record and call the mobile phone.
High: If a person is sensed for 1 seconds, the device will record
and call the mobile phone.
Note: In a crowded environment, it is recommended to turn off
or set the device to low sensitivity to extend the battery life.
Click the calendar icon in the
upper right corner
Select a date to see all cloud
videos of the current date.
Features
Technical Specification
Model
Resolution
Viewing angle
IR LED
Wi-Fi
Audio
Recording
Storage
Battery
Power consumption
Dimensions
Weight
SD-A01
1920*1080
1.7mm@F2.4/166°
4pcs*850mm
IEEE 802 11 b/ g/ n
Two-way talk with noise cancellation
Device TF Card recording
Cloud storage or 8G/16G/32G TF Card
2pcs 18650 batteries (not included)
Standby 200uA, Working 170mA
115 x 50 x 36mm/ 4.53” x 1.97” x 1.42”
150g / 5.29oz
- 19 -
6. Note for using
This device is powered by 2 pieces of 18650 batteries and is
expected to wake up 2000 times when fully charged (10 times
per day, about 6 months). Frequent wake-up will reduce usage
time. When the battery voltage is low, the APP will give a
prompt. Please charge the device in time after receiving the
prompt.
During the installation process, please make sure that the
network is normal in the installation environment, especially
when installing outdoors/outside the door. You need to check
whether the WiFi is covered. If the WiFi signal is weak, you need
to add a WiFi signal amplifier.
This device is a low-power smart product that can support APP
remote wakeup, PIR detection wakeup, and press the doorbell
to wake up. After each wakeup, it will automatically enter the
sleep state after working for 30 seconds.
1)
2)
3)
Two 18650 batteries
Mega HD pixels with ultra-thin 1.7MM wide-angle lens
Support phone wake up
Support to wake up the phone remotely within 1
second
2.4G Wi-Fi connection
High-quality two-way talk with noise cancellation
Support PIR infrared detection, when someone is
hovering at the door, immediately push the alarm
information to the mobile APP
Day and night mode is automatically switched,
whether it is day or night, the image is clearly visible,
protecting the safety of you and your family
Model: SD-A01
Aukey Technology Co.,Ltd
Room 102, Building P09, Huanan City Elec-trading Center,
Longgang District, Shenzhen, China
©Aukey Technology Co.,Ltd All right reserved.
Valkia and the Valkia logo are trademarks of
Aukey Technology Co.,Ltd, registered in the United States.
FCC ID: 2ATIH-SDA01
Infrared Light:When the environment is not bright enough,
infrared light can increase the brightness of the environment
Light Sensor: It can sense the environmental brightness value,
when the environmental brightness value is lower than 2Lux, the
doorbell will activate the infrared light
MIC:Record environmental sound and voice intercom
Doorbell Button:Notify users that someone is visiting
PIR Induction:When someone moves in front of the doorbell, it
can trigger a signal to the phone
Lens:Record video
Indicator Light:
Flash Blue: In configuration status;
Solid Red: The doorbell failed to connect to WiFi;
Solid Blue: The doorbell has successfully connected to WiFi;
Red and blue lights on together: The doorbell is connecting to
WiFi;
Speaker: Make system prompts and voice intercom
AC Input:Power the doorbell by connecting external power
supply with 2 AC input cables, no need to install batteries and
no need to remove the doorbell for charging
Reset Button:Long press for 5 seconds to restore factory settings
Battery Compartment:No need to connect to external power
supply when installing 2 pieces of 18650 batteries
Fixing Holes: Install the bracket on the wall with 4 screws
Anti-theft Screw Hole: Install anti-theft screws to prevent the
doorbell from being disassembled
Micro USB Port: After installing 2 pieces of 18650 batteries, you
can charge the doorbell via a 5V micro USB Port, the first
charging time is preferably more than 12 hours
TF Card Slot: TF card supports up to 32G
- 03 - - 04 - - 05 - - 06 - - 07 - - 08 - - 09 -
Product Diagram
Lens Infrared Light
Reset Button
Doorbell Button
MIC
PIR Induction
Light Sensor
Micro USB Port
TF Card Slot
Indicator Light
AC Input Holes
Fixing Holes
Battery Compartment
Installation Guide
Install the bracket on the wall with screws.
Connect the AC (16-24V) power cables to the
AC input holes ( If there is no AC power supply,
this step can be omitted).
If there is no AC power supply, please put two
18650 batteries into the battery compartment
and install the battery cover.
Long press the reset button for 5 seconds, wait
for the red indicator light to flash slowly.
Buckle the doorbell and bracket together,
tighten the anti-theft screw to complete the
installation.
1)
2)
3)
4)
5)
Downloading and Installing the App
Open the App Store (for iOS) or the Google Play Store (for
Android) on your mobile devices. Search for"XSH Cam" or
scan the following QR Code to download and install it to your
device.
1.
Setting up the App
Please make sure your doorbell is connected to a 2.4GHz
Wi-Fi network, not a 5GHz network.
Please make sure that the XSH Cam application has been
installed on your device.
Add Device: Please launch the XSH Cam application on your
mobile device and click "Add device".
2.
1)
Click “First installation equipment” to install the doorbell
camera.
2) Please wait for the system voice prompt "The camera is now
ready to begin pairing".
3) If you do not hear the voice prompt, please press the reset
button for 5 seconds, wait for the blue LED to light up, the
doorbell will restart and enter the configuration state.
4)
Device connection instructions
APP-AndroidApp Google playApp iOS
Anti-theft Screw Hole
POWER RESET
- 10 -
5)
AC Power
Cables
- 11 -
The phone will emit sound waves, please keep quiet at this
time, put the phone about 30cm from the doorbell, and wait
for the doorbell to configure the network. If the doorbell
cannot connect to the WIFI, please reset the doorbell and
repeat all steps (see the previous step, reset the doorbell).
6)
APP will automatically fill in the WIFI name, please fill in the
corresponding WiFi password. Adjust the volume to a
reasonable level, and then click "Next". If it is the second time
to connect to the same WIFI, the APP will automatically fill in
the password and there is no need to re-enter the password.
User Manual
Wireless Video Doorbell Camera
说明书尺寸:75x120mm
材质:80g铜版纸
印刷:单黑
装订方式:骑马钉装订
*封面背面不印刷
Thank you for purchasing the VALKIA SD-A01 Wireless Video
Doorbell Camera. Please read this user manual carefully and
keep it for future reference. If you need any assistance, please
contact our support team(support@valkiahome.com) with
your product model number and Amazon order number.
Package Contents
Quick Start Guideline
Video Doorbell
Screws
User Manual
- 01 -
- 12 - - 13 - - 14 - - 15 - - 16 - - 17 - - 18 -
- 02 -
The doorbell has been connected to the network, please fill
in the doorbell camera name and password, the password
must be more than 8 characters and contain uppercase
letters, lowercase letters, and numbers.
7)
The installation is complete! APP will automatically enter the
device list interface. Congratulations!
The doorbell is ready for use.
8)
3.Doorbell instructions
On the device list interface, click the settings icon in the upper
right corner to enter the device settings interface.
Reminder
When it is turned on, if someone rings the doorbell or calls loudly,
you will receive a notification.
Share QR Code
If you have already installed the doorbell camera and want to
share it with friends and relatives, you can send the QR code to
them.
Delete Doorbell Device
The mobile device will not receive the notifications after you
delete the camera. But the camera still works and the other
connected mobile devices still able to receive the notifications.
Set up
Call reminding
QR code
删除设备
Deleting equipment
Call reminding
QR code
删除设备
Deleting equipment
4.PIR Detection Instructions
The device supports PIR infrared detection function, select
"infrared detection" in the setting menu.
5.Cloud Storage
In the XSHcam APP setting menu, choose storage managment,
and open Cloud Storage
Cloud Storage Description:
When the device is in sleep mode, PIR is triggered or the
doorbell button is pressed, the device will automatically upload
10 seconds of video to the cloud. Each device can record 20
event videos every day and provide a week of free loop
recording space for users.
Close: In this state, the device will not perform PIR detection.
Low: If a person is sensed for 7 seconds, the device will record
and call the mobile phone.
Medium: If a person is sensed for 5 seconds, the device will
record and call the mobile phone.
High: If a person is sensed for 1 seconds, the device will record
and call the mobile phone.
Note: In a crowded environment, it is recommended to turn off
or set the device to low sensitivity to extend the battery life.
Click the calendar icon in the
upper right corner
Select a date to see all cloud
videos of the current date.
Features
Technical Specification
Model
Resolution
Viewing angle
IR LED
Wi-Fi
Audio
Recording
Storage
Battery
Power consumption
Dimensions
Weight
SD-A01
1920*1080
1.7mm@F2.4/166°
4pcs*850mm
IEEE 802 11 b/ g/ n
Two-way talk with noise cancellation
Device TF Card recording
Cloud storage or 8G/16G/32G TF Card
2pcs 18650 batteries (not included)
Standby 200uA, Working 170mA
115 x 50 x 36mm/ 4.53” x 1.97” x 1.42”
150g / 5.29oz
- 19 -
6. Note for using
This device is powered by 2 pieces of 18650 batteries and is
expected to wake up 2000 times when fully charged (10 times
per day, about 6 months). Frequent wake-up will reduce usage
time. When the battery voltage is low, the APP will give a
prompt. Please charge the device in time after receiving the
prompt.
During the installation process, please make sure that the
network is normal in the installation environment, especially
when installing outdoors/outside the door. You need to check
whether the WiFi is covered. If the WiFi signal is weak, you need
to add a WiFi signal amplifier.
This device is a low-power smart product that can support APP
remote wakeup, PIR detection wakeup, and press the doorbell
to wake up. After each wakeup, it will automatically enter the
sleep state after working for 30 seconds.
1)
2)
3)
Two 18650 batteries
Mega HD pixels with ultra-thin 1.7MM wide-angle lens
Support phone wake up
Support to wake up the phone remotely within 1
second
2.4G Wi-Fi connection
High-quality two-way talk with noise cancellation
Support PIR infrared detection, when someone is
hovering at the door, immediately push the alarm
information to the mobile APP
Day and night mode is automatically switched,
whether it is day or night, the image is clearly visible,
protecting the safety of you and your family
Model: SD-A01
Aukey Technology Co.,Ltd
Room 102, Building P09, Huanan City Elec-trading Center,
Longgang District, Shenzhen, China
©Aukey Technology Co.,Ltd All right reserved.
Valkia and the Valkia logo are trademarks of
Aukey Technology Co.,Ltd, registered in the United States.
FCC ID: 2ATIH-SDA01
Infrared Light:When the environment is not bright enough,
infrared light can increase the brightness of the environment
Light Sensor: It can sense the environmental brightness value,
when the environmental brightness value is lower than 2Lux, the
doorbell will activate the infrared light
MIC:Record environmental sound and voice intercom
Doorbell Button:Notify users that someone is visiting
PIR Induction:When someone moves in front of the doorbell, it
can trigger a signal to the phone
Lens:Record video
Indicator Light:
Flash Blue: In configuration status;
Solid Red: The doorbell failed to connect to WiFi;
Solid Blue: The doorbell has successfully connected to WiFi;
Red and blue lights on together: The doorbell is connecting to
WiFi;
Speaker: Make system prompts and voice intercom
AC Input:Power the doorbell by connecting external power
supply with 2 AC input cables, no need to install batteries and
no need to remove the doorbell for charging
Reset Button:Long press for 5 seconds to restore factory settings
Battery Compartment:No need to connect to external power
supply when installing 2 pieces of 18650 batteries
Fixing Holes: Install the bracket on the wall with 4 screws
Anti-theft Screw Hole: Install anti-theft screws to prevent the
doorbell from being disassembled
Micro USB Port: After installing 2 pieces of 18650 batteries, you
can charge the doorbell via a 5V micro USB Port, the first
charging time is preferably more than 12 hours
TF Card Slot: TF card supports up to 32G
- 03 - - 04 - - 05 - - 06 - - 07 - - 08 - - 09 -
Product Diagram
Lens Infrared Light
Reset Button
Doorbell Button
MIC
PIR Induction
Light Sensor
Micro USB Port
TF Card Slot
Indicator Light
AC Input Holes
Fixing Holes
Battery Compartment
Installation Guide
Install the bracket on the wall with screws.
Connect the AC (16-24V) power cables to the
AC input holes ( If there is no AC power supply,
this step can be omitted).
If there is no AC power supply, please put two
18650 batteries into the battery compartment
and install the battery cover.
Long press the reset button for 5 seconds, wait
for the red indicator light to flash slowly.
Buckle the doorbell and bracket together,
tighten the anti-theft screw to complete the
installation.
1)
2)
3)
4)
5)
Downloading and Installing the App
Open the App Store (for iOS) or the Google Play Store (for
Android) on your mobile devices. Search for"XSH Cam" or
scan the following QR Code to download and install it to your
device.
1.
Setting up the App
Please make sure your doorbell is connected to a 2.4GHz
Wi-Fi network, not a 5GHz network.
Please make sure that the XSH Cam application has been
installed on your device.
Add Device: Please launch the XSH Cam application on your
mobile device and click "Add device".
2.
1)
Click “First installation equipment” to install the doorbell
camera.
2) Please wait for the system voice prompt "The camera is now
ready to begin pairing".
3) If you do not hear the voice prompt, please press the reset
button for 5 seconds, wait for the blue LED to light up, the
doorbell will restart and enter the configuration state.
4)
Device connection instructions
APP-AndroidApp Google playApp iOS
Anti-theft Screw Hole
POWER RESET
- 10 -
5)
AC Power
Cables
- 11 -
The phone will emit sound waves, please keep quiet at this
time, put the phone about 30cm from the doorbell, and wait
for the doorbell to configure the network. If the doorbell
cannot connect to the WIFI, please reset the doorbell and
repeat all steps (see the previous step, reset the doorbell).
6)
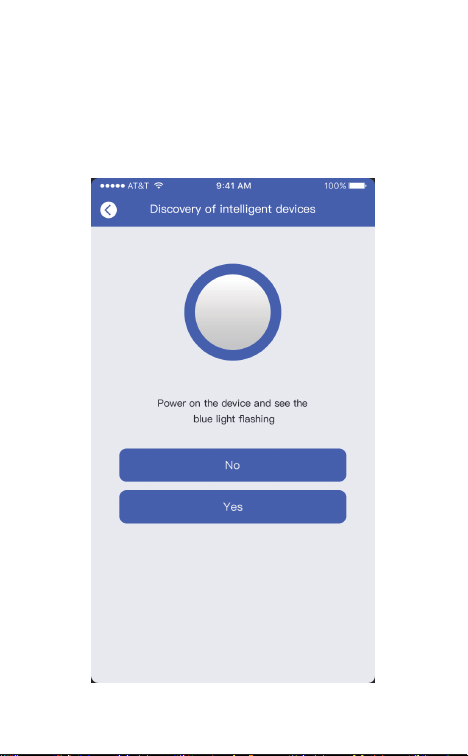
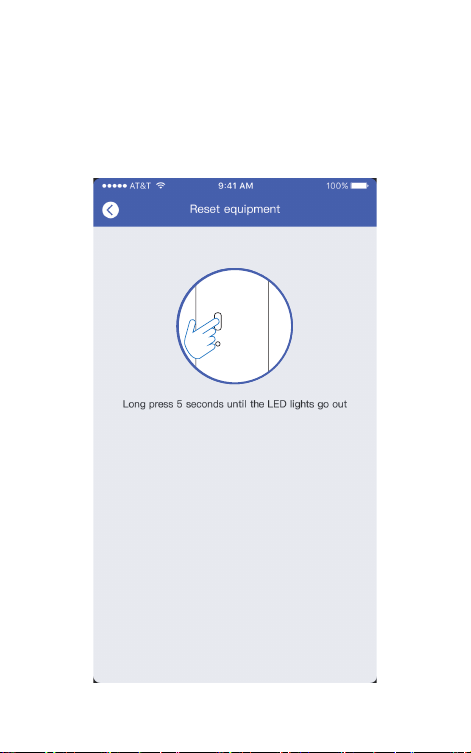
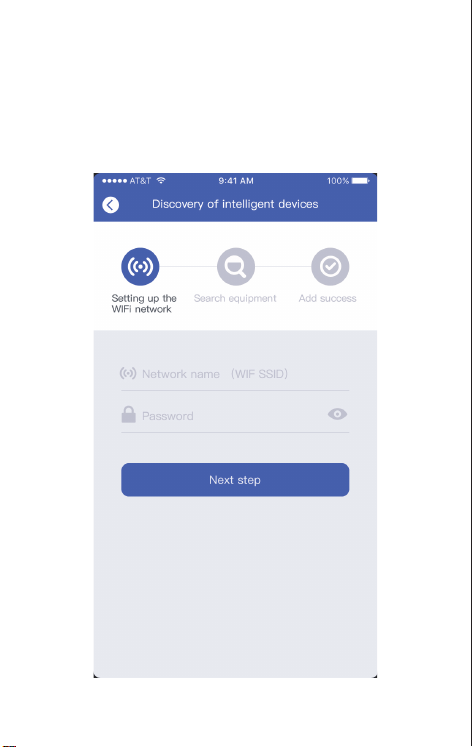
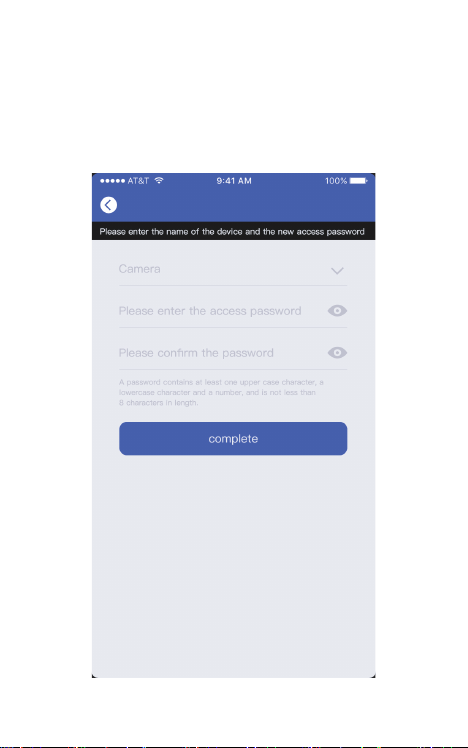
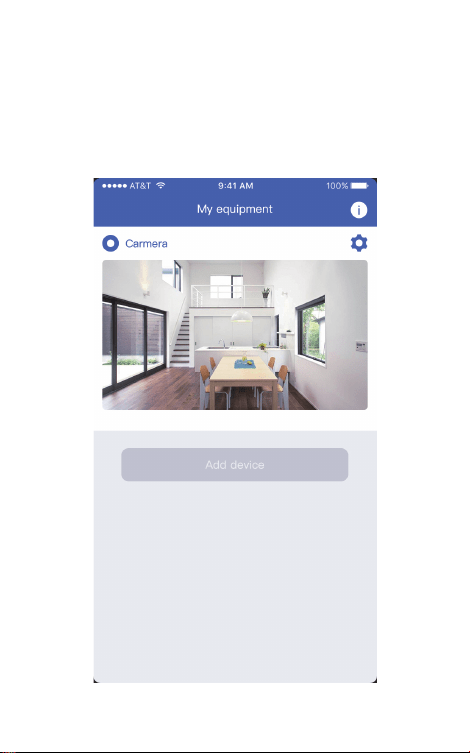
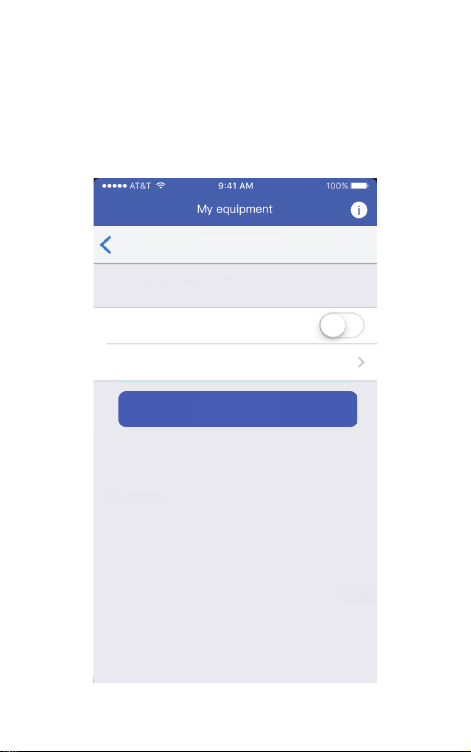
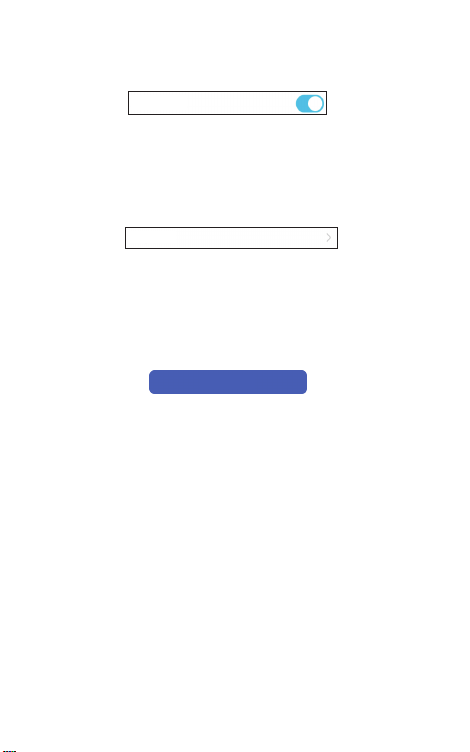
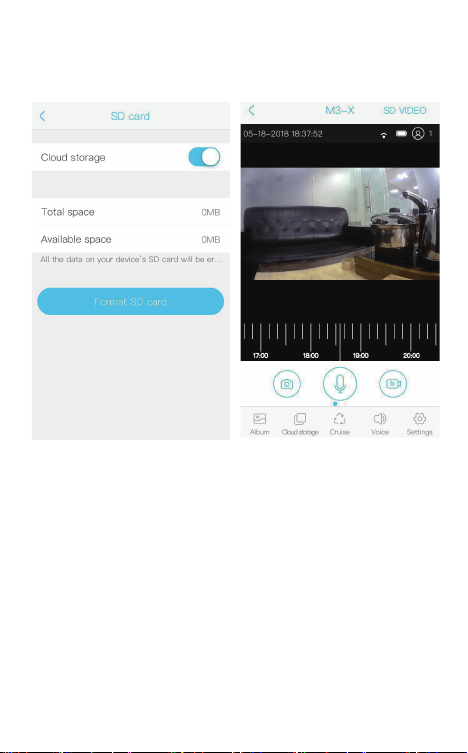
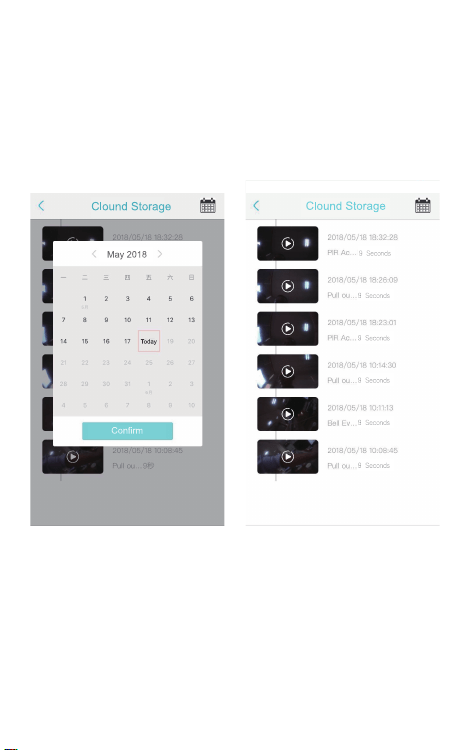
