
Visit Our Website
SCAN ME
PyleUSA.com
USER GUIDE
PSSUB101
10" Shallow Subwoofer System
Questions or Comments?
We are here to help!
Phone: 1.718.535.1800
PyleUSA.com/ContactUs
www.PyleUSA.com2 www.PyleUSA.com 3
READ ALL INSTRUCTIONS CAREFULLY BEFORE USING THIS PRODUCT.
RETAIN THIS OWNER’S MANUAL FOR FUTURE REFERENCE.
Features:
• 10" Shallow Subwoofer
• Compact & High-Powered Output
• Marine Grade Waterproof Rated Construction
• Weatherproof & Water-Resistant Housing
• High Performance in Small Spaces
• Ensuring deep and impactful bass tones
• Ecient Low-Frequency Sound Wave Conversion
• Built with marine-grade materials and an IPX-rated Construction
• Easy Installation in UTV vehicles and boats
• Trail and Sailing Ready
• Completely Waterproof
• Quick Connect Speaker Terminal
• Designed for Custom Audio Car, Truck, and Mobile Vehicle Applications
• Compatible with Sealed Enclosure Speaker Box Audio Setup
• Impressive Bass Response, Low-Resonance Frequency Output
Technical Specs:
• Speaker Size: 10’’ -inch (Each)
• Passive Radiator:5’’ x 7” -Inches (x2)
• Speaker Style: Passive Subwoofer
• Universal Mounting Brackets Roll-Bar / Roll-Cage Diameter: 1.5” ~2” Inches
• Subwoofer Dimensions: 15.2’’ x 11’’ x 7.9’’ -inches, with Bracket (-Each)
What's in the Box:
• (1) 10'' Inch ATV/UTV Subwoofer
• (1) Speaker Connection Wire, 13' ft. (Built-in Subwoofer)
• (1) 2” Inch Aluminum Mounting Bracket (Pre-Installed on Subwoofer)
• (1) 1.75” Inch Aluminum Mounting Bracket
• (1) 1.5” Inch Rubber Pad
• (1) 1.75” Inch Rubber Pad
• (1) 1.85” Inch Rubber Pad
• (1) 2” Inch Rubber Pad
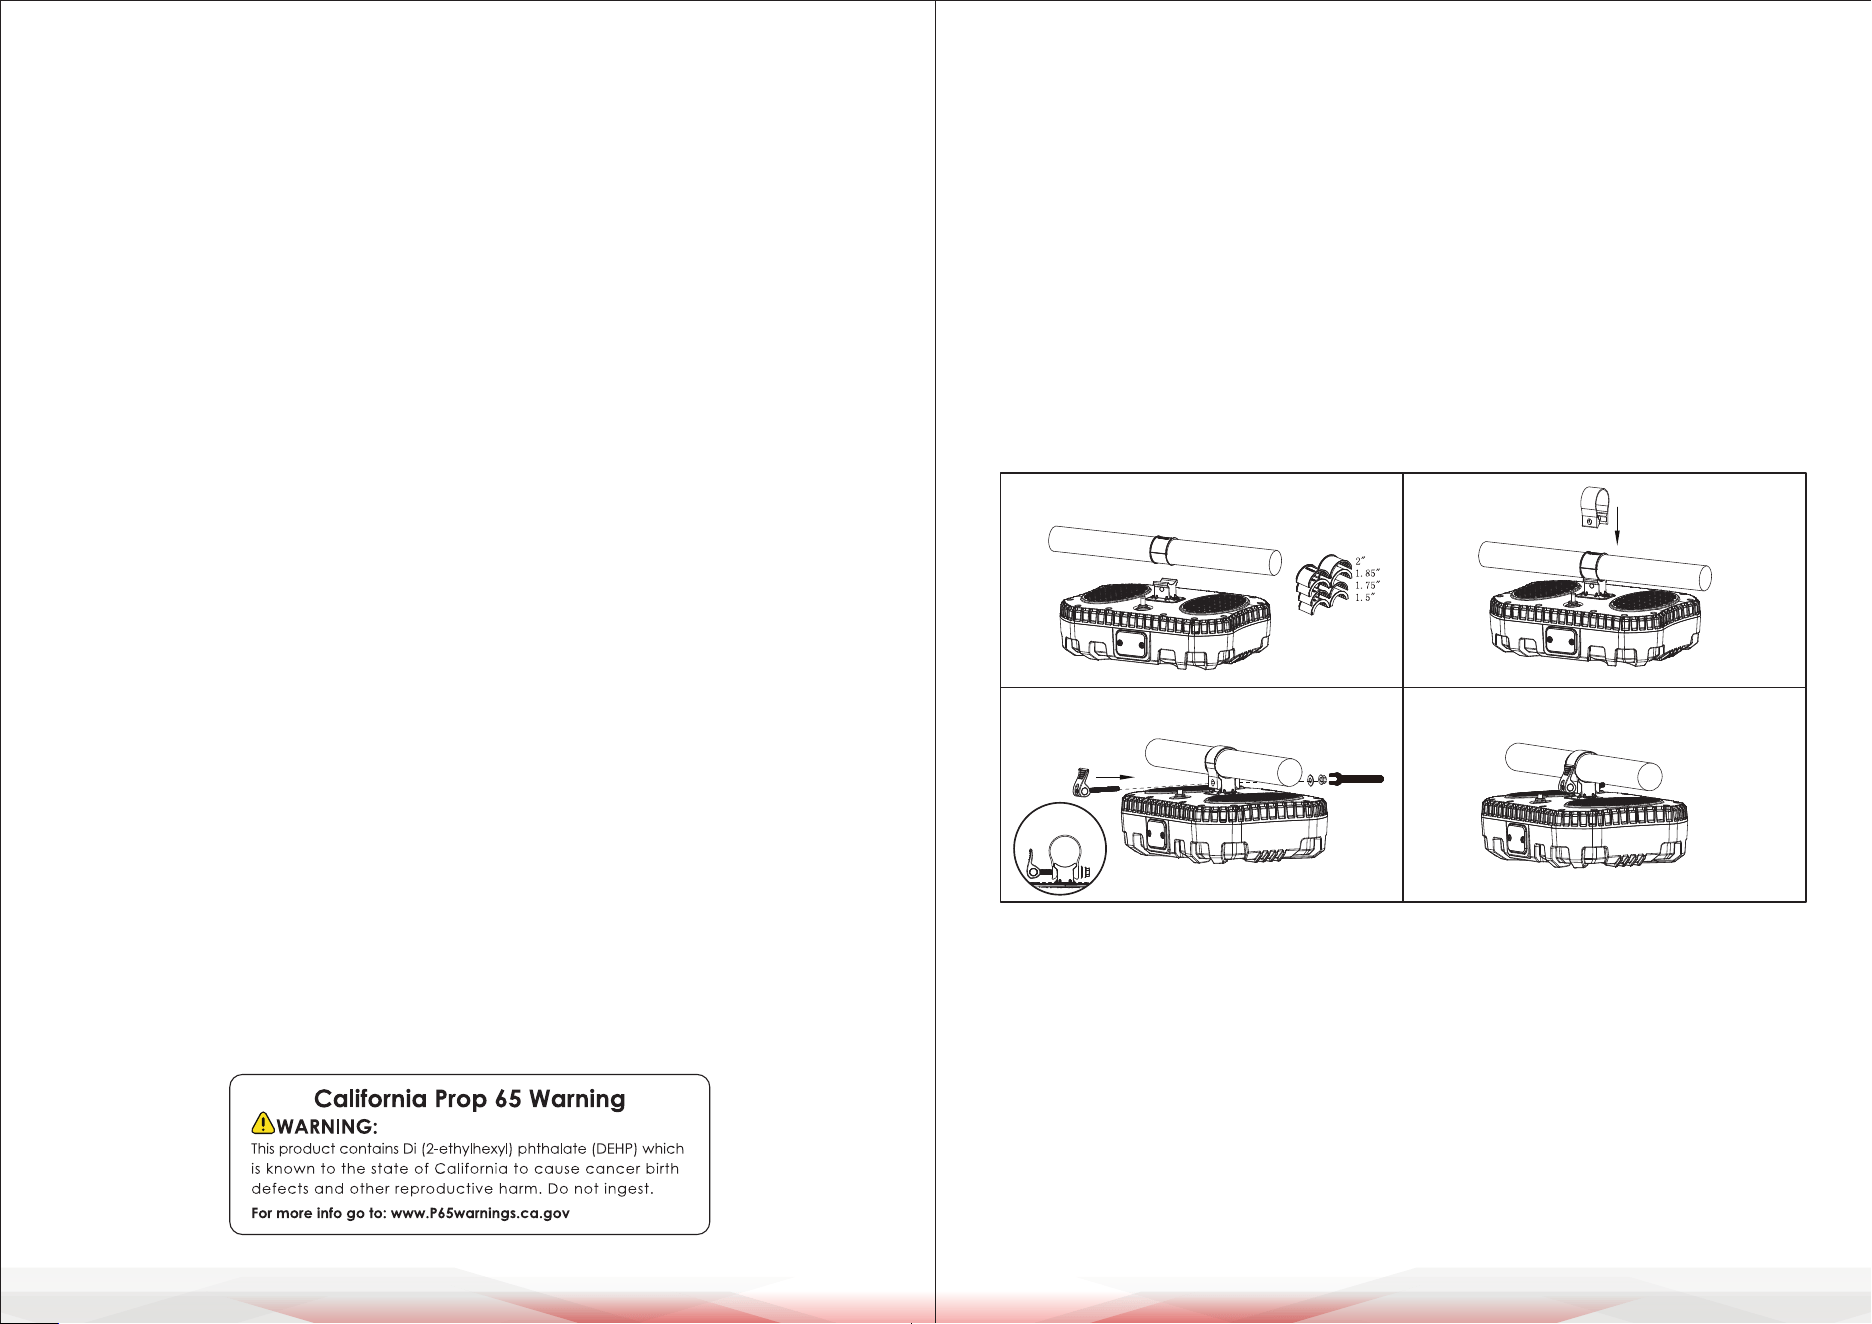
PSSUB101 Installation
Speaker Mounting suggestion as below:
Flat Mounting
Step 1: Install the PSSUB101 in a safe and appropriate place. Select a rubber
gasket of the appropriate size, place it face down, and t it on the
handlebar of the vehicle or boat.
Step 2: Snap the appropriately sized aluminum ring mounting bracket into the
mounting bracket base.
Step 3: Lock the handle screw into the aluminum ring and bracket base, then
x the other end with a non-slip washer and ange nut. Tighten the
ange nut to ensure that the subwoofer can be safely and reliably xed
on the bar.
Step 4: The PSSUB101 Flat Mounting is installed.
STEP 1
STEP 2
STEP 4 STEP 5

www.PyleUSA.com4 www.PyleUSA.com 5
362.2 mm (14.3”)
386.6 mm (15.2”)
118.5 mm (4.7”)
386.6 mm (15.2”)
280.0 mm (11.0”)
200.7 mm (7.9”)
Monitor Mounting Monitor Mounting
Step 1: Install the PSSUB101 in a safe and appropriate place.
Use a Phillips screwdriver to remove two screws from the bracket base.
Step 2: Use a Phillips screwdriver to remove two screws from the plastic nameplate.
Step 3: Lock the plastic nameplate into the middle position.
Step 4: Lock the bracket base into the side position and lock it in place.
Step 5: Select an appropriately sized rubber gasket, place it face down, and t
it on the handlebar of your vehicle or boat.
Step 6: Snap the appropriately sized aluminum ring mounting bracket into the
mounting bracket base.
Step 7: Lock the handle screw into the aluminum ring and bracket base, and x
the other end with a non-slip washer and ange nut.
Tighten the ange nut to ensure that the subwoofer can be safely and
reliably xed on the bar.
Step 8: The PSSUB101 Monitor Mounting is installed.
PSSUB101 Dimensions
STEP 5 STEP 6
STEP 7
STEP 8
STEP 1 STEP 2
STEP 3
STEP 4
Register Product
Thank you for choosing PyleUSA. By registering your product,
you ensure that you receive the full benets of our exclusive
warranty and personalized customer support.
Complete the form to access expert support and to keep
your PyleUSA purchase in perfect condition.