Instruction Booklet
Model: AF2103
XXL digital air fryer
8 liters/8.5 quarts

IMPORTANT SAFEGUARDS
When using electrical appliances, basic safety precautions should
always be followed, including the following:
1. Read all instructions.
2. DO NOT touch hot surfaces. Use handles or knobs.
3. To protect against electrical hazards, do not immerse cord, plugs, or
the appliance in water or other liquid.
4. Close supervision is necessary when any appliance is used by or
near children. Do not allow children to play with the appliance.
5. This appliance is not intended for use by persons (including children)
with reduced physical, sensory or mental capabilities or lack of
experience and knowledge, unless they have been given supervision
or instruction concerning the use of the appliance by a person
responsible for their safety.
6. Unplug from outlet when not in use and before cleaning. Allow to
cool before putting on or taking o parts, and before cleaning the
appliance.
7. DO NOT operate any appliance with a damaged cord or plug or after
the appliance malfunctions, or has been damaged in any manner.
DO NOT open the main housing of the product for servicing. Return
appliance to Salton or an authorized service representative for
examination, servicing, repair or adjustment.
8. The use of accessories or attachments not recommended by Salton
may cause re, electric shock or injury.
9. DO NOT use outdoors.
10. DO NOT let cord hang over edge of table or counter, or touch hot
surfaces.
11. DO NOT place on or near a hot gas or electric burner, or in a heated
oven.
12. DO NOT immerse the housing in water or any other liquid.
13. Extreme caution must be used when moving an appliance
containing hot oil or other hot liquids.
14. Always attach plug to appliance rst, then plug cord into the wall
outlet.
15. To disconnect, turn any control to “OFF”, then remove plug from wall
outlet.
16. DO NOT use appliance for other than intended use.
17. DO NOT leave unit unattended while in use.
2

18. DO NOT insert oversized foods or utensils into the appliance as they
may create a re or risk of electric shock. DO NOT overll the Basket
beyond the MAX ll line.
19. CAUTION: To reduce the risk or electric shock, cook only in the
provided removable basket.
20. Use on a heat resistant and even surface. Keep sides, back and
top of appliance at least 6” (15 cm) away from walls and any other
ammable items. DO NOT place on or near combustible materials
such as curtains, tablecloths or placemats.
21. The outside of the appliance will be hot during use. Use the Basket
Handle to remove the Basket to check food. Use oven mitts.
22. When the appliance stops the Air Fryer will be hot for a period of
time. DO NOT move or clean the appliance before it has completely
cooled.
23. Ensure that the Basket is fully closed while the Air Fryer is in
operation. CAUTION: After hot air frying, the Basket and the cooked
food are hot. Extreme caution must be used when handling the hot
Air Fryer Basket.
24. DO NOT place anything on top of the appliance.
25. DO NOT cover the air inlets or air outlets when the appliance is
working.
26. During air frying hot steam is released through the air outlets. Keep
your hands and face at a safe distance from the steam and from
the air outlets. Also be careful of hot steam when you pull out the
Basket when cooking.
SAVE THESE INSTRUCTIONS
HOUSEHOLD USE ONLY
POLARIZED PLUG
This appliance has a polarized plug (one blade is wider than the other).
To reduce the risk of electric shock, this plug will t in a polarized outlet
only one way. If the plug does not t fully in the outlet, reverse the plug.
If it still does not t, contact a qualied electrician. Do not modify the
plug in any way.
3

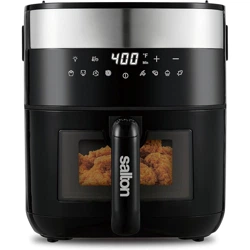
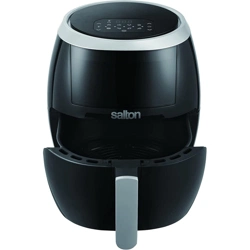
DESCRIPTION OF PARTS
1. Main Body
2. Air Inlet
3. Air Outlet (Back of Appliance)
4. Viewing Window
5. Basket
6. Basket Handle
7. Basket Rack
8. Control Panel
a) Digital Display
b) Increase Temperature – Up Arrow
c) Decrease Temperature – Down Arrow
d) French Fry Preset Button ( )
e) Reheat Preset Button ( )
f ) Chicken Preset Button ( )
g) Bake Preset Button ( )
h) Dehydrate Preset Button ( )
i ) Steak Preset Button ( )
j ) Fish Preset Button (
)
k) Vegetable Preset Button ( )
l ) Increase Time – Up Arrow
m) Decrease Time – Down Arrow
n) Cooking Indicator Lights (5)
o) ON/OFF Button ( )
4
4
a f gd e
ohc
b
m
l
i j k n
5
8
7
1
6
3
2

BEFORE FIRST USE
1. Read all instructions carefully and keep them for future reference.
2. Remove all packing material or labels on the product.
3. Wash the Basket and Basket Rack in warm soapy water with a non-
abrasive sponge. Dry thoroughly.
Wipe the inside and outside of the product with a damp cloth.
NOTE: NEVER IMMERSE THE MAIN HOUSING IN WATER OR
ANY OTHER LIQUID.
4. The Air Fryer is a fat-free fryer that uses hot air heating technology.
Never pour oil or fat into the Air Fryer.
5. IMPORTANT: During rst use, the Air Fryer may emit a slight odor
and smoke. This is normal and will only last a few minutes.
AUTOMATIC SHUT-OFF
This appliance is equipped with a timer. When the timer has reached 0,
the appliance will emit a “beep” sound and will shut o automatically. T
o
manually turn o the appliance, press the ON/OFF button.
HOW TO USE
General:
1. Place the Air Fryer on a at, level heat resistant surface. Place
away from walls and other appliances. It is recommended to leave
a minimum of 6 inches (15 cm) of space between the Air Fryer and
nearby objects.
2. Ensure that the power cord is not touching any hot surface.
3. Remove the Basket from the Main Body by grasping the Basket
Handle and pulling towards you. Place on a at, clean surface.
4. Place the Basket Rack into the Basket.
NOTE: The Basket Rack MUST be used at all times for proper air
circulation under food.
5. Place your desired ingredients onto the Basket Rack.
TIP: Do not overll Basket with food. To ensure proper cooking and
air circulation, do not ll above the MAX line.
IMPORTANT: If cooking food that may expand, make sure the
cooked capacity will not exceed the MAX capacity.
6. Slide the Basket back into the Main Body of the Air Fryer.
NOTE: The Control Panel will not work unless the Basket is in place.
7. Plug the Air Fryer into a 120V AC wall outlet.
NEVER place objects on top of the Main Body as this will block the
air intake and reduce the eciency of the hot air heating.
8. Follow the directions in the Manual Setting or the Preset Function
sections below.
5

9. The Air Fryer can be turned OFF at any time by pressing the ON/OFF
button.
10. Certain foods may require shaking or turning halfway through the
cooking process (please refer to the Cooking Guide). To shake or
turn your ingredients, pull out the Basket using the Basket Handle.
Shake or turn the ingredients using non-metallic utensils and replace
the Basket in the Main Body.
CAUTION: Always use oven mitts when handling your Air Fryer
Basket.
11. Once the timer has nished and if you require additional air
frying time, adjust the temperature and set the timer for 5 minute
increments until you reach the desired results.
12. Excess oil drippings from food will be collected in the bottom of the
Basket below the Basket Rack.
WARNING: Extreme caution is required when handling the Basket.
Remove the Basket and empty the ingredients to a serving bowl
or plate. NOTE: Do not turn the Basket and Basket Rack over
completely as any excess oil that has been collected at the bottom
will also be poured out with the ingredients.
CAUTION: When removing the Basket keep hands and face away
from the opening to avoid hot air or steam.
13. If desired, rell the Basket and continue with subsequent batches.
Manual Setting:
a) Press the ON/OFF Button
b) The default temperature and time is 370ºF and 15 minutes.
c) To adjust the temperature, press the Increase or Decrease
Temperature Arrows on the left side of the Control Panel. To adjust
the time, press the Increase or Decrease Timer Arrows on the right
side of the Control Panel.
d) Press the ON/OFF Button to begin cooking. The 5 Cooking Indicator
Lights will ash across the display.
Preset Functions:
a) Press the ON/OFF button to turn on the appliance.
b) Press the desired Preset Button. The default settings are in the chart
below.
NOTE: If you wish to adjust the temperature or timer for any of
the preset functions, ensure the desired preset function has been
selected and adjust the temperature by pressing the Increase or
Decrease Temperature Arrows on the left side of the Control Panel.
To adjust the time press the Increase or Decrease Time Arrows on
the right side of the Control Panel.
6
c) To begin cooking, press the ON/OFF button.
The chosen preset function icon and the 5 indicator lights will ash
continuously to conrm the setting. The display will show the
temperature and the timer will begin to countdown. When the timer
reaches 0, the appliance will beep and automatically shut o.
NOTE: You may increase or decrease the temperature or time
during the cooking process by pressing the Increase or Decrease
Temperature Arrows or Time Arrows. It is not required to press
the ON/OFF button after increasing or decreasing the time or
temperature during the cooking cycle.
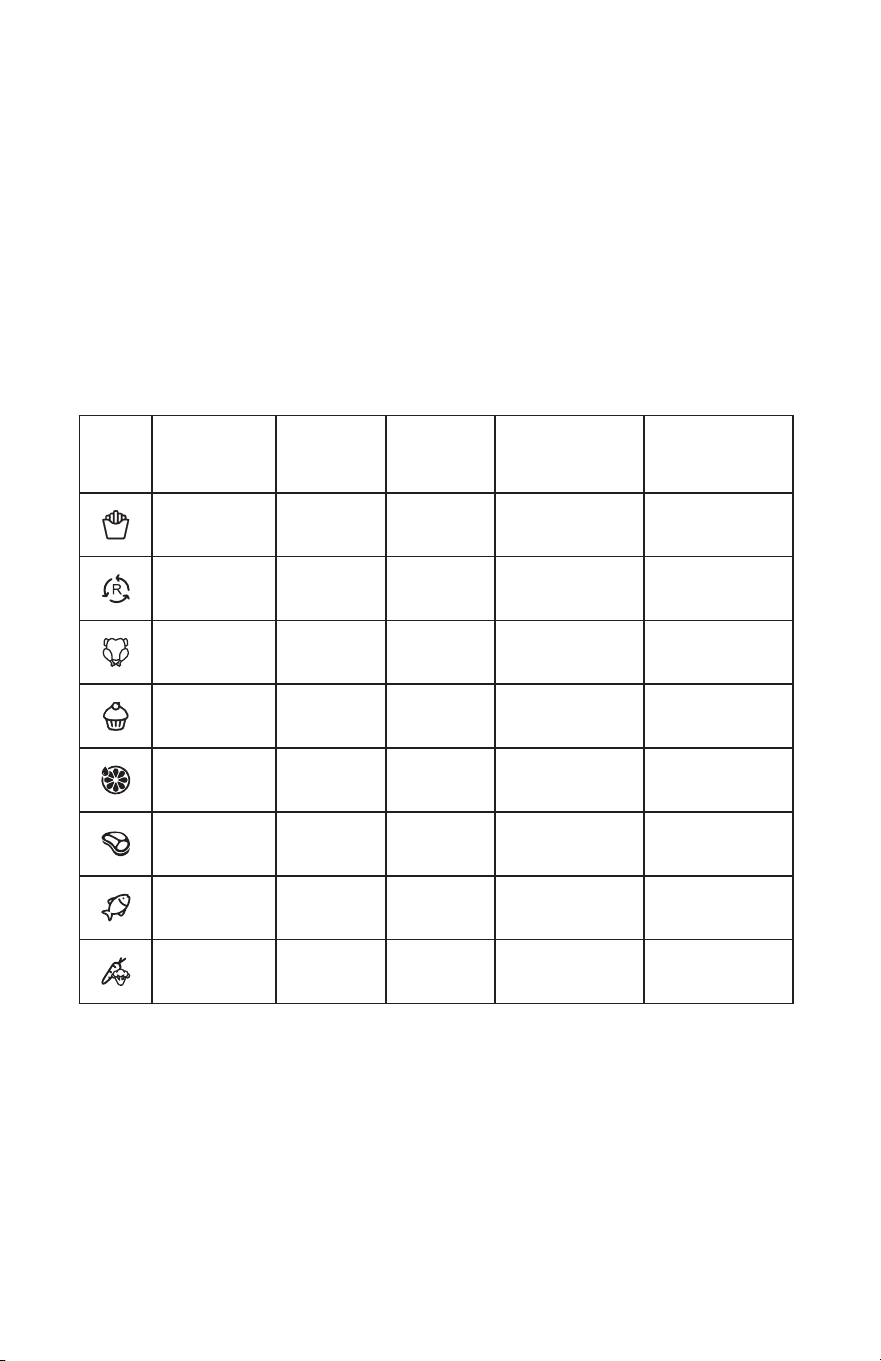
8 Presets - Default times and Temperatures
ICON FUNCTION
DEFAULT
COOK
TIME
DEFAULT
COOK
TEMP
ADJUSTABLE
TEMP
RANGE
ADJUSTABLE
TIME
RANGE
Fries
-Fresh
25 mins 400ºF 150-400ºF 1 - 60 mins
Reheat 15 mins 300ºF 150-400ºF 1 - 60 mins
Chicken 20 mins 370ºF 150-400ºF 1 - 60 mins
Bake 25 mins 320ºF 150-400ºF 1 - 60 mins
Dehydrate 6 hours 130ºF 120-170ºF 1 – 12 hrs
Steak 12 mins 380ºF 150-400ºF 1 - 60 mins
Fish 10 mins 360ºF 150-400ºF 1 - 60 mins
Vegetables 20 mins 390ºF 150-400ºF 1 - 60 mins
7
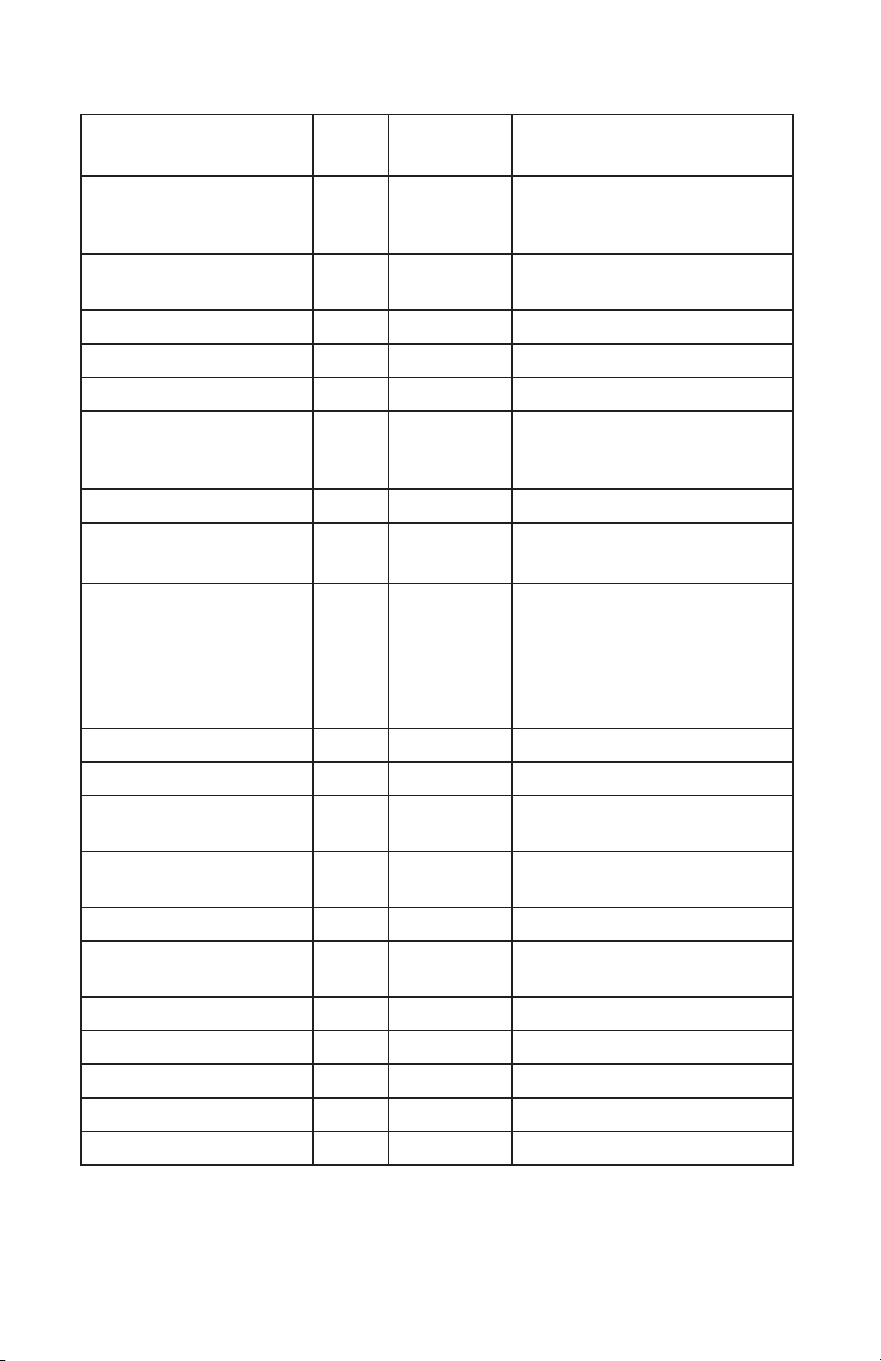
Cooking Chart
Food
Temp
ºF
Time/
Minutes
Fries Frozen
- Thin
- Thick
400
10 – 12
15 – 18
Shake halfway through
cooking for both thin and
thick
Fries – Fresh 400 25 - 28
Shake halfway through
cooking
Hash Browns 350 15 – 18
Pizza – frozen thin 400 12 - 14
Pizza – frozen thick 400 20 - 22
Potatoes - Baked
Russet Potatoes
Sweet Potatoes
400
40 – 45
35 - 40
Spring Roll 350 8 – 11
Meat, Poultry & Fish
Chicken – whole
3 lbs.
370 35 - 40
Cook breast side down
for 30 minutes. Turn to
breast side up for 10
minutes or until internal
temperature reads 165ºF
on a meat thermometer.
Chicken Breast 370 14 – 16
Chicken Leg 350 18 – 25
Chicken Nuggets –
frozen
400 10 - 12
Shake or turn halfway
through cooking
Chicken Wings 400 20 - 22
Shake or turn halfway
through cooking
Hamburger 350 9 – 11
Steak 380 8 - 12
1” thick steaks. Turn
halfway through.
Pork Chops 360 10 - 14
Sausage 350 13 – 15
Skewered meat 400 10 – 13
Fish - frozen 400 8 - 10
Shrimp 350 6 - 8
NOTE: All times are approximate, depending on the size and weight of
food.
8
PLEASE NOTE:
It is recommended that meat and poultry be cooked to the following
internal temperatures to be sure any harmful bacteria has been killed.
Always check the results with an instant read thermometer before serving,
especially when cooking larger pieces of meat.
Ground Turkey/Chicken - 165˚F/74˚C
Ground Lamb, Pork, Veal - 160˚F/71˚C
Fresh Beef, Veal, Lamb - 145˚F/63˚C
Fresh Pork - 160˚F/71˚C
Re-heating meat & poultry - 165˚F/74˚C
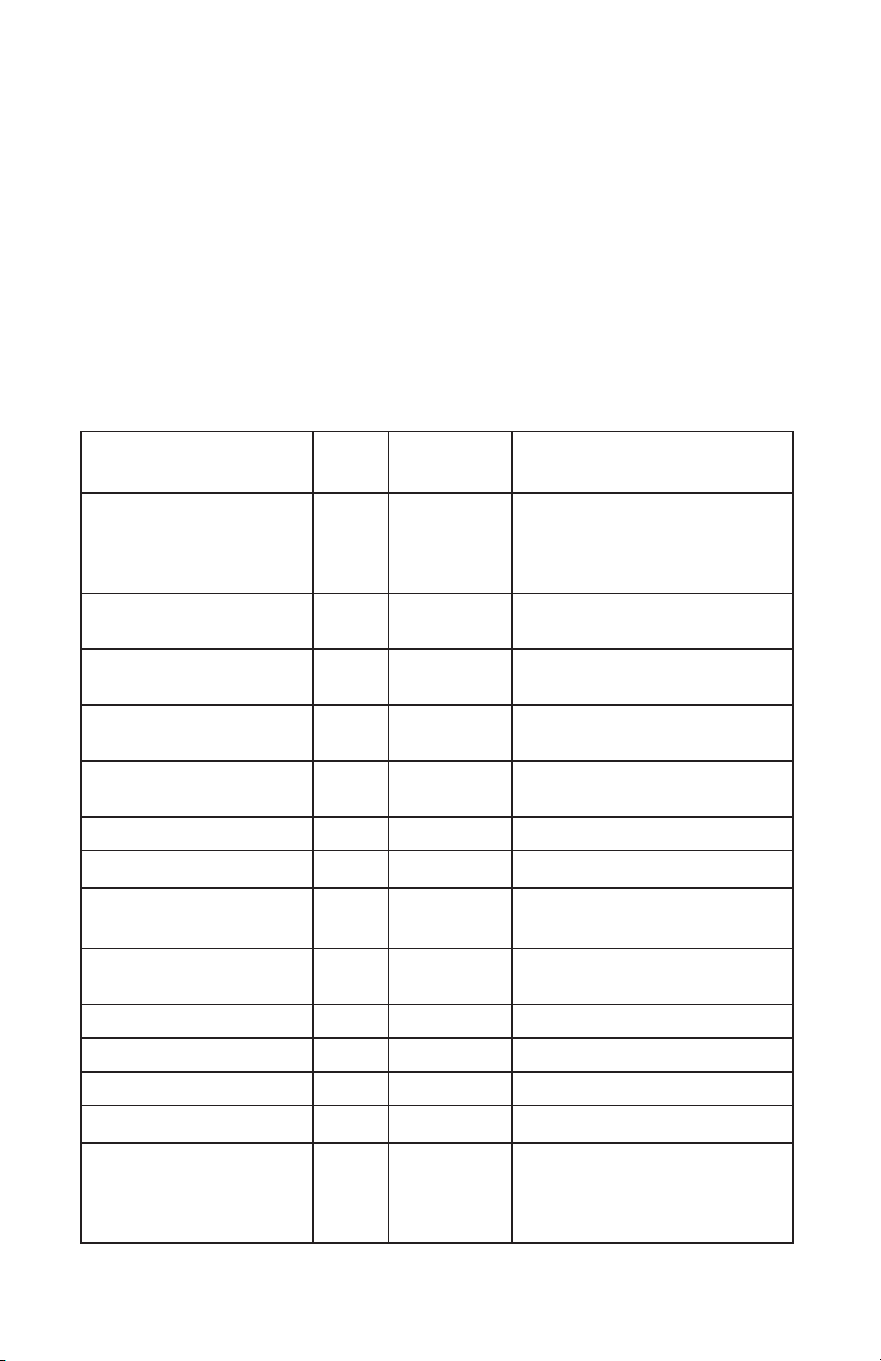
Dehydrator Chart
Fruits
Temp
ºF
Time/
Hours
Preparation
Apple slices 130 7-8
Remove core and slice
into 1/8” slices. Rinse in
lemon water and dry on a
paper towel.
Banana 130 8-10
Peel and slice into ½”
slices
Mango 130 6-7
Peel and remove pit.
Slice 3/8” thick.
Pineapple 130 6-8
Remove outer skin, core
and slice 3/8” thick.
Strawberries 130 6-8
Wash and dry. Cut into
½” slices.
Vegetables
Asparagus 130 6-8
Wash and dry. Cut into 1
inch pieces.
Fresh Herbs 130 4-6
Rinse and pat dry.
Remove stems.
Ginger 130 6 Cut into ½” slices.
Tomatoes 130 6-8 Cut into ¼” slices.
Meat Jerky
Beef 150 6-7
Cut into 1/8” to ¼”
slices against the grain.
Marinate for several hours
or overnight.
9

Chicken or Turkey 150 6-7
Cut into 1/8” to ¼”
slices against the grain.
Marinate for several hours
or overnight.
Salmon 165 6-8 Cut into ¼” slices.
HELPFUL HINTS
• Shaking or turning ingredients halfway through will improve results.
If food is intended to be crispy, air fry in smaller batches rather than
large amounts at one time.
• Wiping excess moisture from food before cooking encourages
browning and avoids excess smoke.
• DO NOT use aerosol cooking sprays as they may damage the non-
stick coating.
• Air Fry freshly breaded items in small batches to ensure food does
not touch, which allows even air ow.
• For best results, when cooking naturally high fat foods, such as
chicken wings or sausages, it may be necessary to empty excess oil
or fat from the frying basket drawer between batches.
• To make homemade French fries:
- Cut potatoes into strips and soak in water for 30 minutes.
- Drain then dry on a kitchen towel.
- Pour ½ tablespoon of olive oil into a bowl, add the potato strips
and stir until coated with oil.
- Fry, in a single layer, on the Fries Preset Function.
- Shake halfway through cooking.
• For consistent browning, arrange food in an even layer. If foods
overlap, shake them halfway through cooking.
• To convert recipes from a conventional oven, lower the temperature
by 30 degrees and check food often to avoid overbrowning.
• The air fryer can be preheated for a few minutes (3 – 5) to help food
cook faster and obtain crispier results. Reduce cooking time by 2 or
3 minutes.
• DO NOT use loose batters that would normally be used in a
traditional fryer.
CARE AND CLEANING
1. Ensure that the appliance is OFF.
2. Unplug from the wall outlet.
3. Allow the appliance to cool completely before cleaning. Metal parts
will retain residual heat for a signicant time after the appliance has
been turned o. Always take great care to ensure that the appliance
has cooled completely.
10

11
4. The Inner Housing, Basket and Basket Rack have a non-stick
coating. Do not use metal kitchen utensils or abrasive cleansers or
cleaning products as this may damage the non-stick coating.
5. The Basket and Basket Rack can be placed in the dishwasher.
WARNING: Do not wash or immerse the Main Housing, in water
or any other liquid or in the dishwasher.
6. The outer surface of the Main Housing can be cleaned by wiping
with a damp cloth. Dry with a soft cloth.
7. Clean the inside of the Air Fryer with a non-abrasive sponge
dampened in warm soapy water. Wipe with a clean cloth and allow
to dry completely.
8. All servicing, other than cleaning, should be performed by an
authorized service representative. See Warranty section.

12
A short supply cord is provided to reduce the hazards of becoming
entangled in or tripping over a long cord. Extension cords may be used
if care is exercised in their use. If an extension cord is used, the marked
electrical rating of the detachable power-supply cord or extension cord
should be at least as great as the electrical rating of the appliance. If
the appliance is of the grounded type, the extension cord should be a
grounded 3-wire cord. The extension cord should be arranged so that
it will not drape over the counter top or table top, where it can be pulled
on by children or tripped over.
This warranty does not include the cost of shipping, which is to be borne by the
customer.
LIMITED WARRANTY
**The original sales receipt is the only acceptable proof of purchase**
Salton Appliances (1985) Corp. warrants that this appliance shall be free from defects
in material and workmanship for a period of one (1) year from the date of original
purchase. Salton Appliances (1985) Corp., at its sole discretion during this warranty
period, will repair or replace a defective product or issue a refund. Any refund to the
purchaser will be at a pro-rated value based on the remaining period of the warranty.
All liability is limited to the amount of the purchase price. This warranty covers normal
domestic usage and does not cover damage which occurs in shipment or failure
which results from alteration, accident, misuse, abuse, glass breakage, neglect,
improper maintenance, use contrary to the operating instructions or commercial use.
This warranty is not available to retailers or other commercial purchasers or owners.

TO OBTAIN PROMPT WARRANTY SERVICE:
Contact one of our many Service Centers found on our website
www.salton.com/customer-care
or
Securely package and return the appliance to us. Please enclose:
• Original proof of purchase
• The completed form below with a $12.50 Return Shipping & Handling
fee – either a cheque, money order or credit card (A personal cheque
will delay return shipping by 2-3 weeks)
For added protection, we suggest that you use an insured delivery
service with tracking information when returning your product. Salton
Canada will not be held responsible for in-transit damage or for
packages that are not received.
Name
Address
City Prov/State Postal/Zip Code
Daytime Phone No. Email
Product defect:
Type of payment Cheque/Money Order □ Visa □ MasterCard □
Name on card Expiry Date CSV No
Card No.
To contact our Customer Service Department:
SALTON CANADA Telephone: 514-685-3660
Dollard-des-Ormeaux, Quebec H9B 2J5 Fax: 514-685-8300
Canada www.salton.com