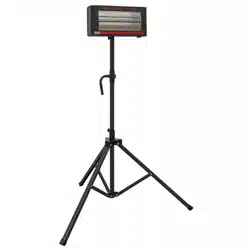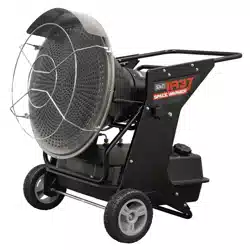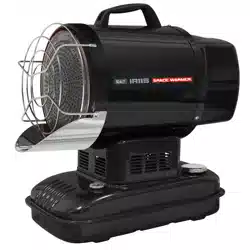
INFRARED SPACE HEATER KEROSENE/DIESEL
HEATER 51,000BTU/HR SPACE WARMER®
MODEL NO: IR115
Thank you for purchasing a Sealey product. Manufactured to a high standard, this product will, if used according to these instructions,
and properly maintained, give you years of trouble free performance.
IMPORTANT: PLEASE READ THESE INSTRUCTIONS CAREFULLY. NOTE THE SAFE OPERATIONAL REQUIREMENTS, WARNINGS & CAUTIONS. USE
THE PRODUCT CORRECTLY AND WITH CARE FOR THE PURPOSE FOR WHICH IT IS INTENDED. FAILURE TO DO SO MAY CAUSE DAMAGE AND/OR
PERSONAL INJURY AND WILL INVALIDATE THE WARRANTY. KEEP THESE INSTRUCTIONS SAFE FOR FUTURE USE.
This product is not suitable for primary heating purposes.
This product is only suitable for well insulated spaces or occasional use.
1. SAFETY
WARNING! Trained operators only. Read the manual before use.
1.1. ELECTRICAL SAFETY
WARNING! It is the user’s responsibility to check the following:
9 Check all electrical equipment and appliances to ensure that they are safe before using.
9 Inspect power supply leads, plugs and all electrical connections for wear and damage.
9 Ensure that the insulation on all cables and on the appliance is safe before connecting it to the power supply.
8 DO NOT use worn or damaged cables, plugs or connectors.
9 EnsurethatanyfaultyitemisrepairedorreplacedimmediatelybyaSealeyqualiedtechnician.
9 Ifthecableorplugisdamagedduringuse,switchotheelectricitysupplyandremovefromuse.
9 Ifthesupplycordisdamaged,itmustbereplacedbythemanufacturer,itsserviceagentorsimilarlyqualiedpersonsinordertoavoid
a hazard.
9 SealeyrecommendthatanRCD(ResidualCurrentDevice)isusedwithallelectricalproducts.
Important:Ensurethatthevoltageratingontheappliancesuitsthepowersupplytobeusedandthattheplugisttedwiththe
correct fuse.
8 DO NOT pull or carry the appliance by the power cable. DO NOT pull the plug from the socket by the cable.
9 Theremovaloftheplughastobesuchthatanoperatorcancheckfromanyofthepointstowhichhehasaccessthattheplugremains
removed.
1.2. GENERAL SAFETY
9 Childrenfromage8yearsandabove,personswithreducedphysical,sensory,ormentalcapabilitiesthosewithlackofexperienceand
knowledgecanusetheappliance,iftheyhavebeengivensupervisionorinstructionconcerninguseoftheapplianceinasafewayto
understandthehazardsinvolved.
9 Children shall NOT play with the appliance.
9 Cleaningandusermaintenanceontheapplianceshallnotbemadebychildrenwithoutsupervision.
9 Theapplianceshallbedisconnectedfromitspowersourceduringserviceandwhenreplacingparts.
WARNING! The appliance contains UV emitter. DO NOT stare at the light source.
WARNING!Failuretocomplywiththeprecautionsandinstructionsprovidedwiththisheater,canresultindeath,seriousbodilyinjury
andpropertylossordamagefromhazardsofre,explosion,burn,asphyxiation,carbonmonoxidepoisoning,and/orelectricalshock.
Onlypersonswhocanunderstandandfollowtheinstructionsshoulduseorservicethisheater.Ifyouneedassistanceorheater
information such as an instruction manual,labels, etc,contact the manufacturer.
WARNING!Notforuseinresidentiallivingareasorinnon-adequatelyventilatedenclosedspaces.
WARNING!Carbonmonoxidecankillyou.Usingaportableheaterinsideatent,RV,camper,vehicle,shelterorotherenclosedareas
canproducedeadlycarbonmonoxide.
WARNING! DO NOTusepetrol,naphthaorvolatilefuels.
8 STOPheaterbeforeaddingfuel.Alwaysrefueloutdoorsawayfromopenames.
8 DO NOTuseanexternalfuelsource.
8 DO NOTuseheaterwhereammableliquidsorvapoursmaybepresent.
8 DO NOT start when chamber is hot.
8 DO NOTstartheaterwhenexcessfuelhasaccumulatedinthechamber.
8 DO NOT place cooking utensils on top of the heater.
WARNING!Notsuitableforuseonwoodenoorsorothercombustiblematerials.Inusetheheatershouldrestonsuitableinsulating
materialatleast26mmthick,extending1metreormorebeyondtheheaterinalldirections.
1.2.1. OPERATIONAL SAFETY
9 Indirect-Firedmeansthatallofthecombustionproductsentertheheatedspace.Eventhoughthisheateroperatesverycloseto100
percentcombustioneciency,itstillproducessmallamountsofcarbonmonoxide.Carbonmonoxide(calledCO)istoxic.COcanbuild
upinaheatedspaceandfailuretoprovideadequateventilationcouldresultindeath.Thesymptomsofinadequate
ventilationare:
• headache
• dizziness
• burning eyes and nose
IR115Issue:120/05/25
Original Language Version
© Jack Sealey Limited
Refer to
instructions
Warning
Electricity
Warning:
Hot surfaces
DonotcoverWearprotective
gloves
Use in well
ventilatedareas
Keep in dry area
protect from rain
• nausea
• dry mouth or sore throat
9 BesuretofollowadviceaboutventilationintheSafetysection.
9 Forced Air means that a blower or fan pushes the air through the heater. Proper
combustiondependsuponthisairow;therefore,theheatermustnotberevised,
modiedoroperatedwithpartsremovedormissing.Likewise,safetysystemsmust
notbecircumventedormodiedinordertooperatetheheater.Whentheheateris
to be operated in the presence of other people the user is responsible for
properly acquainting those present with the safety precautions and instructions, and
ofthehazardsinvolved.
9 Check the heater thoroughly for damage. Do not operate a damaged heater.
8 DO NOT modifytheheateroroperateaheaterwhichhasbeenmodiedfromits
original condition.
9 Forindooruseonly.Notforusewhereexposedtoweather.
9 Useinwellventilatedareas,provideatleast0.19m²ofopeningneartheoorand
0.19m²neartheceilingdirectlytooutdoors.Increaseairopeningsforeachadditionalheater.
9 Always keep combustibles, like paper and wood at least 2.4 m from the heater outlet and 1.2 m from the top, sides and inlet. Locate
3.0mfromcanvasorplasticcoveringsandsecurethemtopreventappingmovement.
WARNING!Duetothehighsurfaceandexhausttemperatures,adultsandchildrenmustobserveclearancestoavoidburnsorclothing
ignition. DO NOTtouch.Keepchildren,clothing,andcombustiblesaway.Installtheheatersuchthatitisnotdirectlyexposedtowater
spray,rainand/orwater.
9 Neveruseinareasnormallyforhabitationand/orwherechildrenmaybepresent.
9 Operateonlyonastable,levelsurface.
8 DO NOT use with duct work. DO NOTrestrictinletorexit.
9 Useonlywithelectricalpowerspecied.
8 DO NOTmove,handle,orservicewhilehotorinoperation.
2. INTRODUCTION
Versatileinfraredmulti-fuelheaterdesignedtorunonkeroseneordiesel.Cleanburning,suitableforwell-ventilatedapplications.11L
Tankallowsapproximately6hrrunningtime,makingthisunitextremelyeconomical.Producesanoutputof51,000Btu/hr,heatingan
areaofapprox.350mtr³(12,500ft³).LEDdisplayforambientandthermostaticallycontrolledtemperature.Fuelgaugeandheavy-duty
fuelcap.Suppliedwithstainlesssteelheatdeectorwhichprotectstheoorfromheatdamagewhenused.Carryhandleforeasy
transportation.Safetyfeaturesincludeautomaticoverheatshut-oandtipoverprotection.
3. SPECIFICATION
Model No: .....................................................................IR115
Airow: ..................................................................... 400m³/h
Fuel Tank: ........................................................................ 11L
Fuel: ............................................................. Kerosene/Diesel
Fuse Rating: ......................................................................5A
Heated Area: ...............................................350m³(12,500ft³)
Motor Power:...................................................................65W
Weight: ........................................................................... 14kg
Output: ..................................................51,182Btu/hr(15KW)
Plug Type: ......................................................................3-Pin
Power Supply Cable Length: .......................................... 2.1m
RunningTimePerFilling(Maximum): .............................6hrs
Supply: ................................................................ 230V-0.6A
Transport Wheels: ............................................................. No
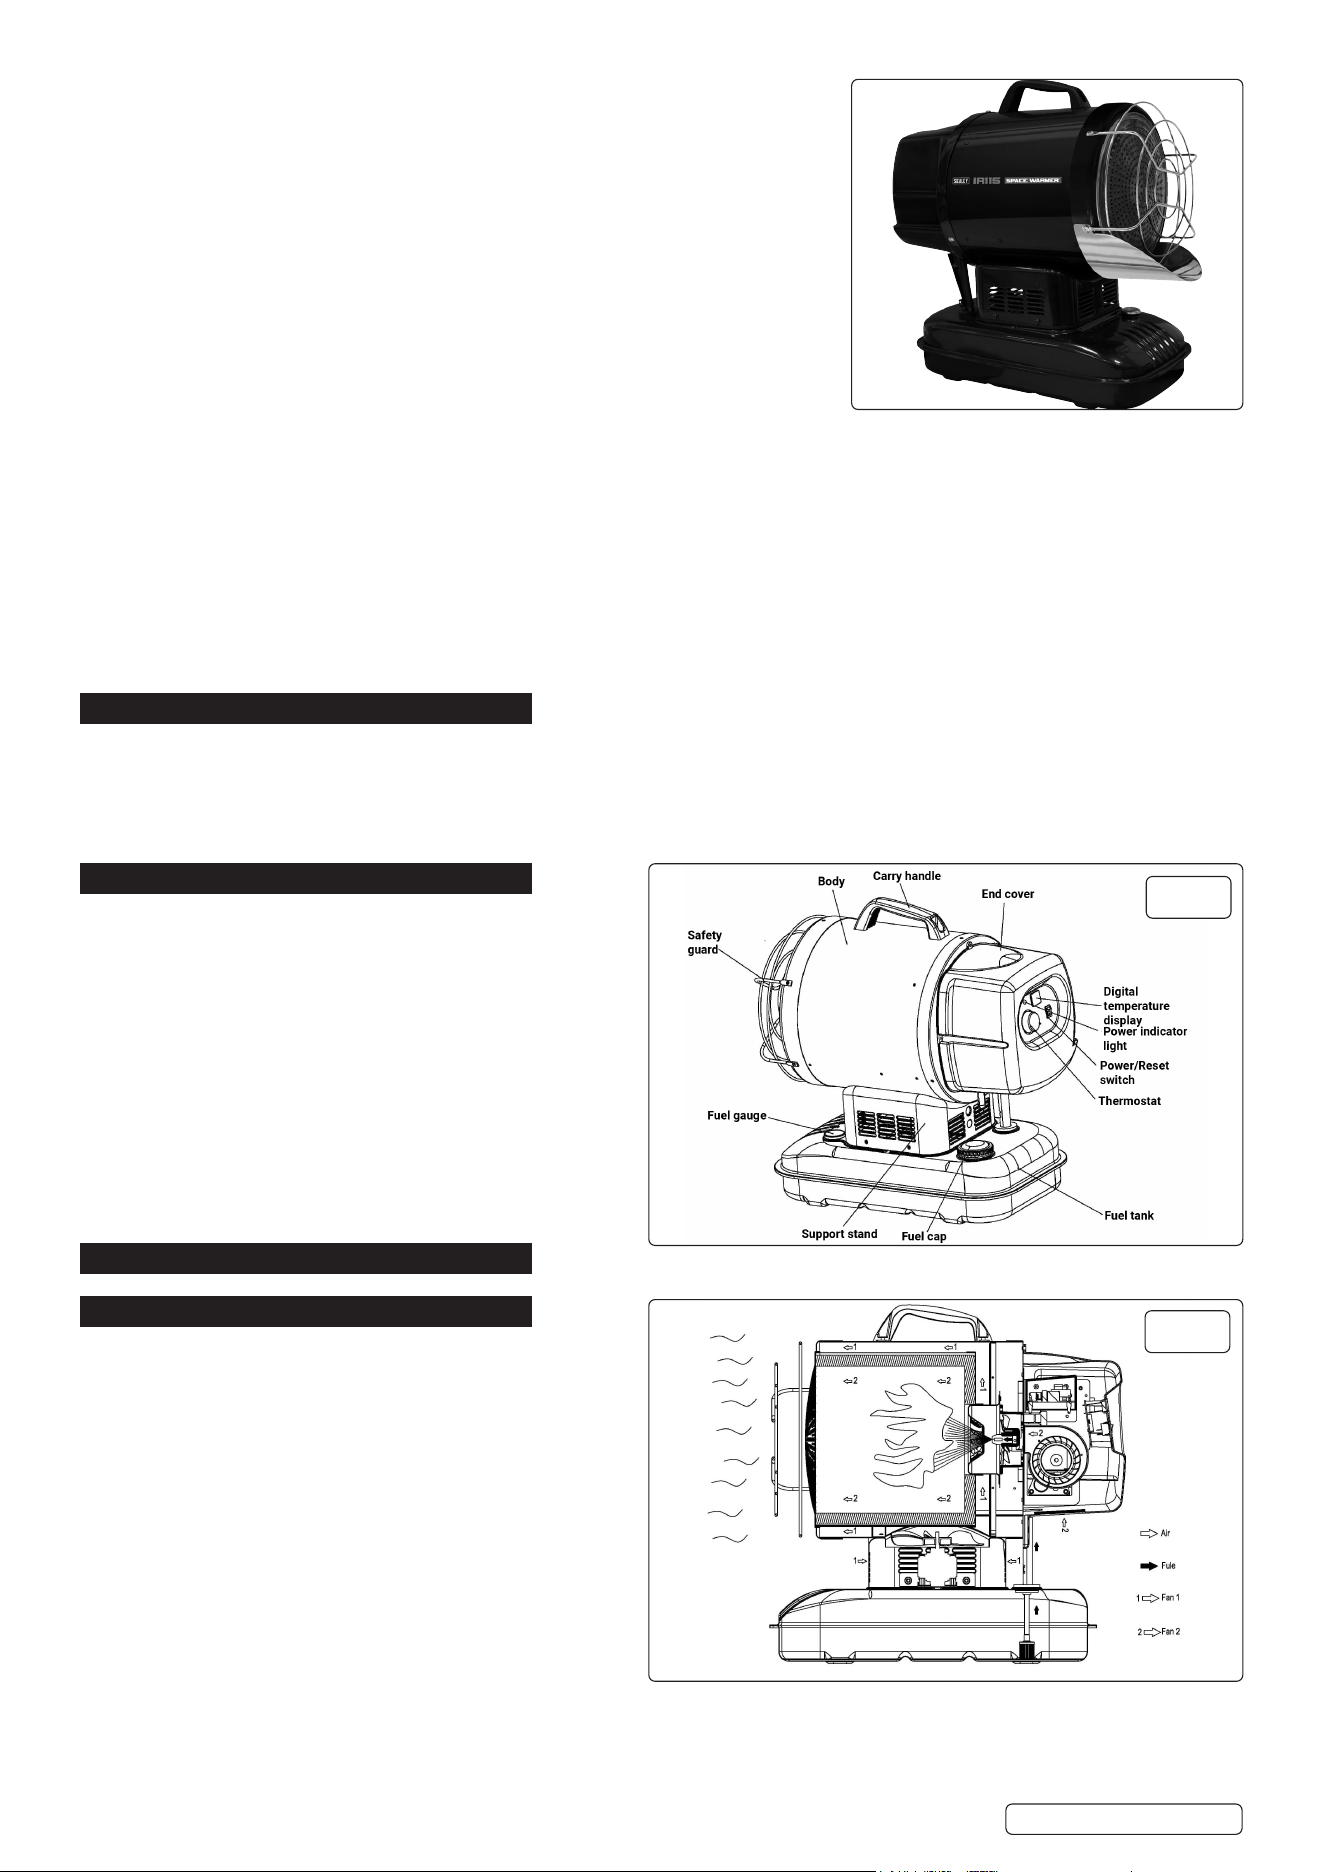
4. FEATURES SEE FIG.1
5. OPERATION
5.1. UNPACKING:
5.1.1. Removeheaterfromcarton.
5.1.2. Removeallprotectivematerialwhichmayhavebeen
applied to the heater for shipment.
5.1.3. Check the heater for possible shipping damage. If any
damage is found immediately contact Sealey.
NOTE:Savetheboxandpackagingmaterialsforfuture
storage.
5.2. FUELS
5.2.1. NEVER use fuel such as gasoline, benzene, alcohol, white
gas,campstovefuel,paintthinners,orotheroilcompounds
in this heater (THESE ARE VOLATILE FUELS THAT CAN
CAUSEAFIREOREXPLOSION).
8 DO NOT use kerosene that has been stored from one
seasontothenext.Kerosenedeterioratesovertime.OLD
KEROSENE WILL NOT BURN PROPERLY IN THIS HEATER.
5.3. PRINCIPLES OF OPERATION g.2:
FUEL SYSTEM: fuel in tank pressurized by electron magnetic pump, transferred into nozzle and atomized.
QUICK-FIRE IGNITION:High-voltagegeneratedbyignitiontransformer.
fig.
1
Original Language Version
© Jack Sealey Limited
fig.
2
IR115Issue:120/05/25
Currentgoesthroughtippositionofthetwoignitionneedles,whichwillprovideasparkandretheatomizedfuel.
AIR SYSTEM:Fan1onthebackoftheproductprovidestheoxygenforcombustionaswellastoblowouttheheatedair.
Fan 2 works to cool down the surface temperature of the product.
5.4. TEMPERATURE LIMIT CONTROL:ThisheaterisequippedwithaTemperatureLimitControldesignedtoturntheheatero
shouldtheinternaltemperaturerisetoanunsafelevel.Ifthisdeviceactivatesandturnsyourheatero,itmayrequireservice.Once
the temperature falls below the reset temperature, you will be able to start your heater.
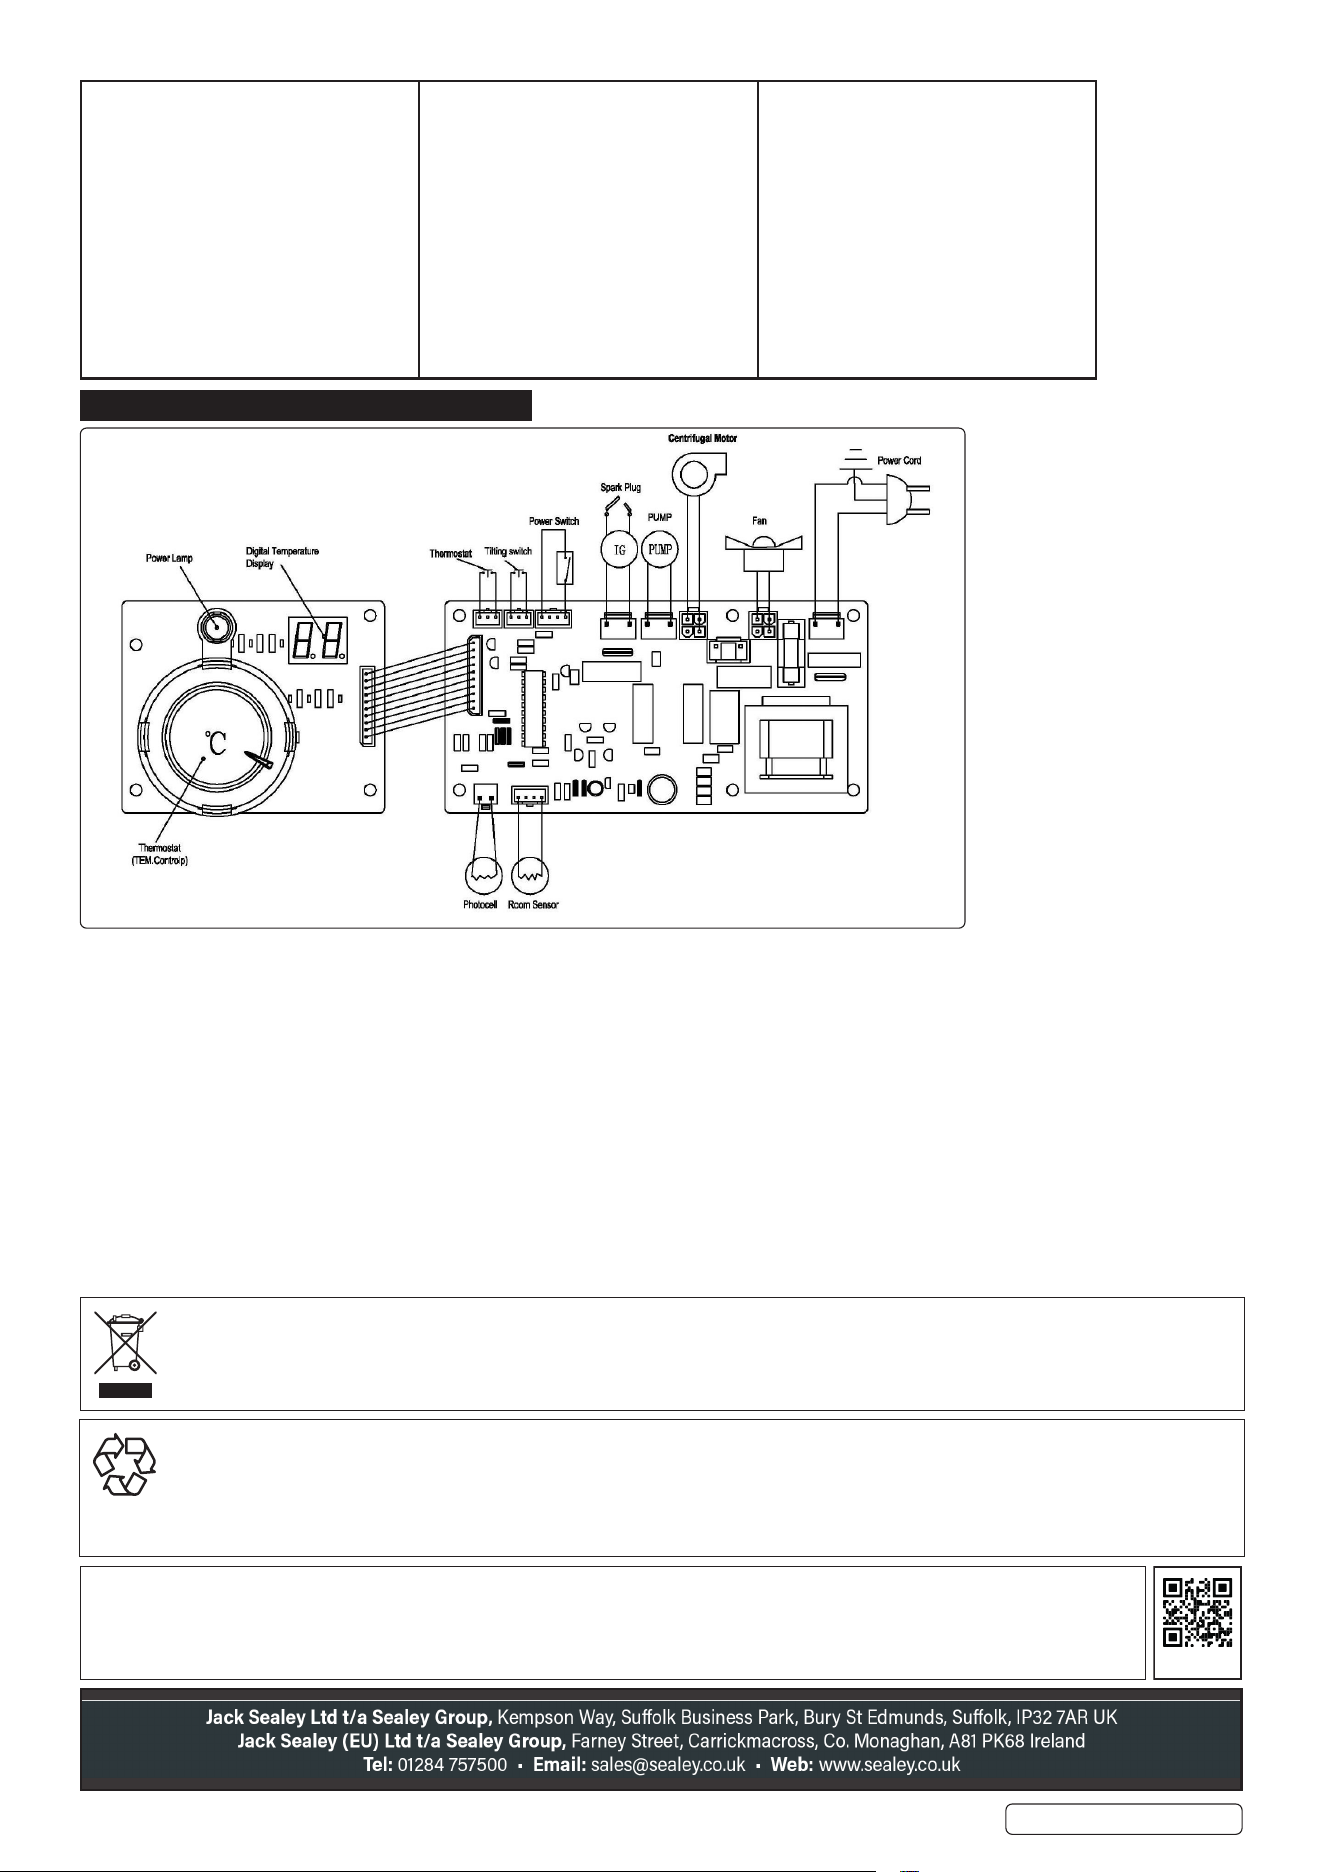
5.5. ELECTRICAL SYSTEM PROTECTION: The heater’s electrical system is protected by a circuit breaker that protects the system
componentsfromdamage.Iftheheaterfails,checkthefuserst,andreplaceifnecessary.
5.6. FLAME SENSOR:Theheaterusesaphotocellto“see”theameinthecombustionchamber.Shouldtheameextinguish,thesensor
willstopelectricalcurrentandtheheaterwillshuto.
5.7. ANTI-TOPPLING: Theproducthasananti-topplingswitchwhichwillshutdownoperationwhenproducttopples.
NOTE: The pump will make a noise when operated for the rst time (this also includes when started after refuelling). The
noise may last for 10 seconds. This process is the pump exhausting air. Please also note that if the pump works for a long
time without fuel, it will seriously reduce the life span of the unit.
5.8. FUELLING THE HEATER
CAUTION:NEVER FILL THE FUEL TANK INDOORS. ALWAYS FILL THE TANK OUTDOORS. BE SURE THAT THE HEATER IS ON
LEVEL GROUND WHEN FUELLING, AND NEVER OVERFILL THE FUEL TANK. NEVER REFUEL THIS HEATER WHILE IT IS HOT
OR OPERATING. FIRE OR EXPLOSION COULD RESULT.
WARNING!Starttheheateroutdoorsforthersttime.Thiswillallowanyoilsusedinthemanufacturingprocesstobeburnedoina
safeenvironment.Thisinitialburnshouldlastatleast10minutes.
5.9. VENTILATION
5.9.1. Risk of indoor air pollution. Use heater onlyinwellventilatedareas.
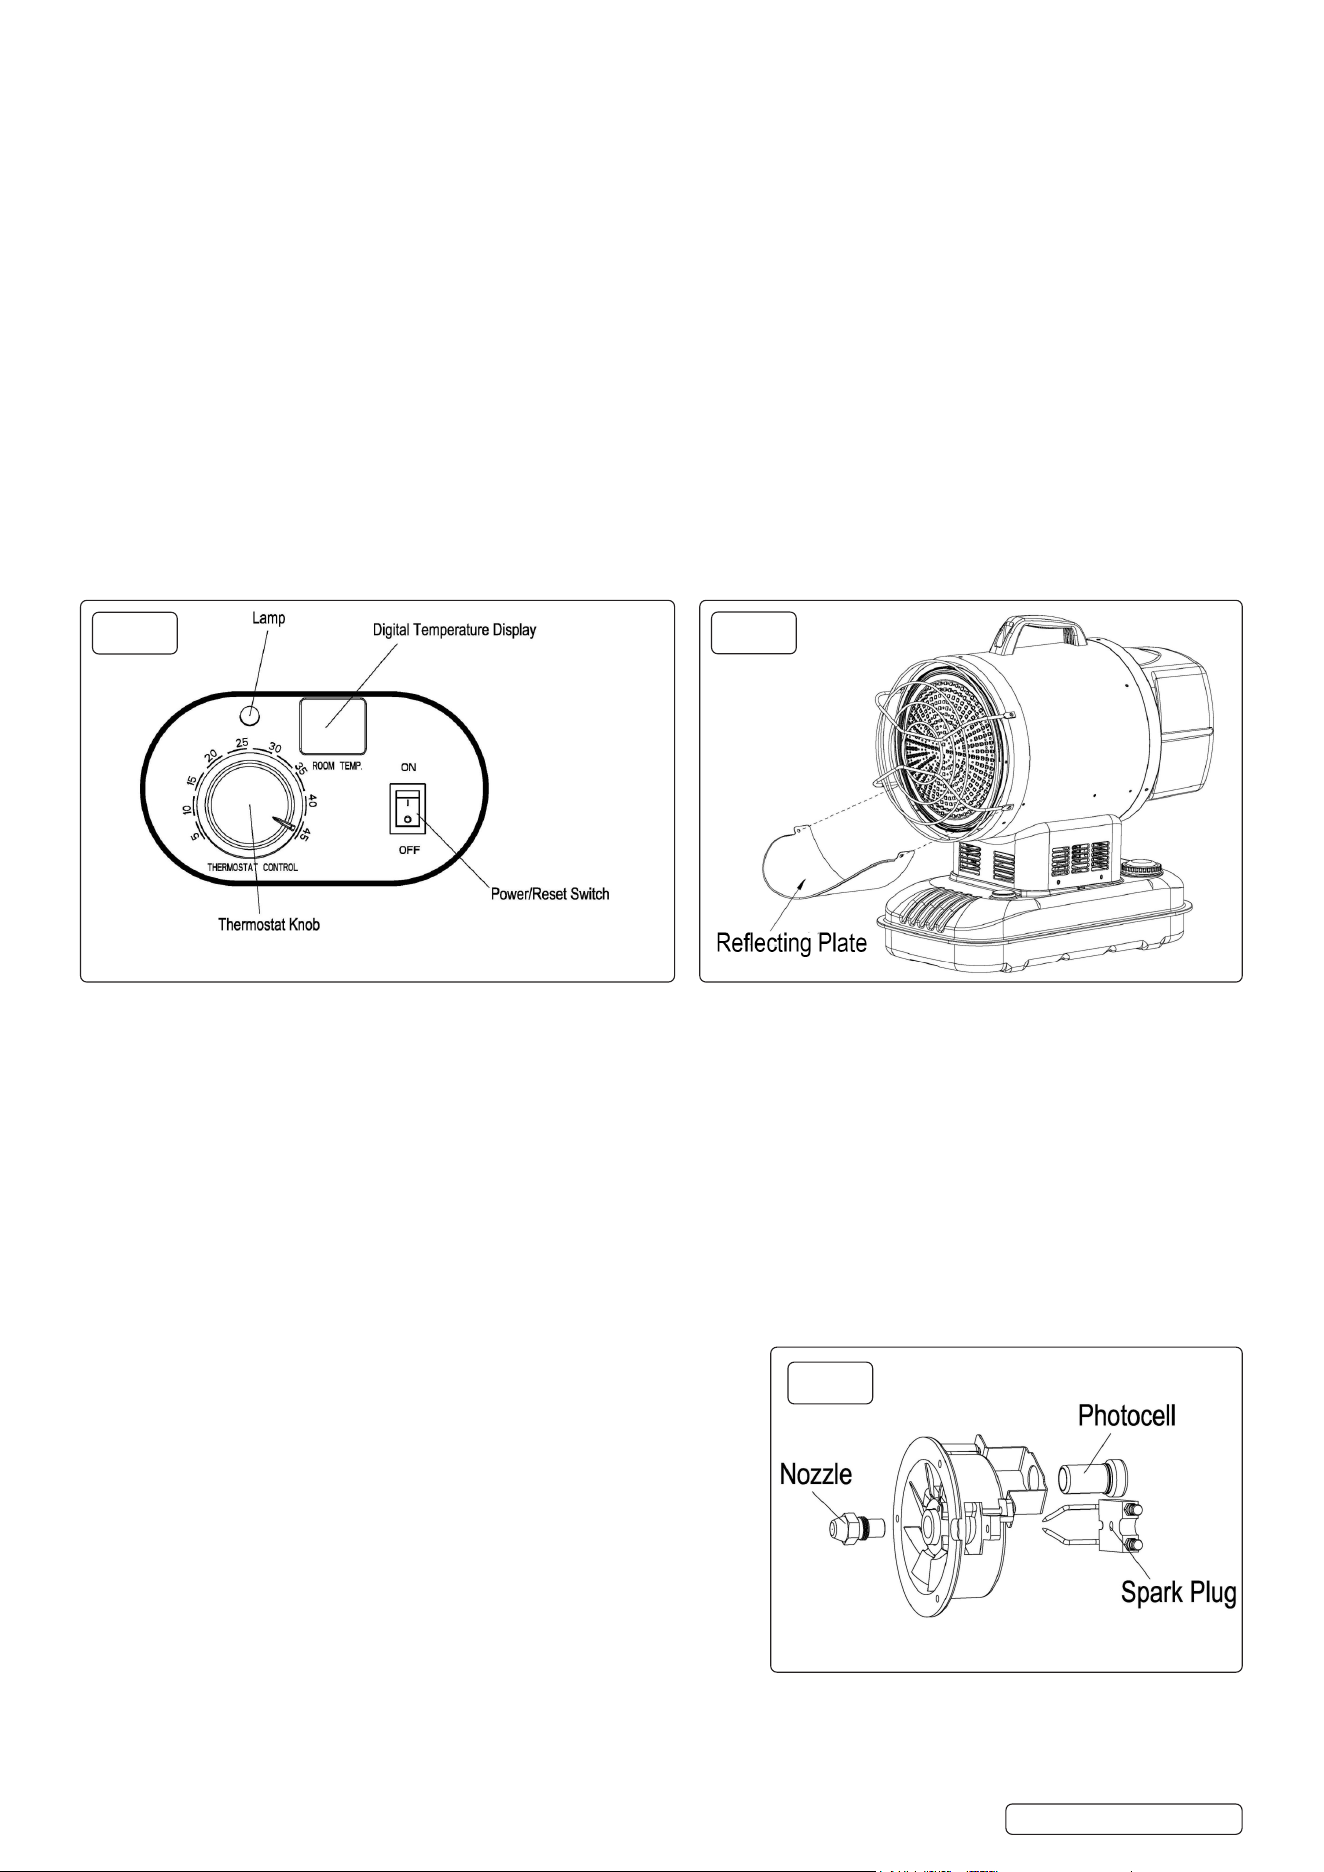
5.10. REFLECTING PLATE g.4:
Whenusingonnon-heat-resistantoororwoodenoor,usersmusttthereectingplate,toavoidrehazardandoordamage,g.4.
5.11. TO START THE HEATER
5.11.1. Fill the tank with kerosene until fuel gauge points to “F”. Make sure fuel cap is secure.
5.11.2. Plug power cord into mains supply.
5.11.3. Turn thermostat control knob to desired temperature setting.
5.11.4. The setting range is from 5°C to 45°C.
5.11.5. PushthePowerswitchtothe“ON”position(Seeg.3).
5.11.6. The power indicator lamp and room temperature display will light and the heater will start.
NOTE: Iftheheaterdoesnotre,thethermostatmaybesettoolow.TurntheControlKnobtoahighersettinguntilheaterres.
Iftheheaterstilldoesnotstart,pushPowerSwitchto“OFF”,thenbackto“ON”.Ifheaterstilldoesnotre,seeTroubleshootingGuide.
NOTE:TheelectricalcomponentsofthisheaterareprotectedbyafusemountedinthePCboard.Iftheheaterfailstore,checkthis
fuserst,andreplaceifnecessary.
Alsocheckthepowersourcetobesurethatthepropervoltageisbeingprovidedtotheheater.
5.12. TO STOP THE HEATER
5.12.1. Turn the Power switch to “OFF” position and disconnect from mains supply.
5.13. TO RESTART THE HEATER
5.13.1. Waittensecondsaftershuttingoheater.
5.13.2. Turn the Power Switch to “ON” position.
5.13.3. Followallstartingprocedureprecautionsabove.
5.14. STORAGE
IMPORTANT:Neverstoreleftoverkeroseneoverthesummer.
Using old fuel can damage your heater.
Storeheaterinadry,well-ventilatedarea
Besurethatthestorageareaisfreeofdustandcorrosivevapours.
Repack heater in its original carton.
Keep the Users Manual in an easily accessible place
Original Language Version
© Jack Sealey Limited
fig.
3
fig.
4
fig.
5
IR115Issue:120/05/25
6. MAINTENANCE.
6.1. NOZZLES: should be cleaned or replaced at least once per heating season. Contaminated fuel could make this necessary
immediately.
6.1.1. To clean dirt from nozzle, blow compressed air through nozzle front.
6.1.2. It may be necessary to soak nozzle in clean kerosene to help loosen any particles.
NOTE: Use of diesel may require additional maintenance.
6.1.3. Using this heater without proper maintenance or with contaminated or old fuel may lead to improper combustion and possible soot
production.
6.2. SPARK PLUG Fig.5: Cleanandre-gapevery600hoursofoperation,orreplaceasneeded.
6.2.1. AfterremovingtheSparkPlug,cleantheterminalswithawirebrush.Re-gaptheterminalsto3.5mm.seeFig.5.
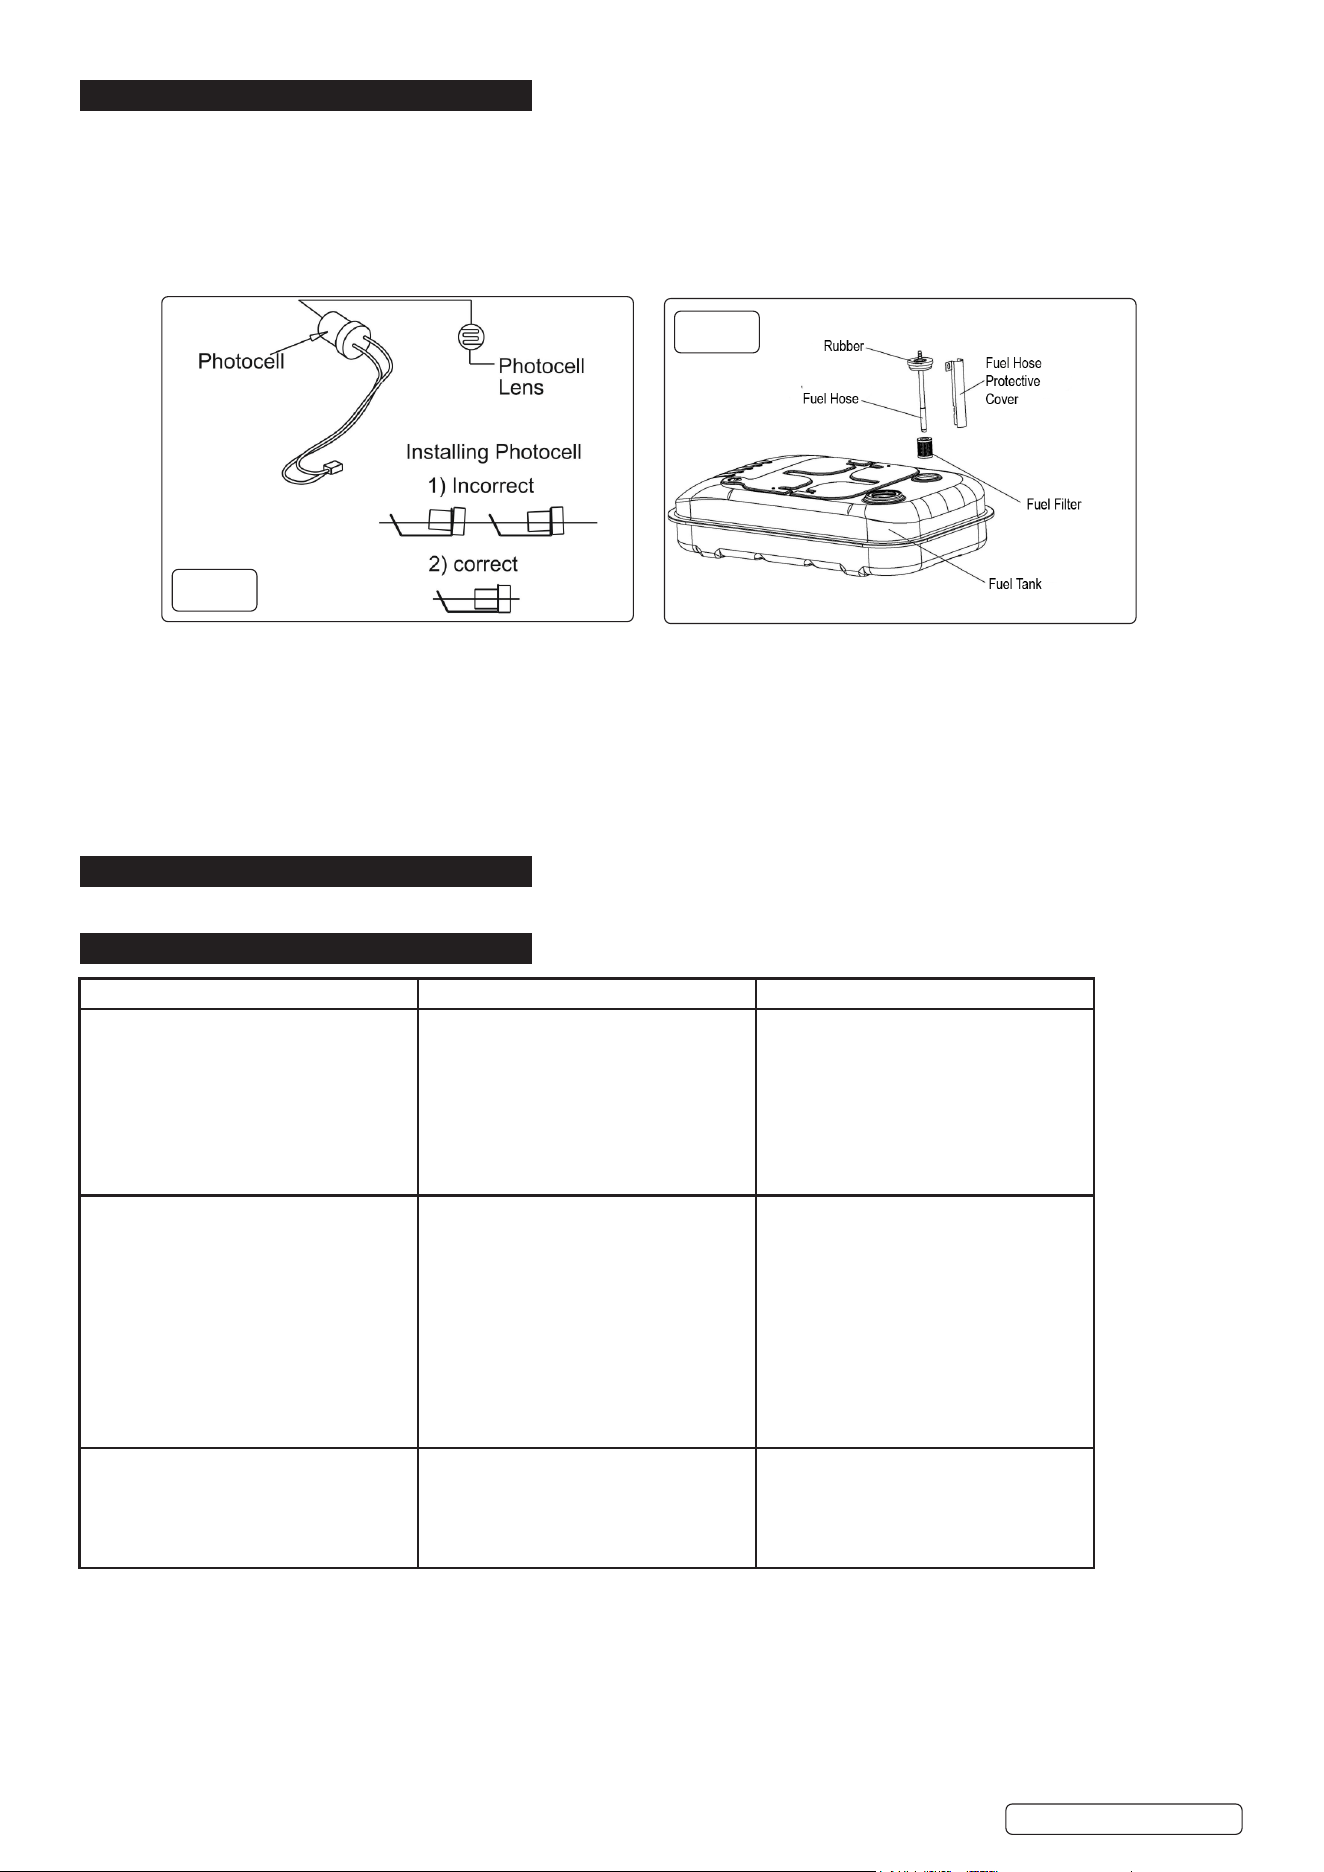
6.3. PHOTOCELL Fig.6: The Photocell should be cleaned at least once per heating season or more depending on conditions.
6.3.1. Use a cotton swap dipped in water or alcohol to clean the lens of the Photocell.
6.3.2. Note the proper Photocell position as shown in Fig.6.
6.4. FUEL FILTER Fig.7: The Fuel Filter should be cleaned at least twice per heating season by rinsing it in clean kerosene. Contaminated
fuel could make this necessary immediately.
6.4.1. Use of diesel may require additional maintenance.
6.4.2. Improper maintenance can lead to poor combustion and soot production.
7. END OF LIFE
At the end of its life product must be dismantled and recycled according to local regulations in force.
8. TROUBLESHOOTING
fig.
6
fig.
7
Problem Possible Cause Solution
Heater fires, but Main PCB shuts
heater off after a short period of time.
Lamp is flickering, and LED display
shows “E1”.
1. Dirty Fuel Filter
2. Nozzle is Dirty
3. Photocell lens is Dirty
4. Photocell not installed properly
5.PhotocellDefective
6. Improper electrical connection
between
Main PCB and Photocell.
1.Clean/replaceFuelFilter
2.Clean/replaceNozzle
3.Clean/replacePhotocell
4.AdjustPhotocellposition
5. Replace Photocell
6. Check wiring connections (See
WiringDiagram)
Heater will not operate
for short time. Lamp flickers and LED
display shows “E1”.
1. No kerosene in fuel tank
2. Corroded Spark Plug or incorrect
plug gap.
3. Dirty Fuel Filter
4. Dirty Nozzle
5.MoistureinFuel/FuelTank
6. Improper electrical connection
between Transformer and Circuit Board
7. Igniter Wire not connected to Spark
Plug
8.DefectiveIgniter
1. Fill tank with fresh kerosene
2.Clean/replaceSparkPlug
3.Clean/replaceFuelFilter
4.Clean/replaceNozzle
5. Rinse out fuel tank with clean fresh
kerosene.
6. Inspect all electrical connections. See
Wiring Diagram
7.Re-attachIgniterwiretoSparkPlug
8. Replace Igniter
Fan does not operate when heater is
plugged in and Power Switch is in the
“ON” position. The lamp is flickering or
on and LED Display shows “E1” or
“E2”.
1. Thermostat is set too low
2. Broken electrical connection between
Main PCB and motor
1. Rotate thermostat to a higher setting
2. Inspect all electrical connections. See
Wiring Diagrams
Original Language Version
© Jack Sealey Limited
IR115Issue:120/05/25
Original Language Version
© Jack Sealey Limited
ENVIRONMENT PROTECTION
Recycle unwanted materials instead of disposing of them as waste. All tools, accessories and packaging should be sorted, taken to
arecyclingcentreanddisposedofinamannerwhichiscompatiblewiththeenvironment.Whentheproductbecomescompletely
unserviceableandrequiresdisposal,drainanyfluids(ifapplicable)intoapprovedcontainersanddisposeoftheproductandfluids
according to local regulations.
Note:Itisourpolicytocontinuallyimproveproductsandassuchwereservetherighttoalterdata,specificationsandcomponentparts
without prior notice.
Important: No Liability is accepted for incorrect use of this product.
Warranty:Guaranteeis12monthsfrompurchasedate,proofofwhichisrequiredforanyclaim.
WEEE REGULATIONS
DisposeofthisproductattheendofitsworkinglifeincompliancewiththeEUDirectiveonWasteElectricalandElectronicEquipment
(WEEE).Whentheproductisnolongerrequired,itmustbedisposedofinanenvironmentallyprotectiveway.Contactyourlocalsolid
waste authority for recycling information.
REGISTER YOUR
PURCHASE HERE
IR115Issue:120/05/25
PoorCombustionand/orexcesssoot
production
1. Temperature limit sensor has
overheated
2. No electrical power
3. Fuse Blown
4. Improper electrical connection
between
Temperature Limit Sensor and Circuit
Board
1. Push Power Switch to “OFF” and
allow
heatertocoolfor10minutes.Push
Power
Switch to back to “ON”
2.Checkpowercordandextension
cord
to insure of proper connection. Test
power
supply
3.Check/replaceFuse
4. Inspect all electrical connections.
Wiring Diagrams
9. WIRING DIAGRAM
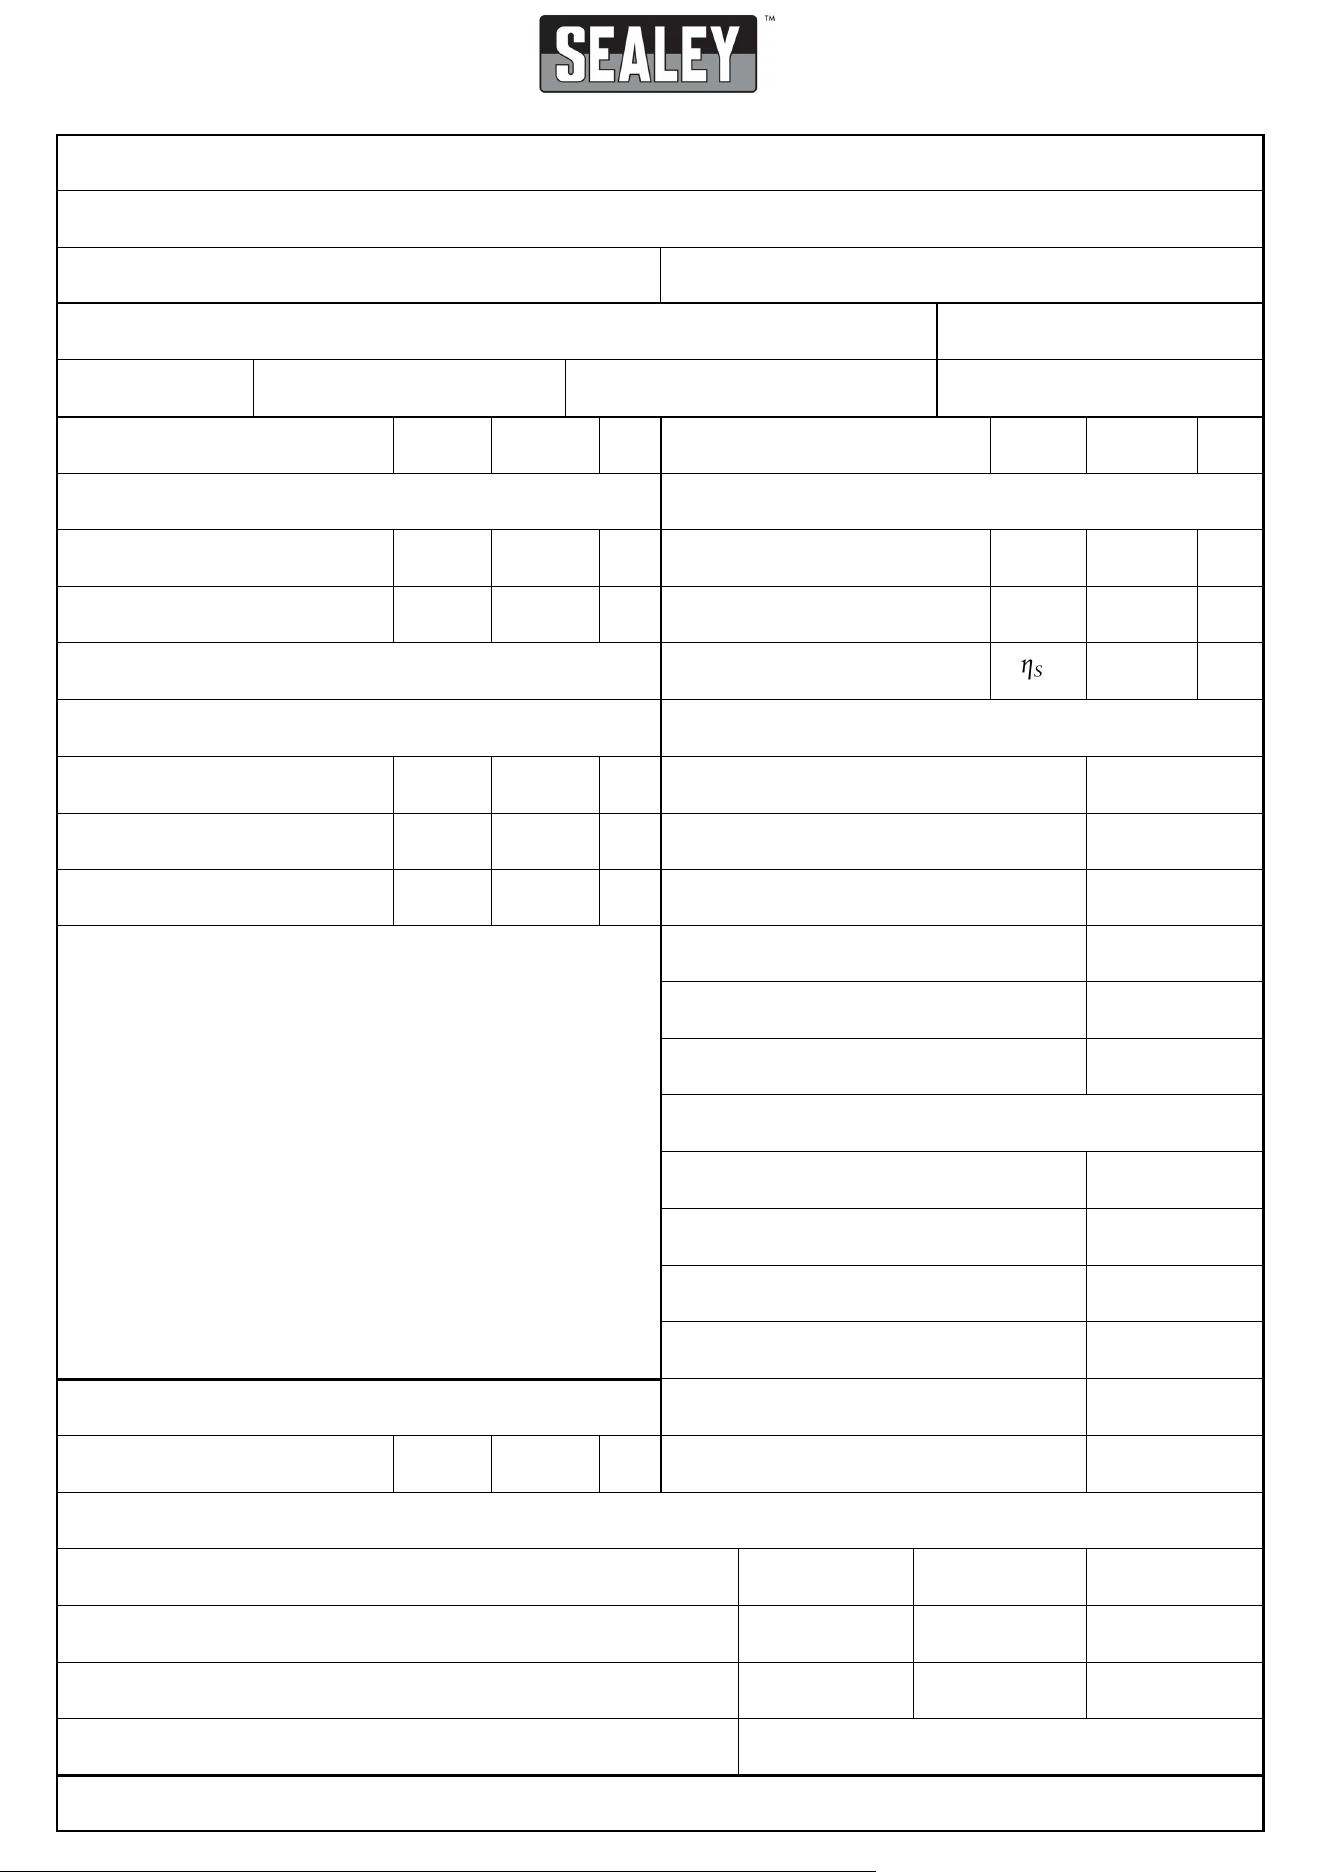
Information requirements for gaseous/liquid fuel local space heaters
Model identifier(s):
Indirect heating functionality: Yes
No
Direct heat output: (kW) Indirect heat output: (kW)
Fuel
Space heating emissions
NO
x
nitrogen oxides
Select fuel type: Gaseous Liquid Specify: [mg/kWh
input
] (GCV)
Item Symbol Value Unit Item Symbol Value Unit
Heat output Useful efficiency (NCV)
Nominal heat output
P
nom
kW
Useful efficiency at nominal
heat output
ῃ
th,nom
%
Minimum heat output (indicative)*
P
min
kW
Useful efficiency at minimum
heat output (indicative)*
ῃ
th,min
%
Seasonal space heating
efficiency
Auxiliary electricity consumption Type of heat output/room temperature control (select one)
At nominal heat output
el
max
kW
Single stage heat output, no room
temperature control
Yes No
At minimum heat output
el
min
kW
Two or more manual stages, no room
temperature control
Yes No
In standby mode
el
SB
kW
With mechanical thermostat room
temperature control
Yes No
* Enter figure or NA
With electronic room temperature control Yes No
With electronic room temperature control
plus day timer
Yes No
With electronic room temperature control
plus week timer
Yes No
Other control options (multiple selections possible)
Room temperature control, with presence
detection
Yes No
Room temperature control, with open
window detection
Yes No
With distance control option Yes No
With adaptive start control Yes No
Permanent pilot flame power requirement
With working time limitation
Yes No
Pilot flame power required
(if applicable)*
P
pilot
kW
With black bulb sensor Yes No
v2
ERP Table 1
%
IR115
15.0
Diesel / kerosene
110.0
15.0
NA
0.100
NA
0.900
100.0
NA
85.0
NA
✔
✔
✔
✔
✔
✔
✔
✔
✔
✔
✔
✔
✔
✔
No