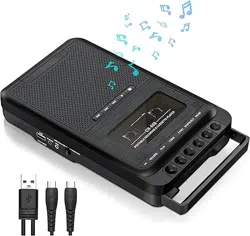
Portable Cassette Player
CR-669
Thank you for purchasing our Portable Cassette Player which is an electronic acoustic technology well-designed by our company. For having a good product experience and better extending product life, using correctly is very important.Please read this manual carefully before using this product.
KEY INSTRUCTIONS
PORTABLE RECORDER & CASSETTE PLAYER
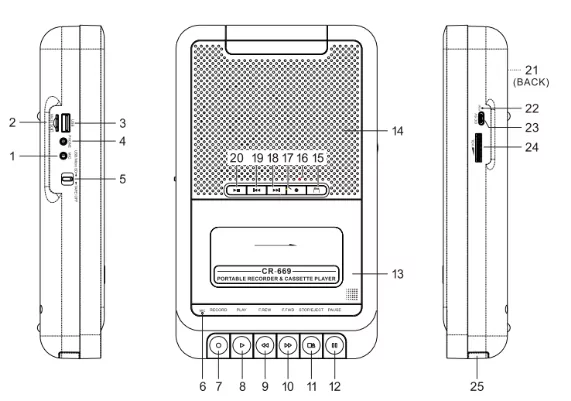
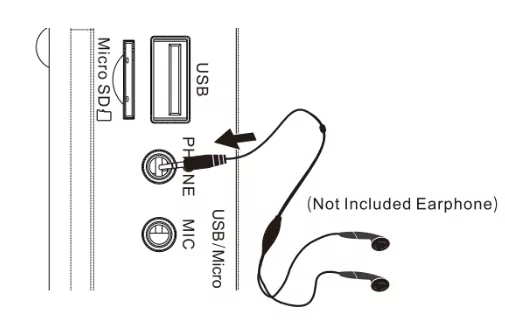
- Microphone Jack
- Micro SD card Slot
- Earphone Jack
- Function Switch
- Built-in Microphone
- Record Button
- Play Button
- Fast Rewind Button
- Fast Forward Button
- Stop/Eject Button
- Pause Button
-
Cassette Door
-
Speaker
-
Music/Recording File(USB/Micro SD)
-
USB/Micro SD/Record Power indicator
-
Record Button(USB/Micro SD)
-
Next Button/Fast Forward(USB/Micro SD)
-
Previous Button/Fast Rewind(USB/Micro SD)
-
Play/Pause Button(USB/Micro SD)
-
Battery compartment
-
Power Indicator
-
DC Power Jack
-
Volume Control
-
Handle
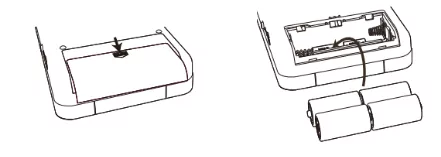
POWER SUPPLY
Battery power
1. Open the battery compartment and put in 4 UM-2/"C" batteries (not included)
2. Make sure it is the correct orientation based on "+" or "-" polarity, otherwise the device will not work or will be damaged.
Note: When the battery runs out, the sound will be distorted or weakened.
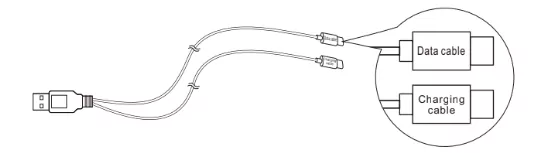
DC power and data transmission lines
The tape player comes with a USB cable with two Type-C connectors, one for powering the product, named Charging Cable, and one for data transmission, named Data Cable.
1.The charging cable can be used for tape playback, Micro SD playback and USB playback functions.
2.The data cable can only be used for Micro SD data transfer.
1.USB function is not able to transfer data with computer via data cable.
2.If you want USB functionality, please use a charging cable. Do not use a data cable.
TAPE PLAYING
1.Set the function switch to the "TAPE/OFF".
2.Press the  button to open the tape door, put in the tape and close it, then press the play button.
3.Use the volume controls to adjust the volume level as needed.
4.To fast rewind or forward the tape, press the "«/»" button.
5.To stop playing the tape, press the button.
Automatic stop
To protect your cassettes and prevent unnecessary wear to the clamping rollers of the cassette mechanism, the unit is equipped with an Auto Stop System. When the tape is at the end of playback, the play button is automatically released to stop the tape from running.
USB/MICRO SD PLAYING
1.Set the function switch to the "USB/Micro SD" position.
2.Insert the USB disk or Micro SD card into the USB/Micro SD card slot. After waiting for a while, it will automatically play music (Supports MP3/WMA format). The recording power indicator shows blue.
3.Short press  to select previous or next song, short press "||" to play or pause music.
4.Long press to fast back or fast forward.
5.Short press " " to switch between playing music/ recording file.
Switching between USB card and SD card modes.
1.If you insert an SD card, and then insert a USB card, it will automatically switch to USB card mode.
2.Please remove the USB card if you want to return to SD card mode.
3.If you insert a USB card and then insert an SD card, it will automatically switch to SD card mode.
4.Please remove the SD card if you want to return to USB card mode.
USB DISK/MICRO SD CARD CONVERT TO TAPE
1.Insert a recordable tape into the cassette player and insert a USB disk or Micro SD card into the USB/Micro SD card slot.
2.Push the function switch to USB/Micro SD mode, then the power indicator is blinking blue. It will play MP3 or WMA format music automatically, the blue indicator light is always on when playing.
3.Press  at the same time to record audio from the USB disk /Micro SD card onto a blank tape. If you want to stop recording, press "
 " to end.
4.If you want to listen to your recorded music, push the function switch to TAPE/OFF mode, press the " " button to play back the tape, and then press the play button to play the recorded audio.
TAPE CONVERT TO USB DISK/MICRO SD CARD
1.Set the function switch to the TAPE/OFF position.
2.Insert the USB disk/Micro SD card and insert the tape and play the tape music.
3.Long press the  button for 2 seconds to start recording, the recording indicator shows red.
4.Long press the button again for 2 seconds to stop recording and stop playing back the tape.
5.Switch to USB/Micro SD mode, automatically play recordings, short press to switch to playing music.
AUDACITY TRANSCRIPTION SOFTWARE INSTALLATION
1.Configure a software CD-ROM, place the CD-ROM in your computer's CD-ROM, and double-click the icon to run the software installation wizard.
2.If your computer does not have a CD-ROM input, you can download this software from this site: Enter the URL on your computer to log in: www.audacityteam.org and press the download button to download Audacity.
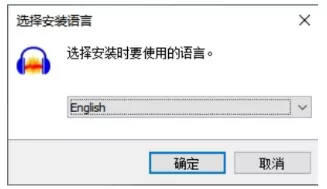
3.Installation Steps.
3.1: Select the language and click "OK" to move on
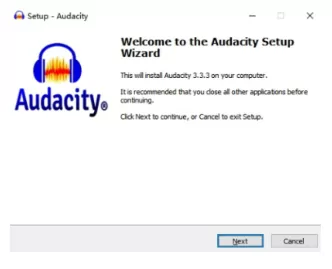
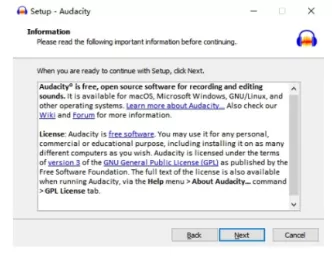
3.2: Please click on "Next" to move forward
3.3: Please click on "Next" to move forward
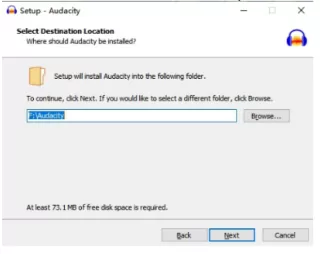
3.4: Please click "Next" to proceed (If you want to change the destination folder, please click "Browse" button, make your choice and click "Next").
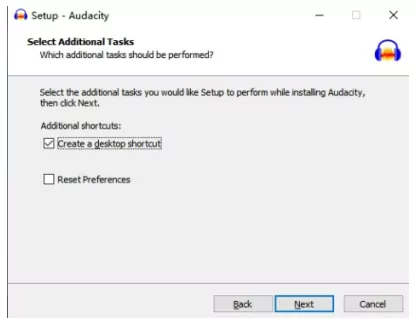
3.5: Please click "Next" to move forward (the desktop icon is created by default, if you want to change it, please cancel and then next step)
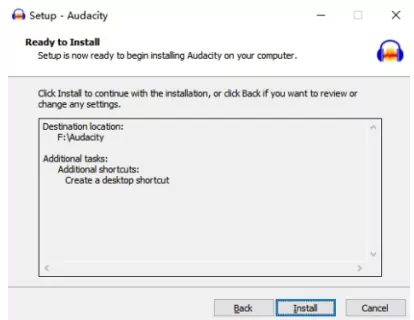
3.6: Please click "Install" to install the software.
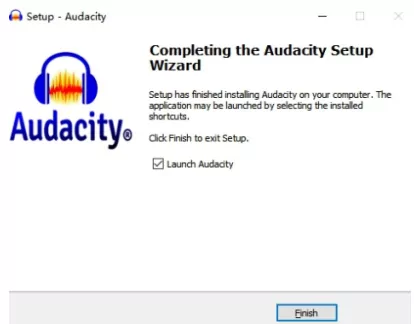
3.7: Please click "Finish" to finish installing the software.
4.Convert cassette music to computer - with Audacity's software
4.1:Set the function switch to the "TAPE/OFF" position.
4.2:Using the data cable, connect the tape drive to the computer.
4.3:Insert the cassette and press  to connect the device to the computer successfully.
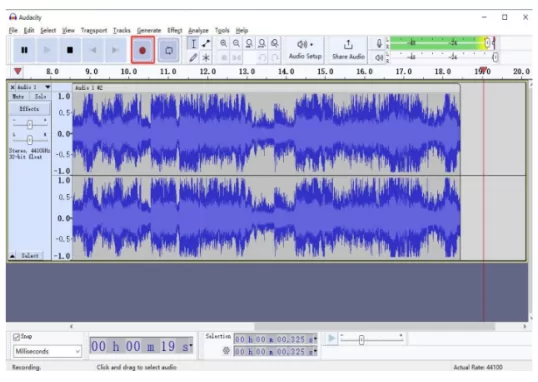
4.4:Open Audacity and click  to start recording audio
5.Click  to stop recording

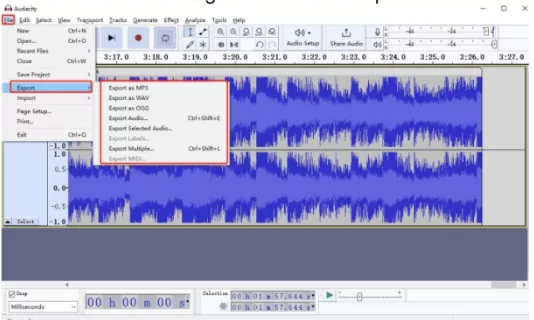
6.Click "File" and select "Export", you can choose to save the audio format and go to the next step.
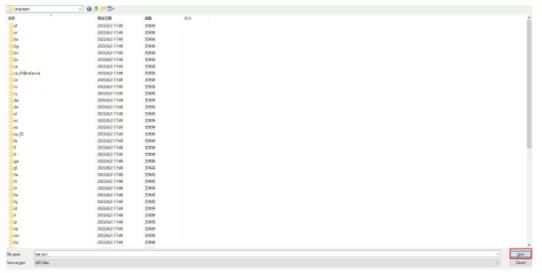
7.Select the save location and confirm saving.
Note:
Please note that you should first successfully connect to your computer and then open the Audacity software for convert.
TAPE RECORDING
Cassette recording via built-in microphone/external microphone
1.Set the function switch to the TAPE/OFF position.
2.Insert a blank recordable tape and press the "Play Button" and "Record Button" at the same time to record your voice through the built-in microphone/external microphone (not included).
3.To stop recording, press the " " button.
4.If you want to listen to your recorded music, push the function switch to TAPE/OFF mode, press the  button to play back the tape, and then press the PLAY button to play the recorded audio.
Record voice to USB/MICRO SD card via built-in microphone/external microphone
1.Switch the function switch to the USB/Micro SD position.
2.Insert the USB disk/Micro SD card into the USB/Micro SD card slot.
3.Long press the  button for 2 seconds to start recording, the power indicator shows red during recording.
4.Long press the button again for 2 seconds to stop recording, and the cassette player will automatically play back the just recorded audio.
MICRO SD CARD CONNECTED TO COMPUTER
The MICRO SD card can be connected to a computer with a data cable. You can only use the data cable to connect to a computer to copy or delete the contents of the micro SD card.
(Note: The charging cable cannot transfer data)
1.Insert the micro SD card into the micro SD card slot.
2.Set the function switch to USB/Micro SD.
3.Use the data cable to connect the computer to the tape drive.
4.When you have made a successful connection, you will hear the sound of the cassette player play a beep, or the USB/Micro SD indicator flashes blue, indicating that the tape drive is connected to the computer. You can copy or delete the contents on the Micro SD card through your computer.
IMPORTANT: The USB disk cannot be connected to the computer via cable transfer.
EARPHONE JACK
In order to meet the multiple listening needs of our customers, the cassette player is set up with a "headphone" jack, simply plug the headphones into the radio without being disturbed or disturbing others.
SPECIFICATIONS
Power source: 4 UM-2/C size battery or Type C Cord
Working voltage: 6V
Speaker: 4Ω 3W
Headphone specification: 3.5mm
MP3 playback format: MP3/WMA
Item dimensions: 245*148*47 mm
Item weight: 685g
PRECAUTIONS FOR USE
Avoid violent shocks or falling to the ground.
Do not expose it to direct sunlight, high temperature or humidity.
Please check it with qualified maintenance personnel if there is any debris falling into the radio.
Please wipe it with a soft cloth dampened with detergent solution. Never use strong solvents such as alcohol, thinner to clean.
Not to use the earphone to avoid traffic accidents when driving.
Keep listening at the proper volume so that you can pay attention to your surroundings to ensure safety.
WARRANTY
This radio has 12 months warranty against manufacturing defects.
The warranty period begins from the date of purchase.
PACKING LIST
Cassette Player x1
Type-C Charging and Data Cable x1
User Manual x1
Software CD-ROM x 1