This manual will help you use the many features of this device. Please read the manual completely
before operating the meter and keep it nearby for future reference.
Due to torque / angle measurement and calibration requiring strict certification, torque instruments
must possess good temperature, precision, resolution capabilities, and must also be able
to correct disturbances (ESD and EMI). And while the characteristics of peripheral
components must meet certain specifications, measurement chip must also meet specifications.
Because of this, the simplification of peripheral passive elements allows an instrument to
accurately measure torque / angle values, which will not only save cost, but also improve
maintenance and assembly quality, and reduce the chance of damage while in use.
Simple multifunctional operation, vibration resistance, torque / angle value presetting, measuring
unit selection, mode selection, data memory & storage, digital up & down increments,
power-saving mode, color changing display & audible alarm, etc.
•Digital torque, angle and default value display.
•LCD display with backlight.
•Accuracy: CW±1.5% (clockwise) CCW±2%
(counterclockwise), +/- 2°angle.
•Can be used in both clockwise and counterclockwise
directions.
•Units: N.m, Kgf.cm, lbf.in., lbf.ft.
•Buzzer and display LED backlight progress indication.
Green backlight below 80% target, orange above 80%
and red at 100% or above.
•Power saving mode (enters power-saving
mode after 2 minutes of inactivity).
•180° flip screen.
•30 memory settings for torque reading and 30
for angle reading.
•Low voltage indicator (reminds user of battery life).
•Compatible with zinc-carbon or alkaline
batteries.
2. PRODUCT FEATURES
1. PRODUCT OVERVIEW
3. TECHNICAL SPECIFICATIONS
Memory
Capacity
60
(Torque: 30 / Angle: 30)
Warning
Green LED backlight below
80% target, orange above
80% and red at 100% or above.
Operation
Modes
Track(T) / Peak hold(P) /
Angle(A)
Unit
Nm‚ kgf.cm‚
lbf.in, lbf. .
Battery life
Battery type
(
Continuous operation)
48 hrs.
AAA (x2)
Battery life
(Standby mode)
1 year
Operating Temperature
-10°C∼60°C
Storage Temperature
-20°C∼70°C
Humidity
Up to 90%
non-condensing
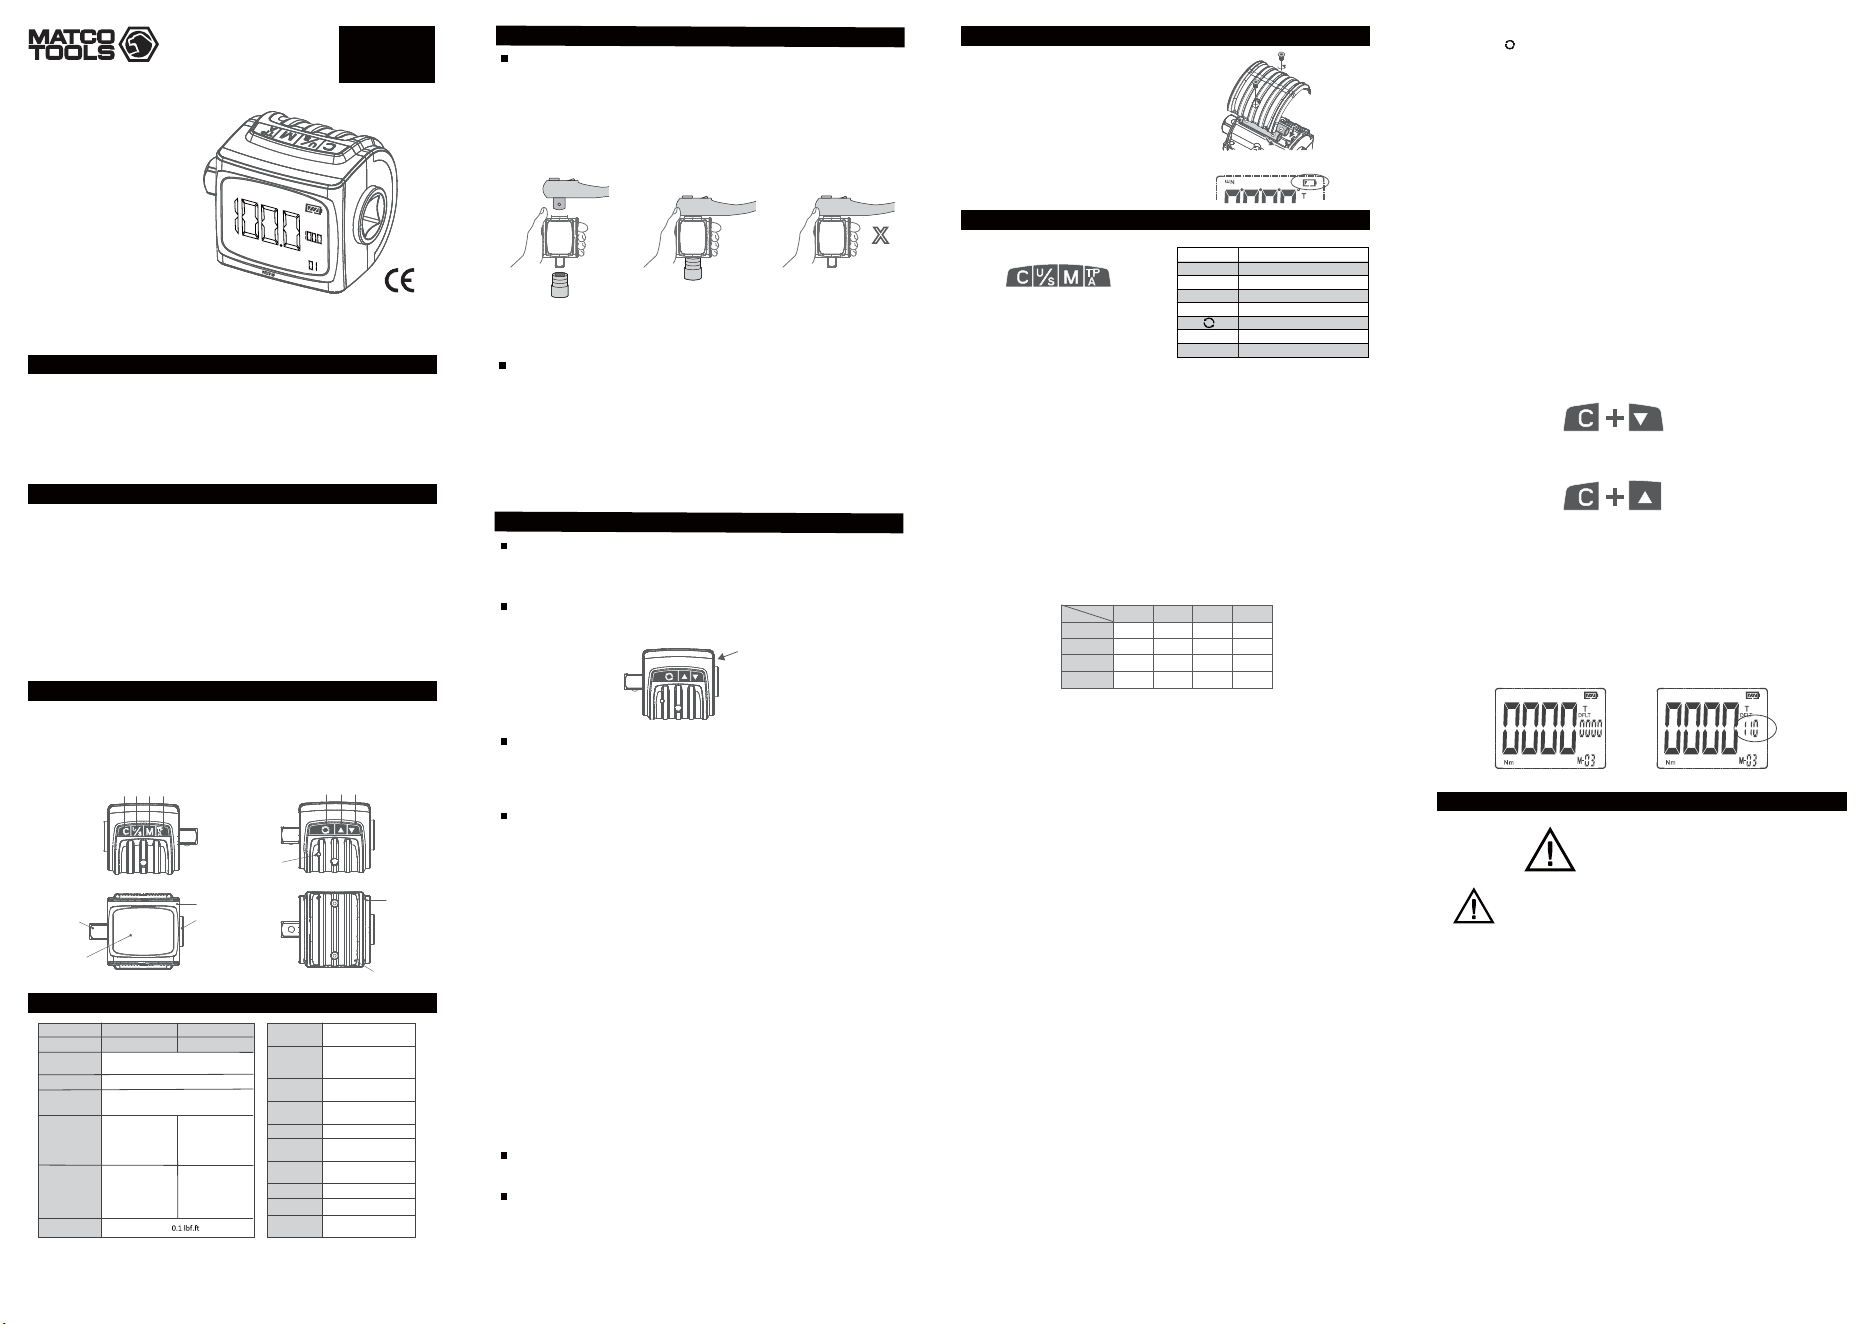
11. Output shaft (square drive)
12. Top cover
13. Bottom cover
14. Battery cover
6. Value adjustment, up button
7. Value adjustment, down button
8. Buzzer
9. LCD display monitor
10. Input shaft (square drive)
1. Power / clear button
2. Unit selection button
3. Memory selection button
4. Mode selection button
5. 180° flip screen button
FUNCTION AND DESCRIPTION
DIGITAL TORQUE
& ANGLE
METER
Do not force in the wrench or socket while the device is still in the
Auto-zeroing process. (See section 5.1)
OPERATION
Digital Torque and Angle Meter
Battery precautions
1. Remove batteries when device will not be used for long periods.
2. Make sure to keep spare batteries at hand when using the device in remote places, long trips
or cold areas.
3. Do not mix battery types or combine used batteries with new ones.
4. Do not use leaking batteries or batteries in bad condition.
5. Dispose of batteries only in designated areas. Do not throw batteries into fire.
6. Device is compatible with zinc-carbon or alkaline batteries.
7. If the LCD screen does not display anything, check if batteries are charged or replace them.
Product Warranty
This Digital Torque and Angle Meter is covered by a 1-year warranty against defects in materials
and/or workmanship. This warranty does not cover items that have been abused, misused, modified,
not given proper maintenance or worn out from normal use.
Serial Number
Product serial number is located on the side of the housing. Please consult with your local dealer
for warranty claims.
Warranty Limitations
During the warranty period, if there is any defect or deficiency related to the product's material or
manufacturing process which affects the device's operation (including non-human factor or
non-resistant external damage), repair services will be provided or product will be replaced if
considered necessary.
Warranty Exclusions
If any of the following conditions apply, the product's warranty will be voided. These non-normal
conditions will require that the customer pays for repair costs and any other expenses determined
by the local dealer.
Conditions are listed below:
1. Product has not been purchased from authorized distribution channels and/or a proof of
purchase cannot be provided.
2. Product’s serial number has been tampered with or is unclear.
3. Customer did not comply with the user's guide resulting in damages due to improper use. In
addition, any damages caused by natural disasters (such as floods, fires, earthquakes,
hurricanes, lightning, etc.), external factors (liquid filtration, insect or animal damage, etc.) or
human factors (surface scratching, dropping, hitting, etc.)
4. Surface scratching and abrading of any parts of the product are regarded as normal wear during
normal use and therefore considered non-warranty.
5. Damages due to modifications or alterations done to the product without authorization, or from
abnormality of other equipment.
6. Damages during product transportation.
Acceptable product warranty conditions are as follow:
1. Device does not power on.
2. Buttons cannot be operated.
3. LCD screen is unable to display data.
4. Device's functions cannot be accessed.
Other situations will be handled as maintenance services.
If product needs to be replaced, a device of the same specifications or better will be provided to the
customer and the defective unit will need to be returned.
Other Suggestions
Please confirm your product specifications and accessories.
Reserved Rights
We reserve the right to change these terms and conditions at any time and without prior notice.
We will post new terms in case of modifications, however we will not inform individual customers.
PRODUCT WARRANTY POLICY
90 °
X
IMSTAM41802A0001
Serial number
▪ Make sure to use correct size of wrench and socket to fit in both ends of the device.
▪ Before using the meter, confirm that the wrench, device and socket are correctly aligned. Then
proceed to operate the device.
▪ If the wrench, device and socket are not properly connected or aligned, do not operate, as this
may result in damages to the device.
12
10
11
9
4321
8
5
6 7
13
14
page 1
Notes1 : According to ISO6789:2003, a specified measuring range from 20% to 100% of the maximum torque value
of the respective tool.
Notes2 : Accuracy of Angle : 1° for 90° rotation at 45°/sec.
Drive Size 3/8''
BTA115 CTA270
1/2''
Torque Accuracy
CW:±1.5%
CCW:±2.5%
Angle Accuracy +/- 2°
Max. angle
measure
720°
Operation Range
160 Nm
1600 kgf.cm
115 lbf.
115 lbf. 270 lbf.
270 lbf.
1400 lbf.in
720°
370 Nm
3700 kgf.cm
3200 lbf.in
720°
Setting Range
8∼160 Nm
85∼1600 kgf.cm
6∼
75∼1400 lbf.in
0.1 Nm、1 kgf.cm、
、1 lbf.in、0.1°
20∼370 Nm
190∼3700 kgf.cm
15∼
165∼3200 lbf.in
1∼720°1∼720°
Min. scale unit
Part Number
lbf.ft
DF
LT
P
M-
page 2
4.1 Battery Installation
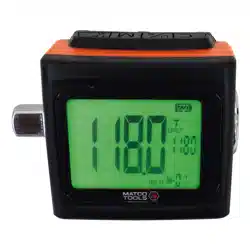
4.2 Low Voltage Indicator
When battery voltage drops below 2.3 volts, the battery icon
at the upper right corner of the display will start blinking and
the device will shut off after several seconds.
4. BEFORE USING THE METER
5. PRODUCT FUNCTIONS
Button Function
C Power and clear
U/S Unit selection
M Memory selection
T/P/A Mode selection
Screen flip
▲ Increases number (UP)
▼
Decreases number (DOWN)
5.1 Power and Clear
Make sure the device is standing perfectly still and press the C button to turn it on. After the
backlight LED flashes, the display will show 0000 (auto-zeroing) and then enter the operating mode.
If the device detects it is not standing still, the display will keep continuously showing 0000 from left
to right until the device is completely static. When the four zeros are displayed at the same time for
three consecutive times, then the device will enter operating mode.
When the meter is used for the first time, after entering operating mode the display will show the
lowest operating value, the units will be set to N.m, memory will be set to #1, mode will be set to
Track "T" and the battery scale will show current battery life. (All 30 memory data sets will be set
the same way.)
Turn Off: Press C button and hold for 3 seconds to switch off.
Clear: Press C button to reset (with device turned on).
5.2 Unit selection
This device works with international metric units of N.m and Kgf.cm and British units of lbf.in and
lbf.ft. Press the U/S button to select desired unit (preset unit is N.m).
Torque unit conversion table :
lbf.in lbf.ft Nm kgf.cm
1 lbf.in 1 0.083 0.113 1.152
1 lbf.ft 12 1 1.356 13.83
1 Nm 8.851 0.737 1 10.2
1 kgf.cm 0.868 0.072 0.098 1
5.3 Memory Function
All memory data sets are preset to the maximum operating value in N.m. To select a memory data
set press the M button, the digit at the bottom right corner of the display (M-01) will start blinking;
use ▲ (up) or ▼ (down) to scroll through memory data sets (up and down buttons can be held
down for continuous increase or decrease). Press M button to select desired memory data base;
after selection digit will stop blinking.
5.4 Track mode T / Peak Hold Mode P / Angle mode A
Track mode :
After setting a target torque value (for example 50 N.m), the user will gradually apply force to the
wrench until reaching desired target. When force is applied, the displayed torque value will start to
increase from zero and vary as the user applies different amounts of force; the torque reading will
increase as applied force increases and decrease as applied force decreases. If there is no force
applied to the wrench the torque reading will go back to zero.
Peak mode :
After setting a target torque value (for example 50 N.m), the user will gradually apply force to the
wrench until reaching desired target. When force is applied, the displayed torque value will start to
increase from zero and the device will hold on the display the maximum torque reached. If the user
decreases the amount of force applied, the torque reading will not decrease. After reaching a
determined torque value, the display will hold that reading and blink for 10 seconds (no actions or
buttons will be effective at this time) and automatically go back to show the original setting data,
the user can also press C button to return to the selected value or apply force again and the torque
reading will restart form zero.
Angle mode :
After setting a target angle value (for example 50°), the user will gradually apply force to the wrench
until reaching desired target. When force is applied, the displayed angle value will start to increase
from zero. After reaching a determined angle value, the display will hold this reading and begin
blinking (during this time the display will also show the amount of torque applied to reach said
angle; torque units can be chosen by user.) If the user needs to swing back the wrench to complete
angle target, the device will automatically hold the angle value reached on the previous swing and
add the angle value from the next swing. The angle reading on the display will change to the preset
value after 10 seconds if no applied force detected, but it will show the latest angle value
automatically when force is applied again. The user can press the C button to clear the angle value,
and the angle reading will start from zero when applying force.
5.5 Range Selection for Pre-set Memories
Torque or angle values can be freely selected as long as force is not being applied or memory
selection has not been performed. After completing torque or angle measurement in either mode,
the selected target value will be displayed.
5.6 Scroll ▲(UP) / ▼(DOWN) Selection
When setting a target value, pressing the ▲ (up) button once will cause the value on the far right of
the display to increase by one unit; pressing and holding the button will cause the value to increase
continuously. Pressing the▼ (down) button once will decrease the value on the far right by one
unit; pressing and holding the button will decrease the value continuously.
5.7 Screen flip
By pressing the button the screen will flip 180°.
5.8 LCD Display/ Monitor Color Changing & Audible Buzzer Warning
▪ In track mode, for example when the target torque value is set to 20 N.m, the reading will begin to
increase from zero as soon as force is applied. Below 80% of target value, the display backlight will
be green. Above 80%, the backlight will turn orange and the buzzer will start to beep. As the torque
reading continues to approach target value, the beeping will be faster; when 100% is reached, the
backlight turns red and the beep becomes continuous. Red backlight and continuous beep will also
be present above 100% target. Beeping frequency will decrease as applied force decreases.
▪ In peak mode, the warnings behave the same as in track mode, but the LED backlight and
beeping will stop once applied force ceases.
▪ In angle mode, for example when the target angle value is set to 20°, the reading will begin to
increase from zero as soon as force is applied. Below 80% of target value, the display backlight will
be green. Above 80%, the backlight will turn orange and the buzzer will start to beep. As the angle
reading continues to approach target value, the beeping will be faster; when 100% is reached, the
backlight turns red and the beep becomes continuous. Red backlight and continuous beep will also
be present above 100% target. Beeping frequency will decrease as applied force decreases.
5.9 Battery Life Indicator
The battery life indicator is shown on the display and it consists of four bars. A battery voltage of
3V or above is shown as a complete charge (four bars), a voltage lower than 2.8V is shown as
three bars, lower than 2.6V is shown as two bars and less than 2.4V is shown as one bar; when
voltage is lower than 2.3V, all functions will cease and the device will turn off after the battery
indicator flashes for 5 seconds.
5.10 Reset Memory Function
Press and hold the C button + ▼ (down) button; after 5 seconds, all values stored in memory will
reset to factory preset values.
5.11 Backlight Switch
Press the C button + ▲ (up) button to turn the display backlight on or off. The backlight is
preset as on.
5.12 Reset
To ensure accurate readings, always press C button to reset the device before using it. This reset
function is disabled while in use to prevent errors in measured values.
5.13 Power Saving Mode
The device will automatically enter power saving mode after 2 minutes of inactivity. Press C button
to exit power saving mode.
5.14 Overload Warning
Switch off and back on or reset device if screen continues to display 110%. This means device has
been forced to 110% of its maximum torque specification. Overloading may result in damages or
loss of accuracy.
Normal Overload
6. MAINTENANCE AND TIPS
ATTENTION
ATENCIÓN
AVERTISSEMENT
In order to maintain device's accuracy, it is recommended to
perform calibration once a year.
For calibration and repairs please contact IMS customer
service at 813-231-0111 or [email protected].
•Do not use any organic solvents to clean the product (alcohol, paint thinner, etc.)
•Avoid contact or proximity to magnets.
•Do not apply heavy force or pressure to the LCD display.
•Do not use the device as a striking tool.
•Do not hit the product with a hammer or similar tools.
•Exceeding the device's maximum torque specification may result in damages or loss of
accuracy.
•Avoid contact with water.
•If product gets wet, immediately wipe with a dry cloth.
•Do not expose the device to high temperatures, direct sunlight or damp environments.
•Do not expose device to excessive dust or sand.
•Do not shake violently and avoid dropping device.
•Remove batteries when device will not be used for long periods.
•Dispose of batteries in designated areas. Do not throw batteries into fire.
•Please read manual carefully and follow all instructions before using this device.
•Do not attempt to use the meter while turned off.
•Do not use additional tools to increase leverage, such as metal or plastic pipes.
•Do not touch any button when torque is exerted.
•Avoid contact between device's shaft and electrical sources or disconnect power supply
before use. Contact with external voltages will damage device's circuit.
Rev.052018
Made in Taiwan
to Matco specifications
3. Close battery cover (Tighten screws with H2 Hex bit)
2. Insert battery, make sure polarity is correct.
1. Open battery cover (Remove screws with H2 Hex bit)
BTA115
CTA270
1808231-27
1808231-27