- 1 -
Technical Support and E-Warranty Certificate www.vevor.com/support
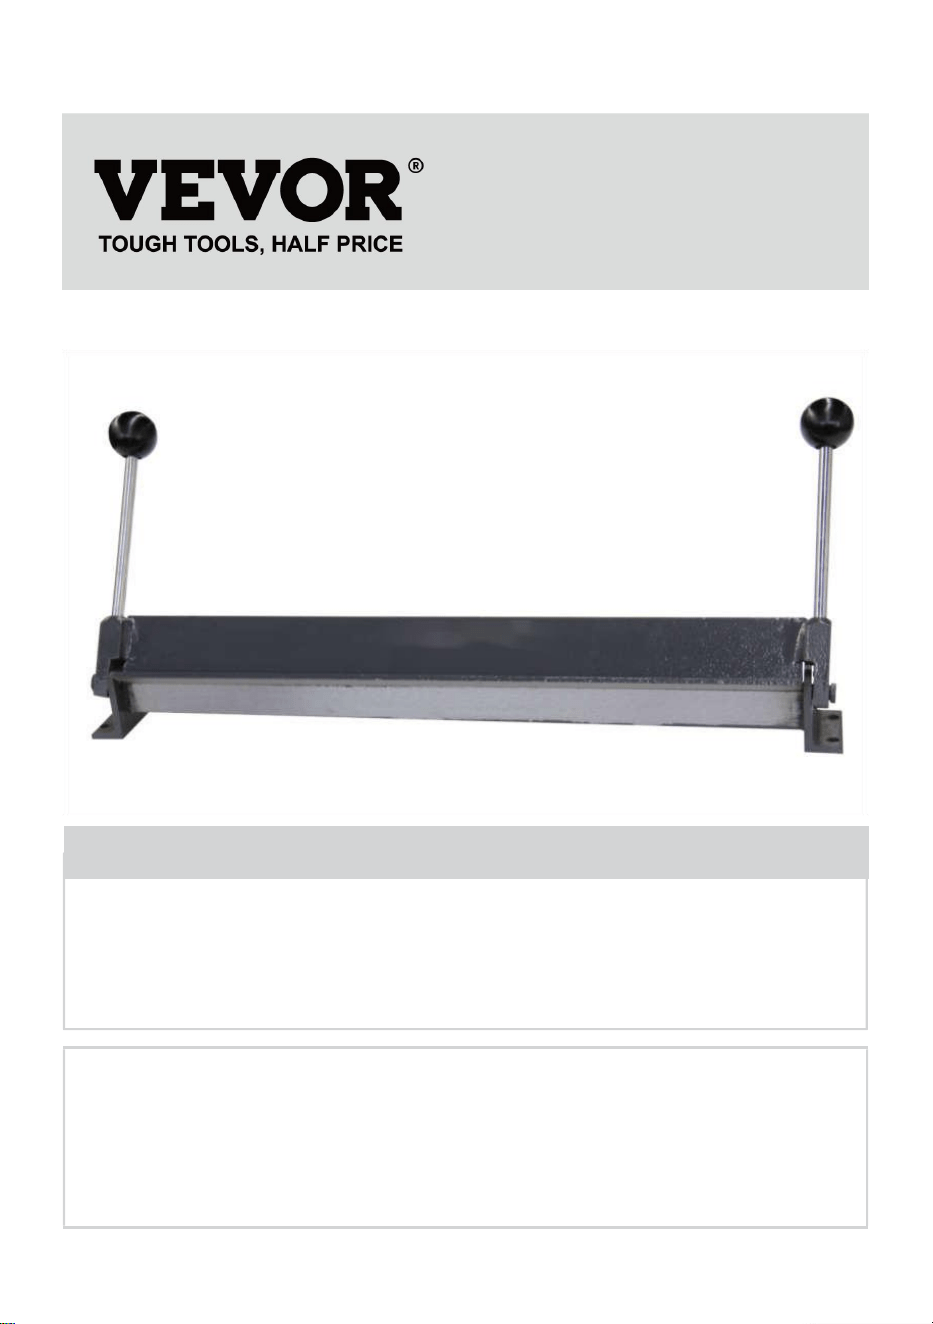
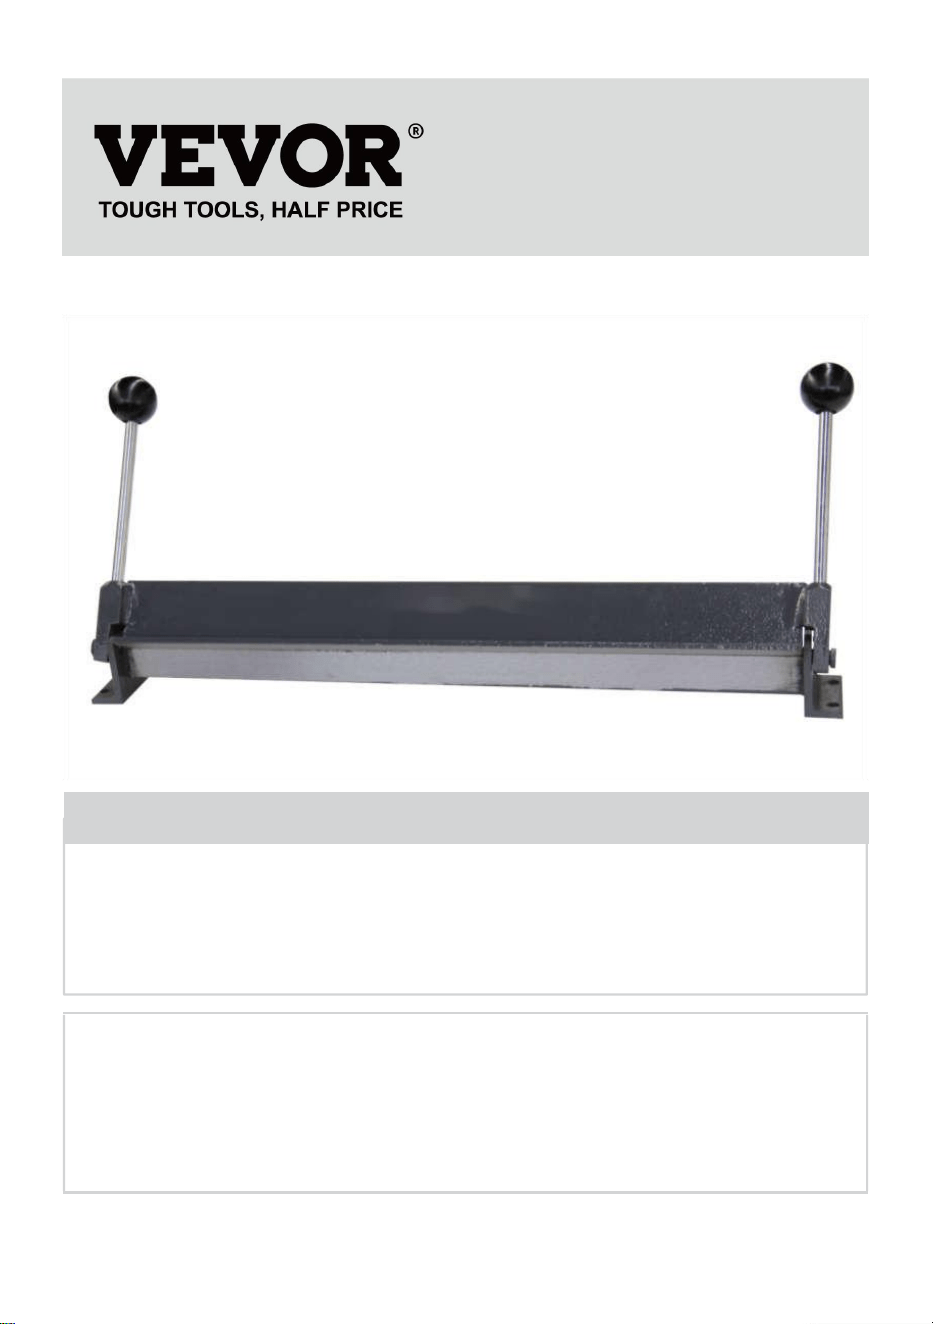
HAND BENDING
OPERATION MANUAL
MODEL:W-1.0X610A/W-1.0X915/W-1.0X1220
We continue to be committed to provide you tools with competitive price.
"Save Half", "Half Price" or any other similar expressions used by us only represents an
estimate of savings you might benefit from buying certain tools with us compared to the major
top brands and does not necessarily mean to cover all categories of tools offered by us. You
are kindly reminded to verify carefully when you are placing an order with us if you are
actually saving half in comparison with the top major brands.

- 2 -
MODEL:W-1.0X610A/W-1.0X915/W-1.0X1220
Have product questions? Need technical support? Please feel free to
contact us:
Technical Support and E-Warranty Certificate
www.vevor.com/support
NEED HELP? CONTACT US!
This is the original instruction, please read all manual instructions
carefully before operating. VEVOR reserves a clear interpretation of our
user manual. The appearance of the product shall be subject to the
product you received. Please forgive us that we won't inform you again if
there are any technology or software updates on our product.
HAND BENDING

- 3 -
Specifications
Bending Capacity: Bend materials up to 18 gauge steel; make up to 90
degree bends; bends material up to 40 inches wide.
Designed for bench top mounting using 3/8” diameter bolts.
Dimensions: 48 - 4/5” x 10 - 1/5” x 7”
Weight: 72 Lbs.
Save This Manual
You will need the manual for the safety warnings and precautions,
assembly instructions, operating and maintenance procedures, parts list
and diagram. Keep your invoice with this manual. Write the invoice number
on the inside of the front cover. Keep the manual and invoice in a safe and
dry place for future reference.
Safety Warnings and Precautions
WARNING: When using tool, basic safety precautions should always be
followed to reduce the risk of person injury and damage to equipment.
Read all instructions before using this tool!
1. Keep work area clean. Cluttered areas invite injuries.
2. Observe work area conditions. Do not use machines or power tools in
damp or wet locations. Don’t expose to rain. Keep work area well lighted.
Do not use electrically powered tools in the presence of flammable gases
or liquids.
3. Keep children away. Children must never be allowed in the work area.
Do not let them handle machines, tools, or extension cords.
4. Store idle equipment.. When not in use, tools must be stored in a dry

- 4 -
location to inhibit rust. Always lock up tools and keep out of reach of
children.
5. Do not force tool. It will do the job better and more safety at the rate for
which it was intended. Do not use inappropriate attachments in an attempt
to exceed the tool capacity.
6. Use the right tool for the job. Do not attempt to force a small tool or
attachment to do the work of a large industrial tool. Do not use a tool for a
purpose for which it was not intended.
7. Dress properly. Do not wear loose clothing of jewelry as they can be
caught in moving parts. Protective, electrically non-conductive clothes and
non-skid footwear are recommended when working. Wear restrictive hair
covering to contain long hair.
8. Use eye and ear protection. Always wear ISO approved impact safety
goggles. Wear a full-face shield if you are producing metal filings or wood
chips. Wear an ISO approved dust mask or respirator when working
around metal, and chemical dusts and mists.
9. Do not overreach. Keep proper footing and balance at all times. Do not
reach over or across running machine.
10. Maintain tools with care. Keep tools sharp and clean for better and
safer performance. Follow instructions for lubricating and changing
accessories. The handles must be kept clean, dry, and free from oil and
grease at all times.
11. Stay alert. Watch what you are doing; use common sense. Do not
operate any tool when you are tried.
12. Check for damaged parts. Before using any tool, any part that
appears damaged should be carefully checked to determine that it will
operate properly and perform its intended function. Check for alignment
and binding of moving parts; any broken parts or mounting fixtures; and
any other condition that may affect proper operation. Any part that is
damaged should be properly repaired or replaced by a qualified technician.
13. Guard against electric shock. Prevent body contact with grounded
surfaces such as pipes, radiators, ranges, and refrigerator enclosures.
14. Replacement parts and accessories. When servicing, use only
identical

- 5 -
replacement parts. Use of any other parts will void the warranty. Only use
accessories intended for use with this tool. Approved accessories are
available from the distributor.
15. Do not operate tool if under the influence of alcohol or drugs.
Read warning labels on prescriptions to determine if your judgment of
reflexes are impaired while taking drugs. If there is any doubt, do not
operate the tool.
Note: The warning and instructions contained in this instruction manual
cannot cover al possible conditions and situations that may occur when
using this product. It must be understood that common sense and
caution are factors, which cannot be built into this product. These factors
must be supplied by the person whom operating this piece of equipment.
Assembly and Operating Instructions
The 40” Mighty Mini Bender requires some minor assembly as described
below. Please refer to the parts diagram and the parts list shown below
when reading this instruction.
1. The Stand (#1) should be secured to a work bench using the mounting
holes and 4 bolts (3/8” diameter).
2. Each Handle Ball (#7) should be attached to the Handle Lever (#6) and
the Handle Levers should be placed into the Pins (#5).
3. To use the Mighty Mini Bender, lower the Handle Lever until the Moving
Plate is parallel to the work bench. Position the material to be bent on the
Supporting Plate (#2) and the moving Plate and properly align with the
edge to be bent up against the back edge of the Supporting Plate.
4. Place and secure the Pressing Plate (#3) on top of the Supporting Plate
with the back edge of Pressing Plate aligned with back edge of Supporting
Plate.

- 6 -
5. Raise the two Handle Levers to bend the material to the desired angle.
Warning: When using the Mighty Mini Bender keep fingers clear of the
Supporting Plate and Moving Plate to avoid personal injury.
6. When the Mighty Mini Bender is not in use, it should be covered and
stored in a dry location.
Parts List
Part #
Description
Qty
1
Stand
1
2
Supporting Plate
1
3
Pressing Plate
1
4
Moving Plate
1
5
Pin
2
6
Handle Lever
2
7
Handle Ball
2

- 7 -


- 2 -
Technique Certificat d'assistance et de garantie électronique
www.vevor.com/support
PLIAGE À LA MAIN
MANUEL D'UTILISATION
MODÈLE : W-1.0X610A/W-1.0X915/W-1.0X1220
We continue to be committed to provide you tools with competitive price.
"Save Half", "Half Price" or any other similar expressions used by us only represents an
estimate of savings you might benefit from buying certain tools with us compared to the major
top brands and does not necessarily mean to cover all categories of tools offered by us. You
are kindly reminded to verify carefully when you are placing an order with us if you are
actually saving half in comparison with the top major brands.
- 3 -
MODÈLE : W-1.0X610A/W-1.0X915/W-1.0X1220
Have product questions? Need technical support? Please feel free to
contact us:
Technical Support and E-Warranty Certificate
www.vevor.com/support
NEED HELP? CONTACT US!
This is the original instruction, please read all manual instructions
carefully before operating. VEVOR reserves a clear interpretation of our
user manual. The appearance of the product shall be subject to the
product you received. Please forgive us that we won't inform you again if
there are any technology or software updates on our product.
HAND BENDING

- 4 -
Caractéristiques
Capacité de pliage : plier des matériaux jusqu'à l'acier de calibre 18 ;
fabriquer jusqu'à 90
coudes à degrés; plie des matériaux jusqu'à 40 pouces de largeur.
Conçu pour un montage sur établi à l'aide de boulons de 3/8" de
diamètre.
Dimensions : 48 - 4/5” x 10 - 1/5” x 7”
Poids : 72 livres.
Sauvegarder ce manuel
Vous aurez besoin du manuel pour les avertissements et précautions de
sécurité, l'assemblage instructions, procédures d'utilisation et d'entretien,
liste des pièces et schéma. votre facture avec ce manuel. Écrivez le
numéro de facture à l'intérieur de la face avant Conservez le manuel et la
facture dans un endroit sûr et sec pour référence ultérieure.
Avertissements et précautions de sécurité
AVERTISSEMENT : Lors de l'utilisation de l'outil, des précautions de
sécurité de base doivent toujours être respectées pour réduire le risque de
blessures corporelles et de dommages matériels.
Lisez toutes les instructions avant d’utiliser cet outil !
1. Gardez la zone de travail propre. Les zones encombrées favorisent
les blessures.
2. Respectez les conditions de travail. N'utilisez pas de machines ou
d'outils électriques dans des conditions humides. ou dans des endroits

- 5 -
humides. Ne pas exposer à la pluie. Garder la zone de travail bien éclairée.
Ne pas utiliser outils électriques en présence de gaz ou de liquides
inflammables.
3. Tenez les enfants à l'écart. Les enfants ne doivent jamais être
autorisés dans la zone de travail. Ne laissez-les manipuler des machines,
des outils ou des rallonges.
4. Entreposer l'équipement inutilisé. Lorsqu'ils ne sont pas utilisés, les
outils doivent être stockés dans un endroit sec. pour empêcher la rouille.
Rangez toujours les outils sous clé et hors de portée des enfants.
5. Ne forcez pas l'outil. Il fera le travail mieux et plus sûrement à la
vitesse à laquelle il est utilisé. c'était prévu. N'utilisez pas de pièces jointes
inappropriées pour tenter de dépasser la capacité de l'outil.
6. Utilisez l'outil adapté à la tâche. N'essayez pas de forcer un petit outil
ou
accessoire pour effectuer le travail d'un gros outil industriel. N'utilisez pas
un outil pour un
un but pour lequel il n’était pas prévu.
7. Habillez-vous correctement. Ne portez pas de vêtements amples ni de
bijoux, car ils peuvent se coincer dans pièces mobiles. Vêtements de
protection, non conducteurs d'électricité et antidérapants Il est
recommandé de porter des chaussures de sécurité pour travailler. Portez
une protection capillaire restrictive pour contenir des cheveux longs.
8. Utilisez une protection pour les yeux et les oreilles. Portez toujours
des protections de sécurité contre les chocs homologuées ISO.
lunettes de protection. Portez un écran facial complet si vous produisez
des copeaux de métal ou du bois
copeaux. Portez un masque anti-poussière ou un respirateur homologué
ISO lorsque vous travaillez à proximité métaux, poussières et brouillards
chimiques.
9. Ne vous penchez pas trop. Gardez toujours une bonne position et un
bon équilibre. Ne vous penchez pas trop sur ou à travers une machine en
marche.
10. Entretenez vos outils avec soin. Gardez les outils bien aiguisés et

- 6 -
propres pour une utilisation optimale et plus sûre. performances. Suivez
les instructions pour la lubrification et le changement des accessoires. les
poignées doivent être maintenues propres, sèches et exemptes d'huile et
de graisse à tout moment.
11. Restez vigilant. Surveillez ce que vous faites et faites preuve de bon
sens. N'utilisez aucun outil lorsque vous êtes éprouvé.
12. Vérifiez les pièces endommagées. Avant d'utiliser un outil, vérifiez
toute pièce qui semble endommagée. endommagé doit être
soigneusement vérifié pour déterminer s'il fonctionnera correctement et
remplir sa fonction prévue. Vérifiez l'alignement et la liaison des éléments
mobiles pièces; toutes pièces ou accessoires de montage cassés; et toute
autre condition qui pourrait affecter le bon fonctionnement. Toute pièce
endommagée doit être correctement réparée ou remplacé par un
technicien qualifié.
13. Protégez-vous contre les décharges électriques. Évitez tout contact
du corps avec des surfaces reliées à la terre. tels que les tuyaux, les
radiateurs, les cuisinières et les enceintes de réfrigérateur.
14. Pièces de rechange et accessoires. Lors de l'entretien, n'utilisez que
des pièces identiques.
pièces de rechange. L'utilisation de toute autre pièce annulera la garantie.
Utilisez uniquement
accessoires destinés à être utilisés avec cet outil. Des accessoires
approuvés sont disponibles du distributeur.
16. N'utilisez pas l'outil si vous êtes sous l'influence de l'alcool ou de
drogues. Lire étiquettes d'avertissement sur les ordonnances pour
déterminer si votre jugement des réflexes est sous l'effet de drogues. En
cas de doute, n'utilisez pas l'outil.
Remarque : L'avertissement et les instructions contenus dans ce
manuel d'instructions ne peuvent pas couvrir toutes les conditions et
situations possibles qui peuvent survenir lors de l'utilisation de ce
produit. Il faut comprendre que le bon sens et la prudence sont des
facteurs qui ne peuvent pas être intégrés à ce produit. Ces facteurs
doivent être fournis par la personne celui qui utilise cet équipement.

- 7 -
Instructions de montage et d'utilisation
Le Mighty Mini Bender de 40 pouces nécessite un assemblage mineur
comme décrit ci-dessous. Veuillez vous référer au schéma des pièces et à
la liste des pièces ci-dessous lors de la lecture de ce document.
instruction.
1. Le support (#1) doit être fixé à un établi à l'aide des trous de montage et
4 boulons (3/8” de diamètre).
2. Chaque boule de poignée (#7) doit être fixée au levier de poignée (#6) et
au Les leviers de poignée doivent être placés dans les broches (#5).
3. Pour utiliser le Mighty Mini Bender, abaissez le levier de la poignée
jusqu'à ce que la plaque mobile soit parallèlement au plan de travail.
Positionnez le matériau à plier sur le support Plaque (#2) et la plaque
mobile et aligner correctement avec le bord à plier vers le haut contre le
bord arrière de la plaque de support.
4. Placez et fixez la plaque de pression (#3) sur la plaque de support avec
le bord arrière de la plaque de pression aligné avec le bord arrière de la
plaque de support.
5. Soulevez les deux leviers de poignée pour plier le matériau à l'angle
souhaité.
Avertissement : lorsque vous utilisez le Mighty Mini Bender, gardez les
doigts dégager la plaque de support et la plaque mobile pour éviter
préjudice corporel.
6. Lorsque le Mighty Mini Bender n'est pas utilisé, il doit être couvert et
rangé dans un endroit sec.
Liste des pièces

- 8 -
Partie #
Description
Quantité
1
Rester
1
2
Plaque de support
1
3
Plaque de pressage
1
4
Plaque mobile
1
5
Épingle
2
6
Levier de poignée
2
7
Poignée à boule
2


- 2 -
Technisch Support und E-Garantie-Zertifikat www.vevor.com/support
HANDBIEGEN
BEDIENUNGSANLEITUNG
MODELL: W-1.0X610A/W-1.0X915/W-1.0X1220
We continue to be committed to provide you tools with competitive price.
"Save Half", "Half Price" or any other similar expressions used by us only represents an
estimate of savings you might benefit from buying certain tools with us compared to the major
top brands and does not necessarily mean to cover all categories of tools offered by us. You
are kindly reminded to verify carefully when you are placing an order with us if you are
actually saving half in comparison with the top major brands.

- 3 -
MODELL: W-1.0X610A/W-1.0X915/W-1.0X1220
Have product questions? Need technical support? Please feel free to
contact us:
Technical Support and E-Warranty Certificate
www.vevor.com/support
NEED HELP? CONTACT US!
This is the original instruction, please read all manual instructions
carefully before operating. VEVOR reserves a clear interpretation of our
user manual. The appearance of the product shall be subject to the
product you received. Please forgive us that we won't inform you again if
there are any technology or software updates on our product.
HAND BENDING

- 4 -
Technische Daten
Biegekapazität: Biegen Sie Materialien bis zu 18 Gauge Stahl; machen
Sie bis zu 90
Grad-Biegungen; biegt Material bis zu einer Breite von 40 Zoll.
Konzipiert für die Montage auf einer Werkbank mit Schrauben mit 3/8
Zoll Durchmesser.
Abmessungen: 48 - 4/5” x 10 - 1/5” x 7”
Gewicht: 72 Pfund.
Bewahren Sie dieses Handbuch auf
Sie benötigen das Handbuch für die Sicherheitshinweise und
Vorsichtsmaßnahmen, Montage Anleitungen, Betriebs- und
Wartungsverfahren, Teileliste und Diagramm. Bewahren Sie Ihre
Rechnung mit diesem Handbuch. Schreiben Sie die Rechnungsnummer
auf die Innenseite der Vorderseite Abdeckung. Bewahren Sie das
Handbuch und die Rechnung zur späteren Verwendung an einem sicheren
und trockenen Ort auf.
Sicherheitswarnungen und Vorsichtsmaßnahmen
WARNUNG: Bei der Verwendung des Werkzeugs sollten immer
grundlegende Sicherheitsvorkehrungen getroffen werden um das Risiko
von Personenschäden und Sachschäden zu verringern.
Lesen Sie alle Anweisungen, bevor Sie dieses Werkzeug verwenden!
1. Halten Sie Ihren Arbeitsbereich sauber. Unordnung kann zu
Verletzungen führen.
2. Beachten Sie die Bedingungen am Arbeitsplatz. Benutzen Sie keine
Maschinen oder Elektrowerkzeuge in feuchten oder feuchten Orten. Nicht

- 5 -
dem Regen aussetzen. Sorgen Sie für eine gute Beleuchtung des
Arbeitsbereichs. Verwenden Sie Verwenden Sie keine Elektrowerkzeuge in
der Nähe von brennbaren Gasen oder Flüssigkeiten.
3. Halten Sie Kinder fern. Kinder dürfen sich niemals im Arbeitsbereich
aufhalten. Lassen Sie sie mit Maschinen, Werkzeugen oder
Verlängerungskabeln umgehen.
4. Lagern Sie ungenutzte Geräte. Wenn Sie nicht im Einsatz sind,
müssen Sie die Werkzeuge an einem trockenen Ort aufbewahren. um Rost
zu verhindern. Werkzeuge immer wegschließen und außerhalb der
Reichweite von Kindern aufbewahren.
5. Verwenden Sie kein Werkzeug mit Gewalt. Es wird die Arbeit besser
und sicherer erledigen, wenn Sie es war beabsichtigt. Verwenden Sie
keine unangemessenen Anhänge in dem Versuch, zu überschreiten die
Werkzeugkapazität.
6. Verwenden Sie das richtige Werkzeug für die Arbeit. Versuchen Sie
nicht, ein kleines Werkzeug oder
Aufsatz, der die Arbeit eines großen Industriewerkzeugs übernimmt.
Verwenden Sie kein Werkzeug für eine
Zweck, für den es nicht bestimmt ist.
7. Ziehen Sie sich angemessen an. Tragen Sie keine weite Kleidung
oder Schmuck, da diese sich verfangen können beweglichen Teilen.
Schützende, elektrisch nichtleitende Kleidung und rutschfeste Bei der
Arbeit werden Schuhe empfohlen. Tragen Sie eine einschränkende
Haarbedeckung, um enthalten lange Haare.
8. Verwenden Sie Augen- und Gehörschutz. Tragen Sie immer einen
ISO-zertifizierten
Schutzbrille. Tragen Sie einen Vollgesichtsschutz, wenn Sie Metallspäne
oder Holzspäne produzieren
Späne. Tragen Sie eine ISO-geprüfte Staubmaske oder Atemschutzmaske,
wenn Sie in der Nähe von Metall- sowie chemische Stäube und Nebel.
9. Überstrecken Sie sich nicht. Achten Sie stets auf den richtigen Stand
und das Gleichgewicht. Greifen Sie nicht über oder quer zur laufenden
Maschine.
10. Pflegen Sie Ihre Werkzeuge sorgfältig. Halten Sie Ihre Werkzeuge

- 6 -
scharf und sauber, um eine bessere und sicherere Leistung. Befolgen Sie
die Anweisungen zum Schmieren und Wechseln von Zubehör. Die Griffe
müssen stets sauber, trocken und frei von Öl und Fett gehalten werden.
11. Bleiben Sie wachsam. Achten Sie darauf, was Sie tun, und
verwenden Sie Ihren gesunden Menschenverstand. Werkzeug, wenn Sie
ausprobiert werden.
12. Überprüfen Sie, ob Teile beschädigt sind. Bevor Sie ein Werkzeug
verwenden, beschädigte Teile müssen sorgfältig überprüft werden, um
sicherzustellen, dass sie ordnungsgemäß funktionieren und seine
beabsichtigte Funktion erfüllen. Überprüfen Sie die Ausrichtung und
Bindung der beweglichen Teile; defekte Teile oder Montagevorrichtungen;
und alle anderen Zustände, die den ordnungsgemäßen Betrieb
beeinträchtigen. Alle beschädigten Teile müssen ordnungsgemäß repariert
werden oder von einem qualifizierten Techniker ausgetauscht werden.
13. Schützen Sie sich vor Stromschlägen. Vermeiden Sie Körperkontakt
mit geerdeten Oberflächen wie Rohre, Heizkörper, Herde und
Kühlschrankgehäuse.
14. Ersatzteile und Zubehör. Verwenden Sie bei der Wartung nur
identische
Ersatzteile. Bei Verwendung anderer Teile erlischt die Garantie.
Verwenden Sie nur
Zubehör, das für die Verwendung mit diesem Werkzeug vorgesehen ist.
Zugelassenes Zubehör ist erhältlich vom Verteiler.
17. Bedienen Sie das Gerät nicht, wenn Sie unter dem Einfluss von
Alkohol oder Drogen stehen. Lesen Sie Warnhinweise auf Rezepten, um
festzustellen, ob Ihr Urteil über Reflexe bei Einnahme von Medikamenten
beeinträchtigt. Im Zweifelsfall das Gerät nicht bedienen.
Hinweis: Die in dieser Bedienungsanleitung enthaltenen Warnungen
und Anweisungen können decken alle möglichen Bedingungen und
Situationen ab, die bei der Verwendung dieses Produkt. Es muss
verstanden werden, dass gesunder Menschenverstand und Vorsicht
Faktoren sind, die können nicht in dieses Produkt eingebaut werden.
Diese Faktoren müssen von der Person geliefert werden die dieses

- 7 -
Gerät bedienen.
Montage- und Bedienungsanleitung
Der 40-Zoll-Mighty Mini Bender erfordert einige kleinere Montagearbeiten,
wie unten beschrieben. Bitte beachten Sie beim Lesen dieses Dokuments
das Teilediagramm und die Teileliste unten. Anweisung.
1. Der Ständer (#1) sollte mit Hilfe der Befestigungslöcher an einer
Werkbank befestigt werden und 4 Schrauben (3/8 Zoll Durchmesser).
2. Jeder Griffball (#7) sollte am Griffhebel (#6) befestigt sein und der Die
Griffhebel sollten in die Stifte (Nr. 5) eingesetzt werden.
3. Um den Mighty Mini Bender zu verwenden, senken Sie den Griffhebel
ab, bis die bewegliche Platte parallel zur Werkbank. Positionieren Sie das
zu biegende Material auf der Platte (#2) und die bewegliche Platte und
richten Sie sie richtig an der zu biegenden Kante aus gegen die hintere
Kante der Trägerplatte.
4. Platzieren und befestigen Sie die Pressplatte (#3) auf der Trägerplatte
mit Die Hinterkante der Pressplatte ist mit der Hinterkante der Stützplatte
ausgerichtet.
5. Heben Sie die beiden Griffhebel an, um das Material in den
gewünschten Winkel zu biegen.
Achtung: Halten Sie beim Gebrauch des Mighty Mini Bender die Finger
von der Stützplatte und der beweglichen Platte fern, um zu vermeiden
oder Personenschäden.
6. Wenn der Mighty Mini Bender nicht verwendet wird, sollte er abgedeckt
und in einem trockenen Ort.
Ersatzteilliste

- 8 -
Teil #
Beschreibung
Menge
1
Stand
1
2
Trägerplatte
1
3
Pressplatte
1
4
Bewegliche Platte
1
5
Stift
2
6
Griffhebel
2
7
Griffkugel
2


- 2 -
Tecnico Supporto e certificato di garanzia elettronica www.vevor.com/support
PIEGATURA A MANO
MANUALE OPERATIVO
MODELLO: W-1.0X610A/W-1.0X915/W-1.0X1220
We continue to be committed to provide you tools with competitive price.
"Save Half", "Half Price" or any other similar expressions used by us only represents an
estimate of savings you might benefit from buying certain tools with us compared to the major
top brands and does not necessarily mean to cover all categories of tools offered by us. You
are kindly reminded to verify carefully when you are placing an order with us if you are
actually saving half in comparison with the top major brands.

- 3 -
MODELLO: W-1.0X610A/W-1.0X915/W-1.0X1220
Have product questions? Need technical support? Please feel free to
contact us:
Technical Support and E-Warranty Certificate
www.vevor.com/support
NEED HELP? CONTACT US!
This is the original instruction, please read all manual instructions
carefully before operating. VEVOR reserves a clear interpretation of our
user manual. The appearance of the product shall be subject to the
product you received. Please forgive us that we won't inform you again if
there are any technology or software updates on our product.
HAND BENDING

- 4 -
Specifiche
Capacità di piegatura: piega materiali fino a acciaio calibro 18; realizza
fino a 90
curve di grado; piega materiali fino a 40 pollici di larghezza.
Progettato per il montaggio su banco di lavoro mediante bulloni da 3/8"
di diametro.
Dimensioni: 48 - 4/5” x 10 - 1/5” x 7”
Peso: 72 libbre.
Salva questo manuale
Avrai bisogno del manuale per le avvertenze e le precauzioni di sicurezza,
il montaggio istruzioni, procedure operative e di manutenzione, elenco
delle parti e diagramma. Mantenere la tua fattura con questo manuale.
Scrivi il numero della fattura all'interno della parte anteriore copertina.
Conservare il manuale e la fattura in un luogo sicuro e asciutto per
riferimento futuro.
Avvertenze e precauzioni di sicurezza
ATTENZIONE: quando si utilizza l'utensile, è necessario seguire sempre le
precauzioni di sicurezza di base per ridurre il rischio di lesioni personali e
danni alle apparecchiature.
Leggere tutte le istruzioni prima di utilizzare questo strumento!
1. Mantenere pulita l'area di lavoro. Le aree disordinate favoriscono gli
infortuni.
2. Osservare le condizioni dell'area di lavoro. Non utilizzare macchine o
utensili elettrici in ambienti umidi. o luoghi umidi. Non esporre alla pioggia.
Mantenere l'area di lavoro ben illuminata. Non utilizzare utensili elettrici in

- 5 -
presenza di gas o liquidi infiammabili.
3. Tenere lontani i bambini. Non permettere mai ai bambini di entrare
nell'area di lavoro. Non lasciarli maneggiare macchinari, utensili o
prolunghe.
4. Conservare l'attrezzatura inutilizzata. Quando non vengono utilizzati,
gli utensili devono essere conservati in un luogo asciutto. per inibire la
ruggine. Chiudere sempre a chiave gli utensili e tenerli fuori dalla portata
dei bambini.
5. Non forzare l'utensile. Farà il lavoro meglio e in modo più sicuro alla
velocità per cui era previsto. Non utilizzare allegati inappropriati nel
tentativo di superare la capacità dell'utensile.
6. Utilizzare lo strumento giusto per il lavoro. Non tentare di forzare un
piccolo strumento o
accessorio per svolgere il lavoro di un grande utensile industriale. Non
utilizzare un utensile per un
scopo per il quale non era previsto.
7. Vestiti in modo appropriato. Non indossare abiti larghi o gioielli perché
potrebbero impigliarsi parti mobili. Indumenti protettivi, elettricamente non
conduttivi e antiscivolo si raccomandano calzature durante il lavoro.
Indossare una copertura restrittiva per i capelli contengono capelli lunghi.
8. Utilizzare protezioni per occhi e orecchie. Indossare sempre
protezioni antiurto approvate ISO.
occhiali protettivi. Indossare una visiera completa se si producono limature
di metallo o legno
trucioli. Indossare una maschera antipolvere o un respiratore approvati
ISO quando si lavora in prossimità metalli, polveri e nebbie chimiche.
9. Non sporgerti troppo. Mantieni sempre un appoggio e un equilibrio
adeguati. Non sporgerti sopra o attraverso la macchina in funzione.
10. Mantieni gli utensili con cura. Mantieni gli utensili affilati e puliti per
un uso migliore e più sicuro. prestazioni. Seguire le istruzioni per la
lubrificazione e la sostituzione degli accessori. le maniglie devono essere
sempre pulite, asciutte e prive di olio e grasso.
11. Resta vigile. Guarda cosa stai facendo; usa il buon senso. Non
azionare alcun strumento quando sei provato.

- 6 -
12. Controllare eventuali parti danneggiate. Prima di utilizzare qualsiasi
strumento, qualsiasi parte che appare danneggiato deve essere
attentamente controllato per determinare che funzionerà correttamente e
svolgere la funzione prevista. Controllare l'allineamento e il legame dei
componenti mobili parti; eventuali parti rotte o dispositivi di montaggio; e
qualsiasi altra condizione che potrebbe compromettere il corretto
funzionamento. Qualsiasi parte danneggiata deve essere riparata
correttamente o sostituito da un tecnico qualificato.
13. Proteggersi dalle scosse elettriche. Evitare il contatto del corpo con
superfici messe a terra come tubi, radiatori, cucine e involucri di frigoriferi.
14. Parti di ricambio e accessori. Durante la manutenzione, utilizzare
solo parti identiche
parti di ricambio. L'uso di altre parti invaliderà la garanzia. Utilizzare solo
accessori destinati all'uso con questo strumento. Sono disponibili
accessori approvati dal distributore.
18. Non utilizzare l'utensile se sotto l'effetto di alcol o droghe.
Leggere etichette di avvertenza sulle prescrizioni per determinare se il tuo
giudizio sui riflessi è alterata durante l'assunzione di droghe. In caso di
dubbi, non utilizzare l'utensile.
Nota: le avvertenze e le istruzioni contenute nel presente manuale di
istruzioni non possono coprire tutte le possibili condizioni e situazioni
che possono verificarsi durante l'utilizzo di questo prodotto. Bisogna
comprendere che il buon senso e la cautela sono fattori che non può
essere integrato in questo prodotto. Questi fattori devono essere forniti
dalla persona che utilizza questa apparecchiatura.
Istruzioni di montaggio e funzionamento
Il Mighty Mini Bender da 40" richiede un piccolo assemblaggio come
descritto di seguito. Si prega di fare riferimento allo schema delle parti e
all'elenco delle parti mostrato di seguito durante la lettura di questo
istruzione.
1. Il supporto (#1) deve essere fissato a un banco da lavoro utilizzando i

- 7 -
fori di montaggio e 4 bulloni (diametro 3/8”).
2. Ogni sfera della maniglia (#7) deve essere fissata alla leva della
maniglia (#6) e alla Le leve della maniglia devono essere inserite nei perni
(#5).
3. Per utilizzare il Mighty Mini Bender, abbassare la leva della maniglia
finché la piastra mobile non è parallelamente al banco di lavoro.
Posizionare il materiale da piegare sul Supporto Piastra (#2) e piastra
mobile e allineare correttamente con il bordo da piegare contro il bordo
posteriore della piastra di supporto.
4. Posizionare e fissare la piastra di pressatura (#3) sulla parte superiore
della piastra di supporto con il bordo posteriore della piastra di pressatura
allineato con il bordo posteriore della piastra di supporto.
5. Sollevare le due leve della maniglia per piegare il materiale
all'angolazione desiderata.
Attenzione: quando si utilizza il Mighty Mini Bender, tenere le dita
liberare la piastra di supporto e la piastra mobile per evitare lesioni
personali.
6. Quando il Mighty Mini Bender non è in uso, deve essere coperto e
conservato in un luogo asciutto.
Elenco delle parti
Parte #
Descrizione
Quantità
1
In piedi
1
2
Piastra di supporto
1
3
Piastra di pressatura
1
4
Piastra mobile
1

- 8 -
5
Spillo
2
6
Leva della maniglia
2
7
Maniglia a sfera
2


- 2 -
Técnico Soporte y certificado de garantía electrónica www.vevor.com/support
DOBLADO A MANO
MANUAL DE OPERACIÓN
MODELO: W-1.0X610A/W-1.0X915/W-1.0X1220
We continue to be committed to provide you tools with competitive price.
"Save Half", "Half Price" or any other similar expressions used by us only represents an
estimate of savings you might benefit from buying certain tools with us compared to the major
top brands and does not necessarily mean to cover all categories of tools offered by us. You
are kindly reminded to verify carefully when you are placing an order with us if you are
actually saving half in comparison with the top major brands.

- 3 -
MODELO: W-1.0X610A/W-1.0X915/W-1.0X1220
Have product questions? Need technical support? Please feel free to
contact us:
Technical Support and E-Warranty Certificate
www.vevor.com/support
NEED HELP? CONTACT US!
This is the original instruction, please read all manual instructions
carefully before operating. VEVOR reserves a clear interpretation of our
user manual. The appearance of the product shall be subject to the
product you received. Please forgive us that we won't inform you again if
there are any technology or software updates on our product.
HAND BENDING

- 4 -
Presupuesto
Capacidad de doblado: dobla materiales de acero de hasta calibre 18;
realiza doblados de hasta 90
curvas de grado; dobla materiales de hasta 40 pulgadas de ancho.
Diseñado para montaje sobre mesa de trabajo utilizando pernos de 3/8”
de diámetro.
Dimensiones: 48 - 4/5” x 10 - 1/5” x 7”
Peso: 72 libras.
Guarde este manual
Necesitará el manual de advertencias y precauciones de seguridad y
montaje. instrucciones, procedimientos de operación y mantenimiento,
lista de piezas y diagrama. Su factura con este manual. Escriba el número
de factura en el interior del frente. cubierta. Guarde el manual y la factura
en un lugar seguro y seco para futuras consultas.
Advertencias y precauciones de seguridad
ADVERTENCIA: Al utilizar la herramienta, siempre se deben seguir
precauciones básicas de seguridad. para reducir el riesgo de lesiones
personales y daños al equipo.
¡Lea todas las instrucciones antes de utilizar esta herramienta!
1. Mantenga limpia el área de trabajo. Las áreas desordenadas son una
buena opción para las lesiones.
2. Respete las condiciones del área de trabajo. No utilice máquinas ni
herramientas eléctricas en lugares húmedos. o lugares húmedos. No
exponer a la lluvia. Mantener el área de trabajo bien iluminada. No utilizar

- 5 -
herramientas eléctricas en presencia de gases o líquidos inflamables.
3. Mantenga a los niños alejados. Nunca se debe permitir que los niños
estén en el área de trabajo. Permítales manipular máquinas, herramientas
o cables de extensión.
4. Almacene el equipo que no utilice. Cuando no se utilice, las
herramientas deben almacenarse en un lugar seco. Para inhibir la
oxidación. Guarde siempre las herramientas bajo llave y manténgalas
fuera del alcance de los niños.
5. No fuerce la herramienta. Hará el trabajo mejor y con más seguridad a
la velocidad a la que la use. Fue intencionado. No utilice archivos adjuntos
inapropiados en un intento de excederse. La capacidad de la herramienta.
6. Utilice la herramienta adecuada para el trabajo. No intente forzar una
herramienta pequeña o
accesorio para realizar el trabajo de una herramienta industrial grande. No
utilice una herramienta para un
propósito para el cual no fue destinado.
7. Vístase adecuadamente. No use ropa suelta ni joyas, ya que pueden
quedar atrapadas en el agua. Piezas móviles. Ropa protectora no
conductora de electricidad y antideslizante. Se recomienda usar calzado
adecuado para trabajar. Usar un protector para el cabello que ajuste bien.
contener cabello largo.
8. Utilice protección para los ojos y los oídos. Utilice siempre equipo de
seguridad contra impactos aprobado por la ISO.
Use una pantalla facial completa si está produciendo limaduras de metal o
madera.
Utilice una máscara antipolvo o un respirador aprobados por la ISO
cuando trabaje cerca de metales y polvos y nieblas químicas.
9. No se estire demasiado. Mantenga el equilibrio y la posición adecuada
en todo momento. No se estire demasiado. sobre o a través de una
máquina en funcionamiento.
10. Cuide las herramientas. Mantenga las herramientas afiladas y
limpias para un uso más seguro. rendimiento. Siga las instrucciones para
lubricar y cambiar los accesorios. Los mangos deben mantenerse limpios,
secos y libres de aceite y grasa en todo momento.

- 6 -
11. Manténgase alerta. Preste atención a lo que hace; use el sentido
común. No opere ningún vehículo. herramienta cuando estés probado.
12. Compruebe si hay piezas dañadas. Antes de utilizar cualquier
herramienta, compruebe si hay alguna pieza que parezca dañada. Los
dañados deben revisarse cuidadosamente para determinar que
funcionarán correctamente. y realizar su función prevista. Compruebe la
alineación y el atascamiento de los componentes móviles. piezas;
cualquier pieza rota o accesorio de montaje; y cualquier otra condición que
pueda afectar el funcionamiento correcto. Cualquier pieza que esté
dañada debe repararse adecuadamente. o reemplazado por un técnico
calificado.
13. Protéjase contra descargas eléctricas. Evite el contacto del cuerpo
con superficies conectadas a tierra. tales como tuberías, radiadores,
estufas y gabinetes de refrigeradores.
14. Piezas de repuesto y accesorios. Al realizar el mantenimiento, utilice
únicamente piezas idénticas.
piezas de repuesto. El uso de cualquier otra pieza anulará la garantía.
Utilice únicamente
Accesorios destinados para su uso con esta herramienta. Hay accesorios
aprobados disponibles Del distribuidor.
19. No utilice la herramienta si se encuentra bajo los efectos del
alcohol o las drogas. Leer más etiquetas de advertencia en las recetas
para determinar si su juicio de reflejos es correcto Si tiene alguna duda, no
utilice la herramienta.
Nota: Las advertencias e instrucciones contenidas en este manual de
instrucciones no pueden cubre todas las posibles condiciones y
situaciones que puedan ocurrir al utilizar este producto. Hay que
entender que el sentido común y la precaución son factores que No se
pueden incorporar en este producto. Estos factores deben ser
suministrados por la persona. quien opera este equipo.
Instrucciones de montaje y funcionamiento

- 7 -
La Mighty Mini Bender de 40” requiere un pequeño ensamblaje como se
describe a continuación. Consulte el diagrama de piezas y la lista de
piezas que se muestran a continuación al leer este documento.
instrucción.
1. El soporte (#1) debe asegurarse a un banco de trabajo utilizando los
orificios de montaje. y 4 pernos (3/8” de diámetro).
2. Cada bola de manija (#7) debe estar unida a la palanca de manija (#6) y
la Las palancas del mango deben colocarse en los pasadores (#5).
3. Para utilizar el Mighty Mini Bender, baje la palanca del mango hasta que
la placa móvil quede paralela al banco de trabajo. Coloque el material a
doblar sobre el soporte Placa (#2) y la placa móvil y alinee correctamente
con el borde que se va a doblar hacia arriba contra el borde posterior de la
placa de soporte.
4. Coloque y asegure la placa de presión (#3) sobre la placa de soporte
con El borde posterior de la placa de presión está alineado con el borde
posterior de la placa de soporte.
5. Levante las dos palancas del mango para doblar el material al ángulo
deseado.
Advertencia: Al utilizar el Mighty Mini Bender, mantenga los dedos
lejos de la placa de soporte y la placa móvil para evitar Lesión personal.
6. Cuando el Mighty Mini Bender no esté en uso, debe cubrirse y
almacenarse en un lugar ubicación seca
Lista de piezas
Parte #
Descripción
Cantidad
1
Pararse
1

- 8 -
2
Placa de soporte
1
3
Placa de prensado
1
4
Placa móvil
1
5
Alfiler
2
6
Palanca de manija
2
7
Mango de bola
2


- 2 -
Techniczny Wsparcie i certyfikat gwarancji elektronicznej www.vevor.com/support
ZGINANIE DŁONI
INSTRUKCJA OBSŁUGI
MODELE: W-1.0X610A/W-1.0X915/W-1.0X1220
We continue to be committed to provide you tools with competitive price.
"Save Half", "Half Price" or any other similar expressions used by us only represents an
estimate of savings you might benefit from buying certain tools with us compared to the major
top brands and does not necessarily mean to cover all categories of tools offered by us. You
are kindly reminded to verify carefully when you are placing an order with us if you are
actually saving half in comparison with the top major brands.

- 3 -
MODELE: W-1.0X610A/W-1.0X915/W-1.0X1220
Have product questions? Need technical support? Please feel free to
contact us:
Technical Support and E-Warranty Certificate
www.vevor.com/support
NEED HELP? CONTACT US!
This is the original instruction, please read all manual instructions
carefully before operating. VEVOR reserves a clear interpretation of our
user manual. The appearance of the product shall be subject to the
product you received. Please forgive us that we won't inform you again if
there are any technology or software updates on our product.
HAND BENDING

- 4 -
Specyfikacje
Zdolność gięcia: Gięcie materiałów o grubości do 18 mm, do 90 mm
zagięcia stopniowe; zagina materiały o szerokości do 40 cali.
Przeznaczony do montażu na blacie stołu za pomocą śrub o średnicy
3/8”.
Wymiary: 48 - 4/5” x 10 - 1/5” x 7”
Waga: 72 funty.
Zapisz ten podręcznik
W instrukcji obsługi znajdziesz ostrzeżenia i środki ostrożności dotyczące
bezpieczeństwa, montażu instrukcje, procedury obsługi i konserwacji, lista
części i schemat. Zachowaj fakturę z tą instrukcją. Napisz numer faktury
na wewnętrznej stronie przedniej strony okładka. Instrukcję i fakturę należy
przechowywać w bezpiecznym i suchym miejscu do wykorzystania w
przyszłości.
Ostrzeżenia i środki ostrożności dotyczące bezpieczeństwa
OSTRZEŻENIE: Podczas korzystania z narzędzia należy zawsze
przestrzegać podstawowych zasad bezpieczeństwa. aby zmniejszyć
ryzyko obrażeń ciała i uszkodzenia sprzętu.
Przed użyciem narzędzia przeczytaj uważnie całą instrukcję!
1. Utrzymuj miejsce pracy w czystości. Zagracenie sprzyja powstawaniu
urazów.

- 5 -
2. Obserwuj warunki w miejscu pracy. Nie używaj maszyn ani
elektronarzędzi w wilgotnych pomieszczeniach. lub w miejscach mokrych.
Nie wystawiać na deszcz. Utrzymywać miejsce pracy dobrze oświetlone.
Nie używać Narzędzia zasilane elektrycznie w obecności gazów lub
cieczy łatwopalnych.
3. Trzymaj dzieci z daleka. Dzieciom nigdy nie wolno przebywać w
miejscu pracy. Nie pozwól im obsługiwać maszyny, narzędzia i
przedłużacze.
4. Przechowuj nieużywany sprzęt. Gdy narzędzia nie są używane,
należy je przechowywać w suchym miejscu. aby zapobiec rdzewieniu.
Zawsze zamykaj narzędzia i trzymaj je poza zasięgiem dzieci.
5. Nie używaj narzędzia na siłę. Wykona ono zadanie lepiej i bezpieczniej
w tempie, w jakim było zamierzone. Nie używaj nieodpowiednich
załączników w celu przekroczenia pojemność narzędzia.
6. Używaj właściwego narzędzia do pracy. Nie próbuj używać na siłę
małego narzędzia lub
przystawka do wykonywania pracy dużego narzędzia przemysłowego. Nie
używaj narzędzia do
celu, do którego nie było przeznaczone.
7. Ubierz się odpowiednio. Nie noś luźnej odzieży ani biżuterii, ponieważ
mogą się one wkręcić. ruchome części. Ochronne, nieprzewodzące prądu
ubrania i antypoślizgowe zalecane jest obuwie podczas pracy. Noś
ograniczające nakrycie głowy, aby zawierają długie włosy.
8. Używaj ochrony oczu i uszu. Zawsze noś zatwierdzone przez ISO
środki ochrony przed uderzeniami.
gogle. Noś pełną osłonę twarzy, jeśli produkujesz opiłki metalu lub drewna
wiórów. Podczas pracy w pobliżu należy nosić maskę przeciwpyłową lub
respirator zatwierdzoną przez ISO metale, pyły i mgły chemiczne.
9. Nie wychylaj się za daleko. Zawsze utrzymuj równowagę i równowagę.
Nie wychylaj się za daleko. nad lub w poprzek pracującej maszyny.
10. Dbaj o narzędzia. Utrzymuj narzędzia ostre i czyste, aby zapewnić
lepszą i bezpieczniejszą pracę. wydajność. Postępuj zgodnie z
instrukcjami dotyczącymi smarowania i wymiany akcesoriów. Uchwyty
muszą być zawsze czyste, suche i wolne od oleju i smaru.

- 6 -
11. Bądź czujny. Uważaj, co robisz; używaj zdrowego rozsądku. Nie
obsługuj żadnych narzędzie, gdy jesteś wypróbowany.
12. Sprawdź, czy nie ma uszkodzonych części. Przed użyciem
jakiegokolwiek narzędzia, każda część, która wydaje się uszkodzone
należy dokładnie sprawdzić, aby upewnić się, że będą działać prawidłowo i
wykonywać swoją zamierzoną funkcję. Sprawdź wyrównanie i wiązanie
ruchomych elementów części; wszelkie uszkodzone części lub elementy
montażowe; oraz wszelkie inne stany, które mogą wpłynąć na prawidłowe
działanie. Każda uszkodzona część powinna zostać odpowiednio
naprawiona lub wymieniony przez wykwalifikowanego technika.
13. Chroń się przed porażeniem prądem. Unikaj kontaktu ciała z
uziemionymi powierzchniami. takich jak rury, grzejniki, kuchenki i obudowy
lodówek.
14. Części zamienne i akcesoria. Podczas serwisowania należy używać
wyłącznie identycznych
części zamienne. Użycie jakichkolwiek innych części spowoduje
unieważnienie gwarancji. Używaj wyłącznie
akcesoria przeznaczone do użytku z tym narzędziem. Dostępne są
zatwierdzone akcesoria od dystrybutora.
20. Nie obsługuj narzędzia, jeśli jesteś pod wpływem alkoholu lub
narkotyków. Przeczytaj etykiety ostrzegawcze na receptach, aby ustalić,
czy Twoja ocena odruchów jest upośledzony podczas zażywania
narkotyków. W razie jakichkolwiek wątpliwości nie należy obsługiwać
narzędzia.
Uwaga: Ostrzeżenia i instrukcje zawarte w niniejszej instrukcji obsługi
nie mogą być interpretowane jako nieważne. obejmuje wszystkie
możliwe warunki i sytuacje, które mogą wystąpić podczas korzystania z
tego produkt. Należy zrozumieć, że zdrowy rozsądek i ostrożność to
czynniki, które nie może być wbudowany w ten produkt. Te czynniki
muszą być dostarczone przez osobę kto obsługuje to urządzenie.

- 7 -
Instrukcja montażu i obsługi
40-calowa mini giętarka Mighty Mini Bender wymaga drobnego montażu,
zgodnie z opisem poniżej. Podczas czytania tego dokumentu należy
zapoznać się ze schematem części i listą części zamieszczoną poniżej.
instrukcja.
1. Stojak (#1) należy przymocować do stołu roboczego za pomocą
otworów montażowych i 4 śruby (średnica 3/8”).
2. Każda kula uchwytu (#7) powinna być przymocowana do dźwigni
uchwytu (#6) i Dźwignie klamki należy umieścić w kołkach (#5).
3. Aby użyć Mighty Mini Bender, opuść dźwignię uchwytu, aż ruchoma
płyta się zatrzyma. równolegle do stołu roboczego. Umieść materiał do
gięcia na Podporze Płytkę (#2) i ruchomą płytkę należy prawidłowo
wyrównać z krawędzią, która ma zostać zgięta do tylnej krawędzi płyty
nośnej.
4. Umieść i zabezpiecz płytkę dociskową (#3) na górze płytki podporowej
za pomocą tylna krawędź płyty dociskowej wyrównana z tylną krawędzią
płyty podporowej.
5. Podnieś dwie dźwignie uchwytu, aby wygiąć materiał pod żądanym
kątem.
Ostrzeżenie: Podczas korzystania z Mighty Mini Bender należy trzymać
palce z dala od płyty podporowej i płyty ruchomej, aby uniknąć
obrażenia ciała.
6. Gdy nie używasz Mighty Mini Bender, należy go przykryć i
przechowywać w miejsce suche.
Lista części
Część #
Opis
Ilość

- 8 -
1
Podstawka
1
2
Płyta podporowa
1
3
Płyta dociskowa
1
4
Ruchoma płyta
1
5
Szpilka
2
6
Dźwignia klamki
2
7
Rączka do piłki
2


- 2 -
Technisch Ondersteuning en E-garantiecertificaat www.vevor.com/support
HAND BUIGEN
GEBRUIKSAANWIJZING
MODEL: W-1.0X610A/W-1.0X915/W-1.0X1220
We continue to be committed to provide you tools with competitive price.
"Save Half", "Half Price" or any other similar expressions used by us only represents an
estimate of savings you might benefit from buying certain tools with us compared to the major
top brands and does not necessarily mean to cover all categories of tools offered by us. You
are kindly reminded to verify carefully when you are placing an order with us if you are
actually saving half in comparison with the top major brands.
- 3 -
MODEL: W-1.0X610A/W-1.0X915/W-1.0X1220
Have product questions? Need technical support? Please feel free to
contact us:
Technical Support and E-Warranty Certificate
www.vevor.com/support
NEED HELP? CONTACT US!
This is the original instruction, please read all manual instructions
carefully before operating. VEVOR reserves a clear interpretation of our
user manual. The appearance of the product shall be subject to the
product you received. Please forgive us that we won't inform you again if
there are any technology or software updates on our product.
HAND BENDING

- 4 -
Specificaties
Buigcapaciteit: Buigt materialen tot 18 gauge staal; maakt tot 90
gradenbochten; buigt materiaal tot 40 inch breed.
Ontworpen voor montage op een werkbank met behulp van bouten met
een diameter van 3/8”.
Afmetingen: 48 - 4/5” x 10 - 1/5” x 7”
Gewicht: 72 pond.
Bewaar deze handleiding
U hebt de handleiding nodig voor de veiligheidswaarschuwingen en
voorzorgsmaatregelen, montage instructies, bedienings- en
onderhoudsprocedures, onderdelenlijst en diagram. Houd uw factuur met
deze handleiding. Schrijf het factuurnummer aan de binnenkant van de
voorkant omslag. Bewaar de handleiding en factuur op een veilige en
droge plaats voor toekomstige referentie.
Veiligheidswaarschuwingen en voorzorgsmaatregelen
WAARSCHUWING: Bij het gebruik van gereedschap dienen altijd de
basisveiligheidsmaatregelen in acht te worden genomen om het risico op
letsel aan personen en schade aan apparatuur te verminderen.
Lees alle instructies voordat u dit gereedschap gebruikt!
1. Zorg dat de werkplek schoon is. Rommelige plekken zijn een bron van
verwondingen.
2. Let op de omstandigheden op de werkplek. Gebruik geen machines
of elektrisch gereedschap in vochtige ruimtes. of natte locaties. Niet
blootstellen aan regen. Zorg dat het werkgebied goed verlicht is. Niet
gebruiken elektrisch aangedreven gereedschappen in de aanwezigheid

- 5 -
van ontvlambare gassen of vloeistoffen.
3. Houd kinderen uit de buurt. Kinderen mogen nooit in het werkgebied
komen. laat ze machines, gereedschap of verlengsnoeren bedienen.
4. Berg ongebruikte apparatuur op. Wanneer gereedschap niet in
gebruik is, moet het op een droge plaats worden opgeborgen. om roest te
voorkomen. Gereedschap altijd opbergen en buiten bereik van kinderen
houden.
5. Forceer het gereedschap niet. Het zal de klus beter klaren en veiliger
zijn in de mate waarin het was de bedoeling. Gebruik geen ongepaste
bijlagen in een poging om te overschrijden de gereedschapscapaciteit.
6. Gebruik het juiste gereedschap voor de klus. Probeer niet om een
klein gereedschap of
bevestiging om het werk van een groot industrieel gereedschap te doen.
Gebruik geen gereedschap voor een
waarvoor het niet bedoeld is.
7. Kleed je goed. Draag geen losse kleding of sieraden, want die kunnen
in je ogen blijven haken. bewegende delen. Beschermende, elektrisch
niet-geleidende kleding en antislip schoeisel wordt aanbevolen tijdens het
werken. Draag beperkende haarbedekking om lang haar bevatten.
8. Gebruik oog- en gehoorbescherming. Draag altijd ISO-goedgekeurde
impactveiligheid
veiligheidsbril. Draag een volledig gezichtsscherm als u metaalvijlsel of
hout produceert
chips. Draag een ISO-goedgekeurd stofmasker of ademhalingstoestel
wanneer u in de buurt werkt metaal en chemische stoffen en nevels.
9. Reik niet te ver. Zorg te allen tijde voor een goede basis en evenwicht.
Reik niet te ver. over of over een draaiende machine.
10. Onderhoud gereedschap met zorg. Houd gereedschap scherp en
schoon voor beter en veiliger prestaties. Volg de instructies voor het
smeren en vervangen van accessoires. De Handgrepen moeten te allen
tijde schoon, droog en vrij van olie en vet worden gehouden.
11. Blijf alert. Let op wat u doet; gebruik uw gezonde verstand. Bedien
geen gereedschap als je beproefd wordt.
12. Controleer op beschadigde onderdelen. Voordat u een gereedschap

- 6 -
gebruikt, moet u elk onderdeel dat er als beschadigd uitziet, controleren.
beschadigd moet zorgvuldig worden gecontroleerd om te bepalen of het
goed zal werken en de beoogde functie uitvoeren. Controleer de uitlijning
en binding van bewegende onderdelen; kapotte onderdelen of
montage-inrichtingen; en elke andere toestand die kan invloed hebben op
de juiste werking. Elk onderdeel dat beschadigd is, moet op de juiste
manier worden gerepareerd of vervangen door een gekwalificeerde
technicus.
13. Bescherm uzelf tegen elektrische schokken. Voorkom lichamelijk
contact met geaarde oppervlakken. zoals leidingen, radiatoren, fornuizen
en koelkastbehuizingen.
14. Vervangende onderdelen en accessoires. Gebruik bij onderhoud
alleen identieke
vervangende onderdelen. Het gebruik van andere onderdelen maakt de
garantie ongeldig. Gebruik alleen
accessoires die bedoeld zijn voor gebruik met dit gereedschap.
Goedgekeurde accessoires zijn beschikbaar van de distributeur.
21. Gebruik het gereedschap niet als u onder invloed bent van
alcohol of drugs. Lees waarschuwingslabels op recepten om te bepalen
of uw beoordelingsvermogen van reflexen verslechterd tijdens het gebruik
van drugs. Als er enige twijfel is, gebruik het gereedschap dan niet.
Let op: De waarschuwingen en instructies in deze gebruiksaanwijzing
kunnen niet worden genegeerd. alle mogelijke omstandigheden en
situaties bestrijken die zich kunnen voordoen bij het gebruik van deze
product. Het moet begrepen worden dat gezond verstand en
voorzichtigheid factoren zijn die kunnen niet in dit product worden
ingebouwd. Deze factoren moeten door de persoon worden geleverd die
dit apparaat bedient.
Montage- en gebruiksaanwijzing
De 40” Mighty Mini Bender vereist een kleine montage zoals hieronder

- 7 -
beschreven. Raadpleeg bij het lezen van dit document het
onderdelenschema en de onderdelenlijst die hieronder worden
weergegeven. instructie.
1. De standaard (#1) moet met behulp van de montagegaten aan een
werkbank worden bevestigd en 4 bouten (3/8” diameter).
2. Elke handgreepbal (#7) moet aan de handgreephendel (#6) worden
bevestigd en de De hendels moeten in de pennen (#5) worden geplaatst.
3. Om de Mighty Mini Bender te gebruiken, laat u de hendel zakken totdat
de bewegende plaat is parallel aan de werkbank. Plaats het te buigen
materiaal op de ondersteunende Plaat (#2) en de bewegende plaat en lijn
deze goed uit met de rand die omhoog moet worden gebogen tegen de
achterrand van de steunplaat.
4. Plaats en bevestig de persplaat (#3) bovenop de steunplaat met de
achterkant van de persplaat uitgelijnd met de achterkant van de
steunplaat.
5. Beweeg de twee hendels omhoog om het materiaal in de gewenste
hoek te buigen.
Waarschuwing: Houd uw vingers uit de buurt van de Mighty Mini
Bender wanneer u deze gebruikt. vrij van de steunplaat en de
bewegende plaat om te voorkomen persoonlijk letsel.
6. Wanneer de Mighty Mini Bender niet in gebruik is, moet deze worden
afgedekt en in een afgesloten ruimte worden bewaard. droge locatie.
Onderdelenlijst
Deel #
Beschrijving
Hoeveelheid
1
Stellage
1
2
Ondersteunende plaat
1

- 8 -
3
Drukplaat
1
4
Bewegende plaat
1
5
Pin
2
6
Handvat hendel
2
7
Handvat bal
2


- 2 -
Teknisk Support och e-garanticertifikat www.vevor.com/support
HANDBÖJNING
BRUKSANVISNING
MODELL: W-1.0X610A/W-1.0X915/W-1.0X1220
We continue to be committed to provide you tools with competitive price.
"Save Half", "Half Price" or any other similar expressions used by us only represents an
estimate of savings you might benefit from buying certain tools with us compared to the major
top brands and does not necessarily mean to cover all categories of tools offered by us. You
are kindly reminded to verify carefully when you are placing an order with us if you are
actually saving half in comparison with the top major brands.

- 3 -
MODELL: W-1.0X610A/W-1.0X915/W-1.0X1220
Have product questions? Need technical support? Please feel free to
contact us:
Technical Support and E-Warranty Certificate
www.vevor.com/support
NEED HELP? CONTACT US!
This is the original instruction, please read all manual instructions
carefully before operating. VEVOR reserves a clear interpretation of our
user manual. The appearance of the product shall be subject to the
product you received. Please forgive us that we won't inform you again if
there are any technology or software updates on our product.
HAND BENDING

- 4 -
Specifikationer
Böjkapacitet: Böj material upp till 18 gauge stål; göra upp till 90
gradböjningar; böjer material upp till 40 tum breda.
Designad för bänkmontering med 3/8” bultar.
Mått: 48 - 4/5" x 10 - 1/5" x 7"
Vikt: 72 kg.
Spara denna manual
Du behöver manualen för säkerhetsvarningar och försiktighetsåtgärder,
montering instruktioner, drift- och underhållsprocedurer, reservdelslista och
diagram. Hålla din faktura med denna manual. Skriv fakturanumret på
insidan av framsidan täcka. Förvara manualen och fakturan på en säker
och torr plats för framtida referens.
Säkerhetsvarningar och försiktighetsåtgärder
VARNING: När du använder verktyget ska grundläggande
säkerhetsföreskrifter alltid följas för att minska risken för personskador och
skador på utrustning.
Läs alla instruktioner innan du använder detta verktyg!
1. Håll arbetsområdet rent. Belamrade områden leder till skador.
2. Observera arbetsområdets förhållanden. Använd inte maskiner eller
elverktyg i fuktig miljö eller våta platser. Utsätt inte för regn. Håll
arbetsområdet väl upplyst. Använd inte elektriskt drivna verktyg i närvaro
av brandfarliga gaser eller vätskor.
3. Håll barn borta. Barn får aldrig vistas i arbetsområdet. Gör inte det låt
dem hantera maskiner, verktyg eller förlängningssladdar.
4. Förvara inaktiv utrustning. . När verktygen inte används måste de

- 5 -
förvaras på en torr plats för att förhindra rost. Lås alltid verktyg och förvara
utom räckhåll för barn.
5. Tvinga inte verktyget. Det kommer att göra jobbet bättre och mer
säkerhet i den takt som det var tänkt. Använd inte olämpliga tillbehör i ett
försök att överskrida verktygskapaciteten.
6. Använd rätt verktyg för jobbet. Försök inte att tvinga ett litet verktyg
eller
tillbehör för att utföra arbetet med ett stort industriverktyg. Använd inte ett
verktyg för en
syfte som det inte var avsett för.
7. Klä dig ordentligt. Bär inte löst sittande kläder av smycken eftersom de
kan fastna i rörliga delar. Skyddande, elektriskt icke-ledande kläder och
halkfria skor rekommenderas vid arbete. Bär restriktiv hårskydd till
innehåller långt hår.
8. Använd ögon- och hörselskydd. Bär alltid ISO-godkänd slagsäkerhet
glasögon. Bär en helsköld om du producerar metallspån eller trä
pommes frites. Bär en ISO-godkänd dammmask eller andningsskydd när
du arbetar runt metall och kemiskt damm och dimma.
9. Sträck dig inte för mycket. Håll alltid rätt fotfäste och balans. Nå inte över
eller tvärs över maskinen som körs.
10. Underhåll verktyg med omsorg. Håll verktyg vassa och rena för
bättre och säkrare prestanda. Följ instruktionerna för smörjning och byte av
tillbehör. De Handtagen ska alltid hållas rena, torra och fria från olja och
fett.
11. Var uppmärksam. Se upp vad du gör; använda sunt förnuft. Använd
inga verktyg när du är prövad.
12. Kontrollera om det finns skadade delar. Innan du använder något
verktyg, alla delar som visas skadad bör kontrolleras noggrant för att
fastställa att den kommer att fungera korrekt och utföra sin avsedda
funktion. Kontrollera för inriktning och bindning av rörelse delar; eventuella
trasiga delar eller monteringsfixturer; och alla andra villkor som kan
påverka korrekt funktion. Alla delar som är skadade bör repareras
ordentligt eller byts ut av en kvalificerad tekniker.
13. Skydda mot elektriska stötar. Förhindra kroppskontakt med jordade

- 6 -
ytor såsom rör, radiatorer, spisar och kylskåpsskåp.
14. Reservdelar och tillbehör. Vid service, använd endast identiska
reservdelar. Användning av andra delar upphäver garantin. Använd endast
tillbehör avsedda att användas med detta verktyg. Godkända tillbehör finns
tillgängliga från distributören.
22. Använd inte verktyget om du är påverkad av alkohol eller droger.
Läsa varningsetiketter på recept för att avgöra om din bedömning av
reflexer är nedsatt när du tar droger. Om det finns några tvivel, använd inte
verktyget.
Obs: Varningarna och instruktionerna i denna bruksanvisning kan inte
täcka alla möjliga förhållanden och situationer som kan uppstå vid
användning av denna produkt. Det måste förstås att sunt förnuft och
försiktighet är faktorer, som kan inte byggas in i denna produkt. Dessa
faktorer måste tillhandahållas av personen vem som använder denna
utrustning.
Monterings- och bruksanvisning
40” Mighty Mini Bender kräver lite mindre montering enligt beskrivningen
nedan. Se deldiagrammet och dellistan nedan när du läser detta
instruktion.
1. Stativet (#1) ska fästas på en arbetsbänk med hjälp av monteringshålen
och 4 bultar (3/8” diameter).
2. Varje handtagskula (#7) ska fästas på handtagsspaken (#6) och
Handtag Spakar ska placeras i stiften (#5).
3. För att använda Mighty Mini Bender, sänk handtagsspaken tills den
rörliga plattan är parallellt med arbetsbänken. Placera materialet som ska
böjas på stödet Plattan (#2) och den rörliga plattan och passa in ordentligt
med kanten som ska böjas upp mot den bakre kanten av stödplattan.

- 7 -
4. Placera och fäst pressplattan (#3) ovanpå stödplattan med den bakre
kanten på pressplattan i linje med den bakre kanten på stödplattan.
5. Lyft de två handtagsspakarna för att böja materialet till önskad vinkel.
Varning: Håll fingrarna när du använder Mighty Mini Bender fria från
stödplattan och den rörliga plattan för att undvika personskada.
6. När Mighty Mini Bender inte används ska den täckas över och förvaras i
en torr plats.
Delarlista
Del #
Beskrivning
Antal
1
Stå
1
2
Stödplatta
1
3
Tryckplatta
1
4
Flytta plattan
1
5
Stift
2
6
Handtag Spak
2
7
Handtag boll
2

- 8 -