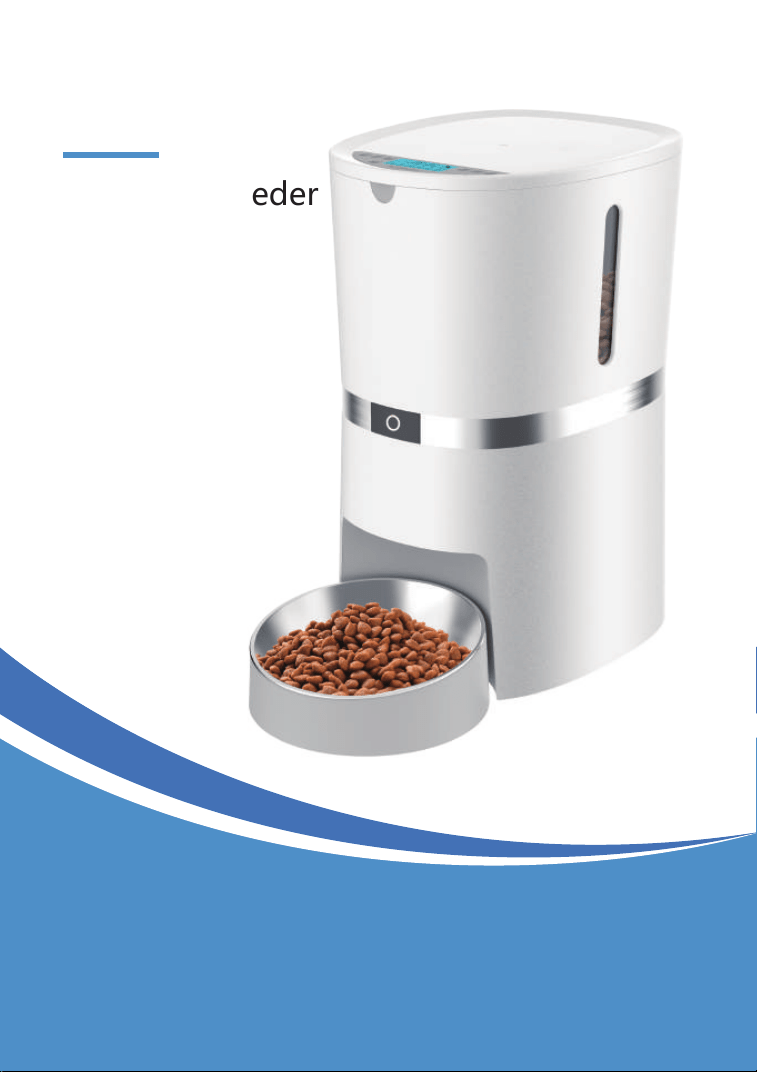
S36
Smart Pet Feeder
User Manual

For the convenience of using, please read
the user manual carefully and follow the
instructions.
We appreciate your choice of the automatic
pet feeder. We insist on providing premium
pet products, helping pet owners feed pets in
a scientific and reasonable way and providing
pets a healthy lifestyle. We are working for
establishing a harmonious relationship
between you and your pets.
Dear customer,
WARRANTY
1 Year Warranty
Lifetime Support: For guidance on product use
and warranty extension, please contact
after-sales email:
WellT[email protected]
If you have any questions related to orders,
please contact the seller via the shopping plat-
form.
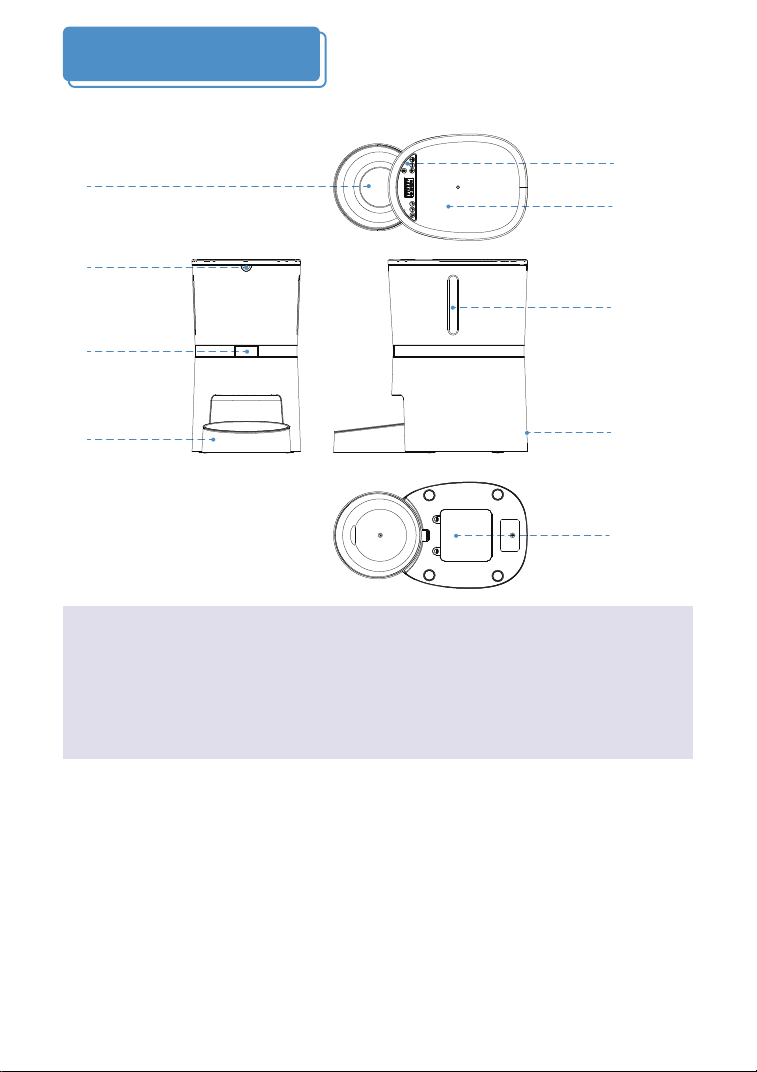
Packing List:
Battery
cover
Feeder
base
WIFI Indicator
light
Hopper release
button
Power
interface
Food
viewport
Feeder lid
Control panel
Stainless steel bowl
01
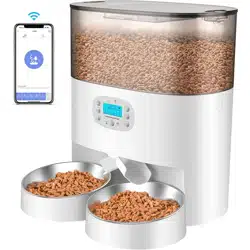
Single Bowl Version:
1 x Pet Feeder, 1 x Stainless Steel Bowl, 1 x Bowl Holder, 1 x Power
Adapter, 1 x Desiccant Bag, 1 x User Manual
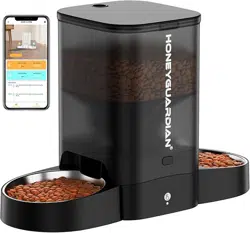
1 x Pet Feeder, 2 x Stainless Steel Bowls, 2 x Bowl Holders, 1 x Power
Adapter, 1 x Desiccant Bag, 1 x 2-way Splitter, 1 x User Manual
Dual Bowls Version:
Notice
1. The feeder is for indoor household use only.
2. The host of the equipment is not washable. The food hopper, the
bowl holder and stainless steel bowl can be removed for washing.
3. Please place the feeder horizontally and close the lid to keep
the food from spilling out when pets knocked over.
Product Diagram
02
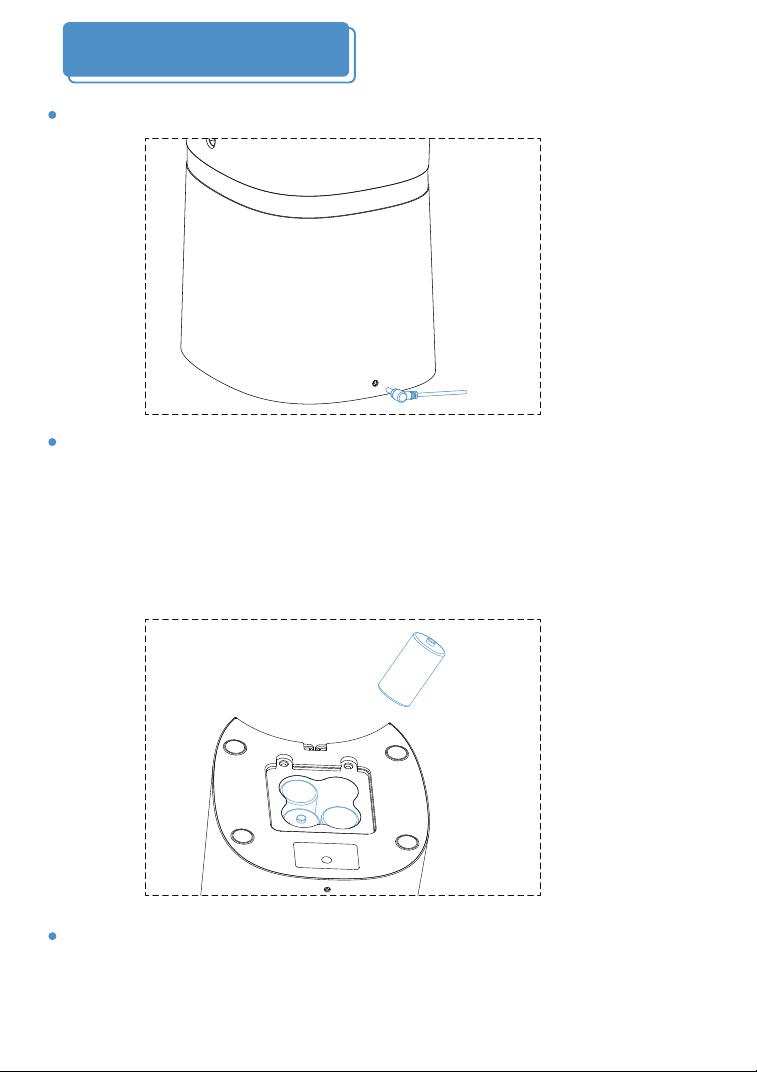
Dual Power Supply
① Plug the power cord into the feeder.
② Install 4 D-size alkaline batteries as back up battery.
(Batteries are not included)
*If powered by battery only. The device can work for 3 months.
*We recommend using both the power adapter and batteries at
the same time in case of a power outage. When the external
power is cut off, the device will change to battery powered.
Note: The WiFi function only work on plug-in power. For
energy saving, the WiFi is unconnectable and all operations on
the app will be unavailable if powered by batteries only.
03
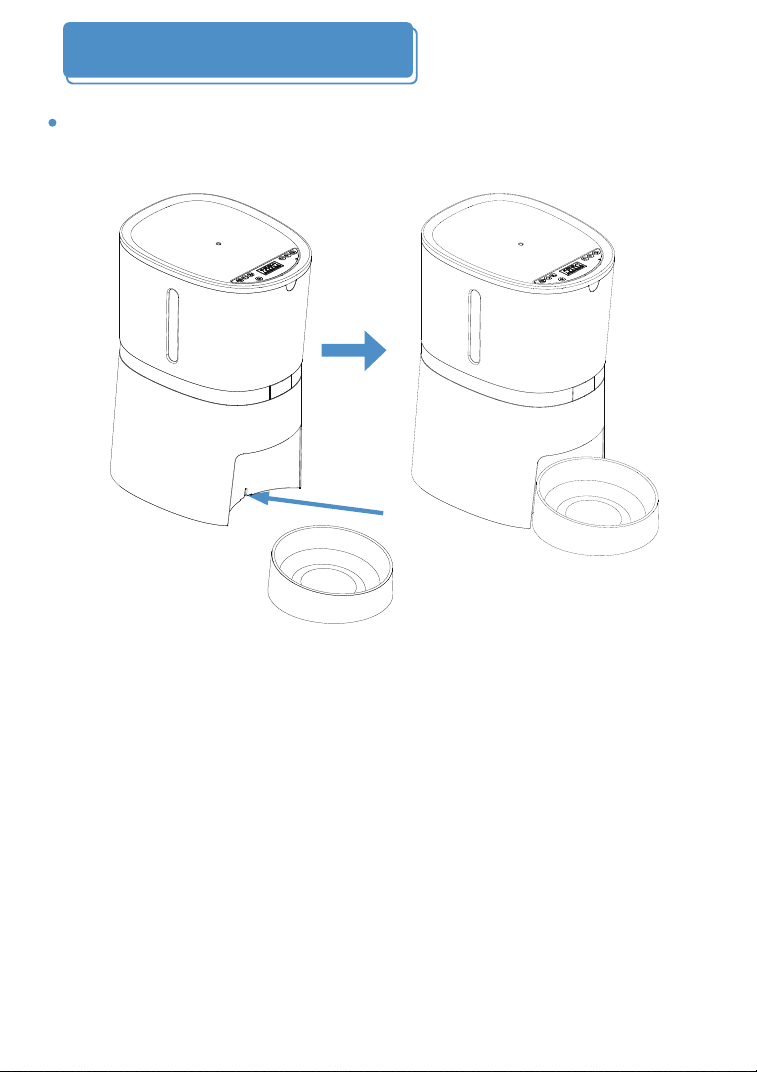
Single Bowl Installation
Please assemble the base of the food bowl with the host .
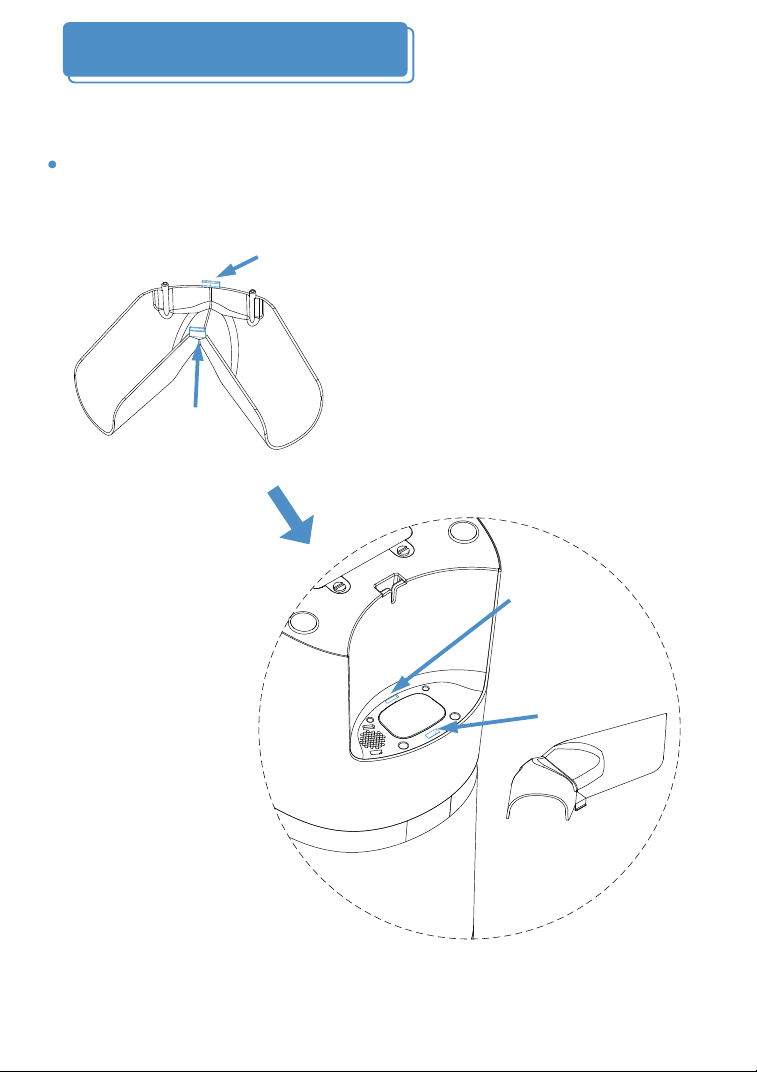
Step 1: Please install the two way splitter into the host.
Buckle A
Buckle B
Buckle
hole A
Buckle
hole B
04
Dual Bowls Installation
(If you purchased the dual bowls version.)
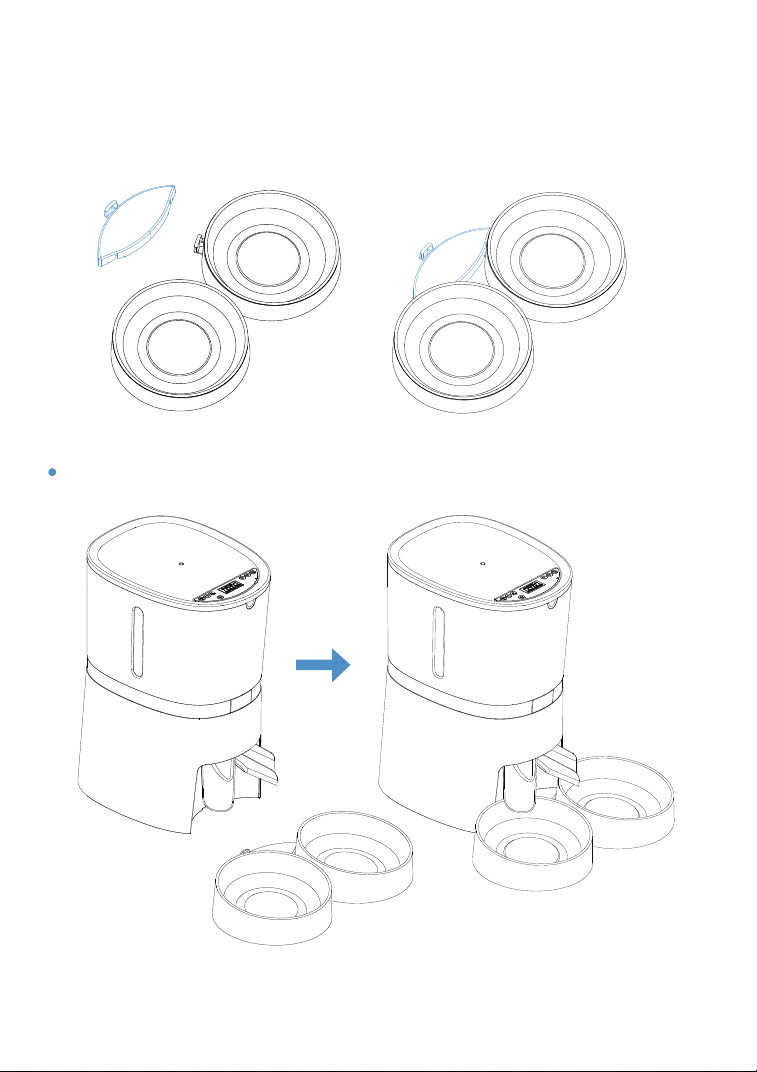
Step 3: Please put the host in place.
05
Step 2: Please assemble the two bowl bases with the
connector plate.
06
1. Dispense each portion size is about 5-6g(16ml) food
kibble;
The dual bowls version dispense one portion to each bowl is
about 2.5g.
2. Recommended food size: 0.2-1.2cm(0.07-0.47inch)
diameter. Please use food smaller than 1.2cm, otherwise the
feeder may get stuck.
Add Pet Food
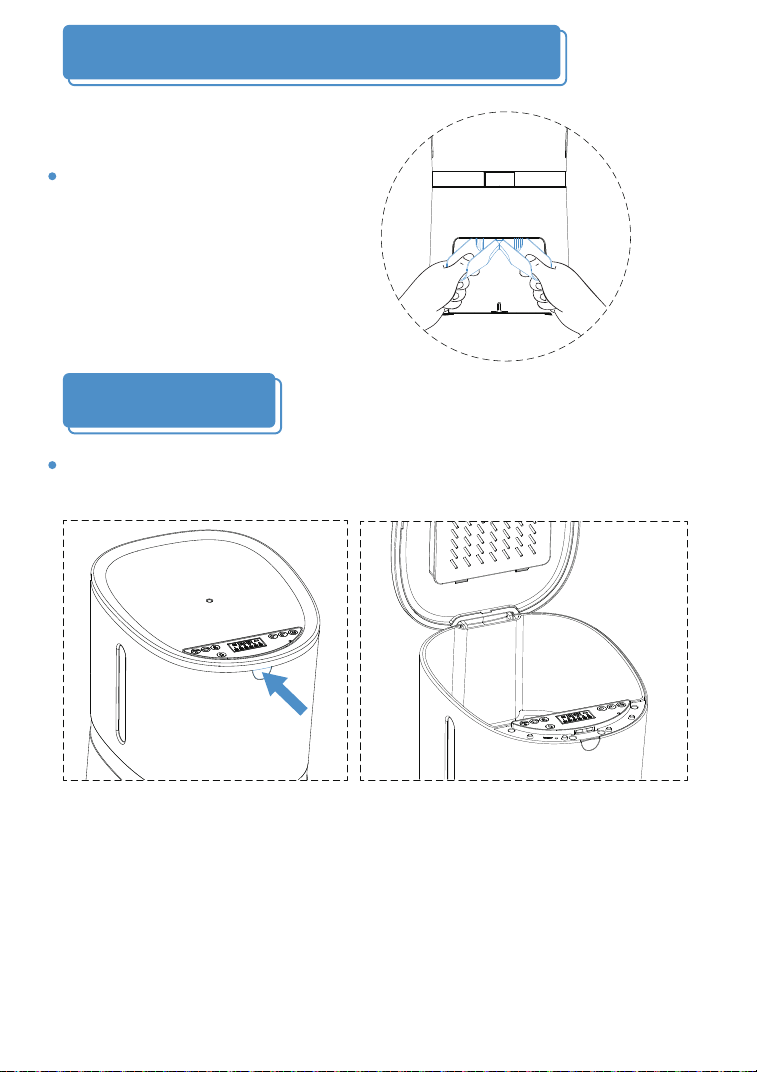
Press the lid open button to open the lid, pour the pet food
into the food container.
How to Remove the 2-way Splitter
Please hold the two sides with
both hands and press down
with thumbs can remove the
2-way splitter.

NOTE
To prevent the mold growth, it is recommended to change the
desiccant bag every 15 days
When the food hopper is short
of food, the blue light will
flash only when the next meals
dispense, it means the motor
run then the machine will
detect the food shortage.
Please add the food then the
light will turn off.
07
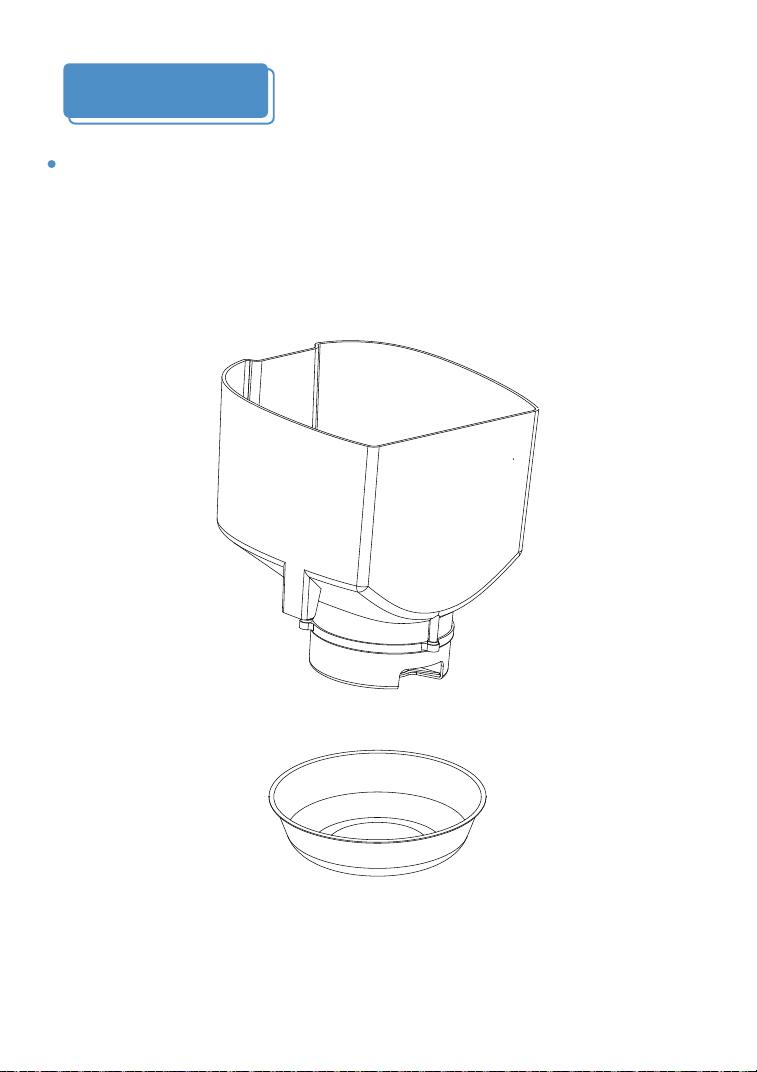
Install Desiccant Bag
Food shortage reminder
Please put the desiccant bag to the desiccant box to keep
pet food dry and fresh.
08
Maintenance
For your pet's health, please clean the food container, stainless
steel bowl and bowl holder regularly. The feeder host is not
washable, please wipe it with a dry cloth.
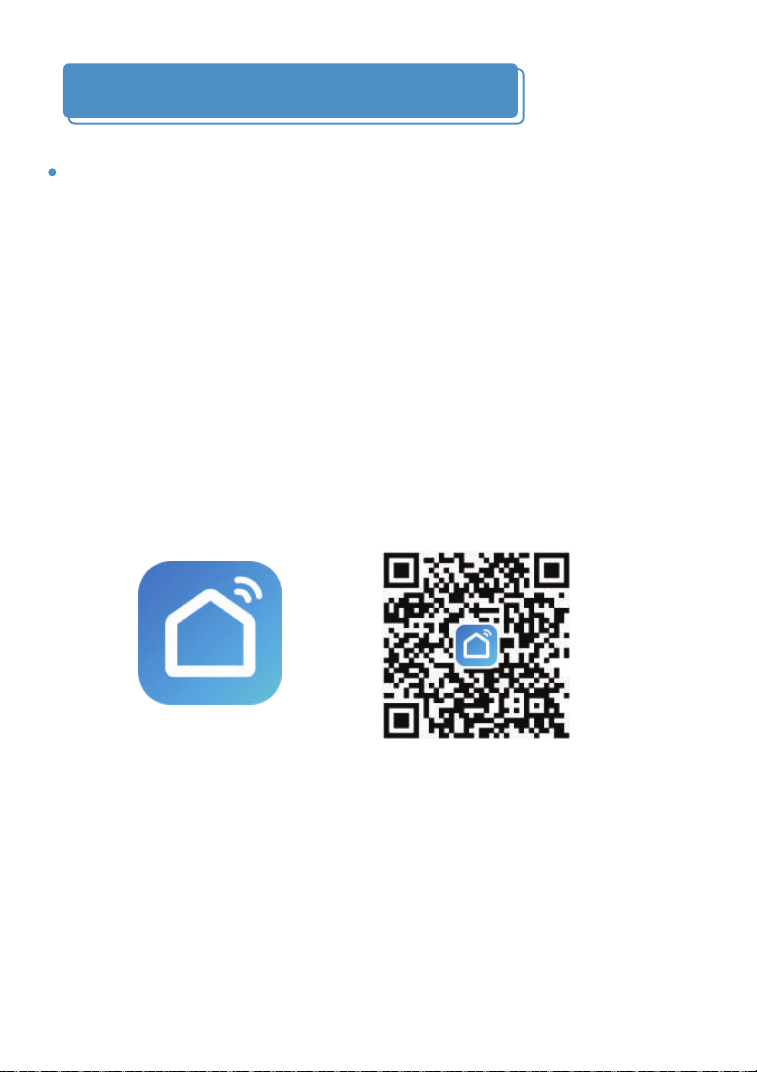
Software installation and setup
Smart Life
Please check and turn on your phone bluetooth and WIFI
before connecting
1.Confirm that the machine is powered by the adapter power.
(For saving battery power,The WiFi function can only be used
when the adapter powered)
2.Confirm that the WiFi network is 2.4Ghz.
(The feeder only works under 2.4Ghz network, does not
support 5Ghz)
Step 1. Install Smart Life APP
Scan the QR code to download or search “Smart Life” in the
app store to download and install the APP.
09
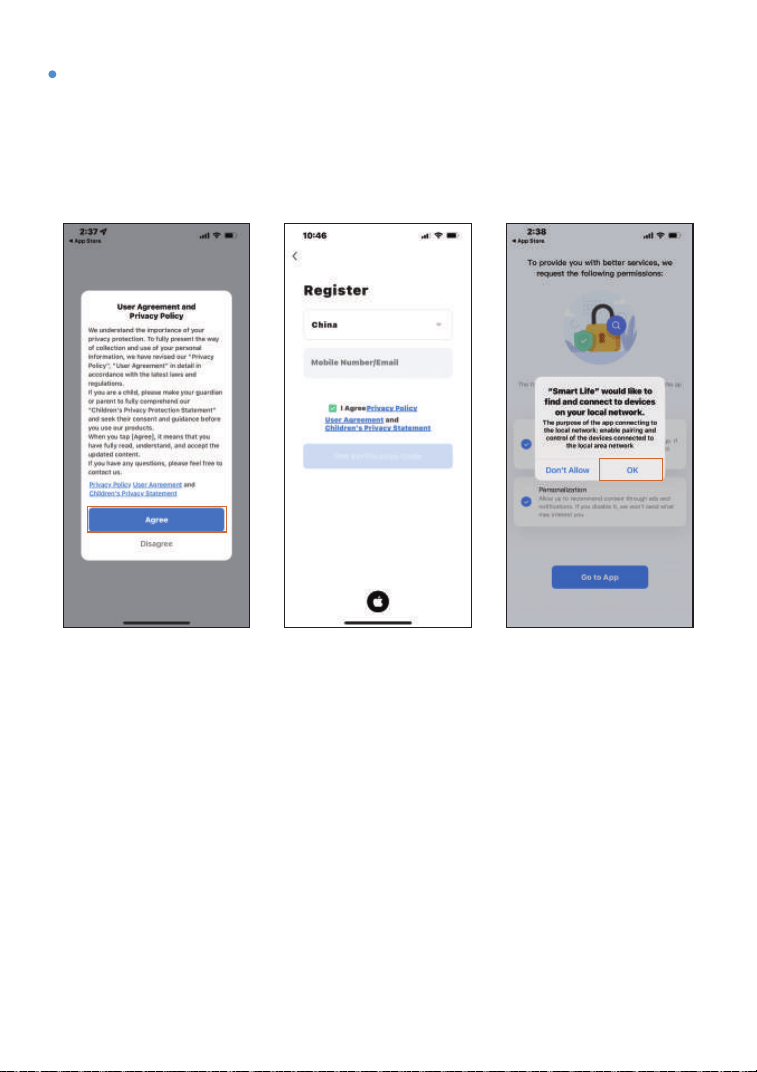
Step 2. Create your account and agree to connect to the
Internet:
Open the Smart Life app, agree to the Privacy Policy, select
correct country, use email or mobile number to register a user
account and log in, agree to grant local area network.
10
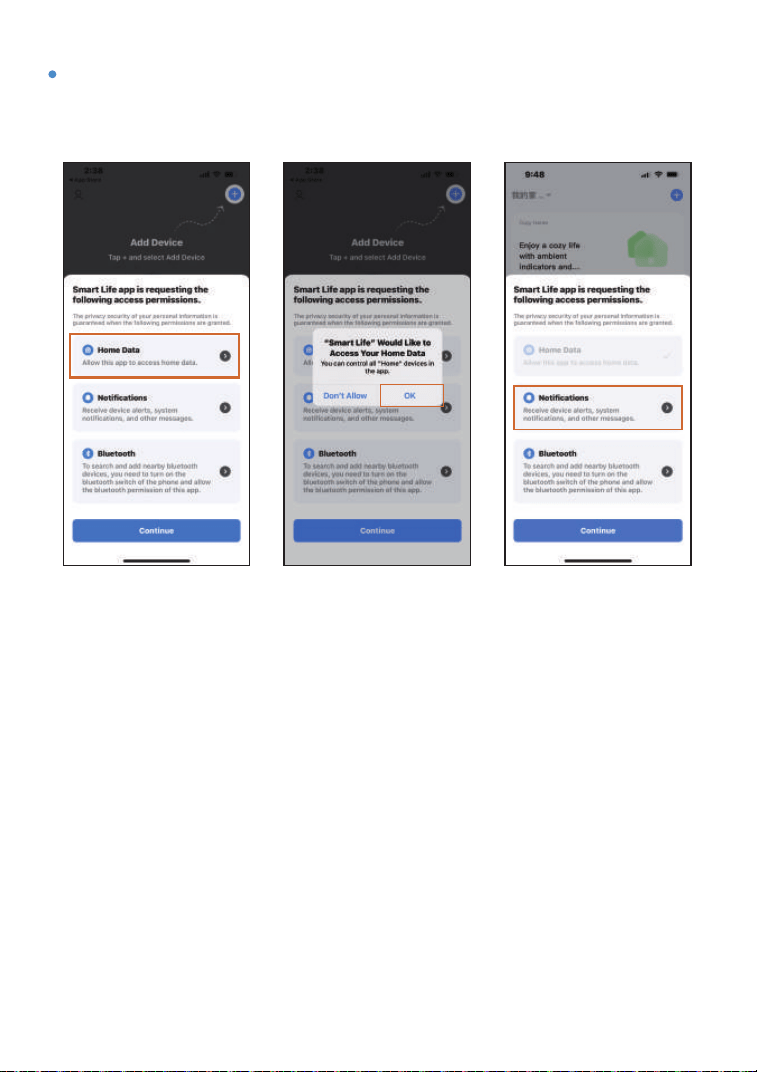
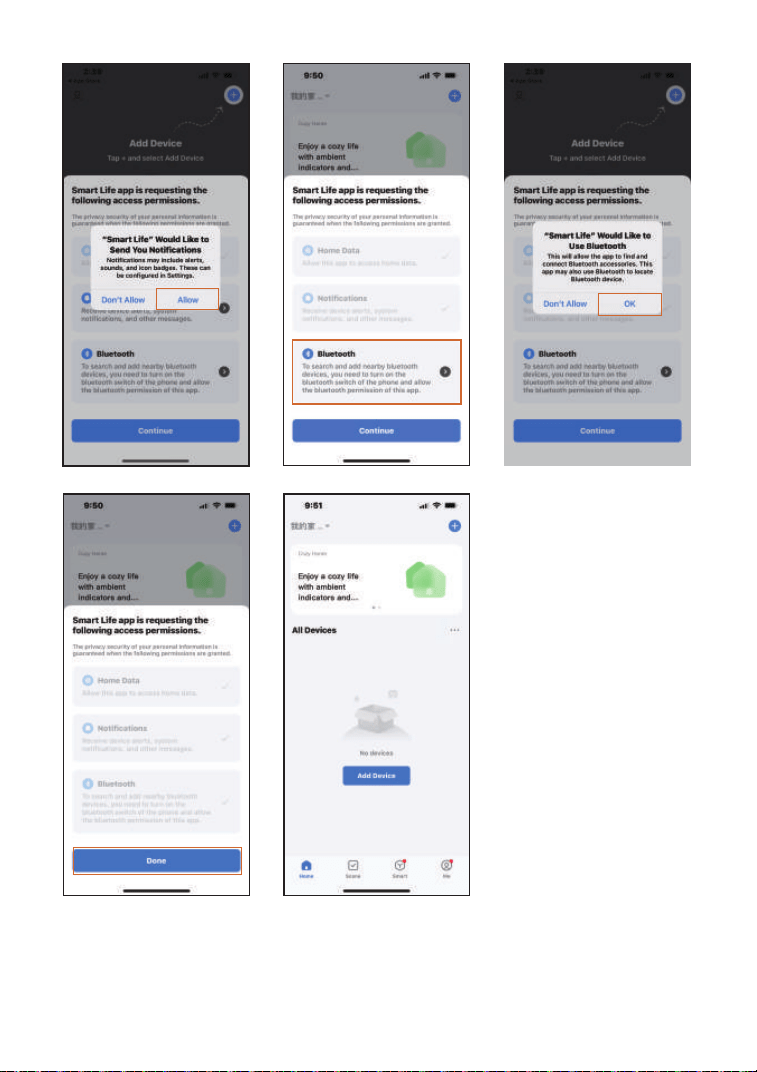
Step 3. Agree to Home Data, Notifications, Bluetooth
Permissions
11
12
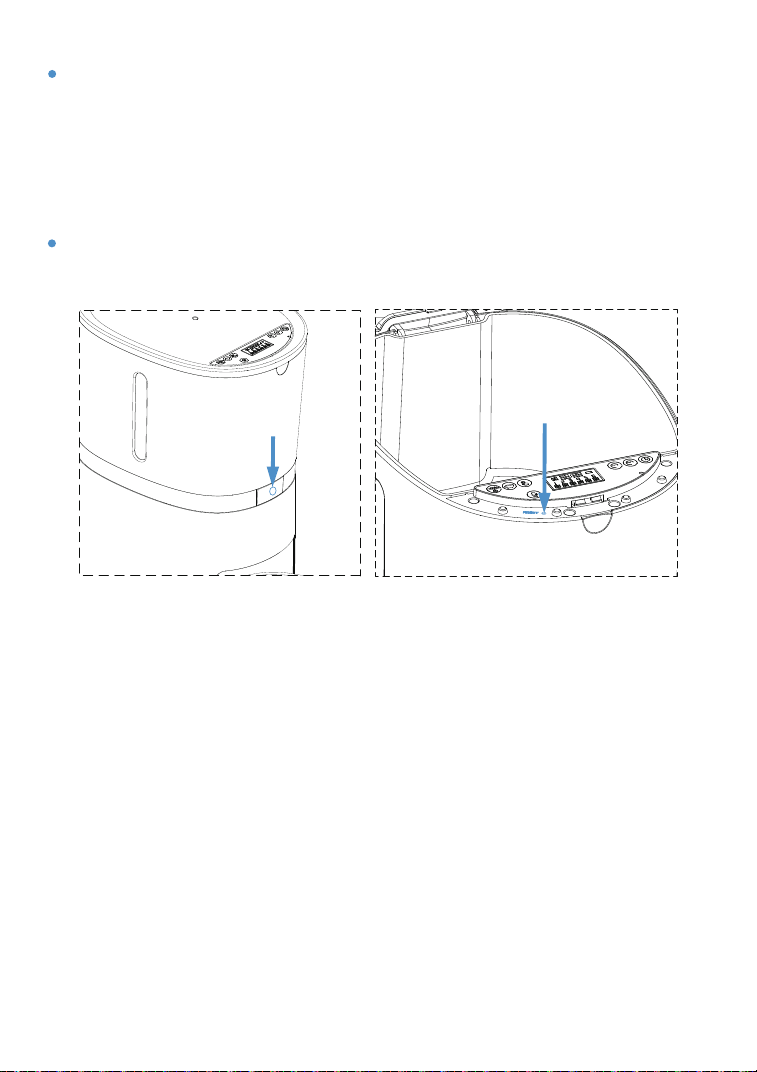
RESET button
Step 4. Long press the device reset button to prepare for
pairing
Please use a sharp object to press the "RESET" button for 5s,
after the "beep", the WiFi indicator starts to flash quickly (once
per second) and the device enters the waiting state for pairing.
Note: The WIFI indicator is off when the power adapter is
not connected.
WIFI indicator light
13
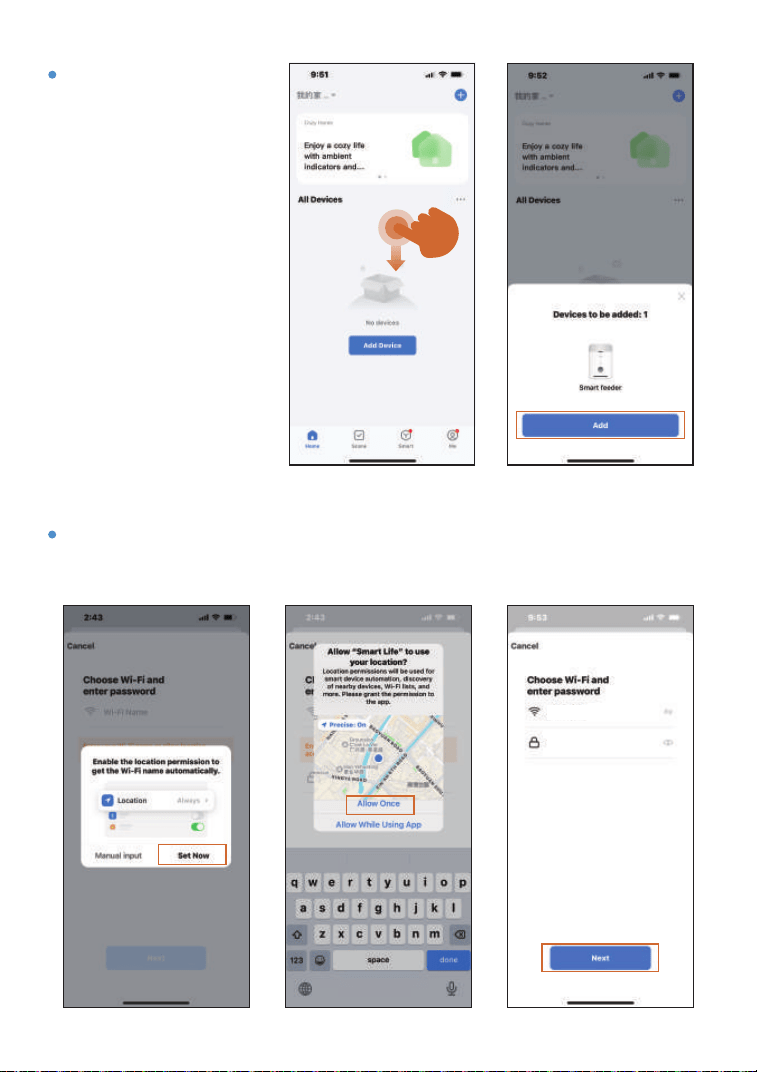
Step 5. Pull to
refresh mobile
phone interface as
the picture:
Pull to refresh the
phone interface to
auto search for the
devices, the
available devices
will pop up, click
add devices
Step 6. Allow these APP permission, select your 2.4GHz WiFi
network and enter the WiFi password.
*******
TP-LINK_3256
14
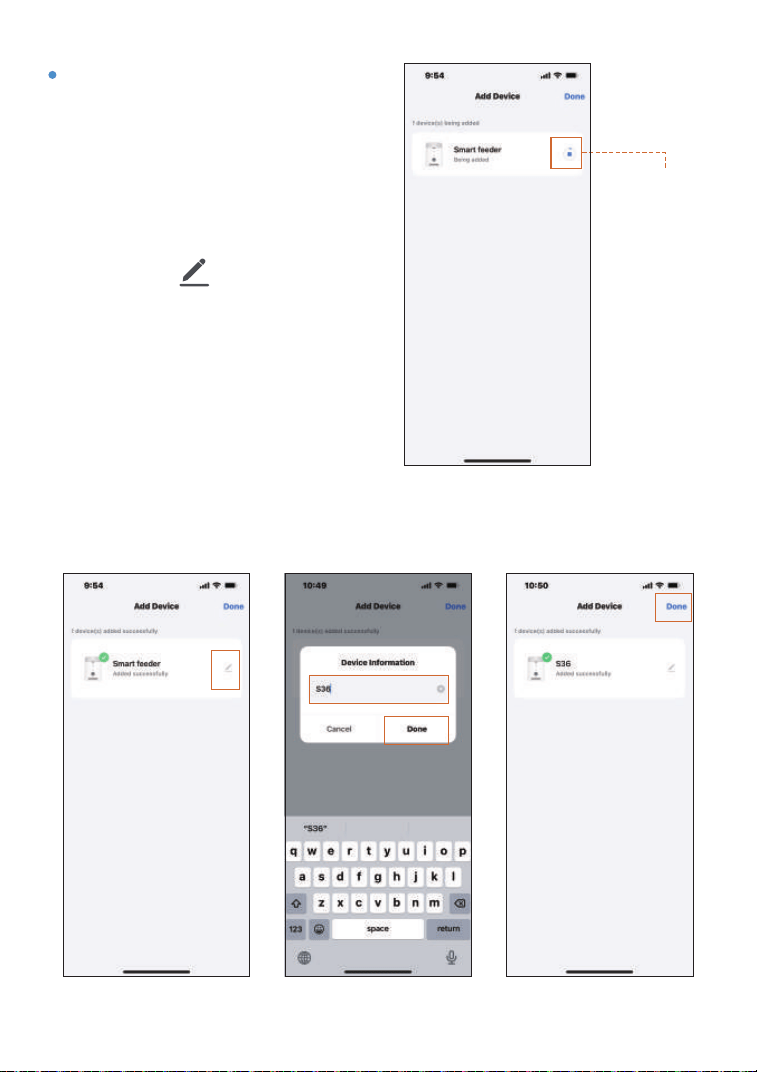
Step 7. Please be patient for
waiting when the APP enters
to "add device” page, when
the device's WIFI indicator
stops flickering and stays on,
the APP interface jumps to
the device name modification
page, click , the APP
interface pops up the device
name modification viewwin-
dow, enter a new name and
click “Done”, The APP
returns to the “Add
Device” page, click
“Done”
Installation
progress
15
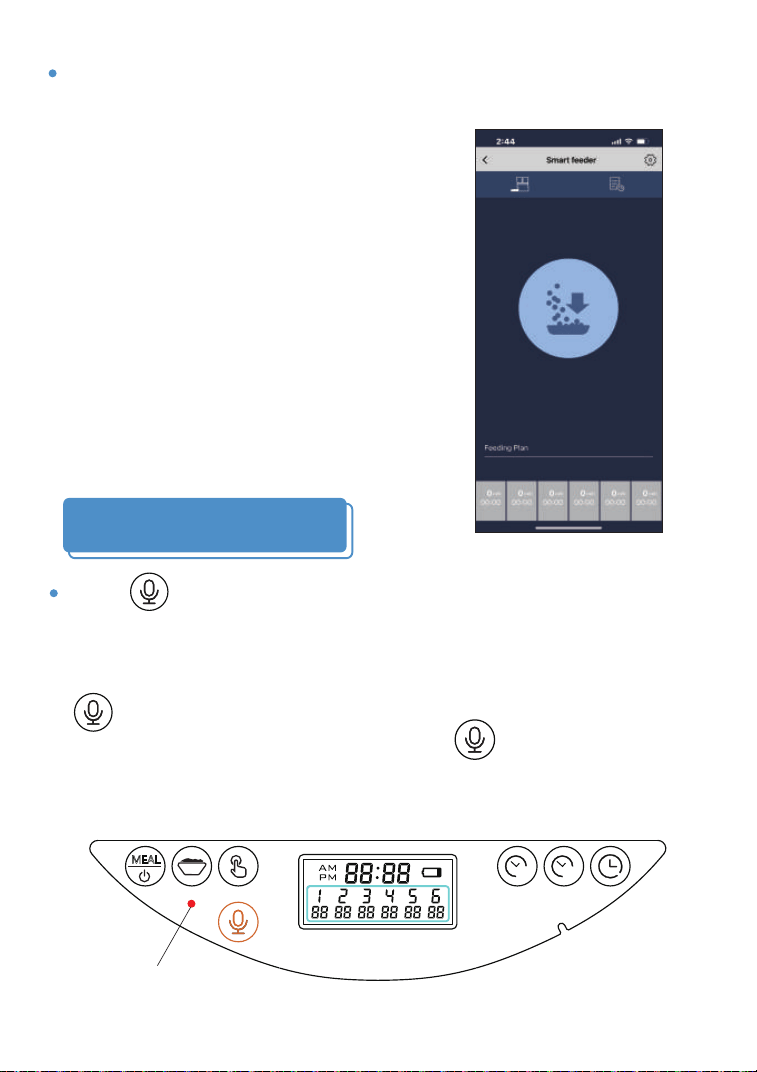
Step 8.The APP jumps to the feeder control page, and the
feeder is successfully connected to the Internet.
12H
60M
MEAL
Recording indicator
16
Recording Setting
Press“ ”and hold for three seconds then you can record
for Max 10 seconds after the recording indicator lighting up.
Release the button during recording as the recording is
completed.After finishing the recording, you can press
“ ”to play your recording. If you need to delete or close
the recording function, you can press“ ”double times
until the recording indicator light blinking 3 times, then the
recording message is removed.

Feeding
Manual Feeding
Select
food
portions
Feeding
confrim
Feeder: Manually feeding button
12H
60M
MEAL
Manually
feeding
button
17
1. Enter the feeder control page, click Manual feeding, select
the portions of food and click "OK" the feeder will dispense
immediately.
2. You can also press and hold the Manually feeding button on
the feeder for 3 seconds, after a "beep",The feeder will
dispense 1 portion.
18
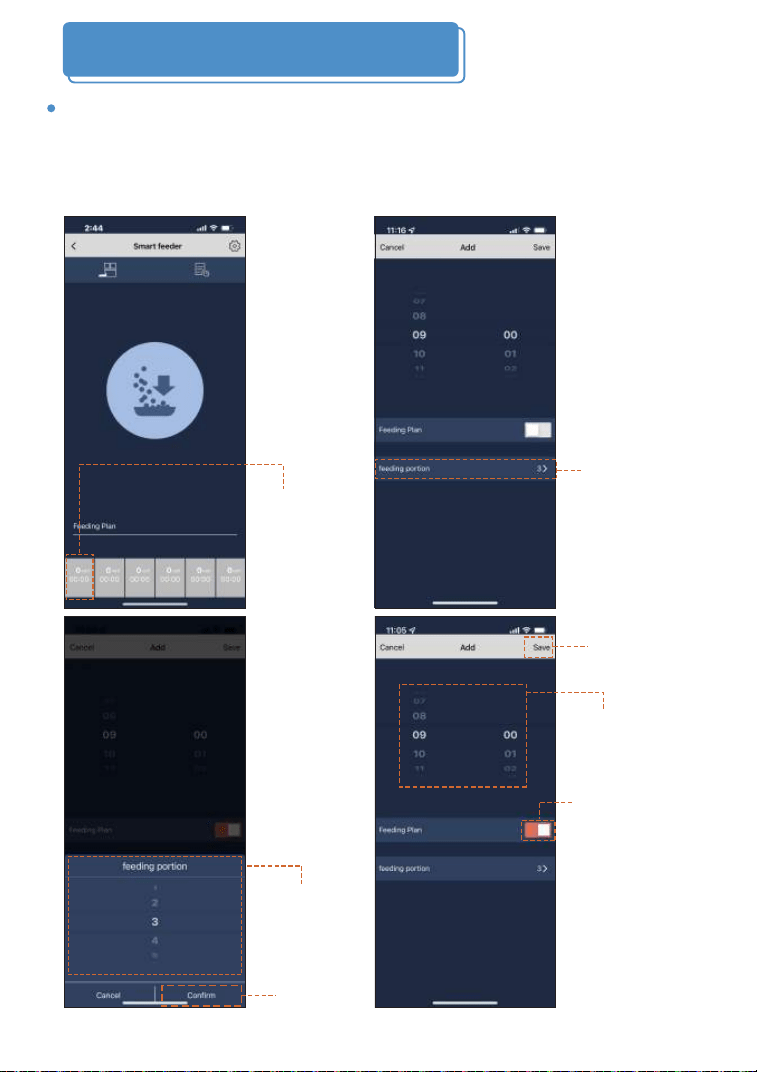
Make a feeding meal plan
1. The feeder supports a daily 6-meal feeding plan, click the
feeding meals plan button to select the feedings portions
volume and meal time, open the feeding meals plan and
click Save.
Clik the
feeding meal
plan
Select the
feeding
portions
Select the
feeding
Portions you
need
Save after
set finished
Confirm
Select meal
time
Open the
feeding meals
plan button
19
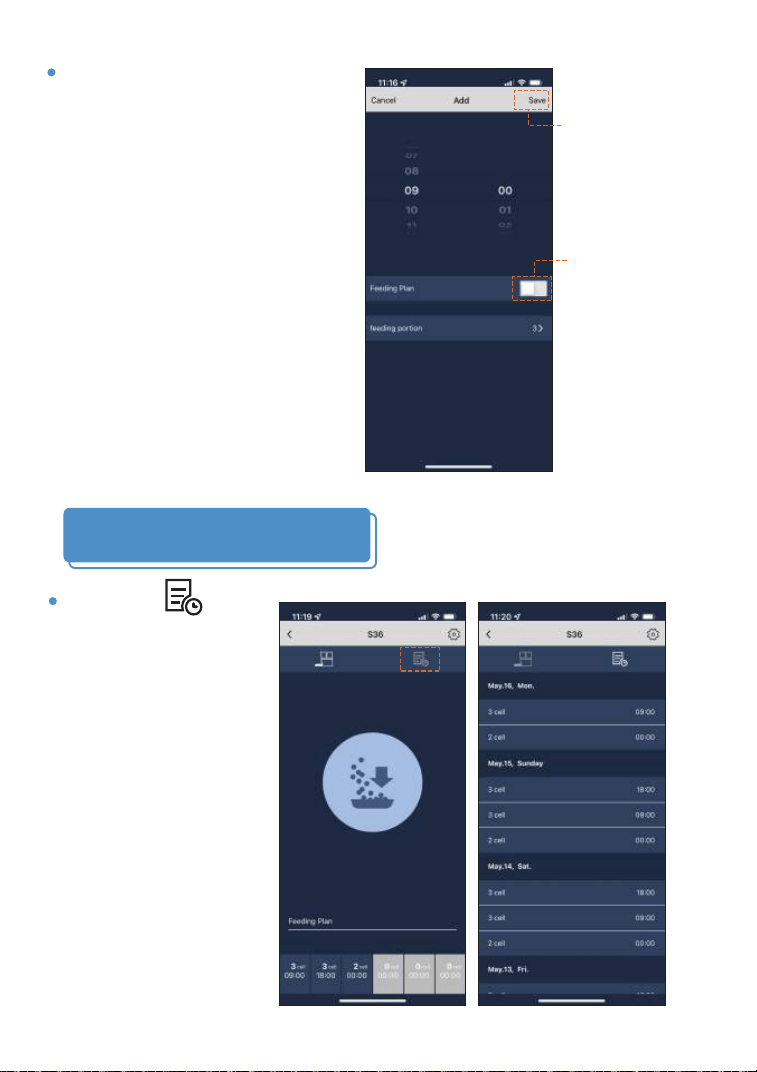
View feeding records
1. Click " ”,
pull down to
open the page,
It will be display
feeding records.
2. If you need to disable
a feeding meal plan,
click the feeding meal,
close
the feeding meals
plan button
, and then
click Save.
1:Close the
feeding meals
plan button
2:Clik Save
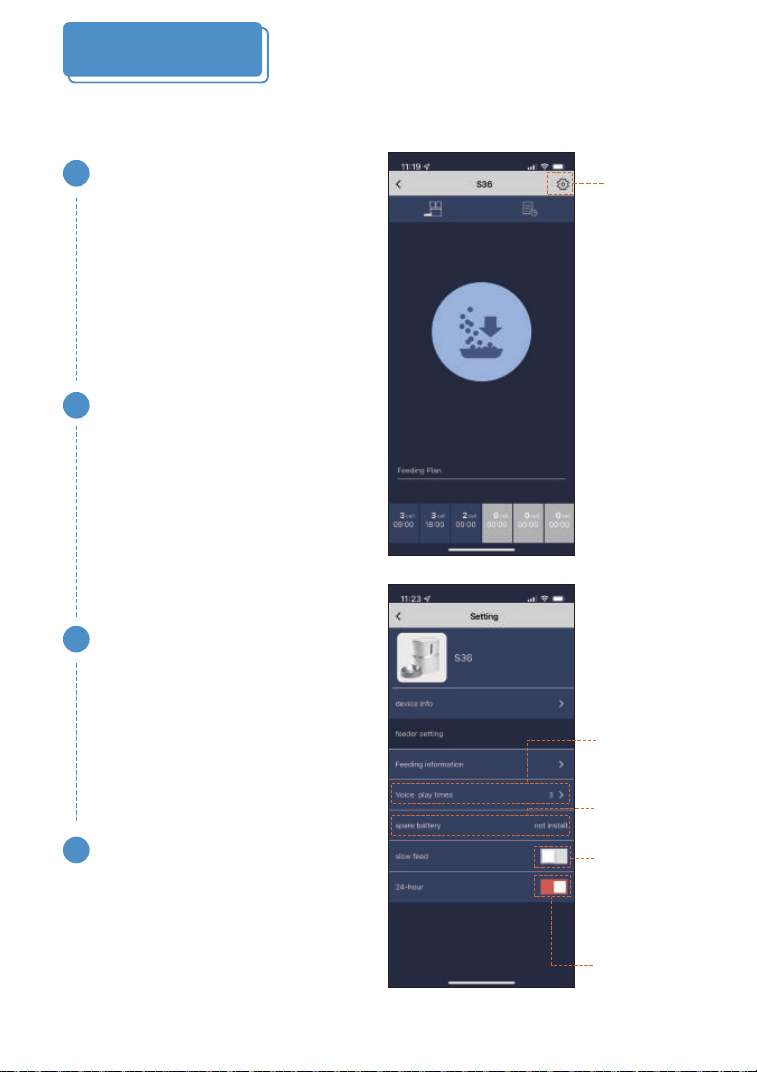
Click the Settings button to jump to the Settings page.
Voice plays times
The number of times
(0 times - 6 times) plays a
recording before feeding
Basic setting
1
Backup battery status
Display battery status
2
Slow feed
Turn on/off the slow feed
function of the feeder
3
24-Hour
Turn 24 hour clock on/off
4
Setting
button
Turn on/off
the slow feed
function of
the feeder
Turn 24
hour clock
on/off
Voice play
times
options
Backup
battery
status
20
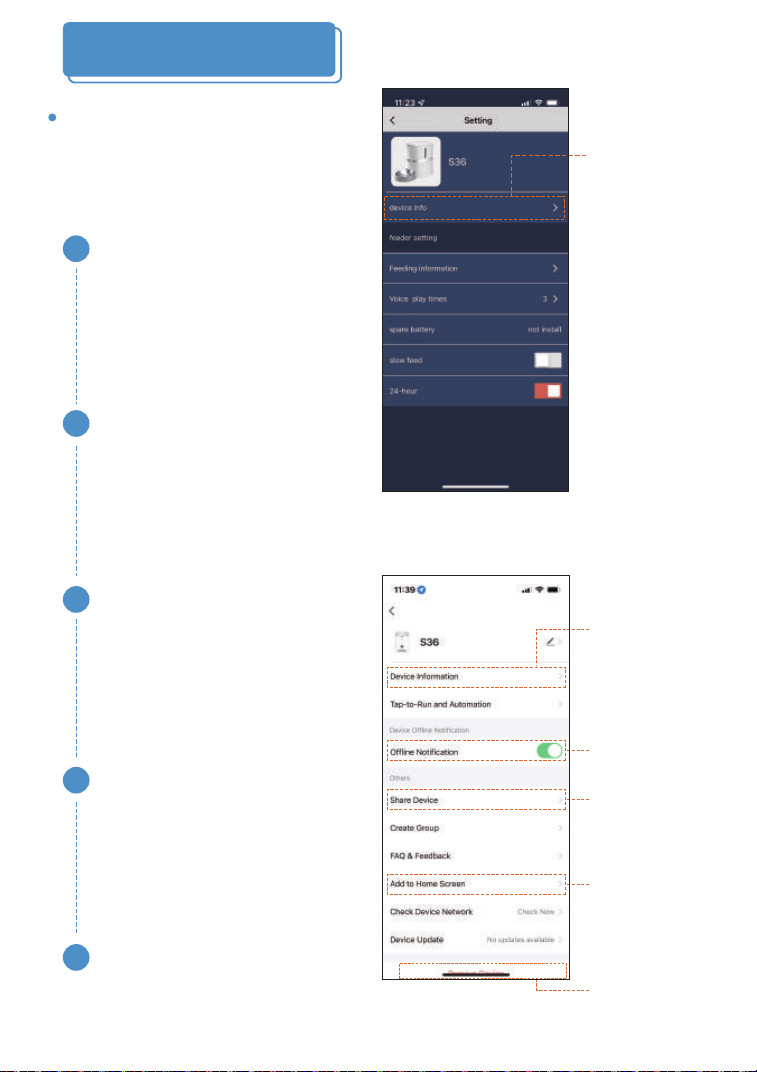
Click device Info to enter the
advanced settings page.
Advanced settings
Click device
Info to
enter the
advanced
settings
page.
Device
Information
Offline
Notification
Share
device
Add to home
screen
Remove
device
21
Device Information
Display device ID, IP,
MAC, device time zone,
signal strength
1
Offline Notification
Turn on this function , the APP
will notify you when the device
Offline.
2
Share device
This function can be used to
Device sharing with your family
3
Add to home screen
Add the feeder to the home
screen for ready access to the
feeder control page
4
Remove device
You can reconfigure the feeder
5

FQA
Q: The LCD screen does not light up when plugged in
A: 1) Poor contact of the power adapter.
2) There is a problem with the power adapter, please contact
the seller on Amazon for a new one.
Q: The food won’t come out
A: 1) Please be sure to fill with dry food, kibble size should
range from 2-12mm/0.07-0.47 inch diameter.
2) Check whether any foreign objects are placed. Disassem-
ble the food tank and check the chute, and also check the
food outlet.
3) Check whether the power adapter is connected or there is
any outage when no battery is installed. And also check
whether it’s low battery level.
Q: Does the pet feeder work must with the power adapter
and battery at the same time?
A: No. The pet feeder can be worked under the power
adapter, battery is back up. In order to prevent power
outage, We recommend using the power adapter and
batteries at the same time(Batteries are NOT included)
22

Q: Is there an indicator light when the battery is low?
A: Yes. When the batteries are low, the battery level sign on
the LCD screen will turn on. After new batteries are installed,
the sign will be turned off.(Battery model :4*D size alkaline)
Q: Why I can’t hear any voice recordings when feeding?
A: Please press the Recording button to check whether the
recorded successfully. If no sound is heard, you may need to
record again and be sure to save following instructions in the
Recording Setup section.
Q: Can the voice recording be turned off with no affect meal
schedule?
A: Yes, you can press the Recording Button twice until the
recording indicator blinking 3 times, then the recording
message is removed.
Q: Does the unit reset after 6 feeding, or does it just stop
feeding?
A: Once you set the feeding schedule, it repeats everyday
until there is no food in the food tank.
23

Q: Does it alert you when it is low/out of food?
A: Yes. When the food hopper is short of food, the blue light
will flash only when the next meals dispense, it means the
motor run then the machine will detect the food shortage.
Please add the food then the light will turn off.
Q: How to delete/reset the feeding schedule?
A: Please open the lid and press the reset button.
Q: For two way distributor system, Why the food split not
evenly in each bowl?
A: The first few portions may vary and it doesn’t mean a
faulty equipment. After several feedings it should be almost
even.
Q:Why does the phone can’t connect to the pet feeder
when only use batteries?
A:Only using the battery cannot satisfy the power supply of
the device in WiFi mode, the device must be powered by an
adapter when using the APP control.
24