Setup Instructions
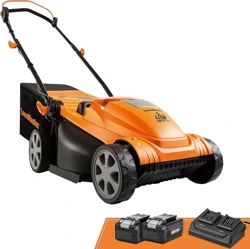
Product No. 3519002
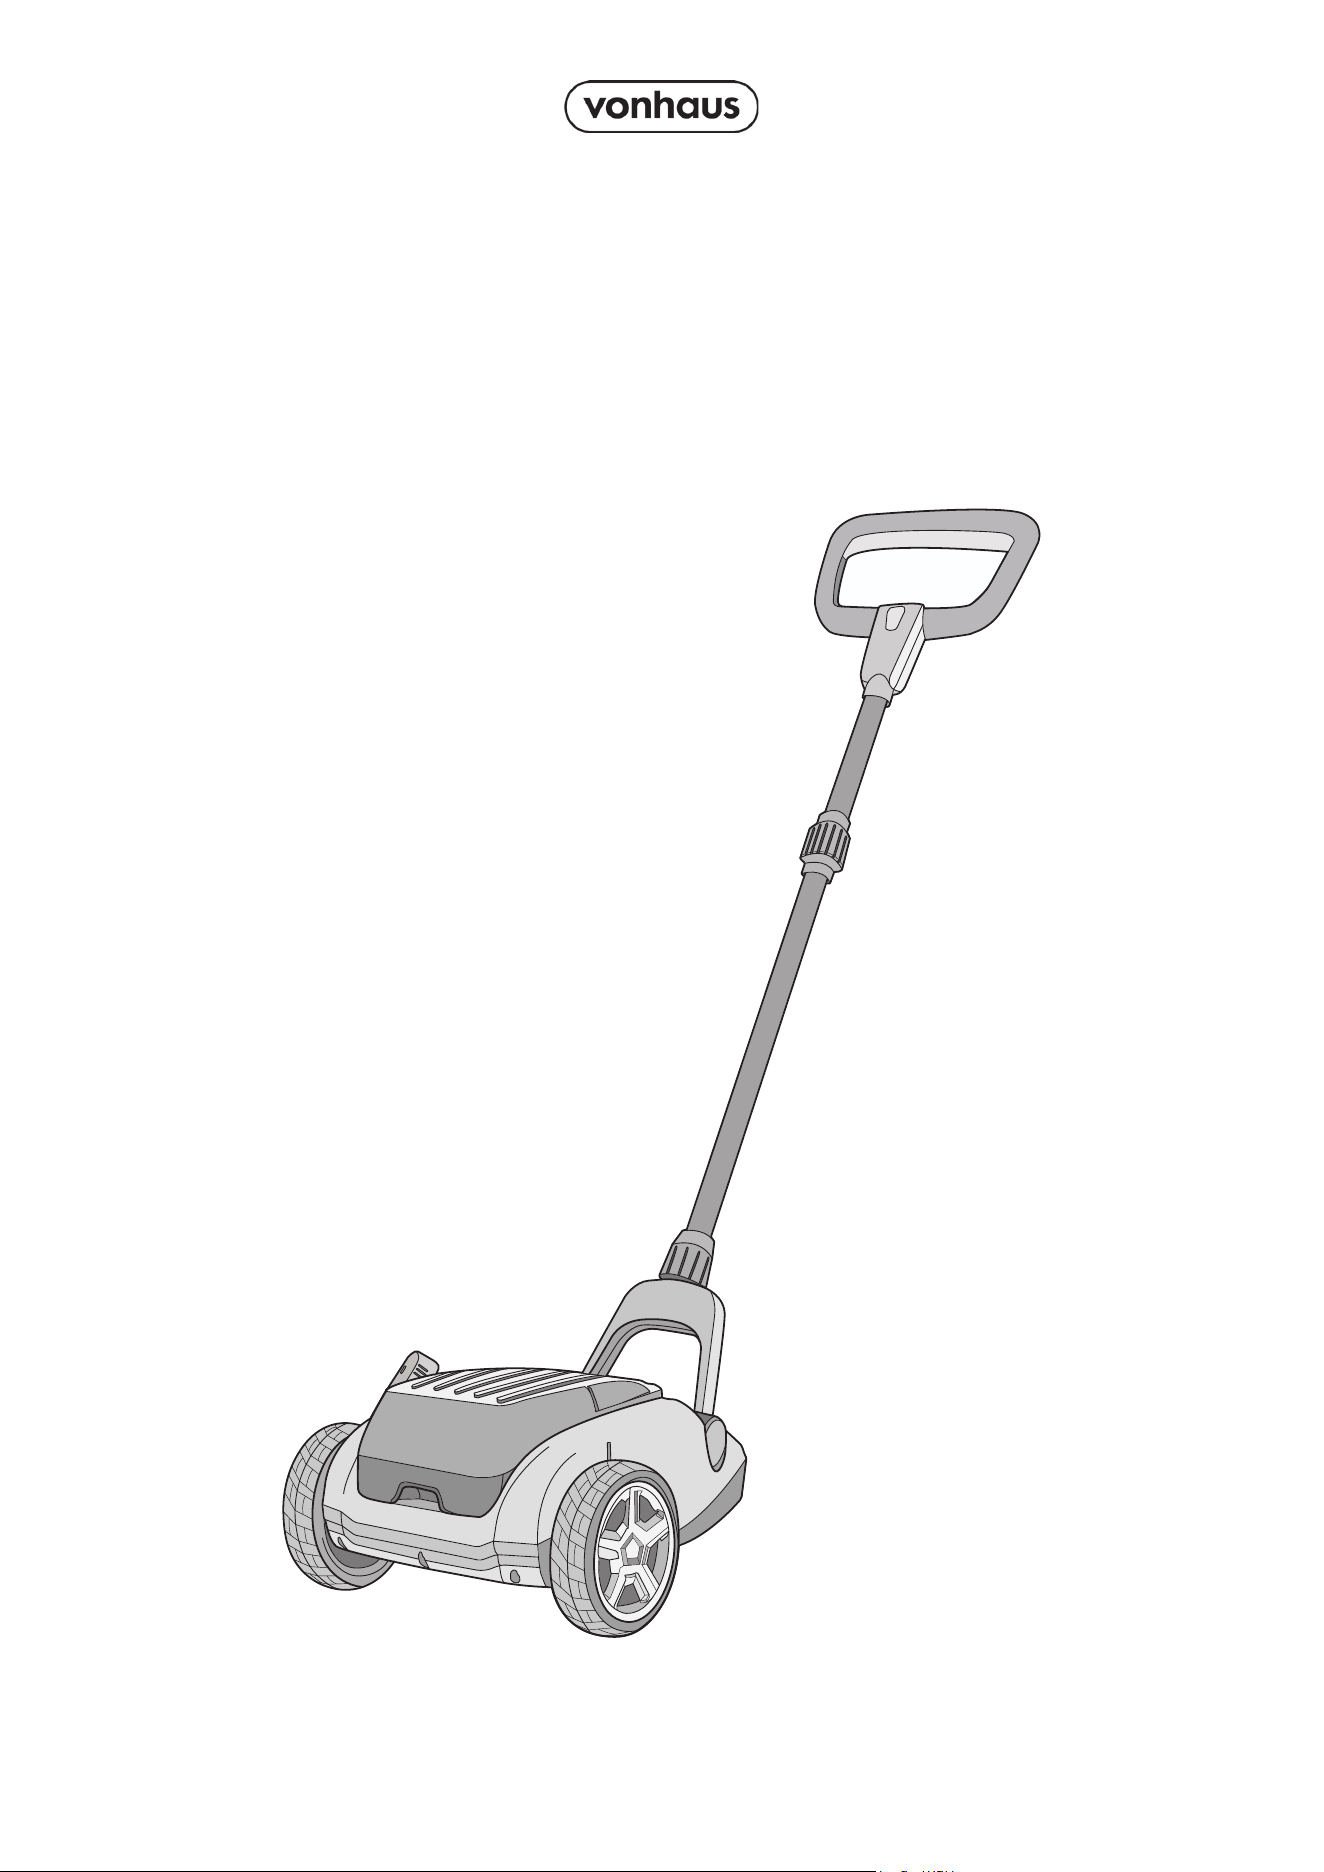
MINI LAWN
MOWER

2
Need further help?
suppor[email protected]
See our full range at
www.vonhaus.com
Besoin d’aide supplémentaire ?
suppor[email protected]
Découvrez notre gamme complète sur
www.vonhaus.com
Benötigen Sie weitere Hilfe?
suppor[email protected]
Entdecken Sie unser gesamtes
Sortiment auf
www.vonhaus.com
Necesita más ayuda?
suppor[email protected]
Descubra toda nuestra gama en
www.vonhaus.com
Hai bisogno di ulteriore assistenza?
suppor[email protected]
Scopri tutta la nostra gamma su
www.vonhaus.com
Important
The device is designed exclusively for mowing private lawns. The lawn must be dry and
level. Flowering meadows, wild meadows, and heavily overgrown lawns with high weeds
(e.g., thistles) are not considered lawns.
It is intended exclusively for private use and is not suitable for commercial use. Only use
the device as described in these operating instructions. Any other use is considered im-
proper and can lead to property damage or personal injury.
3
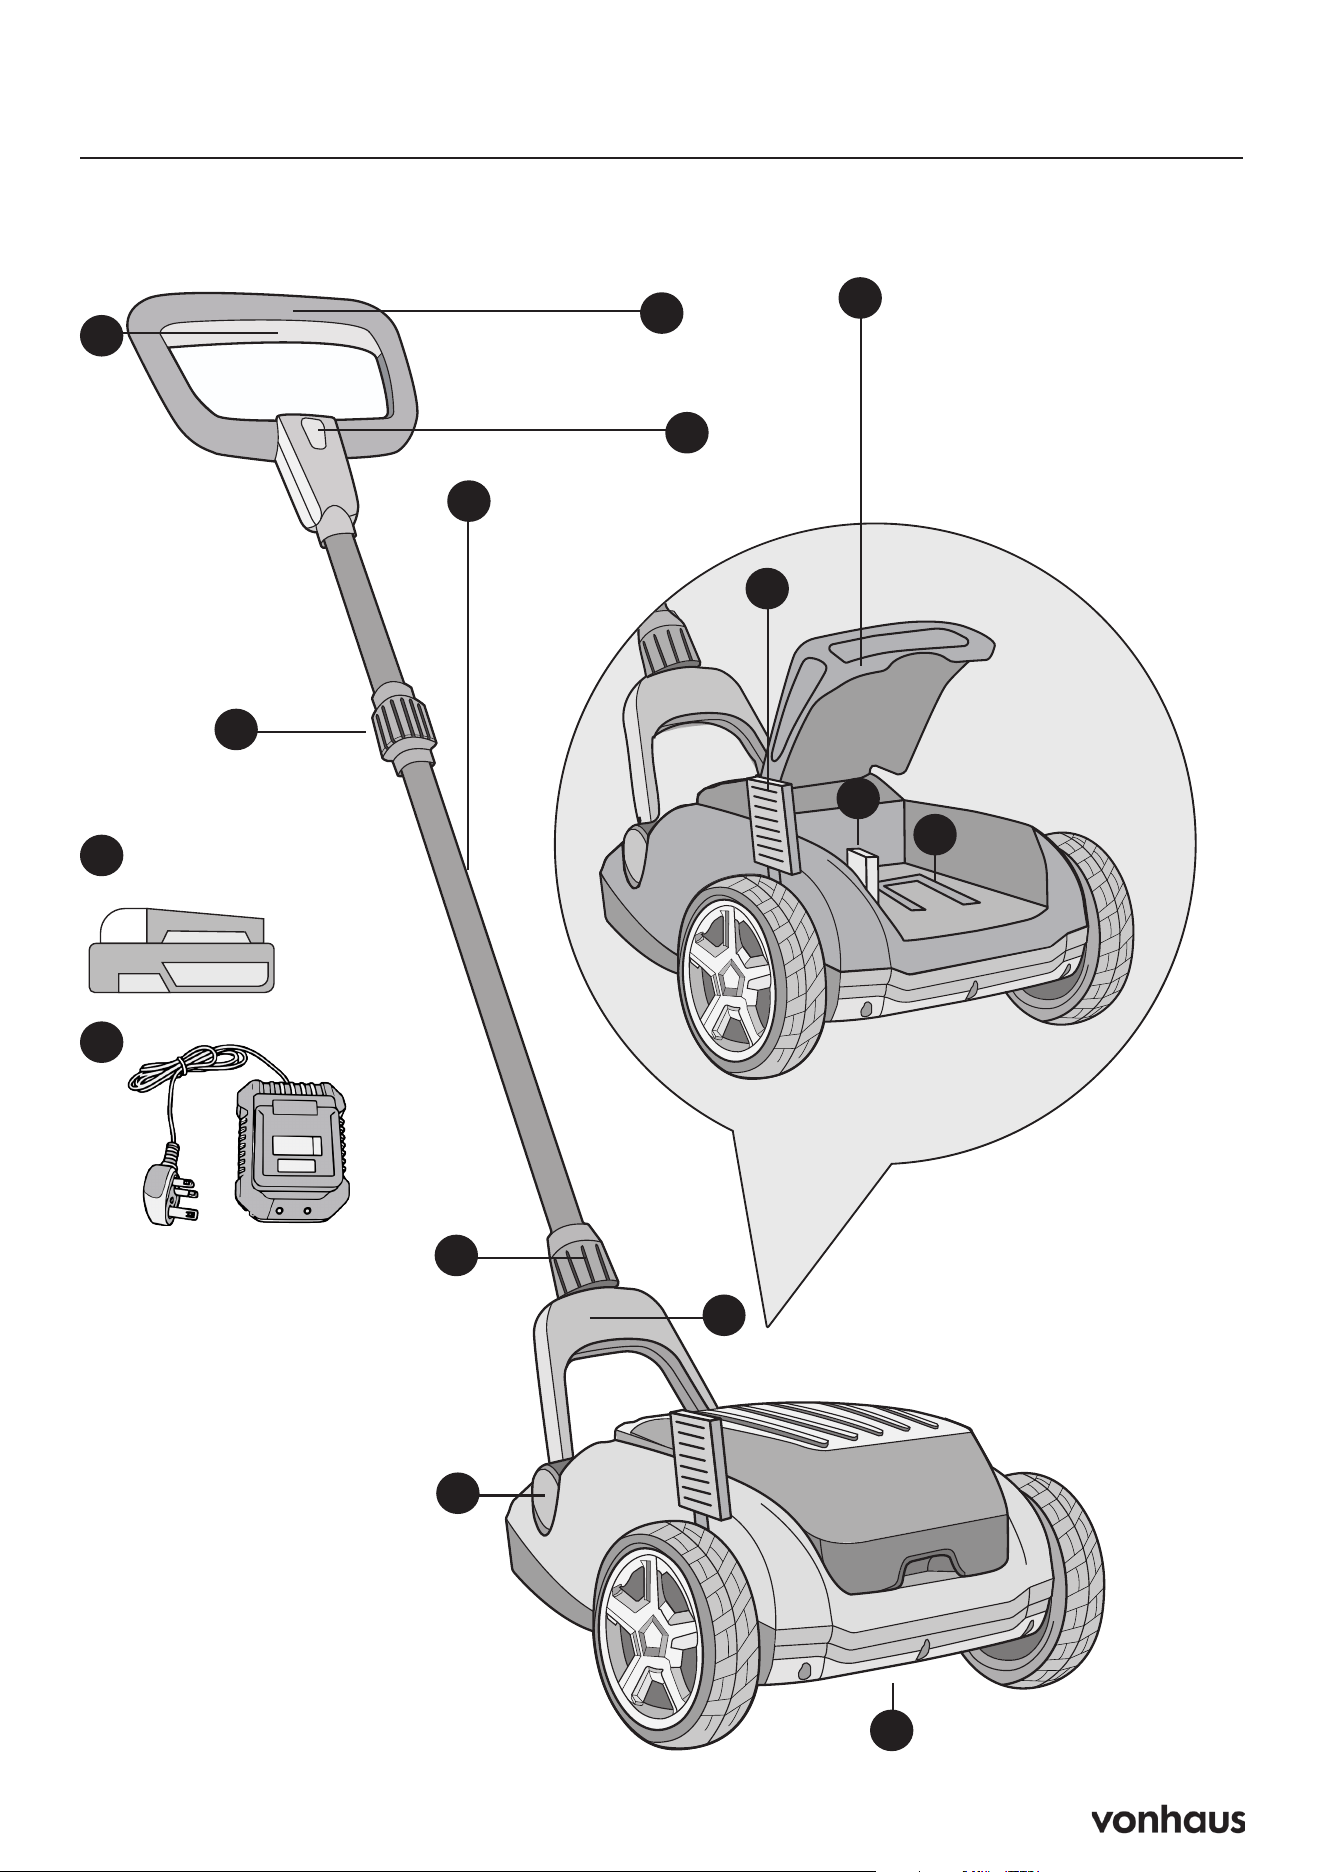
A. Cover
B. Cutting Height Control Lever
C. Security Key
D. Battery Holder
E. Mower
F. Handlebar Release
G. Handlebar Mount
H. Sleeves (x2)
I. Handlebar
J. Start Button
K. Handle
L. Safety Switch
M. Battery
N. Battery Charger
Components
A
B
C
E
I
F
D
G
H
J
K
H
L
M
N
4
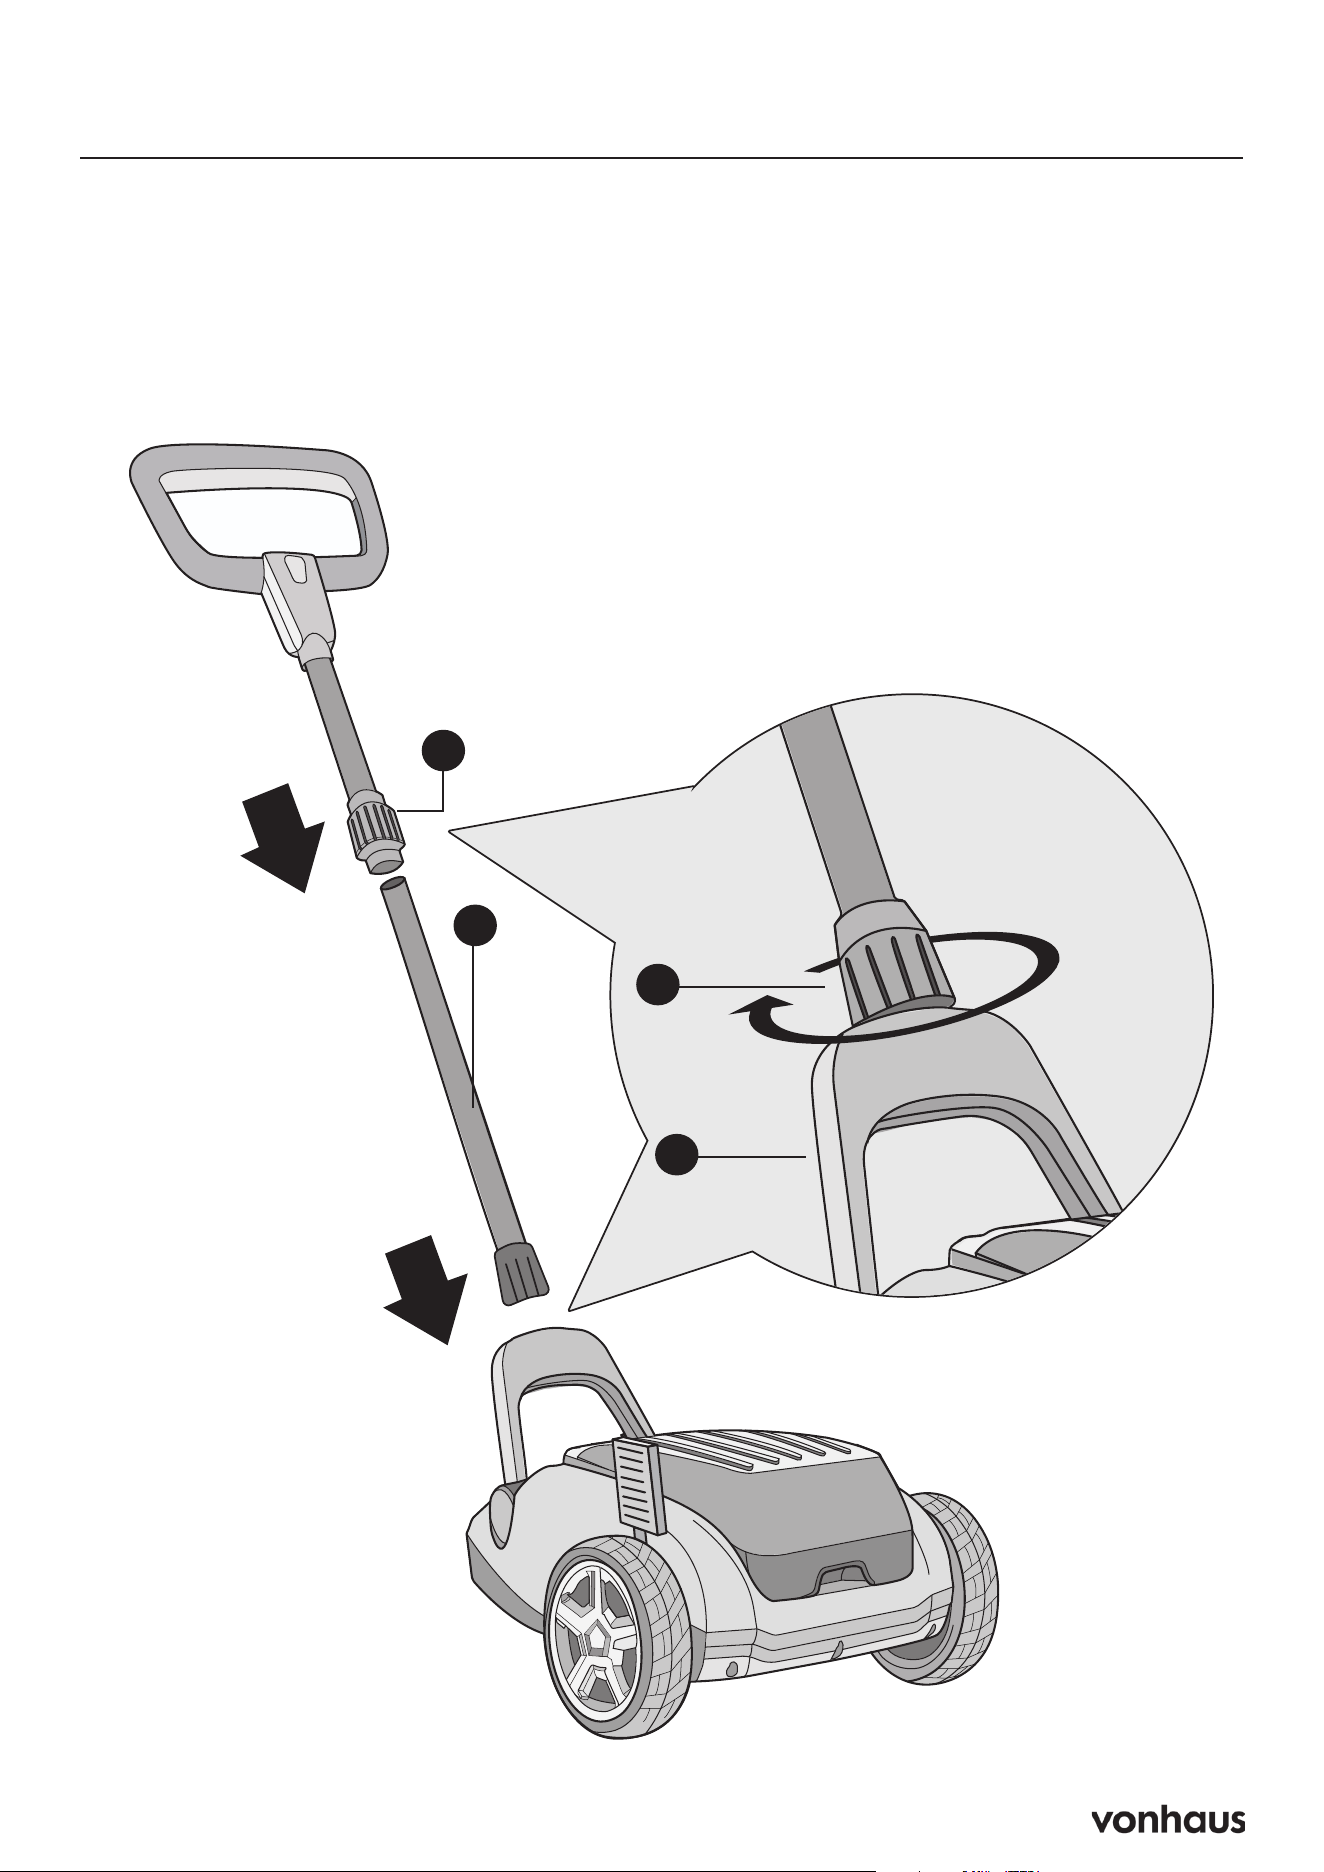
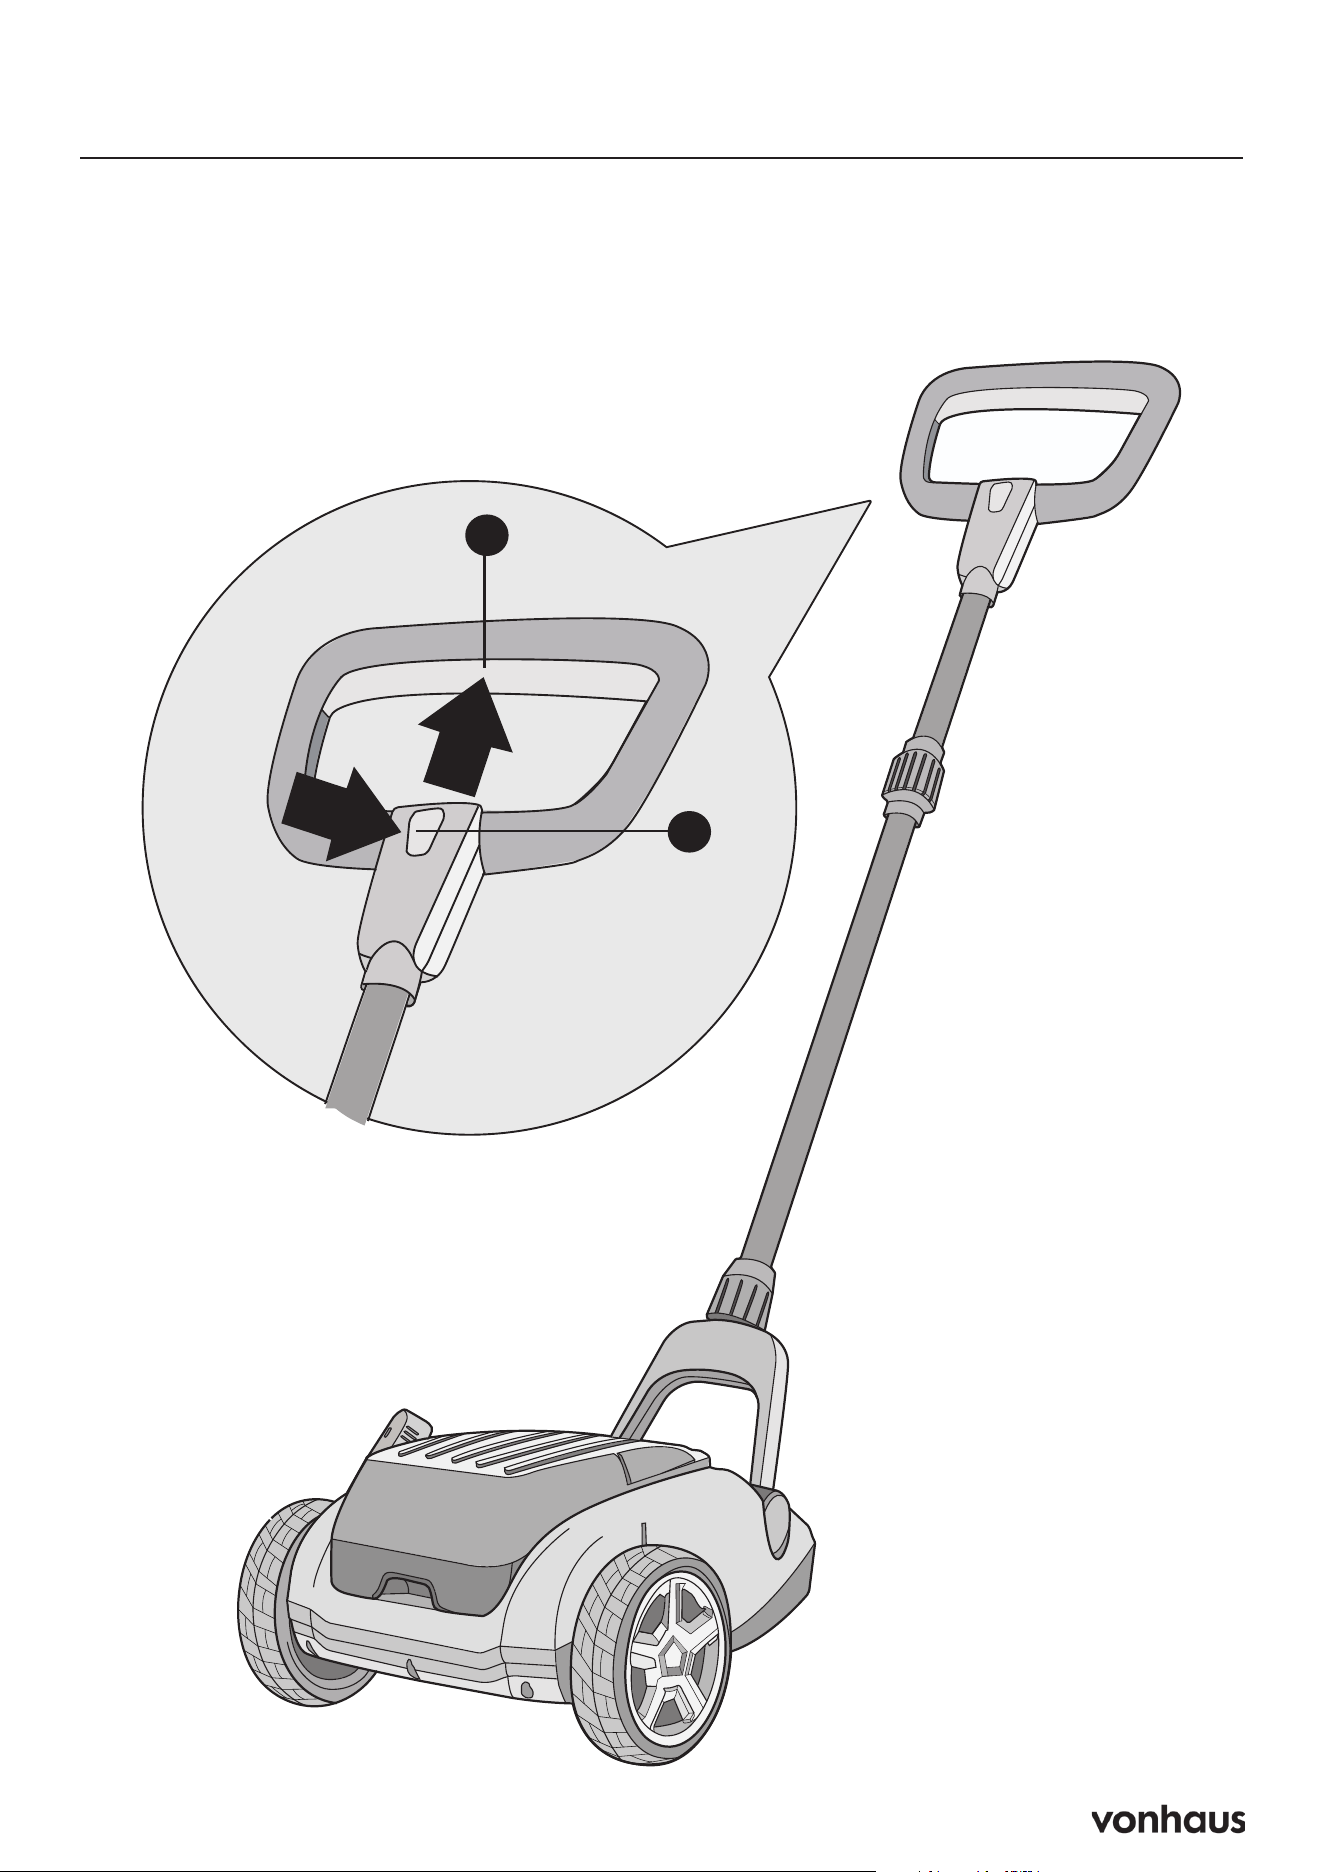
Mounting the Handle Bar
I
G
H
H
5
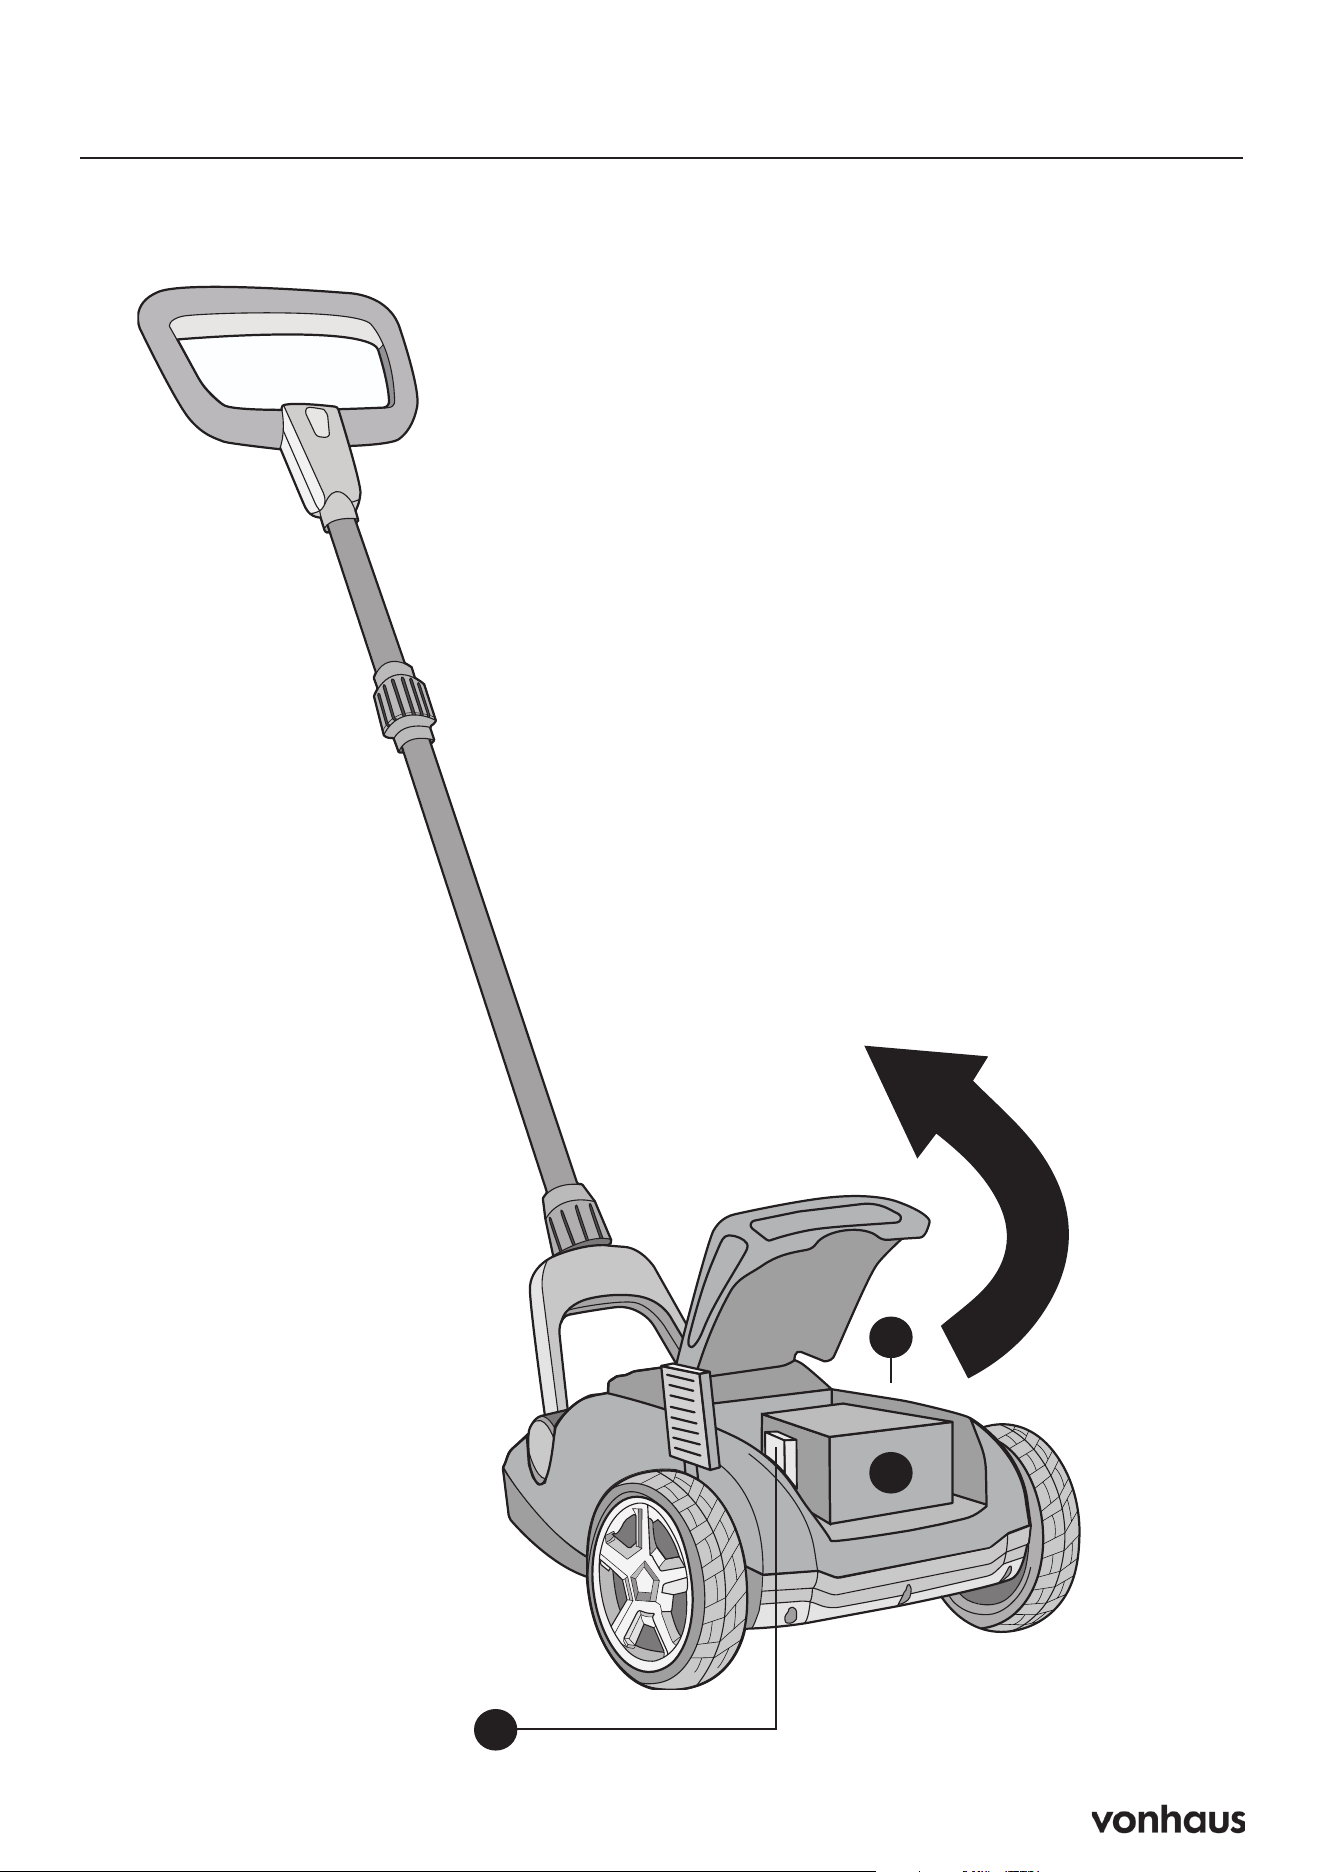
Inserting the Battery
C
M
1. To insert the battery (M), slide it into
the battery holder (D). You will hear a
“click” when the battery lock engages.
2. Check that the battery is firmly seated.
3. To remove the battery, first remove the
security key (C). Then press and hold the
battery release button and pull the bat-
tery out of the battery holder.
D
6
Turning On
J
L
1. Both the Start Button (J) and Safety
Switch (L) must be pressed to start.
2. Once started, you can release the Start
Button and just hold the switch on the
handle to operate.
Release the safety bar (L) to
stop the engine.
7
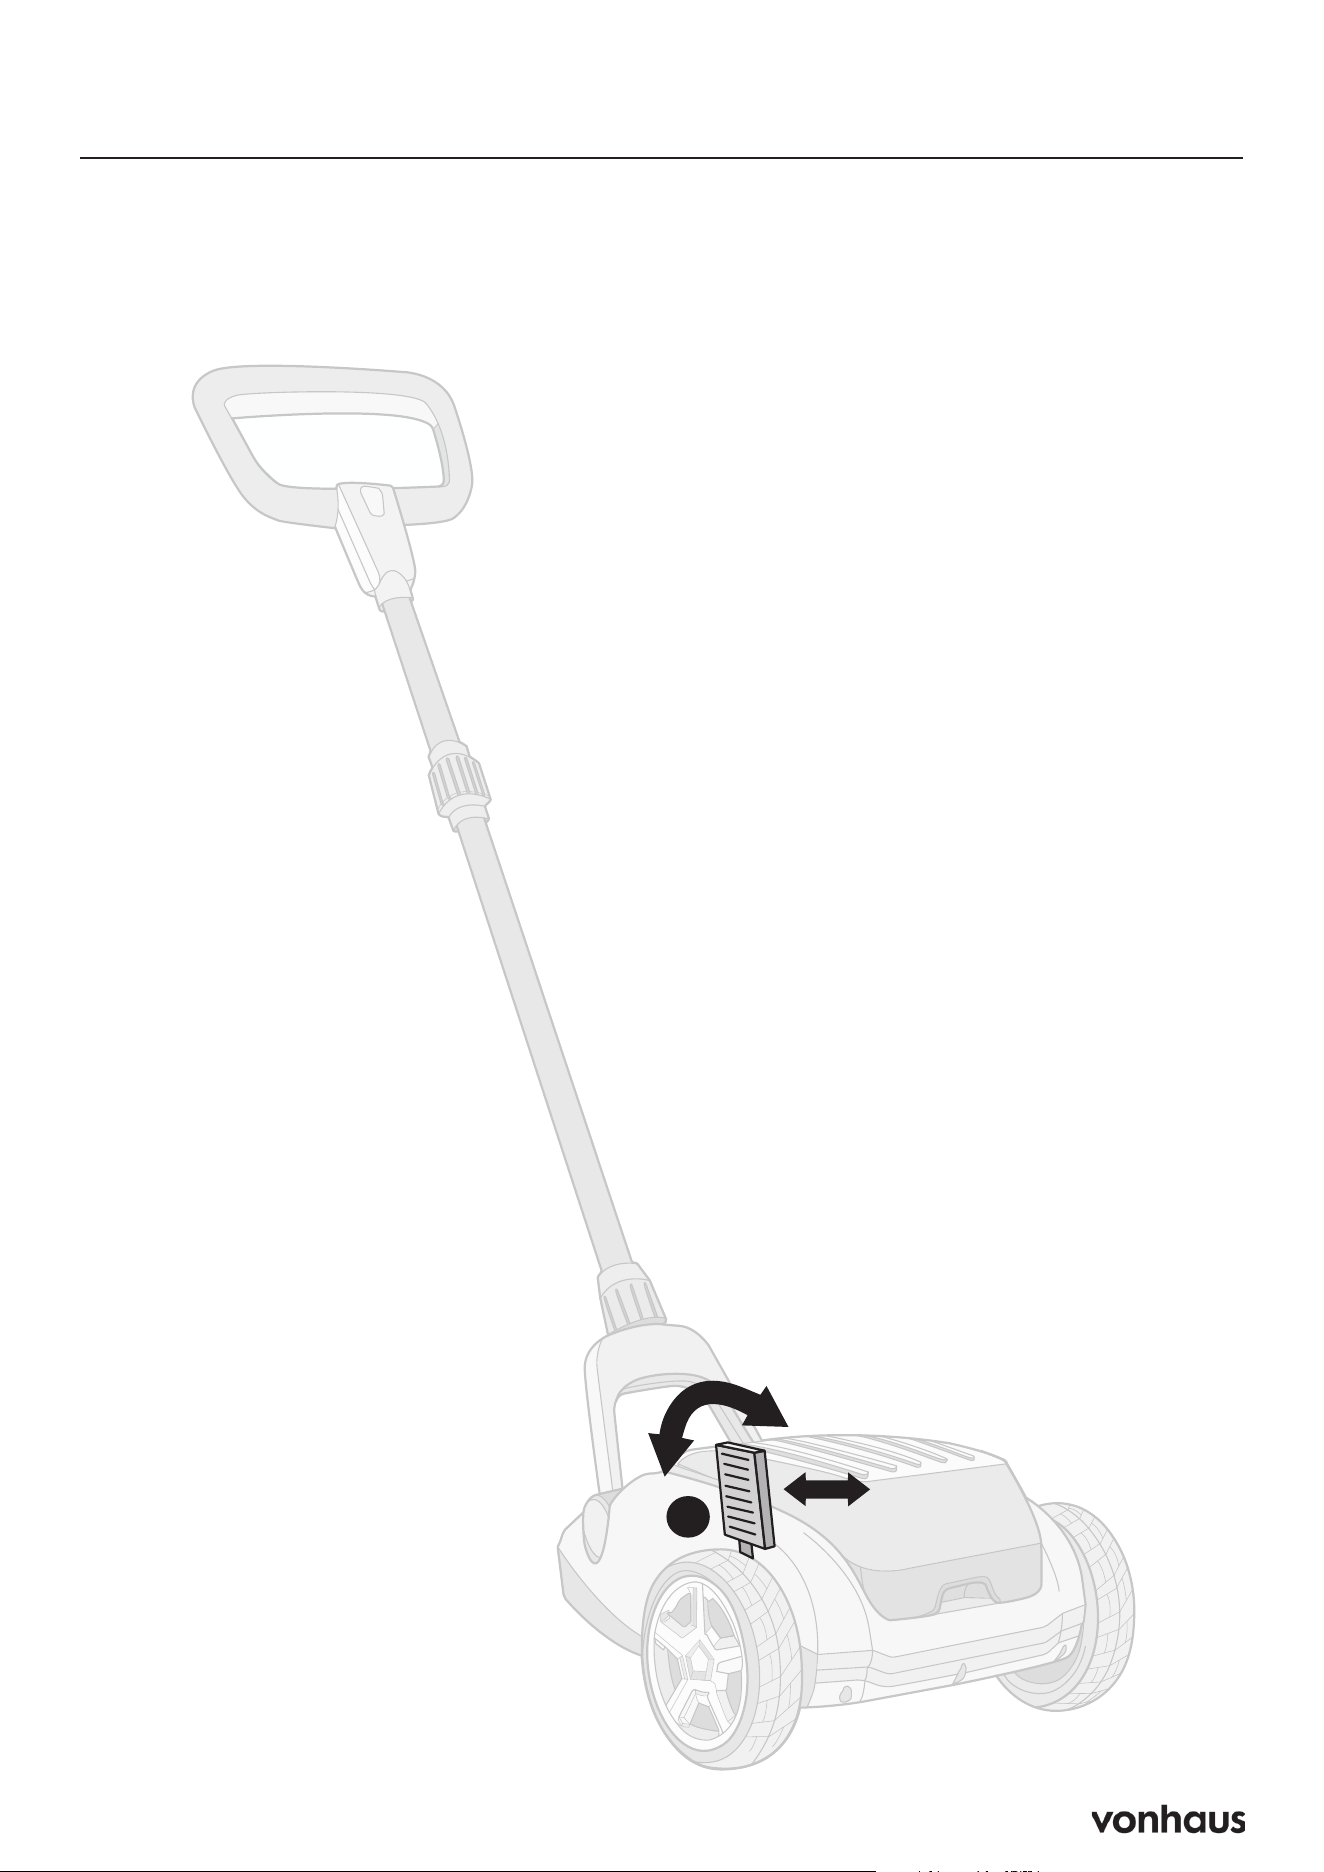
You can choose from 3 cutting heights
(25-48mm):
• Hold the mower by the handle mount
• Pull out the height adjustment lever (B)
• Slide the lever to your chosen height
position
Important Usage Notes:
This mini lawn mower is designed for small
gardens. It is not suitable for very long or
thick grass. For best results, cut your lawn
in stages:
1. Start with the highest setting (48mm) for
the first cut, especially on longer grass
2. Gradually lower the cutting height in
subsequent cuts to reach desired grass
length
3. This stepped approach prevents over-
loading the mower and ensures a bet-
ter cut
Adjusting the Cutting Height
B
8
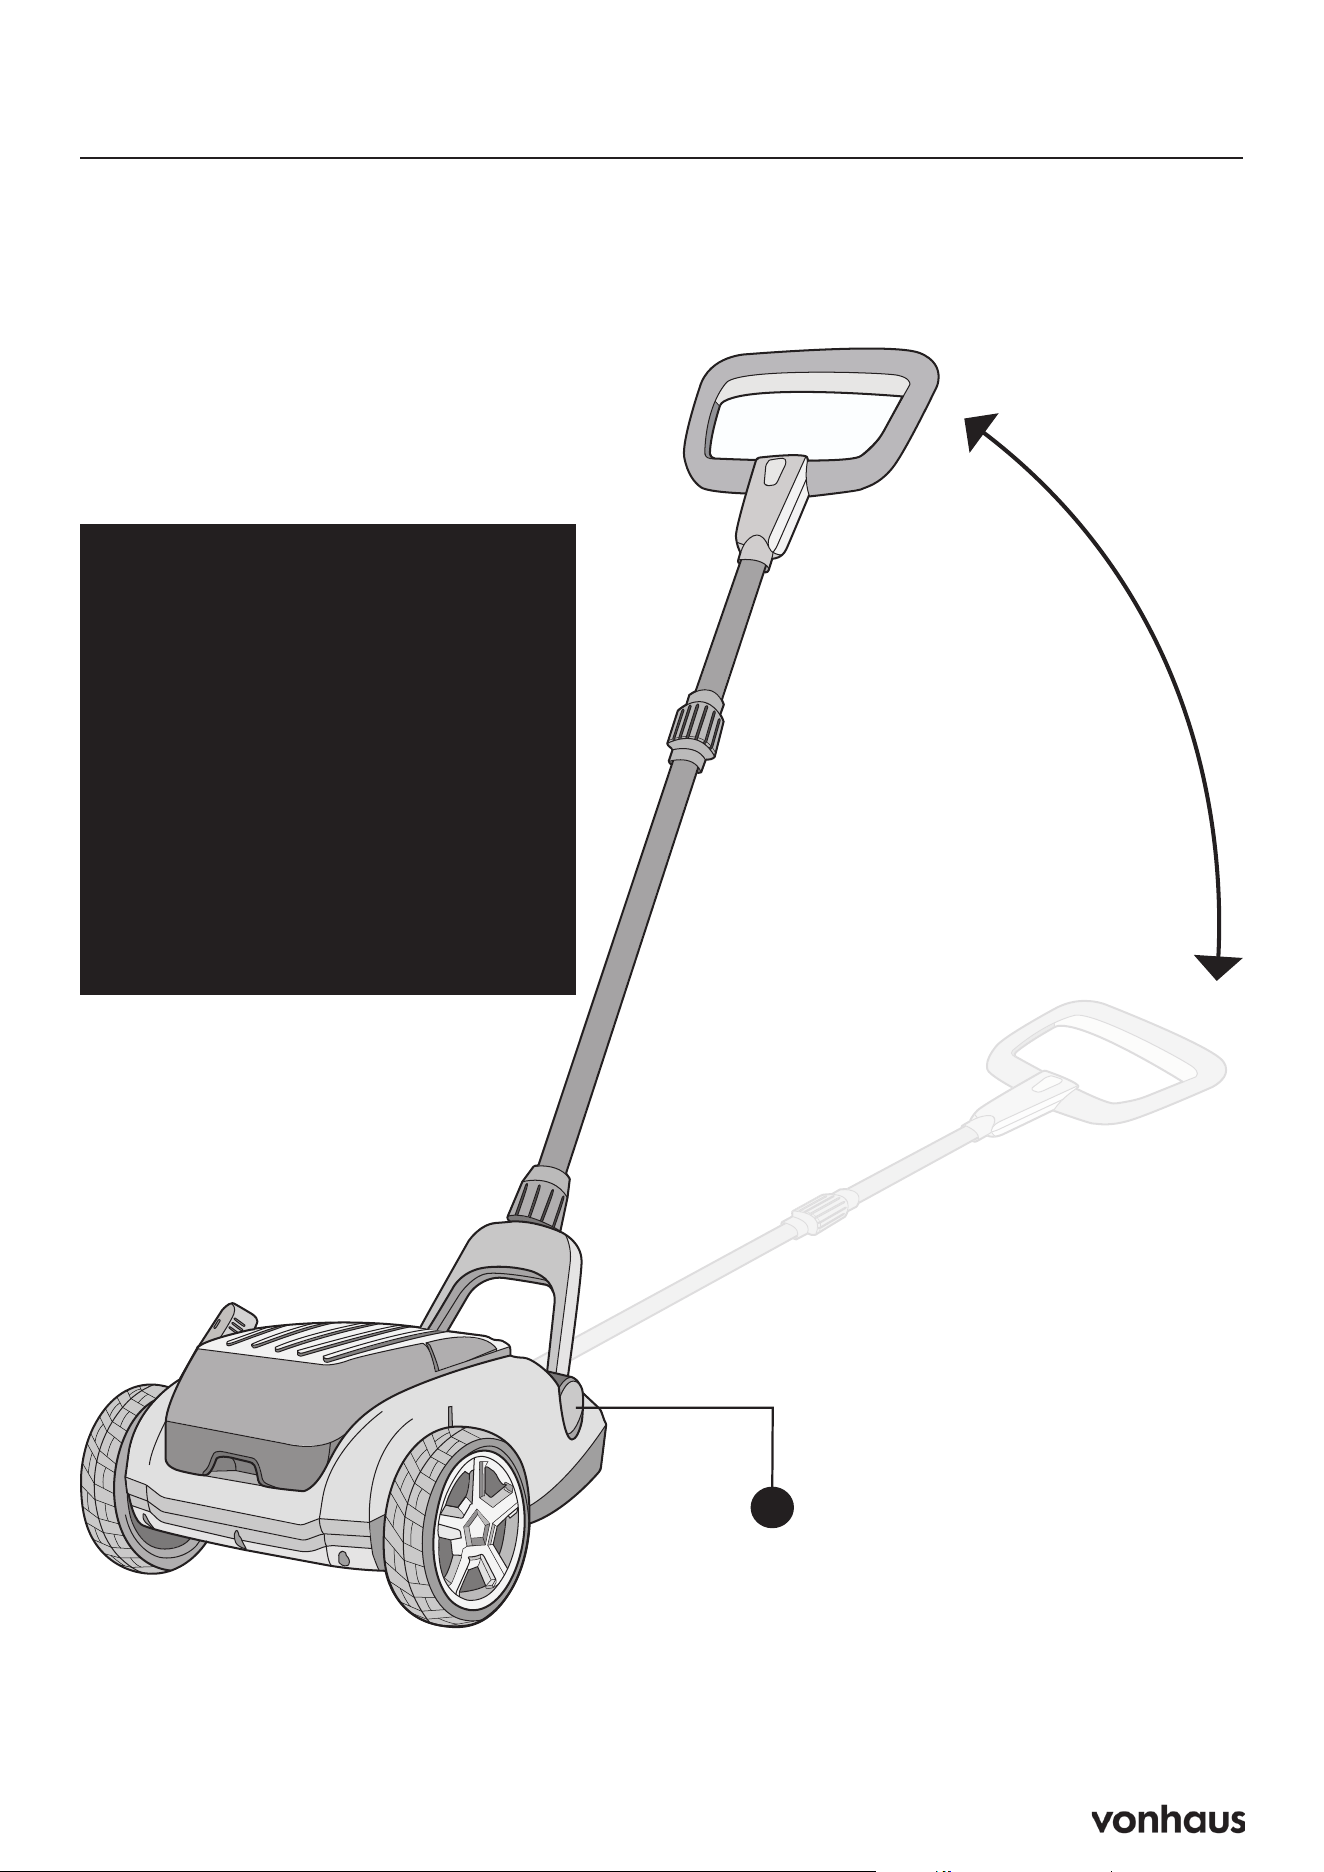
Adjusting the Handle Bar
F
27-63°
Safe angle
27°
63°
The handle can be set to your perfect
height (between 27-63 degrees):
1. Press the release button (F)
2. Move handle to comfortable height
3. Make sure it locks in place
Automatic Motor Cut-Off
The mower is equipped with a safety
switch that automatically cuts off the
motor when the mower is operated at
angles outside of the safe range of 27
to 63°.
Always ensure the mower remains
within these specified angles during
use.
9
Replacing the Blade
CAUTION:
Always remove the battery before
servicing the lawn mower.
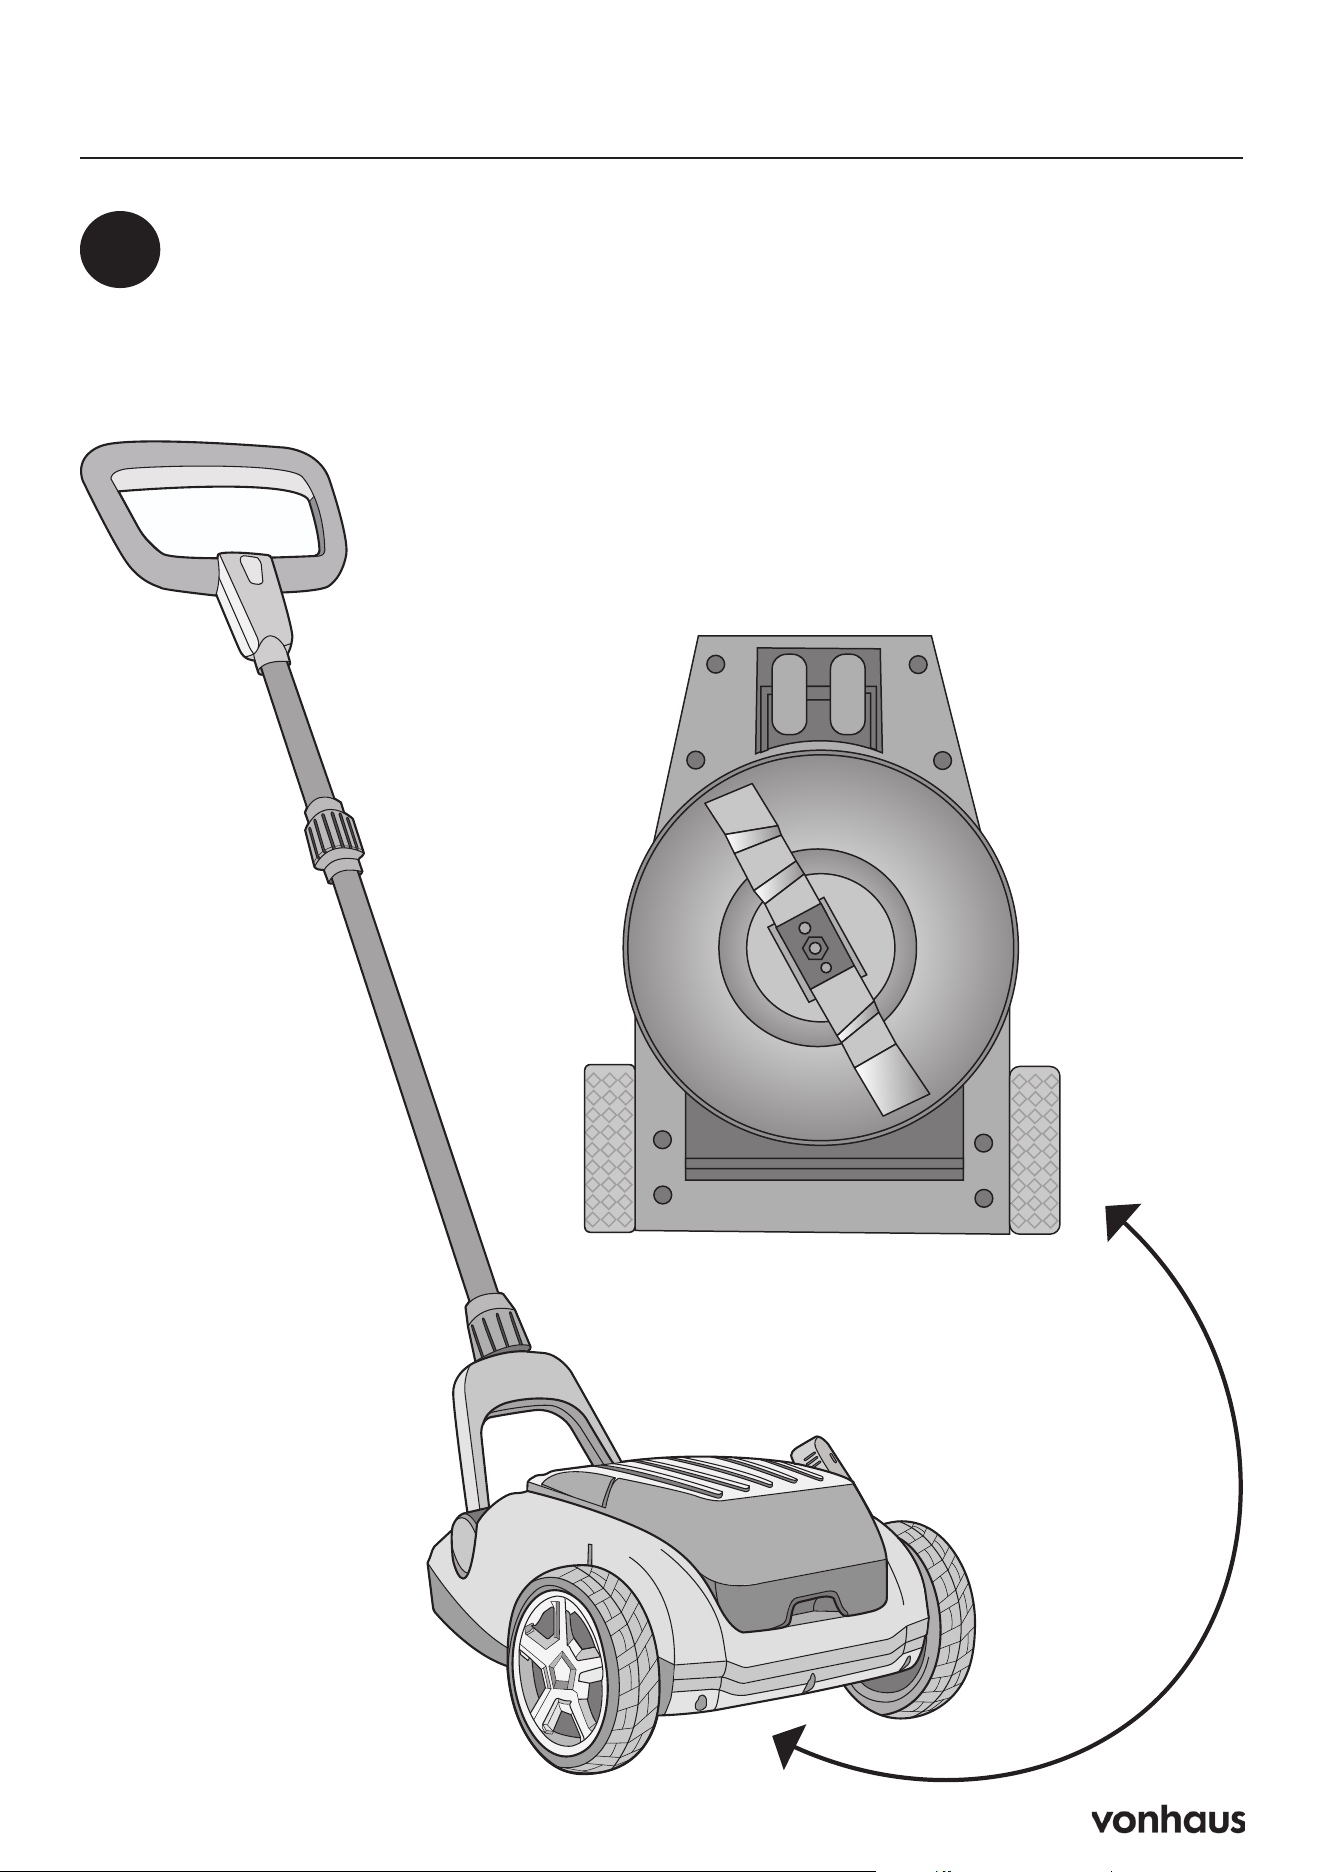
Prepare the mower
• Turn the mower off and remove
the battery
• Carefully flip the mower onto its
back
1

10
Replacing the Blade
Remove the old blade:
• You’ll need your own wrench to remove the M6 lock nut
• Note: Wrench is not included with the machine
2
M6 Lock Nut
11
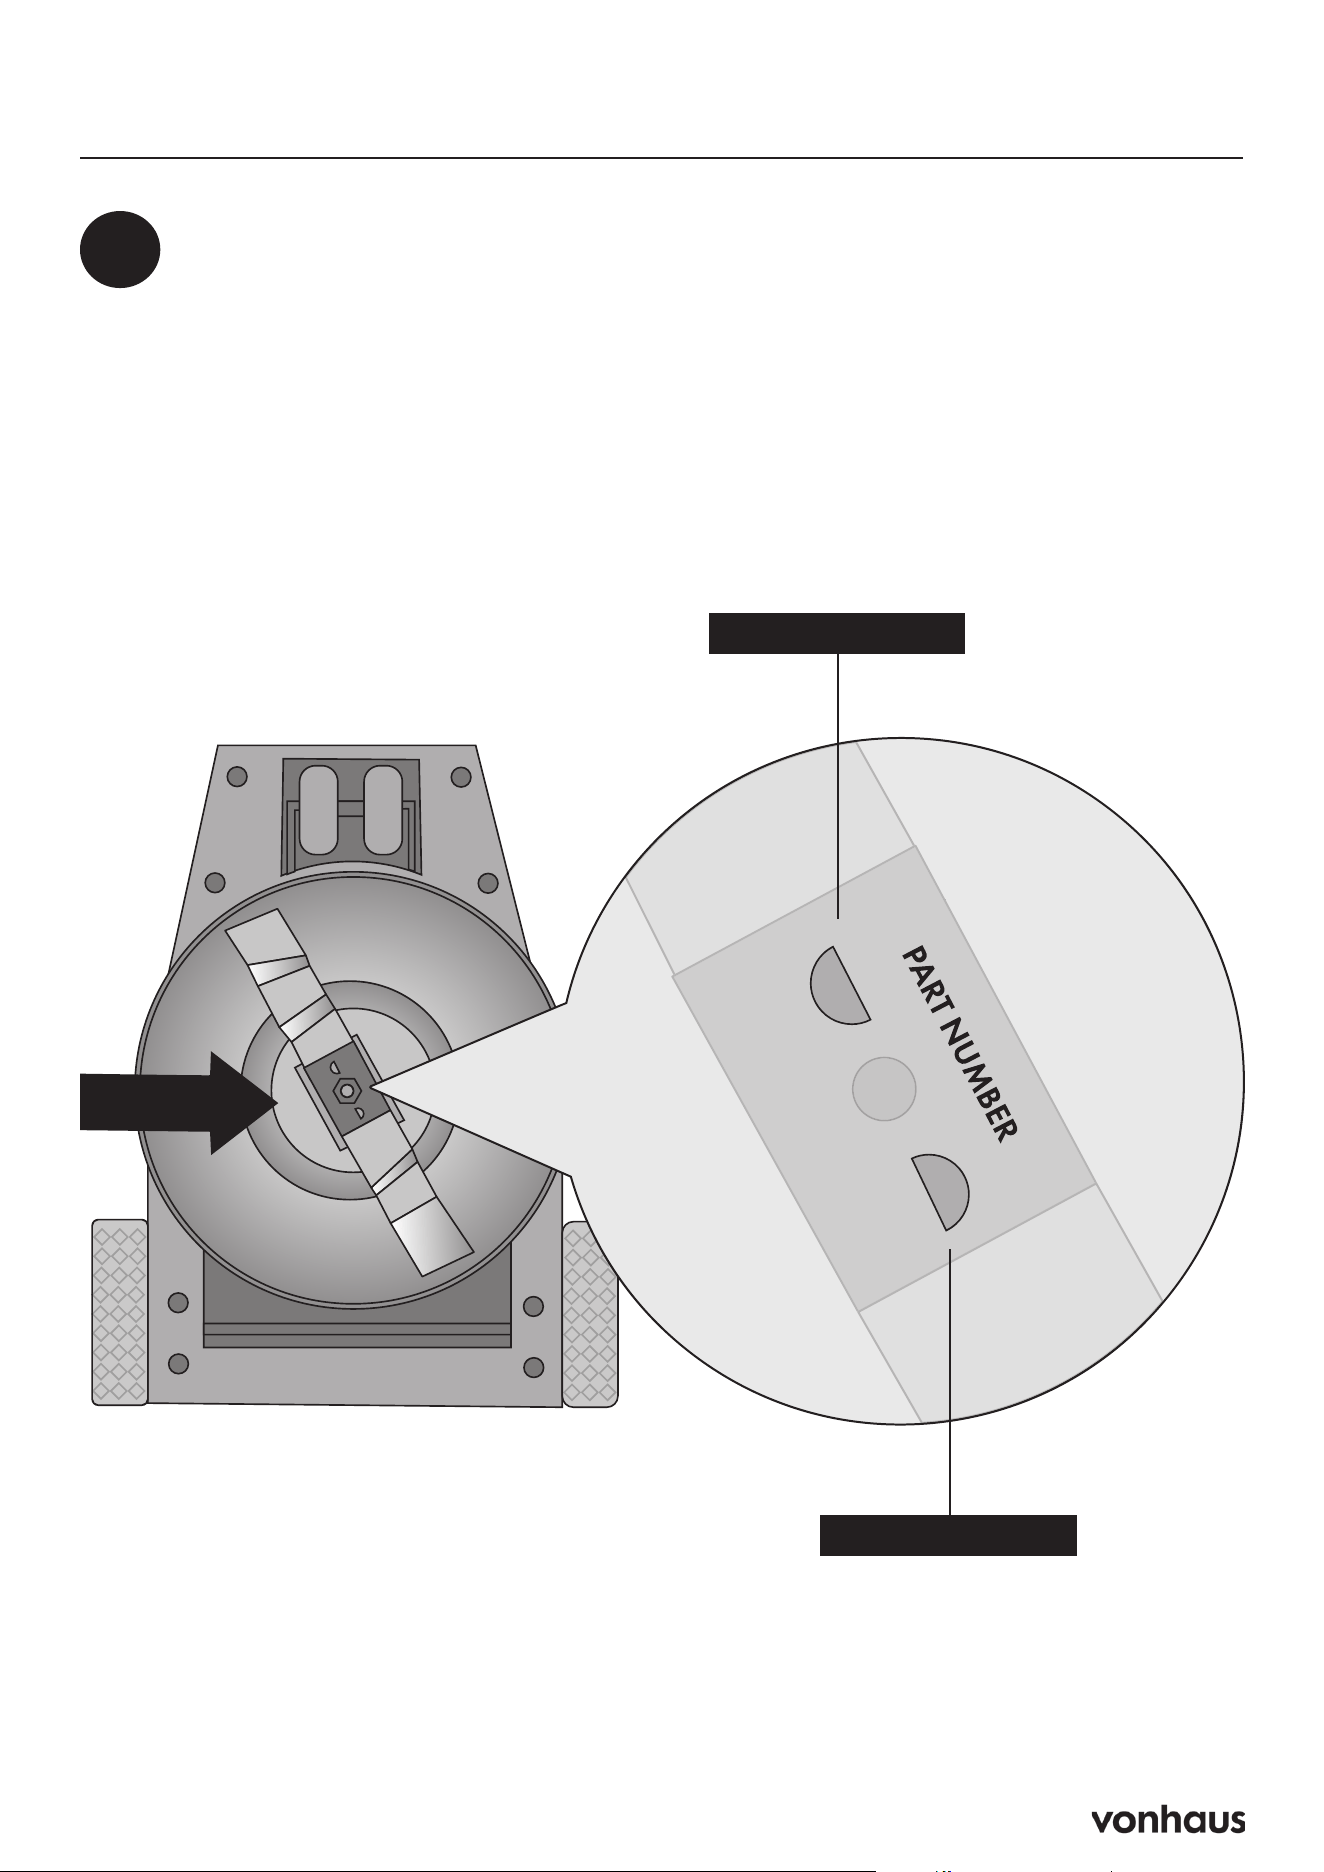
Replacing the Blade
Install the new blade:
• Place the new blade on the base
• Make sure the blade’s part number faces outward
• Line up the flat sides of the mounting hole with the positioning column
• The base has alignment features to ensure correct installation
3
Alignment Feature
Alignment Feature
12
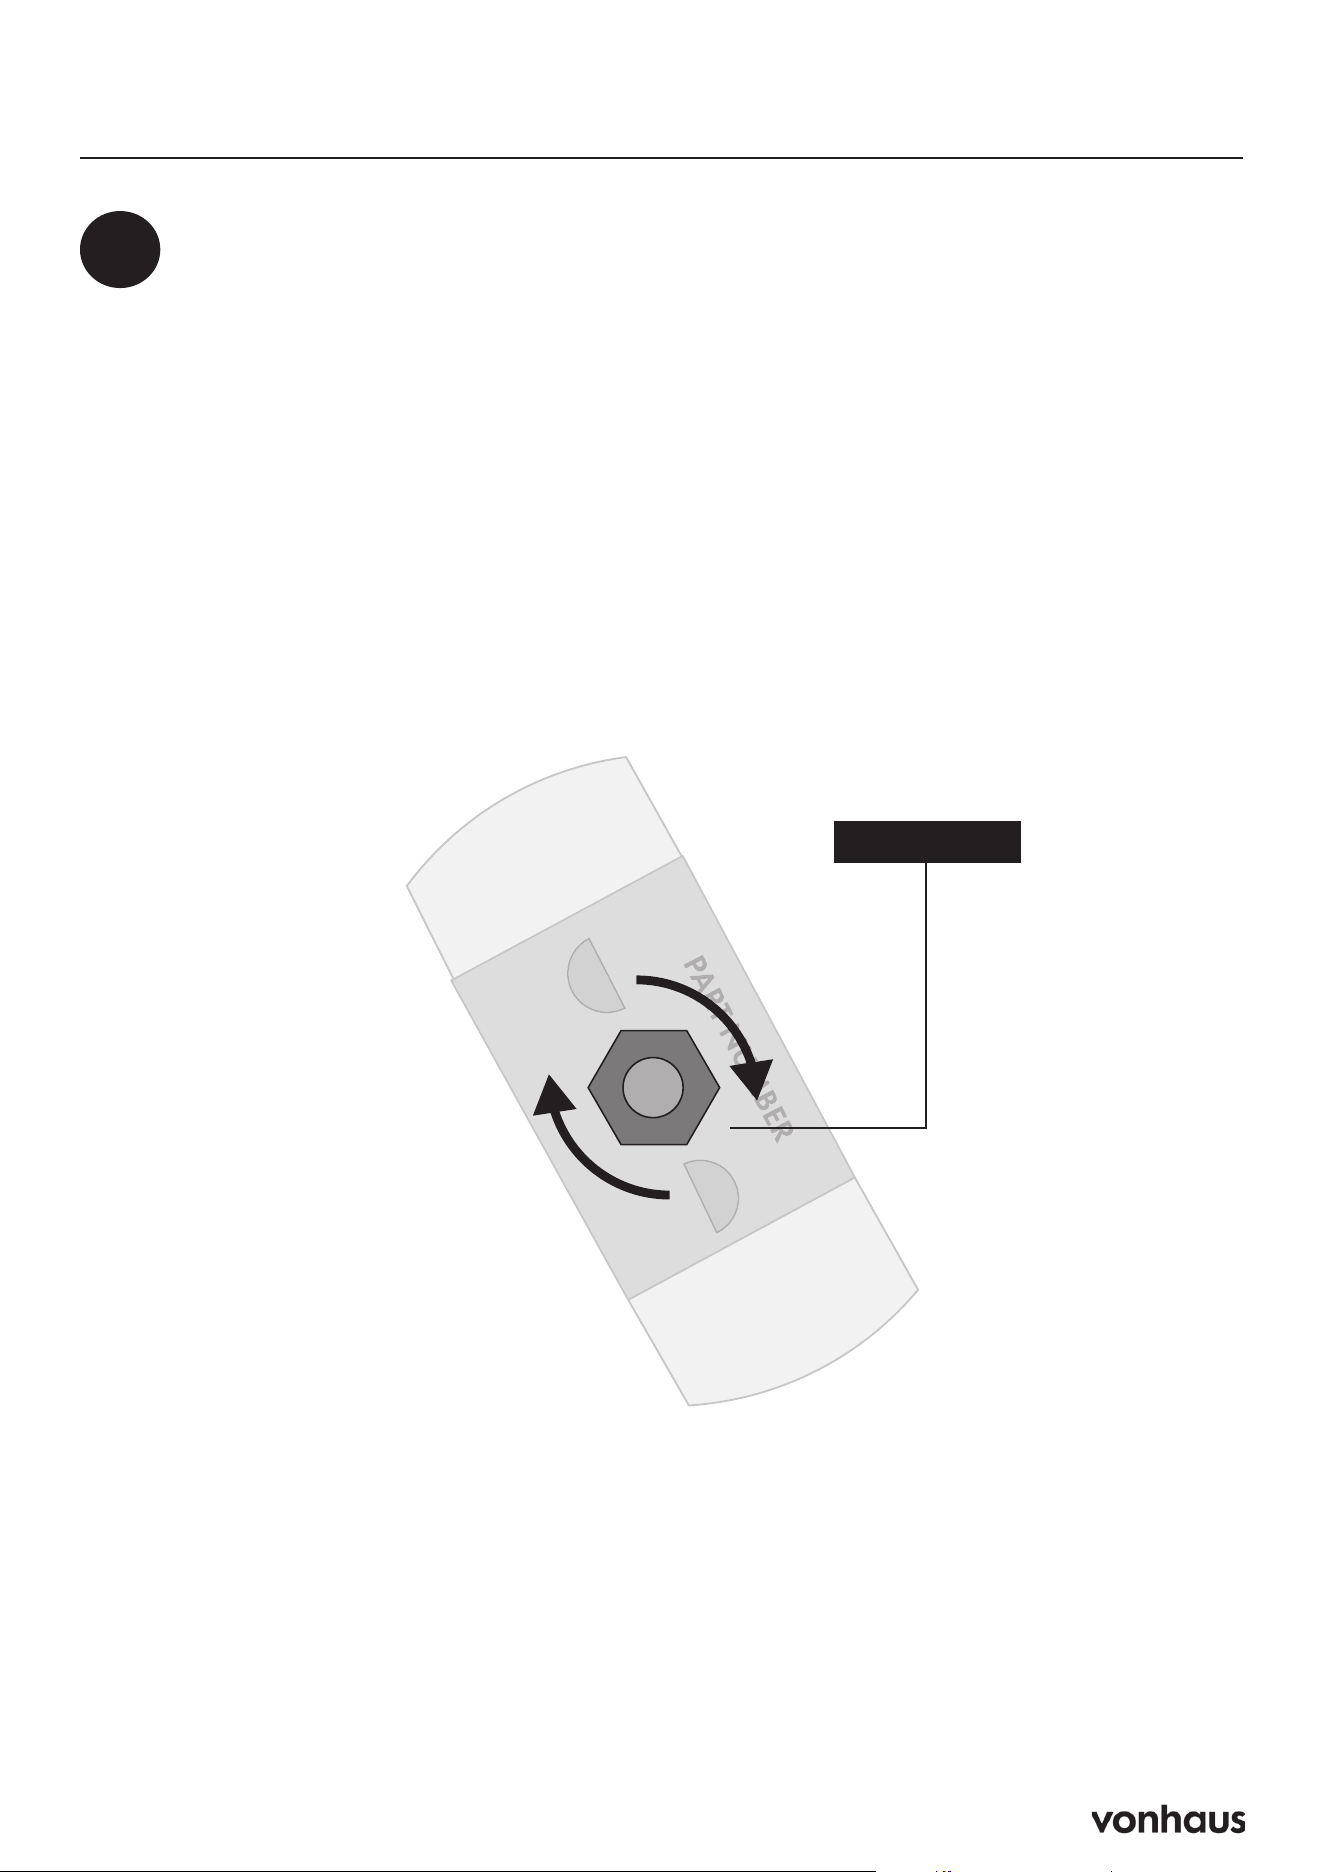
Replacing the Blade
Secure the new blade:
• Use a 10mm sleeve to tighten the M6 lock nut firmly
• Check that the blade is secure before use
4
M6 Lock Nut

13
Safety Instructions
This is a mini lawn mower. Only intended for
the use on small gardens. Not for use on
long grass. No load run time is 45minutes
with 20-30 minuted working time based on
height and thickness of grass
Intended Use: For mowing dry, level private
lawns only. Not suitable for commercial use or
for cutting hedges or shrubs.
General Safety:
• Remove all objects from the mowing area
including stones, toys, sticks, wires, and
mounds of earth.
• Operate only in good visibility and avoid
using during lightning.
• Keep others, especially children, away from
the mowing area.
Personal Safety:
• Ensure all safety devices function properly.
• Do not operate under the influence of sub-
stances that impair judgment.
Operation Guidelines
Initial Setup:
• Check all parts upon delivery.
• Assemble the handlebar securely and adjust
for comfort.
Battery Handling:
• Use only manufacturer-approved batteries
and chargers.
• Charge batteries in safe conditions, avoid-
ing high temperatures or short circuits.
Starting the Mower:
• Insert the safety key (NEXT TO THE BAT-
TERY) and press the start button while hold-
ing the safety bar.
• The mower will stop when the safety bar is
released.
Maintenance
Cleaning:
• Always remove the battery before cleaning.
• Use a hand broom to clear clippings; avoid
aggressive cleaning agents.
Regular Checks:
• Inspect the blades for damage or wear after
each use.
• Ensure the mower is clean and dry before
storage to prevent mold.
Troubleshooting
Common issues include the motor not starting
due to battery issues, security key not inserted,
or the handlebar being out of the safe range.
Solutions typically involve checking the battery
charge, inserting the safety key, or adjusting the
handlebar position.
Need New Batteries?
We also offer spare batteries (3519012), charg-
ers (3519015) and blades (3519017) for this
product.
Information

14
Legal
DISPOSAL INFORMATION
Dispose of old devices and batteries in accord-
ance with local regulations to ensure proper re-
cycling and environmental protection.
Please recycle where facilities exist. Check with
your local authority for recycling advice.
CUSTOMER SERVICE
If you are having difficulty using this product
and require support, please contact support@
vonhaus.com
WARRANTY
To register your product and find out if you
qualify for a free extended warranty please go
to www.vonhaus.com/warranty.
Please retain a proof of purchase receipt or
statement as proof of the purchase date.
The warranty only applies if the product is used
solely in the manner indicated in the warnings
page of this manual, and all other instructions
have been followed accurately.
Any abuse of the product or the manner in which
it is used will invalidate the warranty.
RETURNS
Returned goods will not be accepted unless
re-packaged in its original packaging and ac-
companied by a relevant and completed returns
form. This does not affect your statutory rights.
No rights are given under this warranty to a
person acquiring the appliance second-hand
or for commercial or communal use.
COPYRIGHT
All material in this instruction manual are copy-
righted by DOMU Brands.
Any unauthorised use may violate worldwide
copyright, trademark, and other laws.
THANK YOU
Thank you for purchasing your product/appli-
ance.
Should you require assistance with your pur-
chase, please contact us at support@domu.
co.uk
VonHaus is a registered trademark of DOMU
Brands Ltd.
Made in China for DOMU Brands.
Unit 30, Stakehill Industrial Estate,
Middleton, Manchester, M24 2RW
AUTHORISED REPRESENTATIVE
Authorised Representative Service
77 Camden Street Lower
Dublin, D02 XE80, Ireland

Product No. 3519002